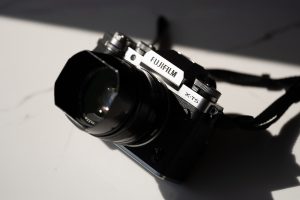
I get asked about 15 times a week, “How can I get the dust out of my lens?” The right answer is you don’t. All lenses have dust in them and it doesn’t affect the images at all 99% of the time. Even if you clean it all out, it will be back after you use the lens a few times.
There are occasionally times that large dust specs very near the rear element are visible in an image, though. There also is the very real issue of resale value; a dusty lens tends to bring a lower price than one without much dust. The right answer in these cases is “send it in for factory service, they’ll disassemble it and clean it.” Doing it yourself is risky.
After I give all of those answers, a lot of people tell me they have an old lens no longer under warranty, not worth the cost of sending it in for factory cleaning, and they are really handy and want to do it themselves. For those people, we’ve put up this post showing how to get dust out of some fairly easy to reach locations. Continue reading →
If there hasn’t been a Color Run 5k or 10k race near you, there probably will be soon. And with all that color, you certainly want to take some pictures, right? Not with your camera you don’t (and not with ours either).
I’m never one to worry much about lens dust. I’ve written about why you shouldn’t worry about some dust in your lens. But the color bombs they throw out at Color Runs are different. In the last month we’ve had over 20 lenses and several cameras nearly ruined by these things. For what it’s worth, all of the renters tell us they really weren’t near any of the major ‘color bombs.’
Here’s a few pictures from a brand new lens that returned after its first rental — at a Color Run. These pictures are, of course, after the lens was cleaned externally. All of that dust is inside the front and rear elements.
When we optically tested the RokiBowYang tilt shift, I mentioned that my recommendation was tempered by wanting to see how it was built. Parts and repairs, at least in the U. S., are nonexistent and the price is a bit high for me to consider it a disposable, like the 14mm RokiBowYang. So first thing this morning, instead of doing the work we were supposed to be doing, Aaron and I dove into one.
The release of the Rokinon 24mm f/3.5 Tilt-shift lens (also branded as Samyang or Bower) has created quite a bit of excitement. For Canon and Nikon shooters, it offers a 24mm tilt-shift alternative for around half the price of the brand name lenses. For shooters of other systems, it offers a tilt-shift option they may not have had at all.
There is a bit of confusion regarding the names of the old versus new version of Sigma’s 30mm DX (crop sensor) lens. The original version is officially the Sigma 30mm f/1.4 EX DC HSM, while the new one is the Sigma 30mm f/1.4 DC HSM A1. I think. I do want to thank them for not calling it the 30mm f/1.4 X, though.
Since we got a nice bunch of the A1 version lenses in yesterday, we thought it would be worthwhile to do a bit of comparison with the older version. For those who haven’t had the pleasure used the original Sigma 30mm f/1.4 lens, it was something of a love-hate relationship. The original 30mm was small, sharp, and inexpensive; a perfect combination for those shooting a crop sensor camera. Unfortunately, it had the somewhat dubious combination of being rather inaccurate to autofocus, yet extremely difficult to manually focus because of its inaccurate MF ring. There was, perhaps, a bit more copy-to-copy variation than many of us found acceptable.
We had a chance a few days ago to look at the first copy of the Zeiss 135mm APO-Sonnar CP.2 lens, but today received several copies of the 135mm APO-Sonnar in ZE (Canon) mount. I’ve been wanting to play with it personally, of course, but more to the point wanted the chance to test multiple copies, which always makes me feel better about out test results. I also wanted to compare its direct competitor, the Canon 135mm f/2L. Continue reading →
Of course, being a photo guy who loves shooting at 135mm, I can’t wait to get my hands on the photo version of the new Zeiss 135mm lens. I don’t have that yet, but we did get the CP.2 Cine version of the lens, the Zeiss CP.2 135mm T2.1 in today. In addition to making our video shooters all drool, the CP.2 gave us a nice preview of the coming photo lenses.
This will probably be of limited interest to most of you, but we like to know how things work, not just how well they work. Since we haven’t had any lenses or cameras to take apart lately, we thought we’d take a couple of pictures when we disassembled a ballhead in case any of you were interested. Our demonstration partner today was a Benro B1 ballhead that had a stripped tension adjustment knob, but all ballheads work basically the same way.
Unlike most photography gear, ballheads are elegantly simple. They have only a few parts. There’s the ball itself, of course, and the external case. Between the ball and the top of the case is a form fitting bearing. The bearing material (not visible in photo) is a firm plastic that has low friction, but it distorts a bit with pressure, exerting more friction at higher pressures. Many balls, like this one, have an opening in the bottom. Continue reading →
Ah, as if the 70-200 zoom field wasn’t crowded enough, with each camera maker having one or four along with the Tamron 70-200 f/2.8 VC and the Sigma 70-200 f/2.8 OS, but Tyler decided we have to stock yet another one. So today I have to test yet another 70-200mm, the Zeiss 70-200 T2.9 CP.2.
One of these things is not like the others.
Comparing the Specs
The Zeiss is a bit pricier than the others lenses in this range, and a bit larger. But you get twice as many aperture blades for your money. Not to mention it has significantly more light transmission. Don’t you wish photo lens makers had to use actual transmission (T) instead of theoretical calculations (f)? Looking at the table you kind of see why the camera makers might rather not.
Zeiss CP.2
Canon IS II
Nikon VR II
Tamron VC
Sigma OS
Price
$19,900.00
$2,200.00
$2,400.00
$1,499.00
$1,249.00
Weight (lb)
6.2
3.3
3.4
3.2
3.15
Length (in)
9.85
7.8
8.1
7.4
7.8
Aperture blades
18
8
9
9
9
Min. Foc Dist. (ft.)
5
3.9
4.6
4.2
4.6
T#
2.9
3.4
3.3
3.2
3.2
Ok, enough of the silliness. The Zeiss lens is clearly an entirely different beast and while we can mount it to our SLRs that’s not what it’s designed for. That extra money and weight go into making it a true cinema lens with long, smooth focus and zoom gearing. It’s also really parfocal, meaning if you focus on something at 70mm and zoom out to 200mm the object is still in focus. None of the photo lenses are (although budget minded cinematographers desperately want them to be).
Just a Little Bit of Handling
I could go on for some time about how accurately it focuses (it does), how smoothly it zooms (totally true) or how it’s not too heavy to hand hold for a while (a complete lie – it weighs almost as much as a Canon 500 f/4 IS II). This is a lens designed from the ground up to be mounted to a set of rails and focused with a geared follow focus system. It’s perfect for that and built as solidly as any cinema lens we carry.
Cinema lenses, as a rule, are designed differently than photo lenses. Photo lenses are about rapid autofocus, which means rear or inner focusing. That in turn means focus breathing, often to the point of massive changes in focal length when you focus closely. Being parfocal is of little importance for a rapidly autofocusing photo lens. When you zoom from 80 to 150mm if the camera can autofocus in a split second, who cares if it’s still in focus after the move? Not to mention the subject might be moving anyway. Being parfocal is very important for a cinema zoom.
We did a quick parfocal check, comparing it with the Canon 70-200 f/2.8 IS II, which is not parfocal (but actually sort of close to it). We simply set the lenses at 70mm and live view focused on the bush in the center with each lens.
Then zoomed to 200mm and took another image.
Here are 100% crops of the bush at 200mm with the Zeiss on the left, Canon on the right.
100% crops at 200mm after focusing at 70mm. As expected, the Zeiss (left) is parfocal, but not the Canon (right).
We did a quick check for focus breathing, too. I won’t repeat the Canon lens, it breathes significantly and the focal length changes as you zoom close. The Zeiss 70-200 did not focus breath significantly from far to near focusing.
Yes, I Had to Run the Numbers
Absolute resolution, historically, has been far more important for a photo lens sitting in front of a high-resolution sensor than a video lens. Even 4K video is about 8 megapixels, not nearly as resolution sensitive as a 36 megapixel SLR. So when we’ve tested video lenses for resolution compared to photo lenses they’ve historically not held up well. Resolution isn’t their primary focus.
But we thought we’d see if the Zeiss could hold its own against the best 70-200 f2.8 photo zoom we have, the Canon 70-200 f/2.8 IS II. Because the Canon is actually shooting at T3.4, we tested the Zeiss wide open (T2.9) and also stopped down slightly to T4. I’m not going to clutter up the tables with the T4 numbers – this lens is as sharp wide open as it is stopped down, with the exception that the corners get just a tiny bit better at T4.
These are Imatest MTF50 results using a Canon 5D II test camera showing point sharpness at the center, average over the entire lens, and average of the 4 corners.
Center MTF50
Avg. MTF50
Avg. Corner MTF50
Zeiss@ 70mm
990
775
600
Zeiss@ 135mm
915
675
575
Zeiss@ 200mm
815
575
425
Canon@ 70mm
875
755
575
Canon @ 200mm
840
720
525
Well, as you can see from the table, the Zeiss 70-200 T2.9 takes the idea of video lenses being lower resolution and shows that at the right price point, you really do get it all. At 70mm it’s clearly outresolving the Canon 70-200 f/2.8 IS II. The MTF50 decreases steadily at longer zoom lengths, but even at 200mm it’s still as sharp in the center as the Canon, which is the highest resolving 70-200 zoom we’ve tested. And remember the Canon is working at T3.4 wide open, a half stop slower than the Zeiss.
Let’s keep some perspective – if I were a photographer I wouldn’t be spending this kind of money for a 6-pound 70-200mm zoom because it’s sharper at the wide end. And even shooting 6k video I suspect you’d be hard pressed to detect a huge difference in your footage at 70mm. But now you can have a true cinema lens with long focus and zoom throws, properly geared for follow (and zoom) focus, parfocal and without significant breathing that’s as sharp as any photo lens made.
While $20,000 is sticker shock for my photography colleagues, consider a set of three Cooke Panchro primes covering the same focal length at the same aperture costs $22,000 and doesn’t even approach the Zeiss in resolution. Plus Zeiss lenses don’t tend to spit out focus helicoid collars and require a $600 repair every 3 months like Panchros do.
Roger Cicala and Aaron Closz
Lensrentals.com
April, 2012
BTW – I know what you’re thinking. Yes, I do love my job.
Obviously I’m a gearhead, so I like to know the traits of the lenses I shoot with. I want to know what aperture gives maximal corner sharpness, for example, whether the plane of focus is curved or flat, where the distortion changes in a zoom, which end of the zoom range or focusing distance is the lens sharper at, and a number of other things you may not care a bit about.
Does it improve my composition and technique? No. But knowing this stuff can be helpful. For example, when I want to shoot a landscape at 70mm and f/5.6 will my corners be sharper with my 24-70 f/2.8 or a 70-200 f/2.8? Or which will have less distortion for an architectural shot (since I hate the resolution loss of correcting distortion in post), my 35mm f/1.4 or my 24-70 zoom at 35mm? (Surprisingly, the answer is my zoom.)
This kind of information is easy to find. DxoMark has nice graphs for each lens that show distortion, vignetting, chromatic aberration, and resolution at various focal lengths and apertures for each lens they test. SLRgear.com has a nice pop-up app that shows the resolution across the field of the lens at various apertures and focal lengths. The Digital Picture has great pop-ups that let you compare two lenses side-by-side for flare, distortion, vignetting and even images of ISO 12233 crops.
A lot of people use those tools when deciding which lens to buy. I use them after I have the lens so I know how to best use it.
Resolution Maps
One thing that I’ve started using more frequently in post processing is a resolution map of the lens. We all know that every lens has highest resolution in the center and less in the corners. But the pattern of sharpness is different for different lenses.
Some lenses have a high peak of resolution right in the center that quickly drops off. Others maintain significantly high resolution halfway to the corners and then drop like a rock. Others have a rather linear drop-off from the center to the corners.
Just as an example, below are 6 Imatest charts showing MTF50 of 6 different lenses across the field of view. The absolute resolution numbers aren’t important for this demonstration, rather it’s the pattern of how the resolution changes. For each lens, yellow is the highest MTF50, blue is about 1/3 the value of yellow.
Imatest resolution maps of 6 lenses.. Yellow is highest resolution, blue lowest.