Equipment
A Peek Inside the Leica Vario-Elmarit-SL 24-90mm f/2.8-4 ASPH
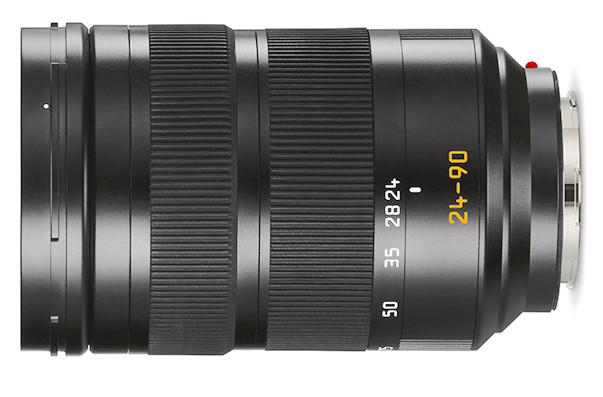
We always get excited when a lens comes out with some new technology or major changes. This time, the new technology came from an unexpected source when Leica released the Vario-Elmarit-SL 24-90mm f/2.8-4 ASPH lens. I know most of you don’t think of Leica as technological groundbreakers and most of you probably barely noticed the release of the Leica SL system. Not a lot of you were crazy to get your hands on a $7,500, 24-megapixel camera with a $5,000 variable aperture zoom.
Still, there’re some interesting things here, both in the camera (which Joey took for a spin) and the lens. First of all, I was impressed that Leica proudly put out hard specifications on the lens: MTF curves at multiple focal lengths and both near and close distance focusing, specifications on which elements move during zooming, cutaway views, etc. Needless to say, Aaron and I were pretty interested in taking a look inside this lens. Just so I don’t waste anyone’s time, there’s nothing amazingly cool inside, although there are a couple of interesting points.
Overview
The 24-90mm contains 18 elements in 15 groups, similar to lenses like the Canon or Nikon 24-70 f/2.8 II lenses. It also contains 4 aspheric and 11 low dispersion elements, compared to 3 of each in the Nikon and 2 aspheric and 3 LD in the Canon. Additionally, the Leica has 6 different moving groups inside the lens, which is rather more complex than most standard range zooms.

Leica 24-90mm SL cutaway and lens diagram. Courtesy Leica Camera https://us.leica-camera.com/Photography/Leica-SL/Lenses/LEICA-VARIO-ELMARIT-SL
To be honest, we were pretty interested in looking at how all of those elements move. And of course, we were interested in how things were put together in there. This will just be a quick look, not a complete teardown, but it should give us a general idea.
Let’s Open Things Up!
There are two sets of screws in the back, 3 holding the rear baffle in and 5 holding on the bayonet mount.

Lensrentals.com, 2016
The baffle removes easily enough. The screws holding on the bayonet mount (on the left) are, as they should be, long, heavy-duty, and well covered with Loctite.

Lensrentals.com, 2016
The camera contact electrodes are mounted to the rear bayonet with screws coming up from underneath. It was simpler just to disconnect the flex from the PCB than to remove the screws.

Lensrentals.com, 2016
Underneath the bayonet mount is rear shims. These usually are simply to place infinity focus properly.
Lensrentals.com, 2016
The PCB, as we’re seeing in a number of newer lenses, is isolated from the structural parts of the lens by a set of rubber bumpers on both sides.

Lensrentals.com, 2016
The screws attaching the rear barrel to the lens chassis are removed next.

Lensrentals.com, 2016
After which the rear barrel slides off.

Lensrentals.com, 2016
I’ll mention that a bit of force was needed to remove the rear barrel, as it’s very tightly sealed by the thick, greenish weather gasket underneath.

Lensrentals.com, 2016
Once the rear barrel has been removed we can disconnect the flexes and lift the PCB out.

Lensrentals.com, 2016
Then we rotate the zoom ring around to expose the single zoom key, which we removed, along with 6 screws set in the notches of the internal chassis (thick light gray piece at the top).

Lensrentals.com, 2016
That lets us slide the entire outer barrel assembly off of the inner barrels. So basically, the zoom and focus rings are one modular assembly connected to the main chassis.

Lensrentals.com, 2016
The 24-90mm Leica is a focus-by-wire lens so rotating the focus ring moves the electrical actuator. We can see a bit of this inside the focusing barrel. I won’t argue with those who prefer a mechanical focusing linkage, and I agree that some electric focusing mechanisms feel sloppy and inaccurate. But I’ll add that they aren’t all made equally, and the Leica focus feels quite good and seems very accurate.

Lensrentals.com, 2016
Now that we’ve got the casing removed we can take a better look at the optomechanical parts of the lens. The front barrel (containing the front lens group) is to the right side in the photo below. You can also get a look at all of the various helicoid grooves that allow those 6 elements to move on 6 different paths. (Actually, you see 4 helicoid grooves in this photo. There are three identical sets spaced around the barrel’s circumference. You’re looking at the ‘extended’ portion of one set at the bottom of the barrel, and the starting point of the next set at the top of the barrel, with the third set around on the back side.)

Lensrentals.com, 2016
To get a better look at the mechanism, we removed the front barrel screws, which are the slotted screws you see on the right of the image above. The copper spring tab on the white plastic back you see is there to make movements smooth and steady, they provide some of that nice smooth feel you get when zooming this lens.

Lensrentals.com, 2016
Each of the three front barrel screws inserts into a collar that travels in the helicoid slot. In this lens they are all metal and quite sturdy — as they should be.

Lensrentals.com, 2016
Here’s a quick look at the helicoid barrel with the front removed – now you can see all 5 helicoid slots (the 6th moving element is the focusing element). This is a really nice example of the mathematical formulas involved when you move elements. Notice none of those grooves are parallel; as you zoom the lens the various elements move in a rather complex dance. We left the front barrel collar in it’s helicoid slot (the silver oblong one in the second helicoid slot from the front).

Lensrentals.com, 2016
Here’s a closeup of a couple of the lens group collars as the sit in their helicoid slot.

Lensrentals.com, 2016
These are identical for 4 of the 6 moving groups (the front group, which we showed earlier, and the focusing element, which we’ll show later, are the other two.) They’re standard size nylon rollers over a brass center post with a healthy size screw holding them in place. Again, exactly what we’d expect from a well-made lens.

Lensrentals.com, 2016
Further disassembly requires removing sets of three collars and lens elements in order. The ones above were taken out to remove the rear element from the rearmost helicoid so that we could see the more interesting focusing group just in front of it. Unfortunately, just looking at it from below turned out to not be very interesting.

Lensrentals.com, 2016
So, despite the fact we didn’t want this to turn into a full disassembly, we decided to take it out too.

Lensrentals.com, 2016
With these removed the focusing assembly slides right out of the barrel. Here things get quite interesting, as this is a bit of an unusual assembly. You can see the stepper motor (green line) of course. The actual focusing element is what Aaron is holding the group by. The larger group in the center is where the entire assembly is attached to the helicoid. One of the first things we notice (red arrows) is this group has 3 pairs of adjustable eccentric collars. These were thoroughly glued in place so we left them alone, but it seems each pair has one collar for tilt and another for centering of this group. None of the other moving groups had eccentric adjustment collars visible.

Lensrentals.com, 2016
Here’s a closeup of the adjustment collars with a better look at the focusing group in the rear.

Lensrentals.com, 2016
And while not the best shot (it’s deeply recessed) here’s a look at the screw rod that actually moves the focusing group. Like everyone else, Leica claims to be the fastest autofocusing of any lens-camera combination. But in Leica’s case they actually give you a number: 110 milliseconds from one end to the other, so maybe they really are the fastest. In any case, though, it’s apparent they put some design effort into the autofocus: a single, small, lightweight element is all that the stepper motor needs to move.

Lensrentals.com, 2016
One thing impressed me that I’d like to mention, since I’ve expressed hesitations in the past that some of these ‘vertical movement’ focusing groups in other lenses are only supported by thin rods at two places, which to my mind means they might tilt during focusing. If you scroll back up to the view of the focusing group from below you can see that it’s supported by a couple of thick structures that take up a significant portion of the circumference. These would seem very unlikely to allow any play or tilt in this element as it moves. Again, that’s just me speculating. It may be this is never an issue. But this makes me feel better.
Anyway, before Aaron started putting everything back together, we did take a look up into the barrel, where the IS unit is visible. Yes, we see the screws just like you, and yes, we thought about taking it apart. But then remembered how delicate and finicky IS units are so we decided to quit while we were ahead and call it a day.

Lensrentals.com, 2016
As I said, at first, there weren’t any earth-shattering revelations in this peak inside. Just a well-made lens with a couple of interesting technologies. But we always like to know what’s in there, and I know at least a few of you do too.
Roger Cicala and Aaron Closz
Lensrentals.com
February, 2016
The usual addendum: It continues to amaze me that 613 people ask after every teardown but to save responses to comments: yes, we put it back together and yes, it works just fine, and yes, we optically tested it before and after and it’s unchanged, and yes, it’s back in the rental fleet.
Author: Roger Cicala
I’m Roger and I am the founder of Lensrentals.com. Hailed as one of the optic nerds here, I enjoy shooting collimated light through 30X microscope objectives in my spare time. When I do take real pictures I like using something different: a Medium format, or Pentax K1, or a Sony RX1R.
-
Heinz Richter
-
Dré de Man
-
gallery90
-
Mel Gross
-
davev8
-
Heinz Richter
-
Roger Cicala
-
Roger Cicala
-
John Wynne
-
John Wynne
-
jason bourne
-
Tatu Takanen
-
Thinkinginpictures
-
AaronClosz
-
Allan Sheppard
-
Roger Cicala
-
Siegfried
-
Roger Cicala
-
Siegfried
-
Wilson Laidlaw
-
almeich
-
Maya
-
bdbender4
-
Roger Cicala
-
yes-yes!!
-
Heinz Richter
-
Roger Cicala
-
Siegfried
-
J.L. Williams
-
Athanasius Kirchner
