Equipment
The Long-Awaited, Scary and Amazing Fuji Lens Teardown
For, oh, about 2 years now, every time we do a lens teardown I get emails from Fuji shooters asking me to tear down one of their lenses. There are several reasons we haven’t. For one thing, we have far fewer copies of those lenses so there is less reason to work on them. Since we can’t get parts for them, chances are we couldn’t fix what’s wrong even if we did open them up.
Probably more realistic, though, is the fact that we are just plain and simply scared of them. Fuji lenses are really different inside, we’ve seen that from some quick peeks in the past. Since we have no experience with them, the chance of making idiots of ourselves during a teardown is significant. But we finally decided to face our fears because we had a nice, water-killed copy of the Fuji XF 55-200mm f/3.5-4.8 R LM OIS lens sitting on the parts shelf. After about 6 months, Aaron and I finally got the time and courage to take it apart.

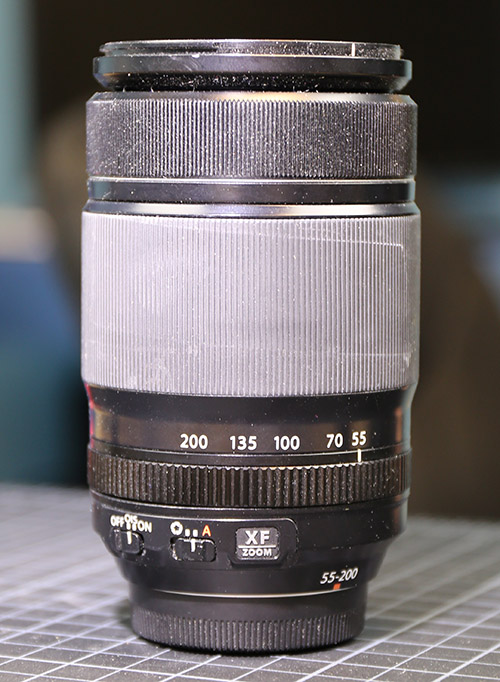
- Looking a bit worn, but anatomically correct, the Fuji 55-200mm is our subject for the day. Lensrentals.com, 2016
Plus, there were some things we were interested in seeing. First among these, of course, was the ‘dual linear focusing motor’ assembly. While this is a consumer-priced lens, it gets excellent reviews and has a very well-built external feel with its metal barrel. We were kind of interested in seeing how well-built it was inside. Most importantly, though, we just wanted to face our fears and explore the land of Fuji, where things are done differently.
We’ll start our adventure at the front of the lens. There’s a nice metal makeup ring that peels up. Underneath it is a plastic base ring that is there just for the makeup ring to stick to. The base ring can be removed by taking out 4 small screws after you peel up the makeup ring. Notice I say ‘can be’. If you look closely at the picture below you can see it’s staged with a broken piece of the plastic base ring stuck to the makeup ring Aaron (I repeat, Aaron) is pulling up. But don’t say anything, he’s kind of embarrassed about it and I promised I wouldn’t mention it to anyone.

- Lensrentals.com, 2016
Anyway, with the makeup rings removed we are looking down at the front of the lens. Things are already a bit different and more complex than with most lenses, so I thought I’d further complicate this picture with some colored lines. The green lines show two of the 4 holes where the makeup ring screws were before we removed them. The blue lines point to the screws holding the front filter barrel in place. The red lines point to to the positions for the screws holding the front element group in place.

- Lensrentals.com, 2016
Having this many screws in the front barrel is different (the most we’ve seen), but there’s something much weirder going on here. If you notice the red lines you’ll see that there are only screws at 3 of the 4 positions. We first thought that somebody at the factory just left out a screw. Except that empty space isn’t even threaded; there was never a screw there. So we were really puzzled. Why would you design a lens with screws in only 3 positions? Plus there’s another interesting thing; the front optical group and the filter barrel are heavily glued together; you can see some of the white glue in the image above.
We found out, the hard way, that you have to remove all of the filter barrel and lens screws and then take the filter barrel and first group out as a single assembly. That glue was pretty resistant to alcohol and heat.

- Lensrentals.com, 2016
Once the front group was out, we understood the mystery of the 3 screws (well, we think we did). Under each of those screws was a fairly stiff spring. So by loosening and tightening the screws we could actually adjust tilt on the front group. Springs could used as a shock absorber, perhaps, but if that was the case I can think of no reason they wouldn’t be at all 4 positions. So a tilt adjustment seems more likely.

- Lensrentals.com, 2016
To the right of the spring shown above, you can see the brass of the female screw threads. These are actually brass inserts slid into the barrel from the side before the screw is placed. Very sturdy – the tension is on the brass insert which has a thick base, rather than on plastic screw threads that might tear out.

- Lensrentals.com, 2016
That basically finished the front end disassembly, so we flipped the lens over and started by removing the light baffle and rear mount. I added this artistic, low-key, fade-to-black image for those of you who, for whatever reason, come to the teardown articles to complain bitterly about the photo quality. I thought this was quite the dark, moody image; sort of matching my usual mood.

- Lensrentals.com, 2016
The rear baffle and rear bayonet mount screws come out in the usual fashion, and the screws were appropriately large for a lens this size. They insert into plastic posts in the rear internal mount of the lens, but the plastic has fairly heavy brass inserts that the screws go into, so they aren’t trying to hold the bayonet on by screws-into-plastic. Screws into metal is best, but screws into metal inserts is good. We noted a single circular shim under just one of the screw posts, so we assume the rear mount is adjusted for tilt.

- Lensrentals.com, 2016
As we see in a number of micro 4/3 lenses, there were ground flexes from the PCB to the rear barrel.This photo also demonstrates that sufficient caffeine to keep me alert leads to motion blur when I try to handhold macro shots from some contorted position or other. If you’re looking for high quality photography, go read one of Sarah or Zach’s posts. I’ll warn you, though, their tear downs are way worse than my photography.

- Lensrentals.com, 2016
With the bayonet off we removed 4 small, non-loadbearing screws to remove the rear barrel and the switch plate.

- Lensrentals.com, 2016
The back end of the lens with PCB is pretty exposed now and looks fairly complex, with a lot of flex connections, a lot of empty screws sleeves from those we’ve already removed, and a lot more screws still in place. If you want the system with the most screws, you want Fuji, no question.

- Lensrentals.com, 2016
With the flexes disconnected, the PCB, which is held in place by rubber bumpers on both sides, can be lifted out. Removing three more screws lets us take out the rear group. We took out the rear group at this step because, honestly, we couldn’t figure out how to get the aperture ring off, which is what we had planned to do next.

- Lensrentals.com, 2016
We were surprised to see the rear group has an electronic flex, with some obvious sensors held firmly in place by foam rubber friction pads.

- Lensrentals.com, 2016
We’re not at all certain what function these perform since the rear group isn’t a moving or focusing group. Here’s a closeup of the paired, identical sensors. Hopefully one of you can tell us all what they are. (I’ll repeat what I’ve said before — intelligent people come and inform us about what we don’t understand in the comments section. Less intelligent people come inform us about what they don’t understand in the comments section. Sometimes it’s really hard to tell which category a given comment belongs in.)

- Lensrentals.com, 2016
With the rear group removed, we can see why the aperture ring didn’t want to come off the barrel; there are some screws from inside the barrel into the aperture assembly that need to come out.

- Lensrentals.com, 2016
Then we removed the plastic clip holding the aperture sensor in place. With this and the inner screws removed the rear aperture ring slides right off.

- Lensrentals.com, 2016
The aperture has a nice mechanical feel, but it’s actually electronically controlled. There’s an electrical sensor that knows the dial has been rotated and adjusts the aperture accordingly.

- Lensrentals.com, 2016
The aperture click mechanism, as with most aperture click mechanisms, is a spring-loaded ball bearing that clicks into slots in the aperture ring as it’s rotated. This technology has been around so long I assume Voigtlander stole it from Petzval along with his lens formulas.

- Lensrentals.com, 2016
With the aperture ring removed, we can peel off the sealing tape under the zoom rubber,

Lensrentals.com, 2016
remove a couple of screws connecting the ring to the inner zoom barrel, and slide the zoom ring off.

Lensrentals.com, 2016
The inner zoom barrel is a solid piece of aluminum over 1mm thick. There are 3 zoom keys from the barrel into the inner mechanism; that’s good engineering, most lenses in this price range have one or two keys.
Each of the zoom keys is held in place by two screws and they have to be removed to take the metal zoom barrel off. Again, these are nice, heavy duty pieces of metal.

Lensrentals.com, 2016
There were a few more screws in the back mount that have to be removed and then we can slide the zoom – focus barrel assembly off of the inner part of the lens.

Lensrentals.com, 2016
The 55-200mm is a focus-by-wire lens, and with the outer barrel off we can see the focus ring sensor inside the ring. There’s also a felt friction ring that prevents scraping and keeps the focus ring feeling smooth when you turn it.

Lensrentals.com, 2016
With all of the outer pieces removed, it might be a good time to show you a summary of the disassembly to this point. At the top of the image nearest to Aaron is the helicoid barrel and most of the optics. That’s what we’ll be working on for the rest of this post.

Lensrentals.com, 2016
Here is a closer look at the inner helicoid barrel. The extending barrel is to the left, Arron’s holding the barrel by the base where the camera mount was originally attached. You can see even at a glance that the nylon collars that the elements slide in the helicoids are really thick, larger than most lenses we see.

Lensrentals.com, 2016
We took the extending barrel off next, giving us a better look at the helicoid itself. You can see now that there are actually 5 groups that move when you zoom this lens. The front group moves with the extending barrel (which went in the long slot along the top in the image below). There are three groups each moving in one of the slots along the front of the lens. Finally, the 2nd group (from the front) moves in the slot near the front of the lens. We were really shocked that the new Leica 24-90mm zoom had 6 moving groups, we’re even more surprised to see 5 groups moving in a sub-$1,000 lens.

Lensrentals.com, 2016
We were even more interested when we took a closer look at the collars. Most are thick nylon collars placed over heavy-duty post screws. However one set is something we’ve never seen before. These are actually double collars. The outer one rests in an oval slot in the lens group while the inner collar is clearly eccentric. These are used to adjust the center group optically, similar to what brass eccentric collars do in a lot of lenses. It’s really kind of an elegant solution, and definitely something we’ve never seen before.

Lensrentals.com, 2016
As you can probably tell already, we decided to remove the collars and take the various elements out of the helicoid. We often don’t do this because it means optically readjusting the lens, but this lens was dead anyway so we weren’t putting it back in stock. More importantly, we were curious not only because there are a number of moving elements within this helicoid, but also because the IS unit and focusing unit are in there and we wanted a look at them.
The second group (first group was removed from the front of the lens earlier) is the OIS (image stabilizing) group. But it became apparent when we started to remove it that the flex connector going to the back of the lens (you can see it out of focus at the top) was going to keep us from removing the OIS group entirely.

Lensrentals.com, 2016
So we went around to the back side of the helicoid and removed the second-from-the-rear group which came out nicely.

Lensrentals.com, 2016
At this point, we removed all of the other group’s collars and slid the helicoid barrel off of the inner sleeve, so now we have a simple tube containing the rest of the lens elements.

Lensrentals.com, 2016
In the above image, you can see the forceps pointing to what’s obviously a position sensor for the focusing group. This had to be removed to free up the focusing group. Once we took it out we could see it is a fairly straightforward plastic slider.

Lensrentals.com, 2016
Now we can finally eviscerate our lens, sliding all of the remaining optics and their electronics out from the front of the center barrel, leaving just the empty tube behind.

Lensrentals.com, 2016
With all the pieces out, we can take a closer look at the various components. The OIS unit was first.

Lensrentals.com, 2016
Inside it’s really solid. Two large electromagnets sit opposite two smaller standard magnets (you can see the tips of them poking out from under the electronic flexes. Between each magnet the floating IS element is suspended by a set of springs over pins. It’s pretty normal looking construction but solidly made.

Lensrentals.com, 2016
The aperture assembly was next on our list. It’s held together by 8 screws; again well built. We see some that use fewer.

Lensrentals.com, 2016
Opened up, it’s pretty normal looking with an included glass element, the usual aperture control motor and slots that open and close the blade by rotating the upper ring.

Lensrentals.com, 2016
Finally we get to the part I most wanted to see, the linear focusing assembly. This is a big assembly (scroll back up to the picture when we’re removing everything from the inner barrel, it’s that large thing Aaron’s holding in his fingers). Because it’s large and I have to use a macro lens to show you what I want to show you, in each of the following images there will be a fair amount of out of focus focusing element. (That was pretty good wasn’t it?) And for the inevitable comments, no I’m not going to get a tripod and macro rail and shoot them at f/16 or stack them in post. I’ve got work to do and this is what I do for fun.
First we’ll look down at the focusing element from the top of the assembly. The focusing element is at the bottom, attached to electromagnets on either side (you can see part of the copper coils) which are the ‘twin’ AF motors Fuji mentions in their marketing material. At 12 o’clock the silver bar you see is a position sensor that slides up and down as the focus group moves.

Lensrentals.com, 2016
Here it is from the back side. You can see the magnetic strip along the back side of the metal rod and the green magnetic sensor that we’ve lifted up, out of position. This means there were two position sensors with the focusing group; the sliding one we removed earlier from the inner barrel and this one. Our guess is that the first one reports the position of the entire focusing group, which moves during zooming, and this one the position of the focusing element within the group. That’s another thing we haven’t noticed in other lenses.

Lensrentals.com, 2016
This view is from the bottom of the focusing assembly with the focusing element in its most forward position. It gives a good view of the two large magnets the focusing group slides up and down on. While they’re out of focus, you can also see the two thick metal rods that also pass through the element. We’ve looked at some lenses with electromagnetic focusing where I was concerned the element could tilt during travel because the travel seemed a bit loose. I have no such concerns here. The focusing element is securely anchored at 4 different points. This is very solidly made.

Lensrentals.com, 2016
Conclusions
Well, possibly the most fun for a lot of you was watching us fumble around inside a lens we’d never seen before. We messed up the front makeup ring getting in, stumbled figuring out the rear barrel disassembly, and made the disassembly of the helicoid group more complicated than it needed to be. Even after the fact, we aren’t quite certain exactly how some of the electronics and sensors work.
As for our impressions, first and foremost, the Fuji lenses are a bit more complicated than most we’ve tackled, but not hugely so. The construction, especially when considering this is a consumer-price zoom lens, is impressive. Some things, like the number of zooming elements, reminds us a bit of the Leica zoom we disassembled last week. There are obviously some optical adjustments made during the assembly of this lens, and that always makes me feel more comfortable. I’m uncomfortable when the manufacturer just assumes assembly is going to be fine – but since optical adjustment is what I do all day, that may just be my perspective.
The overall construction is excellent. There was no place during this disassembly that either of us thought we saw a weak point that would be likely to cause problems. It’s not massively over engineered, but it’s very solidly constructed. It’s definitely better constructed than what we would expect from a $600 zoom. This looks like a lens that was designed by people who know how to make reliable lenses.
As to whether we’ll do any more Fuji disassemblies, it’s not likely. We just don’t have enough Fuji stock that I see us doing repairs in-house. But we learned some things today and came away impressed — at this price point it’s an extremely well-built lens with a lot of interesting technology inside.
Roger Cicala and Aaron Closz
Lensrentals.com
February, 2016
Author: Roger Cicala
I’m Roger and I am the founder of Lensrentals.com. Hailed as one of the optic nerds here, I enjoy shooting collimated light through 30X microscope objectives in my spare time. When I do take real pictures I like using something different: a Medium format, or Pentax K1, or a Sony RX1R.
-
obican
-
simon_e
-
Roger Cicala
-
DrJon
-
Andrew Dodd
-
Andrew Dodd
-
Roger Cicala
-
Roger Cicala
-
ShermanLiu
-
Carl Eberhart
-
bdbender4
-
intrnst
-
Roger Cicala
-
Roger Cicala
-
Roger Cicala
-
Trevor Overman
-
Steve Matko
-
Carl Eberhart
-
ChrisHarrisionPhoto
-
Trenton Talbot
-
Roger Cicala
-
Trenton Talbot
-
Roger Cicala
-
Roger Cicala
-
Tim Underwood
-
Zach Sutton Photography
-
Roger Cicala
-
John Dillworth
-
Trenton Talbot
-
Kenneth Rosenstrøm
