Equipment
Teardown of the Nikon Z7 Mirrorless Camera
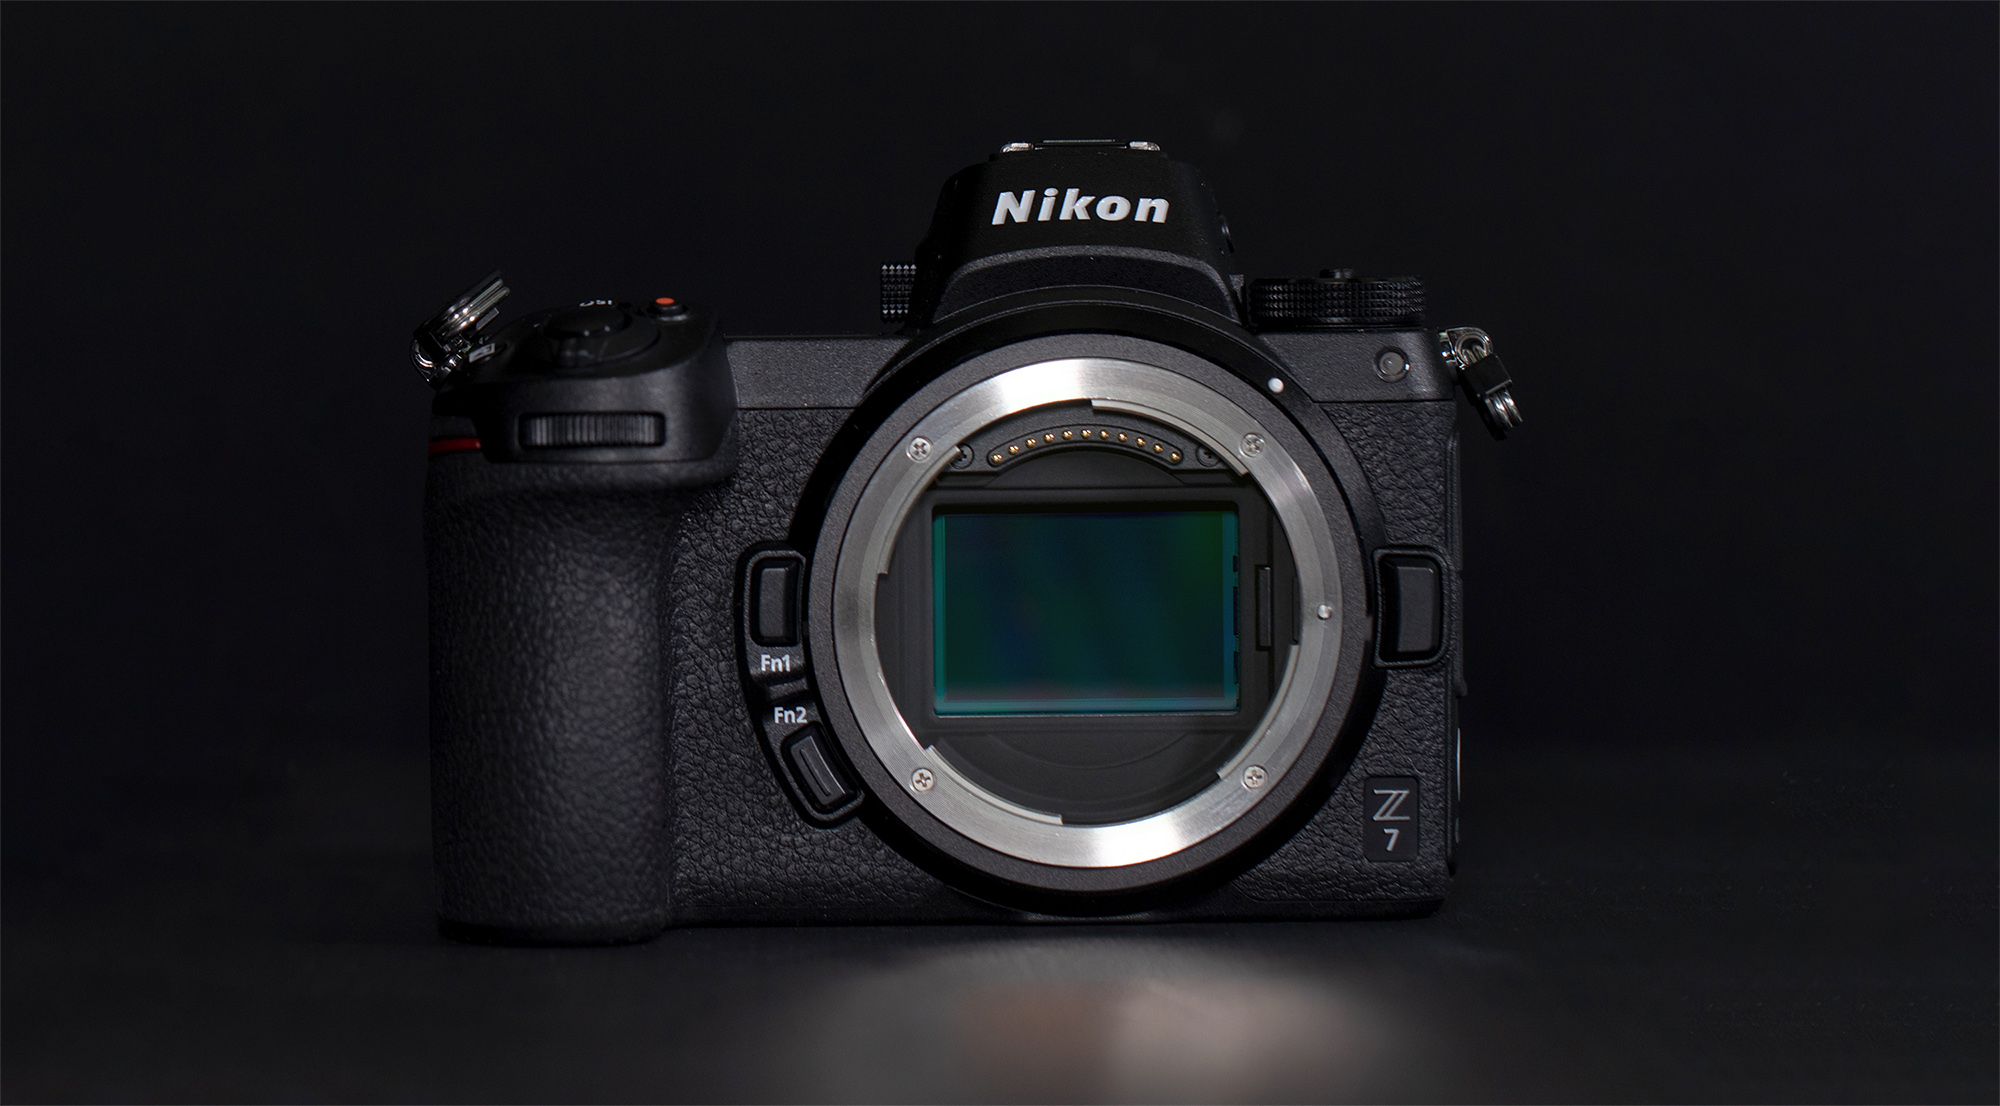
We published our teardown of the Canon EOS-R and then had to decide which of the Nikon Z cameras to do. We decided to go with the top-end Nikon Z7. The Nikon Z6 would be the more appropriate comparison from a price standpoint; the Nikon Z6 is retailing for $2145, the Canon EOS-R for $2299, and the Nikon Z7 for $3545. (FWIW, the Sony A7R III splits the difference, at $3,000.) But we had a Z7 and didn’t have a Z6. And honestly, I was more interested in what the top-end camera looked like inside.
Yes, I know fanboys are going to go berserk about it being an unfair comparison, but fanboys are going to get upset no matter what I do. Nikon shooters will legitimately wish I’d compared both the Z6 and Z7 to help with decision making. I’ll probably crack a Z6 open just to peak at differences when we get them, but I probably won’t make a full tear down.
I also want to mention that the good guys at Kolarivision (I highly recommend them, BTW, should you ever want an IR conversion) have already done a Z7 teardown. I think the two teardowns will complement each other. They give you a great look at the sensor assembly, because removing sensor assemblies all day is what they do, so we just left that alone. We’re going to focus more on the other parts of the camera because repairing dead cameras (and looking for weak points) is what we do. We won’t take out the sensor because I have too much to do, and that part is already done well by Kolarivision.
Nikon Z7 Teardown
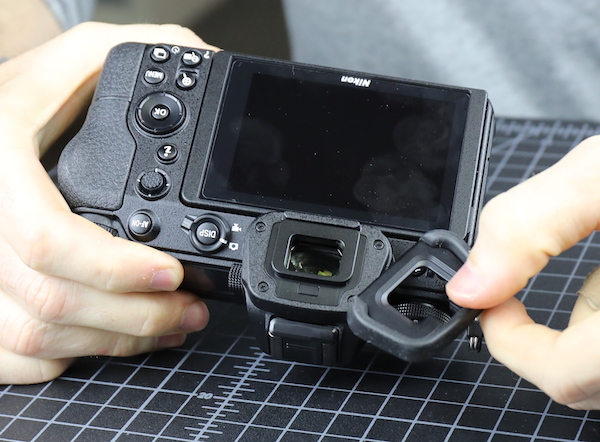
Well, the first difference comes early: the viewfinder rubber is clip-on, where the Canon’s was attached with screws. You guys can go ahead argue for a few hours about which is better or worse; I don’t think it matters.
lensrentals.com, 2018
Opening the doors and looking around shows a lot of weather-resisting gaskets everywhere. There is more robust door sealing than we saw on either the Canon EOS R or the Sony A7RIII.
lensrentals.com, 2018
While the Canon had a new type of bracket for their fully rotating LCD, the Nikon has a tilting LCD with standard bracketing that we’ve seen on numerous cameras. It’s tried-and-true, I have no worries about it; tilt brackets are less stressed than rotating-tilting brackets.
lensrentals.com, 2018
Anyway, with external inspection out of the way, we started taking out the obvious screws.
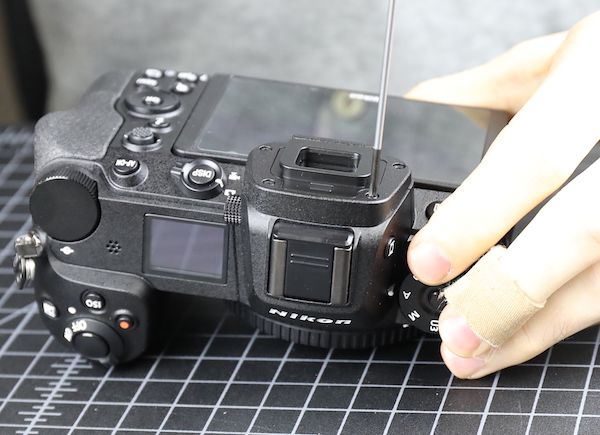
lensrentals.com, 2018
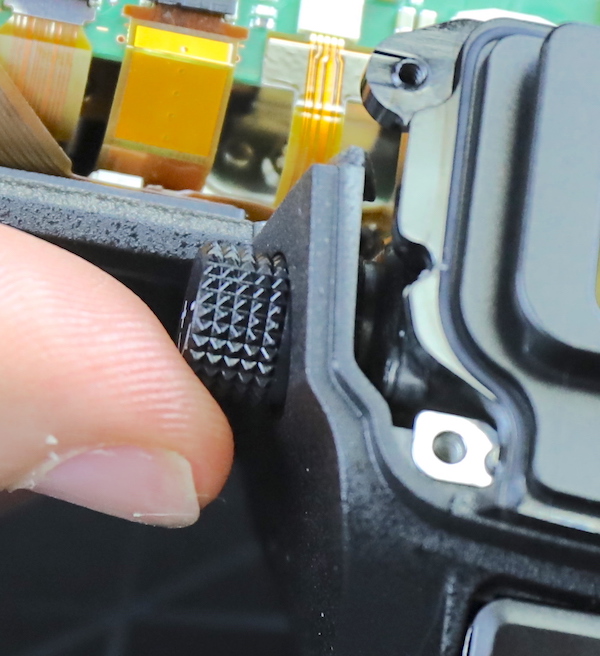
And removing the grip rubber. Another thing that makes absolutely no difference to anyone but us, but we got spoiled with Canon’s new adhesive. Nikon uses more of a ‘you ain’t getting this off without a fight and a heat gun’ adhesive. Kind of a pain for disassembly/reassembly, but the strong adhesive, along with lots of overlapping edges covered by the grip rubber is kind of impressive. In many places the plastic shell doesn’t just interlock; it overlaps, screws together and then is covered with rubber grip and adhesive. That should not only give a superior weather seal, but it’s also probably giving some added strength to the assembly.
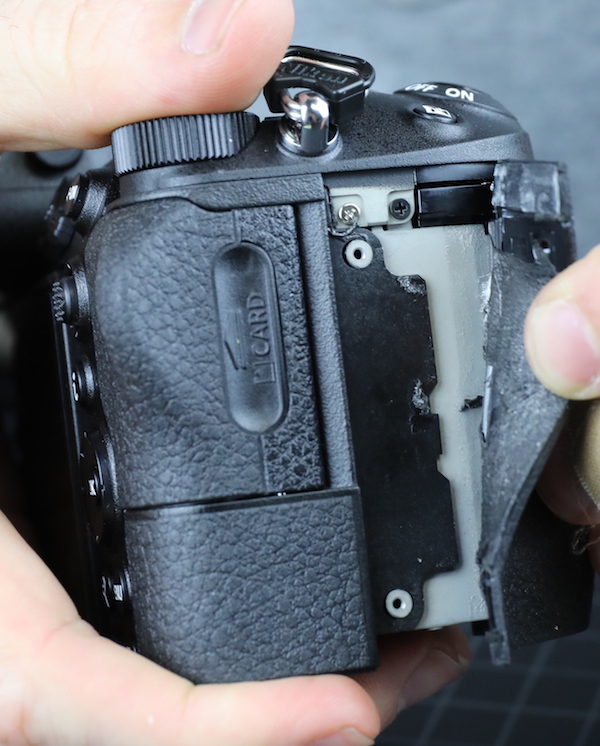
lensrentals.com, 2018
Nikon cameras tend to want the bottom plate removed before going on to other things, so we started there.
lensrentals.com, 2018
Those of you who read a lot of my teardowns know that my life revolves around mocking Nikon for having actual wires (how 80’s) winding hither and yon in the camera. I’m pleased to see they’ve obviously been listening to me because the first thing we see is a wire neatly held in a bracket. The white color makes me think it’s a WiFi antenna wire.
lensrentals.com, 2018
The bottom plate, again, has thick weather gaskets both around the edges and at the tripod mount.
lensrentals.com, 2018
The tripod mounting plate itself is OK, but certainly neither as robust as, nor is the screw insert as long as the Canon. When will this matter? Probably never, but I would be careful not to insert an overly long tripod plate or accessory screw on this camera; you might pop the top of the socket off.

lensrentals.com, 2018
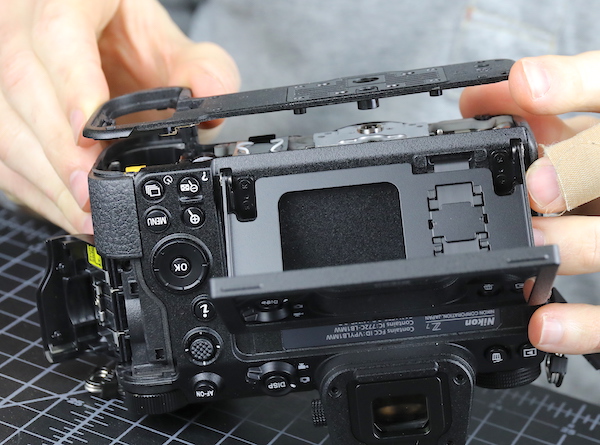
With grips off and screws out, the back panel and LCD assembly slide right off.
lensrentals.com, 2018
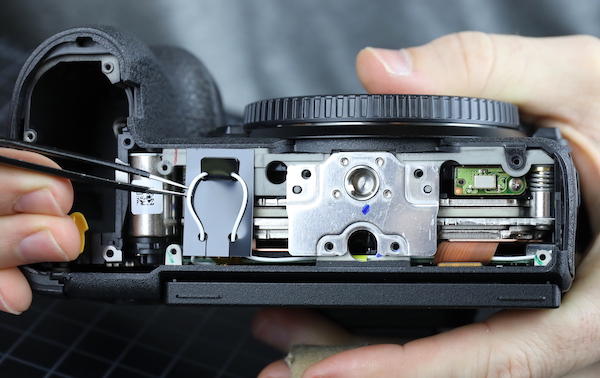
And at this point, things look much like any Nikon SLR disassembly. You can see the end of that white wire inserting into a plug on the PCB which confirms its WiFiness.
lensrentals.com, 2018
And let me give props where they are due: there is not a soldered wire to be seen, flexes are neatly laid out, and runs are short. It’s an immaculate and thoughtful design.
Lensrentals.com, 2018
Let’s also praise some thorough weather sealing. Here you see it along the top.
lensrentals.com, 2018
And here along the sides.

lensrentals.com, 2018
And, of course, the buttons are all well sealed. I think we can safely assume that all cameras have well-sealed buttons these days, but the Nikon Z7 has great sealing everywhere we looked.
lensrentals.com, 2018
With the bottom and back off we can get a nice look up from the bottom at the various boards. If you compare it from a similar view of the Canon EOS R near the end of that post, you can see that there’s a lot less air in the Nikon, mostly because there’s a lot of IBIS in there.
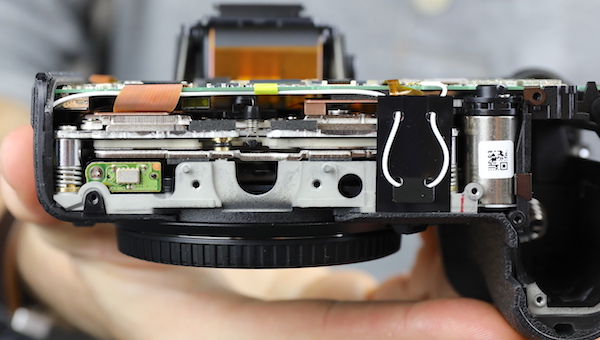
Lensrentals.com, 2018
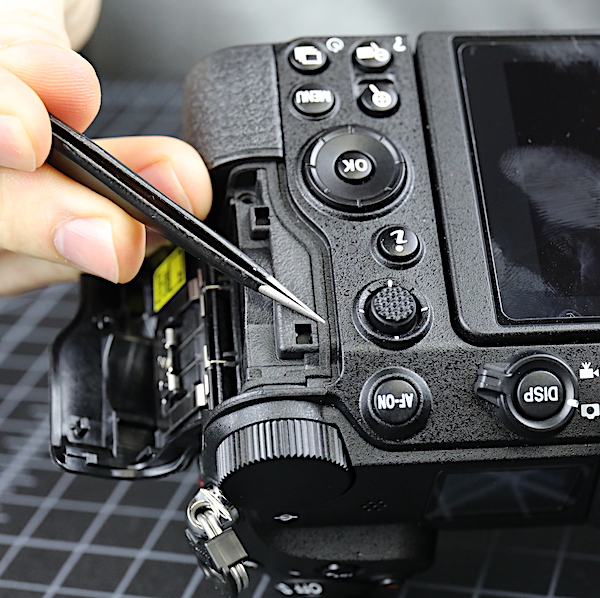
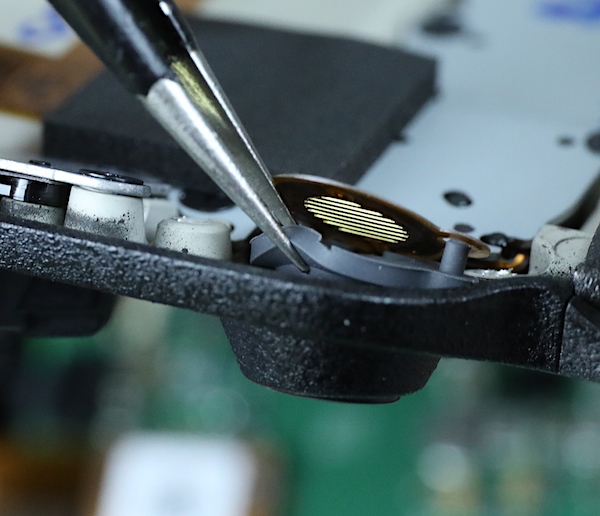
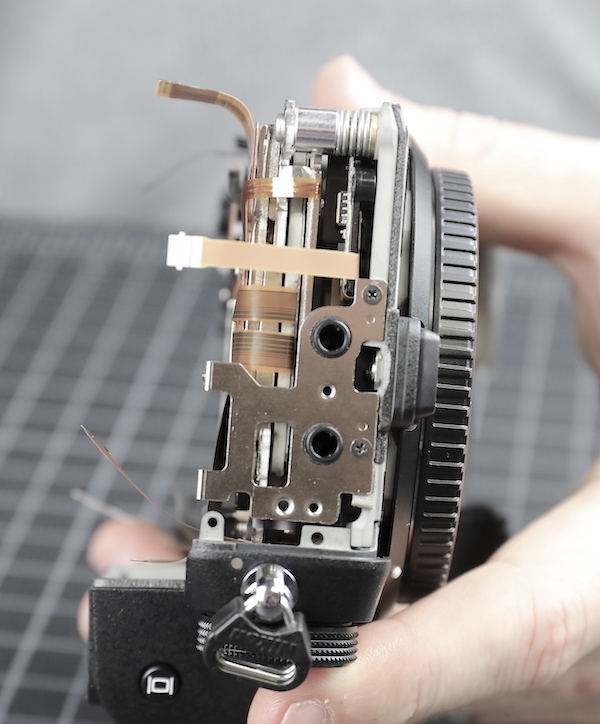
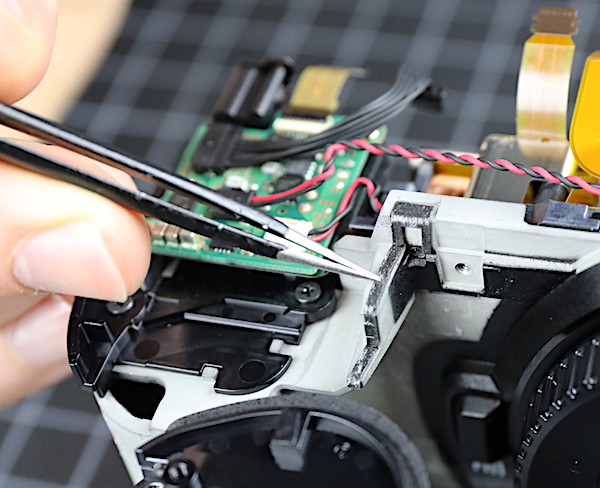
Next step is taking out the EVF. There are very few things I didn’t like about this camera from a reliability standpoint, but one was the diopter adjustment knob. In some ways it’s very nice – you have to pull it out to adjust it, which is good. But when it is pulled out, it feels rather weak and overly flexible. Who cares? Only me. You’ll only adjust this once in a great while and never have a problem. But my theoretical purpose here is to find out what’s likely to break on a rental unit. This will get adjusted with every rental and I suspect we’ll see some breakage here.
Lensrentals.com, 2018
I got irritable (irritable – the feeling I get when I’m nervous) when we were trying to pop off the makeup plug to get to the screw inside. Aaron would try to pry up the makeup plug. The diopter knob would pop out and bend like a palm tree in a hurricane. Aaron: Hold the knob for me. Roger: You are prying with a scalpel. Not happening.
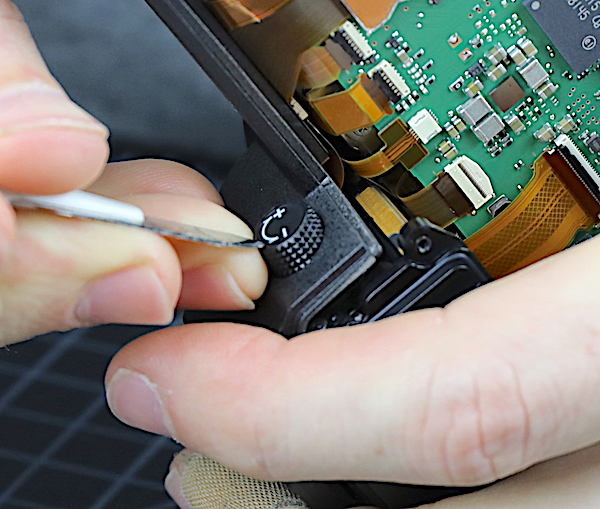
Lensrentals.com, 2018
Eventually, (I held the knob with some forceps) the diopter adjustment knob was removed (no fingers or camera parts were damaged during the disassembly) and the EVF came right out. Again, a big, thick moisture seal sits under the adjustment knob. Had I held the knob with my fingers, this would have prevented my blood from getting deep into the camera.

Lensrentals.com, 2018
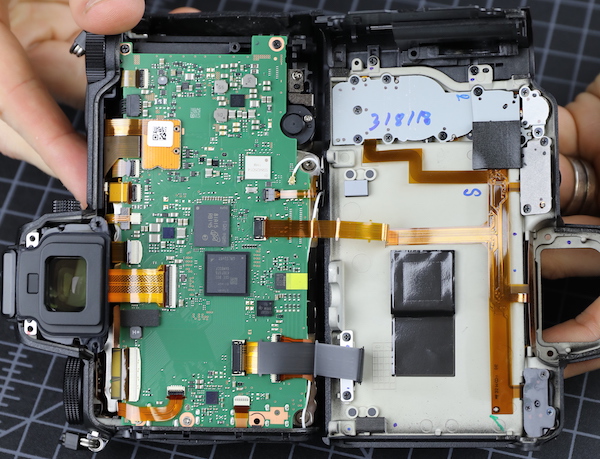
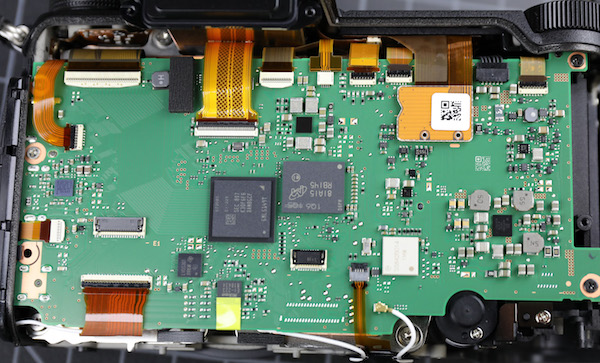
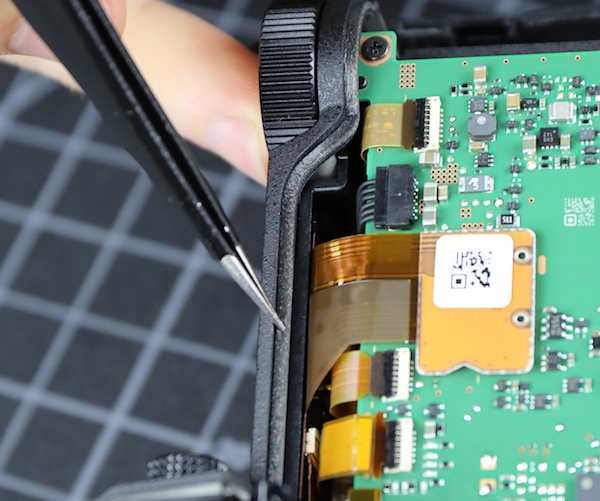
Removing a few more screws let us take the main PCB off.
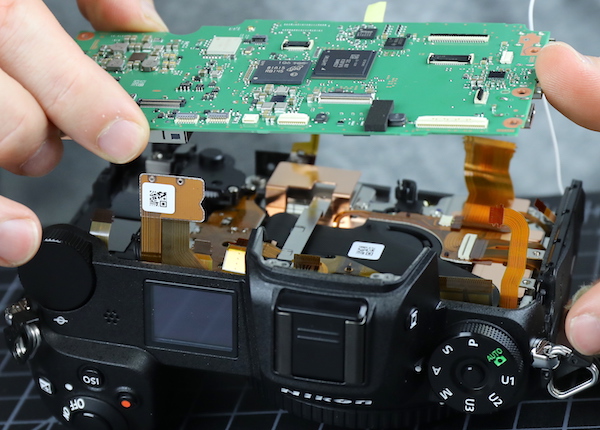
Lensrentals.com, 2018
As mentioned earlier, it’s neatly laid out and not particularly crowded.
Lensrentals.com, 2018
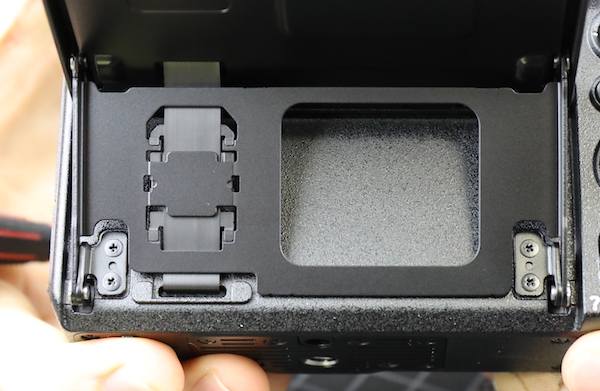
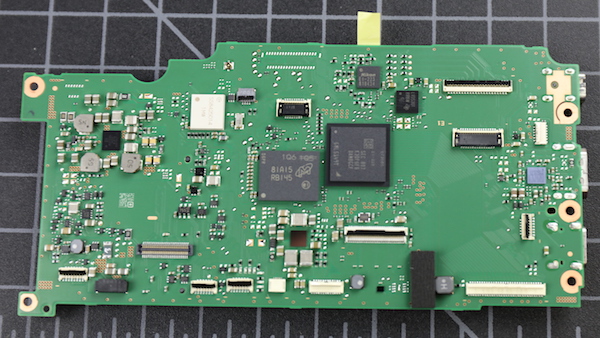
The underside shows the XQD card slot and the ports are all soldered on. The audio plug jacks are on a separate sub-board. That’s the date-time battery in the upper right. In the early days, we used to worry about where the battery was because you’d have to change them after a couple of years. It’s not an issue with modern batteries.

Lensrentals.com, 2018
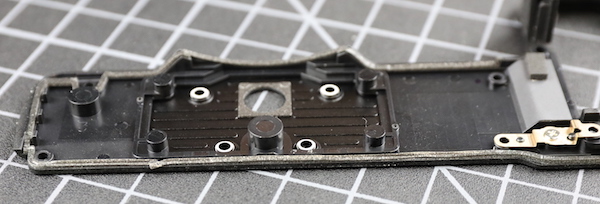
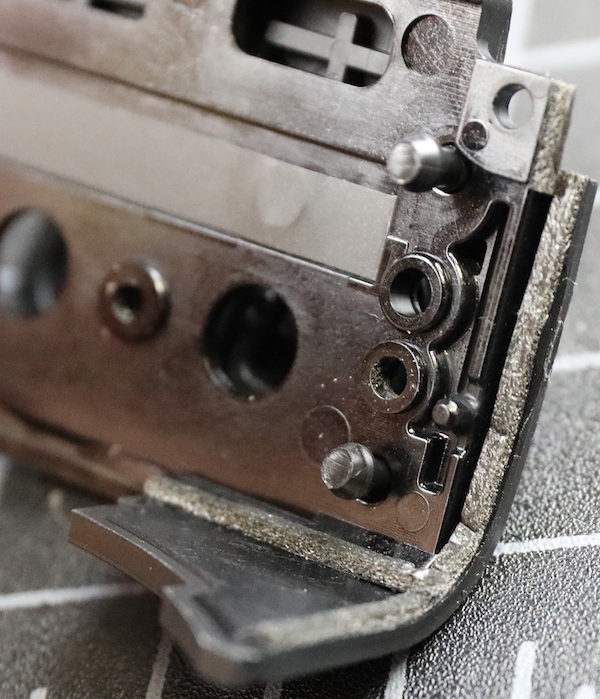
With the board out you can look down at the sensor / IBIS assembly. It’s noticeably more compact, has less travel than the Sony system, and seems more robust. From our focus on repair, we see this as a good thing – early Sony IBIS systems would sometimes move enough to jam and/or break. (To be clear, that’s not an issue with newer Sony cameras. I point this out just to show that the manufacturers have been watching each other.)

Lensrentals.com, 2018
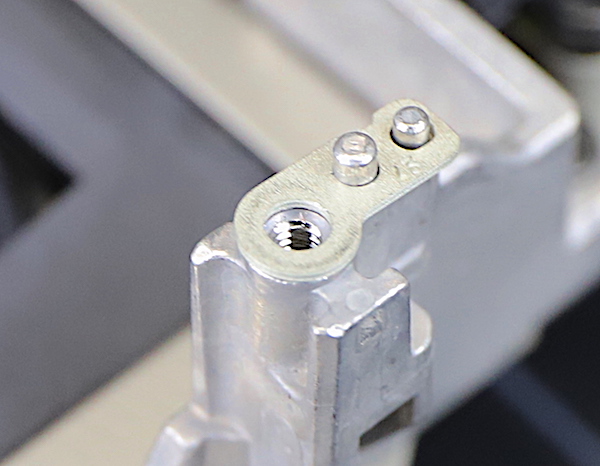
Certainly, the adjusting posts, which support the entire assembly, are robust; at least the equal to the Canon EOS R.

Lensrentals.com, 2018
I should also point out that both Canon and Nikon have used infinitely adjustable spring-over-screw systems to correct sensor-to-flange tilt. Sony uses a shimmed post. In theory, at least, the step-wise adjustment of shims can’t be as accurate as an infinite adjustment; whether the technique actually results in less sensor-to-flange tilt, I do not know. I could imagine, though, that with a wider lens mount, and the narrow depth of field of f/1.2 lenses, sensor-to-mount tilt might require more accuracy.
We took off the port cover next. I won’t show a close-up, but you can make out foam sealing around the release button, and we saw the sealing around the edge that meshes with the back assembly earlier.
Lensrentals.com, 2018
Here are the mic and audio out plugs on their separate board.
Lensrentals.com, 2018
The port bracket certainly looks up to the task of keeping the audio ports from pulling out, but I’m not sure it does much to prevent, the more common and severe problem of pulling the HDMI port off of the board. Still, all protection is good protection.

Lensrentals.com, 2018
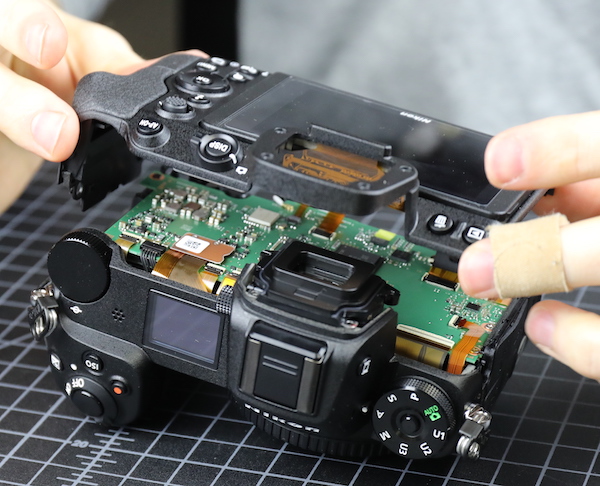
Finally, we removed the top assembly. By the way, the magnesium frame you now see is fairly thick, stiff, and heavy.
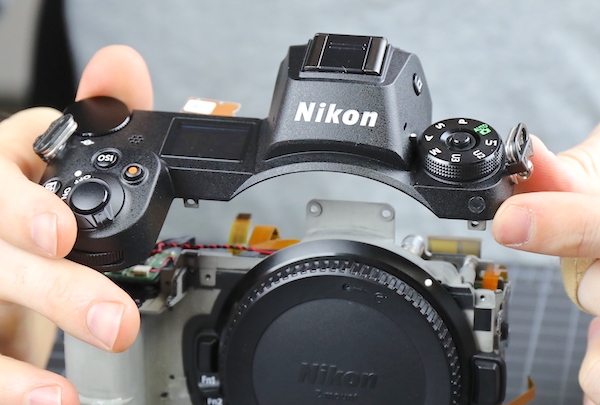
Lensrentals.com, 2018
The usual electronic complexity of all top assemblies is there. And as usual, we aren’t going to spend hours taking it apart.
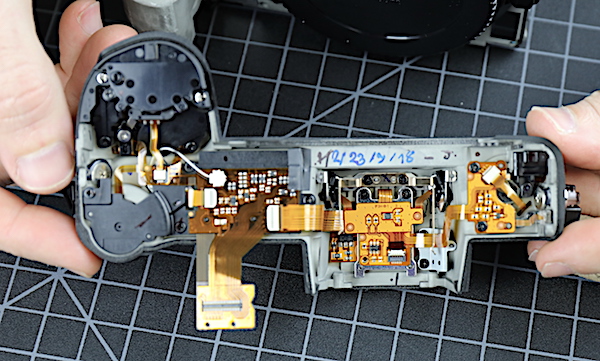
Lensrentals.com, 2018
But I will show yet another close-up of the really impressive weather sealing.
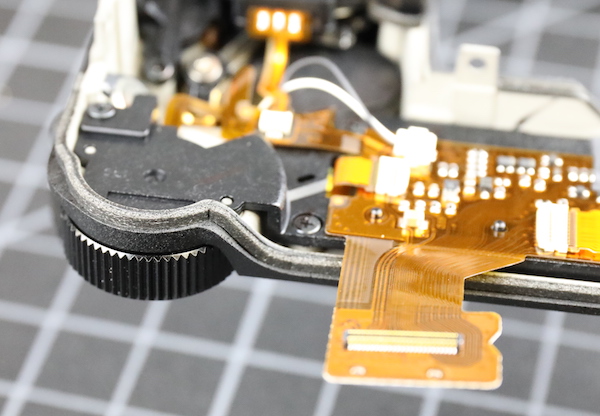
Lensrentals.com, 2018
Just in case I haven’t made my point, a couple of more pictures of ‘if there’s an edge, there’s a weather seal’ in this camera.
Lensrentals.com, 2018
Lensrentals.com, 2018
I’ll leave you with one last shot of the sensor / IBIS/frame assembly. Not a lot of air in this one, but a lot of really strong looking supports and connections.

Lensrentals.com, 2018
Conclusion:
This is not marketing department weather resistance. This is engineering department weather resistance. Anything that can be sealed has been sealed. I’m impressed, and I will say for future cut-and-paste blurbs: this is as robustly weather sealed a camera as we’ve ever disassembled.
I don’t believe in weather resistance myself. I believe like life; water will find a way. I believe in plastic baggies and rubber bands. I am, however, a great believer in the idea that if you claim to do something, then damn well do it right. This is done right.
I’m impressed by the very solid construction of the chassis and IBIS unit. I’m impressed with the neat, modern engineering of the electrical connections. Yes, I’m aware that soldered wires carry electricity just fine, but to me, there’s something reassuring about seeing neat, well thought out, 2018 level engineering.
I’m not here to tell you which camera is best to use or has the best performance. I’m just here to say this is a damn well-built camera, the best built mirrorless full-frame camera we’ve taken apart. (For the record, I haven’t torn down a Leica SL.)
Even I don’t buy cameras strictly because of how well they are built. And I can’t say until we take apart a Z6 (and really also whatever Canon releases as their high-end mirrorless) if the build quality is how Nikon’s going to do it or because it’s a flagship camera. I would guess a bit of both. But so far the CaNikon mirrorless have been exactly what we expected.
Roger Cicala and Aaron Closz
Lensrentals.com
October, 2018
Author: Roger Cicala
I’m Roger and I am the founder of Lensrentals.com. Hailed as one of the optic nerds here, I enjoy shooting collimated light through 30X microscope objectives in my spare time. When I do take real pictures I like using something different: a Medium format, or Pentax K1, or a Sony RX1R.
-
J.L.
-
Brad Stokkeland
-
Frank Döring
-
spider-mario
-
ThomasH
-
billp
-
Chris
-
james Smith
-
Ken Westover
-
Bill Graham
