This article applies mostly to people shooting video on DSLR cameras, with lens adapters, or on higher-end interchangeable lens camcorders. Most ENG style camcorders come equipped with a built-in ND filter dial, which is about as much filtration as ENG style shooters have time for.
For ND filter basics check out the ND filter section of this article.
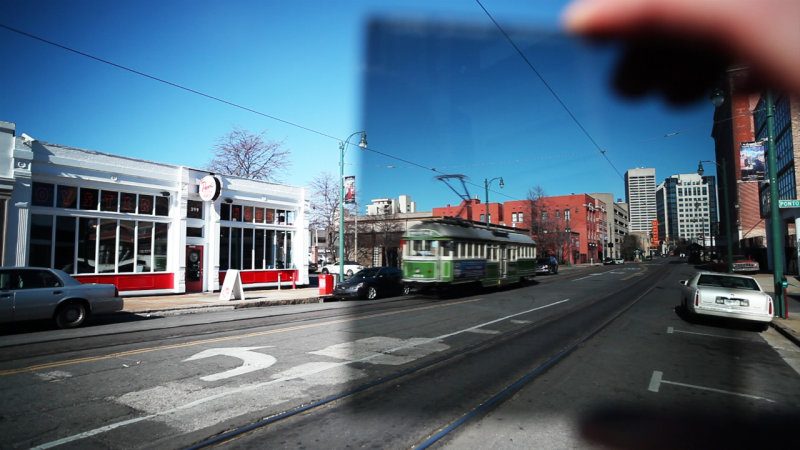
Effect of a 1-stop ND filter
Alternatives to Using ND Filters
When shooting video outdoors or in brightly lit places, using an ND filter is often a necessity in order to get proper exposure. Video-makers have access to the same in-camera options for controlling exposure as photographers. However, it is important to understand the affects these options will have on footage – it can be quite different than the effects they have on photography.
These options include:
1. Reducing ISO (Gain)
2. Increasing shutter Speed
3. Reducing Aperture (Iris)
Reducing ISO
ISO on DSLRs and digital video cameras is a mock representation of “film speed”. Sometimes referred to as gain control, these settings find most of their use in low light situations. It is important to note that different ISO settings will effect your image quality. In very basic terms, the lower your ISO setting, the sharper and less noisy your image will be (there is some argument as to what the ideal ISO setting is but most agree that it fits within the range of 200 and 400).
To some subtle, nuance-minded cinematographers, the noise and softness associated with certain ISOs may be a desirable element of the overall picture quality. Ultimately the decision on whether you want to make ISO a creative decision (“I really feel like the graininess of the image reflects inner psyche of the main character”) or a utilitarian one (“We have to drop down to 100 ISO because I didn’t bring along enough ND filters and we are over-exposed!”) depends on personal preference or circumstance.
For the most part ISO setting is primarily a consideration for low-light situations (situations where you normally wouldn’t use ND filtration anyway, i.e.: at night), on bright sunny days even the lowest ISO setting won’t keep your exposure from blowing out, therefore only two real options: aperture and shutter speed are left to control exposure.
Increasing Shutter Speed
There are compelling reasons you shouldn’t use shutter speed control as a means to regulate exposure, but it is an option. Adjustment of the camera’s shutter speed has a major impact on the fluidity and movement within the frame (not to mention movement of the frame). Simply stated, lower shutter speeds let more light in and movement within the frame appears smoother; higher shutter speeds allow less light into the camera and result in jerkier or more frenetic action (i.e.: the battle sequences in Saving Private Ryan). Shifting from a more standard shutter speed (such as 1/30 or 1/60) to a higher shutter speed can have a profound affect on the overall look and feel of your footage and it is important to take these affects into consideration before making any shutter speed adjustments.
As with ISO, the decision of where to set your shutter speed comes down to creative or utilitarian decision (DOP: “We have to up the shutter speed because we’re already set at 100 ISO, I don’t have enough ND filters and we’re over exposed! But don’t worry, it’ll give it that cool Saving Private Ryan battle scene look.” Director: “But we’re shooting a romantic-comedy.” DOP: “Yes, but I feel like this overall look really reflects the inner psyche of the main characters”).
Reducing Aperture
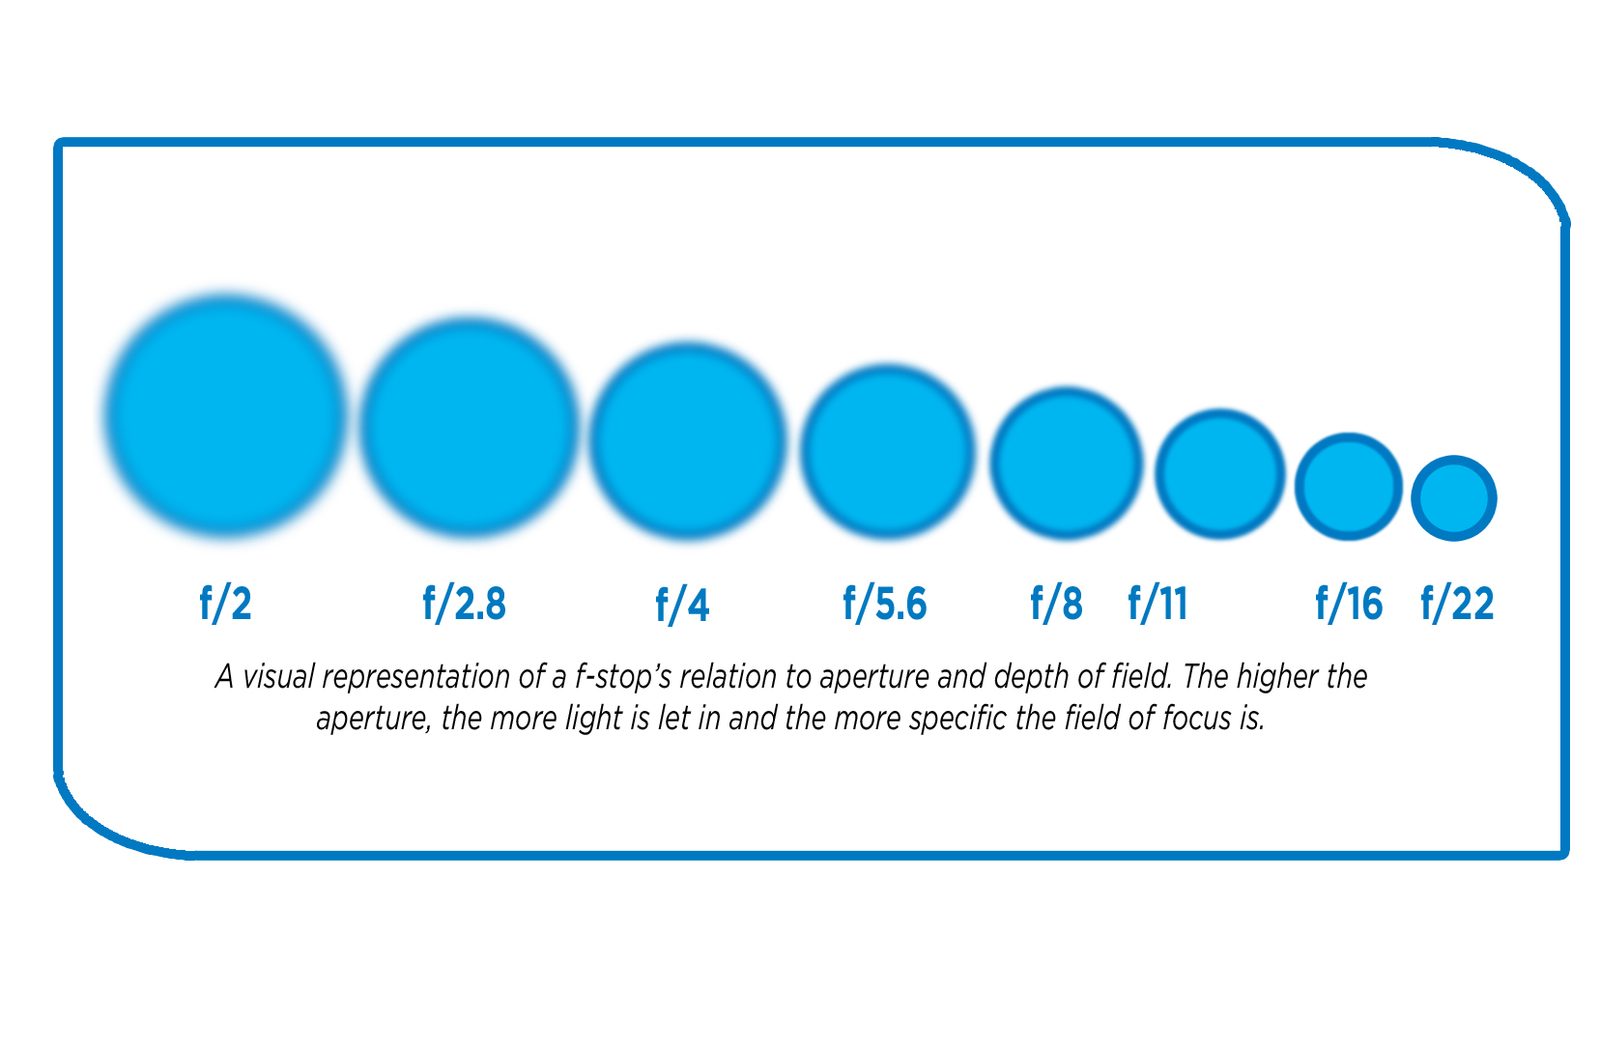
It’s no secret; people shooting video with DSLRs want to achieve shallow depth of field. Some people refer to this as good depth of field because shallow depth of field “looks better”. Others refer to a wide focal plane as good depth of field. People who wish to be understood don’t ever use the phrase good depth of field.
It stands to reason (and our experience) that as a means to achieve a shallow depth of field, DSLR shooters aim to shoot with the aperture as wide open as possible, which of course exposes the sensor to more light. (Director: “Couldn’t you just close down the iris on the lens and then we could keep our ISO and shutter speed the same throughout?” DOP: “Yeah, but then we wouldn’t get good depth of field.”). Reducing the aperture, for most shots, changes the entire look and emphasis of the scene.
Neutral Density Filters to the Rescue
Ultimately if you wish to achieve a good exposure and avoid using the extreme ends of shutter speed and aperture control; ND filtration is a necessity. At the very least, keeping an ND filter on-set arms you with more options and offers you less compromise when it comes time to shoot.