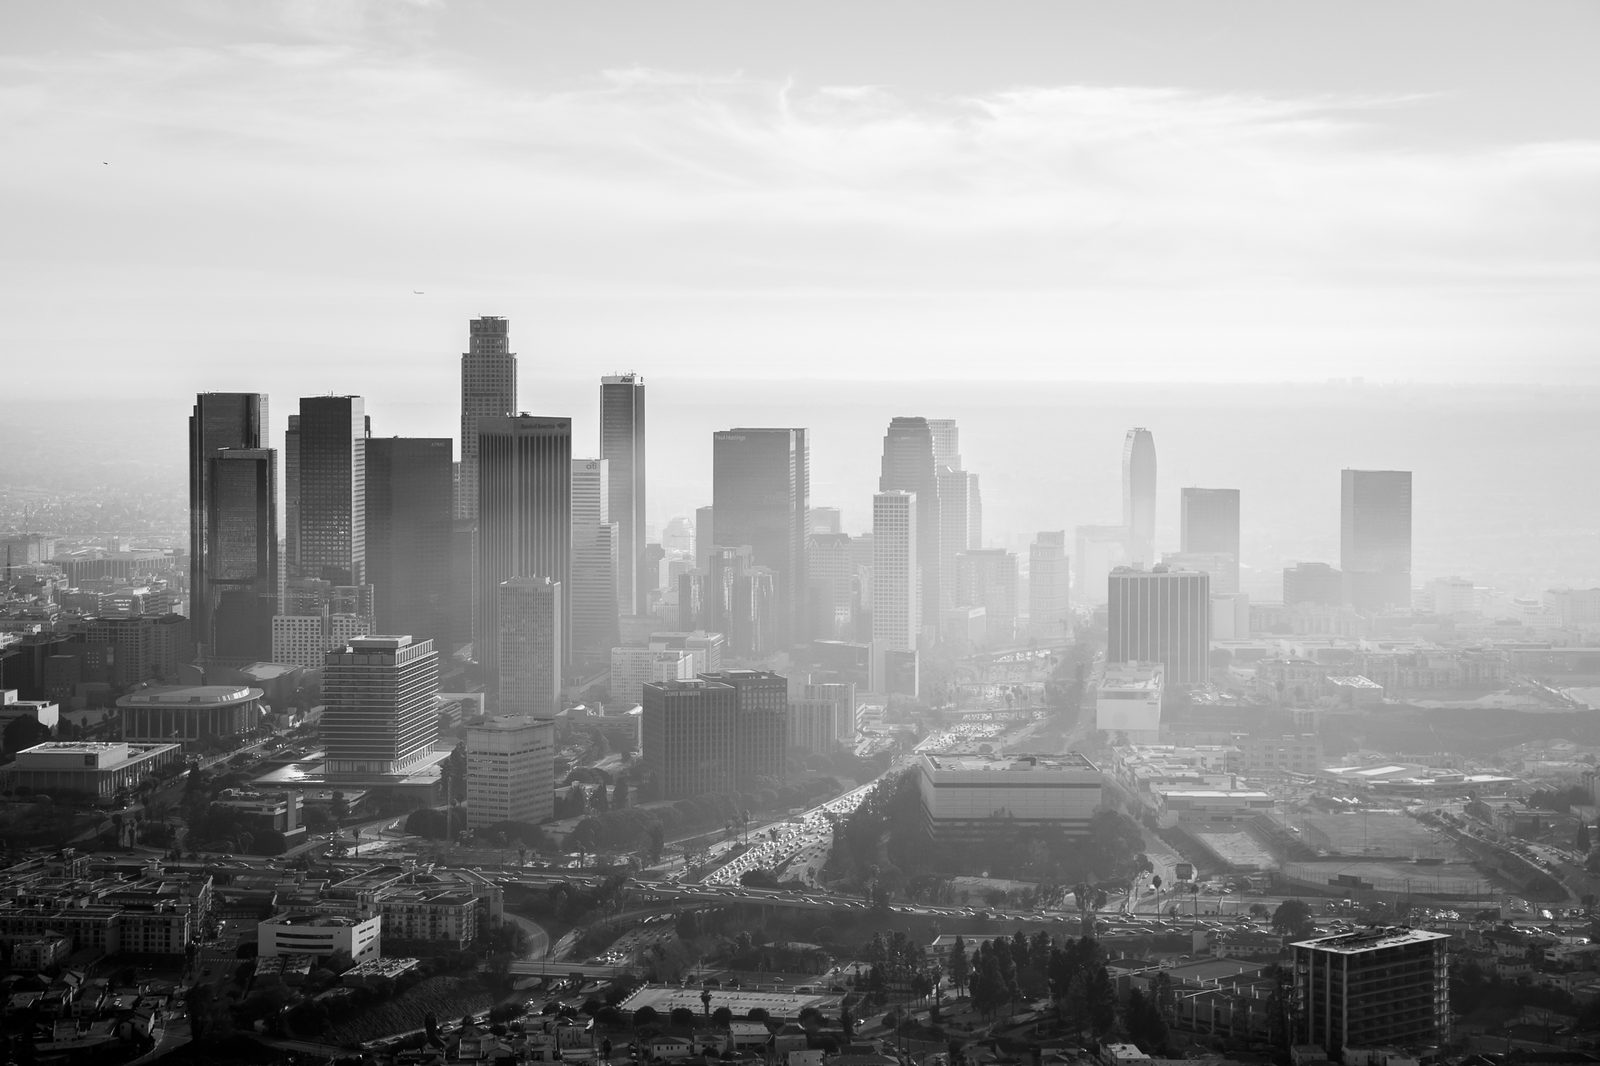
In the last few years, the price of renting a helicopter has decreased dramatically. Coupled with the advent of DSLRs that perform very well in low light, this has created a wonderful opportunity for photographers to charter helicopters in numbers never seen before. Over the past two years, I’ve spent a ridiculous amount of time in helicopters as I put together my book LA AIRSPACE, which documents the city of Los Angeles from above. I’ve learned quite a few things in the process and wanted to share the knowledge I’ve gained of equipment and technique so that you’re prepared when the time comes for you to take to the skies with camera in hand.
While the price of these flights has dropped drastically in recent years (helicopter time can be had for as low as $300-$350 per hour for a Robinson R22 – absolutely sufficient for aerial photography), it can still add up to a significant chunk of change when you’re trying to make the perfect shot happen. In order to maximize the time spent in the air, I’ll let you learn from my mistakes and make sure that you’re well equipped to get the most bang for your buck.
Preflight
Before going up in a helicopter, it’s best to have a very solid plan dialed in. I study Google maps extensively and plan the targets that I want to shoot and will bring a print-out or send an email to the pilot ahead of time so he can prepare. It’s best to let the pilot do the planning and routing to get from point A to point B, especially in congested airspace like LA or NYC. You’ll also want to get on the phone with your pilot ahead of time and make sure that you’re even allowed to overfly certain areas, as TFRs (temporary flight restrictions) can be in place over events, residential areas, diplomatic or presidential visits, etc. Plus, you definitely don’t want angry air traffic controllers talking to you once you’ve already paid a fortune to get up in the sky! Most FBOs (fixed base operator, or the company that you’re chartering with) charge a small fee for consultations and route planning that is well worth the cost.
You’re also going to need to let the pilot know that you’re conducting a photo flight. This means flying without a door. Yes, that is right – for photo flights, you’ll want to remove the door(s) from the helicopter so that you’re able to shoot without obstruction. It’s safe to say that I hope you don’t have a fear of heights! As a result of being doorless, you’ll be strapped into the helicopter with a five-point harness of some point to prevent an accidental unbuckling of the seatbelt, which would result in a long, possibly painful, fall.
With the door wide open, you need to have everything securely fastened to your body or harness to prevent anything from falling out. Any object falling from a helicopter could be potentially fatal or open you and the operator up to a slew of lawsuits, so this is no joke. Phones need to be away, lens caps and hoods need to be removed and left on the ground, and straps need to be looped through the harness or around your neck. I personally prefer looping them through the harness as this leaves me free to let them dangle and not worry about messing up my neck with the dead weight of a 70-200 on it.
I also recommend taking two camera bodies – since switching lenses in a tiny, confined space while moving at 100mph and vibrating helplessly is asking for trouble (plus who knows what kind of stuff gets invited or blown onto your sensor with that kind of wind). This will allow you to cover a wide range of focal lengths without having to waste time switching lenses, and of course you’ll be covered in case of a camera or lens failure, which is a very real possibility as helicopters are incredibly hostile environments for cameras to be in, as they’re being constantly bumped, dinged, scratched and blown around as you switch camera bodies, reach out the door to get the shot, and zoom in and out super fast to track and follow scenes in front of you.
Gear
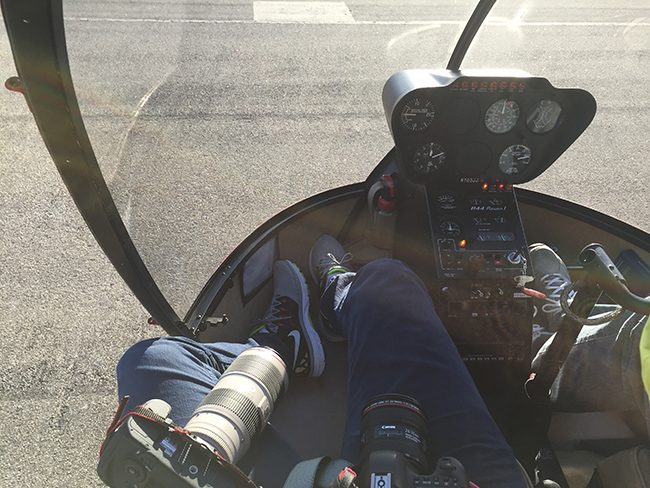
First of all, unless you’re dropping thousands of dollars an hour on a high-end jet helicopter, you’re going to be in a tight space. If it’s your first time flying, you’ll probably be a bit surprised at just how tiny and bare the interiors of these things are. For that reason, I try to use the smallest bodies and lenses possible. I take off any battery grips, hoods, L-brackets or hotshoe mounted accessories ahead of time. All that stuff is just going to get in the way and serves no real purpose inside a helicopter, so ditch it! One battery will be sufficient for any flight unless you plan on recording video from takeoff to landing an hour later. I’ve never even come close to depleting a battery in one flight, and I can shoot over 2,000 photos over a 90-minute hop.
As I’m a Canon shooter, I personally use the 70-200L 2.8 IS II and the Canon 24-70 F4 IS. Some sort of image stabilization is a must, as the micro-vibrations inside a helicopter are rather intense. A little bit of image stabilization helps to smooth things out and will give you more keepers than without, especially later during in the day as light falls.
Some may question the choice of the 24-70 F4 over the 2.8 version, but the weight and size is much better in my opinion for the tight confines of a helicopter, plus the image stabilization, as I said, helps to improve the keeper rate towards the end of the day. I’ll usually try to keep this wider lens above 1/800th of a second – something like f7.1, ISO 100-400, 1/800th of a second is a good starting point during daylight hours. The weight and size savings compared to the 2.8 are very substantial, and make a big difference in such a tight space.
As far as the 70-200 goes, at longer focal lengths in a helicopter, the vibrations can get VERY intense, especially when moving at a high rate of speed. You’ll want to keep the shutter speed as high as you can when shooting at the long end of this lens – I try to never go below 1/1250th of a second, and I always keep the IS on. Some basic starting settings that I use are 1/1600th of a second, f4, ISO 200 or 320, depending on conditions.
Another note with that 70-200 – BE CAREFUL! It may not appear that you are moving at a ground speed over 100kts, but if you stick that long lens barrel out the wide open door as you’re moving, you’re going to get a bloody forehead as the wind grabs it and throws it right back in your face. Take it from me – it’s happened that I’ve received a hot-shoe shaped cut above my eye on more than one occasion. Always take a look at the airspeed indicator before leaning out the door to get the shot with a tele lens on. You’ll see exactly what I mean once you take a flight and see a tempting shot down below.

As far as cameras go, like I said, I’m a Canon guy, so I personally use a pair of Canon 5d Mark IIIs or a Canon 6d and 5d Mark III combination (I find the 6d marginally better in low light, so will grab it if I know it’s going to be a later flight). I recommend any camera that has a decent burst speed, as you’ll definitely be wanting it, especially on the telephoto end of things, since the scene can change so quickly while you’re circling above. I’ve also used a Pentax 645z, which opens a whole other can of worms as far as equipment is concerned.
When shooting medium format from a helicopter, you’ll want to use a gyroscopic stabilizer such as a Kenyon 4×4 or Kenyon KS6 due to the increased megapixel count and stabilization required to get a sharp shot on these systems. These stabilizers will add significant weight and volume to your setup, and as a result, will really slow you down. In addition, medium format cameras are usually a fair bit slower than DSLRs, so using them for aerials requires even more planning and anticipation than usual. Gyros can also be quite odd to use at first, as they aren’t very intuitive. If you’re going to fly, make sure you practice shooting from a moving car or boat before you take it up in the sky. It will behave in ways you didn’t think were physically possible, but the results can be absolutely breathtaking.
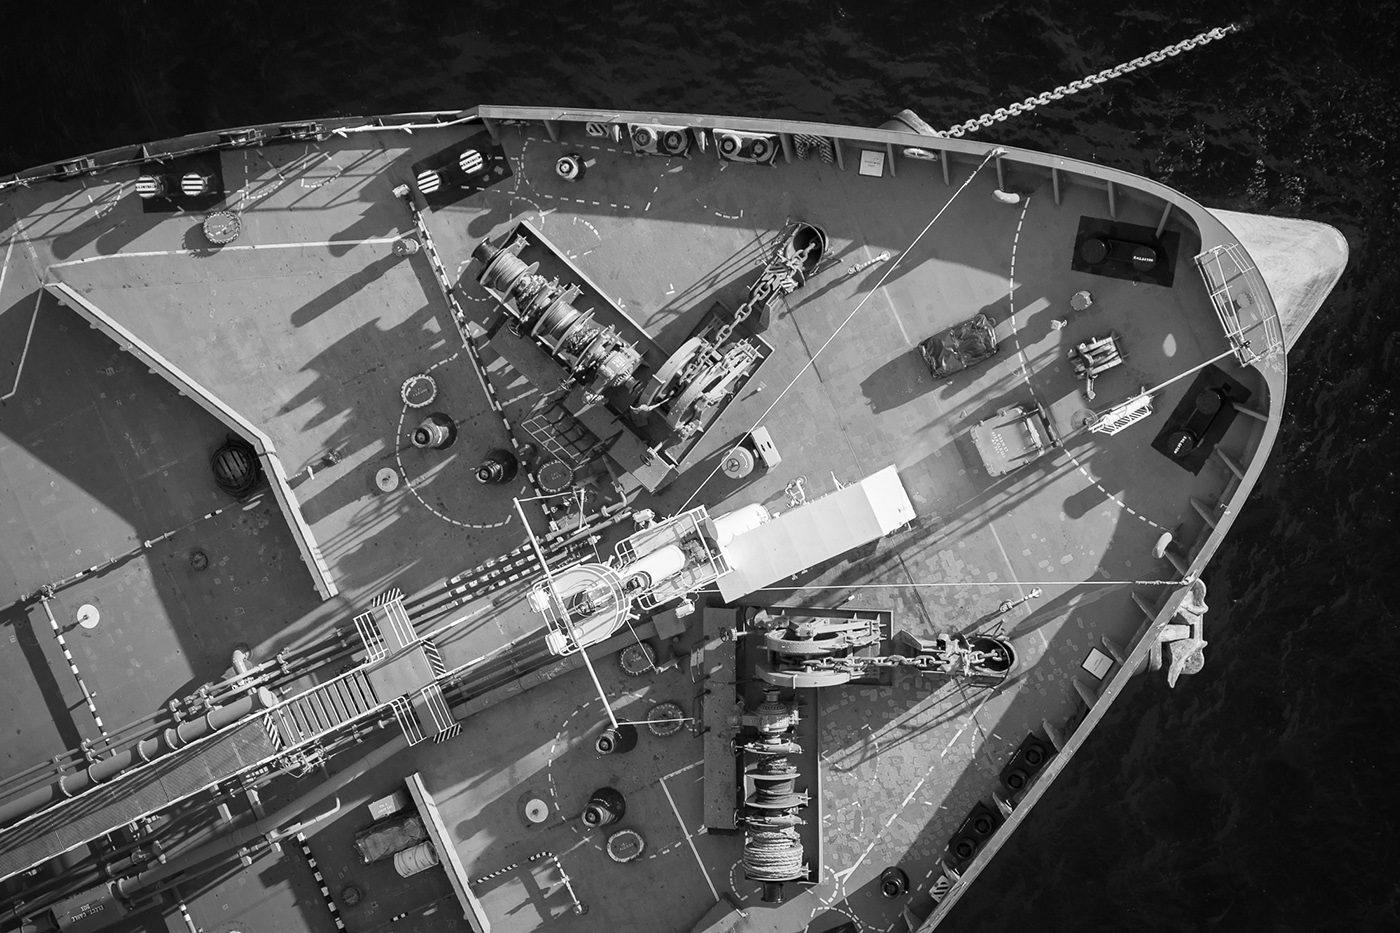
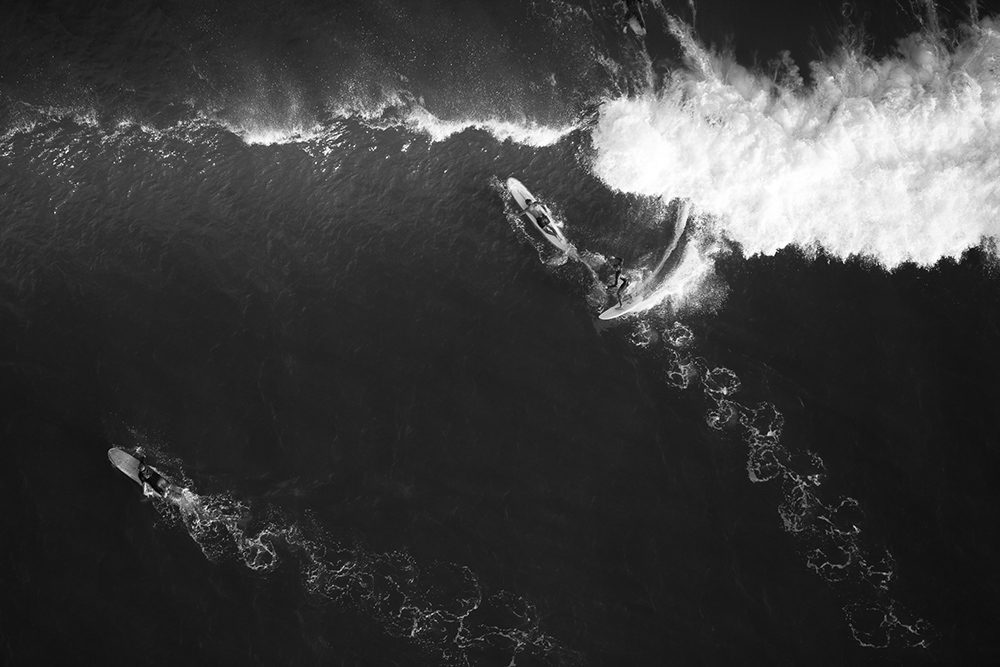
I have found that for most still camera uses, the KS6 is sufficient, but for video you will definitely need the 4×4 to get smooth enough footage. When using a gyro, you’ll be able to get some incredible results at slower shutter speeds – for example, this image was shot at 400mm and 1/250th of a second and is tack sharp, all while hanging out the side of a helicopter. Very impressive, even for handholding a 400mm lens on the ground!
Shooting
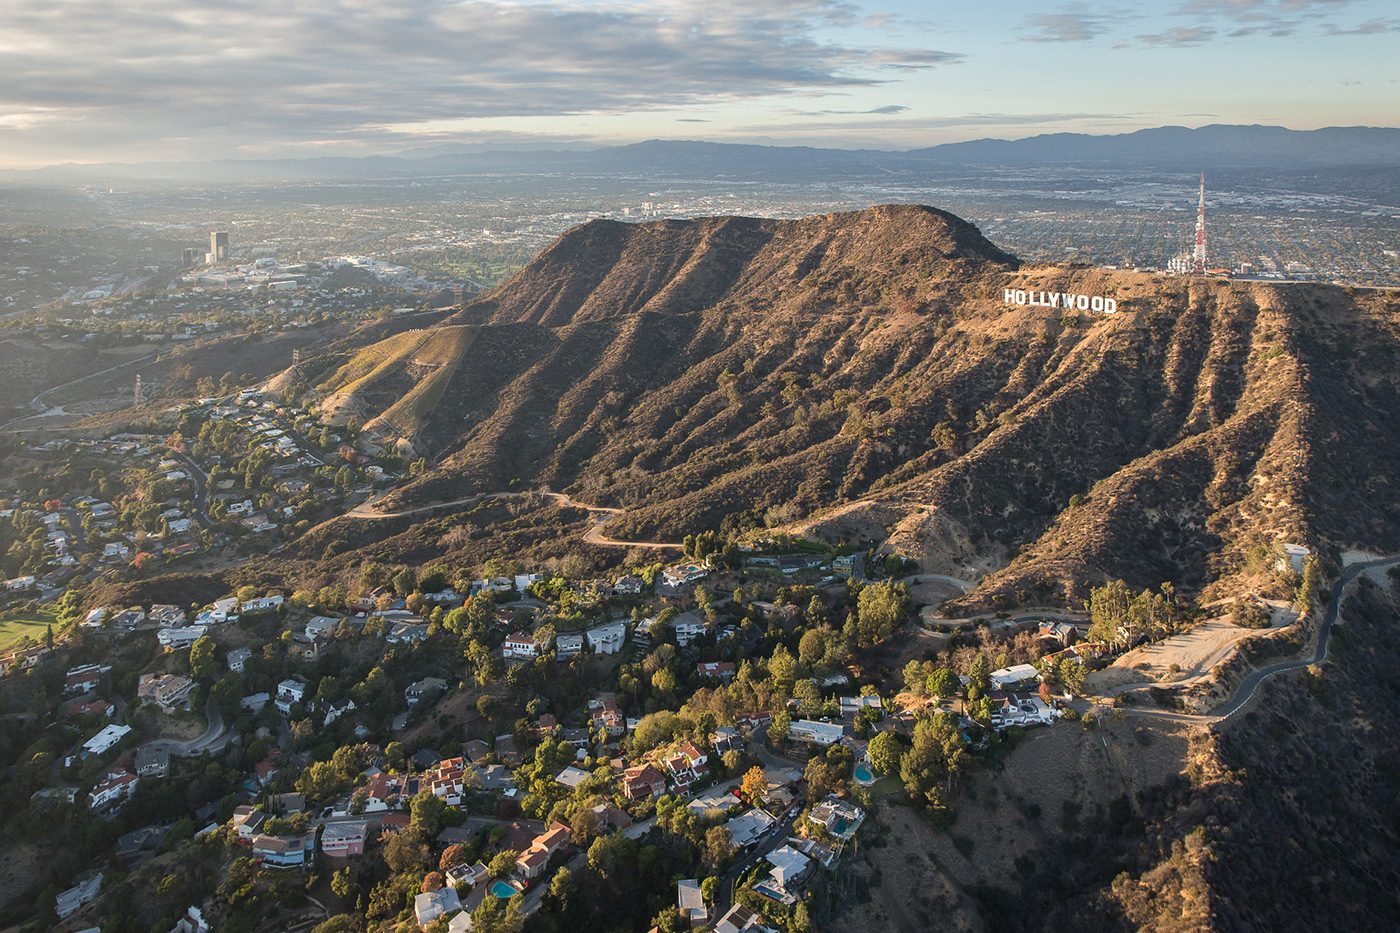
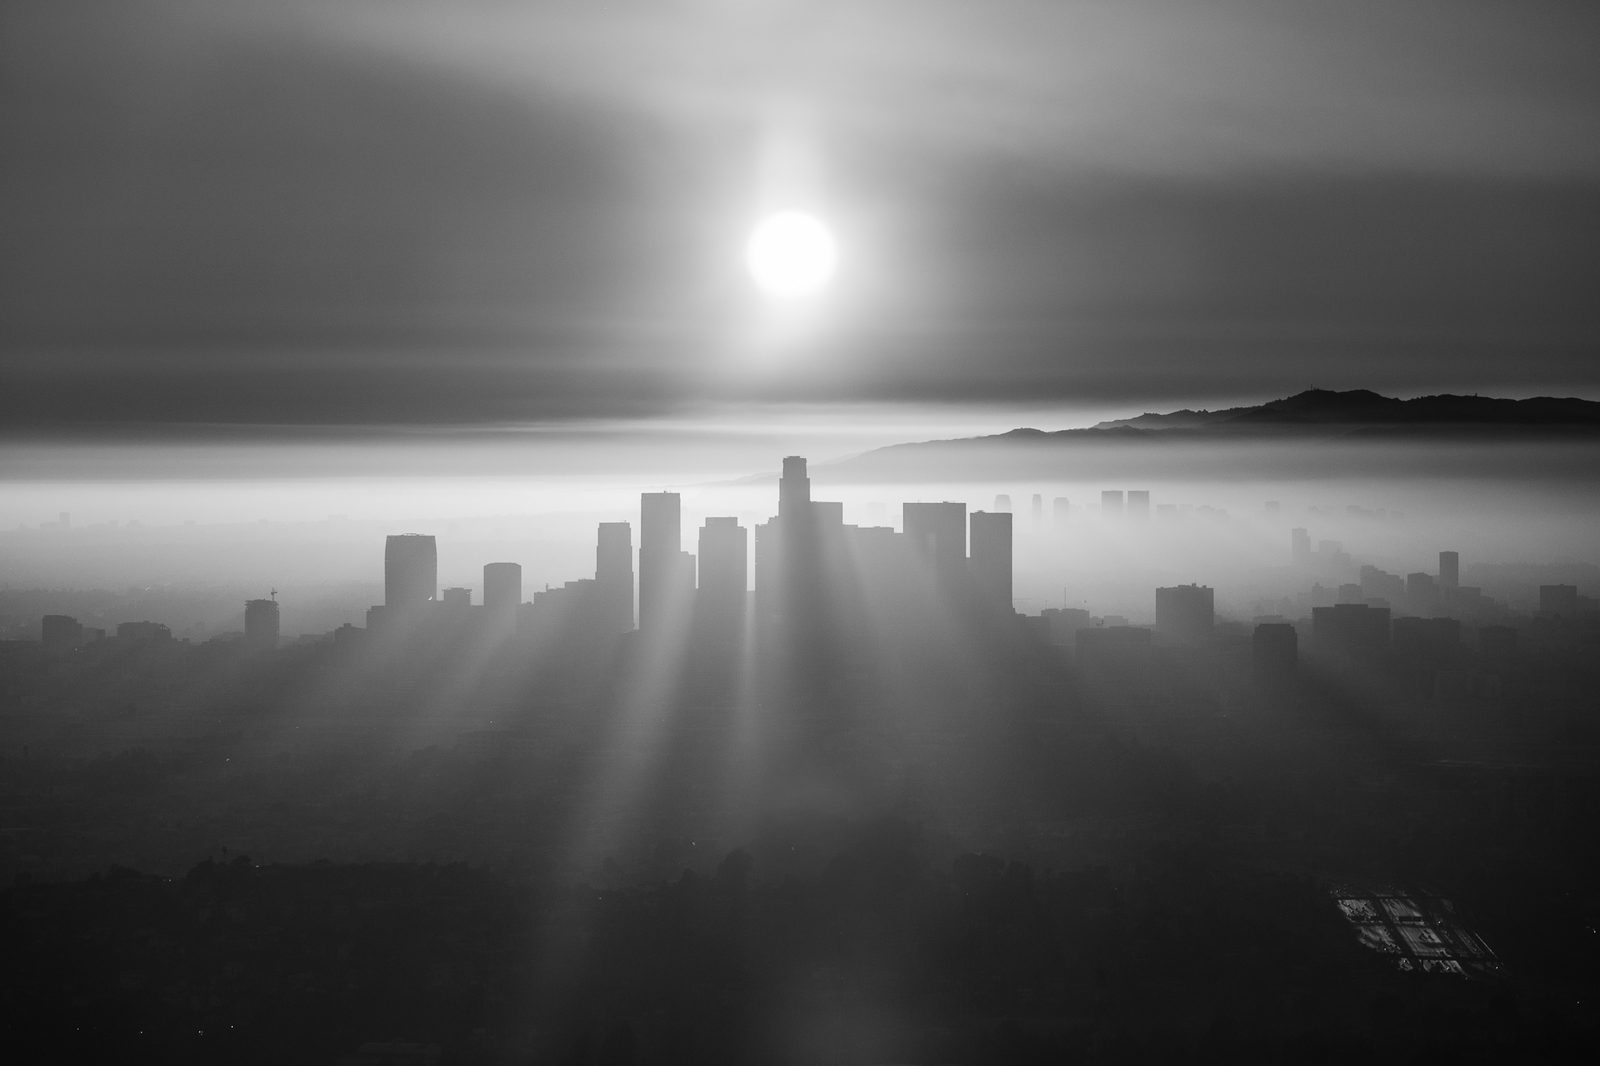
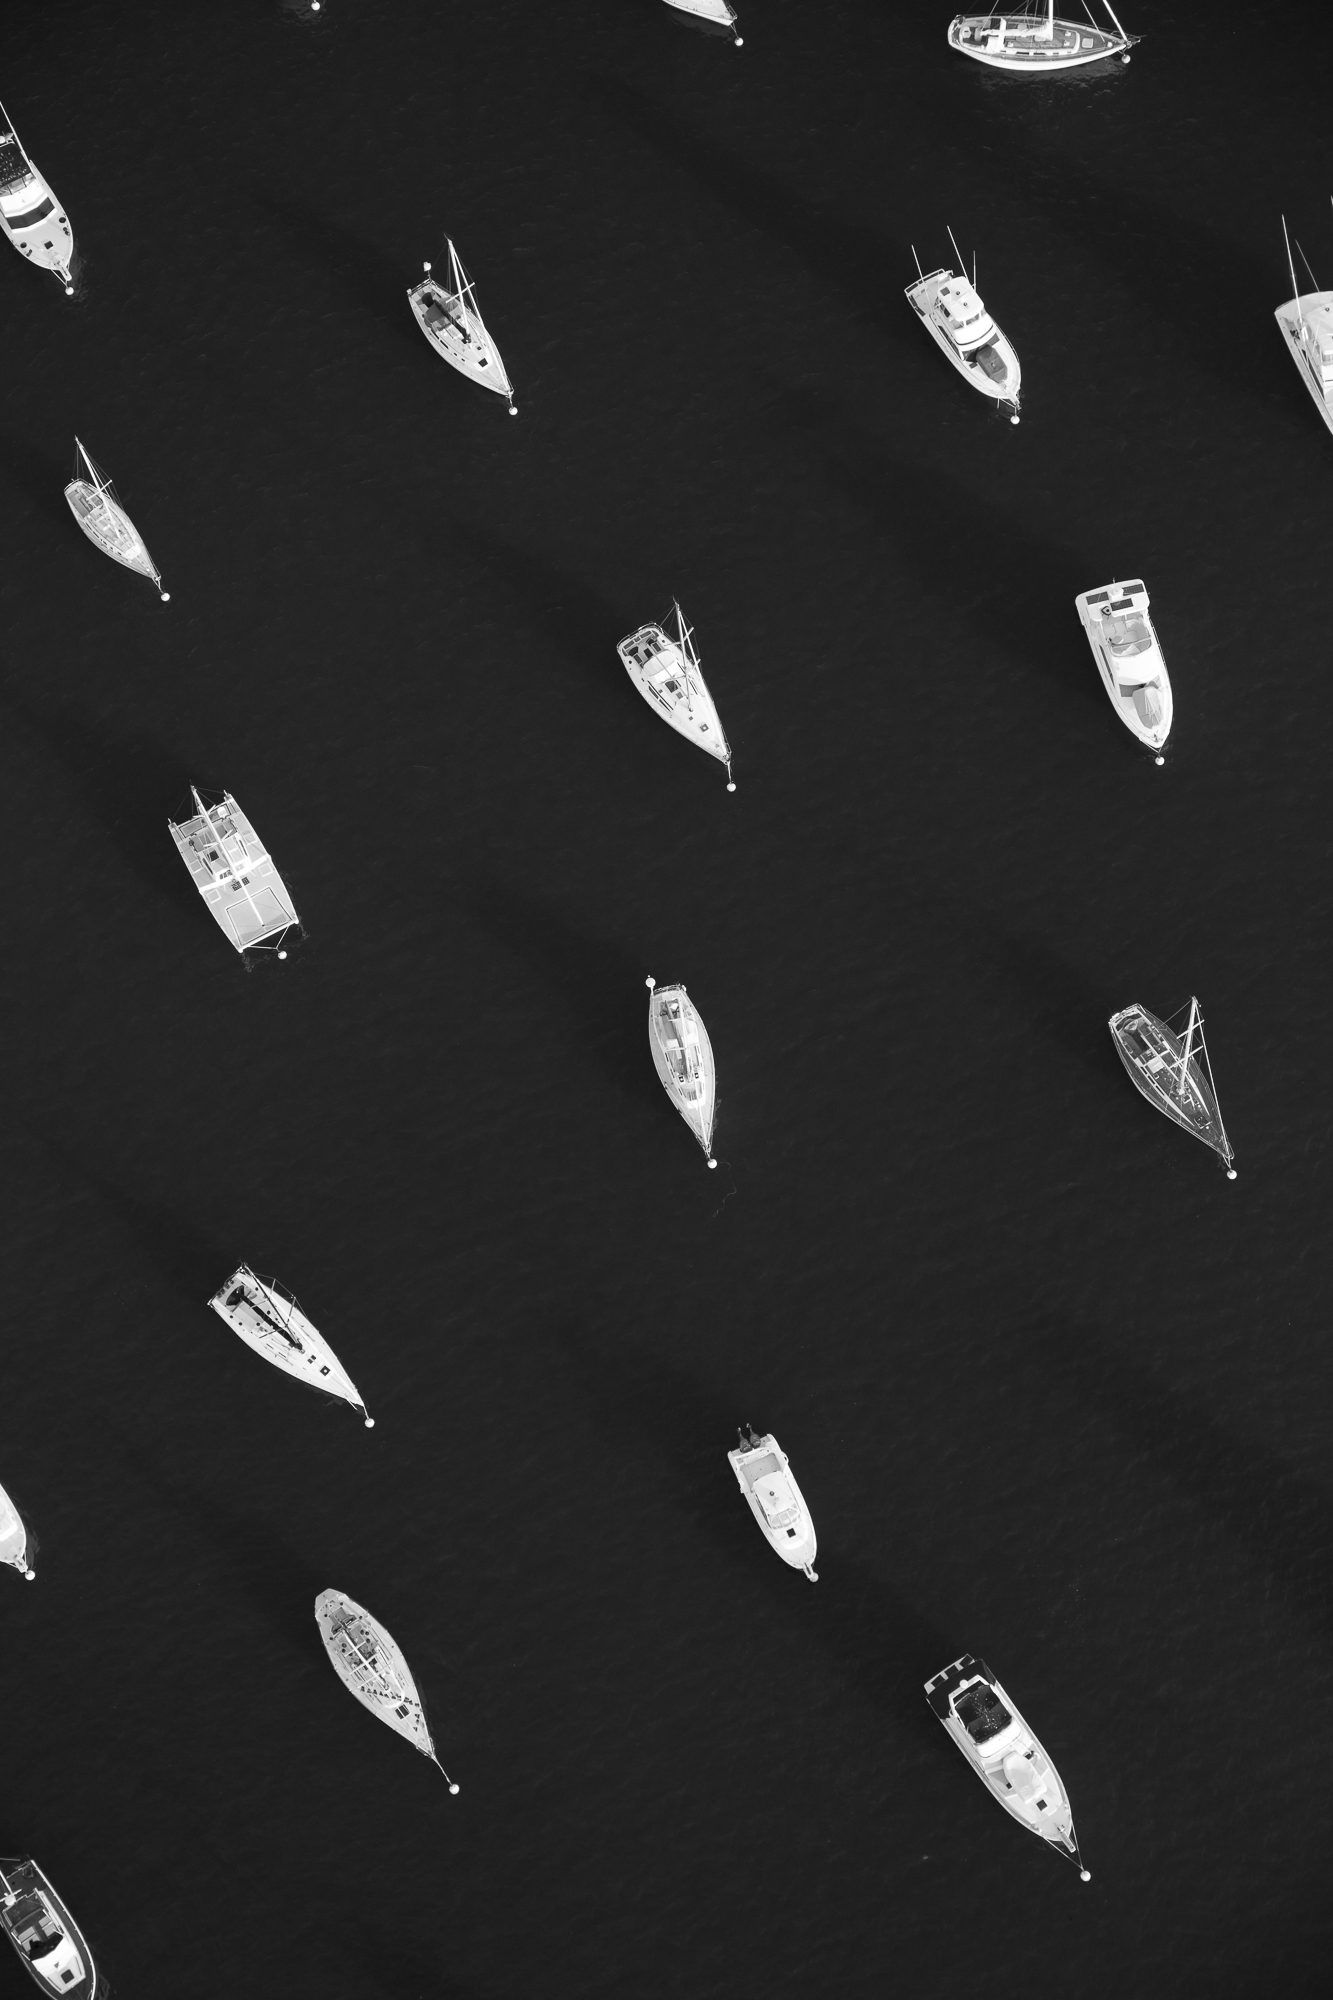
Alright, all that tech stuff out of the way! I’ve found that the best images are those that are backlit, which gives an incredible depth and texture to the landscape. The best time of day to get this effect is the golden hours, either right after sunrise or right before sunset. Don’t be afraid to shoot right into the sun! It’s really easy to get a very flat scene when shooting in broad daylight, but that might be more your style if you’re into vivid colors and contrast. I just love the depth and textures that I get when shooting later and earlier in the day. I try to takeoff about 90 minutes or 2 hours before sunset, and time it so that we land right at sunset to maximize the great light that this time of day offers.
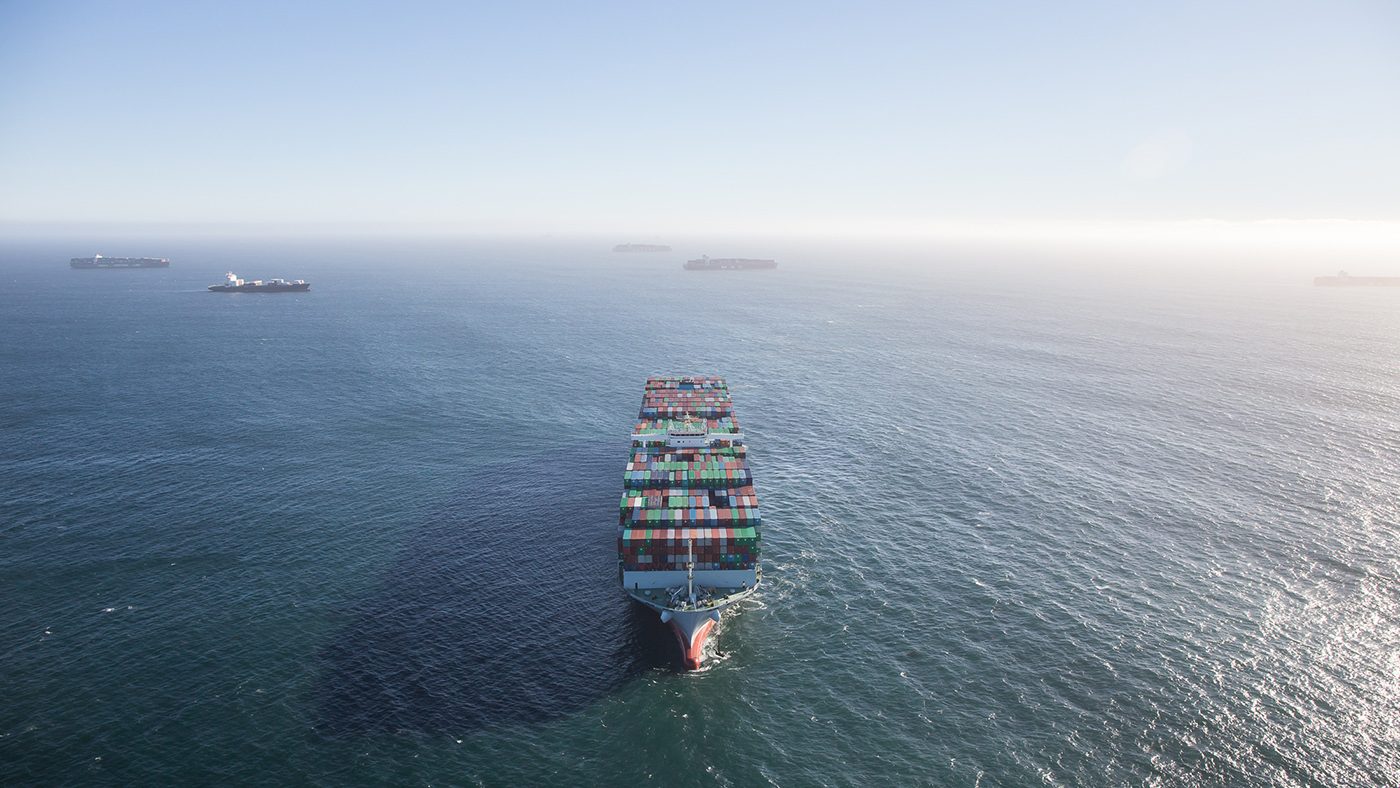
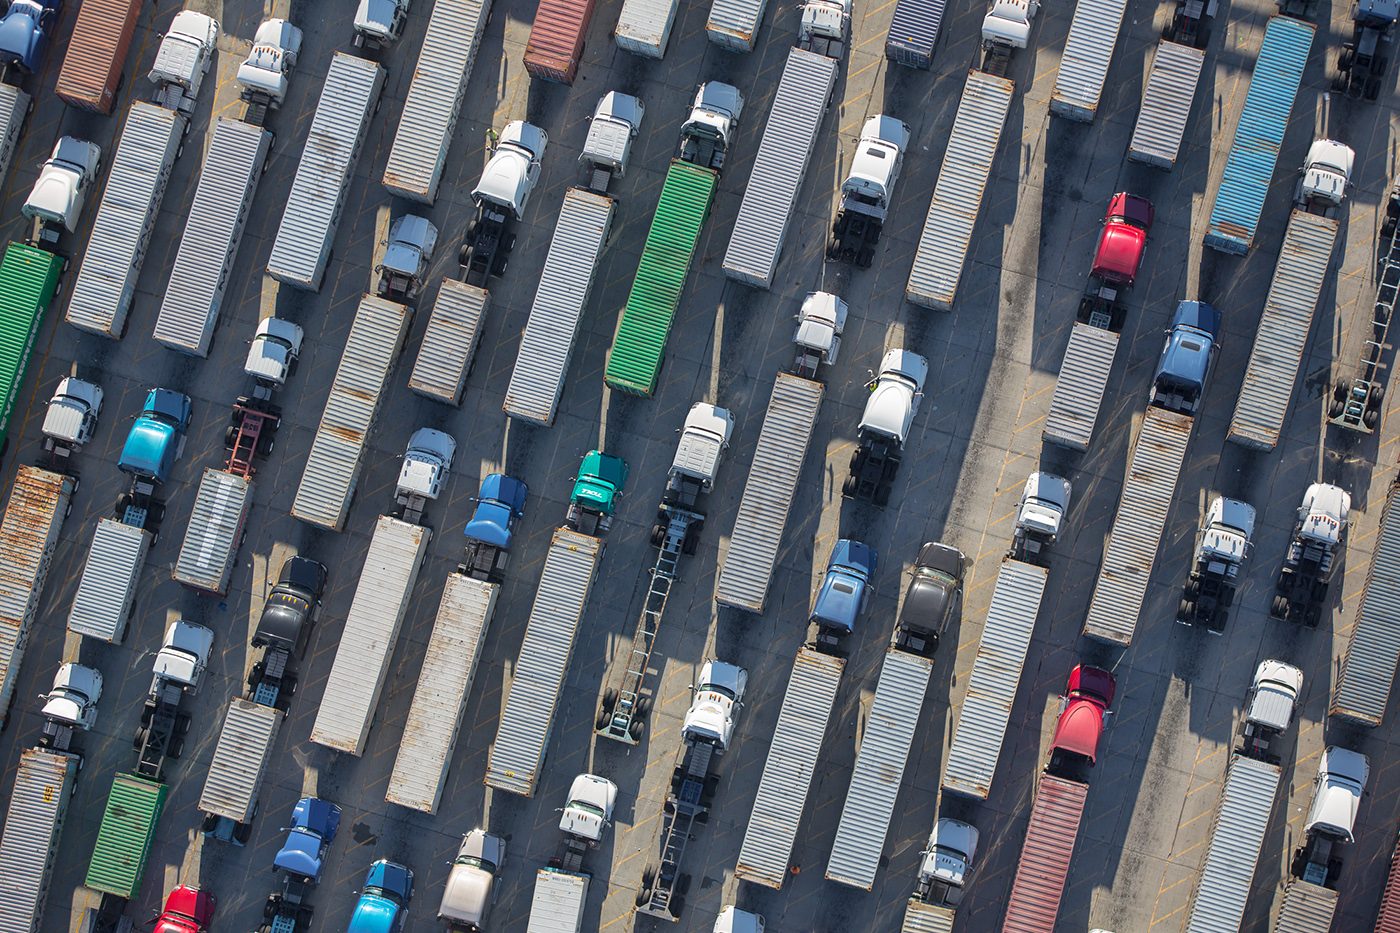
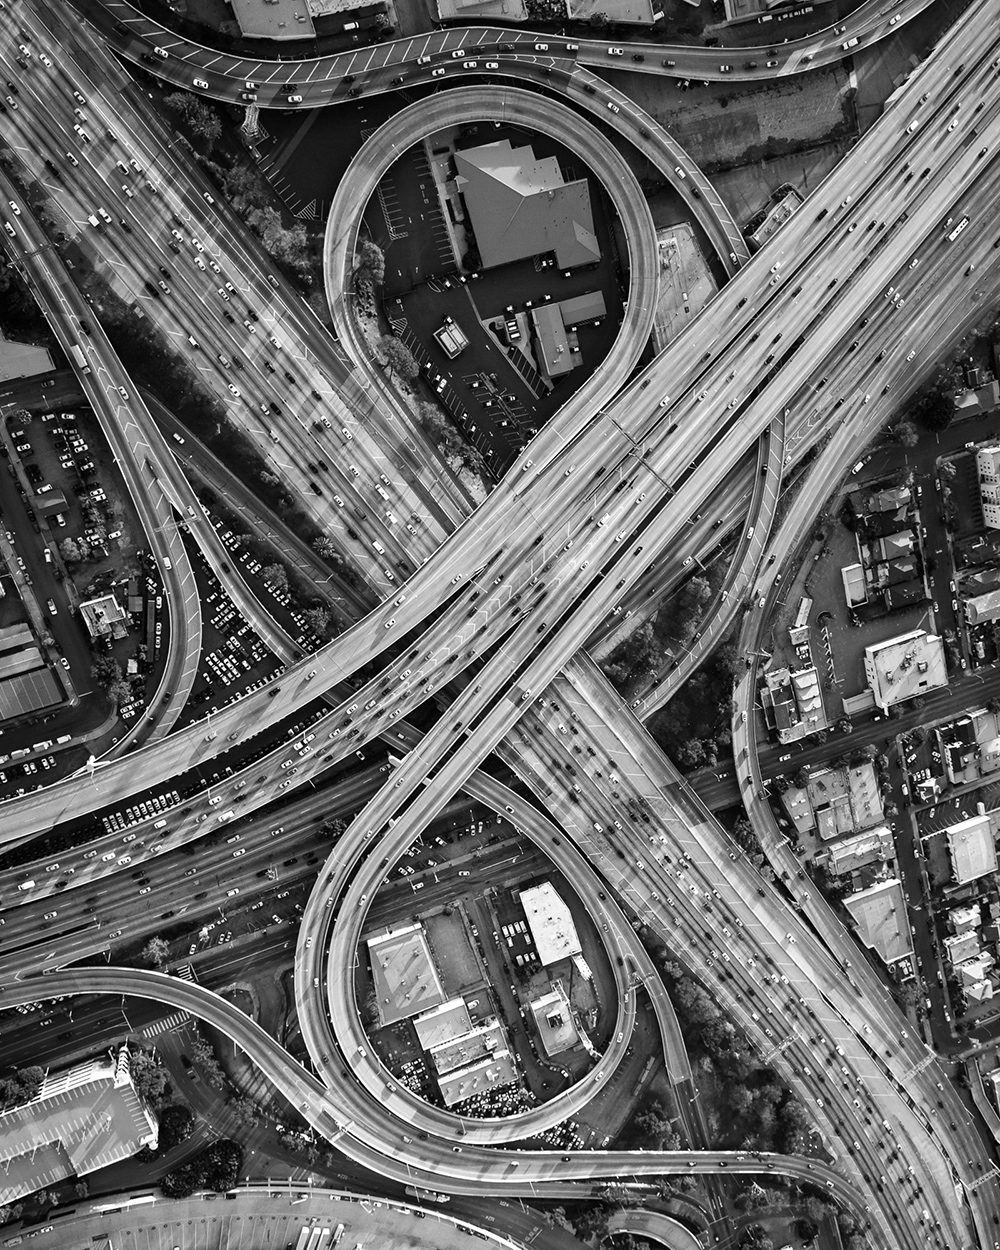
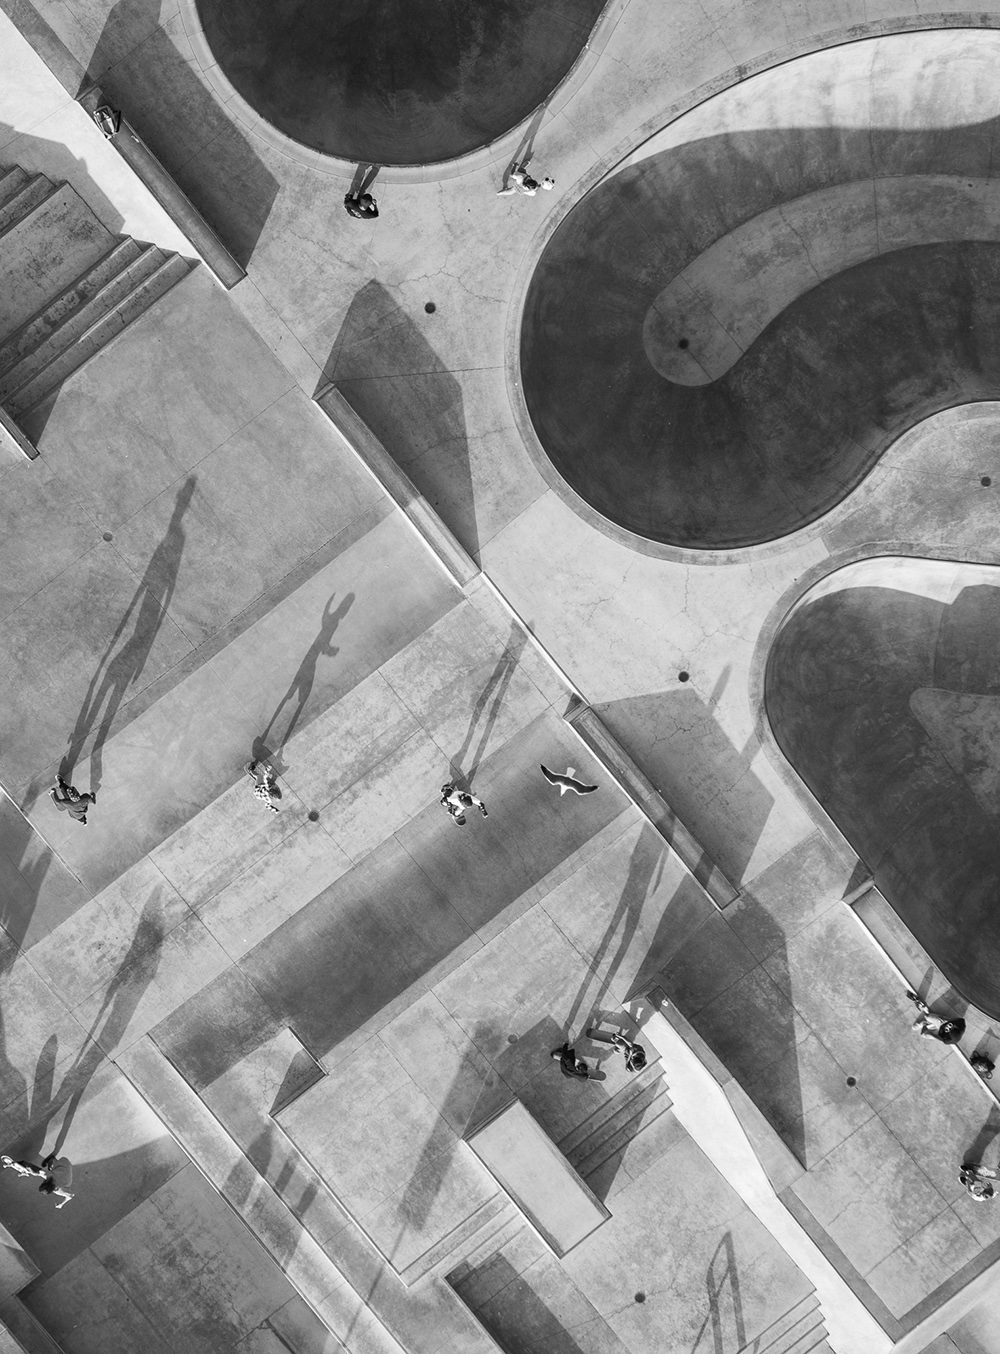
Another thing to keep in mind is that most of my favorite images have occurred while traveling to and from my primary photo targets, and are not the ‘money shots’ that I had envisioned at all. Little slices of life, unexpected quirks of cities, and architectural details can all be extremely interesting when shot from above. I always keep an eye in the camera no matter what, and try to pick up on patterns and abstract forms that pass quickly by below – another great time to have a fast camera that will allow a rapid burst of images in sequence.
Don’t be afraid to bump that ISO, either, especially if the light is falling. A sharp but grainy image is always going to be better than a blurry, clean image, especially with the noise reduction technologies in cameras and processing software out there today. Even if you’re slightly underexposed but still sharp, it’s much better than having a properly exposed, but blurry, image!
Lastly, remember to take a deep breath and remember that you’re experiencing something that only a handful of people in the world will get to experience. It’s always fun to just sit back, relax and take it all in if you’ve finished shooting your primary targets for the day or the light has gotten too low for shooting. There’s not much better than flying over the gridlock traffic of a major city in a helicopter, so don’t forget to enjoy it if you get the chance.
LensRentals.com Contributor
15 Comments
Nick Collura ·
Great article. It’s funny though, to hear your minimum shutter speed notes is almost exact opposite of my approach. We’re in very different circumstances though, as when i’m shooting from a helicopter I’m usually shooting moving boats. I’m trying all that I can to drag the shutter at speeds SLOWER, like 1/30, and even 1/15 in some cases. I use the 24-105 for it’s IS and better range, albeit worse sharpness. Good handholding technique at those shutter speeds with IS is a little different than on the ground, and in normal shooting situations. I find myself consciously NOT resting my elbows on my knees or tucked into my body, because that translates the vibration into the camera. I do press the camera harder into my forehead for that extra point of contact to help stabilize. and overshooting is key. You can get 1-3 keeper in a burst of 8, when the boat is moving at 35 knots. More if the water is really still.
Nick Collura ·
I should also add that a an Hughes MD500 with 5 rotors is far smoother than a 2 blade Robinson r44 or 22.
Jared ·
Well said. I like your work and thanks for the tips. For aerials I recommend Zeiss lenses. The added clarity and microcontrast really help once you’re up there in the mist and haze. I shot some aerials out of a door-less Robinson in Kauai using only the Zeiss 21mm. It was flawless and the prints are phenomenal.
Tim Cooper ·
These are great photos, and I’m very glad someone else is taking them.
Wally ·
Never shot from a helicopter but have shot from a WWII era trainer with sliding canopy. Nothing like a convertible at 200 mph. Was great fun until we did a hammerhead and a spinning dive at the ground, not sure of the name, something like “Death Spiral”, shooting all the way down. Shooting from the plane while flying level was enjoyable but during the stunts it was a bit much for my stomach. Also trying to hold a camera during 4G maneuvers is a challange. The safety advice was also a bit unnerving. “If I pop the canopy and jump, follow-me out and pull your rip cord before you hit the ground”.
Tuco ·
My Cessna 180 still has a mount under the floor for a surplus Kodak K-24. No fooling around with that machine. Today, we pull the right door off and take the right seat out. Strap in and lay on the floor. Its breezy, but pretty unencumbered.
Bernhard ·
Great advice and pictures Mike!
Dennis L ·
Excellent tutorial and photos.
Michael Delman ·
Great article and great shots, Mike. Thanks for the pointers. Where/when can one buy your book?
Ludwig ·
I really really like the tone of the bw pictures! Can somebody point me in the direction which post processing steps achieve a look similar to this? Preferrably without the need of layers? Or is this done differently for every picture so you have to figure out the necessary steps for every picture on its own?
Regards,
Ludwig
Ludwig ·
I really like the tone of the BW pictures. Can somebody point me in the right direction how to achieve a similar look in post processing? Preferably without the use of layers. Or is this something that has to be decided for every picture individually with the desired end result in mind?
Regards,
Ludwig
Ludwig ·
Whoops. Nevermind. I thought my comment never made it through the spam filter…
Money Aggarwal ·
Thank you for this post! this helped me a lot. It’s true that aerial photography with drones nowadays are made easy and more accessible, i’m also amazed by the video created by Eric Cheng which is the Santa Cruz Surfers, the aerial video was really amazing. Drones (UAVs) really helped us to create a astounding aerial photography and video. Cheers to this blog! God bless.
Michael Thermodyne ·
One of the best articles on aerial photography that I read. Thanks Mike. Your images are outstanding too.
How did you find the Pentax 645Z for aerial photography? And how many stops of advantage did you get using the Kenyon Gyros on the Canon and the Pentax?
Finally, with a camera like Sony A7 iii with 5 stop IBIS and a fast lens like Sigma 35mm f1.2, do you think you are well placed for night time aerial photography, without the use of the Gyros?
Manoj Kumar ·
A truly exceptional photography isn't just a picture; it's a story frozen in time, waiting to be rediscovered with every gaze. It's the laughter shared between friends, the stolen glances between lovers, and the quiet contemplation of solitude. Its life, unfiltered and unapologetic, captured in its purest form for all eternity.
wedding photography in Madurai