Teardowns and Disassembly
24-70mm f/2.8 Lens Teardown Comparison
Warning: This is strictly a Geek article. If you don’t like looking at lenses’ insides, there’s absolutely nothing of interest for you here.
We’ve been doing a lot of teardowns lately and I’ve made comments like “well thought out” or “carefully engineered.” Several people have asked me to show them some comparisons so they can see what I’m talking about. Given that we have fairly modern releases of 24-70mm f/2.8 lenses from several manufacturers, we thought it would make sense to compare what the insides look like.
We’ll compare the Canon 24-70 f/2.8 Mk II, the Nikon 24-70 f/2.8 AF-S, and the Tamron 24-70 f/2.8 Di VC.
This will largely examine the electro-mechanical mechanisms in the lenses. But just for completeness here are the optical diagrams for all 3. The Canon is the most optically complex, containing 18 elements in 13 groups. The Tamron has 17 elements in 12 groups, while the Nikon has 15 elements in 11 groups.
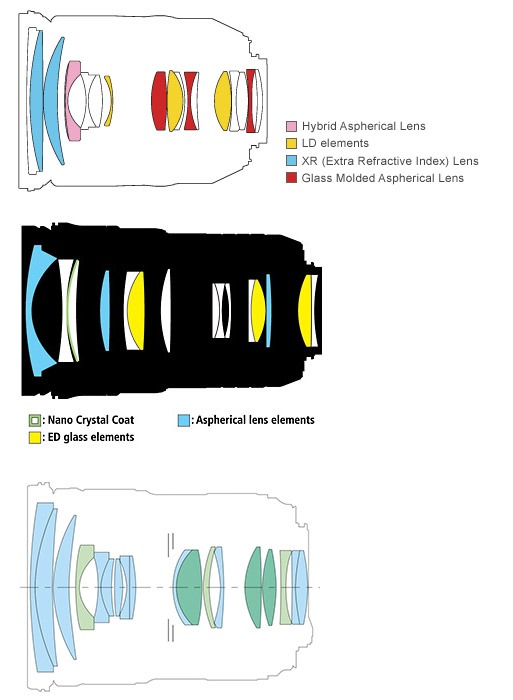
- Optical diagrams for (top to bottom) the Tamron 24-70 f/2.8 VC, Nikon 24-70 f/2.8 AF-S, and Canon 24-70 f/2.8 Mk II (not to scale).
The Front Group
One thing that all 3 of these lenses have in common is a large front group at the end of an extending barrel. They all disassemble the same way – a makeup ring is removed exposing the screws that let us remove the front group from the lens. The Canon front group is pictured below but they’re all very similar — 2 or 3 glass elements permanently set in a plastic case.
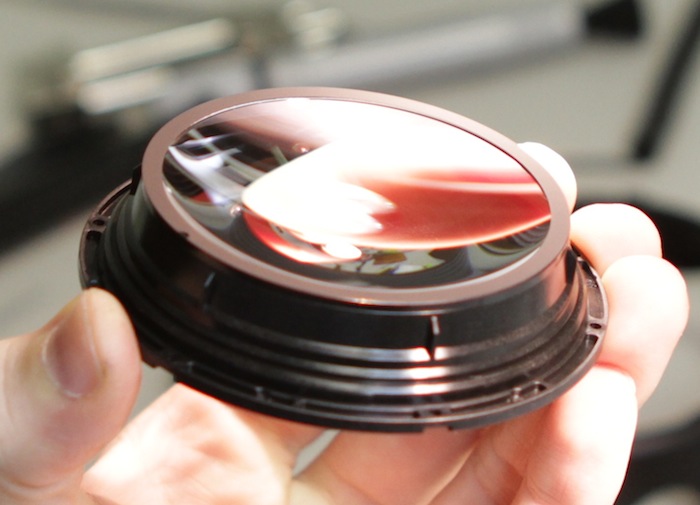
- Canon 24-70 f/2.8 Front Group
I will include an image of the Tamron front group below to show the variable thickness shims used to obtain proper spacing (two on the element, one lying beside it). Both the Tamron and Nikon lenses use shims to space the front element. The Canon does not.
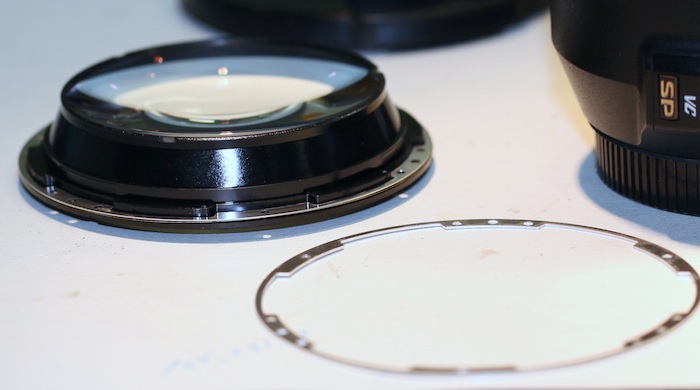
- Tamron 24-70 f/2.8 VC front group with shims
I also want to show one close-up of the Tamron front group because the back element of the first group (element #2) was the one we had reported coming loose in a couple of early copies. This copy (which is more recent) shows a very hard plastic seal rather than the softer glue we had seen in those early ones. We may have gotten a couple with defective seals in those early copies, or Tamron may have changed things. Either way, we haven’t seen that problem in a long time now.
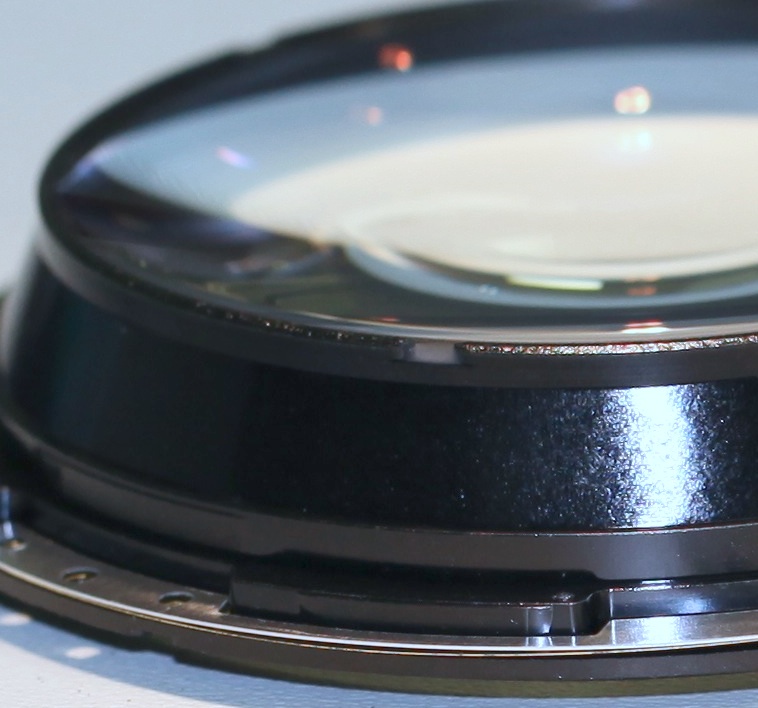
- Closeup of the second element seal in Tamron lens.
Opening up the Back
Since we’re doing this to show internal differences, I should start with some generalizations. The Canon 24-70 f/2.8 II is typical of most newer (last 5-6 years) Canon designs. The Nikon 24-70 is quite typical of a Nikon lens, which haven’t changed very much in the last decade. Sony lenses tend to be very much like Nikon lenses. Sigma and Tamron lenses used to be much like Nikons, too, but recently are morphing and taking on some of the characteristics of Canon lenses.
Nikon Preliminaries
For all 3 lenses, opening up the back involves removing the screws that hold the bayonet mount and electrical connections in place. For the Nikon there is an additional step: the rear element of this lens is attached directly to the inside of the bayonet mount and is removed first. This is a bit unusual but it is convenient if you need to clean the inside of the rear element.
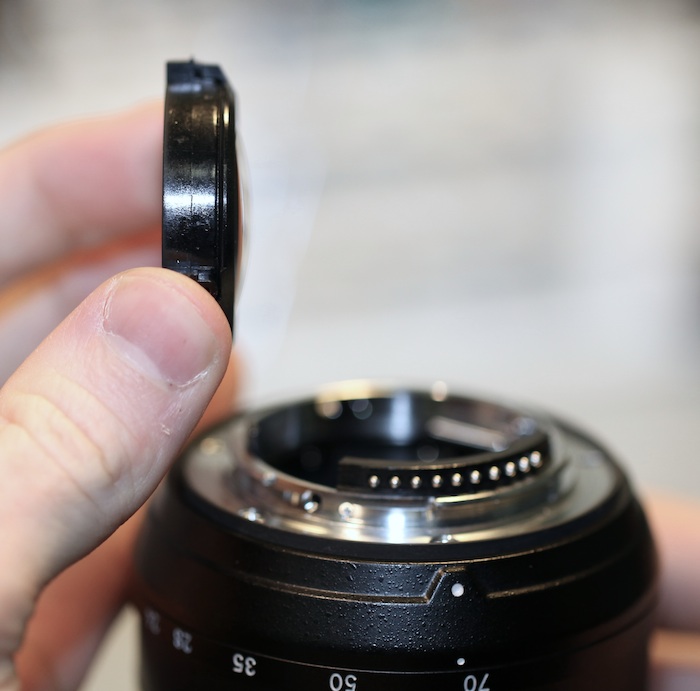
- Rear element removed from bayonet mount.
The Nikon lens also has electronic position-sensing brushes under the zoom and focus rings that have to removed before any disassembly takes place.
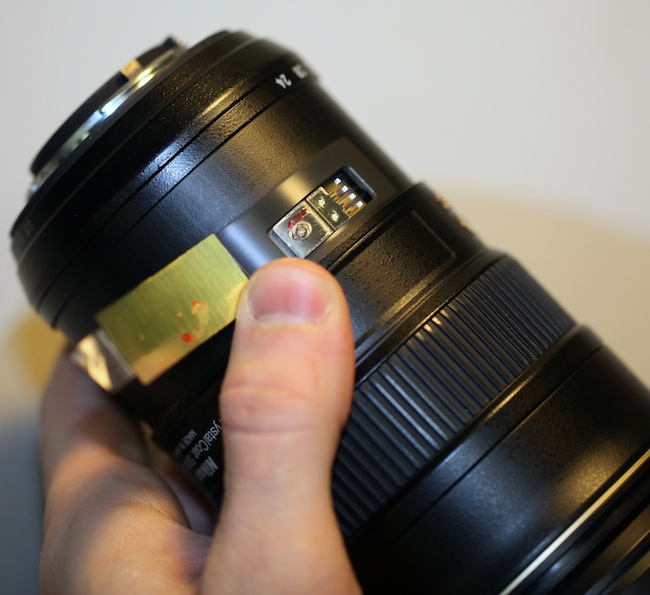
- Nikon zoom brush
The focus brush is smaller and deeper, so it’s difficult to show you until it’s removed.
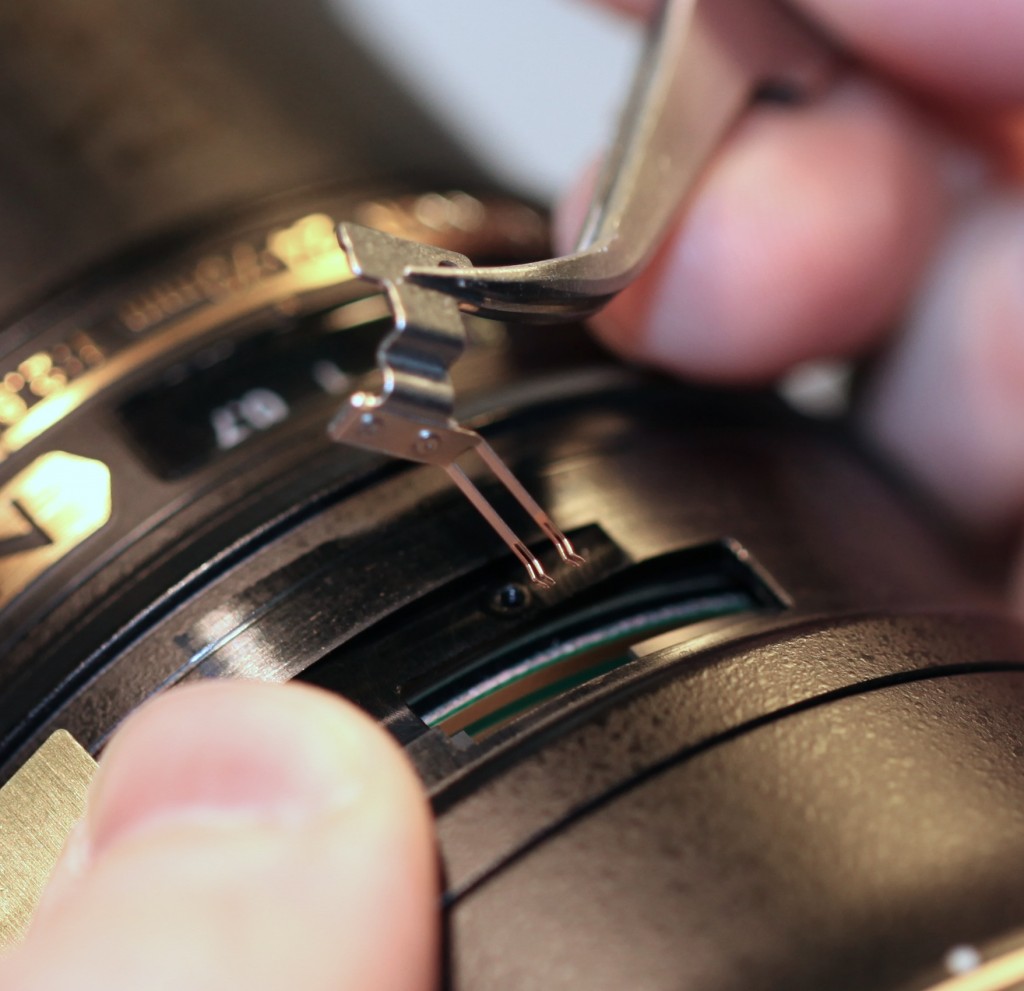
- Focus electronic brush being removed.
Under the Bayonet Mount
OK, once we’ve got the Nikon de-accessorized, the rear bayonet mount of all three lenses is removed the same way. (You’re also beginning to see why it takes a little more time to work on a Nikon lens.)
Nikon
The bayonet mount contains the long lever that actuates the mechanical aperture mechanism.
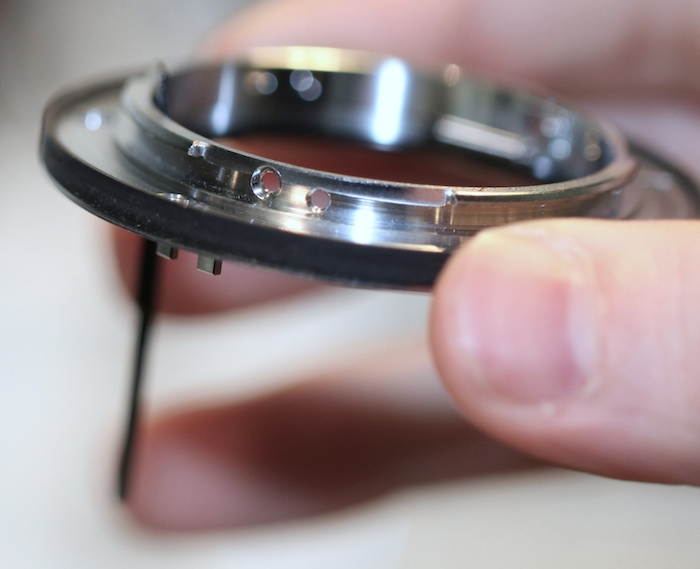
- Nikon mount showing long aperture lever.
There’s a spring in the mount that returns the aperture lever to neutral position if the camera isn’t actively moving it. Some Nikon lenses have two springs, some just one.
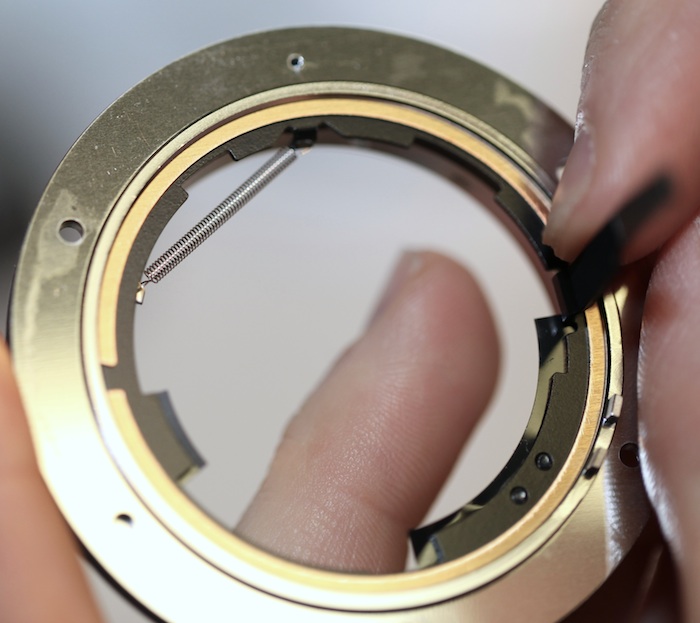
Underneath the bayonet mount are more shims. For most lenses shim thickness at the bayonet mount adjusts proper infinity focus. If you change a bayonet mount, you’ll generally need to alter the shim thickness, etc.
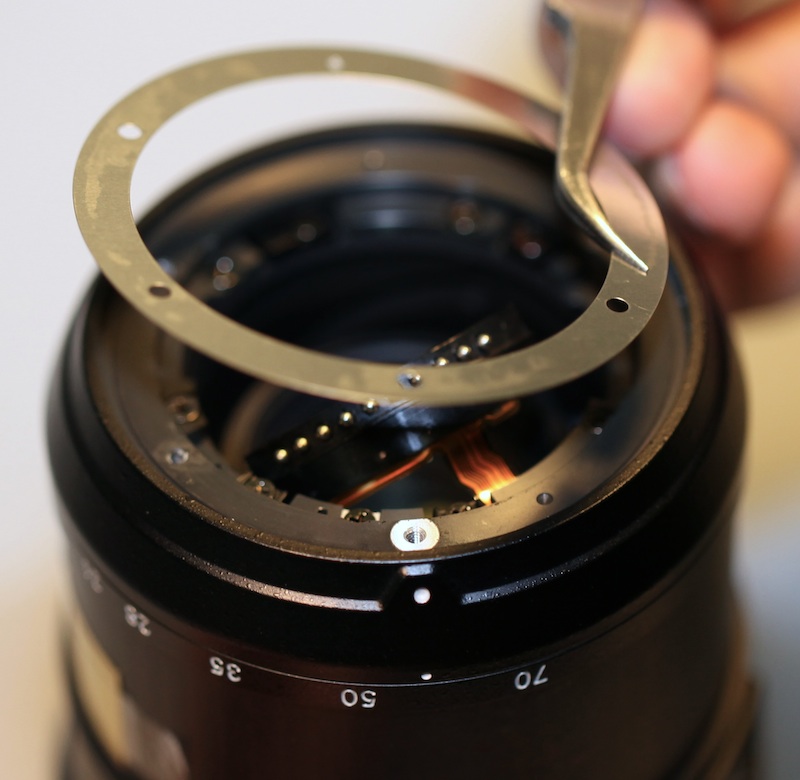
- Shim between bayonet mount and lens
Canon
There’s not much to show with the Canon bayonet mount. There are no shims. Canon bayonet mounts come in various thicknesses, so rather than shimming they simply choose the correct thickness mount when they assemble the lens.
There are no aperture control levers and springs because the aperture is controlled electronically. Springs and levers bend and break, but electronics burn out. If there’s any reliability difference between electronic and mechanical aperture control I’ve never noticed it.
With the bayonet mount and rear barrel mount removed from the Canon lens we’re looking straight at the PCB (printed circuit board) where all the electrical connections live – typical for Canon lenses. If you scroll back up, you’ll notice the Nikon lens doesn’t have a PCB.
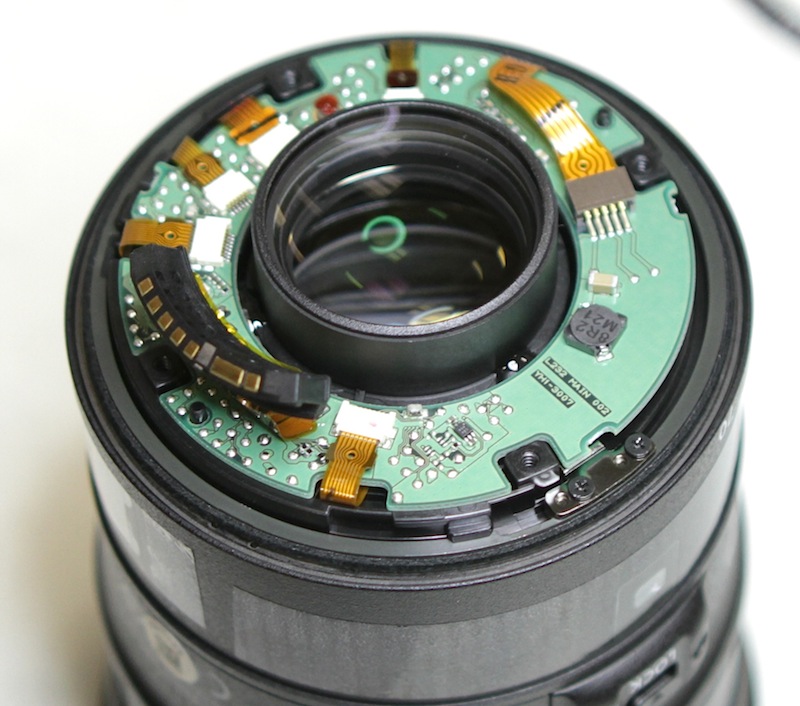
- Main PCB of Canon 24-70 f/2.8 II
Tamron
We dissected a Canon-mount Tamron, so it doesn’t have a mechanical aperture lever. Had we done a Nikon-mount version then the bayonet mount would have had an aperture control lever, like the Nikon. Like Nikon, however, the Tamron (and most third-party lenses) use shims under the bayonet mount to achieve proper spacing.
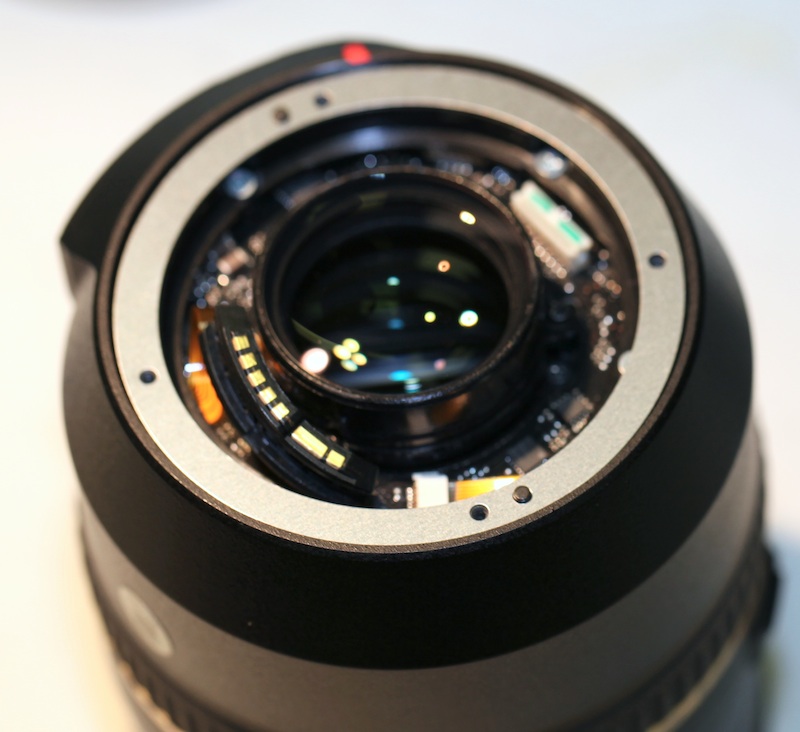
- Rear shim under bayonet mount of Tamron 24-70 f/2.8 VC
Under the shim, however, the Tamron has a PCB like the Canon. Older third-party lenses generally didn’t have PCBs, but in recent years most are using them. I particularly like Tamron’s because they are a very cool black color. I assume the plug with green marks on it is a computer connection for factory adjustments.
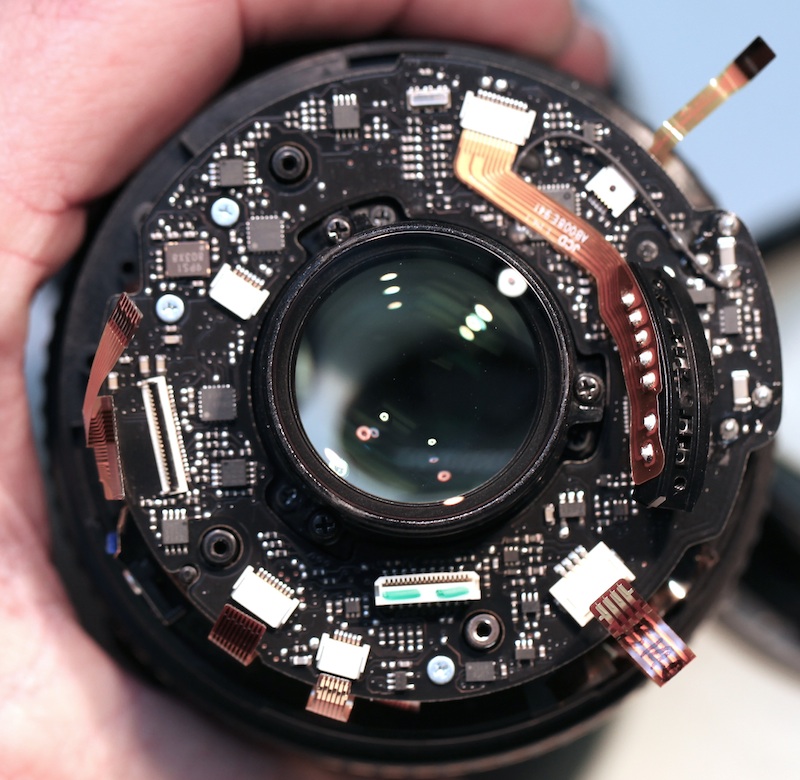
- Tamron PCB looks mighty fine in basic black.
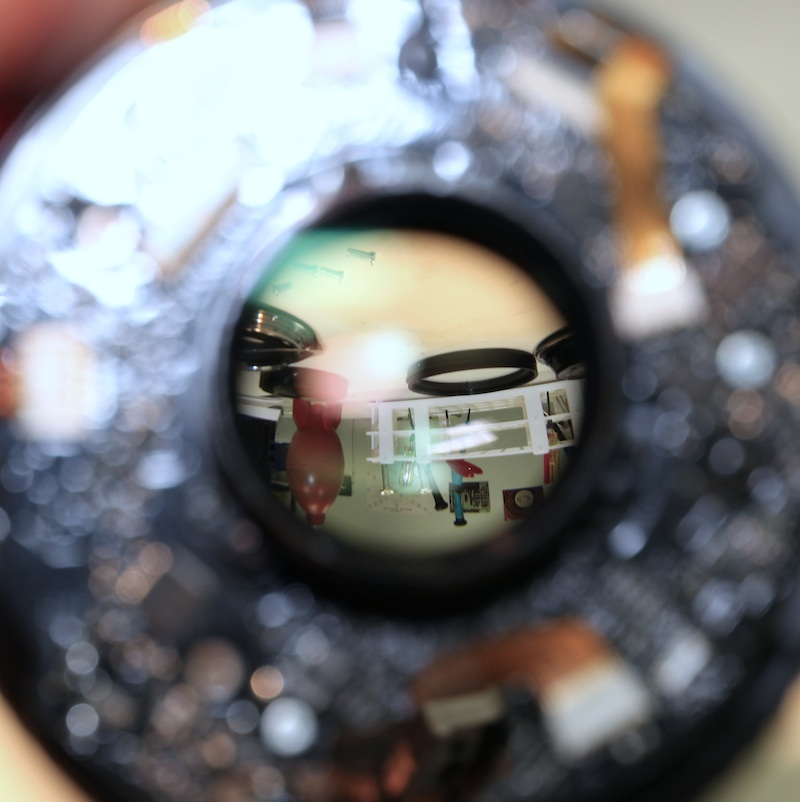
The black PCB also makes for lovely bokeh from the electronic components if we take a through-the-lens shot of my workbench.
Removing the Rear Zoom Components
Canon
With this one I’ll start with the Canon lens, since it’s the most straightforward. After the PCB is off we remove several screws . . .
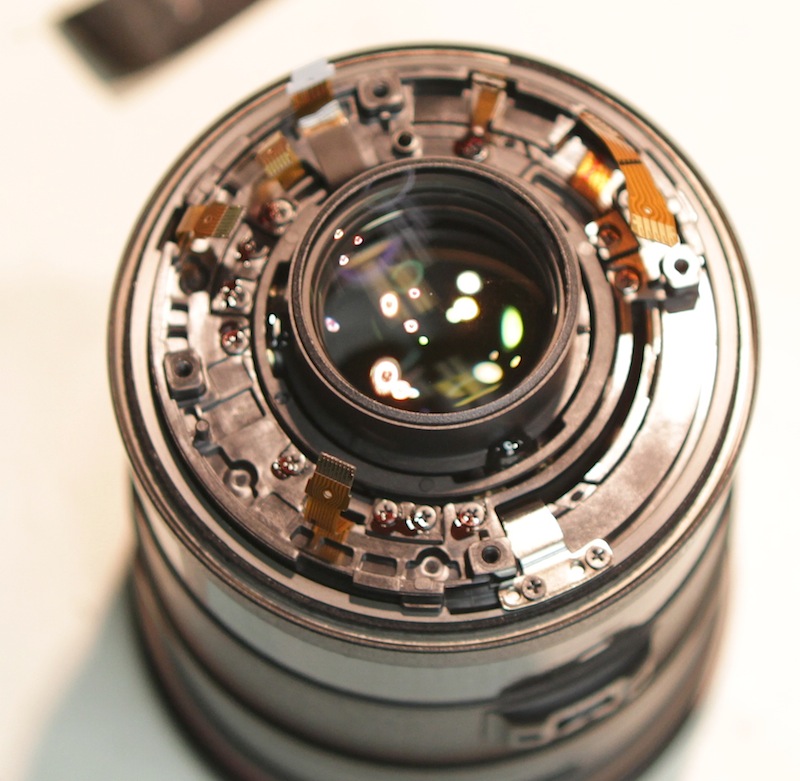
. . . and the entire rear barrel assembly comes off as a unit. This contains zoom mechanism and keys, the zoom brush assembly, and the lens switches.
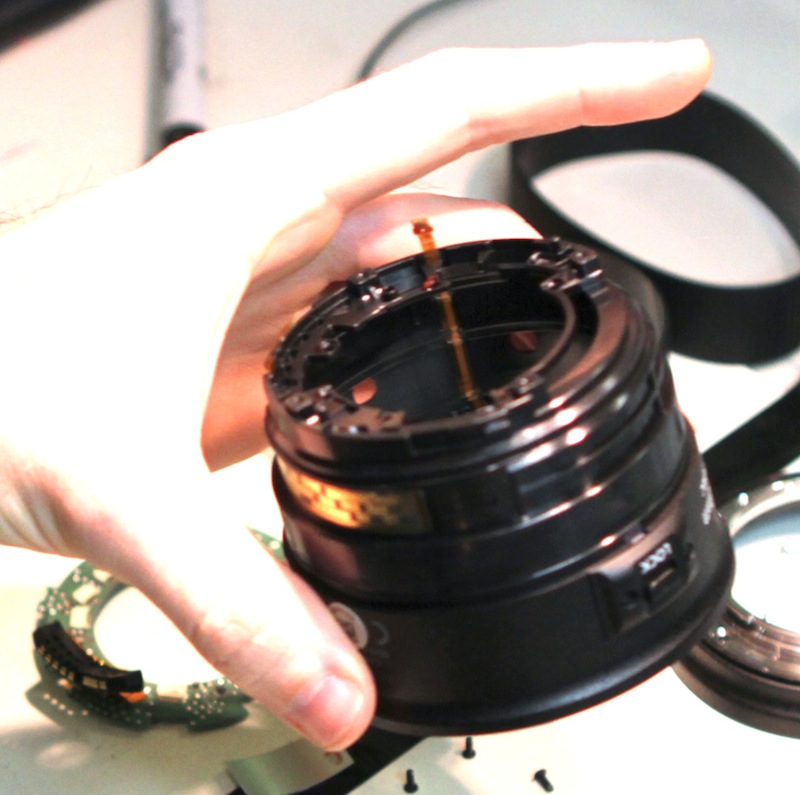
The optical elements and ultrasonic motor (silver thingie with slots near the top) remain behind.
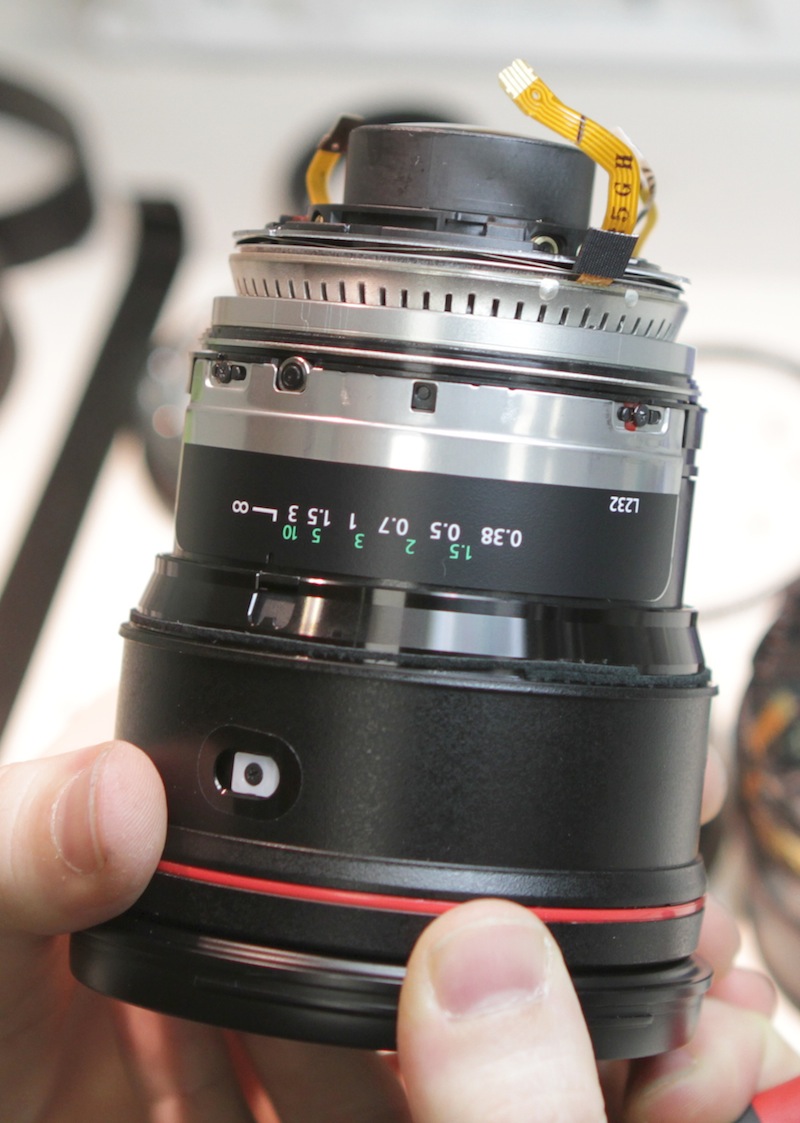
- Notice the small, flat spring washer between two plates at the top of the motor. Adjusting this adjusts the motor tension. A good thing to leave alone, usually.
Removing one more set of screws removes the ultrasonic autofocus motor section from the optical portion of the lens. Simple, sweet, and logical. It’s a dream to disassemble. Most recent Canon lenses have this type of modular assembly.
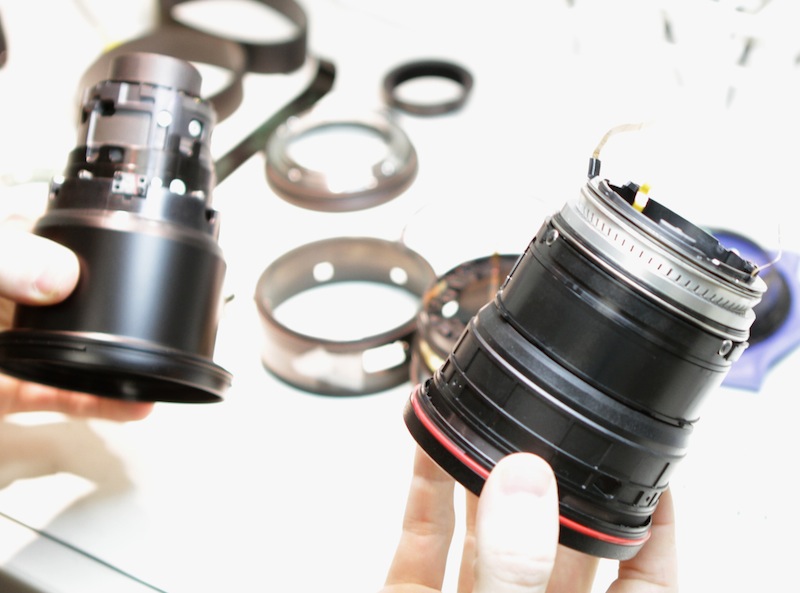
The Nikon 24-70 f/2.8 AF-S comes apart a bit differently. The zoom key is removed first.
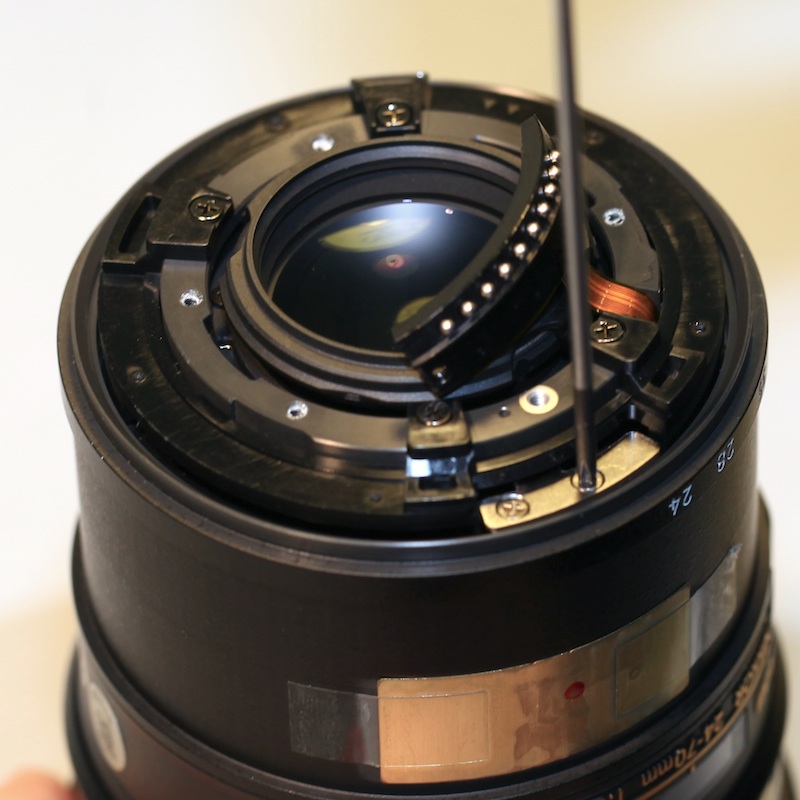
Then the zoom ring is removed simply by lining everything up properly and lifting.
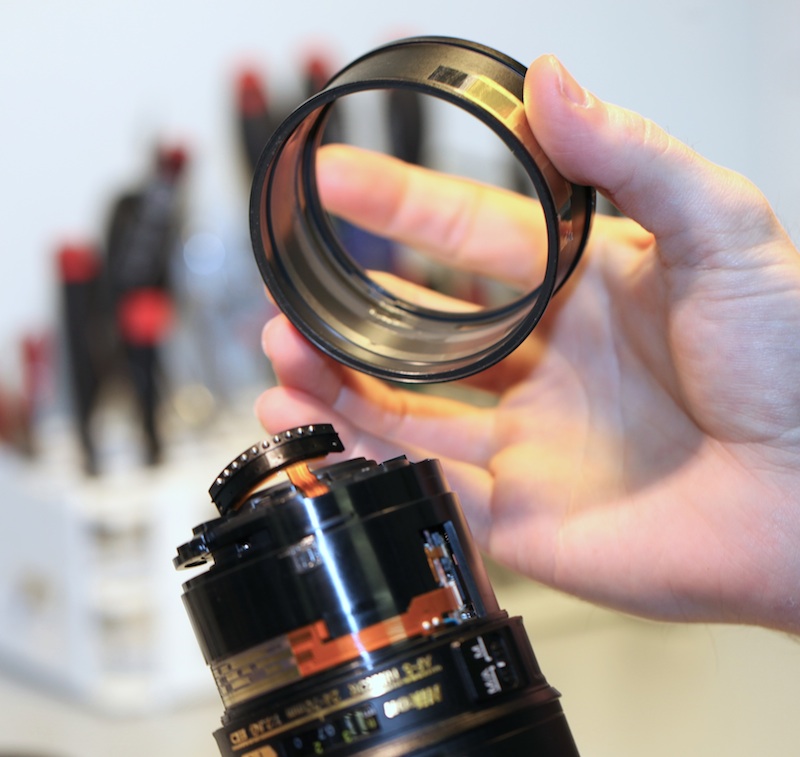
Then we can remove the screws holding the mid barrel in place and slide it off.
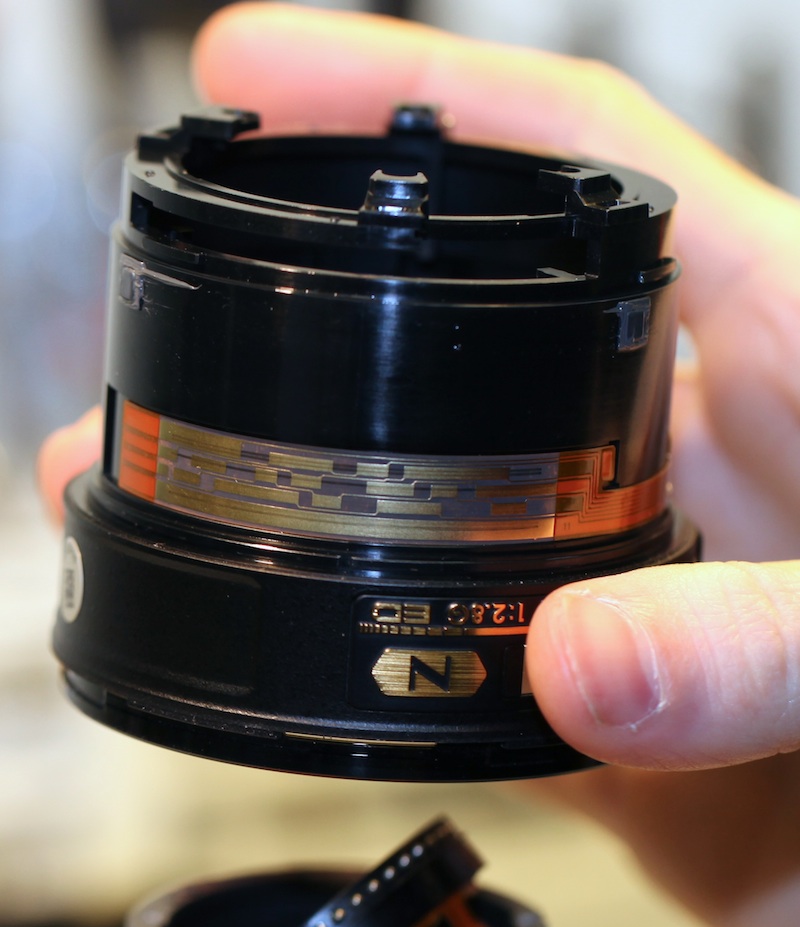
With the mid barrel removed we now see why the Nikon lens doesn’t have a PCB at the back. Nikon uses several small circuit boards connected by flex cables and even some soldered wires, wrapping them around the inner barrel. It doesn’t look quite as elegant but it works just fine. This is how lenses have been made for years.
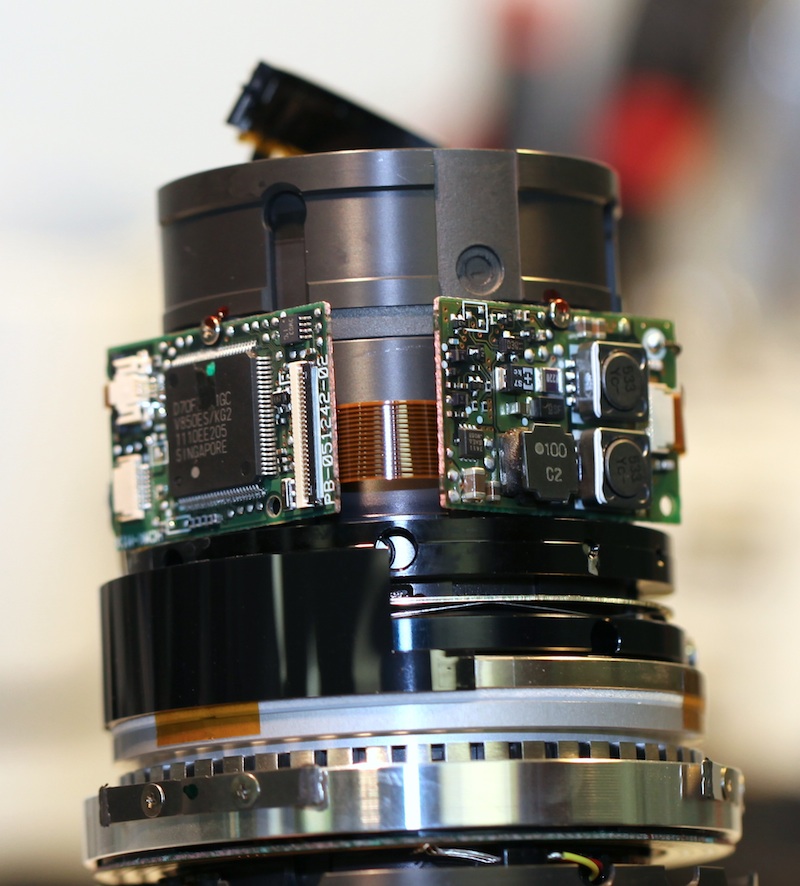
- You can also see the Nikon ultrasonic motor toward the bottom of the picture. Notice the tension washer between two plates and lower down the slots of the motor.
On the other side of the lens we can also see the GMR (Giant MagnetoResistor) unit — the slivery piece held on by two screws at the left of the image below. The GMR is the position sensor Nikon and many third-party lenses use. In the spirit of ‘don’t do what I did, do what I say’, I’ll tell you don’t ever touch that with a finger. If you do the lens no longer works and the unit has to be replaced by Nikon and Aaron will give you that look he gives when you’ve done something really stupid.
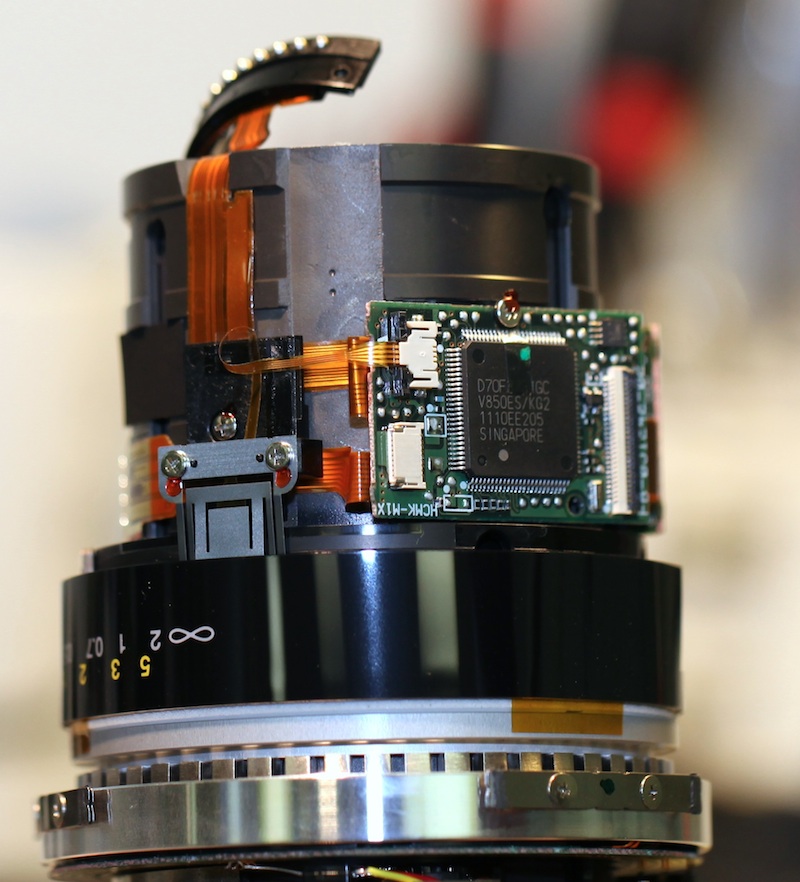
- Nikon inner barrel showing one of the circuit boards, some flex cables, and the GMR sensor.
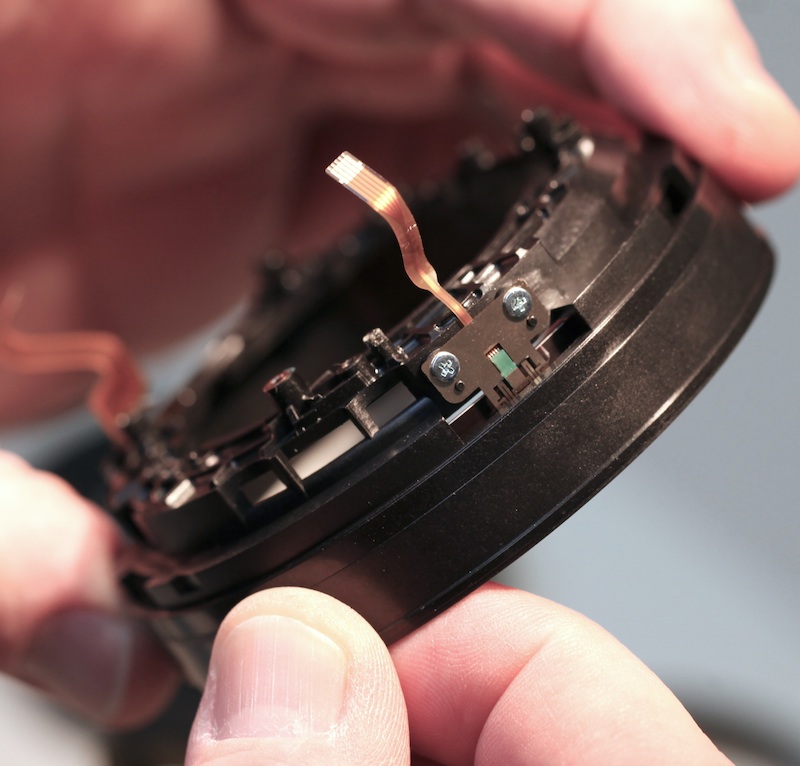
Newer Canon lenses use a smaller optical sensing unit tucked inside the barrel of the focusing unit we removed above. Even though this is the Nikon section, I’ll show it below for comparison. The limited research I’ve done found that both types of units are available in a wide variety of accuracies, so I don’t know that one type is better than another. The optical units are a lot smaller and out of the way if you open up a lens, but I doubt many of you care about that.
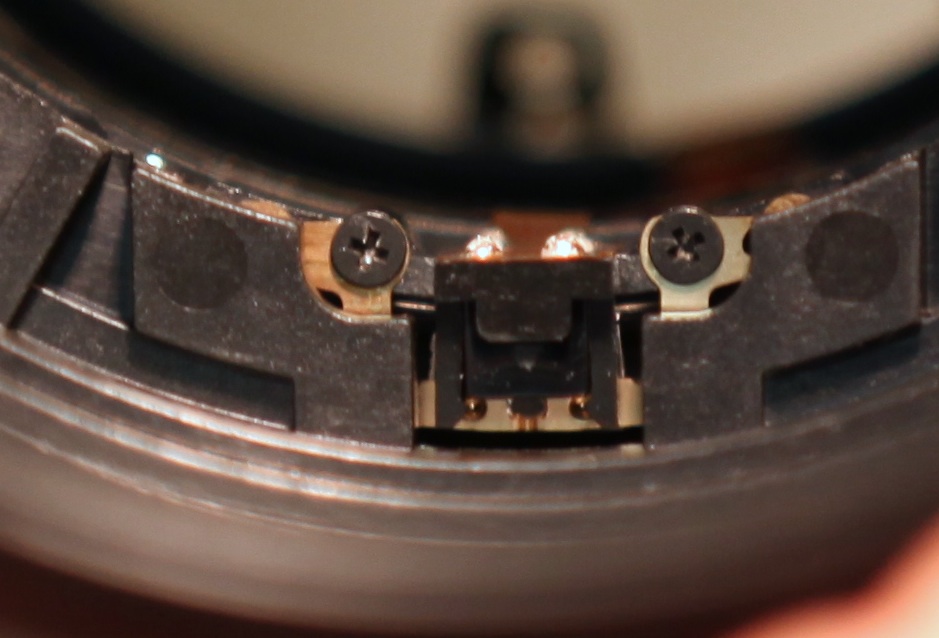
- Canon’s optical focus position sensing unit.
The Nikon ultrasonic motor is the next disassembly step. Unlike the Canon lens it doesn’t come off as a unit — it has to be disassembled piece by piece. Underneath it there is a soldered wiring harness so complete disassembly involves desoldering some wiring, too. That’s a time consuming process that we’re not going to go through for a demo.
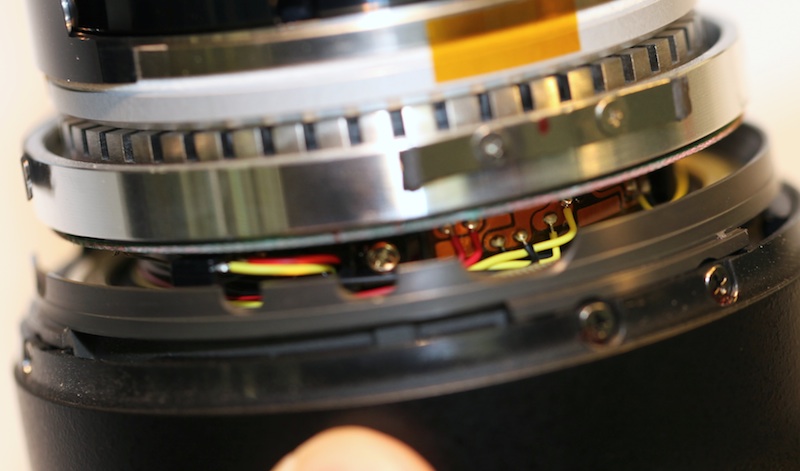
Tamron
Once it’s PCB is removed, the Tamron shows some traits similar to both the Nikon and the Canon lenses. It doesn’t come apart modularly like a Canon, but it is a bit more organized inside than the Nikon. The aperture key (screwdriver is removing it’s screw) need to be removed, along with 4 mounting screws, then the mid barrel comes off.
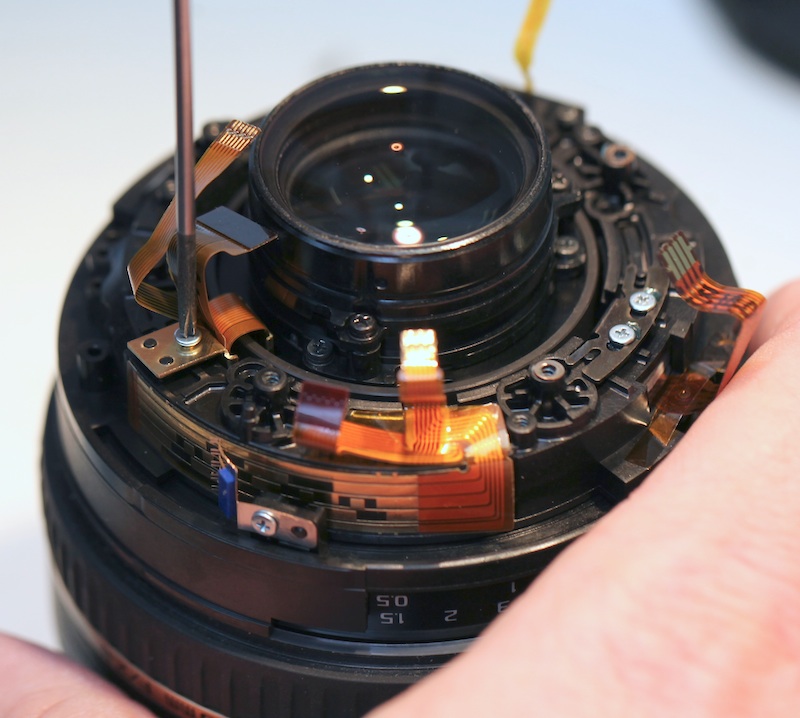
The mid-barrel contains the Tamron’s GMR unit.
With the mid barrel removed we can see the Tamrons ultrasonic motor, which is very similar to the Nikon and Canon motors.
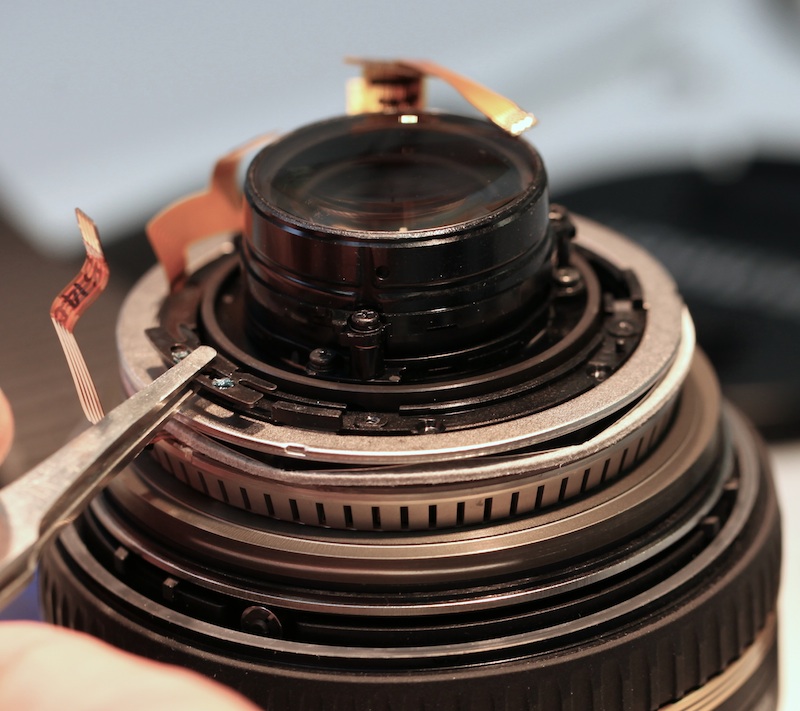
- Tamron USM exposed. Forceps are removing the focus key.
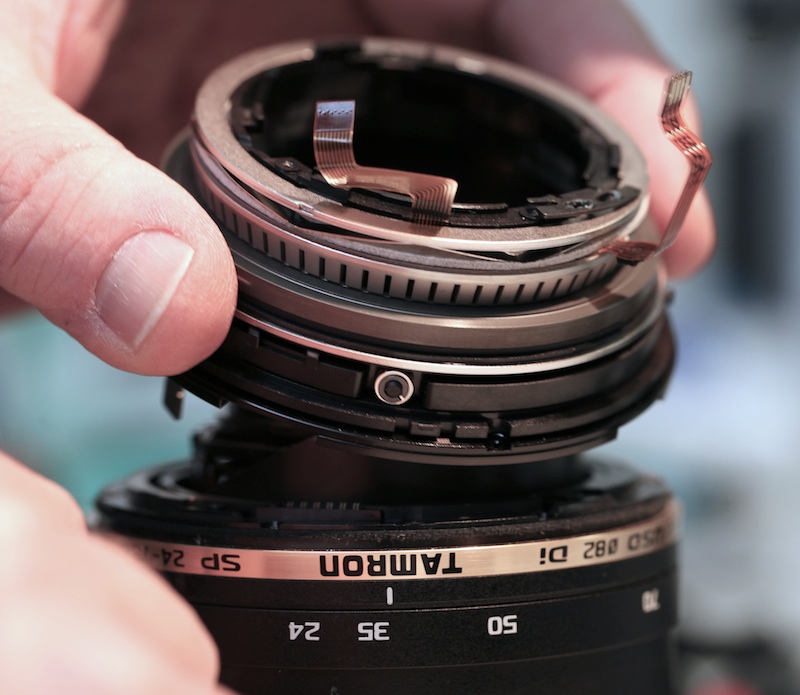
- USM removal leaves the optical core of the Tamron intact.
The Tamron isn’t quite as modular as the Canon, but the USM assembly does come off easily as a unit.
Optical Element Adjustments
While we’re not getting into the optical elements too much in this teardown, I will take a minute here to demonstrate one of the main differences between the lenses. Notice the rear part of the Tamron optical assembly two images above (the picture with the forceps) and you’ll see several screws holding the rearmost group onto the optical assembly. If we take those screws out we remove the rear group.
As shown in the image below, under each screw is a set of shims – different thicknesses of the three shims could both space and correct tilt of the rear element. Notice also there are three more screws holding the next element in place (each of these screws is just to the left of the rear element screw posts with the brass shims still in place).
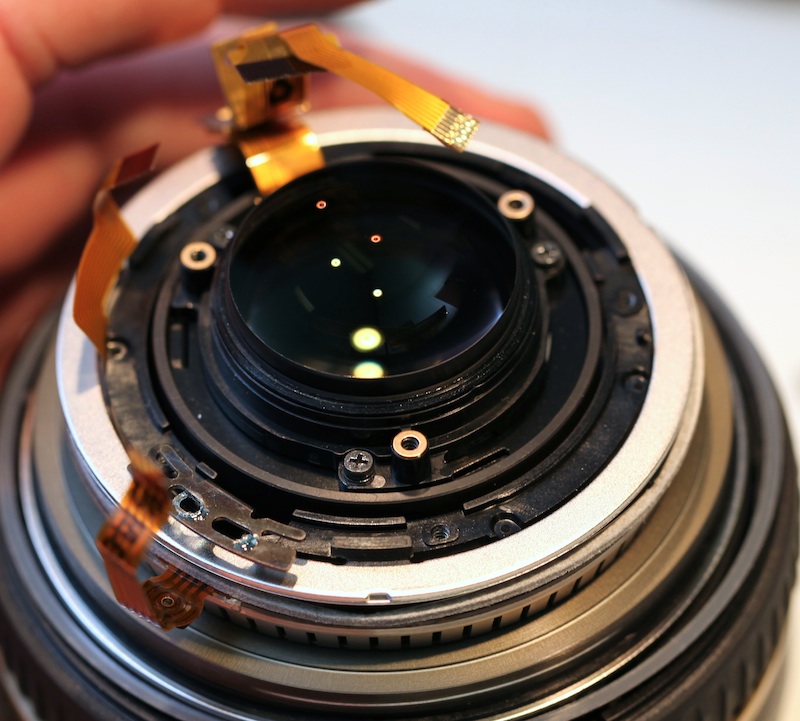
- Individual shims for the three screws of the Tamron rear element.
Removing these screws lets us remove the next element, which shows a set of spacing shims. Changing shims here would adjust the spacing between elements, but not the element’s tilt.
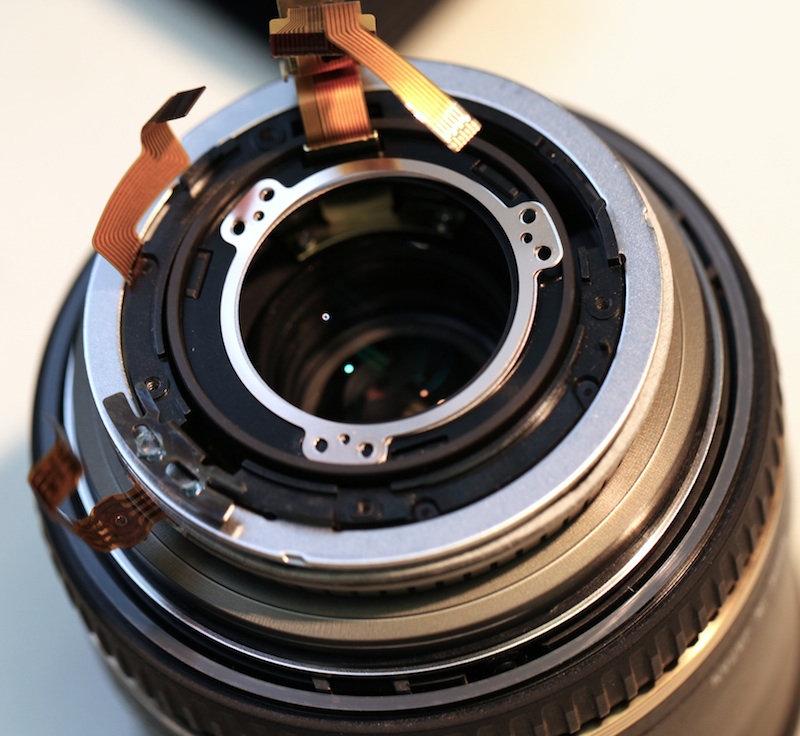
- Spacing shims under next optical group.
Most lenses (including most Nikon and Sigma) use shimming to adjust most of the optical elements. Canon lenses tend, instead, to have helical collars on the lens elements. Rotating the collars tilts the element forward or backwards.
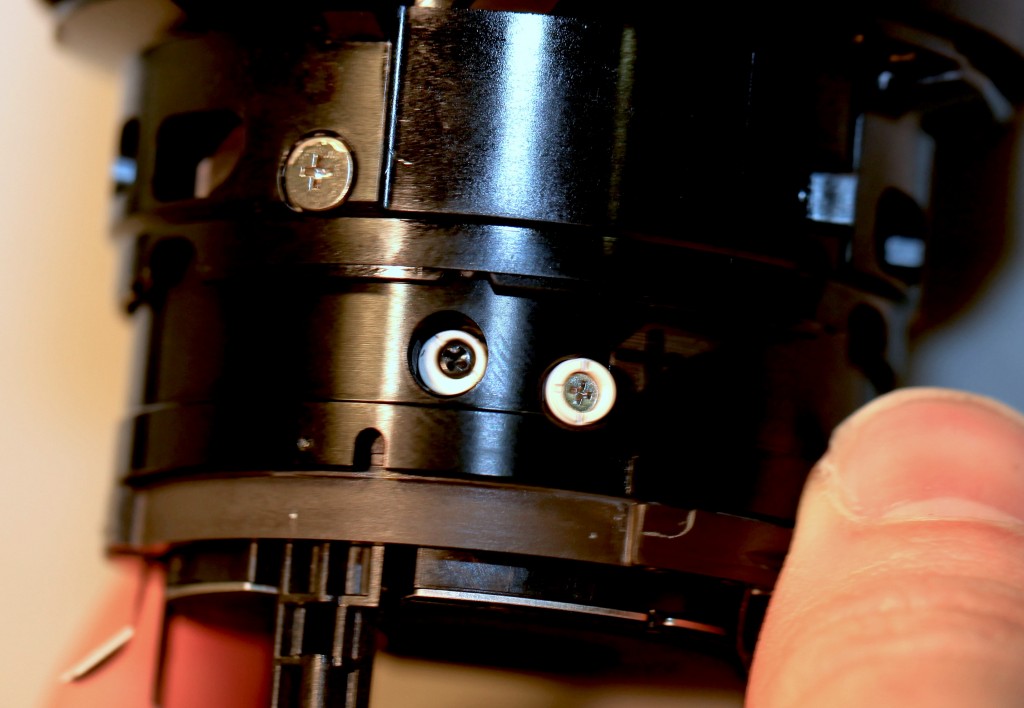
- Helical collars for adjusting elements in a Canon lens.
Conclusion
Well, if you’ve gotten this far, you have earned the Geek Scout Merit Badge for lens teardown. You may (or may not) have also gained some appreciation for why it costs so much to do a ‘simple’ repair on some lenses.
There are certainly differences in how the various manufacturers design the non-optical portions of their lenses. Third-party lenses used to be very similar to Nikons but recently are starting to, uhm, borrow some of the designs Canon has used.
From an photographer’s standpoint, one design isn’t better or worse. They all make lenses that work just fine.
But a number of you have asked us to demonstrate why we call some designs ‘cleaner’ or more organized than others. Hopefully this demonstrated that, at least to some extent.
Roger Cicala and Aaron Closz
Lensrentals.com
January, 2013
Author: Roger Cicala
I’m Roger and I am the founder of Lensrentals.com. Hailed as one of the optic nerds here, I enjoy shooting collimated light through 30X microscope objectives in my spare time. When I do take real pictures I like using something different: a Medium format, or Pentax K1, or a Sony RX1R.
-
Brian
-
Klaus
-
Klaus
-
Martin Dittmann
-
Martin Dittmann
-
Martin Dittmann
-
Unhappy
-
Ben Bernier
-
Ken
-
Spencer
-
Joe
-
Chester
-
Chris Wordsman
-
Phil
-
Stephen
-
Jonathan
-
CarVac
-
CarVac
-
Dr Croubie
-
desmondism
-
Nqina Dlamini
-
tianle
-
Aaron
-
Feng Chun
