This time of year, particularly, people have plays, pageants, and all kinds of indoor activities to photograph. Since its one of the most difficult types of photography, we get a lot of questions about it. Since I know absolutely nothing about concert and theatre photography, I’ve asked Brad Kolodzaike to write an article on the subject. Brad is a Memphis area sports, concert, and architectural photographer. He has combined his passion for photography with his knowledge and expertise of the sporting and concert industries to offer a unique perspective of the events. Brad’s work can be viewed at Kolodzaike Photography.
How to shoot a concert (or school play, theatrical production, etc)
By Brad Kolodzaike
Basic principles
I’m going to outline some of the information that I have learned photographing concerts. These same principles could be applied to any sort of stage production, your kid’s play, a nephew’s band, or any other theatrical light performance. Each event has it’s own idiosyncrasies, fleeting moments that we frantically attempt to capture on digital film.
Capturing moments & Storytelling
Concert Photography, as with any sub-category of photography, boils down to capturing moments that everyone witnesses but few stop to really appreciate. It’s a look from a guitar player, or an intense stare from a drummer, and a handshake with a young fan. It’s about freezing those moments to share with the world. By capturing these moments we are able to tell a story about the dynamic of the band, the show, or the venue.
The question is what story are we telling? Was the venue sold out that night? Maybe throw in a few crowd shots or wide angle of the entire space. Has one of the band members recently rejoined the group? Capture some shots of him/her interacting with the other band members. To be able to effectively tell the story of the night you need to research your subject ahead of time to know the dynamics of the band.
Creativity
Concert photography takes a keen eye and an open mind above all else. The performers are unpredictable and move in all sorts of directions. The lighting is constantly changing in rhythm to the music and the crowd is never predictable. While this plays havoc with the camera settings it also has the possibility to spark a creativity that is unmatched by few situations. The colors alone can be an inspiration, consider that you have at your disposal more lights and lighting versatility than most of the seasoned professional photographers will ever shoot with on the highest end commercial shoot. Your ability to use those lights to your advantage can make the difference. Working with natural stage performers is a huge advantage, just try to get a family portrait that is as expressive and natural as most bands. All you have to do is figure out how all of the puzzle pieces fit together to make a great image.
Equipment & Settings
Speed Kills (Fast lenses & high ISO)
As world and humanitarian photographer, David duChemin, says; “Gear is good, vision is better.” (David duChemin, PixelatedImage.com) In this case you are 99% more likely to bring home some great shots if you come to the event prepared and with the right equipment. There are two things that matter most when shooting in low light concert and performance venues; High ISO and fast glass. Most concert venues require somewhere between ISO 800-1600; you’ll need ISO 3200 and above if you’re in a club setting. If you are using a quality DSLR that was made after 2006 chances are good that the sensor will be able to produce great images at that level. A good post processing workflow always helps the noise as well.
The second part of the equation is to make sure you are shooting with fast lenses. That is, lenses that have an aperture of f/2.8 or wider in most cases This combination of aperture and ISO will allow you to have a shutter speed fast enough to routinely freeze the action. One of the staples of my shooting arsenal is the 70-200 f/2.8 which gives great reach for closeups and the auto focus is fast and accurate even in low light. A wide angle lens gives great perspectives and spacial relationships; for example, when used from the pit the 14-24 f/2.8 has a great look to it. A mid-range lens, something like the 24-70 f/2.8 is a great all purpose lens when shooting up close. If you’re looking for even more fun look for the f/1.4 or faster prime lenses. Choosing lenses with a fixed aperture throughout their zoom range will make your other settings much easier. If your aperture is constantly changing as you are zooming you’re in for a long night.
Vibration reduction
Vibration reduction is a newer technology that has allowed photographers to be able to shoot handheld at a much lower shutter speed while keeping the image steady. This is especially important when working with telephoto lenses in lower light situations. By anticipating moments of hesitation by the artists, such as a hand in the air or holding their guitar in a certain position you can time those reactions and be able to freeze the motion with a relatively slow shutter speed. By using vibration reduction technology it’s possible to eliminate the shake of the camera and the person holding it. One of the best examples of this technology is the new Nikon 24-120 f/4 VR II. By allowing the photographer a buffer of up to 4 stops of additional hand holding ability this is a versatile option in terms of zoom and shooting at slow speeds.
Manual shooting
With so many variables constantly shifting around you it’s important to know your camera’s functions and be able to adapt on the fly. The best way I have found to be able to accomplish this is to have the camera set in Manual mode. While shutter and aperture priority modes are very useful in constant situations, and being the modes that I usually find myself in, concert photography requires more control on the fly. The more variables that a scene imposes the more control you need to have over your camera. Although there are numerous custom shooting settings the three major controls you should know inside and out are the shutter speed, aperture, and ISO and their relationships with each other.
If you were to leave you camera in aperture priority to set the aperture wide open (usually a good practice) and happen to swing your camera to shoot towards some of the theatrical lighting your camera is going to make the decision to set the shutter speed somewhere near 1/8000 to compensate for the bright light. Now that’s a good thing if the light is your main subject, it will be well exposed. If, by chance, you’re still trying to photograph the lead guitarist the entire picture besides that light is going to be pitch black.
By shooting in manual mode it’s easy to leave the aperture where you want it and with the flick of a dial change the shutter speed to adjust for the lighting levels and leave them where you know the performer will be well exposed. Don’t worry too much if you’re new to this kind of shooting, these aren’t your father’s SLRs. The light meters in today’s DSLR cameras are very good and come with a handy display in the viewfinder. This meter moved to the + or – side based on how your settings currently are. If you’re familiar with your camera’s controls it’s a simple procedure to have the meter read somewhere near the middle. Of course in the digital age, instant gratification is king. You can always check your LCD and the histograms to figure out what changes need to be made.
Techniques
Composition
Always start with the basics and then put your own spin on them. Remember the rule of thirds, level horizons, and cutting portraits off at flattering points of the body. If you’re photographing the entire band in the shot look for opportunities where the members form a triangle in the frame. After you figure those out try adding some different angles to your image, zoom in for an expression and don’t worry that the back of their head is out of the frame. The people you are photographing on stage are creative personalities, make sure you represent them in the same creative way.
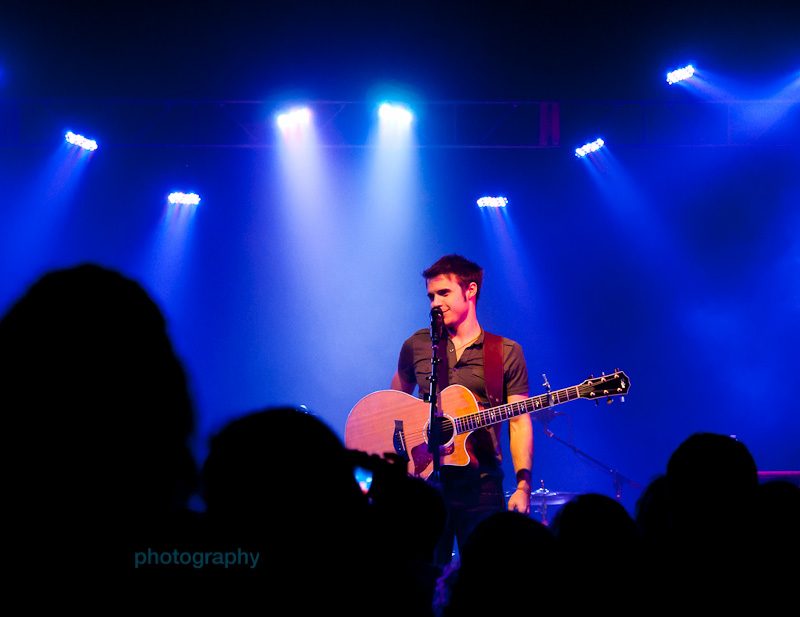
By not including the fiddle player’s upper half the eye is directly pulled to the lead singer. Also, the shadow of the fiddle player becomes a strong element.
Being artistic
As discussed later on, most of the time motion blur is a negative thing to have happen to your image, but if done correctly it can be a mesmerizing effect that adds a strong sense of movement to your image. Just like a race car with the wheels frozen doesn’t look like it’s moving a drummer with no motion in the drumsticks appears that he just has his hands up in the air. Pick your spots to use this and drop your shutter speed to something close to 1/50, be aware of which parts of the scene you are looking to blur and find which parts need to remain sharp.
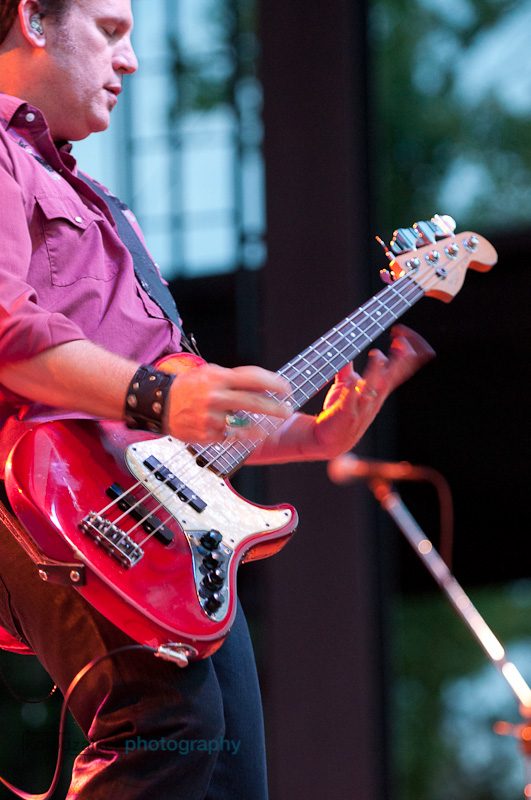
The bassist’s hand is blurred while the guitar and the rest of his body is crisp.
Lighting
Using creative lighting to your advantage
Find ways to use the lighting to your advantage. Popular lighting techniques used today include back lighting, moving lights, and patterned lights of all different colors. Catching a bassist with a strong red light low from behind him will cast a beautiful silhouette. Find a few radiating light beams shining up from behind the lead singer really frame them as the focal point. Overhead lighting creates dramatic shadows, just make sure your subject is looking up towards them or it’ll look like Halloween all over again. Be on the lookout for the crowd flood lights when the band is looking for the crowd to sing along with them, this is your opportunity to catch an overall wide shot.
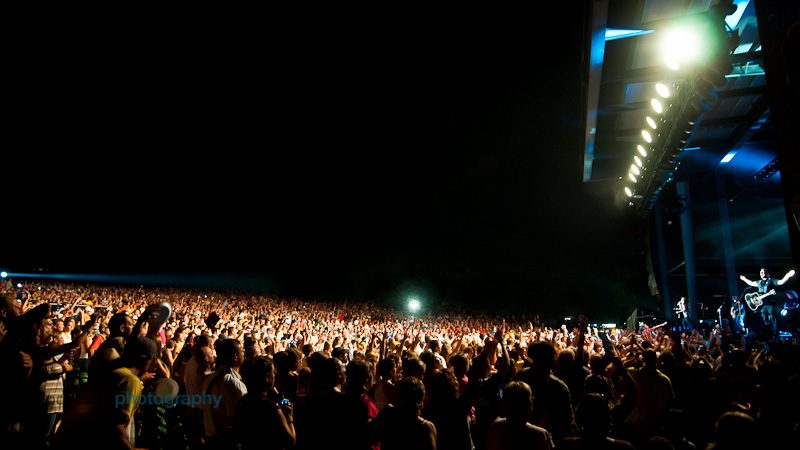
If you try to photograph the scene while the lights are out the stage area will blow out and they will be playing towards a sea of darkness. The lighting usually moves in a predictable pattern, try and find spots to shoot from that uses it to your advantage.
Watching out for UFOs
If you were shooting outside they are commonly referred to as sun flares. They are circular aberrations that appear when a strong light source passes through the various lens elements. From a strictly technical perspective the flares are something that lens manufacturers spend many hours and millions of dollars trying to reduce and eliminate completely. On the other hand there has been a strong revival artistically to create a strong linear pattern of flares as part of the overall composition. However you choose to approach UFOs make sure that you compose your images in such a way that they strengthen your image and not distract from it.
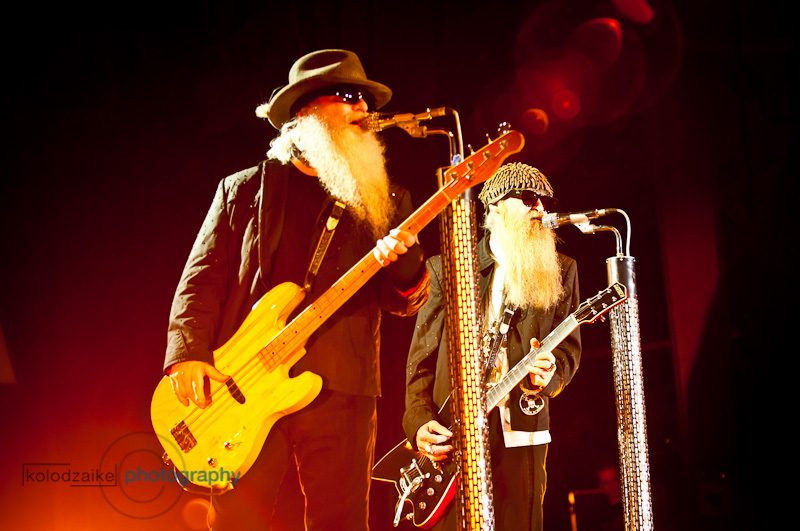
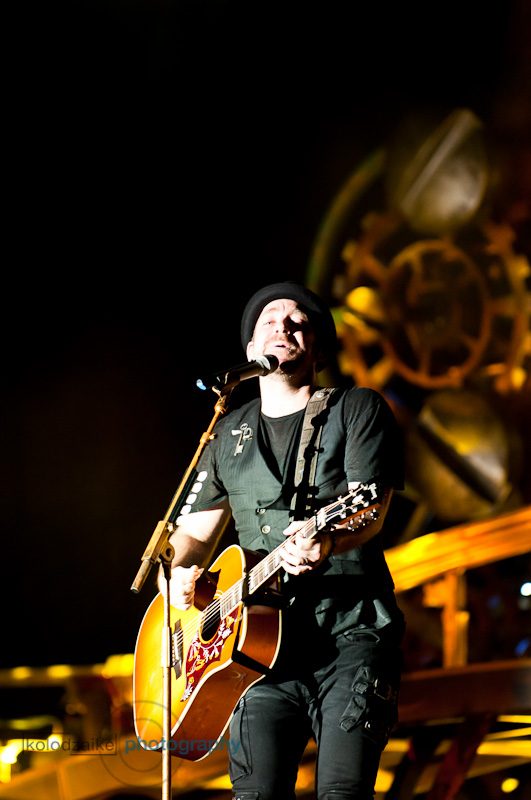
Notice how the light flares line up with Dusty’s guitar neck.
Pitfalls
Low shutter speed
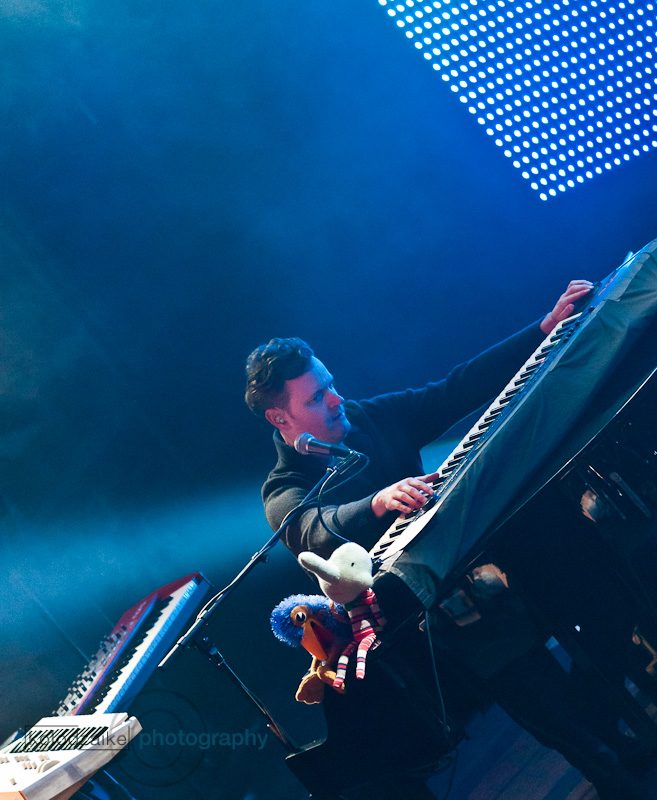
Always a concern in low light situations, especially with moving elements of the frame. To avoid the blurry nature of slow shutter speeds make sure that your aperture is wide enough and that your ISO is high enough to balance out the shutter speed. The shutter speed is going to depend on what you are photographing. If your subject is seated at a piano and moving slightly back and forth from the mic a shutter speed of 1/160 will most likely be enough to freeze the motion. In contrast, if your main subject is a guitarist that you are trying to freeze in mid jump something closer to 1/500 will be more appropriate. Practice and experience will be your best guide to know what settings are best for the situation.
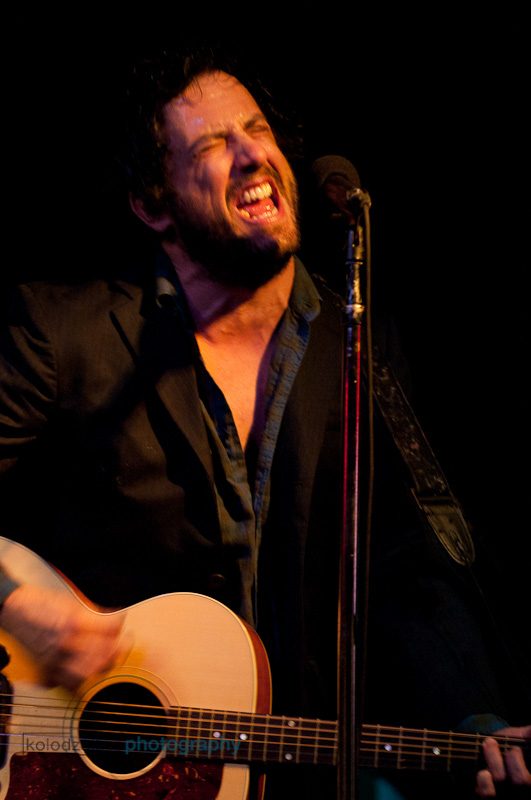
1/50 was not a fast enough shutter speed to capture Will Hoge while his head was in motion.
Metering off of a direct light source
All modern DSLR’s built in light meters are great instruments, but must be used as a guide only. If the camera had it’s way with everything you would end up with a perfectly gray image every time. Only you know what is supposed to be truly dark in the scene, trust your instincts in the metering. Lighting technicians like to play as many games as possible with photographers, at least it seems that way, depending on the song or the artist the lighting can change from a very dark scene to a brightly lit one in a matter of seconds. This lighting change can throw off your camera’s meter as much as 8 stops. Be constantly aware of the lighting conditions and be able to adjust on the fly by varying your settings.
On camera flash
Leave the on camera flash to the fans 15 rows back with the point and shoot. It makes a wonderful image if you have a wide angle of the performer leaning into the crowd with a bunch of small flashes going off. If you must use it make sure you have a flash unit besides the pop-up one and be sure not to overpower the scene, the most effective use of the flash is when someone can look at your image and not have it immediately jump out at them that you flashed it. Also make sure you’re close enough to your subject to make sure the flash is actually reaching them. Search for “inverse square law” to learn more about this. Most shows have policies regarding flash photography, make sure you check with whomever is assigning you the photo pass about their restrictions.
Obstructions
As photographers we’re often confronted with obstructions to getting the shot that we want that are often overlooked by the casual fan. Take, for example, the microphone and it’s stand, At the end of the night I always end up with more than a handful of photos that appear to have a large growth coming out of the lead singer’s cheek. The drummer is another example of someone who is usually dodging in and out of sight behind a cymbal.
Instead of looking at these objects as barriers look to them as opportunities. The lead singers usually dance with the mic and eventually they will lean away, that’s your opportunity. Make sure you include the mic stand if there is one, it gives a nice vertical element to the composure.
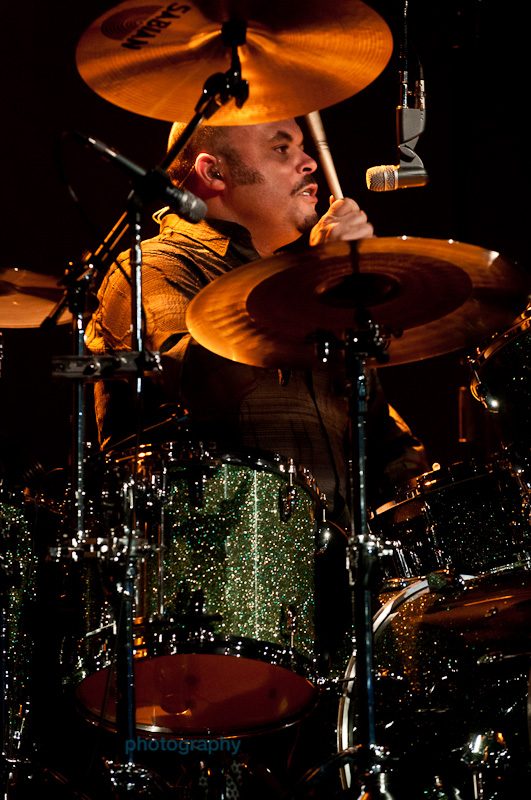
The drummer can be nicely framed within the drum set assuming you can get to a good spot on the floor to see them.
Kristian Bush of Sugarland leans far enough away from the mic to give a clear exposure of his entire face on the left, while Tyler Stewart of the Barenaked Ladies is framed within his own drumset on the right.
Limited shooting area and time
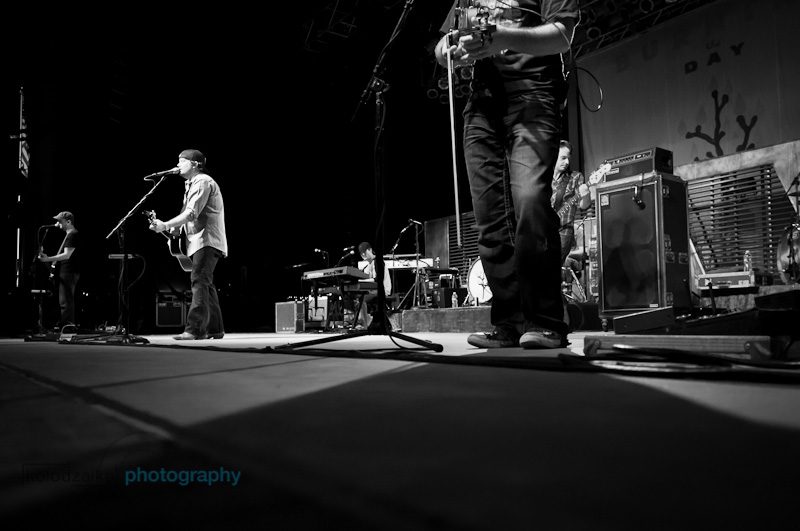
For some of the larger shows in arenas, photographers may be assigned to a certain area from which to shoot—usually somewhere towards the back of the floor near the mix. Be prepared ahead of time for this situation as you will most likely need a longer lens and possibly a monopod to get your shots as crisp as possible. In this case you just have to pick your moments when there is a good pose or scene on stage since moving to another location is not an option. Most of the time, you will find a song limit for most of the established acts. Three songs is about standard for the industry, some more, some less. For these shows you need to scout the location ahead of time if possible, keep moving, find your angles and move from position to position quickly. It does no good to come home with 50 images in a row from the same exact spot and nothing else. Don’t be afraid to push yourself up to the front of the barricade if it’s a general admission floor, just don’t be a jerk about it. Before the show starts, calmly ask the people around the area you want to be if it’s alright to get a few shots, let them know that you won’t be there for more than a minute. In my experience they are usually happy to oblige.
Conclusions
Concert shooting is an exhilarating experience, play your cards right and you’ll have access to some fantastic angles for shows in your area. Choreograph your movements for your time at the event to maximize your shooting time. The less time you find yourself wandering around thinking of the next shot the better. Set your camera ahead of time and be ready to change the settings on the fly. Bring your best lenses and open them as wide as they will go. Be flexible and adapt to changes as they happen. Most of all, enjoy yourself, being able to photograph concerts is a special privilege, I know it has been for me.
Brad Kolodzaike
LensRentals.com
November 2010

3 Comments
Jeannine ·
This was very helpful. I am a beginner and will be experimenting at my daughters bowling party with the laser lights and dark setting. Now I know what to practice to get good shots. Thanks.
Michael Clark ·
If we could see the images attached to older blog posts that might be very useful.
Null Static Void ·
I almost always shoot shutter priority when taking photos in clubs. I usually do the standard rule of starting with my focal length as the minimum shutter speed. 85mm, 85th of a second. To contain hand held blur. I used to fight a losing fight against shooting with high isos. But I soon realized a noisy shot is better than no shot. And B&W is an acceptable lateral strategy to mitigate the noise. Besides gritty noisy black and white photos seem ‘authentic’.