Alright everybody. Tim here with a little info for you about strobe triggers. We get quite a few calls or emails each week asking how these little guys work, which one is best, which one will make my photos better than everyone else’s, etc. Since I’ve noticed a trend of questions, I thought I’d go ahead and write up an article on these wonderful but misunderstood creatures of lighting equipment. In this article, I’ll give a comparison of the various types we have. I will cover both studio lighting as well as the ever-popular hotshoe flashes. But first, let’s get everyone on the same page.
What are they?
Strobe triggers are a path to wireless freedom. Using the various types that are out there, you are able to sync the flash-source you’re using with your camera, all without the 15ft sync cord stretched across the floor. Not only does this eliminate the dreaded “My Assistant Just Tripped Over the Sync Cord and $15,000 Met Mr. Ground”, but you also stand to gain quite a few features, depending on the technology you go with.
What they are not!
While some triggers do provide nearly automated lighting, they still need to be set up correctly. I’ll go ahead and let those unfamiliar with lighting know, you can’t just plug them in and they do everything for you. You’ll still need to understand how your light works and what each setting adjustment does.
How they work and when to use them?
Our various strobe triggers are based upon two types of triggering signal, infrared-signal and radio-signal. While each has their advantages and disadvantages, they both give the photographer the freedom from being tied to their light source. The first thing to understand is what are the key differences between the two types.
-
Infrared-signal triggers are primarily used for close-range triggering. They are commonly referred to as “Commanders/Transmitters”, as they are used for triggering/controlling hotshoe flashes. They provide TTL/E-TTL control of their compatible speedlites, as well as manual setting control, all from the camera itself. They have the flexibility of only needing a single commander that sits on the camera’s hotshoe, as the flashes that they communicate with already have the correct technology inside them. Their biggest disadvantage is their working range. They only work within line-of-sight, which means if you can’t read the brand name on the front of the flash, it may be too far away. There are a lot of factors that can affect their effective range such as other shooters, bright daylight, direction the flash is facing, placement of flash, etc.
-
Radio-signal triggers are useful for long-range triggering. Radio triggers are becoming more and more popular, and for good reason. They generally work very reliably and have a much longer range than infrared triggers. Depending on which type you choose, they can be used with both hotshoe flashes as well as studio lighting. While all of them allow shooting in manual modes, there are some that allow for TTL/E-TTL triggering, as well as a few that actually allow full control of lights from the on-camera trigger itself. With nearly all of the types we carry, you do need a commander for the camera and a receiver for each light. This makes the initial cost of radio triggers more than infrared triggers, but the gain in range, reliability, and flexibility could make up for that, depending on what you’re shooting.
A Note About Our Comparison
Before anyone jumps to the end of the article to comment on how their brand’s trigger is better than everyone else’s triggers are, I just want to stress that this is meant as a comparison of the various models we carry and how they are useful. We know there are many more brands out there than what I write about here, but these are the models we carry and have experience with.
For each model, I’m going to address these same 12 points: compatibility, range, reliability, control, sync speed, flexibility, technology, battery used, ease of use, cost, ideal setup, and ability to update. Where it is applicable, I will give the manufacturers’ provided specs that fall into these points vs. what we’ve actually experienced. This is not meant to “call out” the manufacturer, but to provide the working photographer, in working conditions, with how the product performs. With that said, on to the comparisons!
Canon ST-E2 Speedlite Transmitter
Nikon SU-800 Wireless Speedlight Commander
Pocketwizard Plus II Transceiver
Pocketwizard FlexTT5-Canon
Pocketwizard FlexTT5-Nikon
Pocketwizard PowerMC2 (triggerd by PW FlexTT5)
RadioPopper PX System – Canon Kit
RadioPopper PX System – Nikon Kit
RadioPopper JRX System – Canon Kit
RadioPopper JRX System – Nikon Kit
CyberSync Radio Kit for Einstein E640
Profoto Air Remote Transceiver
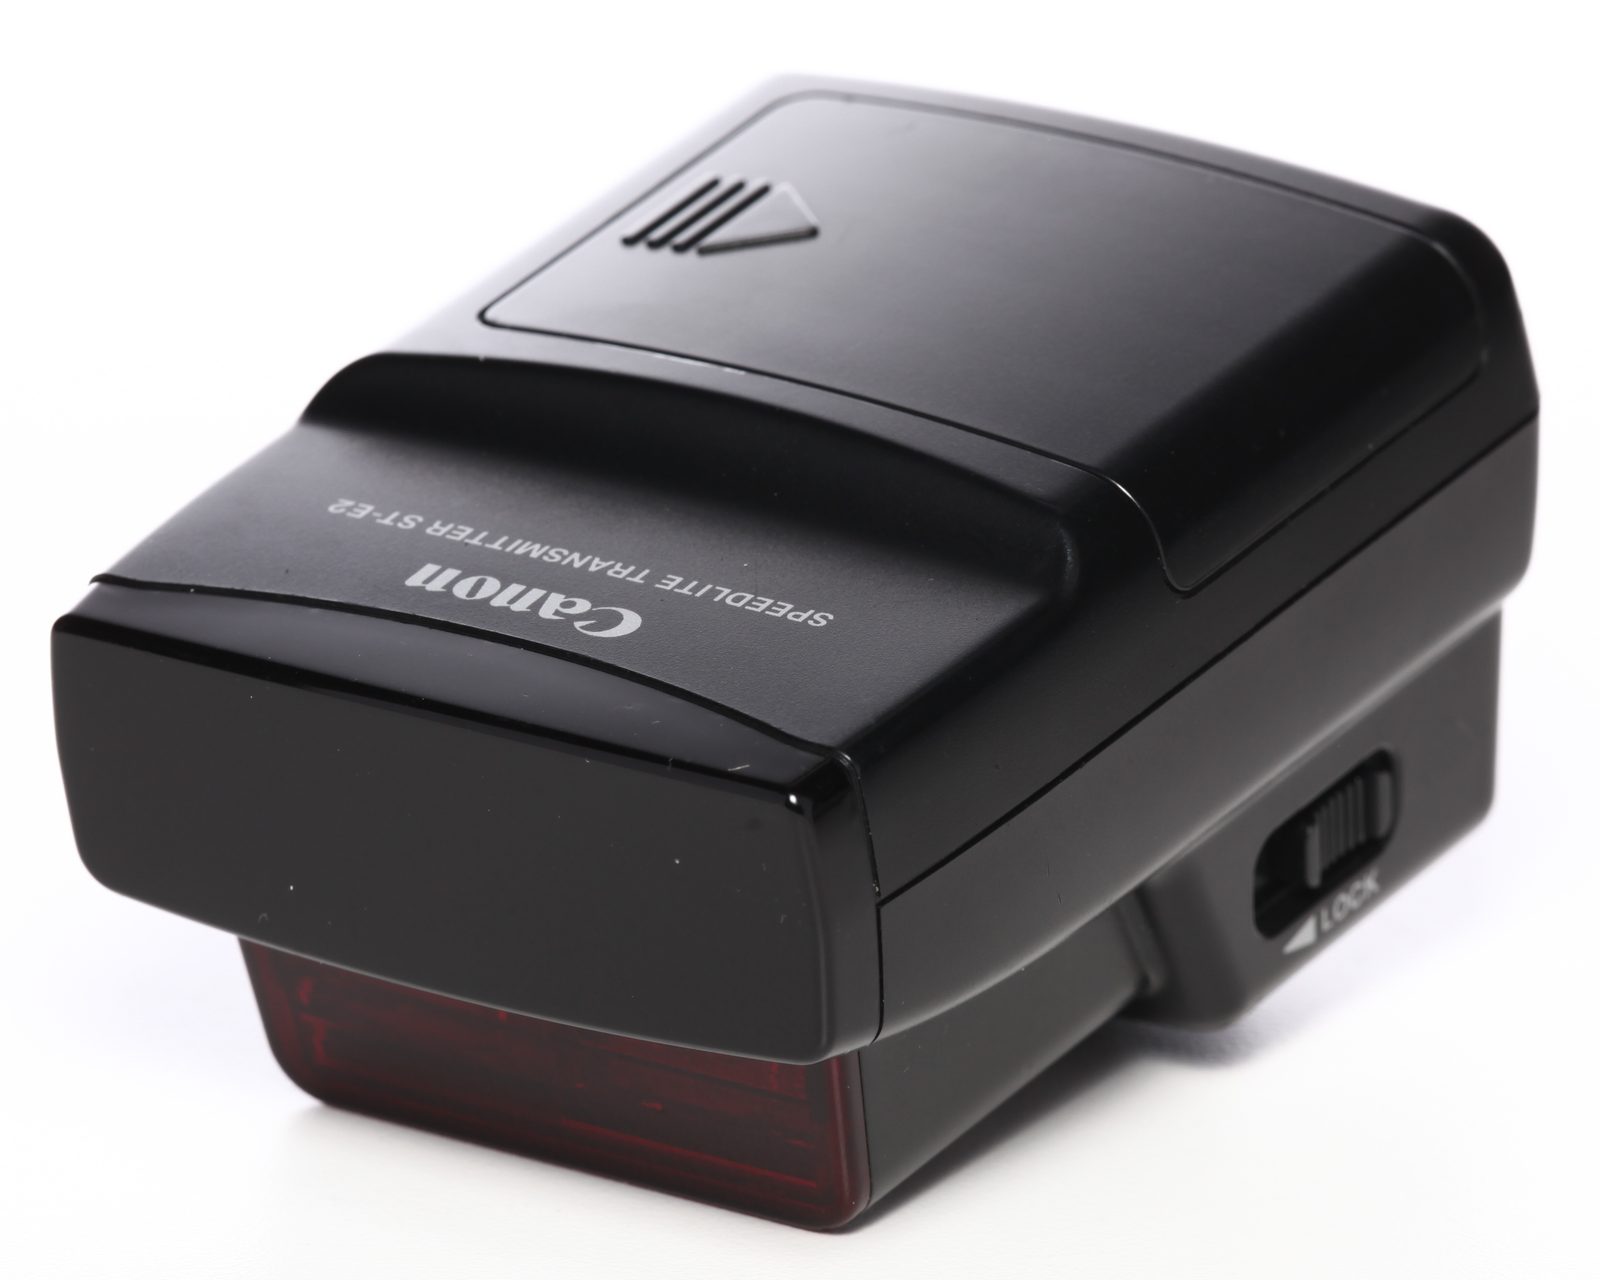
Canon ST-E2 Speedlite Transmitter:
The ST-E2 is Canon’s version of an infrared-signal trigger. It is compatible with Canon cameras ranging from the G-series point-and-shoots and entry-level DSLR cameras all the way up to the Pro-Level DSLRs. From a light-compatibility standpoint, it does not work with studio lighting. It is designed for use with the following Canon Speedlites: 270EX II, 320EX, 420EX, 430EX, 430EX II, 550EX, 580EX, and 580EX II. It is said that the ST-E2 will work with some wireless E-TTL compatible third-party flashes, but we cannot comment on this as we’ve never tried them.
Range:
It requires line-of-sight to trigger the compatible flashes. If there are other Canon users around who are also using wireless flashes, you may run in to some problems. According to the official specs, its working range is 39.4 – 49.2′ indoors and 26.2-32.8′ outdoors. I’m not saying these distances are not possible in absolutely ideal conditions, but we haven’t seen reliable results at these distances. A specific range is difficult to pinpoint as the conditions you’re in and how you’re using the flashes can affect distances quite a bit. I would say in an indoor setting with low ceilings, lower light, no light modifiers, and the flashes pointed at the camera straight ahead, you can get close to the range its rated at. Doesn’t really sound like your typical shooting conditions does it?
If you want reliable results while moving around, I’d give it a range of 15-20ft indoors and 8-10ft outdoors if using modifiers such as softboxes or umbrellas. I know this is going to get a ton of people all riled up, but keep in mind I’m referring working range with lots of variables and still getting consistent results. I’m not saying it can’t be better, but this is the range you can expect when you’re focusing on your subject and not perfect placement of all the variables.
Control:
From a control standpoint, the ST-E2 is great. You can set an unlimited number of Speedlites to two different groups (A and B) with the ability to do quick ratio adjustments from 1:8 to 8:1. Oh yeah, all of this is while using E-TTL! You can adjust E-TTL output through FEC (flash exposure compensation) on your DSLR. If close range and line-of-sight isn’t an issue for you, you’ll be hard-pressed to find a trigger that gives more control of Canon Speedlites. You do have the ability to use Canon’s High-Sync Speed mode with compatible flashes. However, the ST-E2 itself does not increase the actual sync speed in normal flash situation.
Size:
The ST-E2 sits on your camera’s hotshoe and adds very little weight. It’s not too large in size, but that varies in relation to the camera you’re using it with. On a Canon G12, it’s pretty big and cumbersome. While on a 1D IV, it’s no problem. It doesn’t have the latest and greatest full color LCD touch screen, in fact, it doesn’t even have a screen! Its basically got a few buttons and some LED’s. Nevertheless, it gets the job done. One extra feature this little guy gives you is an AF assist beam that aids in low-light AF. You won’t see that with radio triggers. It takes a 6v 2CR5 lithium battery (included in our rental), which is fairly easy to find at pretty much any store that carries a variety of batteries.
Ease of Use:
Okay, the big question is how easy is it to use. If you’re familiar with your Canon Speedlite, the ST-E2 will be pretty simple. If you’re jumping in to both the Canon Speedlites and the ST-E2 at the same time, you will probably get confused. That’s what manuals are for. The biggest thing you need to understand when using the ST-E2 is E-TTL. Look in to that, and you’ll be able to work this transmitter pretty well. Cost-wise, the ST-E2 is much easier to jump into than radio triggers, if you’re just working with Speedlites. If you start talking studio lights as well, just save yourself some money and get a system that works with both. The ideal setup is pretty simple, the ST-E2 and whatever compatible Speedlites you have. You don’t need anything else to make them work together! The transmitter itself doesn’t have firmware to upgrade. However, your camera may require the latest firmware in order to function with the ST-E2. You can check the Canon site to ensure you’re working with the latest firmware, which you should already be doing!
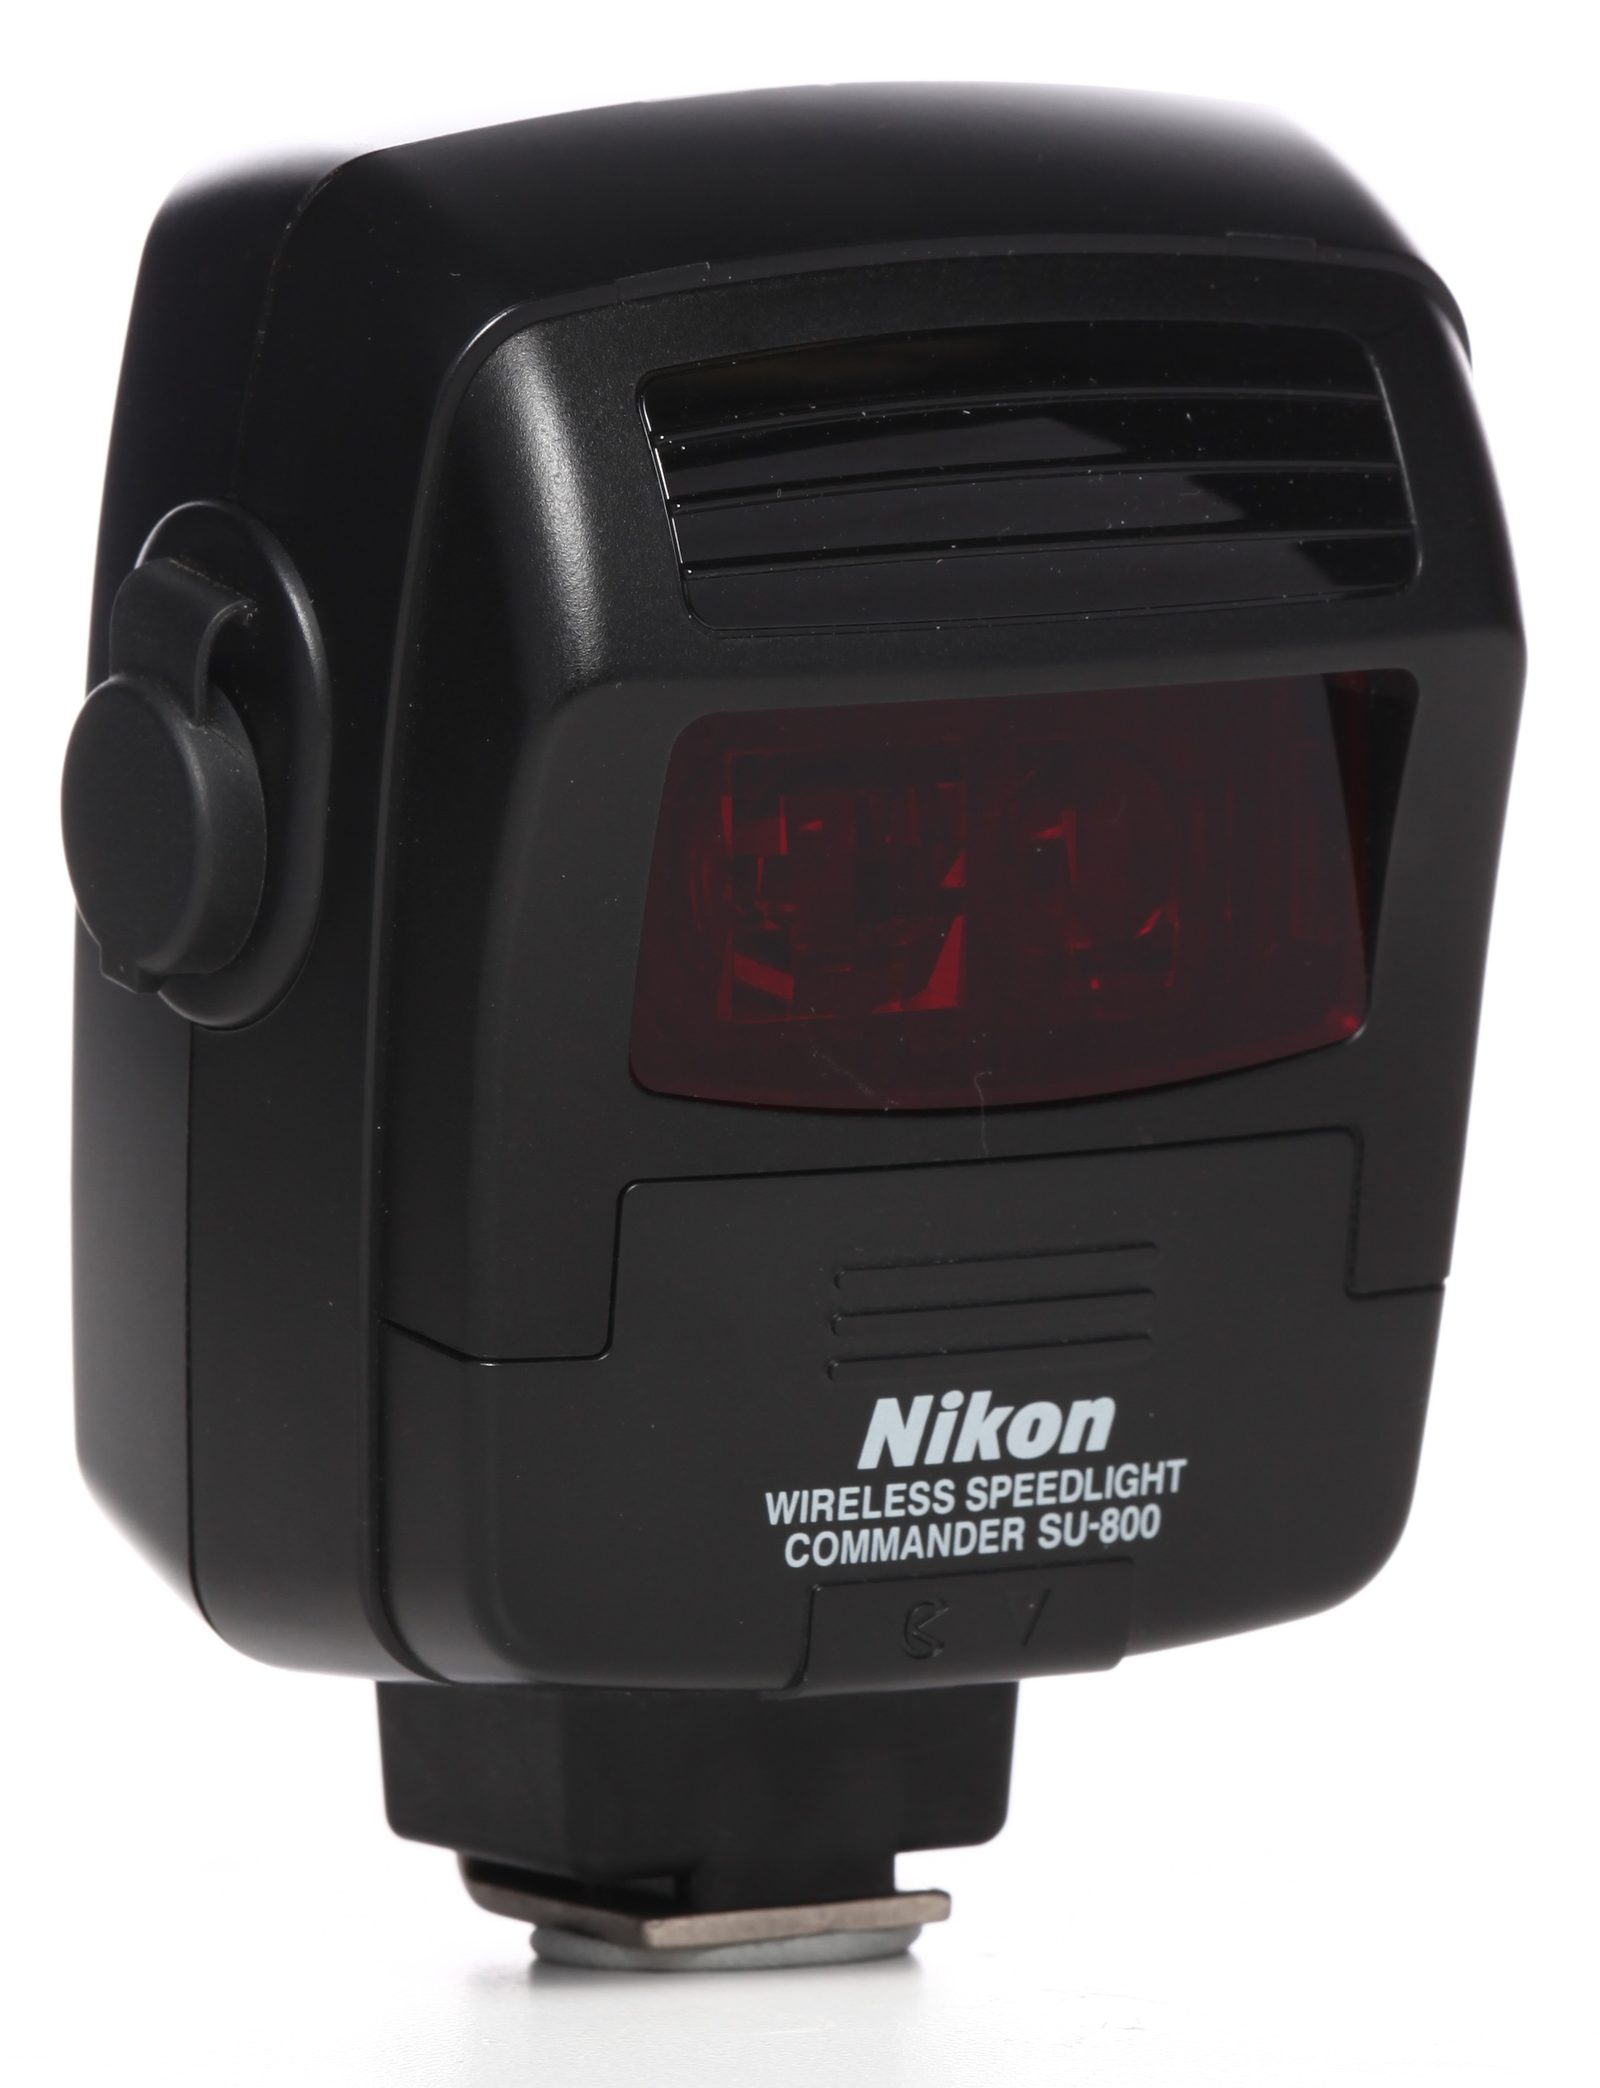
Nikon SU-800 Wireless Speedlight Commander
The SU-800 is Nikon’s version of an infrared-signal trigger. It is compatible with Nikon cameras that support the Nikon’s Creative Light System (all the Nikon cameras we rent are compatible). Just like the Canon infrared trigger, the Nikon Su-800 is designed for use with the following Nikon Speedlights: SB-R200, SB-600, SB-700 SB-800, SB-900 and SB-910. Again, like the Canon counterpart, there are third-party flashes out there that will also work with the SU-800, but we do not have any experience with them.
Range:
The SU-800 performs in a very similar way to the Canon ST-E2. It requires line-of-sight to trigger the compatible flashes, but does include the option to change channels in case other Nikon users are around. Nikon specs list its range at 66′, but it’s going to depend on the same variables as the Canon ST-E2. Since I listed all of these in the ST-E2 section, I won’t list them out again. This isn’t meant to say one is better than the other, I just don’t want to list them again when the same thing affects them both.
Control:
As far as controls go, the Nikon SU-800 definitely offers the most for infrared triggers. An unlimited number of Speedlights and be set to three different groups, as well as complete power output control of each group. What’s this mean? Once you place the Speedlight where you want it, set it to remote mode and that’s it. All power adjustments, whether using i-TTL or manual, can be adjusted from the SU-800. Yep, even ratios! Throw in a close-up mode for macro shooting with the SB-R200 and compatibility with Nikon FP High-Speed Sync, and you’ve got a pretty well-rounded piece of equipment.
Size:
Is it big and obtrusive? Not so much. It’s taller than the ST-E2, but it doesn’t take up quite the footprint. One big thumbs up is the LCD panel on the back. This makes controlling everything that the SU-800 does easier. You have the built-in AF assist for low-light situations, which radio trigger users can be jealous of at times. It’s all powered by a 3v 123A Lithium battery (included in rental) that’s found at most stores in the battery section.
Ease of Use:
So does it take a degree in Nikon CLS-ology to figure this out? Not really. Again, if you’re familiar with you Nikon Speedlight, you’ll feel pretty much at home. Just get to know your flash and i-TTL and you should be good to go. Not to keep repeating this, but much like the Canon ST-E2, all you need for the ideal setup is the SU-800 and your Speedlights. And your camera, you do need a camera. Nikon doesn’t have firmware for the SU-800 itself, but their cameras as well as their newer flashes do. So double check their website to ensure you’re up-to-date on your shots, I mean firmware.
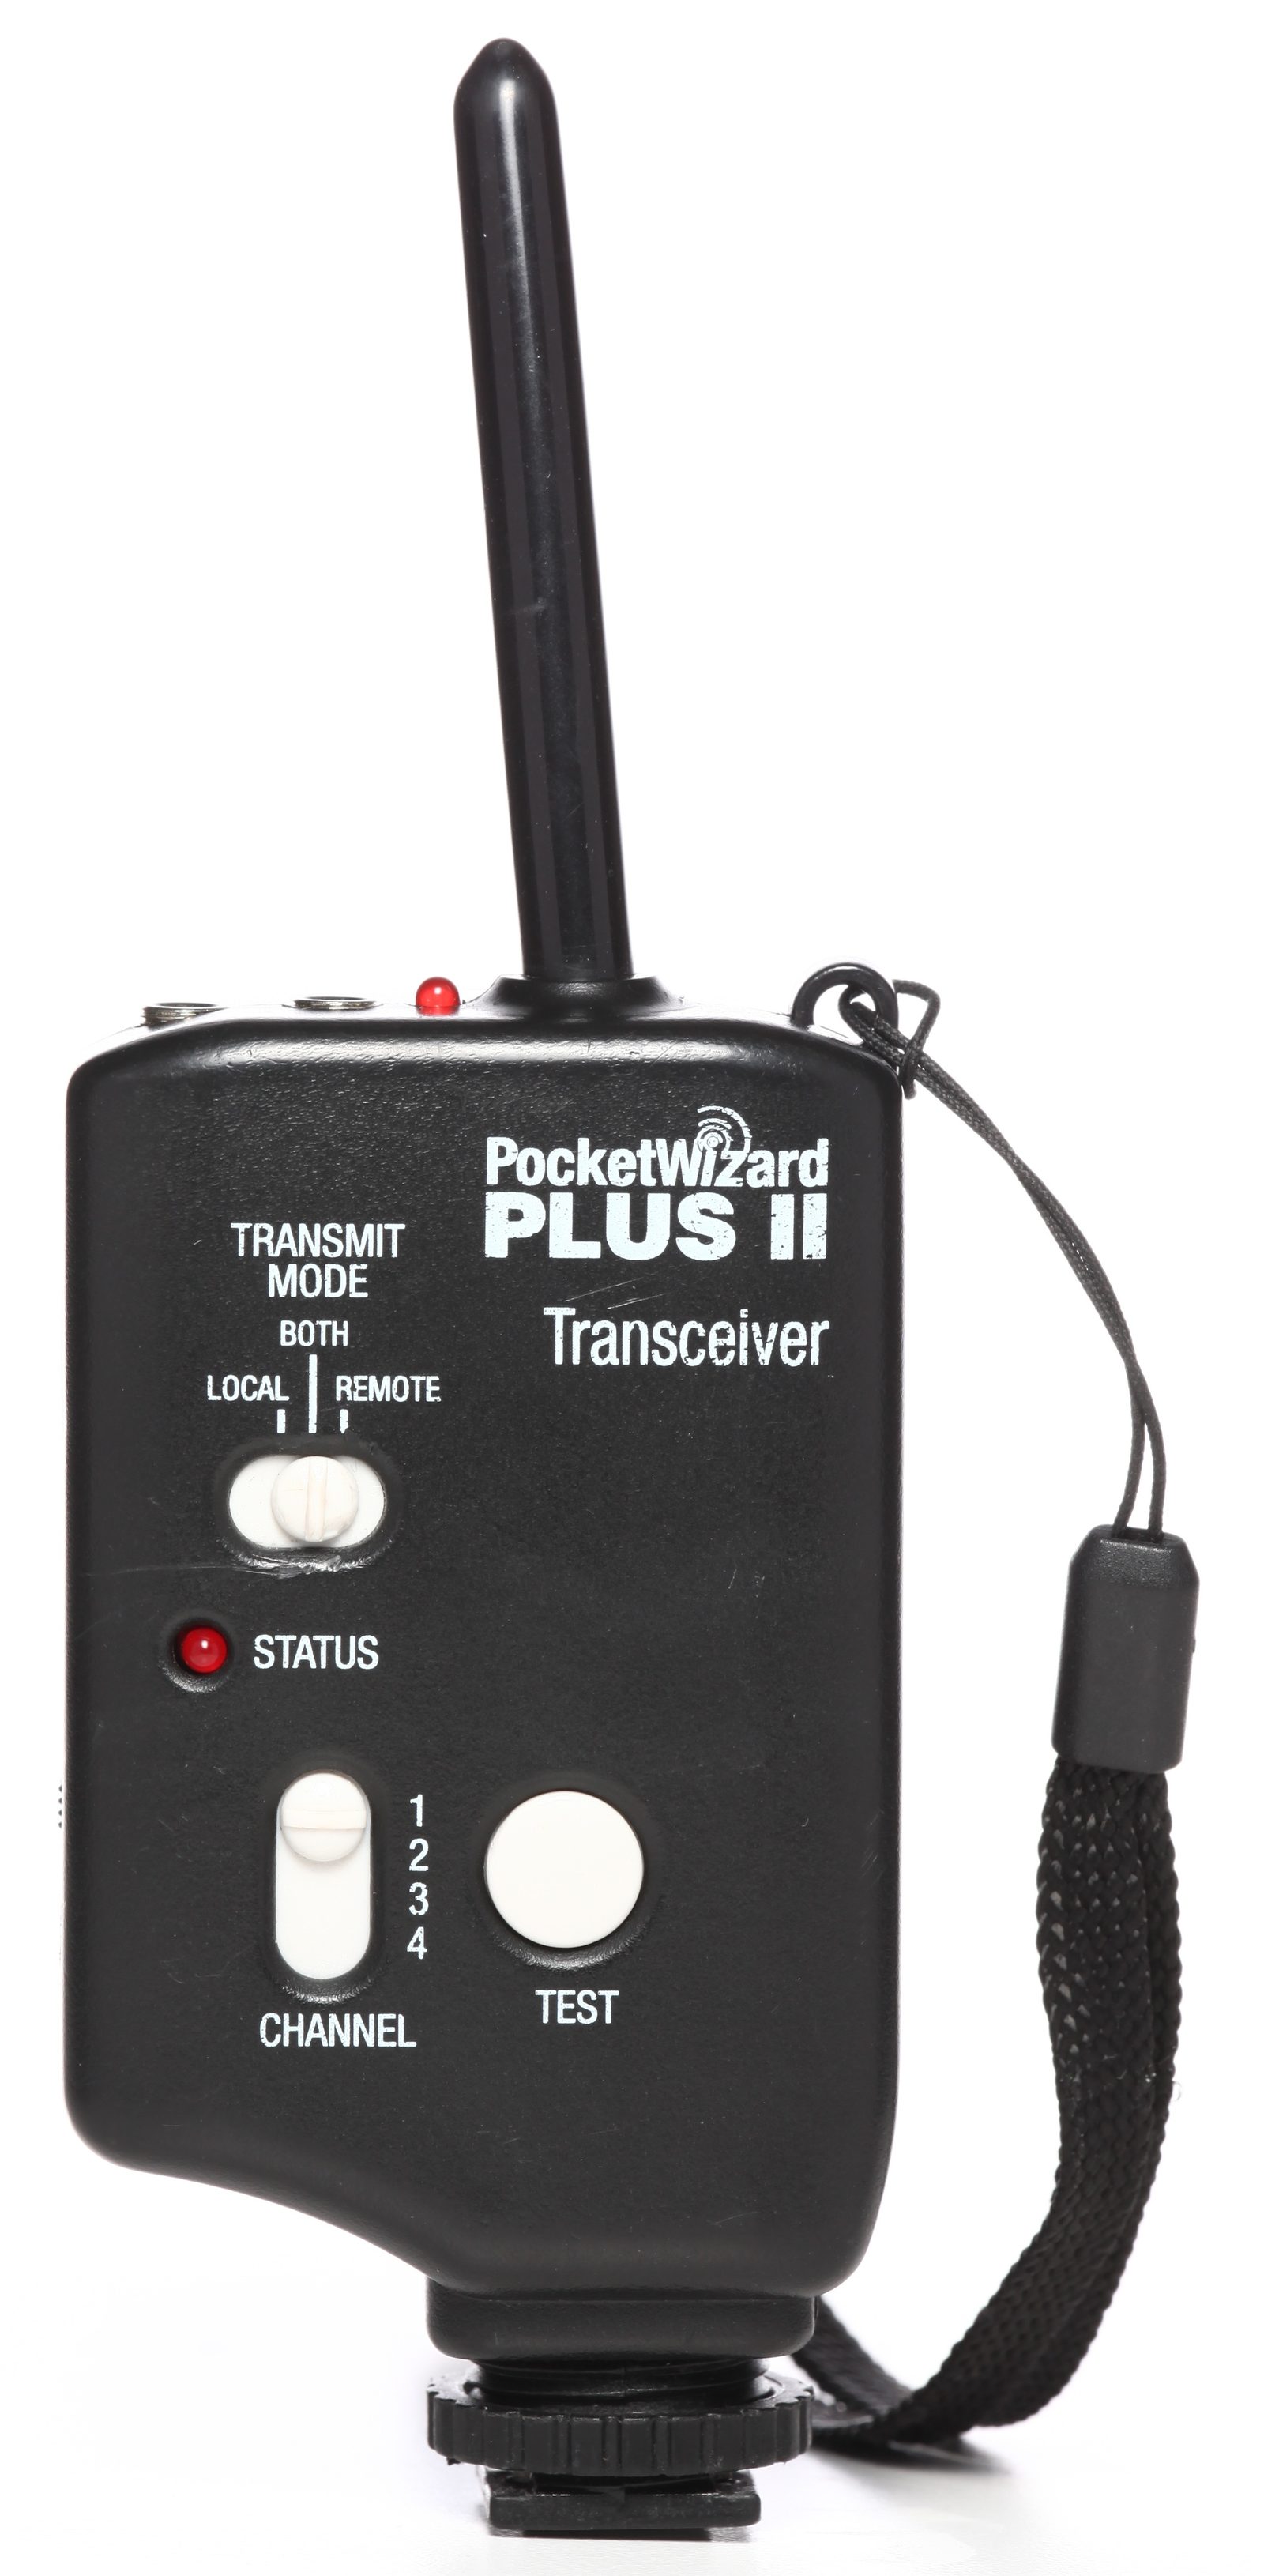
Pocketwizard Plus II Transceiver
First off, I’m going to let you guys know from here on, Pocketwizard will be referred to as PW. Now that you know the code, I shall continue. The PW Plus II is the basic radio-signal trigger made by PW. It’s compatible with just about every camera with a standard hotshoe or PC sync. This excludes Sony users who don’t have a PC sync port from the party for now (I’ll address Sony users at the end of the blog post). It can trigger pretty much any studio light and works with a wide variety of hotshoe flashes that have a PC sync. Please take note of that last statement! If your flash doesn’t have a PC sync (I’m talking to you Canon 430EX II and Nikon SB-600/700 users), this PW is a no go. PW also made the Plus II compatible with all of their older radio triggers, as well as able to function as a receiver with newer models. If you have a studio lighting kit that has a built-in PW, that’s compatible with the Plus II too!
Range:
The Plus II uses radio-signal technology to trigger your strobes. This means you’re not limited by line-of-sight or close distances. In fact, PW rates the range at 1600ft! Just like everything else, conditions may affect the actual range limit, so don’t try shooting portraits with an 800mm lens across a large field of power lines (I might have to try this, just to say I have). Lighting modifiers aren’t going to affect the triggering, so go ahead and use that beauty dish, it creates beauty! You have a total of four 16-bit coded channels to choose from in case there’s anyone else within 1600ft using PWs. As far as reliability, you don’t get much more reliable than the Plus II. If you’ve got them attached right, which is pretty obvious, and the channels set to the same, they just work. If you want something that works every time, you don’t get a much better choice than the Plus II.
Control:
So far the PW Plus II seems like it does everything you could ask for. How about lighting control you ask? As long as you’re looking to shoot in manual, you’ll get everything you were expecting. That’s right, you don’t have any control of lighting output with the Plus II. It’s all manual, all the time. What’s that saying about cake and eating it? Sorry! As for sync speeds, the Plus II tops out at 1/250th-second for focal-plane shutters and 1/500th-second for leaf-shutters. It can fire up to 12fps, which is great for those water-drop captures we all play around with.
Size:
It can either sit on your camera’s hotshoe or connect via PC sync cord for transmitting, and uses a 1/8″ mini to whatever you need to connect to your light for receiving. While the Plus II body itself is 4″ tall plus a non-removable 2.4″ antenna, it adds hardly any weight. You don’t have any fancy bells and whistles like an LCD with this little guy either. It’s 3 switches and that’s it. You know those alkaline AA batteries you had to buy in a pinch when you couldn’t find any lithium batteries? The Plus II would be happy to use them. In fact, use the same 2 for a while. It only sips power!
Ease of Use:
Okay, now I’m not knocking any of the other triggers by saying this, but why can’t they all be this easy? You have a transceiver that both transmits and receives, hence the name. Step one, put it on your camera’s hotshoe. Step two, plug the needed sync cord, which unfortunately is a seperate item, in to your light. Step three, set the channel and forget about it. That’s it! Ideally you would want one Plus II for the camera and one Plus II for each light that takes a sync cord, but some people do use a single PW on one light and let the other lights slave. I would suggest using one for each light, but you’re free to do as you please.
When you rent the Plus II from us, we include one 1/8″ mini to PC cord per PW. This is the cord used to connect the PW to either a camera’s PC sync or a flash’s PC sync. If you need a cord for studio lights, PW makes nearly every cord you could think of, many of which we carry. For those interested, you can also use the Plus II as a camera remote via accessory cord, but we do not keep stock of these. The Plus II does not have firmware upgrades, so there is nothing you really have to keep up with other than batteries.
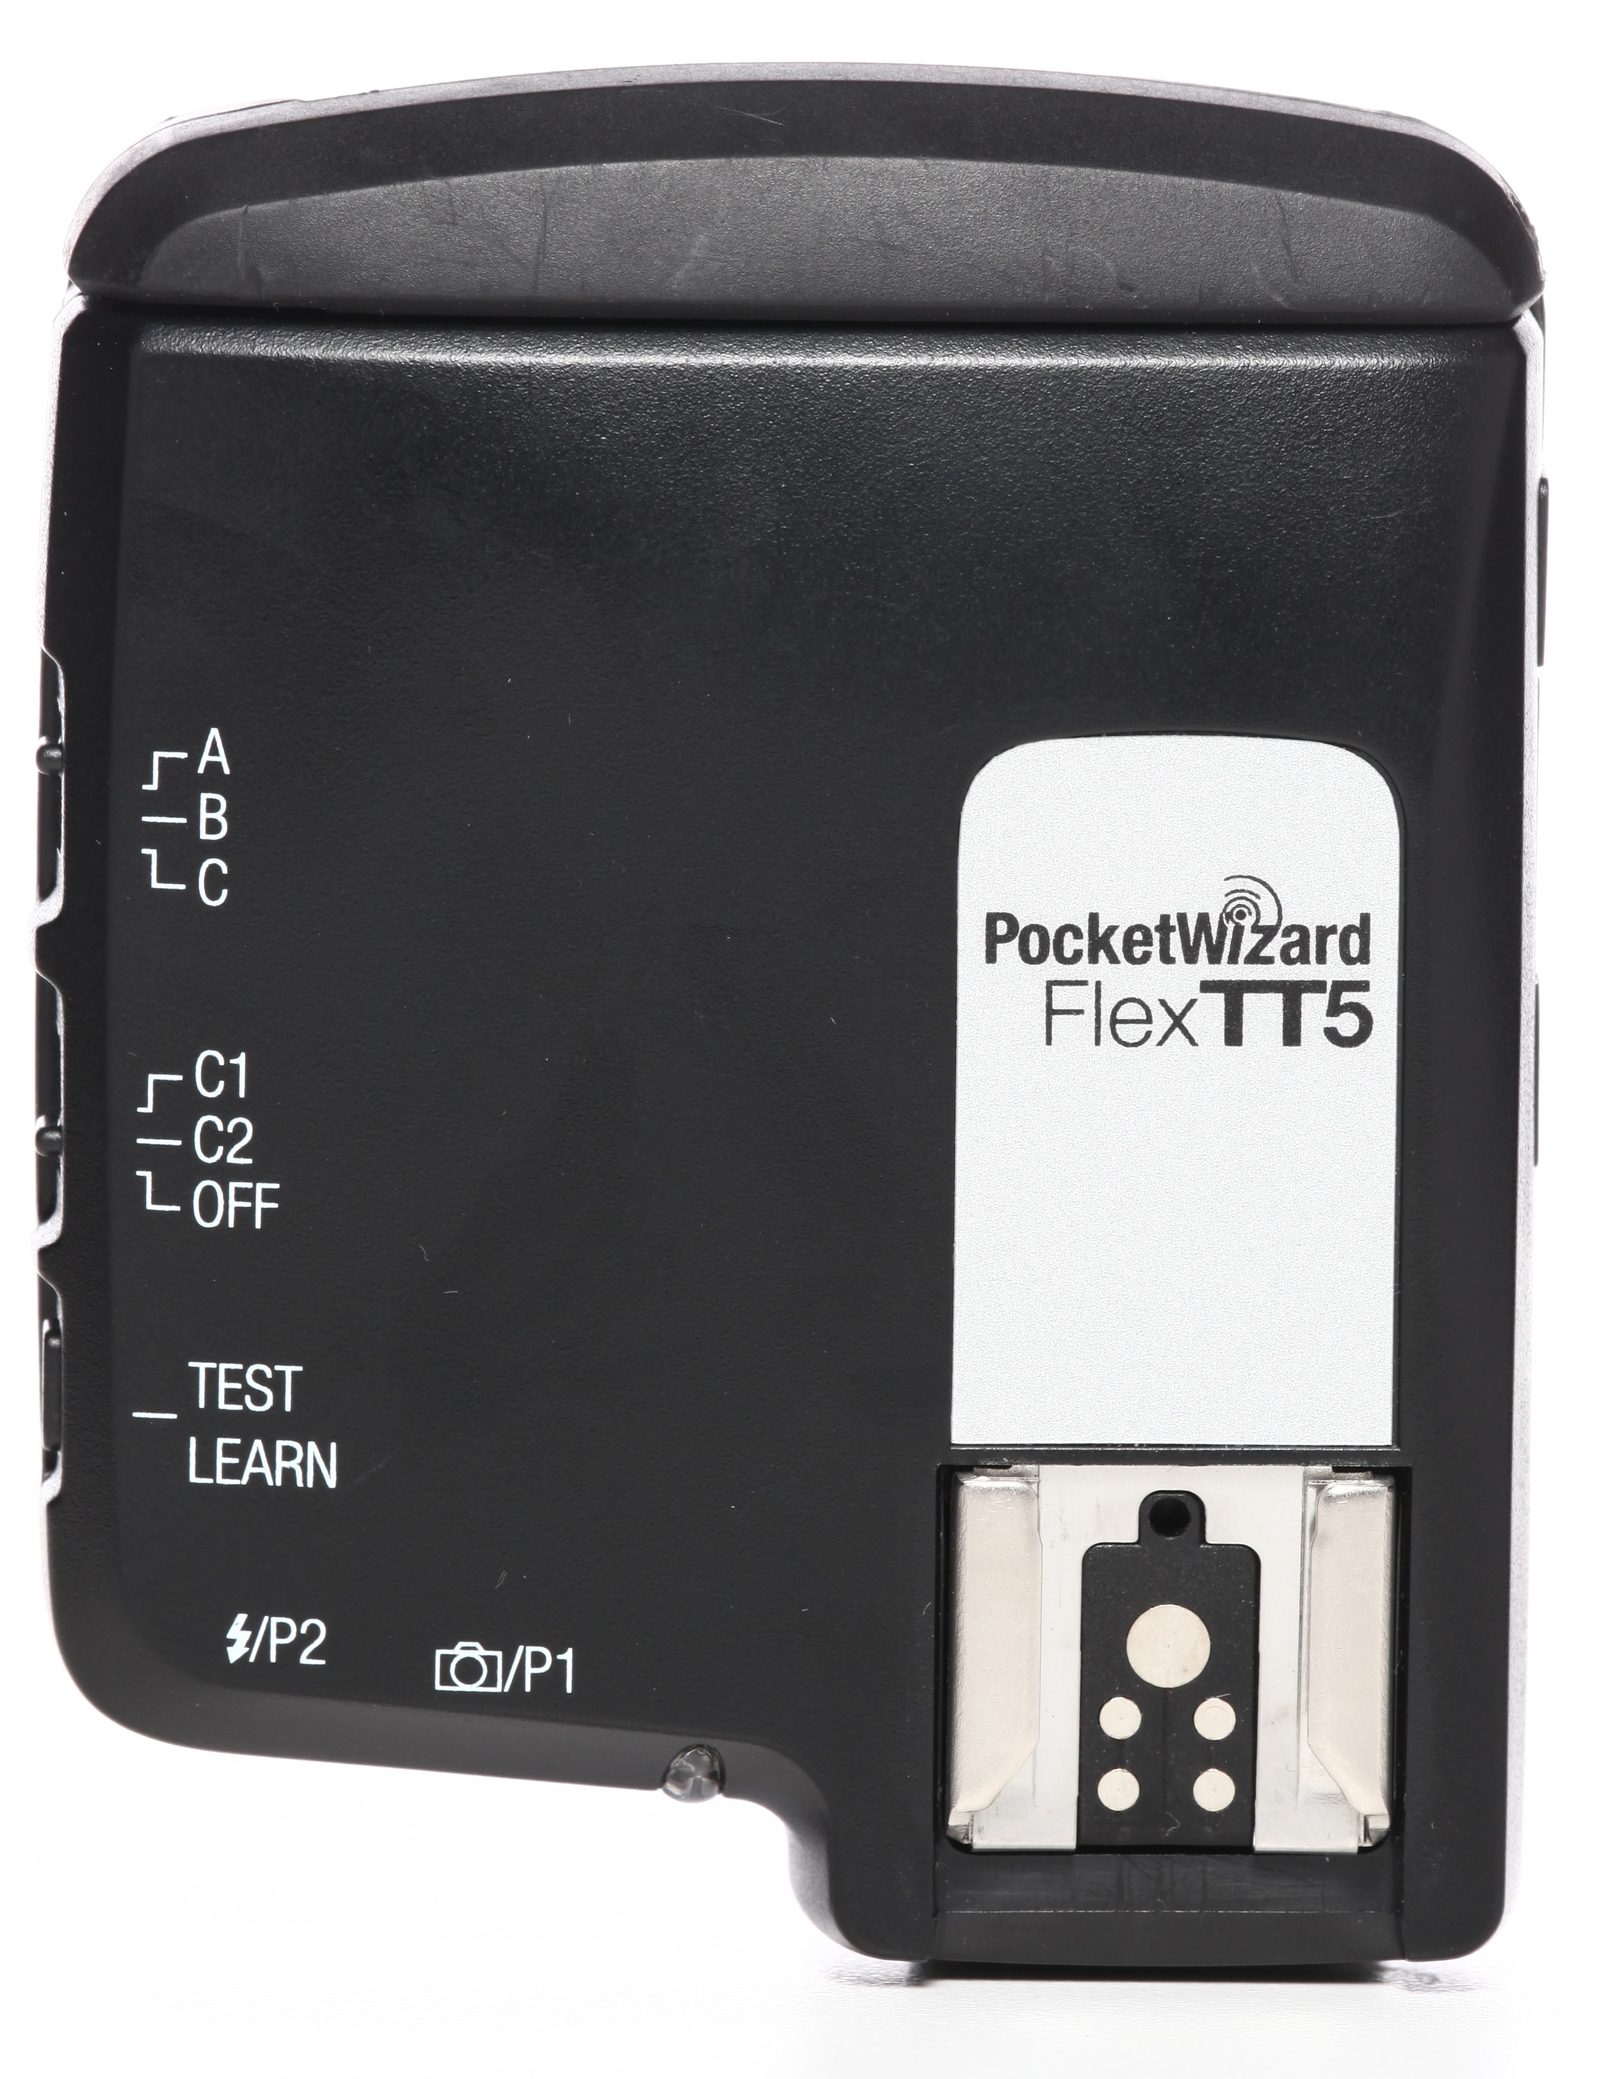
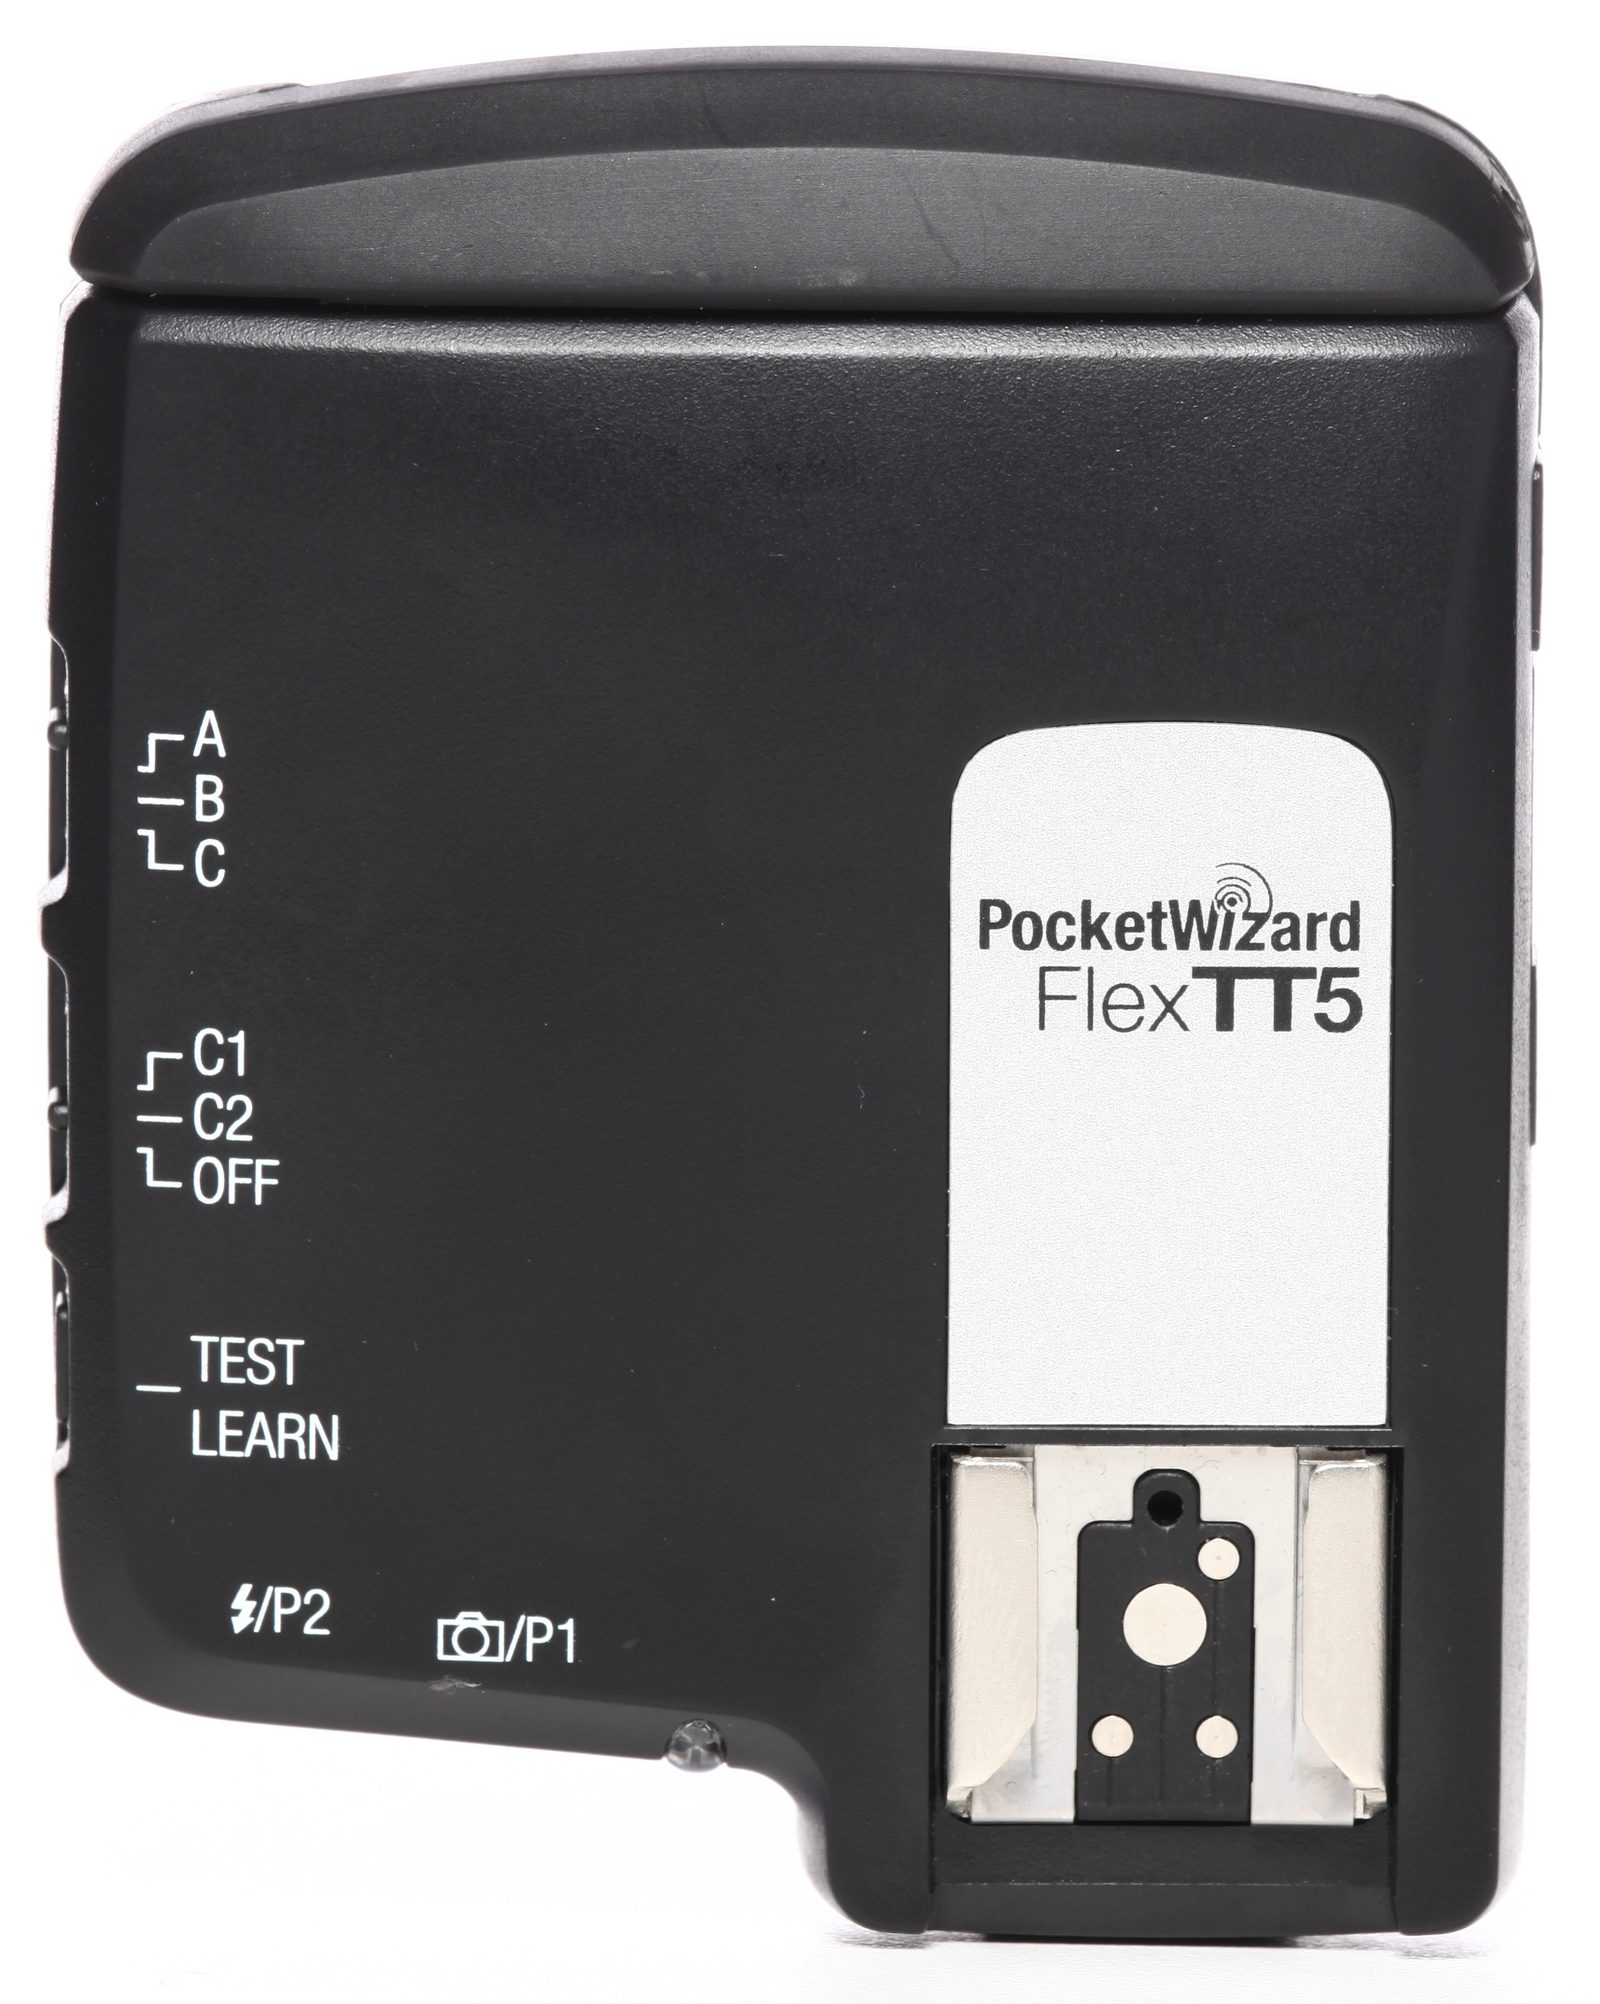
Pocketwizard FlexTT5-Canon
The PW FlexTT5 is the most advanced radio-signal trigger made by PW, allowing the transmission of E-TTL information to your lights . This version is Canon-specific, therefore it only works with Canon DSLR’s compatible with E-TTL II (you can check here to make sure your camera is compatible). It works with studio lights (in manual mode, not e-TTL), most Canon Speedlites (all current generation and many previous generation, you can check the same link as above if you have an older flash in question), and some third-party speedlite flashes. The FlexTT5 is compatible with all versions of PWs as a transmitter and can be used as a transceiver with another TT5 or TT1. Just like the PW Plus II, the Flex TT5 can also be used to trigger studio lighting with a built-in PW.
Range:
The TT5 is based on radio-signal technology, giving you the freedom to move around and not worry about line-of-sight. However, its range is a bit finicky depending on your settings. Specs from PW are as follows: If used to trigger flashes via E-TTL, in ideal conditions, can trigger flashes up to 800ft. If you are doing basic triggering no with E-TTL, in ideal conditions, the range increases to a max of 1200ft. But, and this is a BIG but, if you’re triggering a Canon 580EX II, 580EX or 430EX your working range is reduced dramatically due to emitted RF noise from the flash. How dramatically you ask? In some instances, you could have misfires or no fires at more than 30ft. Yeah, 30ft!
There are workarounds that can improve your range found on PW’s website, but be aware that this issue does exist. If you need absolutley reliable long-range triggering, the Plus II would be the way to go. As far as interference goes, the FlexTT5 has 20 ControlTL channels for E-TTL triggering and 32 standard channels that can either autoset or be manually adjusted via the free Pocketwizard Utility software from your computer. This means working with other PW users near won’t be a problem. How about reliability? Well, that part is debatable. For one, there is the RF noise issue you must consider. Then you have the fairly involved setup, which could be more user error than a reliability issue. I have mixed feelings myself about the device, but if you need what it offers, then you find a way to make it work.
Control:
And now to the selling point of the FlexTT5; the control it offers. Let’s see, you got E-TTL transmission for compatible Canon Speedlites, as well as some studio lights via accessory. It doesn’t stop there, ’cause you can also transmit using Canon’s High-Speed Sync which can allow ultra-fast sync speeds to be close to your camera’s max shutter speed. You don’t get all the power out of your flash in this mode, so working from a distance is limited, but it’s still very cool! If you do find yourself needing more power while using a high sync speed, the TT5 features PW’s HyperSync mode which allows you to use your flash at full power to get sync speeds higher than your camera’s max x-sync. This does have various limits, with your camera model and flash used having the most impact. With Speedlites, you can usually get at least an extra 1/3 shutter speed, sometimes more. Hypersync is also compatible studio lights, but the increase in shutter speed will greatly depend on the strobe duration and settings used. All of the various control settings can be set using the Pocketwizard Utility software linked to above. Oh yeah, did I mention the ability to shoot 8fps with E-TTL or manual triggering?
Size:
The TT5 sits on your camera’s hotshoe as it has a hotshoe itself to allow use of an on-camera flash. It does have 2 sync ports, one for cameras and one for flashes (for use with studio lights). It sits just 3.6″ x2.9″ x1.4″, so it’s not intrusive. It has a positionable antenna so you can always keep it facing up, which you do need to keep an eye on. While the unit itself doesn’t have any visible bells and whistles, it’s packed full of features and has a very advanced utility software. It’s powered by 2 AA batteries, so no crazy goose hunts through the battery section are needed.
Ease of Use:
Oh boy, easy of use is an oxymoron with this trigger. I don’t want to scare you away, but damn! I’ve been working with all of the lighting we carry for a few years, but this PW has always been somewhat difficult. If you know your equipment and how it works, you’re still going to be sitting in front of your computer reading the TT5 manual and tutorials if you want to use all of its features. A lot of it is trial-and-error, so give yourself a good bit of time to learn its features. If you want simple, the TT5 isn’t it. The PW Plus II would be a better choice for that. But if you want crazy fast sync speeds with E-TTL, then the TT5 is worth learning. Ideal setup for E-TTL is one TT5 transceiver on the camera and one for each flash. For manual triggering, you can use a TT5 on camera and a Plus II on your lights to save a bit of money. The TT5 itself has a firmware that is updated regularly to improve compatibility and add new features. The firmware is updated via the PW Utility Software.
Pocketwizard FlexTT5-Nikon
This is essentially the same product as above, but for use with the Nikon system. Therefore, this overview will read the same except where the two differ. The PW FlexTT5 is the most advanced radio-signal trigger made by PW, allowing the transmission of i-TTL information to your lights . This version is Nikon-specific, therefore it only works with Nikon DSLR’s compatible with i-TTL (you can check here to make sure your camera is compatible). It works with studio lights (in manual mode, not i-TTL), most Nikon Speedlites (SB-910 compatibility will come in a future firmware update, you can check the same link as above if you have an older flash in question), and some third-party speedlite flashes. The FlexTT5 is compatible with all versions of PWs as a transmitter and can be used as a transceiver with another TT5 or TT1. Just like the PW Plus II, the Flex TT5 can also be used to trigger studio lighting with a built-in PW.
Range:
The TT5 is based on radio-signal technology, giving you the freedom to move around and not worry about line-of-sight. However, its range is dependent on your settings. Specs from PW are as follows: If used to trigger flashes via i-TTL, in ideal conditions, the range is up to 800ft. If you are doing basic triggering with i-TTL, in ideal conditions, the range increases to a max of 1200ft. Unlike the Canon setup, the FlexTT5 for Nikon is not subject to RF interference from compatible Nikon Speedlights. As far as interference goes, the FlexTT5 has 20 ControlTL channels for i-TTL triggering and 32 standard channels that can either autoset or be manually adjusted via the free Pocketwizard Utility software from your computer. This means working with other PW users near won’t be a problem.
How about reliability? Well, Nikon users fair better than Canon users with the lack of RF interference. However, you still have the fairly involved setup, which could be more user error than a reliability issue. Despite the increase in reliability with this version, my mixed feelings myself about the device do not change.
Control:
And now to the selling point of the FlexTT5; the control it offers. Let’s see, you got i-TTL transmission for compatible Nikon Speedlites, as well as some studio lights via accessory. It doesn’t stop there, cause you can also transmit using Nikon’s HSS/FP which can allow ultra-fast sync speeds as high as your camera’s max shutter speed. You don’t get all the power out of your flash in this mode, so working from a distance is limited, but it’s still very cool! If you do find yourself needing more power while using a high sync speed, the TT5 features PW’s HyperSync mode which allows you to use your flash at full power to get sync speeds higher than your camera’s max x-sync. This does have various limits, with your camera model and flash used having the most impact. With Speedlites, you can usually get at least an extra 1/3 shutter speed, sometimes more. Hypersync is also compatible studio lights, but the increase in shutter speed will greatly depend on the strobe duration and settings used. All of the various control settings can be set using the Pocketwizard Utility software linked to above. With the Nikon version, you can shoot within 1FPS of the camera’s max when transmitting i-TTL, or max out at the camera’s FPS when transmitting in basic trigger mode (manual flash settings).
Size:
The TT5 sits on your camera’s hotshoe as it has a hotshoe itself to allow use of an on-camera flash. It does have 2 sync ports, one for cameras and one for flashes (for use with studio lights). It sits just 3.6″ x2.9″ x1.4″, so it’s not intrusive. It has a positionable antenna so you can always keep it facing up, which you do need to keep an eye on. While the unit itself doesn’t have any visible bells and whistles, it’s packed full of features and has a very advanced utility software. It’s powered by 2 AA batteries, so no crazy goose hunts through the battery section are needed.
Ease of Use:
Oh boy, easy of use is an oxymoron with this trigger. I don’t want to scare you away, but damn! I’ve been working with all of the lighting we carry for a few years, but this PW has always been somewhat difficult. If you know your equipment and how it works, you’re still going to be sitting in front of your computer reading the TT5 manual and tutorials if you want to use all of its features. A lot of it is trial-and-error, so give yourself a good bit of time to learn its features. If you want simple, the TT5 isn’t it. The PW Plus II would be a better choice for that. But if you want crazy fast sync speeds with i-TTL, then the TT5 is worth learning.
Ideal setup for i-TTL is one TT5 transceiver on the camera and one for each flash. For manual triggering, you can use a TT5 on camera and a Plus II on your lights to save a bit of money. The TT5 itself has a firmware that is updated regularly to improve compatibility and add new features. The firmware is updated via the PW Utility Software.
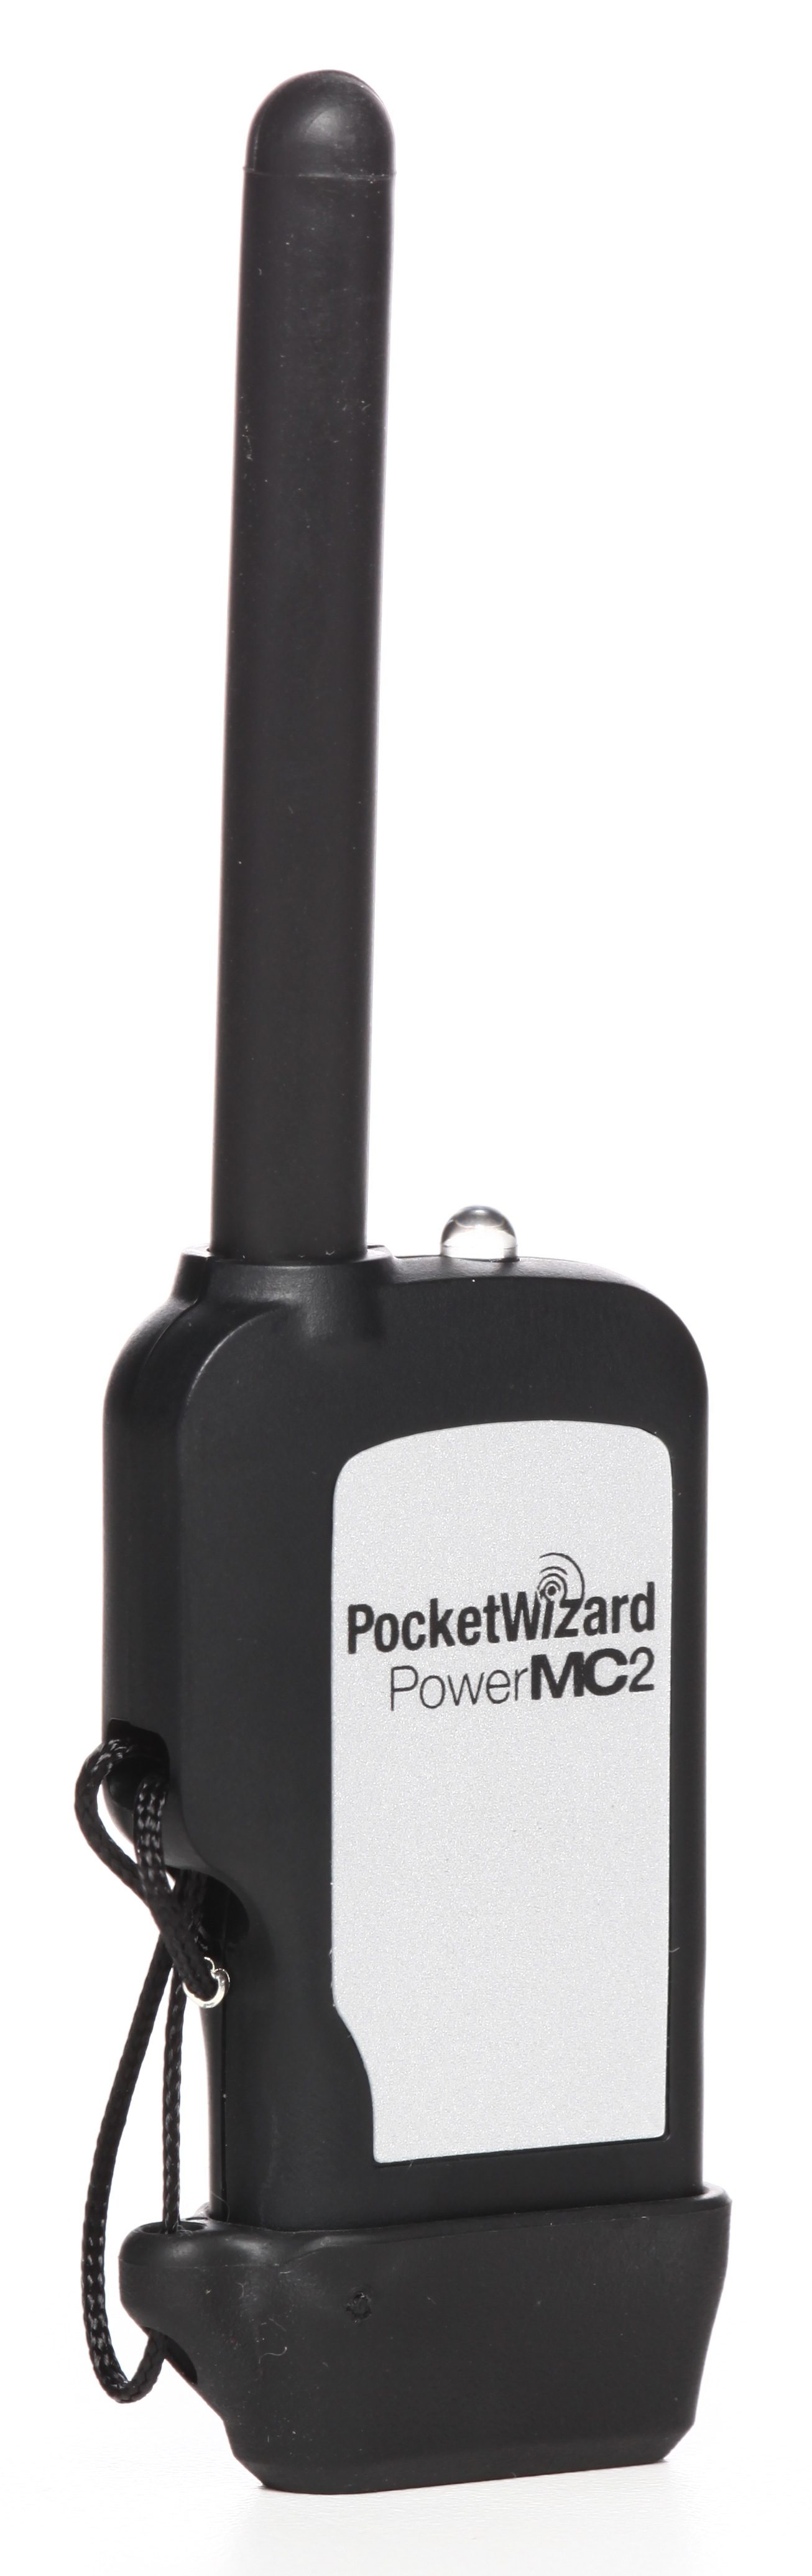
Pocketwizard PowerMC2 (triggered by PW FlexTT5)
All of the details about the FlexTT5 are above, so I’ll only address how the two work together. The PowerMC2 is a radio-signal PW module that plugs directly into the Einstein E640 strobe unit. It only works with the Einstein, so speedlight and other strobes need not apply. It can be triggered by any PW, but you will get the most control using a FlexTT5.
Range:
Being a radio trigger, walls and other obstacles are of no worry. Go ahead, walk around. Be free! The MC2 itself doesn’t have a listed range, as it’s just the receiver. The range will be based on your transmitting PW’s range, so you can look above for the listed range depending on the PW used. For those flash mob sessions, there are 20 ControlTL channels and 32 standard channels that can be selected on the Einstein itself. The MC2 itself is a very reliable tool, but keep in mind it’s just the receiver. If using a complicated PW as a transmitter, you may have slightly different results. Even if using the PW FlexTT5, without the Speedlite interferrence to contend with, it should perform quite well. Just make sure to set it up correctly and all will be well.
Control:
As for control, this will be based on using the FlexTT5 as your transmitter. With this combo, you will have full control of the Einstein’s power using PW’s ControlTL system. Do keep in mind there are several different modes that all work a bit differently. So you may not have all the controls at once, but you do have the ability to change the various settings through the Pocketwizard Utility while connected to your computer. The ControlTL system essentially functions in a similar way to your camera’s E-TTL/i-TTL. You have the flexibility of power adjustments being controlled by the camera’s Exposure Compensation/Flash Exposure Compensation (FEC).
Then, there’s the PowerTracking mode, which does have multiple variables to set. But once you’ve done so, you can change any exposure-related setting on you camera and the light will adjust accordingly. Next, you have Hypersync mode, which takes advantage of the Einstein’s amazingly-fast flash duration. You set the Einstein to full power, and depending on your camera model, it nearly reaches its max shutter speed. Yea, no more 1/250 second sync, hello 1/4000 second sync! There are some limitations, so you’ll need to visit the Pocketwizard PowerMC2 Wiki page.
Size:
The PowerMC2 is a tiny receiver unit. Once it’s plugged in to the Einstein, you’ll not even notice it’s there (other than the antenna protruding). It has a single LED status light on top and a mini-B USB port for connecting to a computer. All its technology is not visible, but it is inside. Its a very smart trigger! No battery required, as it pulls a minuscule amount from the Einstein.
Ease of Use:
Okay, I’m going to be entirely honest with you. This isn’t the easiest setup in the world if wanting to utilize all of the different features. This is largely in part to the difficulty of the FlexTT5 that you would need. It will involve multiple trips from computer to light, so be patient. The best things in life don’t come easy! If you are comfortable with the FlexTT5 and Pocketwizard Utility Software, then you’ll have a good head start, but it’ll still take some work. We will be working on a setup tutorial for the FlexTT5 and PowerMC2, so check back for that. For those who want just a simple trigger system without elaborate controls with their Einstein, you could go the PW Plus II route. You’ll have a rock-solid system that is arguably the most reliable possible, all while being relatively inexpensive. Ideal setup is one MC2 per Einstein strobe unit.
Just one more reminder, the PowerMC2 is only a receiver, so you must have some sort of PW transmitter. It’s backwards-compatible, meaning any pocketwizard transmitter/transceiver will work with it. It does have firmware updates that you’ll need to keep an eye on. But so far, the updates have been to add a slew of great features, which makes the hassle well worth it!
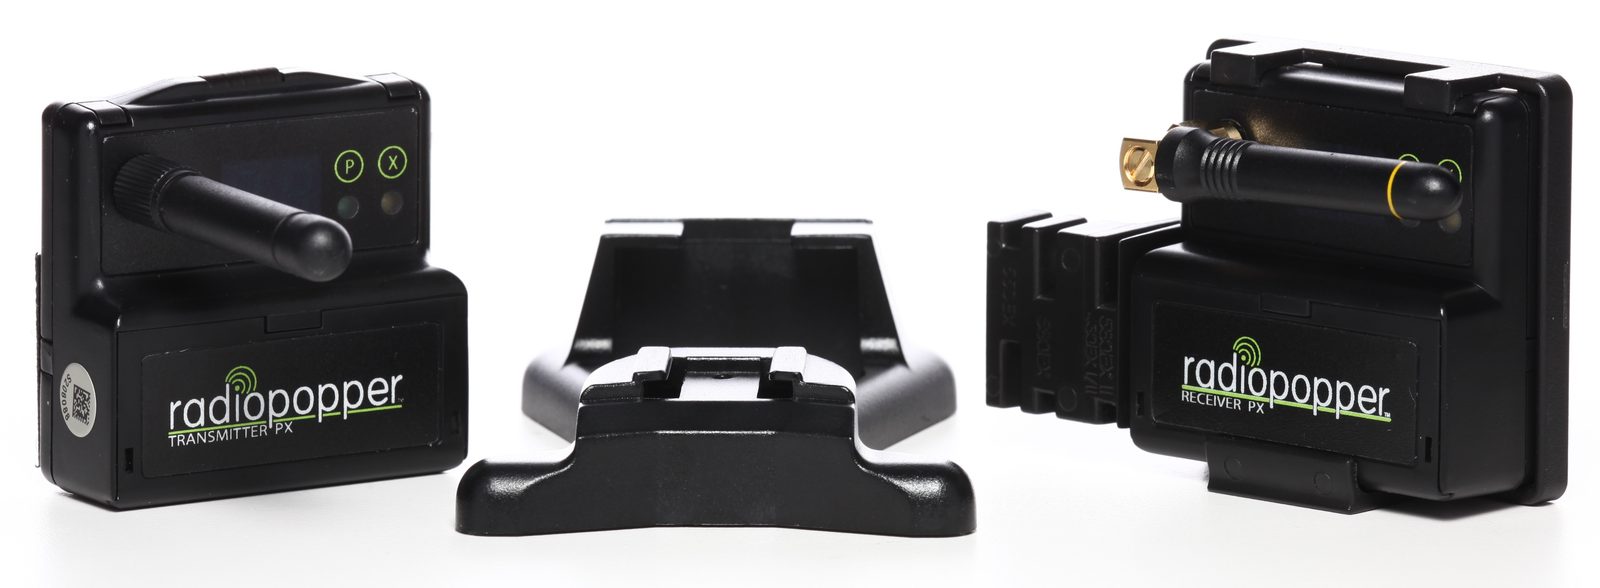
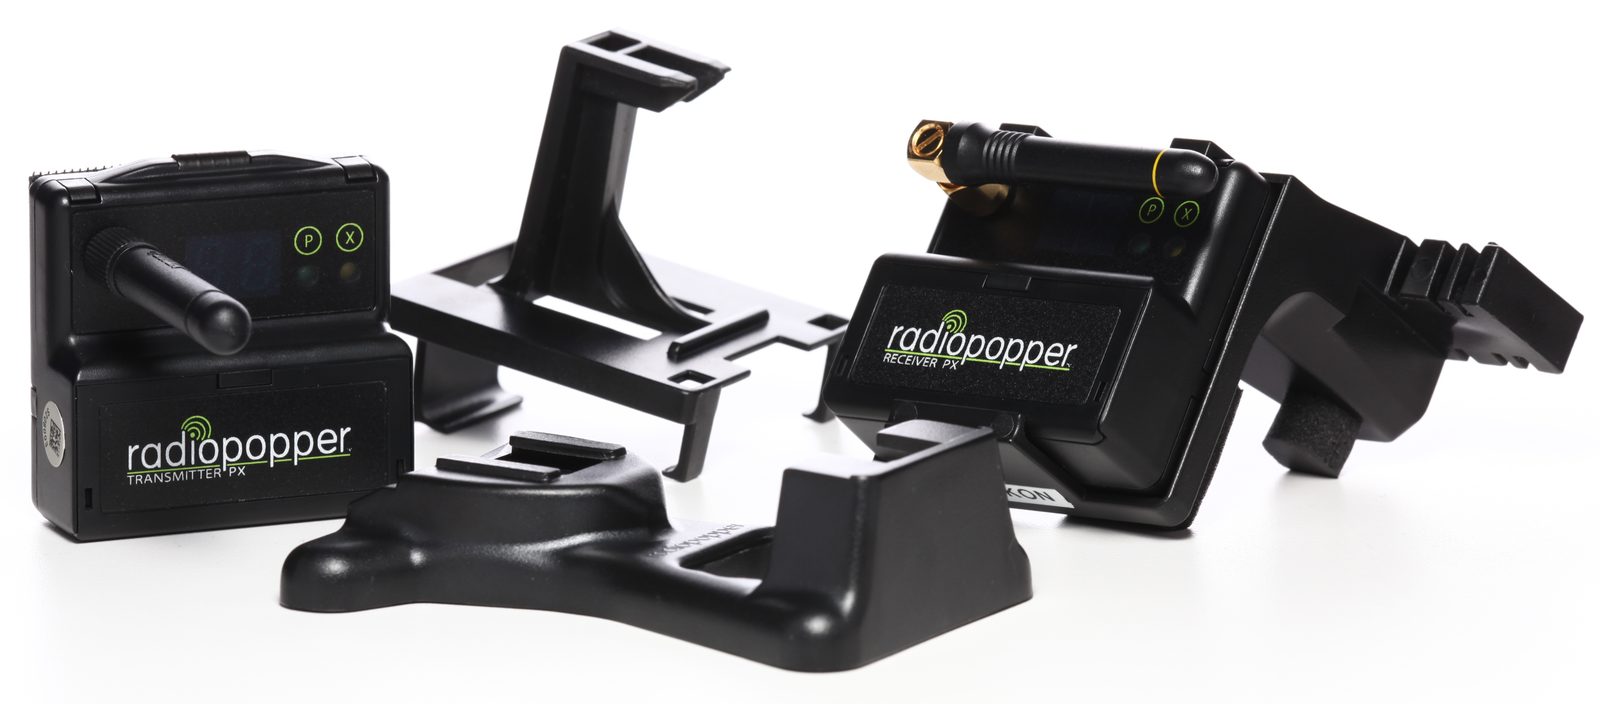
RadioPopper PX Kit for Canon
The PX System kit is an advanced radio transmitter and receiver kit that allows E-TTL triggering. We have our kits separated for Canon and Nikon, and this is the Canon kit. The PX system takes a different approach than the other radio kits we carry, in that it works as an extension of the Canon E-TTL wireless flash system. Basically, the PX system piggybacks on the Canon wireless flash system. This means you’ll need either an ST-E2 or Master Speedlite on-camera to attach the PX transmitter to. The receiver then attaches to your E-TTL compatible Speedlite via included bracket. RadioPopper provides a compatibility guide here. Our PX system kit only works with Speedlites, so if using studio lights, you’ll have to look elsewhere.
Range:
Despite the fact the PX system acts as an extension of the Canon infrared signal, the PX triggers communicate to each other via radio signal. This allows an extended range of up to 1500ft and no line-of-sight restrictions, according to the manufacturer. Like every other product, crazy shooting conditions may affect your range, so do consider this. The PX system has 16 user-selected channels, in addition to the 4 channels your Canon flash system has, which allows for an effective 64 channels.
Each PX device must be set itself, but the receiver offers a unique auto channel scanning feature that scans for the clearest channel. Then just input that channel to the transmitter and you’re set for interference-free shooting! As for reliability, the PX system is pretty solid. I have experienced a misfire on occasion, but it’s more likely this was due to the flash not recycling as fast as I was shooting, which is a limitation of using Speedlites. As long as you’ve got everything attached correctly and your channels set, you’ll have worry-free shooting.
Control:
And now to the fun part, the control you get. As stated above, the PX system piggybacks on your Canon E-TTL wireless flash setup. This means you have all the great features that Canon designed for their flash system, with a longer range and more reliable signal. You can adjust groups and ratios from whichever master unit you’re using (ST-E2 or 580EX II) and tweak flash levels via FEC (Flash Exposure Compensation). In regards to light adjustments, I do want to point out a limitation of the Canon system. You can only adjust the overall flash output from the camera, so individual light adjustment still requires a trek to the light itself. Since the PX system functions as an extension of the Canon wireless system, you’ll have the same limitation while using the PX triggers.
On a lighter note, you do have full access to Canon’s High-Speed Sync mode, which allows sync speeds of up to your camera’s max shutter speed. This mode does reduce the output of the flash, so don’t try to light a group of people 50ft away in pitch black at 1/8000th second, cause it won’t work… unless you’ve got 20 Speedlites. Hmmm, that sounds like another fun test.
Size:
The PX transmitter attaches to your ST-E2 or 580EX II master unit by way of velcro. If you’ve always wondered why you see some flashes with velcro on the top, this is one of the reasons for it. Once attached, it’s pretty resilient and isn’t going to fall off on its own. The PX receiver comes with a flash mounting bracket that holds the receiver unit and the flash sits on. This does add some bulkiness to the off-camera remote flash, so do keep this in mind if your planning on hiding the unit within the shot. The bracket itself is pretty simple to assemble, but it is made of plastic, so try to minimize its exposure to high heat or physical abuse. Considering you’ll also have an expensive flash attached to it, you’re probably already pretty cautious of this. Both the transmitter and receiver units have an external antenna, with the receiver’s being angled and positionable.
They each have just two buttons, a power and menu button, which also serve as navigation and selection within the menu. The menu is displayed on you average, run-of-the-mill LED display. While it’s no full-color LCD, its basic layout is very easy to work with. As for power, each unit takes 2 AAA batteries and has a battery level gauge. This is good thing, as they are a tad power-hungry. You’ll want to make sure you’ve got a few extra batteries handy and ensure you power them off when not in use.
Ease of Use:
With all of the features the PX system allows, they’re only useful if the system is easy to use. Well, it is indeed just that. The bracket is really the only thing that takes assembly, which doubles as a flash stand, so it’s basically replacing one step with just a variation. If you’re already familiar with the Canon wireless flash system, you’ll be right at home. Set the channels on the PX triggers, attach them and you’re set. Any adjustments past initial setup will be made on the Canon Master unit or camera itself, so other than physically being attached, the PX triggers perform as if they weren’t there at all. There’s not any new terminology to decipher, and you don’t have to connect anything to a computer to change a setting. That’s right, no endless trips to the computer to change a setting!
Cost-wise, the PX system is at the top of the strobe-triggers’ totem pole, and this is by themselves. You still need a Canon master unit as well as a remote flash. However, if you already have these and you’re struggling with range and reliability, then the PX system is a no-brainer. As an ideal setup, you’ll have your Master flash or commander attached to your camera, with the PX transmitter velcroed to the top. Then, your off-camera flash will sit on the included flash bracket, which also holds the PX receiver. That’s it! No additional cords or accessories are needed, and your Canon wireless flash system works the same as it did before. You don’t have the ability to upgrade firmware yourself, so future updates do require sending them back to RadioPoppers, but they do offer a free upgrade option.
RadioPopper PX Kit for Nikon
Just like the others above, this is the Nikon version of our kit, so much of the information is the same. However, there are a few advantages the Nikon system holds over the Canon. The PX System kit is an advanced radio transmitter and receiver kit that allows i-TTL triggering. We have our kits separated for Canon and Nikon, and this is the Nikon kit. The PX system takes a different approach than the other radio kits we carry, in that it works as an extension of the Nikon CLS wireless flash system. Basically, the PX system piggybacks on the Nikon wireless flash system. This means you’ll need either an SU-800 or Master Speedlight on-camera to attach the PX transmitter to. If using a Nikon camera with a pop-up flash that can be set to commander mode, you can trigger the system this way as well. The receiver then attaches to your compatible Speedlight via included bracket. RadioPopper provides a compatibility guide here. Our PX system kit only works with Speedlights, so if using studio lights, you’ll have to look elsewhere.
Range:
Despite the fact the PX system acts as an extension of the Nikon infrared signal, the PX triggers communicate to each other via radio signal. This allows an extended range of up to 1700ft and no line-of-sight restrictions, according to the manufacturer. Like every other product, crazy shooting conditions may affect your range, so do consider this. The PX system has 16 user-selected channels, in addition to the 4 channels your Nikon flash system has, which allows for an effective 64 channels.
Each PX device must be set itself, but the receiver offers a unique auto channel scanning feature that scans for the clearest channel. Then just input that channel to the transmitter and you’re set for interference-free shooting! As for reliability, the PX system is pretty solid. I have experienced a misfire on occasion, but it’s more likely this was due to the flash not recycling as fast as I was shooting, which is a limitation of using Speedlights. As long as you’ve got everything attached correctly and your channels set, you’ll have worry-free shooting.
Control:
And now to the fun part, the control you get. As stated above, the PX system piggybacks on the Nikon CLS system. This means you have all the great features that Nikon designed for their flash system, with a longer range and more reliable signal. You can set and adjust groups from whichever master unit you’re using (see compatibility guide) and tweak flash levels via Exposure Compensation. Nikon users definitely have the upper hand here, as individual flash levels can be adjustment from the master unit itself. This means there’s no need to mess with the off-camera Speedlights except to physically move them (sorry, the PX system doesn’t have a flash levitation feature).
You also have full access to Nikon’s High-Speed Sync/ Focal Plane mode, which allows sync speeds of up to your camera’s max shutter speed. This mode does reduce the output of the flash, so don’t try to light a group of people 50ft away in pitch black at 1/8000th second, cause it won’t work… unless you’ve got 20 Speedlites. Hmmm, that sounds like another fun test.
Size:
The PX transmitter attaches to your master unit by way of velcro. If you’ve always wondered why you see some flashes with velcro on the top, this is one of the reasons for it. If you’re using the Pop-up flash Commander mode, we include the hotshoe bracket that holds the transmitter on-camera. With either setup, once attached, they’re pretty resilient and won’t fall off on their own. The PX receiver comes with a flash mounting bracket that holds the receiver unit and the flash sits on. This does add some bulkiness to the off-camera remote flash, so do keep this in mind if your planning on hiding the unit within the shot. The bracket itself is pretty simple to assemble, but it is made of plastic, so try to minimize its exposure to high heat or physical abuse. Considering you’ll also have an expensive flash attached to it, you’re probably already pretty cautious of this. Both the transmitter and receiver units have an external antenna, with the receiver’s being angled and positionable.
They each have just two buttons, a power and menu button, which also serve as navigation and selection within the menu. The menu is displayed on you average, run-of-the-mill LED display. While its no full-color LCD, its basic layout is very easy to work with. As for power, each unit takes 2 AAA batteries and has a battery level gauge. This is good thing, as they are a tad power-hungry. You’ll want to make sure you’ve got a few extra batteries handy and ensure you power them off when not in use.
Ease of Use:
With all of the features the PX system allows, they’re only useful if the system is easy to use. Well, it is indeed just that. The bracket is really the only thing that takes assembly, which doubles as a flash stand, so it’s basically replacing one step with just a variation. If you’re already familiar with the Nikon CLS, you’ll be right at home. Set the channels on the PX triggers, attach them and you’re set. Any adjustments past initial setup will be made on the Nikon Master unit or camera itself, so other than physically being attached, the PX triggers perform as if they weren’t there at all. There’s not any new terminology to decipher, and you don’t have to connect anything to a computer to change a setting. That’s right, no endless trips to the computer to change a setting!
Cost-wise, the PX system is at the top of the strobe-triggers’ totem pole, and this is by themselves. You still need a Nikon master unit as well as a remote flash. However, if you already have these and you’re struggling with range and reliability, then the PX system is a no-brainer. As an ideal setup, you’ll have your Master flash or commander attached to your camera, with the PX transmitter velcroed to the top. If using the Pop-up flash as commander, slide the included bracket in the camera’s hotshoe and snap the transmitter in place. Then, your off-camera flash will sit on the included flash bracket, which also holds the PX receiver. That’s it! No additional cords or accessories are needed, and your Nikon wireless flash system works the same as it did before. You don’t have the ability to upgrade firmware yourself, so future updates do require sending them back to RadioPoppers, but they do offer a free upgrade option.
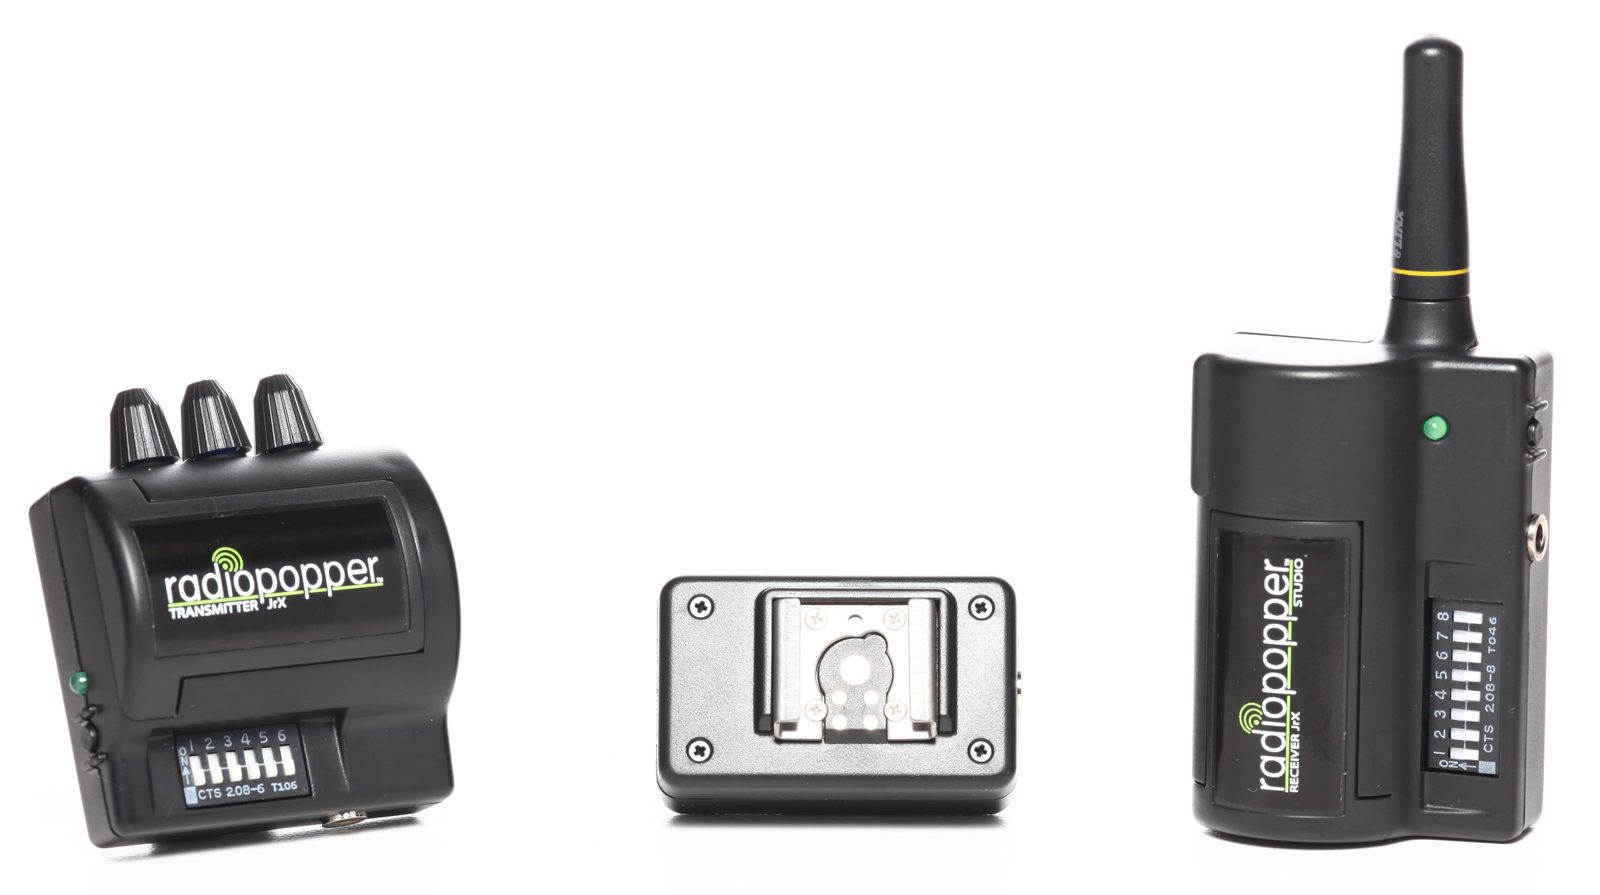
RadioPoppers JrX Kit for Canon
The JrX system is RadioPoppers’ base-level radio trigger option. While technically the JrX triggers are universal, our kit includes the Canon-specific RPCube. So, for our purposes, it’s for Canon. With that said, the transmitter is compatible with Canon DSLR cameras with a standard hotshoe. The receiver works with any strobe unit that accepts a 1/8″, 1/4″, or 2.5mm sub-mini sync cord. The included RPCube adapter makes triggering TTL- compatible Canon Speedlites possible as well.
Range:
Like all the other radio-signal triggers, the JrX allows freedom to move around without any wires tying you down, as well as shooting from distances without line-of-sight. According to the manufacturer, its maximum range is a whopping 1700ft, but various conditions can and will shorten its range. If other photogs are near and happen to be plotting against you by using radio triggers, you’ve got 16 frequency channels to choose from to thwart their attempt.
Control:
From a control standpoint, the JrX is an interesting breed. Because of their small size and basic appearance, many would overlook them as just any other plain-ole’ trigger. But the JrX has a couple tricks up its sleeve. If you’ve got an AlienBee, White Lightning, or Zeus strobe unit that has an RJ-11 remote jack, you can adjust power output from the transmitter itself. With three control dials, you can control up to three different groups of lights, as well as enable/disable modeling light tracking from the transmitter. This makes shooting without an assistant quite feasible. However, it doesn’t stop there. Using the included RPCube, can also adjust power output of TTL-compatible Canon Speedlites.
I know what your thinking, but what about TTL control?!? Unfortunately, it’s just manual level adjustment, so you’d have to jump up to its big brother PX for TTL control. But don’t discount the JrX for lack of TTL, ’cause the three dial setup is quite easy to work with. In fact, some would argue its ease of use compared to constant button-smashing. It probably comes down to personal preference, so if you’re interested, give it a try. Getting back to the facts, the JrX has a max flash sync speed of 1/250 second, which is about average. It doesn’t have any HSS mode, so nothing faster than 1/250 here.
Size:
From a size-standpoint, the JrX transmitter and receiver are quite reasonable. It’s our smallest triggering option, so if you’re searching for an unobtrusive system, you’ve found it. The transmitter attaches via hotshoe, but it does have the ability to connect via sync cord (not included). It has a power/test button, three control dials, and a set of six dip-switches. The first four control channel selection, while the last two are for group operation and control lock-out (we include a diagram, as well as it being listed here). The receiver unit is a tad larger, but it’s still pretty small in relation to other types. It has a short antenna that extends from the top and power buttom on the side, as well as a 1/8″ sync port and RJ-11 data port for when using studio strobes. The RPCube adds a little more size, but since it doubles as a mount, this is quite acceptable. The receiver has a total of 8 dip-switches, so there’s a couple more options for it, but the manual linked above goes over their function. There’s no visible advanced technology with the JrX, but there doesn’t really need to be. It’s designed to be more functional than fancy, and it does achieve its purpose. Both the transmitter and receiver take a CR123 battery (included), but replacements can be readily found if needed.
Ease of Use:
So is it easy to use? Yep! Although some find dip-switches intimidating, if you match-up channels on the two units, the JrX is pretty simple. The additional options on the dip-switches affect aren’t very confusing, so a quick look over the manual will be all it takes to see if you need to make any other adjustments. The only ever-so-slightly tedious task is on the receiver’s end, but it’s more recognizing what’s needed depending on what you’re triggering. Ideal setup for the JrX receiver with an AlienBee, White Lighting, or Zeus strobe is as follows: First, connect the two together with the included “telephone” cable. Then plug the included “dummy” 1/8″ plug into the strobe unit to disable the optical slave. Before turning on the strobe, set the power level on the strobe to full power and set the modeling light to the preferred setting. You’ll then power on the strobe, followed by the receiver. One important thing to note, when adjusting the power level on the transmitter, you will need to hit the test/power button on the trigger itself to dump excess power. This will ensure the power level is correct.
You’ll ideally want each strobe used to have a receiver, so that you can control power levels on them as well. Now, the ideal setup for the JrX receiver with a Canon Speedlite is: First, attach the Speedlite to the RPCube’s hotshoe. Next, connect to the receiver to the RPCube via the included 1/8″ to 1/8″ sync cord. Now, power on the two devices and set the flash to TTL mode. While the JrX doesn’t transmit TTL, the flash does have to be set in that mode to control the power levels. If using this setup, creative rubber banding will be necessary, so have a couple handy. All accessories needed, other than the rubber bands, are included in our kit, so no worries there. Like the PX system, the JrX doesn’t have firmware that can be updated by the user, so it’ll have to meet its maker if a firmware becomes available.
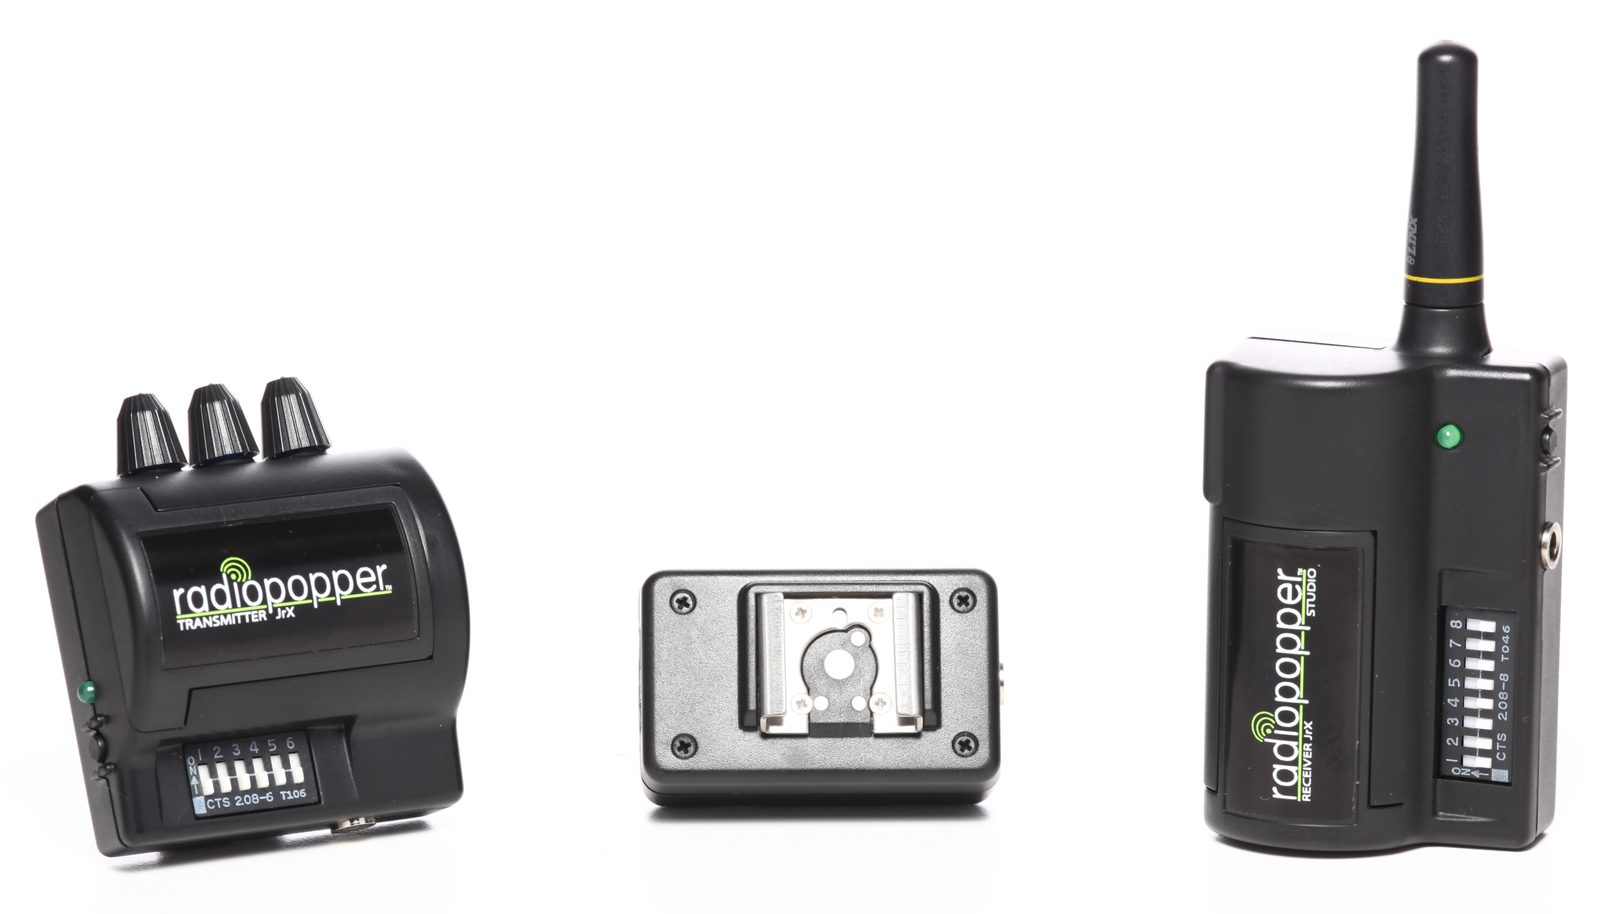
RadioPoppers JrX System Nikon Kit
Just like the others above, this is the Nikon version of our kit, so much of the information is the same. However, there are a couple limitations with the Nikon system. The JrX system is RadioPoppers’ base-level radio trigger option. While technically the JrX triggers are universal, our kit includes the Nikon-specific RPCube. So, for our purposes, it’s for Nikon. With that said, the transmitter is compatible with Nikon DSLR cameras with a standard hotshoe. The receiver works with any strobe unit that accepts a 1/8″, 1/4″, or 2.5mm sub-mini sync cord. The included RPCube adapter makes triggering TTL- compatible Nikon Speedlights possible as well. Here’s the catch, Nikon has since changed their TTL-protocol to only i-TTL on the SB-700, SB-900, and SB-910. This does indeed mean you won’t be able to use the JrX with those flashes, which sucks!
Range:
Like all the other radio-signal triggers, the JrX allows freedom to move around without any wires tying you down, as well as shooting from distances without line-of-sight. According to the manufacturer, its maximun range is a whopping 1700ft, but various conditions can and will shorten its range. If other photogs are near and happen to be plotting against you by using radio triggers, you’ve got 16 frequency channels to choose from to thwart their attempt.
Control:
From a control standpoint, the JrX is an interesting breed. Because of their small size and basic appearance, many would overlook them as any other plain-ole’ trigger. But the JrX has a couple tricks up its sleeve. If you’ve got an AlienBee, White Lightning, or Zeus strobe unit that has an RJ-11 remote jack, you can adjust power output from the transmitter itself. With three control dials, you can control up to three different groups of lights, as well as enable/disable modeling light tracking from the transmitter. This makes shooting without an assistant quite feasible. However, it doesn’t stop there. Using the included RPCube, can also adjust power output of TTL-compatible Nikon Speedlights (still no SB-700, 900, or 910).
I know what you’re thinking, but what about TTL control?!? Unfortunately, it’s just manual level adjustment, so you’d have to jump up to its big brother PX for TTL control. But don’t discount the JrX for lack of TTL, cause the three dial setup is quite easy to work with. In fact, some would argue its ease of use compared to constant button-smashing. It probably comes down to personal preference, so if you’re interested, give it a try. Getting back to the facts, the JrX has a max flash sync speed of 1/250 second, which is about average. It doesn’t have any HSS mode, so nothing faster than 1/250 here.
Size:
From a size-standpoint, the JrX transmitter and receiver are quite reasonable. It’s our smallest triggering option, so if you’re searching for an unobtrusive system, you’ve found it. The transmitter attaches via hotshoe, but it does have the ability to connect via sync cord (not included as all compatible cameras have a hotshoe). It has a power/test button, three control dials, and a set of six dip-switches. The first four control channel selection, while the last two are for group operation and control lock-out (we include a diagram, as well as it being listed here). The receiver unit is a tad larger, but it’s still pretty small in relation to other types. It has a short antenna that extends from the top and power buttom on the side, as well as a 1/8″ sync port and RJ-11 data port for when using studio strobes.
The RPCube adds a little more size, but since it doubles as a mount, this is quite acceptable. The receiver has a total of 8 dip-switches, so there’s a couple more options for it, but the manual linked above goes over their function. There’s no visible advanced technology with the JrX, but there doesn’t really need to be. Its designed to be more functional than fancy, and it does achieve its purpose. Both the transmitter and receiver take a CR123 battery (included), but replacements can be readily found if needed.
Ease of Use:
So is it easy to use? Yep! Although some find dip-switches intimidating, if you match-up channels on the two units, the JrX is pretty simple. The additional options on the dip-switches affect aren’t very confusing, so a quick look over the manual will be all it takes to see if you need to make any other adjustments. The only ever-so-slightly tedious task is on the receiver’s end, but it’s more recognizing what’s needed depending on what you’re triggering. Ideal setup for the JrX receiver with an AlienBee, White Lighting, or Zeus strobe is as follows: First, connect the two together with the included “telephone” cable. Then plug the included “dummy” 1/8″ plug into the strobe unit to disable the optical slave. Before turning on the strobe, set the power level on the strobe to full power and set the modeling light to the preferred setting. You’ll then power on the strobe, followed by the receiver. One important thing to note, when adjusting the power level on the transmitter, you will need to hit the test/power button on the trigger itself to dump excess power. This will ensure the power level is correct.
You’ll ideally want each strobe used to have a receiver, so that you can control power levels on them as well. Now, the ideal setup for the JrX receiver with a compatible Nikon Speedlight is: First, attach the Speedlight to the RPCube’s hotshoe. Next, connect the receiver to the RPCube via the included 1/8″ to 1/8″ sync cord. Now, power on the two devices and set the flash to TTL mode. While the JrX doesn’t transmit TTL, the flash does have to be set in that mode to control the power levels. If using this setup, creative rubber banding will be necessary, so have a couple handy. All accessories needed, other than the rubber bands, are included in our kit, so no worries there. Like the PX system, the JrX doesn’t have firmware that can be updated by the user, so it’ll have to meet it’s maker if a firmware update becomes available.

CyberSync Radio Kit for Einstein E640
Our CyberSync Radio Kit for Einstein E640 consists of the CyberCommander transmitter and CSXCV receiver module. They are a radio trigger and receiver pairing from the Paul C. Buff lighting company. The Commander works with any digital camera with a standard hotshoe (not Sony) or PC sync port (some Sony cameras do have this, so check your manual). The CSXCV Transceiver is made for use with the Einstein E640 strobe only. In other words, you cannot connect the CSXCV to a speedlight or any other strobe unit besides the Einstein. It is impossible! While you can use this setup in combination with other Buff Cybersync triggers and receivers, we have not tried this and cannot comment on their functionality. You can check compatibility with those items on the Paul C. Buff website.
Range:
This Buff Commander and receiver are based on radio-signal technology. According to the Buff website, “testing indicates a usable range of up to 400 feet, depending on obstructions such as walls or adverse conditions such as metal buildings, bodies of water, etc.” All sorts of things can affect a radio frequency, so just be aware of what’s around you. If you happen to be running 30 microwaves in the same room with a few cordless phones while shooting, you’ll probably kill the range as well. Basically, the more stuff there is between the Commander and CSXCV, the more you’re range will be affected. If a longer range is required, you may need to look at some of the other trigger options. Nevertheless, the Cyber Commander has 16 user-selectable channels for situations where shooting around other Cybersync users is inevitable. As for reliability, they seem pretty good in our testing. We have experienced a misfire occasionally with this setup, so user beware.
Control:
Alright, now for the goods. With this setup, you have full control of the Einstein E640, all from the Cyber Commander that conveniently sits atop your camera. On a multi-function coolness level, the Cyber Commander is through the roof. It functions as a strobe trigger that gives you full power control of your Einstein E640’s flash and modeling power. Flash power adjustments can be done in 1/10th f-stops. Which, in turn, will also give you a readout of the exact camera settings to use thanks to the built-in flash meter. That’s right, you’ll have a radio trigger with a built-in flash meter! Unfortunately, it doesn’t automatically adjust your camera settings for you, but just do what the readout tells you to and you’ll be set.
You can program and define/name up to 16 strobes, in addition to managing group bracketing on any combination of those 16 strobes. One cool feature that you currently only have with the Einstein E640 are the Color and Action Modes. These modes are also selectable through the Commander, with accurate readouts of both color temperature and flash duration in either mode.
Size:
The Cyber Commander itself sits atop your camera’s hotshoe at 2″ wide by 4.75″ tall. It has a pivot hotshoe mount, just in case you don’t want 4.75″ protruding from the top of your camera. You are able to connect to your camera via PC sync, but you will have to employ the highly technical rubber band method of rigging. It does have a full color LCD screen for setting adjustments, which is quite nice to view your changes on. It’s powered by 2x AAA batteries, and it is a battery-hungry little trigger. The CSXCV module, on the other hand, is a tiny little module that plugs into the top of the Einstein strobe unit. Since it pulls its needed power from the Einstein itself, you can plug it in and forget about it.
Ease of Use:
Like I said earlier, I will be honest with you about each item’s ease of use. Here goes… The Cyber Commander is quite frustrating. It has such a great set of features that are designed to work with some of the most cost-effective, high quality strobes out. However, it’s crippled by its own controls and layout. You have two “joysticks” that control navigation and entry. They don’t perform set functions, as each submenu uses various combinations of button smashing to make selections. You will have to sit down with the manual, as it’s not something you’ll be able to pick-up and start using. Luckily, getting the Commander and Einstein to communicate together only takes a single step. If you sit down with enough time and patience, you will get it to work. If you wait a long period of time before you use it again, you’ll probably be confused, so breaking out the manual may be necessary.
If you’re in need of a studio setup, the Einstein with this Commander/Transceiver combo is one of the best out. The ideal setup is the Cyber Commander on camera and a CSXCV Transceiver module on each Einstein unit used. Like other radio triggers, you could use the CSXCV on only one Einstein and have the other nearby Einsteins set to slave, but you lose control options on the strobes that don’t have the CSXCV. Possible accessories are the sync cords for connecting the Commander to non-standard cameras, but that’s pretty much it. Firmware updates are done via microSD card in the Commander. This is something you must keep up with, as firmware updates are fairly common with this product to improve issues found.
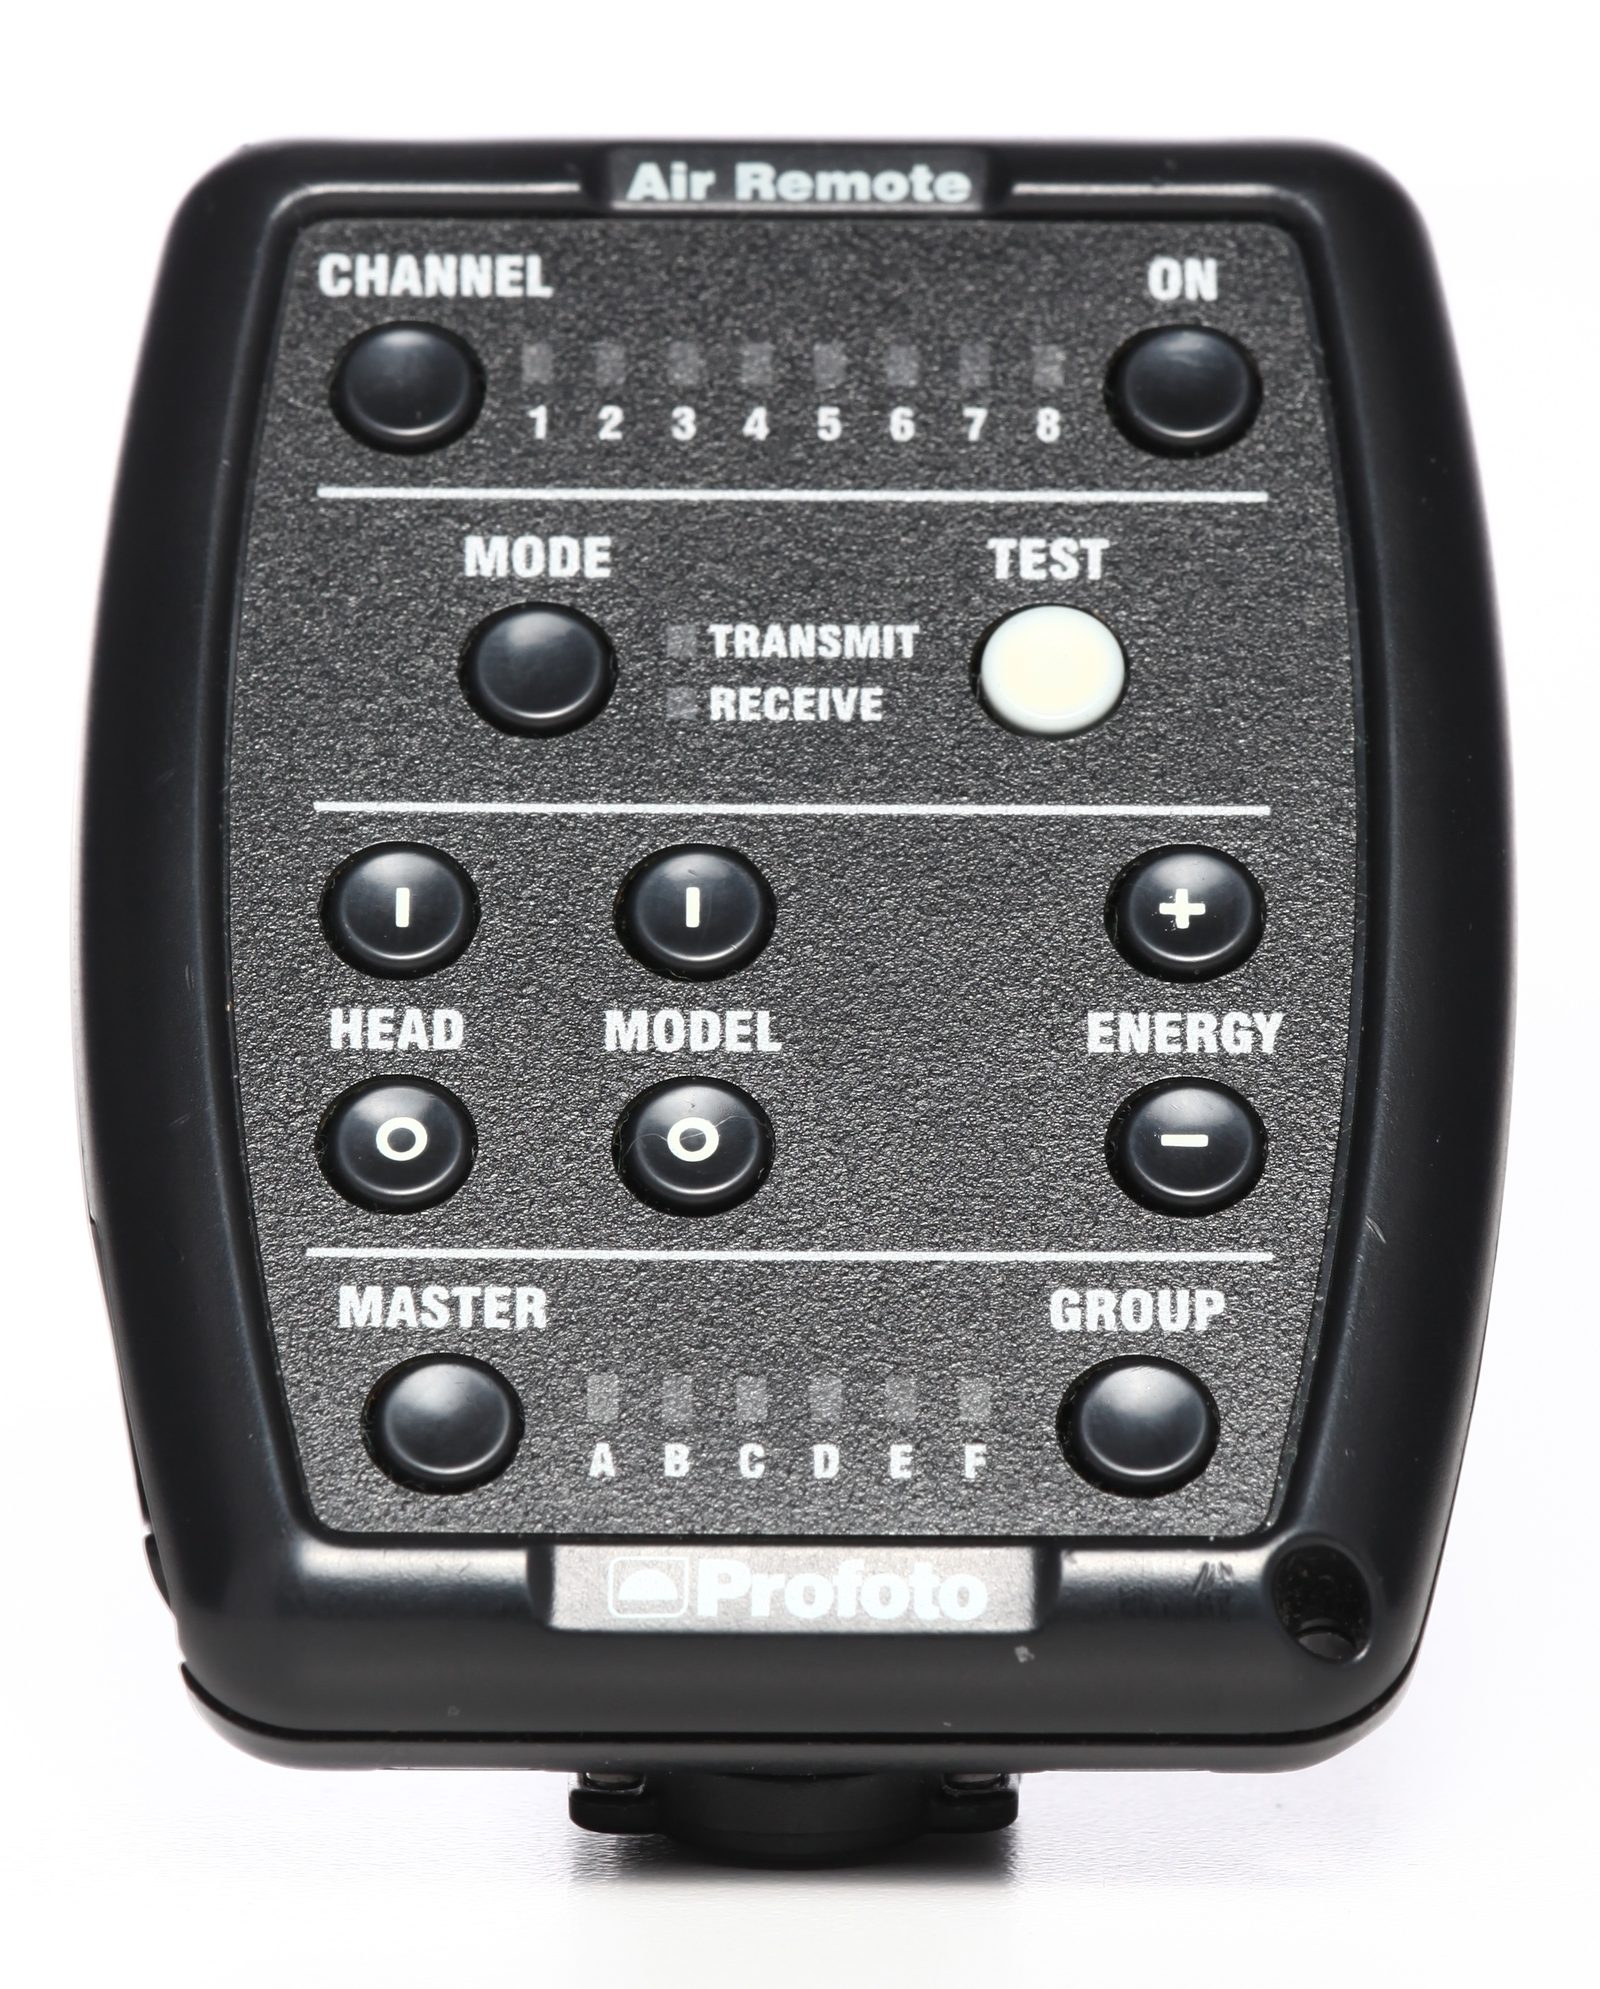
Profoto Air Remote Transceiver via Profoto Air D1 500 Twin Monolight Kit
I wanted to throw this one in the mix since it is relavent. This blurb will be based on using the Profoto Air Remote Transceiver with the kit we rent it with (Profoto Air D1 500 Twin Monolight). I know it is much more flexible and can work in different ways, but for our purposes, this is how I’ll approach it. The Profoto Air Remote Transceiver is a radio-based strobe trigger with advanced features. While it’s technically compatible with other manufacturers’ strobes via sync cord, for the use of any features that make it unique, you must use a Profoto Strobe that has built-in Profoto Air. The transceiver itself can be triggered by a standard hotshoe or PC sync port, so Sony users with no PC sync are out.
Range:
As you’ve probably already gathered from the several times I’ve said it above, radio triggers, including this one, are not limited to line-of-sight. According to the manufacturer, the Profoto transceiver offers a range of up to 1000ft. That is based on ideal condtions, but you do have the option of 6 groups with 8 channels each to pretty much eliminate interference from other photographers. One big plus in regards to its range is you’re not limited to merely triggering the strobe unit. You can also use all of the Profoto Air features at these long distances, which many other radio triggers have a pretty limited range for their “bells & whistles.” As far as reliability goes, the system itself is pretty solid. We haven’t experienced any issues with misfires.
Control:
Alright, now let’s talk the goods. The Profoto Air Remote Transceiver, when used with the Profoto Air D1, allows you to make adjustments to the light all from the trancseiver itself. You have full control of both power output in 1/10th stop increments (with our Air D1 kit) and modeling light levels. If you set each light to their own channel or group, you can turn lights on and off individually as well as adjust power output on combinations of lights. Basically, you can tell your lights what to do all from the transceiver. You don’t have TTL or some crazy variation of it, but with the control you do have, you don’t need it. The max sync speed for focal plane shutters is 1/250 second, which is plenty fast for most situations. One feature Profoto makes sure to mention is the ability to shoot at 100fps. So, you’ll be happy to know in 10 years or so, the Profoto Air System will be able to keep up with your DSLR monster that shoots at 100fps in full resolution 120mp RAW files. Computer companies better get on the ball.
Size:
Like most of the other triggers, the Profoto transceiver sits atop your hotshoe. It’s not too big or heavy, but you won’t forget its there. Its biggest flaw is the lack of a locking pin for the hotshoe mount. You must always be cautious of camera movements, as it has a tendency to fall off if bumped. Couple this with a plastic housing, and you’ve got yourself a breaker. You’ve got all the controls on the back on the transceiver, so no computer trips or strange camera settings that pull double-duty. There are LED indicator lights that correspond with the channels and groups, which make it easy to keep multiple strobes and their settings straight. The transceiver itself is powered by 2x AAA batteries.
Ease of Use:
As for ease of use, the Profoto Air transceiver is pretty simple. It is crucial to set the lights themselves to slave mode first. Otherwise, you’ll stand there red in the face wanting to throw the transceiver as far as you can, all because the light you’re wanting to control is not set to receive the signal. This happens, I’ve done this multiple times! Once you set the obvious, it’s great. The transceiver has dedicated buttons that don’t change functions after every press (Cybersync!!!), which is an absolute blessing. If you need lighting that you can control power from the camera, the Profoto Air system is one of the best. Ideal setup is the transceiver sitting on your hotshoe and each light having built-in Profoto Air. There are optional accessories, such as sync cords to connect to a camera’s PC sync or third-party strobes (you won’t have power control, just triggering ability). Profoto also makes an Air USB that allows studio light control from a computer (using their software), but we haven’t tried it. There’s not any firmware options for the transceiver itself, but if you’re using the Profoto software, they do update it.
A Note to Sony Shooters
I don’t want the Sony users to feel like I’m not properly addressing their options. At the moment, there isn’t a native Sony triggering system that from any of the brands we carry. There are various models out there that do use the Sony hotshoe, some even “transmit” TTL information. However, we haven’t found a product that holds up to renting and works with their newest models as well. We’re watching for a couple models that say they’ll update their firmware to allow use with newer cameras like the Sony a77 and a65, so maybe in the future we’ll have a true Sony option. Until then, most of the above triggers will work with Sony cameras via sync port. However, this is only helpful if you have a camera that has that port. If you don’t, we do carry the Sony FA-HS1AM Hot Shoe Adapter that adapts the Sony hotshoe to a standard hotshoe. However, it does add a little box that sits on top on your camera. Throw in another little box of a trigger, and it can start getting cumbersome. Nevertheless, if you need strobes, it does work!
Closing
So there you have it! Hopefully this will help those previously unfamiliar with the world of lighting triggers to understand their differences. If you made it through all of that in one sitting, you passed the test. Heck, if you made it through it without being thoroughly confused, you did better than I! Like I said at the beginning, this is a guide to what we carry and their uses/features. There’s bound to be many more options out there, so don’t take this as an exclusive list of options. Also, all of our triggers are the real deal versions. What do I mean? In other words, no generic eBay models. The knock-offs may offer the “same” features, but there will be differences in range/reliability. I’m not saying you can’t go that route, but for important shoots, you may what to rely on one of the larger brands above.
Tim Ashbrand
Lensrentals.com
1.13.2012
14 Comments
ben ·
Pocket wizards would be great if they would work all of the time. Many of us have moved away from the to flash waves III’s because the PW’s just aren’t reliable. The 12fps burst rate is laughable with a 5dmkII and a 580ex flash…It rarely works that well. It would be a great product, but even PW knows they have canon issues. Great roundup though!!
Jeff Nycz ·
Tim:
Great job on the article!
Another feature that is impressive with the PWII’s and the MultiMax is the ability to fire both the camera and a strobe(s).
I shoot college basketball and often times setup a camera behind the backboard as well as strobes mounted in the mezzanine on 13’ light stands. I set my strobe triggers to channel 2 and the camera trigger to channel 1. I trigger the camera with a PW on channel 1 which tells the PW on the camera behind the backboard to fire the camera then AUTOMATICALLY switch to the next channel up (channel 2) to fire the strobes, all in perfect synchronization. Awesome!
Jeff
tim ·
Jeff,
The ability to trigger a camera via Pocketwizard Plus II is definitely a plus. Since we don’t regularly stock the cords needed to trigger a camera from Pocketwizard, I didn’t want to push them too hard, as readers wouldn’t be able to rent them. However, I probably could have mentioned their wonderful use in just the type of situation you described. For away-from-the-camera sports shooters, they are invaluable.
Thanks!
Tim
Michael ·
Can’t flashes like the 430EX II and those not special enough to receive a PC port be triggered by a hot shoe adapter? I mean, it’s an extra little box, but these are pretty cheap to come by.
Jeff Nycz ·
Michael:
I do exactly that with my 550EX when I want extra fill light for outdoor/off camera light. I had it located behind the duct work on the left in this photo:
http://www.midsouthimages.com/Portraits/Hip-Hop-Dance-Group-10-15-11/19647228_XkdWzm#!i=1540490223&k=8rsSMSP
Jeff Thompson ·
Great post about triggers, thank you for the summary. I bought the Pixel King radio trigger/receiver and they’re working great with wireless ETTL II on my Canon 5D Mark II.
I’m using them for a small in-home studio setup with a 2 umbrella speedlight setup and they work great!
Tony ·
Re Cyber Commander ease of use:
I found the product very intuitive and easy to use. I needed to look at the manual for only a couple of minutes during initial setup, and I’ve never needed to refer to the manual again.
Of course, every person will have their own perception here, so my comments are in no way meant as a criticism of this review — just another perspective from someone who had a very different experience.
tim ·
Tony,
Thank you for your perspective! I didn’t want to pin the Cyber Commander as a product that is excessively difficult to work, but since we’ve had several people call or email with problems using them, I did want to consider those experiences. I definitely agree with you that some will have a better experience than others. Frequent strobe users and those who understand lighting will pick-up on the Cyber Commander much faster than a novice. Once the user understands it’s controls and operation, the Cyber Commander is one of the best options out there.
Thanks!
Tim
David ·
Great article. But there’s another option that really should get a mention. I am a Canon shooter, but I presume the following would apply equally to the equivalent Nikon products. Instead of buying the ST-E2 wireless transmitter, you can just buy another 5-series EX flash and use that as your trigger. A second hand 550EX is pretty cheap and only a little more than the ST-E2. This gives you three big advantages – (1) the flash is more powerful and therefore has a longer range. (2) The flash has a pan and tilt head so you can point it at your slaves, and (3) The flash can be used as an additional light source when you need it.
Thorne ·
GREAT article.
I’d only suggest a couple tweaks, primarily that Canon Speedlight heads can be rotated on their bases, so the light itself doesn’t need to be aimed at the shooter (as a less experienced reader might infer), only the base. And I found myself wondering how the 7D’s built-in IR would get along with the devices made to bracket onto Speedlights or the IR transmitter (since I’m buying my 7D tomorrow!)
But seriously, a GREAT article, an excellent resource, a rare bookmark. 😉
tim ·
Thorne,
Thanks for the suggestion! When researching for the post, I did contact RadioPoppers about using the built-in IR transmitter feature on the Canon 7D. At this time, they do not offer a bracket that works for the Canon cameras in the same way as the Nikon pop-up flash bracket. Since the Canon hotshoe has two clips under each edge that disable the pop-up flash if the hotshoe is being used, you cannot use the same pop-up flash bracket they offer for Nikon. While you could probably rig something that would work, they don’t suggest it, which means we can’t really suggest it.
Thanks!
Tim
David ·
Impressively comprehensive article within the gamut of what you offer. You might consider an addendum with a few of the EBay specials that have an enormous forum presence, but very little professional attention. The PT-04, RF-603, Cactus V5, are compelling for limited budgets. My own kit has five RF-602 receivers. With the exception of one defective transmitter, they’ve been absolutely reliable. For non-ETTL shooting where you can reach the lights, I can’t imagine most people would need anything better.
Scott ·
Great review! I bought 3 PW Flex TT5’s along with a Mini TT1 and AC3 zone controller for my 5D MkII. I was never able to get them to work reliably with a 530 EXII even using the “bandaid” sleeve and shoe that is supplied or with the optional hard shell mount that supposedly cures the RF problem. It was also unreliable with a 430 EXII – it often would not trigger 5 feet from the camera.
The build quality is also poor – very cheap and vague plastic switches, and plastic hotshoes. Very disappointing.
I replaced them all with Elinchrom Skyports, which are a fraction of the price, better built, and more importantly, work every time with my speedlights and with my Quadra.
Hankk ·
Great article! Two things to add:
1. For some Nikon cameras, you don’t need to buy the SU-800 at all, because the body has a commander built in. The D700 and D7000 both have this, as do the D800 and D800E. Maybe others as well. In these cases, the on-body flash serves as a trigger for the external flashes. Menus on the camera let you set the levels for them all. The system works great indoors and at close range outside as well. You’re not going to send a signal 1000′ with this, but how often do you really need that anyhow?
2. As of March 2012, Canon has just released a new flash and commander which are radio-based (the 600EX-RT and ST-E3-RT). If this system ends up working well, it may turn out to be easier and more reliable than the 3rd-party triggers such as the PocketWizards.