Equipment
Infrared Photography: Imaging in a Different Light
Creative Experimentation
As a photographer with an art background and an employee of a company with endless gear options, I am always looking for something to give me a fresh perspective on image making. On our recent trip to the Wedding and Portrait Photographers International Conference+Expo (WPPI) in Las Vegas I took the opportunity to learn more about Infrared photography with the Sony A7s IR modified camera.
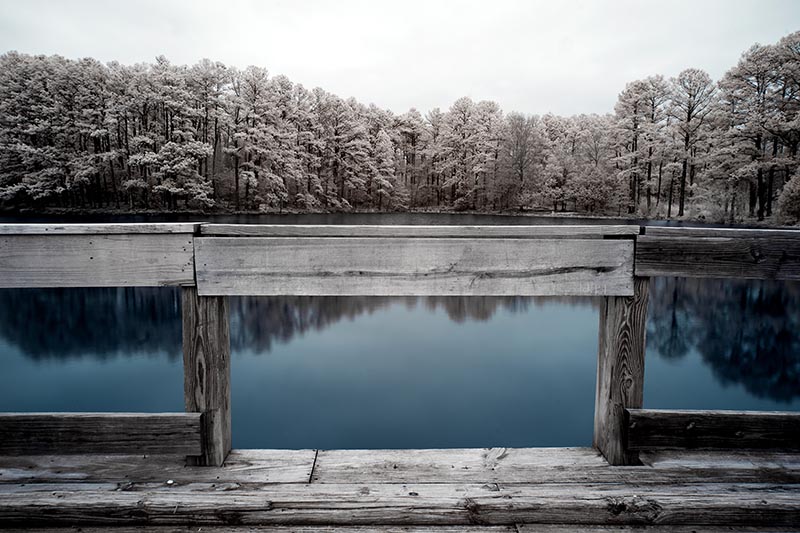
- 715nm IR modified Canon 5D Mark II + 17-40mm f/4 L, Kenny Malone, 2013
What is IR?
For those of you who are not familiar with Infrared converted cameras, they are cameras that have had the IR blocking filter replaced with an IR passing filter so the sensor can see light that your eyes cannot (700 to 1400 nm wavelengths). This can result in dramatic landscapes with dark skies and white foliage, or dreamy portraits with milky skin, but the creative possibilities are endless.
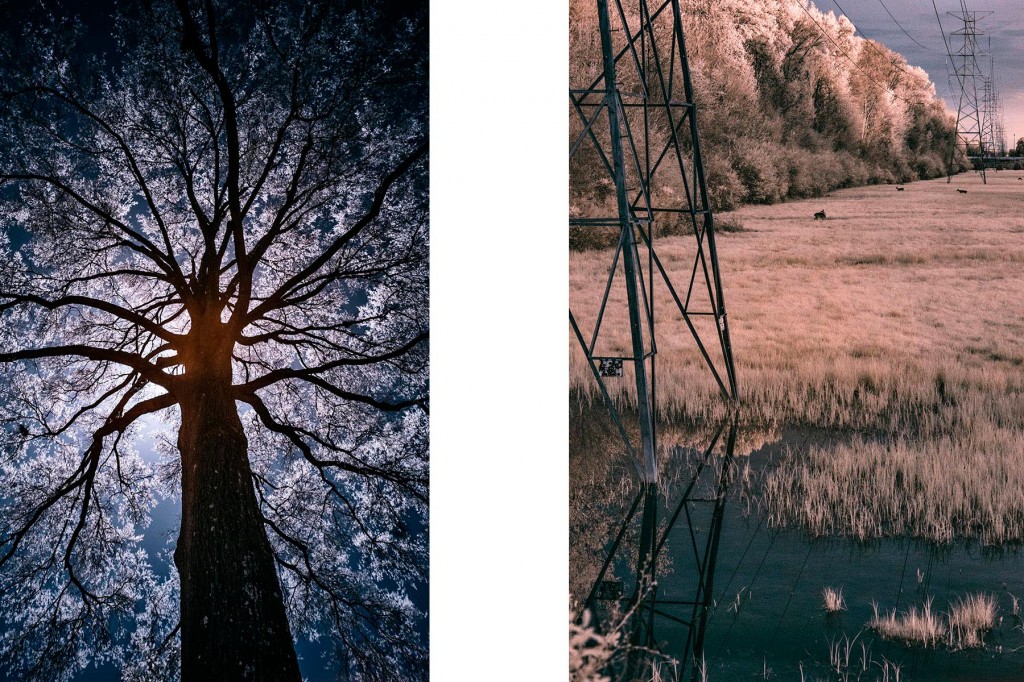
- Left:5D Mark III IR (715 nm)+Zeiss Distagon T* 2.8/21 ZE, Right:5D Mark III IR (715 nm)+ Zeiss Planar T* 1.4/85 ZE, Erik Morrison, 2015
Infrared images are normally of beautiful blooming trees, blue skies, reflections on water, and generally dreamy and tranquil scenes. This is pretty much the opposite of how I would describe Las Vegas. I’ve never seen any IR photography of the city so I thought it would be an interesting time to experiment.
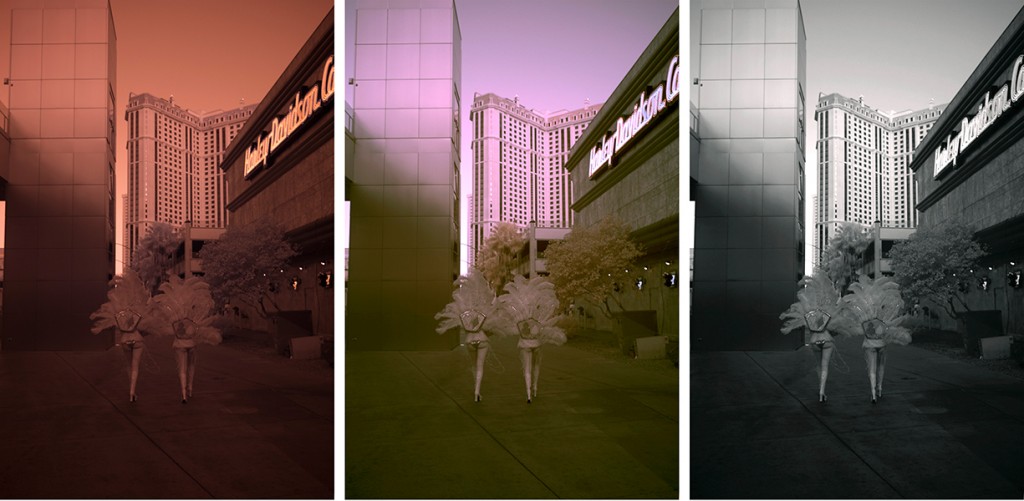
- In Order: SOOC, False Color with Channel Mixing, B&W. Shot with Sony A7s (720nm)+Zeiss Loxia E 35mm f/2 Biogon. Sarah McAlexander, 2015
The original files will be tinged bright red or pink but this can be changed by setting a custom WB in camera. An easy way to meter is to point the camera at grass or whatever greenery you can find because it is usually a neutral area. Doing this will give you more color information to manipulate in post.

- Sony A7s (720nm)+Metabones III Adapter+Canon TS-E 24mm. Sarah McAlexander, 2015
In post processing you will want to convert your files to black and white for a more natural look, or play with the color channels to get a unique false color effect. In the photos above I adjusted the color balance, switched the blue and red color channels, and then adjusted the blue and red levels. The final colors are completely up to you; there is no ‘correct’ way to process these images in post and just by playing with it you can get some pretty interesting results.
*Remember that any time this much post processing is needed it is best to shoot in RAW for more flexibility in your image.
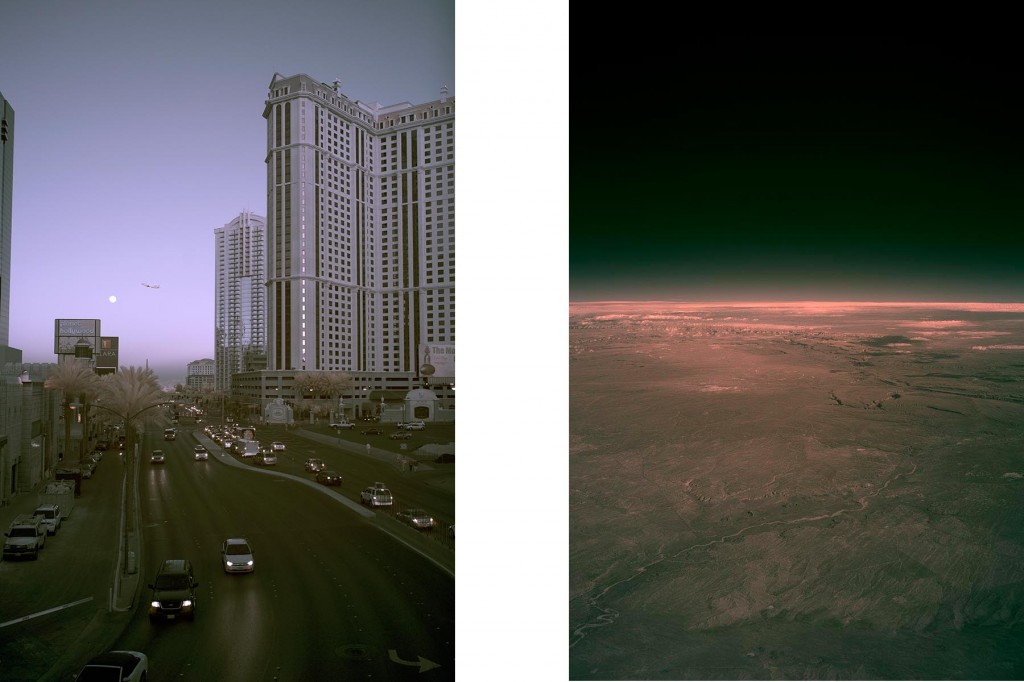
- Sony A7s (720nm)+Zeiss Loxia 35mm f/2 Biogon. Sarah McAlexander, 2015
Ideal Shooting Conditions for IR Photography
Bright Daylight is preferred simply because there is more IR light to capture. Bright sunny days yield dark skies and strong contrast. That being said, there are no hard rules and many of these shots were taken as the sun was setting.
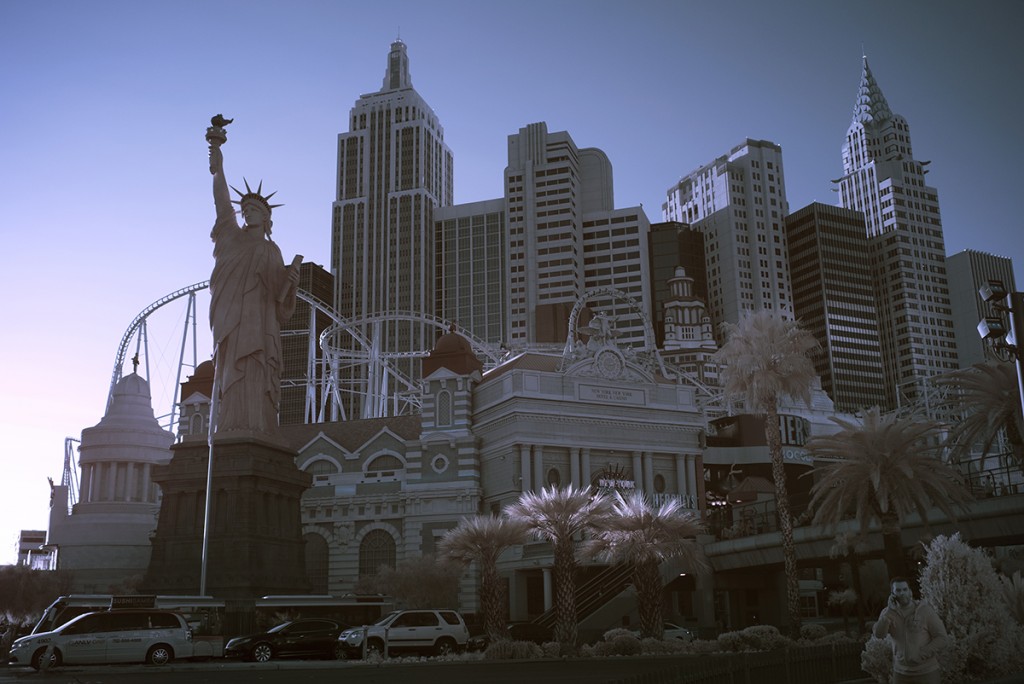
- Sony A7s (720nm)+Zeiss Loxia 35mm f/2 Biogon. Sarah McAlexander, 2015
The IR camera did not pick up on many of the screens and lights that Las Vegas is known for (since they are not emitting or reflecting much IR light) giving many of the images a ghostly or gloomy feel. This can be a tool or a hindrance based on your own creative goals.
What I’ve Learned
There are a few things to consider before choosing an IR camera for a shoot.
For Portraits: IR photos can yield soft smooth looking skin and dreamy portraits but things like dyed hair, makeup, and certain fabrics look very different in infrared light. For example, if the subjects hair is not a natural color it can show up in the image brightly colored or white. Similar things happen with low quality fabrics. Notice the unflattering coloring on the people in the background of the photo below. In addition, the subject in the foreground was wearing a dark blue shirt and it now appears very light.
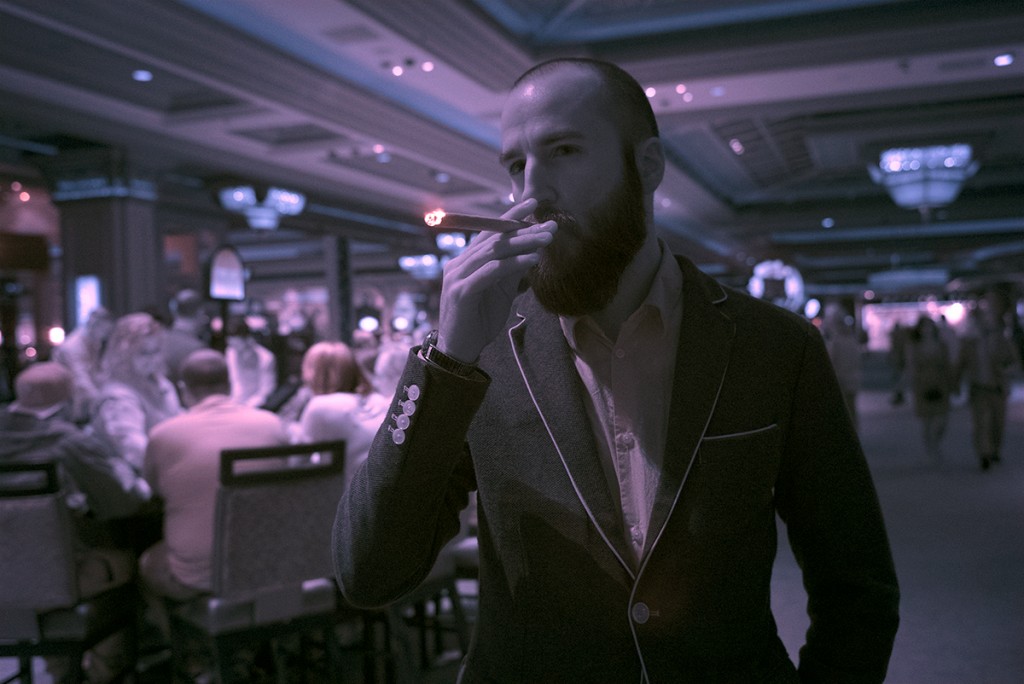
- Sony A7s (720nm)+Zeiss Loxia 35mm f/2 Biogon. Sarah McAlexander, 2015
Focusing: Focusing with an IR camera will not be as accurate so be sure to use live view and manually focus to avoid front and back focusing. This will mean spending time to take shots more deliberately and being careful with snapshot or run-and-gun types of shooting.
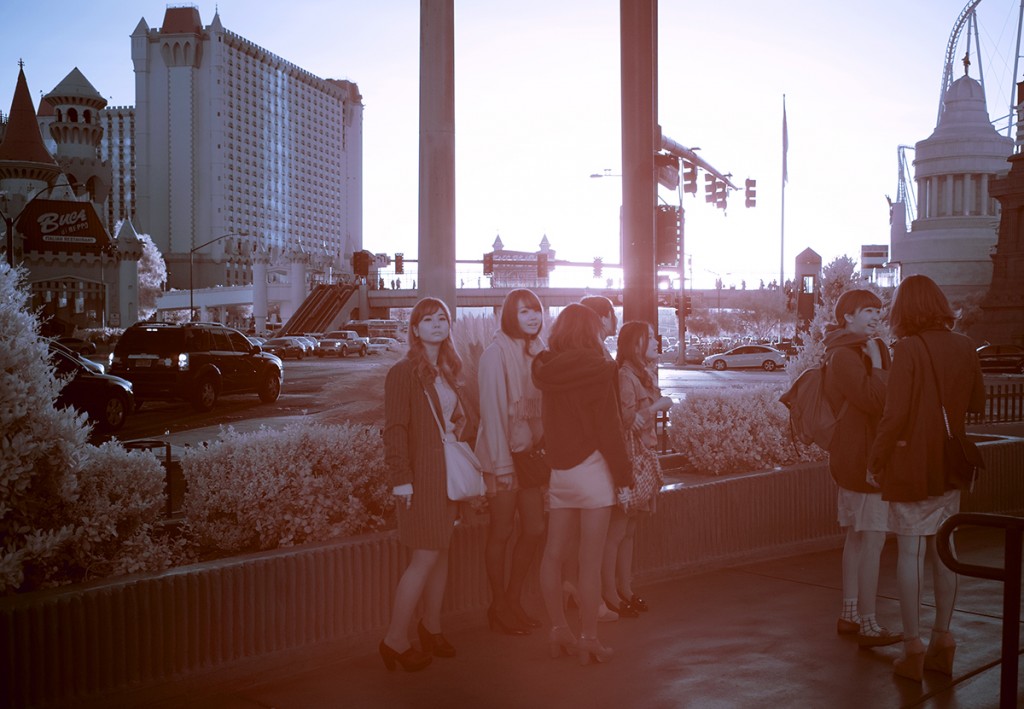
- Sony A7s (720nm)+Zeiss Loxia 35mm f/2 Biogon. Sarah McAlexander, 2015
Hotspots and Flare: These are two common problems in infrared photography. Normally lenses have coatings on the front element and inside the barrel that help reduce issues with flaring, but they are not effective for IR shooting. Hotspots appear as blurry bright spots near the center of the image and can be avoided by using a lens that has been tested to have a compatible coating for shooting IR. There are multiple lists of infrared friendly lenses available with a quick Google search, and while we have not personally done extensive testing, we have found that Zeiss glass works particularly well. Remember to research the lens you are planning to shoot with before hand so you don’t end up with a white orb in the middle of all of your images.
Avoiding flare involves shooting carefully, reviewing often, and avoiding pointing the lens toward the sun (unless you enjoy the effect). For both hot spots and flare changing the aperture setting will help minimize the issue.
Just remember to review, review, review.

- Sony A7s (720nm)+Zeiss Loxia 35mm f/2 Biogon. Sarah McAlexander, 2015
Converting a camera to an Infrared camera is a very technical process, and can quickly ruin a camera if not done correctly. For that reason, we have professionally converted cameras, and have made them available to rent directly from LensRentals. Doing this removes the risk on your end, so you’re able to still experience the world of Infrared Photography without any problems. To look through our inventory of Infrared cameras, click here.
This may not be a go-to camera for day to day work, but stepping outside of a normal routine can bring a new flow of creativity and better understanding of image making that can impact how you shoot in the future.
Author: Sarah McAlexander
I’m Sarah. I have a BFA in Photography from the University of Memphis. I’ve been shooting professionally for over 6 years. When I’m not working here or freelancing, I enjoy yoga and traveling.
-
Katherine Ko
-
William Dyer
-
Kevin Purcell
-
Rob L
-
adrian
-
SoulNibbler
-
Aaron
-
Nqina Dlamini
