Tamron 15-30 f/2.8 Di VC Partial Teardown
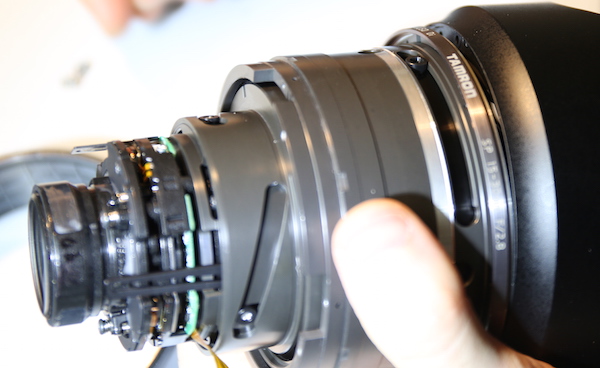
We’ve become fans of the Tamron 15-30mm f/2.8 Di VC USD lens since we first tested it optically, but we haven’t really been inside of one yet. It’s not that we weren’t curious. We’ve just been trying to get through the week before and after Memorial Day, typically one of the busier times of the year for the repair department, so we haven’t had time.
But we had two copies show up in the repair department with a jammed zoom mechanism. A peek under the zoom rubber didn’t show any obvious problems. So we needed to open them up and see what was wrong, and thought we’d take some pictures along the way. This is a rather different looking lens and we were curious if it was different inside too.
This isn’t one of our classic teardowns done just for demonstration purposes, though. The fact that the lens has a jammed zoom means that normal disassembly procedures may not work. With most zoom lenses standard disassembly requires you have to have the lens in a certain zoom position to take this off, a different zoom position to take that off.
Also I’m writing this up ‘as we go’. I thought it might be fun for some of you, at least, to see what it’s like when we try to figure out what’s wrong with a lens that we don’t know very well.
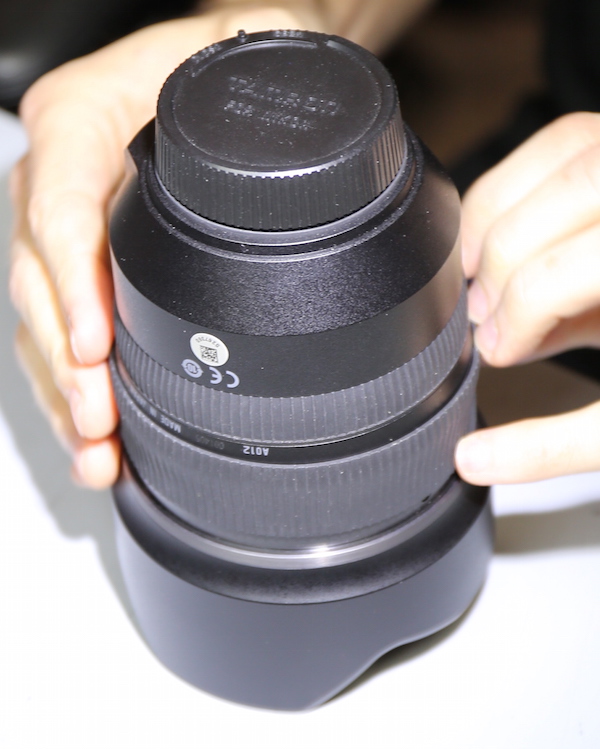
Front End Disassembly
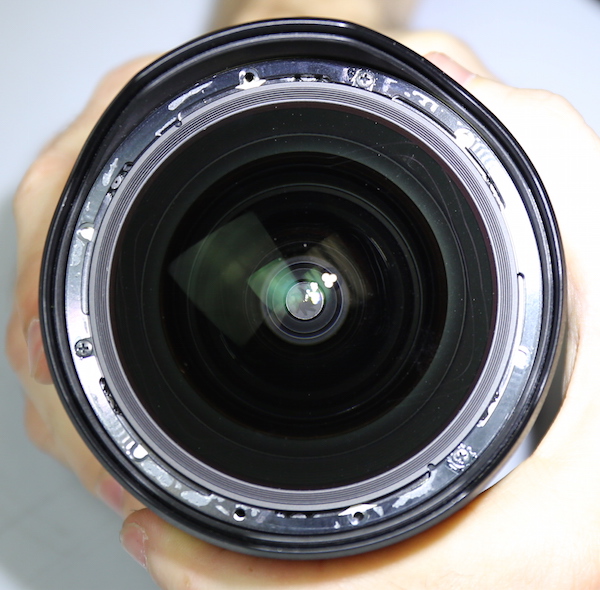
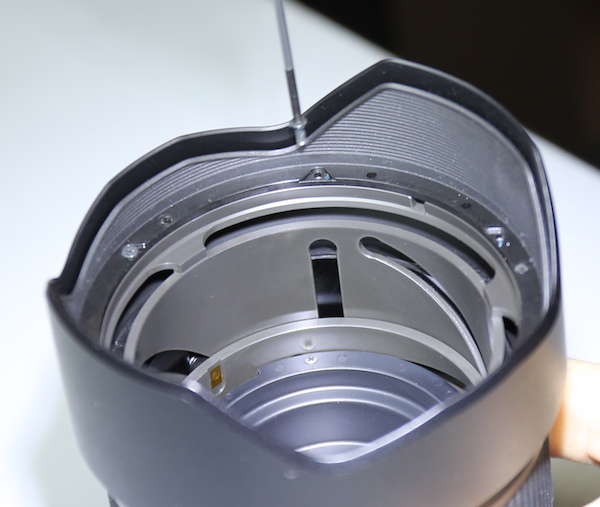
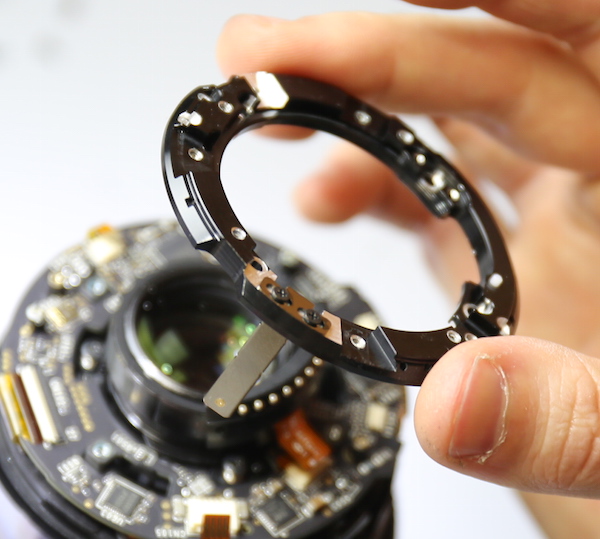
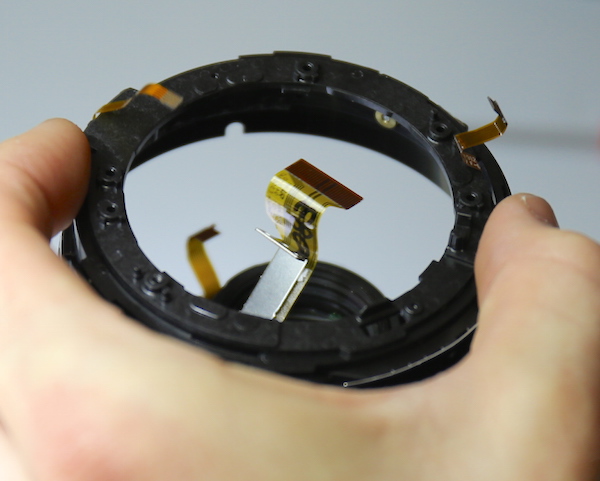
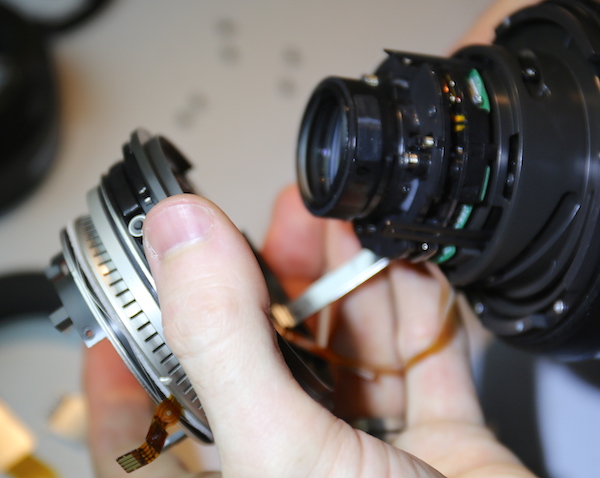
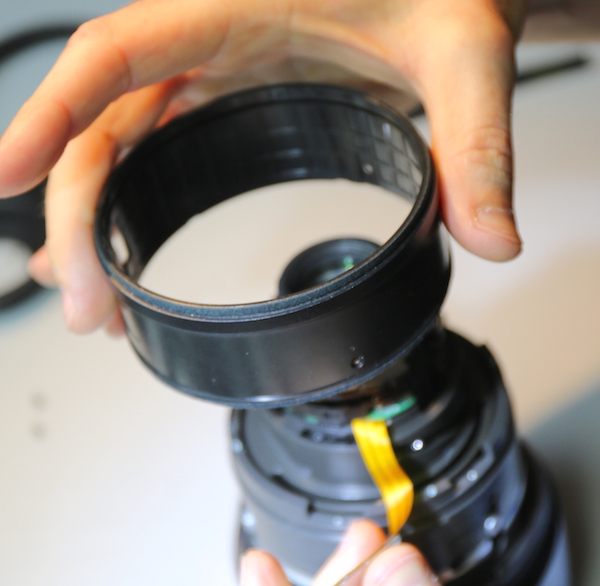
We weren’t quite sure what the best way into this lens was so we just started at the front. There is a stick-on makeup ring that has to be peeled off before we get to work.

Removing that exposes several different screws, some of which hold the front group in place.
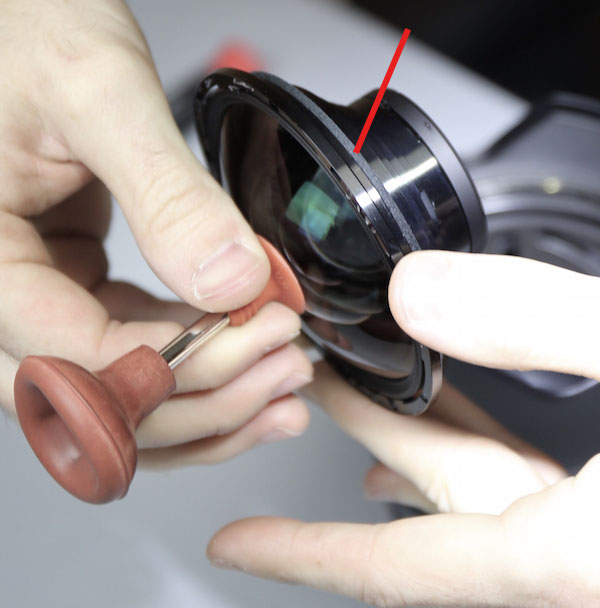
Remove three screws and the big, sealed front group comes out in one piece. That’s the good news for all of you who plan on disassembling your copy for fun and profit – getting the front group out couldn’t be simpler. Notice there’s a nice, robust seal (red arrow) on the back surface of the group. The rear element of this group could be removed, but there was no need to do that for this problem.
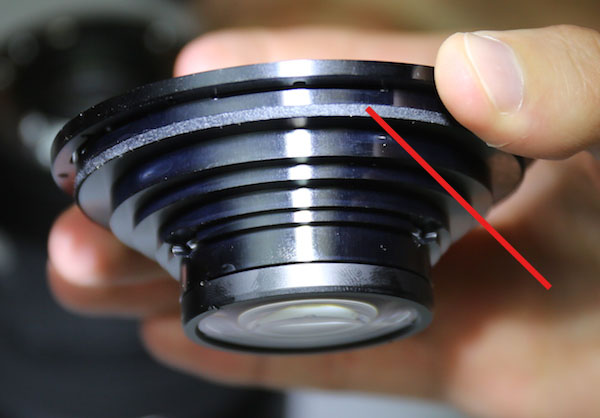
The bad news about this front group is it has a complex set of shims. mostly held in place by the screws that we had removed to take out the element. From the glass side down, first there are a couple of tiny round shims at each of three locations.
Under which are several ring shims of various thicknesses. Under the ring shims are another one or two tiny round shims at each screw location.
So with the screws gone nothing holds this 8-deep (your number may vary) stack of shims in place. A stack of 8 shims isn’t very stable, so the shims are going to tend to fall out of place. When the shims fall out of place you don’t know which ones went where. When you don’t know which ones went where, you get to spend an hour or two optically testing the lens and moving them around until you get the lens optically correct again during reassembly.
My own method of dealing with the situation is to volunteer to write up the report while Aaron fixes the optics and does the reassembly. You don’t have that option, so I really wouldn’t recommend taking the front glass out of your Tamron 15-30 f/2.8 VC unless you’re really comfortable with lens disassembly and optically adjustment.
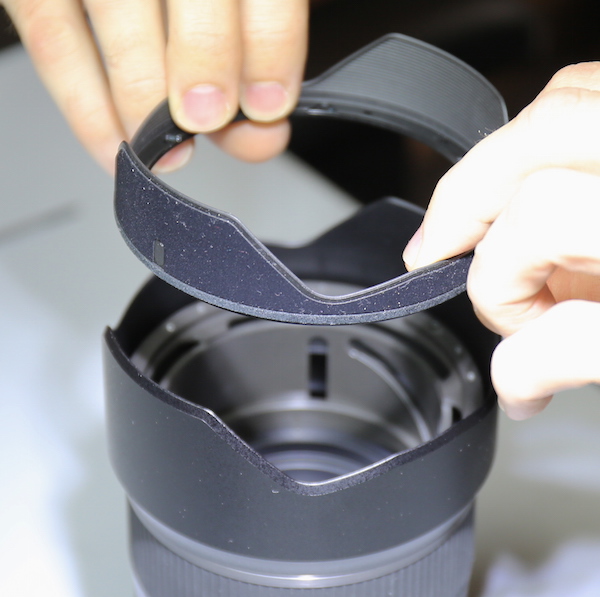
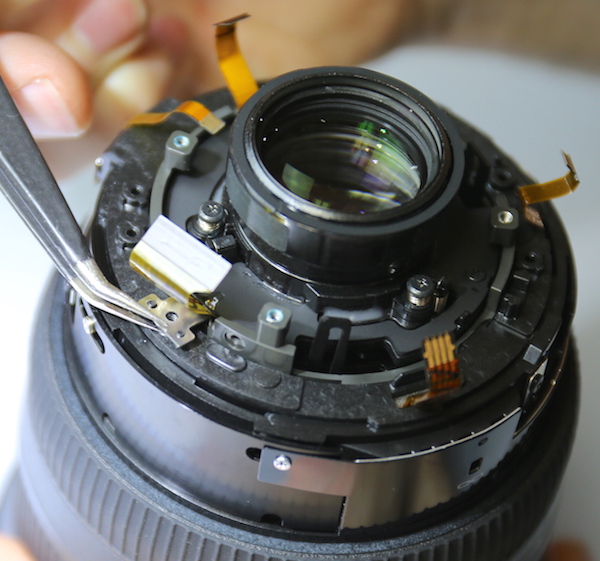
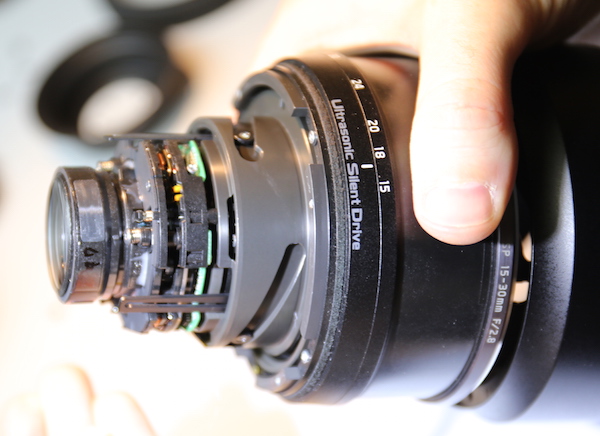
After we’d collected all the shims from where they fell inside and outside the lens, we got back to disassembly. There are several screws under the ring shims that hold the inner petal hood in place.
With these removed, the inner hood comes right out. Again there is a nice, thick, gasket around the bottom of the hood, and some optically black felt lining the outside. This the way it should be, helping to dust and light seal the lens, but too often we see things aren’t taken care of properly like this.
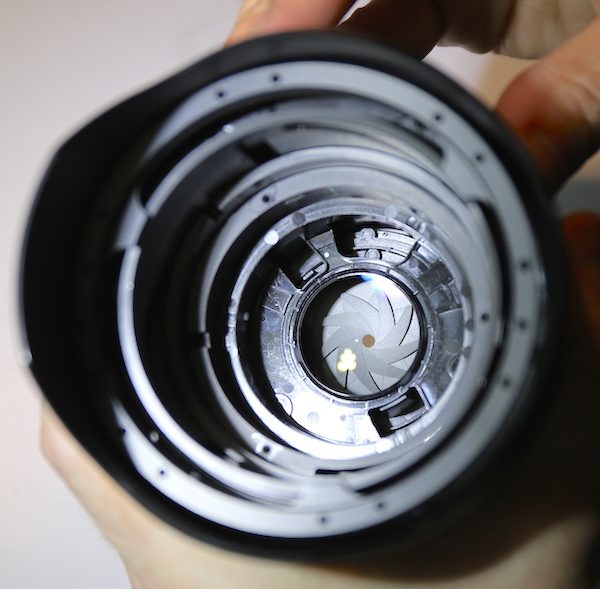
Unfortunately, removing all of the front glass and inner hood accomplished nothing more than letting us look down inside the lens. We still didn’t have any access to whatever was causing the zoom to jam.

Rear Disassembly
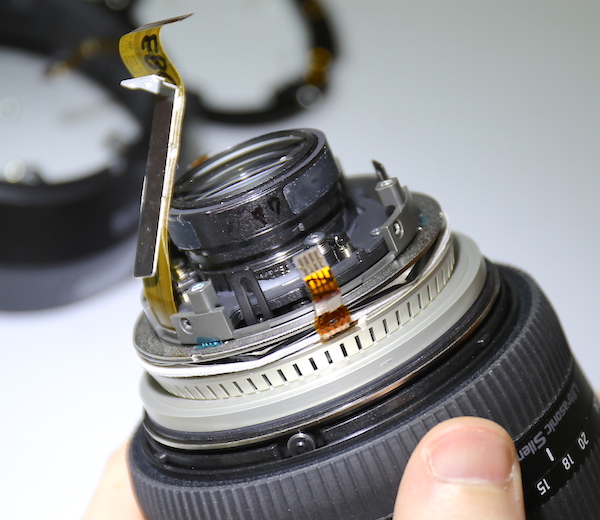
So we flipped the lens over and began rear disassembly by first removing the rear light baffle.

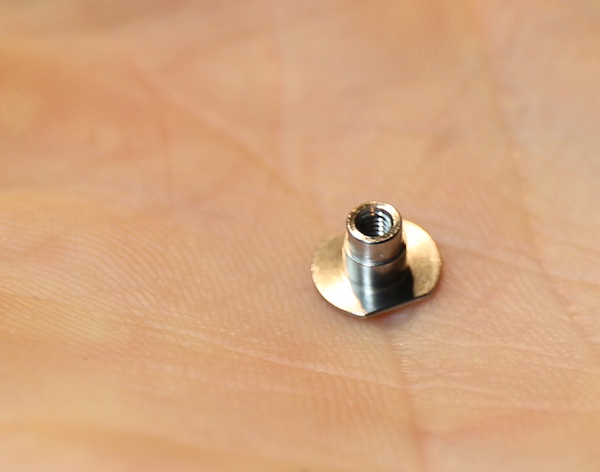
And then the rear mount and electrical connections can be removed. (This is a Nikon mount, hence the mechanical aperture system.) Of course, there are more shims under the lens mount. There is also a nice thick weather-sealing gasket around the bayonet mount. Weather sealing, for those of you who aren’t aware, means “the manufacturer still doesn’t cover water damage”, but some of you really are interested in it, so I thought I’d mention it.
With the shims out out of the way, the 4 screws holding the outer rear barrel in place can be removed and the rear barrel taken off.

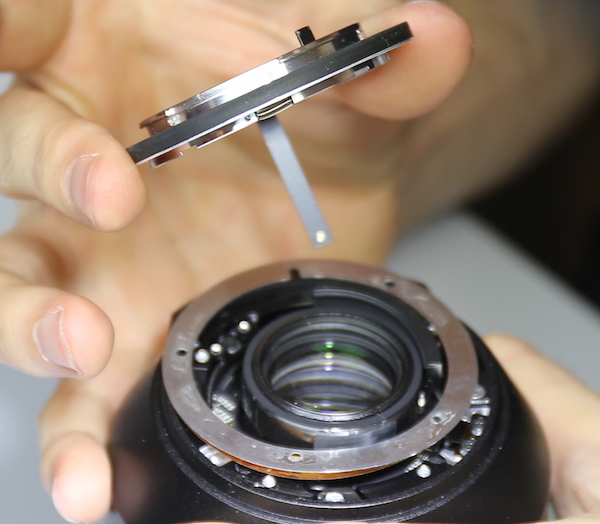
For those of you following along at home and disassembling your own lens, note that the GMR unit is now exposed. Touch it and your lens dies, pretty much.
There’s a solid metal inner barrel that gets removed next. This basically connects the bayonet mount on one side to the lens body on the other.
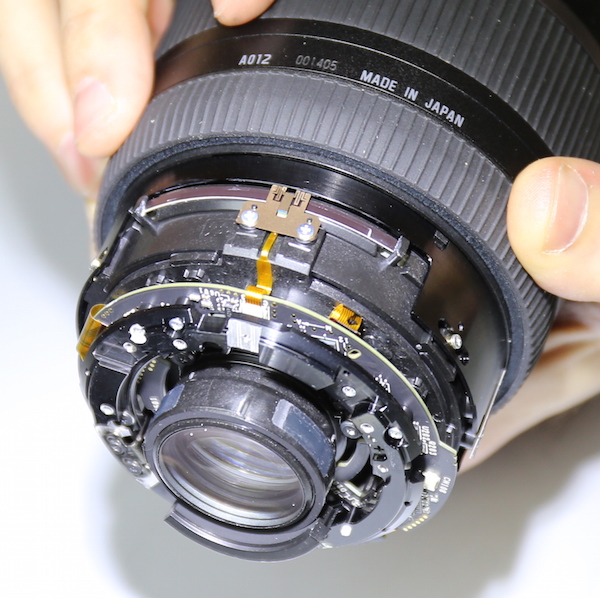
After which flexes can be disconnected and the PCB board removed. Like most Tamron lenses, the PCB is rather sexy (to a Geek) in basic black, unlike the green and blue-green PCBs most manufacturers use.

If you’ve followed other tear-downs we’ve done, you’re probably getting the idea that this one, while not complex, is a bit more tedious than most. That would be a correct impression. But now that we have all these various pieces removed, we start to get down to the mechanical workings of the lens.
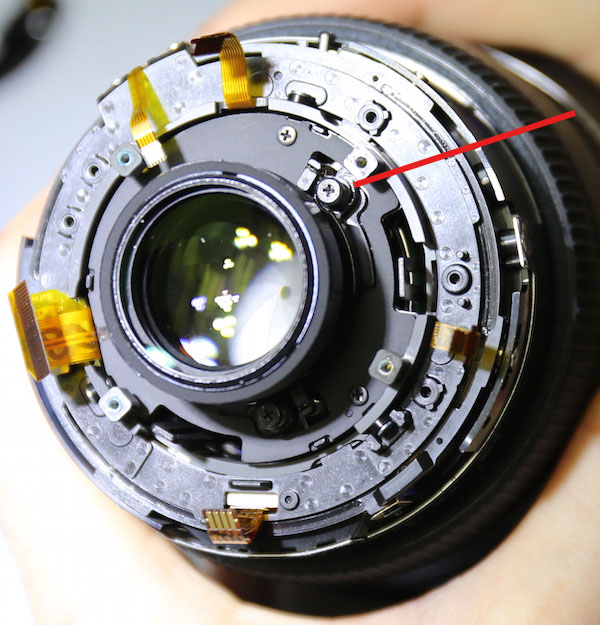
We can now remove what I thought was the focus key (being held by the forceps). I was, as is so often the case, less correct than I would like to admit. It actually is just a metal plate that holds the flex (the one just above the forceps) in place as it goes down through the lens.
The rear group is held in place by several large, spring-loaded screws that just scream “I’m a centering element, if you remove me I will make your life a living hell as you try to recenter me.”

Either by luck, or by good design (I’d say the possibilities are about equal), the inner rear barrel can be removed by taking out several side-mount screws. The rear-element centering system isn’t disturbed at all.
Which lets us remove the rear inner barrel without touching the rear optics.
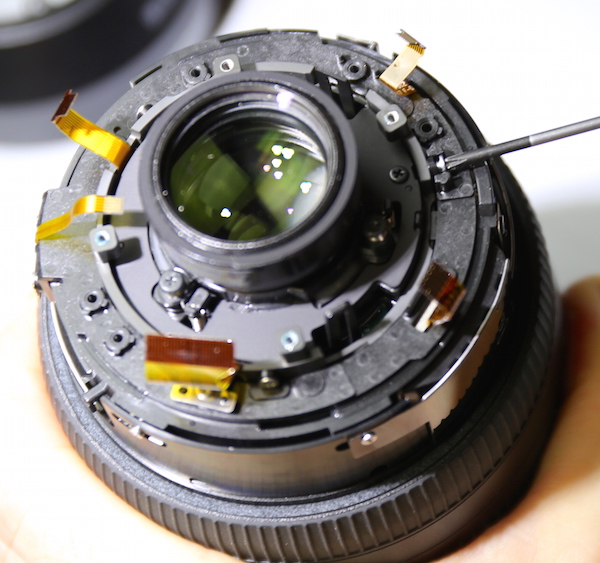
We’ve now got the focus motor exposed, but still aren’t seeing anything causing the zoom mechanism to jam.
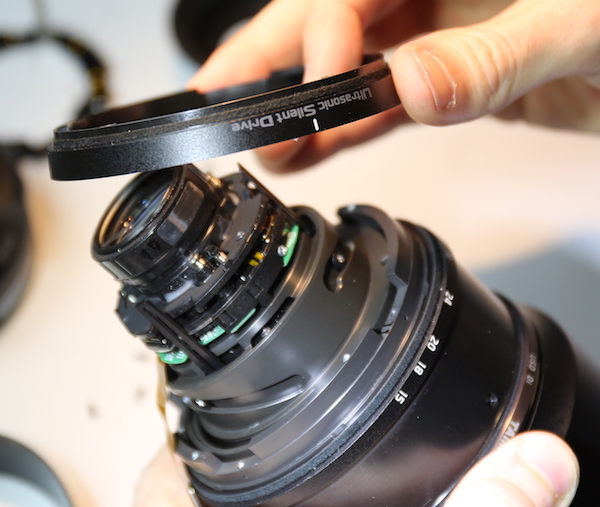
The focus ring comes off now when turned to the proper location.
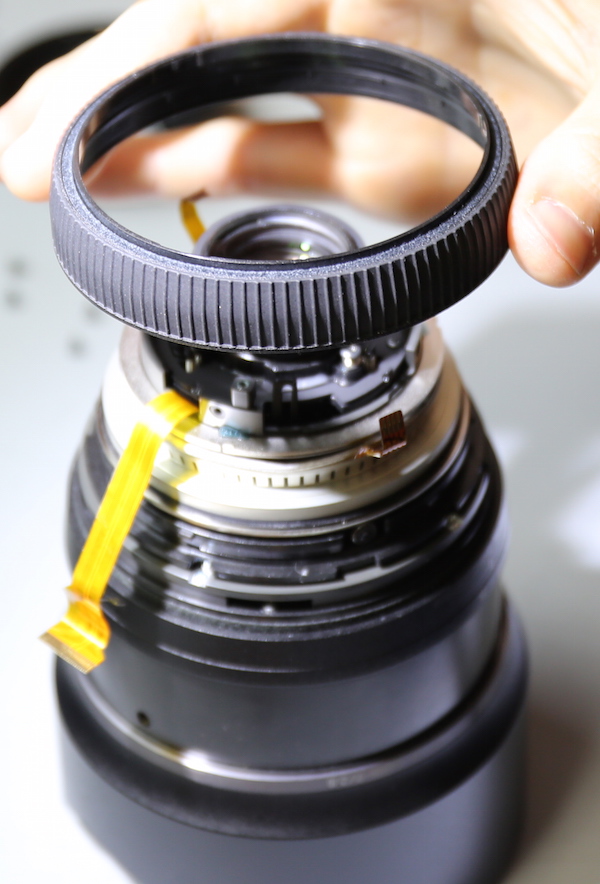
After which the screws holding the focus motor in place are visible.
After removing these the focus motor can be taken off of the barrel.
With the motor off, most of the helicoids for the zoom and focusing mechanism are exposed, but we still can’t find any reason that the zoom is jammed.
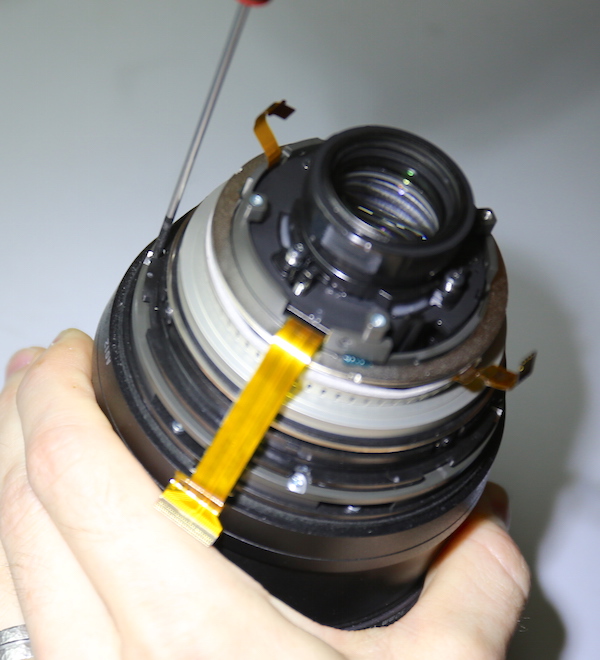
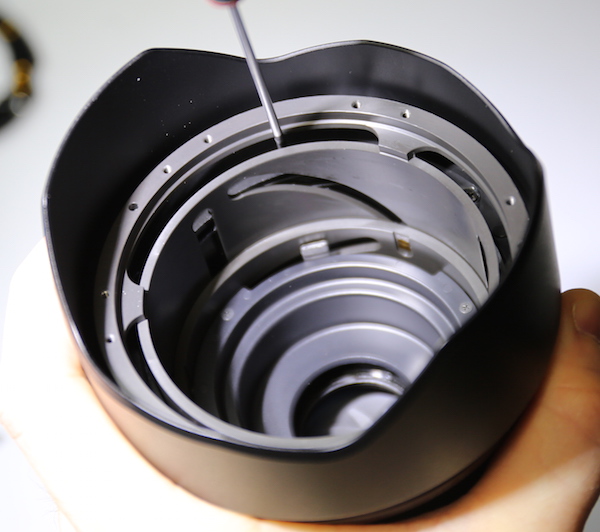
We turned things back over at this point, first removing the deep inner baffles.
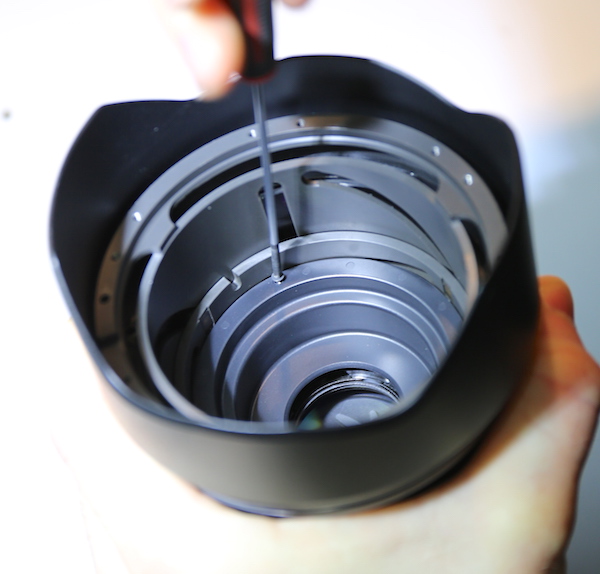
Still no joy, however, as the inner barrel still shows no sign of what’s causing our zoom jam.
Looking around, we found another set of screws that seemed to hold the front barrel and outer hood on. Because the zoom mechanism was jammed, we couldn’t move the barrel to get to these very easily which led to the rather different technique of loosening the screws from above… .
And then removing the loosened screws through the helicoids.
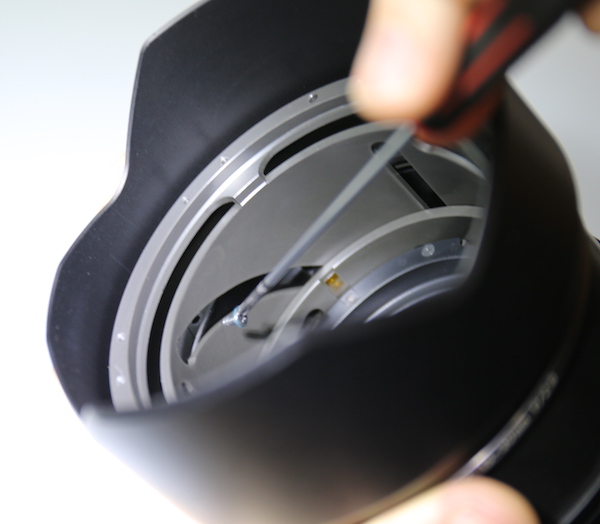
At this point it became obvious that the front barrel did not come off over the front of the lens, it had to be taken back over the rear, which meant removing the mid barrel. This does have some real-world implications: when the built-in hood breaks, replacing it is going to require a near complete disassembly. Anyway, at this point taking out 4 more screws let us take the mid barrel off.
Which let us remove the zoom ring.
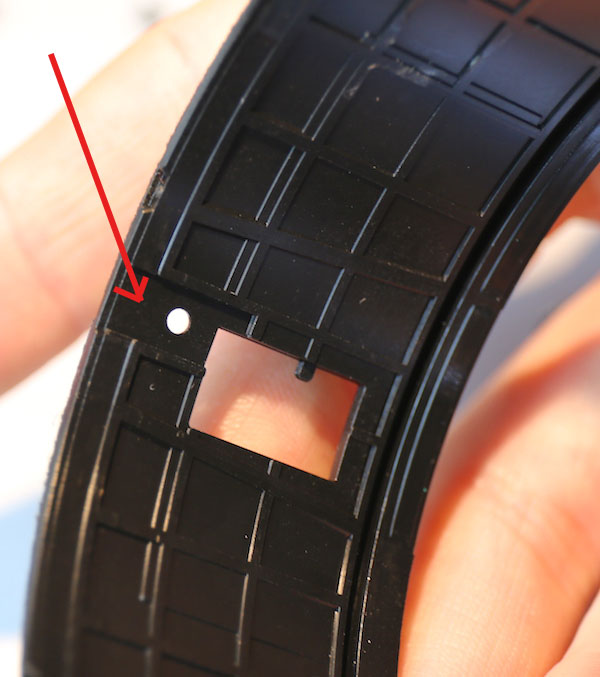
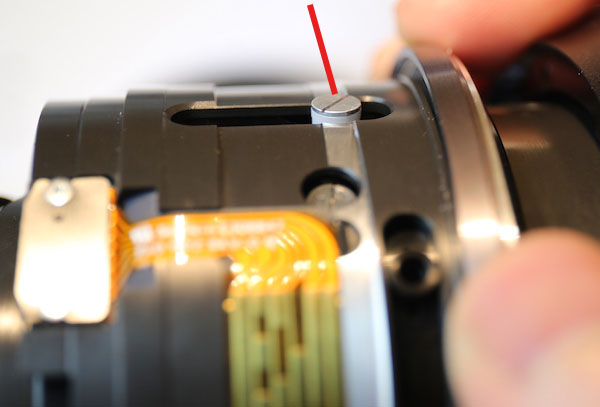
At this point we found that there was not a classic zoom key, rather there were several of these metal ‘plugs’.
The flat base of the plug sits in a slot inside the zoom ring (red arrow)
And the inner slot inserts into openings in the inner zoom mechanism (where the forceps are) so that turning the ring turns the inner zoom mechanism. Its not an uncommon system for attaching the zoom ring; most larger zooms use a similar system.
At this point, after looking at the keyholes and posts and ring for about 5 minutes, we still had no damn clue what was jamming the zoom mechanism.
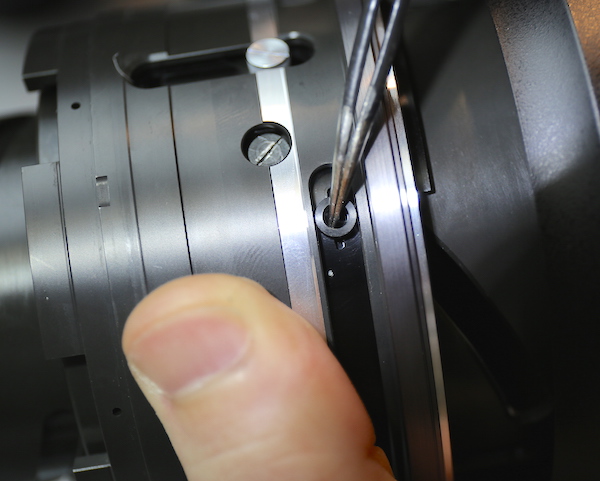
But then when we looked back at the exposed inner barrels the problem became obvious. The large guide screws and collars that the barrel slides along (they keep it sliding back and forth in a straight line) had loosened and backed out. One of them poked way up through it’s opening and had been jamming the zoom ring. Simply tightening it back (with a generous dose of loctite to hopefully keep it where it belongs) restored the zoom to normal function.
And yes, because someone always asks, the lens was reassembled, optically corrected, tested, and works perfectly. It’s back in the rental fleet now.
So, Mr. Wizard, What Did We Learn Today?
Well, a couple of things. First, figuring out how to work on a lens without having access to any repair manuals requires a bit of trial-and-error. It’s not quite as slick and smooth as we’d like it to be. But I thought you might enjoy seeing what it’s like. If we need to do this again, for example, we don’t need to do any disassembly of the front. The screws in question could be reached by just the rear disassembly.
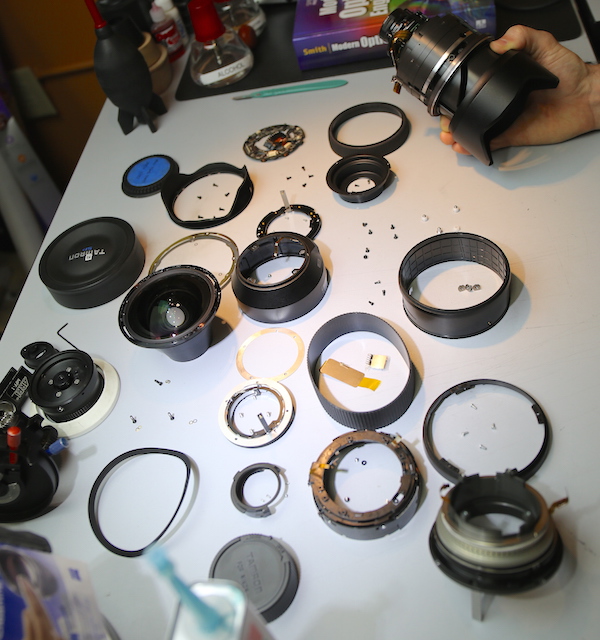
Second, we found that the Tamron 15-30 f/2.8 is a well built lens, but certainly not very modular in construction. Where a modular lens, such as the newer Canon lenses, separates easily into three sub-assemblies, the Tamron came apart in lots of separate pieces as shown in the picture below. And we hadn’t done anything like a complete disassembly. None of the optical elements or helicoids had been touched yet and the front barrel was still on.
Getting in and out of it is not complicated or difficult, but it’s definitely more tedious than a modular design. How does this affect you? Not at all. Tamron has a really good service department, consistently ranking high on our list. Their techs probably wish the lens was more modular (I know we do) but they’ll be able to fix it just fine.
Two things that might be worth noting, though. Replacing the built-in front petal hood isn’t simply removing a couple of screws and replacing the hood, it requires a significant disassembly of the lens. So don’t drop yours on concrete. And since we’ve seen two of these zoom jams already, well, at least now you’ll know what’s causing it if it happens to yours. I doubt any of you will want to try to fix it yourself at home, but it should be easy and simple for it to be fixed at the service center should it happen to you. And I suspect they’ll throw some extra loctite on there just like we did.
Roger Cicala and Aaron Closz
Lensrentals.com
June, 2015
42 Comments
Sam ·
That was amazing. How long did this take you?
Roger Cicala ·
Sam, about an hour to disassemble and fix, another hour to reassemble and optically test.
Don Keller ·
Roger and Aaron
Ya’ll are the best ! Taking the time to fully document this AND joke about. Of course Roger was doin’th jokin’ while Aaron was sweating the reassembly. Thanks for helping us all to understandthe complexity of the “glass” and the “box with a hole in it”
Don in New Orleans,, La
Lyle ·
You are a brave man. Very interesting and educational. Thank You.
erno james ·
Man, now I’m beginning to understand why lenses cost what they cost! I bet if you tried, you could build a space shuttle. Fascinating series of images, E.
Nqina Dlamini ·
Good grief DIY is border line out of the question for me. So many screws, shims and washers that you can lose. Thanks for sharing.
Shane ·
I love reading these teardown posts. Plus, they are well documented photographically. Excellent.
Jim Kramer ·
I could have done this in half the time, because after my disassembly there would have been no need to take the time to put it back together – it would have been a pile of useless junk. You guys got a lot of chutzpah!
Michael Reed ·
I read up on the GMR but can’t find the why touching it is BAD.
Explanation?
thanks
Roger Cicala ·
Michael, magneto resistors are incredibly delicate. Just touching one can make it stop sensing and then the lens doesn’t know where it is located focus-wise. Most lenses just stop working, at least in AF mode, if that happens.
If you’re interested, here’s a nice resource: http://machinedesign.com/sensors/basics-rotary-encoders-overview-and-new-technologies-0
Stuart ·
Hi, nice work. Next time you have to go in, after you loosen the front element, if you turned it upside down and kept the screws in the holes, the shims may not fall out and all over the place. Tape or blutac could help keep them in, and that could ease the pain of reassembly. I know hindsight is 20/60…….
How old was the lens, it seems odd that two have the same issue. Is this going to happen to more of them?
Roger Cicala ·
Stuart, they were both a few weeks old. Probably just a batch that got through without enough lactite. I doubt it’s a real common problem.
Tim ·
That last photograph of all the parts on the desk reminds me of something I took apart when I was a teenager. Unfortunately, 40 years later, it’s still in pieces in a box in the attic.
Thanks for taking the time to document the teardown. It’s always informative.
Joseph Andrews ·
My comment is this–some will say it is a political comment but it is not.
What bothers me most about our modern economy is that folks like bankers, who do nothing but collect, count and safeguard (!?) moneya are paid millions and millions of dollars…annually…
BUT people who can really do things…really build things…really take apart things…really make things that matter to the peeps…do not make millions.
Congrats to Roger and his staff. You guys are the best. I enjoy reading your posts and plan to reward your efforts with a rental soon (I would be a first-time customer).
Thanks again.
Matthew Saville ·
Trial and error? More like Trial and terror. Eeesh!!!! (And I’ve taken apart my fair share of lenses, lol…)
Ralph Conway ·
Hell! Now I know why I stopped de-assambling stuff like this a couple of dozend years ago. Never ever I would be able to re-assamble those millions of peaces and get a working lens again.
Best wishes
Ralph
Ilya Zakharevich ·
Roger, you wrote:
“some optically black felt lining the outside”
What good does it make OUTSIDE of the hood? And why do you think the INSIDE (which AFAIU is the only thing which matters) is not optically black, but gray?
Roger Cicala ·
Ilya, I think it would be possible for some stray light to leak in between the two hoods and the optical black helps prevent that.
Jorgen Risum ·
Hi I am impressed. Now it is obvious that DIY is not usable in this area – and why I dont do it myself (DIM). I wish we had a company like yours nearby – just moved to Sweden and havent found any yet.
Randy ·
Thanks, Roger. Sure seems like a lot of things to go wrong or perhaps be assembled not quite right. This is the type of lens I’d rather have been pre-owned by LensRentals.
RAY REPEDE ·
Great article and photos.
What type of Loctite do you use in the lens?
Would that same type of threadlocker be good to place on the 1/4 inch screw to secure a camera strap to the tripod mount (not to use on a tripod but to make sure the camera strap mount does not come out)?
Thanks.
Roger Cicala ·
Ray, the very large screws, like 1/4″, rarely have lactate applied, so we’ve followed the manufacturers and not used it on them.
Mogens Werth ·
Great article as always; well written and well documented. Where else can you get insight to the inner parts of our lenses…….? I really look forward to reading your clever comments on this and that. Great technical skills too.
Maybe a warning would be appropriate: many types of Loctite or other anearobic adhesives, could lead plastic to crack; normally you never know what type of plastic you have, so to play it safe, i never apply Loctite if i’m not absolutely sure if the surrounding materials can stand it……..what’s your experience in that matter?
Best wishes Mogens Werth
Roger Cicala ·
Mogens, I think every lens we’ve ever disassembled has lactate over ever screw, so we have just assumed all the parts are safe.
Roger
Lynn Allan ·
Is it a reasonable speculation that this lens might be prone to this type of “zoom lock-up” issue?
If so, would you use a different, more direct series of steps to fix the next instance of this problem showing up? I’d guess some of the steps were, in hind-sight, unnecessary. Or not?
Roger Cicala ·
Lynn, in retrospect we never needed to touch the front half of the lens. We could have fixed the problem just going in from the back. We’ll know next time.
Ray Repede ·
Henkel says its Loctite 425 Assure product is safe on plastics (good on metal to metal and metal to plastic), but it is much more expensive than Loctite 242 which is not specified for metal to plastic.
Danny Wilson ·
Roger, I sure hope you mean there is Loctite, not lactate, on those screws 🙂
Andy ·
Roger, I bought this for a wedding. Jammed zoom ring out the box and Tamron wont honor it, they put the blame on me and said I did “Impact Damage”. My ask you what recourse I can seek for its only 9 months old.
Roger Cicala ·
Andy, you can walk up the food chain at Tamron, that’s about it. But Tamron’s usually pretty reasonable.
Martin K ·
Great article – I had exactly the same problem, but having seen this, rather than diss-assemble the lens, I just drilled 3 holes (through the zoom ring) over the loose screws, tightened them and then covered the holes with very thin metal plates. Job done in less than 30 mins!
Andrew ·
Hey. I’m having an exact same problem, but I’m not quite understanding. Would you please help me, guiding where you drilled the holes? I want to make sure I do it right in the first time. Please help me…
Jake ·
Very good tear down! I had the very same issue and managed to get it sorted out in less that an two hours with your instructions! Question for you guys, the lens is now registering 24mm (if I mess with the brushes it will sometimes move to 22mm or 23mm) all the time, my guess is something is up with the zoom brushes. Did you guys run into this when reassembling the lens?
Pitulice Paul ·
I’ve bought a second hand tamron 15-30, and when i openened the photos in lightroom all photos taken where registered with 24mm. Got the lens to the service, they told me.that the zoom rimg turns very hard (not jammed) due to a shock. They find out how to resolve the exif problem, but the hard turn not… i dont know
KM Shum ·
Hi Roger. After viewing this fantastic article. I repaired my 15-30mm lens for zoom jam problem. When I put back everything that I found no auto focus function on this lens. Any suggestion or idea to fix it?
Kenneth_Almquist ·
I don’t think Roger reads comments on old blog posts. He does say that “Tamron has a really good service department,” so that’s an option.
Michael Clark ·
“For those of you following along at home and disassembling your own lens, note that the GMR unit is now exposed. Touch it and your lens dies, pretty much.”
The GMR unit is what reports the lens’ focus position back to the camera.
Justin ·
Great article! I hope to God to never have to do this myself.
Class A ·
Great write up! The advice about not smashing the lens onto concrete has been noted.
Salty Roast ·
Its funny, you removed everything except the thing I came here to see, the outer lens hood 🙂
Ali Ameer ·
Dear Sir I have SP 15-30mm 2.8 VC G2 my front round glass is damage but lens work fine on video and on photos but due scratches it spread the light to much lens is not useable in events or something else if remove the front round glass it will work or not