LensRentals hasn’t been able to get enough copies of the Zeiss Batis lenses to even fill our existing orders, much less enough for Aaron and I to test and play with them. But one of our customers was kind enough to drop a Zeiss Batis 25mm f/2 lens the other day. Nothing looked smashed, but after the drop, the AF system stopped working. So it was supposed to go to Zeiss, but we thought, even though we’d never been inside of one, maybe we could fix it. OK, we didn’t think that. We thought this would be a great excuse to open one up and look inside. Plus, it was already broken anyway so we couldn’t get in a lot of trouble.
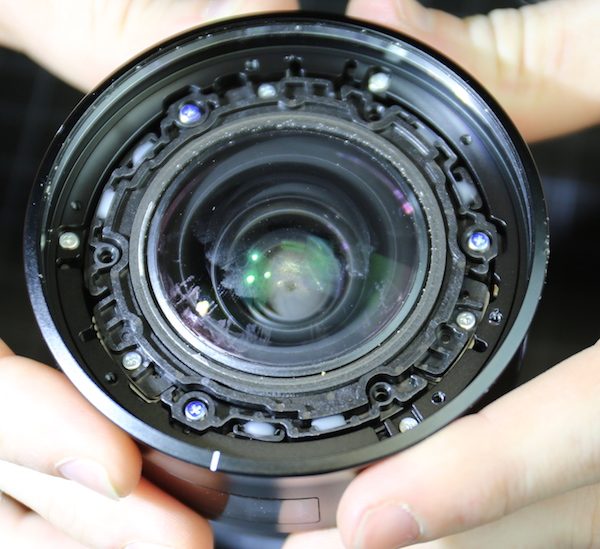
We started in the usual fashion, taking off the rear bayonet mount. This has a nice (and bright blue) rubber seal around the edges. The electronics, like those in most Sony lenses, are best removed along with the bayonet.
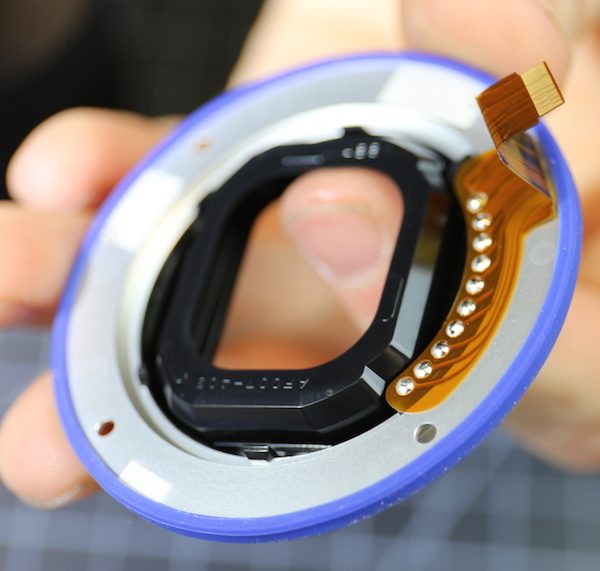
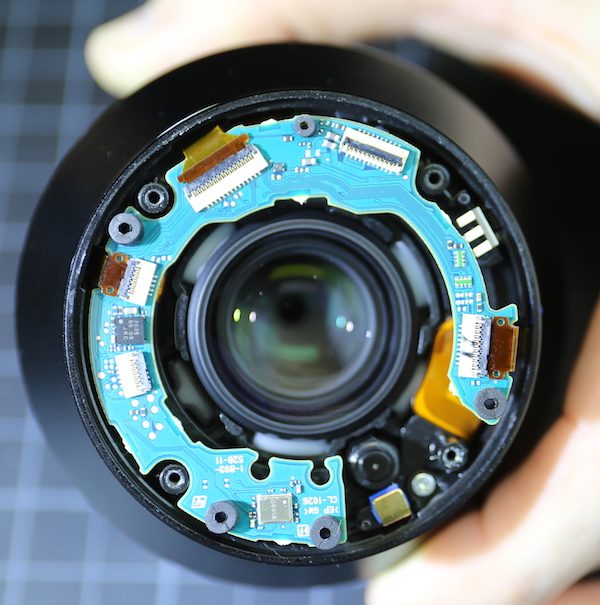
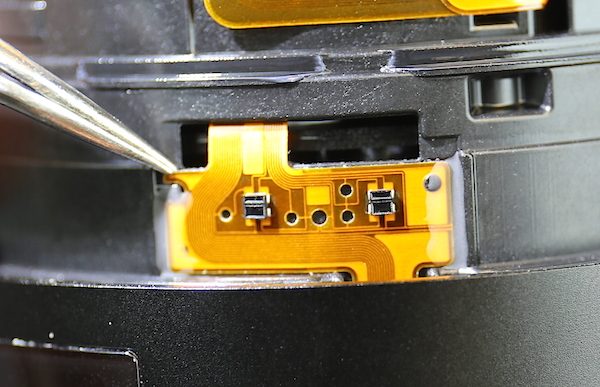
Removing the bayonet exposes the PCB board. The board looks very similar to ones we see in the Sony FE lenses: Similar board material, solders, traces, flex clips, and same rubber bumper system. That isn’t, I guess, very surprising.
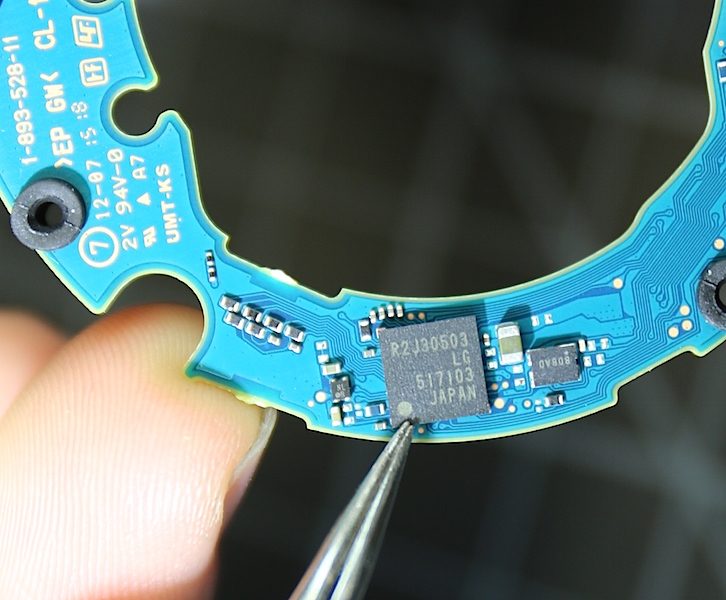
There was one flex attachment on the board that was blank. I assume it’s to connect a flex for factory diagnostics, but I’m not certain.
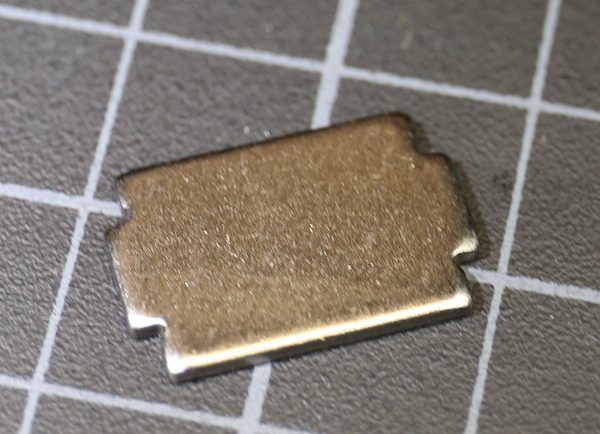
Immediately underneath the ’empty’ flex slot is this chip, although whether it’s there on purpose or by coincidence I don’t know. I’m not a chip guy, so one of you let us know, but it doesn’t look like a programmable memory chip to me.

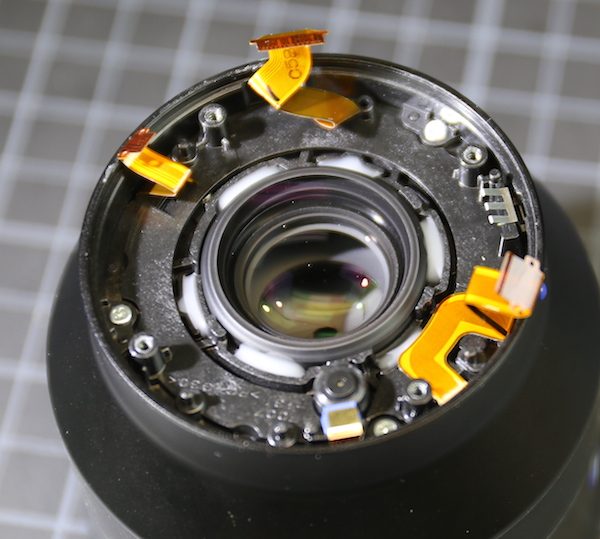
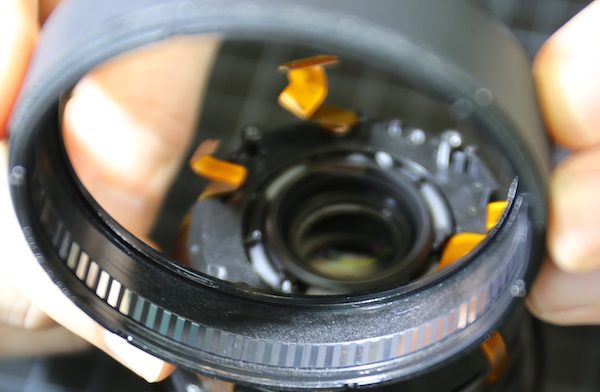
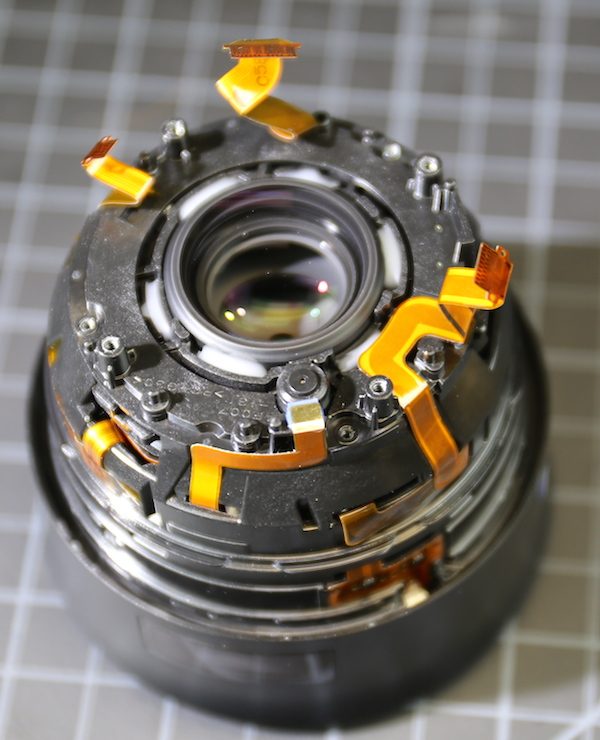
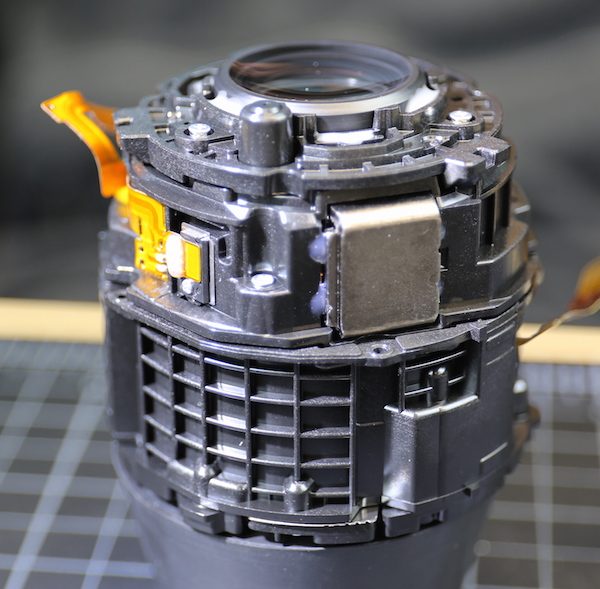
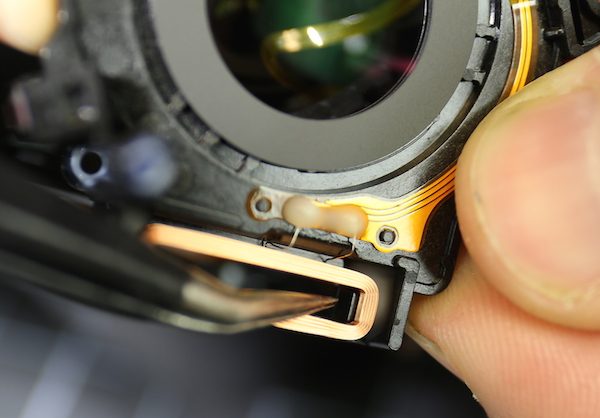
With the flexes unhooked and the PCB removed we can get a good look into the rear barrel area of the lens. Over on the right you can see a small aluminum fork. This appears to be simply a tensioner to help keep the PCB in place, it’s not electrically active. You can also see there is thick white glue around the rear group. We’ve seen an identical glued-in arrangement with identical glue in the Sony FE 70-200mm f/4 G lens. Please, fanboys, don’t go crazy speculating on what lens is made by whom where. We’ve seen the exact same system in Fuji lenses and some other brands. It’s just a technique.
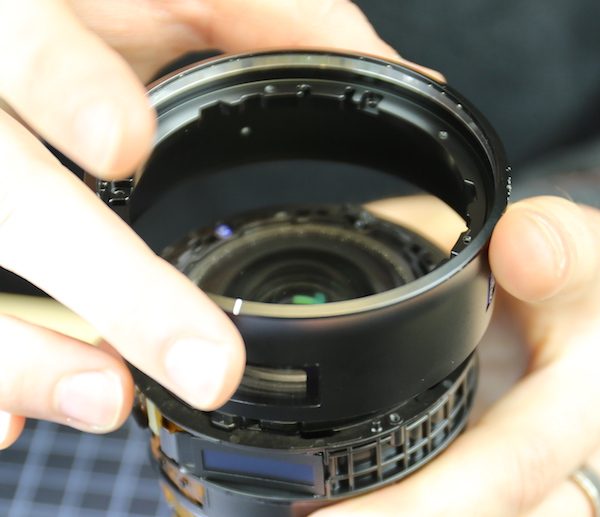
Taking out the 4 screws that were under the PCB lets us slide the rear barrel off of the lens.
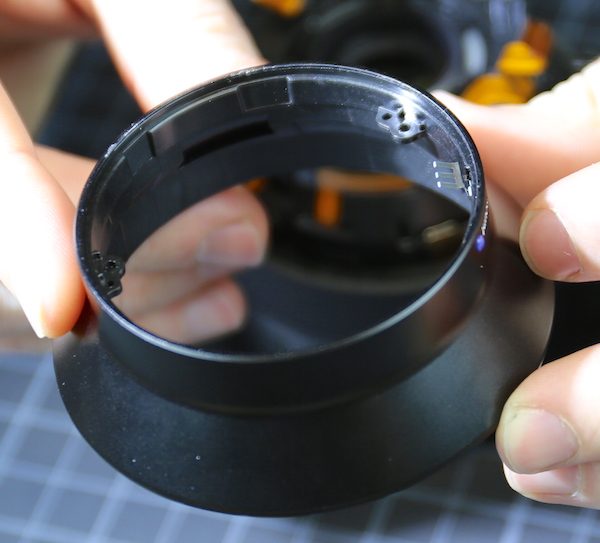
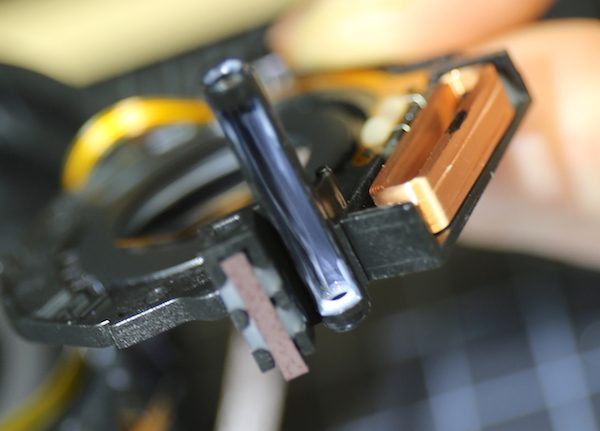
The focus barrel slides off as soon as the rear barrel is out of the way. This is a focus-by-wire lens, of course, and we can see what appears to be an optical focusing marker disc inside the focusing barrel.
Mounted on the lens barrel underneath that ring are a pair of optical sensors. When you turn the focusing ring the sensors activate the focus motor inside; there are no mechanical linkages. In the old days, focus-by-wire systems felt sloppy and inaccurate. They don’t anymore. This one is smooth and accurate.
I should show you that both the rear barrel and the focusing ring have nice rubber felt sealing their edges. This provides some weather/dust sealing and helps the focus ring feel nice and smooth when you turn it.
At this point, we have the rear of the lens pretty well undressed.
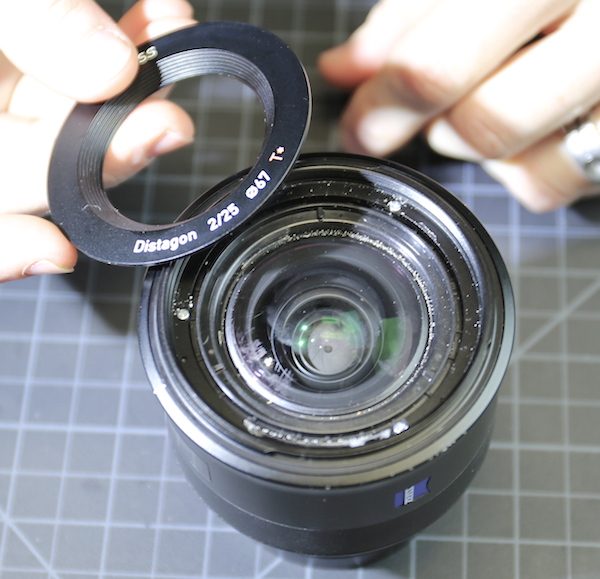
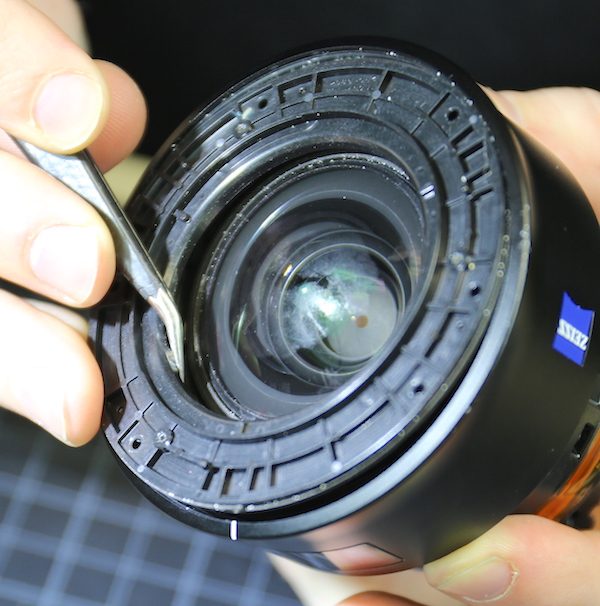
There’s no obvious further disassembly to do from the rear end, so we turned the lens over and started in from the front. The makeup ring is a fairly thick pop-off type. With it removed we get our first surprise: underneath it is a bunch of sand. We knew the lens had been dropped and stopped working, but apparently it got dropped into some sand. Trust me, we have sand-detection radar when we are working on lenses. The only thing worse for a lens is salt water. I am impressed, though, that in disassembling the entire rear part of the lens we didn’t see one grain of sand.
You probably noticed the three screws in the plastic filter ring that sits below the makeup ring. Removing these lets us remove the filter ring.
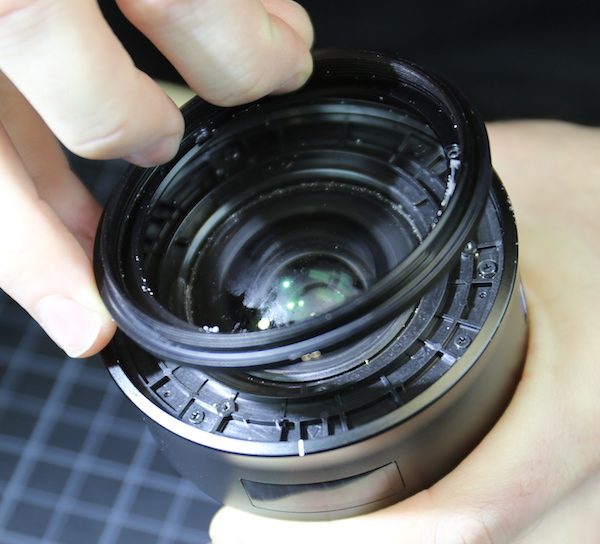
Now we can see yet another set of screws holding a plastic underplate onto the front of the lens.
Removing these 6 screws lets us slowly work this plate off.
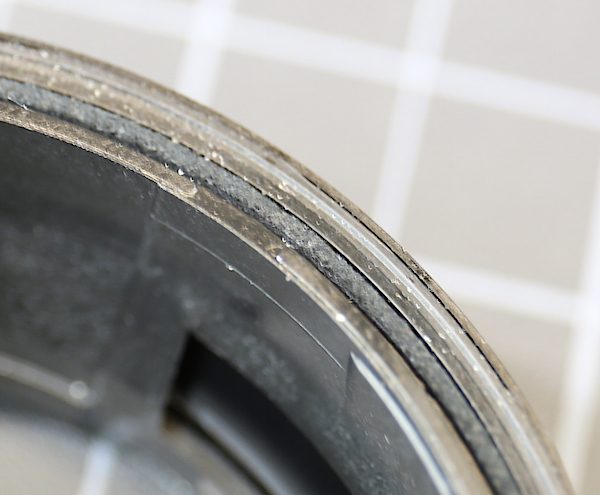
This is the level where the front of the lens is sealed. There was a lot of friction as we carefully worked the plate off, and once off we can see there is thick rubberized felt around the edges.

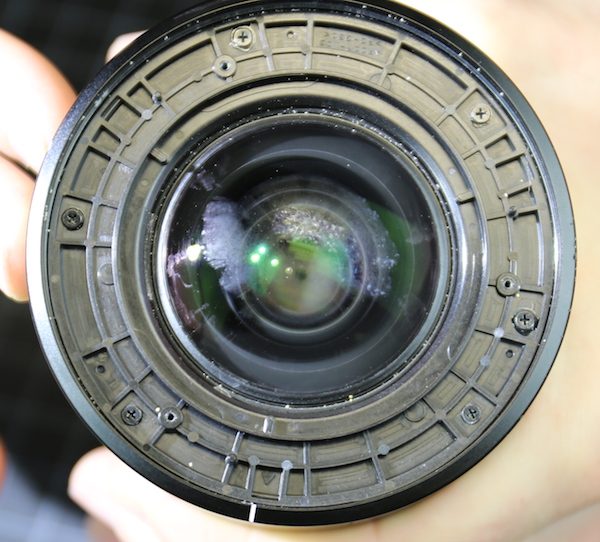
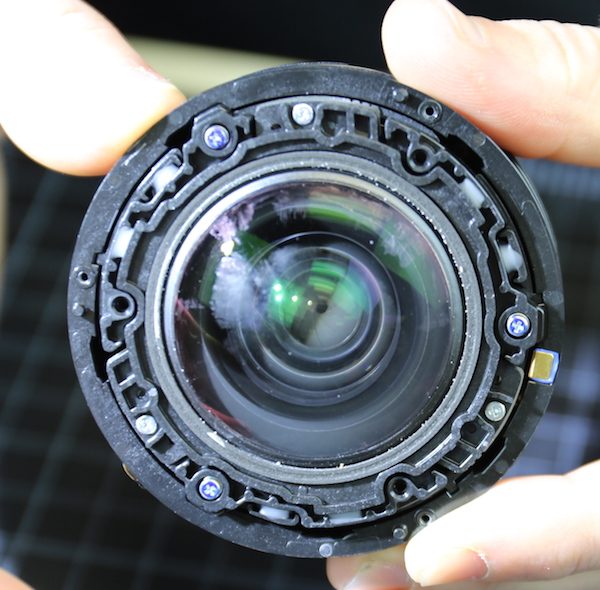
With the sealing plate off we can now see the front group of the lens. Around the element is another ring of rubberized felt that seals against the center of the plate we just removed. You can see there is some sand inside this near the front element and around the rim of the lens, but none of it got under the sealing plate and into the working parts of the lens.
Taking out the three screws you can see around the outer rim above lets us remove the front barrel.
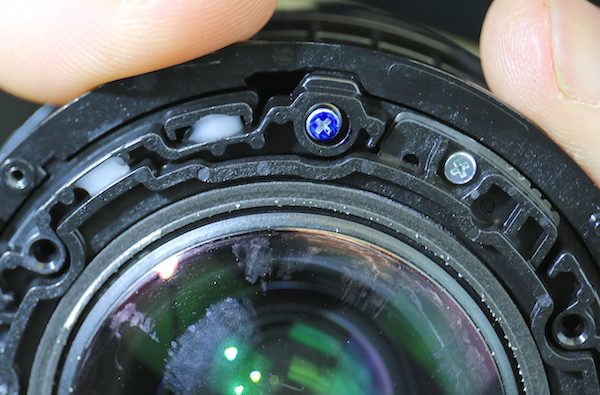
This gives a nice, unimpeded look at the front group. You can see it is held in by 6 screws. The three purple ones are spring loaded so tension on them might be used to adjust front tilt or centering (or they may simply be shock absorbers). There are definitely shims behind the 3 silver screws. These may be for tilt adjustments or for spacing, or both, we can’t tell yet. And there’s plenty of white silicon elastomer/glue filling in the spaces of the front assembly and keeping things in place.
Here’s a closeup of that spring-shim assembly with the purple spring screw, and the silver shims showing beneath the silver screw.
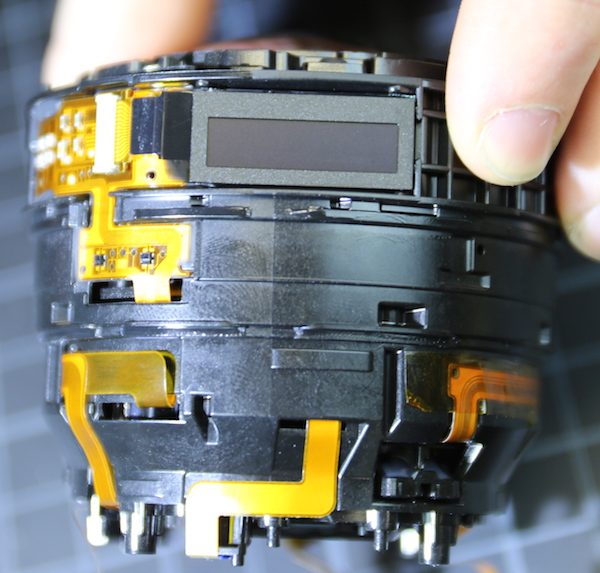
We can also show you the LCD now, which gives us that cool numeric display of what the lens is doing.
To further separate things, we have to remove 5 screws that are located down inside little slots or tunnels that are just hard to show you in photographs. Once those are removed the inner rear barrel can be removed.
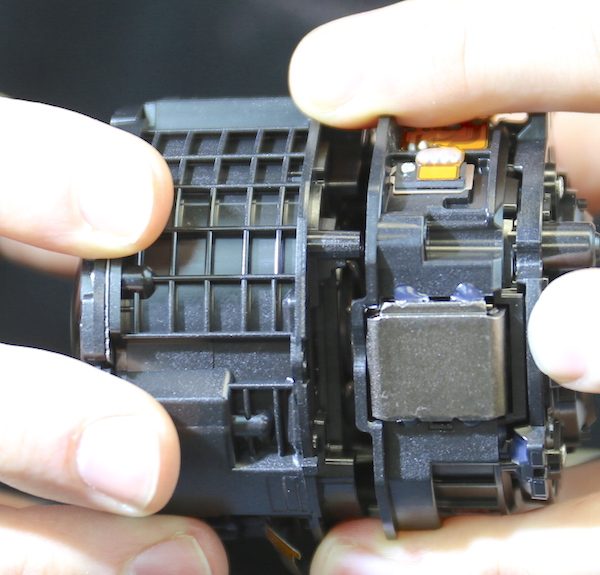
Now, for the first time, we can look at the focusing motor. From the outside it’s the same magnetic motor we’ve seen in several Sony FE lenses. One notable difference, though, is that there are 4 gobs of elastic glue holding the magnet to the barrel. In previous lenses we’ve torn down, the magnets have been held only by friction against the plastic and the inner frame.
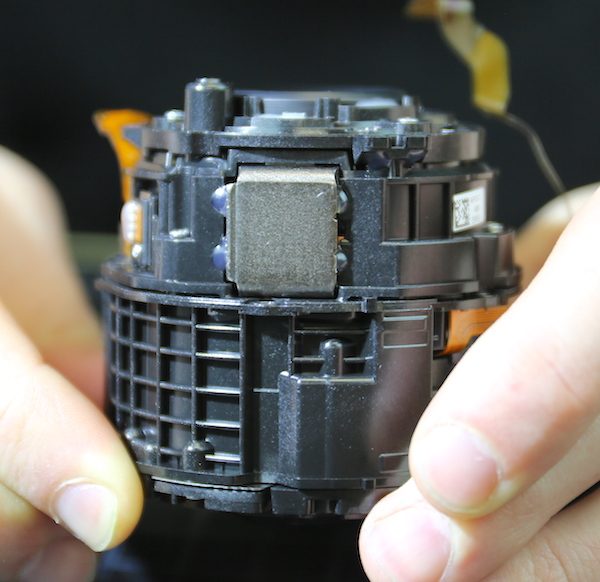
Another view of the back shows the focus position sensor to the left of the motor magnet (where the yellow flex ends) and one of the three screws holding the two halves of the inner assembly together (on the plastic raised portion between the position sensor and the motor magnet.
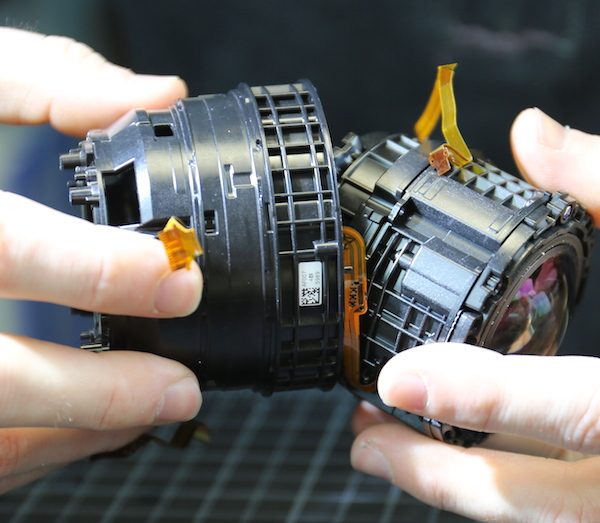
Taking those three screws out, lets us separate the two halves.
One half contains the aperture assembly.

The other half lets us look down on the autofocus assembly from above. At the bottom of the image you can see the permanent magnet. Note that in the Batis, as compared to, for example, the Sony FE 24-70mm f/4, the electromagnetic coil is encased in a plastic housing, not just glued to a plate. Just to the right of the magnet assembly and about 1/3 the way around to the left are the two posts that the focus element slides up and down on. Just to the right of the post closest to the magnet is the focus position sensor.
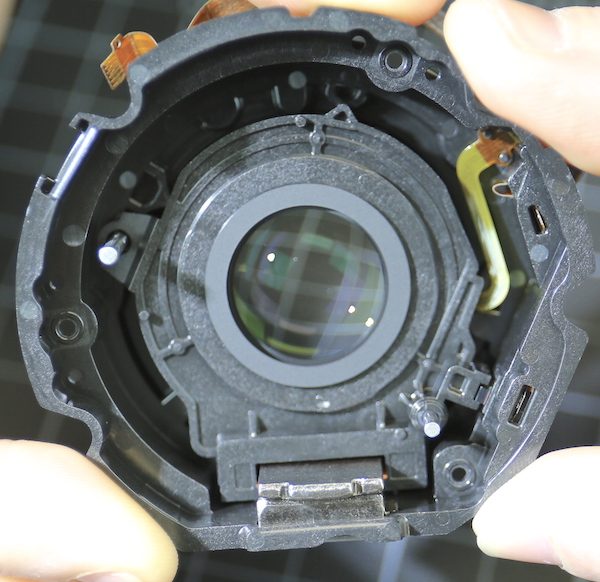
While there are some differences, notably the plastic casing holding the electromagnetic coils in place and more glue around the focusing motor assembly, many of you will notice that this assembly is almost identical to the AF assemblies we’ve seen in other FE magnetic AF lenses. Please don’t go making a bunch of generalizations about who is making what for whom. If you do some patent searches you’ll see that most patents for camera lens electromagnetic focus systems are owned by a company you’ve never heard of. I’m guessing that a third party is supplying this assembly to several different manufacturers. But it’s a guess. I have no firsthand knowledge. And I imagine everyone who does has signed some non-disclosure agreements.
Since the AF system in this lens was broken already, we were a bit braver than usual and continued our disassembly even though some glue discouraged it.
The permanent magnet can be popped off of the AF assembly.
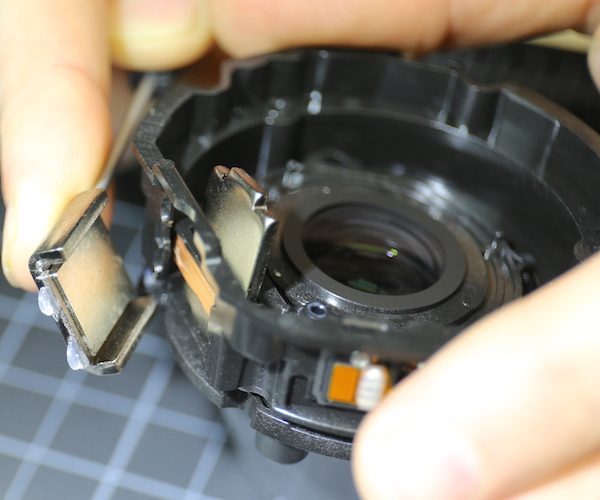
Then the metal slide just lifts out. When the lens is assembled it is held in place by the top and bottom halves of the focus assembly, but even disassembled the magnet strongly discouraged lifting it out until we’d popped the magnet off.
At this point we lifted out the two metal rods that the lens assembly slides on and lifted out the focusing group. We noted that one rod had some pretty strong resistance to sliding out, but didn’t think much of it at the time. We’ve repaired a number of FE 24-70mm f/4 lenses that had stopped autofocusing because the glue holding the electromagnetic coil to the lens plate had separated. That was not the case with this lens. The plastic case actually surrounds the coil, which should make a much stronger bond than the earlier lenses that are just attached with glue.
Again, I want to emphasize this isn’t a “Zeiss makes a more reliable autofocus motor than Sony” statement, which I know some fanboys are going to want to claim. I really doubt either Zeiss or Sony make this assembly. It’s possible that Zeiss directs it being made to different specifications. I think it’s more likely that we’re seeing an improvement in mechanical design with a newer lens since a weakness has been identified in an older lens. If that’s the case, we’ll see this type of assembly in newer FE mount lenses from all brands. ( I doubt we’ll see it retrofitted to existing lenses, there are probably space constraints in their design.)
At this point, we were pretty certain that whatever had gone wrong with this autofocus system was not mechanical, but rather something electronic that we couldn’t fix. So we started reassembly, hoping that Zeiss would take pity on us and repair whatever the problem was at the factory service center. But we noticed when we reassembled the focusing group that stiff bar we’d noted on disassembly slid very easily back into position with little resistance. Once in place, the focus assembly slid up and down much more easily. There is a nice, well-lubricated channel for the focusing element to slide over the bar with.
And the rod sits in a small recess on the top and bottom of the focusing assembly. We suspected that perhaps the drop had jarred it out of place and left it tilted, making it impossible for the focus assembly to move. Sure enough, when Aaron finally got the lens reassembled, it focused just fine and worked like a charm. We optically tested it, gave it to the techs to use for a few days as a test lens to make sure it had no other problems, and then put it back in the rental fleet.
So What Did We Learn Today?
Well, first we learned that sometimes if you take things apart and put them back together they start working. Of course, I should point out that on numerous occasions we’ve taken working things apart and put them back together and they stopped working. It’s kind of a cosmic crapshoot. But this is why we like doing tear downs on stuff that isn’t working. There’s nothing to lose.
We learned that Zeiss’ claim to weather and dust resistance is well founded. We saw a lot of tight foamed seals and there were no obvious ‘leak points’ in the lens. And it had obviously gotten into a lot of sand, but there was not one grain of sand on the inside.
We confirmed (as we already expected) that electromagnetic linear focusing system is at its core identical to the one used in other FE mount lenses. We did find it seems more robustly put together than what we saw in the first generation systems. Whether this is because Zeiss has it manufactured to a different specification or simply because the new technology is being improved we don’t know yet. Neither do we know who actually is making the AF module for the various E mount lenses. It really doesn’t matter, but I’m sure people are going to argue about it. Because people love to argue about things that don’t really matter.
Roger Cicala and Aaron Closz
Lensrentals.com
March, 2016

26 Comments
Mike Aubrey ·
Thanks for this!
Mike Aubrey ·
Also, for what it’s worth, the unconnected mystery chip is this:
http://photo-parts.com.ua/parts/part_profile.php?part=2575
Larry Templeton ·
Wow, fascinating site (with a little Google translation help). Thanks for the link!
KeithB ·
That sand looks familiar…White Sands NM, possibly? If so, it is relatively soft gypsum, not SiO2.
And, FWIW, I splashed a lens and camera with salt water. The camera died, but the lens seems OK.
Oleg ·
Very enjoyable reading – thank you guys!
Emmanuel Pigout ·
The procesor r2j30503 LG seems to be in charge of “Zoom driver, OIS driver, Mirror charge driver” … Cf. http://www.photo-parts.com.ua/parts/dbphp.php?part=6
Jonathan Stewart ·
Nice, well-lubricated channels are awesome, no matter what.
Charlie Webster ·
Nice Work!!
Ben Rubinstein ·
Did the renter get off paying for the repair?
Roger Cicala ·
He had our insurance so he wasn’t going to get charged anyway.
Ben Rubinstein ·
Go insurance! Cool.
Eric PK ·
Please also disassemble a Zeiss Loxia
Freddo ·
Well, if Roger intends to wait for one of those to break down before doing his autopsy, I honestly think the wait will be long. 🙂
Adynaton ·
It would be nice to see how things are inside Zeiss’ DSLR lenses as well, and compare Otus to Milvus.
Shimon Mor ·
Always an enlightening and informative read. I appreciate how the two instances of your usage of “fanboy” are able to connote such derision. Nicely done.
Franck Mée ·
If I may allow myself a little off-topic digression, every time you finish an article with the “So what did we learn today?” part, I end up whistling Tom Paxton’s “What Did You Learn in School Today?” all day long.
So I wondered if that was your intention from the beginning to promote an old protest-song (just like you did with Alice’s Restaurant a few years ago) with this title. In this case, well, kudos: it works wonderfully.
Roger Cicala ·
Thank you, Franck, that made my day. But actually, what got me started that was an old South Park clip where the kids tried to start an internet business and near the end, Kyle says “You know, I learned something today.” https://youtu.be/W3sX3aD6GSM
Dmitri ·
Dear Roger and Aaron,
Could you please share your findings about what is the material used for outer barrel: whether it is black matte plastic or aluminum? Many reviewers say it is plastic, therefore the lens is very lightweight; the CZ state in the product’s leaflet and replies to my question, that it is aluminum. I tend to believe them because of the authority of the company, but still I am in doubts, because people say the opposite. What was your personal observation when you disassembled the lens?
Thank you for your feedback!
AaronClosz ·
Dmitri,
The answer is both. The rear outer barrel and focus ring are plastic. The filter ring and front barrel (portion with the index window) are aluminum.
Dmitri ·
Thank you for making this clear 🙂
Stephan Wahlen ·
” I’m not a chip guy, so one of you let us know, but it doesn’t look like a programmable memory chip to me.”
Its a pretty beastly (for a lens) Microcontroller. The R2J30504 is a special applications device for Image stabilization (also used in some canon Cameras) from Renesas. They are one of Japans biggest uC manufacturers and widely used in japanese Products.
Nushen Senevirathna ·
Hi, I’m trying to repair a 18mm 2.8. to my surprise it has the exact same circuit board. all model numbers match up with this.
cant get the front markup ring off though, any suggestion would be highly appreciated.
Nushen Senevirathna ·
Hi, I’m trying to open up a 18mm 2.8. to my surprise it has the exact same circuit board. all model numbers match up with this.
cant get the front markup ring off though, any suggestion would be highly appreciated.
Marotia Fidy ·
Thanks a lot ! Very helpful topic. Would you mind to explain witch tool did you use to remove the front lens
makeup ring is (thick pop-off type) ?
Thanks for your answer
jason ·
yes. please share how to remove the pop off beauty ring
Noah ·
Thank you for this article! I just got around to tackling my Batis 85/1.8 myself as Zeiss/Gentec quoted me $950 CAD to have it repaired... This article was my motivational tipping point to tackling it!
Took photos and wrote a Reddit post on the process in case anyone else wants to attempt repairs:
https://www.reddit.com/r/So...