Teardowns and Disassembly
The A7II Teardown: A Look Inside Sony’s New Camera
A while back we did a teardown of the Sony A7r, and were very impressed with its clean modular design. Now that Sony has released the A7 II we thought a similar teardown would be worthwhile. There are certainly going to be some differences. First among them, of course, is that the new camera has 5-axis, in-body image stabilization, which is definitely going to create some differences. There also is a more robust magnesium alloy shell and lens mount, and perhaps (or perhaps not) improved weather resistance.
For anyone who isn’t aware of my cynicism regarding weather sealing, I’ll repeat my quote from The Cynic’s Photography Dictionary:
Weather resistant – A term that consumers falsely define as “weather proof” and camera companies accurately define as “the warranty doesn’t cover water damage.”
Just looking at the cameras from the outside, though, it’s fairly apparent the A7II is larger and heavier than its predecessor.
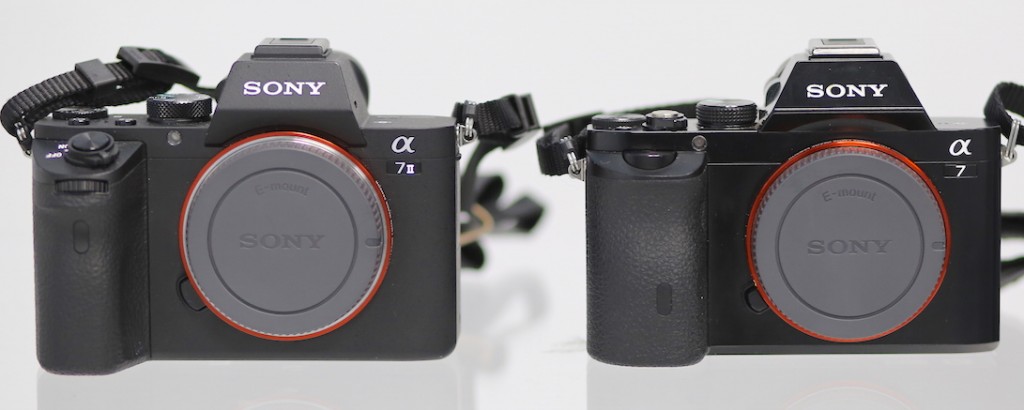
- All images Roger Cicala, Lensrentals.com, 2015

- All images Roger Cicala, Lensrentals.com, 2015
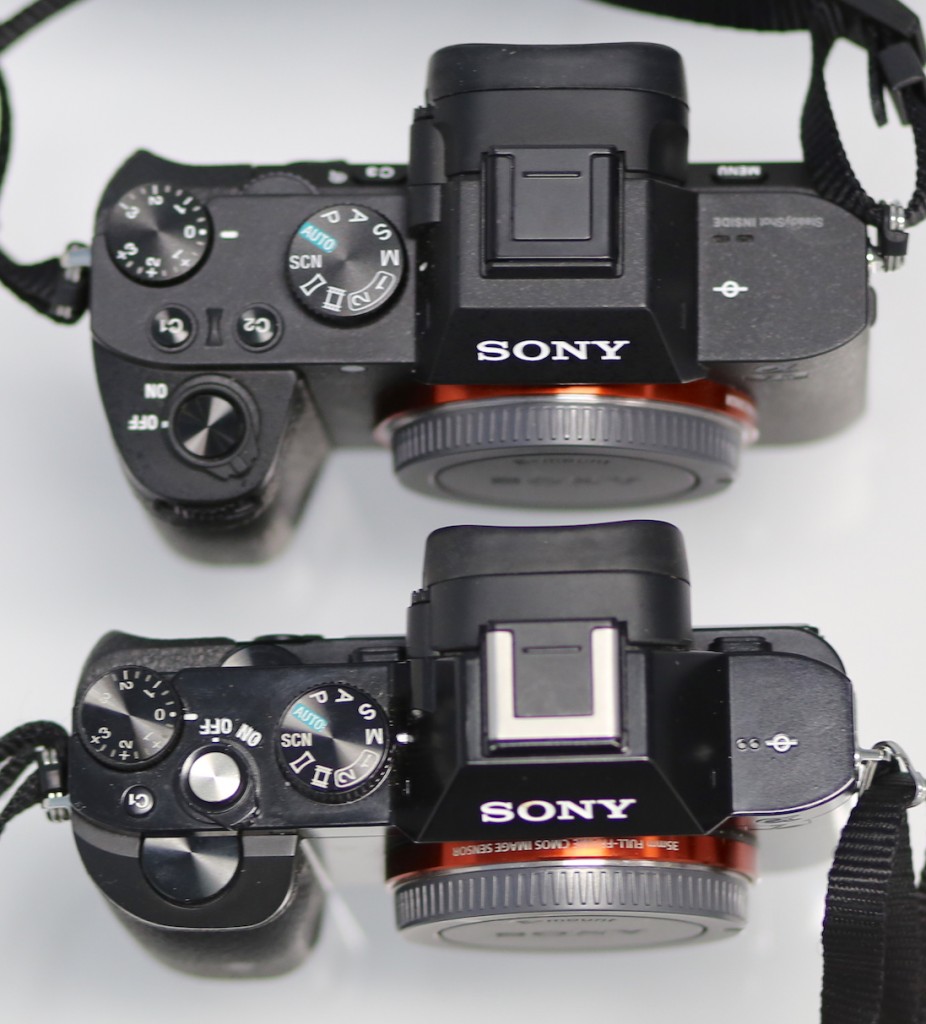
- All images Roger Cicala, Lensrentals.com, 2015
So let’s see what all Sony has crammed into that extra space and how it’s put together.
Some Outside Niceness
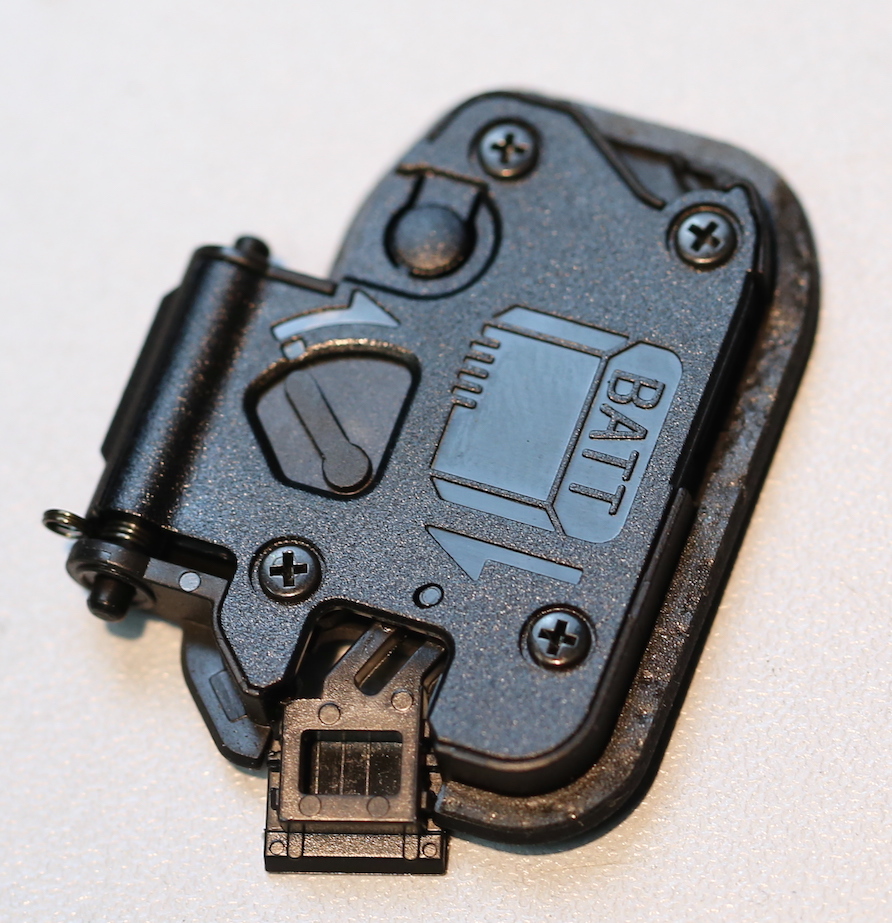
A couple of minor, but very nice, points are apparent just looking at the camera. One is what Aaron called “the world’s most impressive battery door.” The spring-latch not only pulls in the posts to remove the door if you put on a grip, it locks them in so they can’t break off (you probably haven’t seen broken battery door posts, but we sure do). It also has a rubber cable opening (in case you want to run the camera from an AC adapter when one becomes available). And finally, it has weather sealing gaskets around the edges, except for one corner between that cable opening and the hinge. By the way, don’t be looking for more rubber gaskets. This was it.
- All images Roger Cicala, Lensrentals.com, 2015
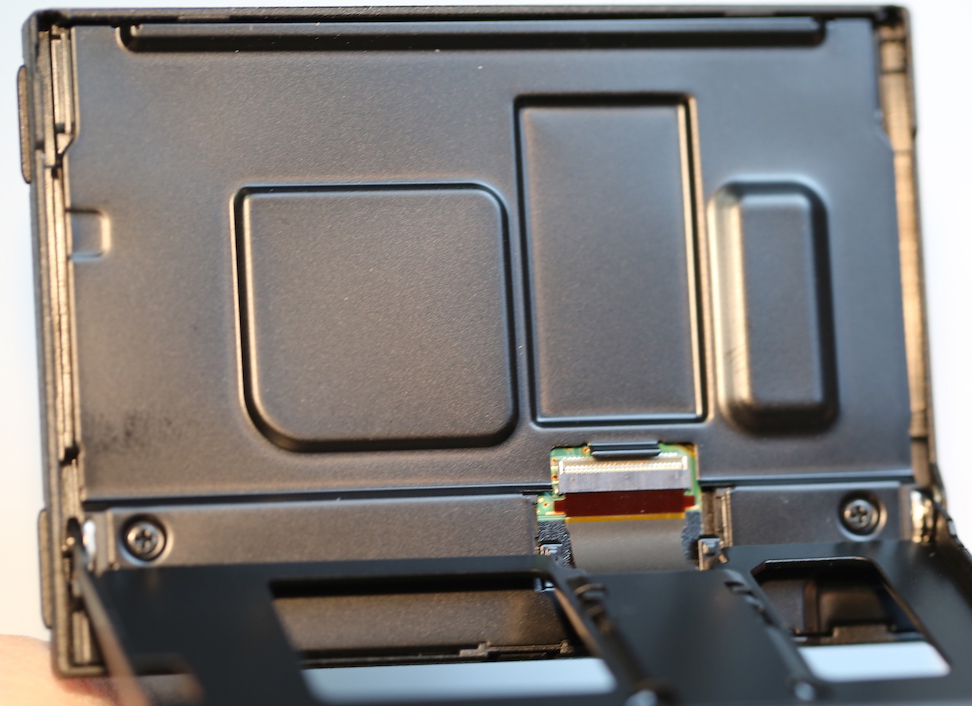
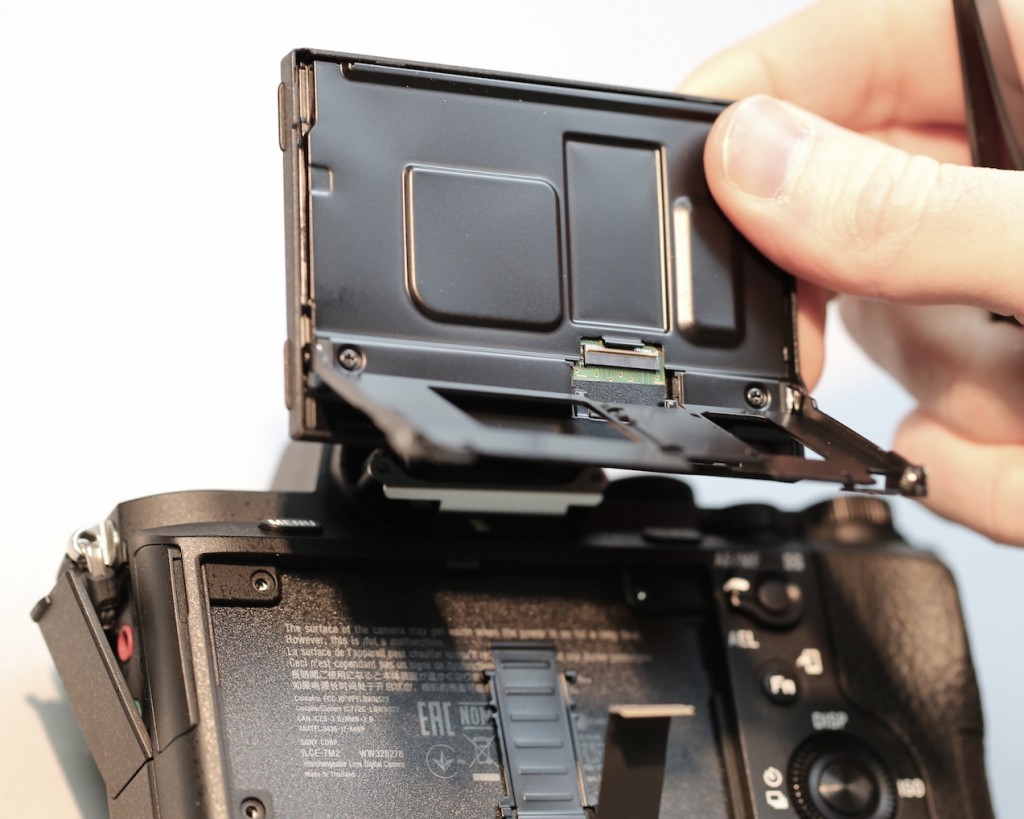
One other thing that you probably won’t care about but repair techs will is that the flex connection between the LCD and the camera body is now exposed under the LCD.
- All images Roger Cicala, Lensrentals.com, 2015
The time it takes to change out a scratched LCD screen just got reduced 75% — remove two screws, disconnect the flex and the screen is off.
- All images Roger Cicala, Lensrentals.com, 2015
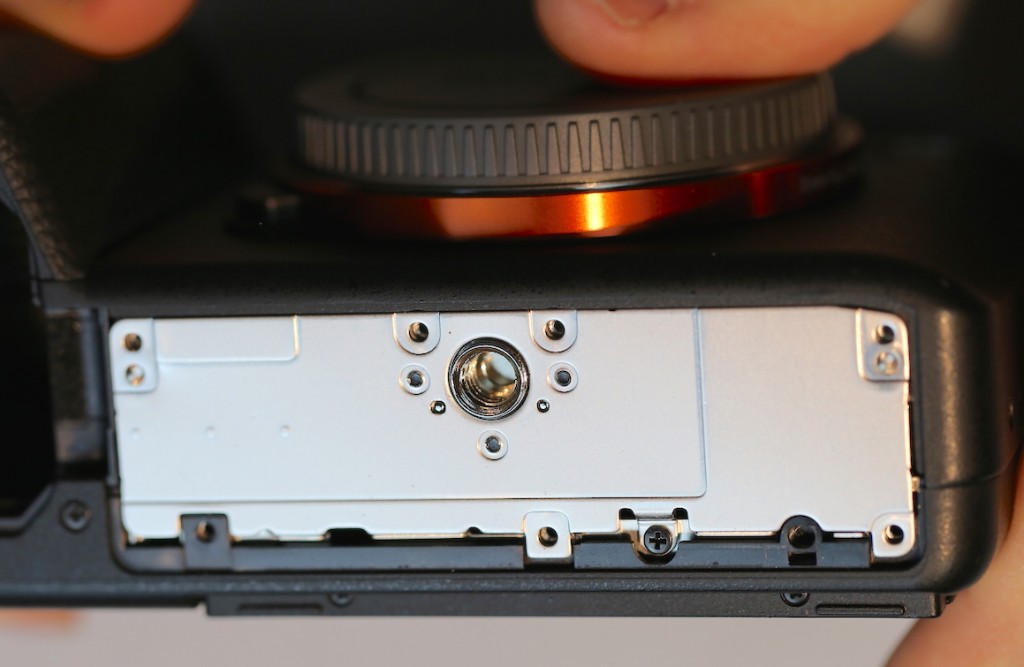
This isn’t exactly the outside of the camera, but it’s pretty close. The bottom plate/tripod mount has also been beefed up a bit. When the bottom cover is removed, the plate is obviously thicker and more solidly anchored than the first generation A7 cameras were.
- All images Roger Cicala, Lensrentals.com, 2015
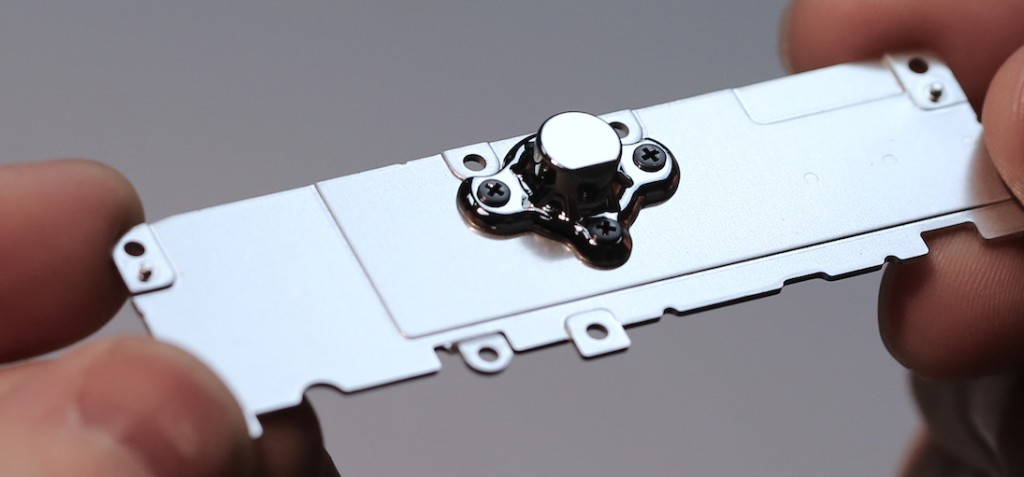
The increased stiffness and thickness is more obvious when the plate is removed.
- All images Roger Cicala, Lensrentals.com, 2015
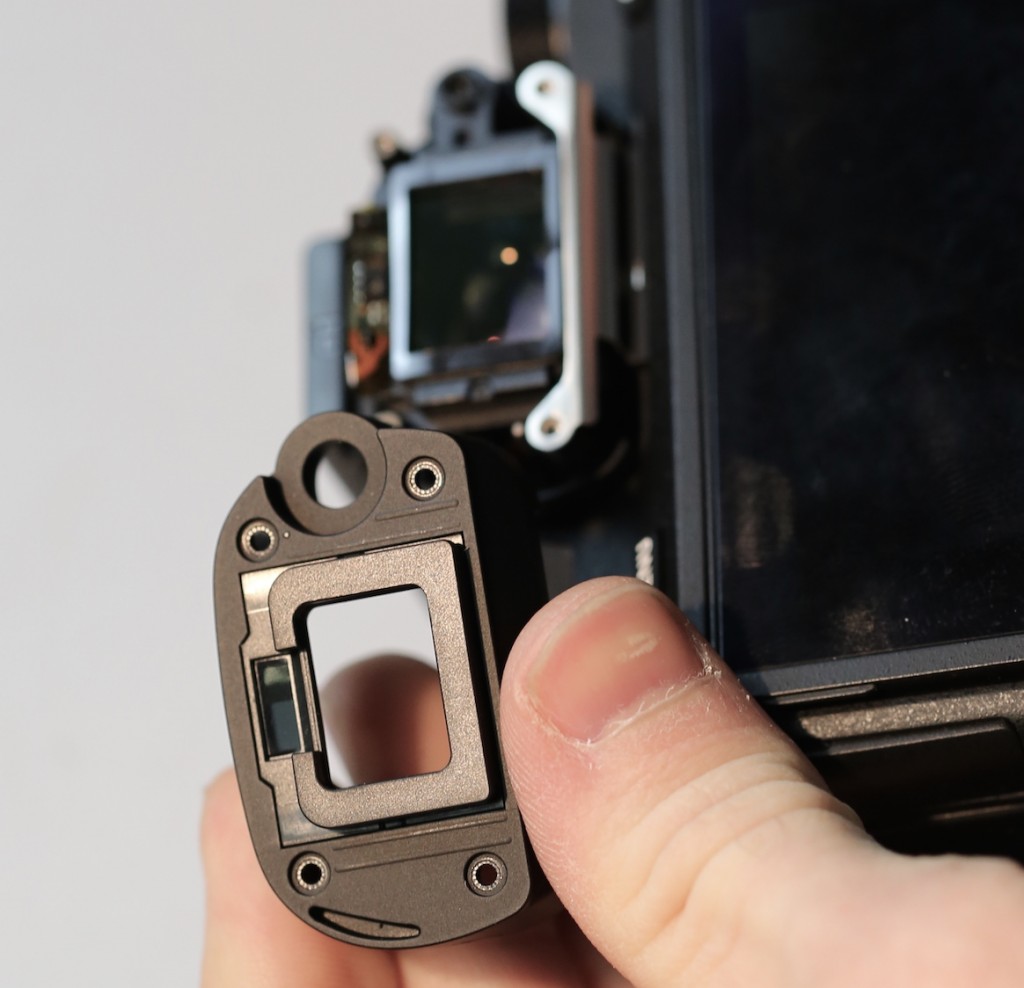
While we’re looking at the outside attachments, removing the viewfinder cover shows no weather sealing. It’s possible the plastic fittings are so tight and smooth that they are water resistant, of course, but there are certainly no rubber gaskets like we’re used to seeing.
All images Roger Cicala, Lensrentals.com, 2015
Let’s Look Inside
We can get our first glimpse at that in-body image stabilization by looking at the area where the tripod mounting plate was removed. The thick metal sandwich (red bracket outlines the left edge) contains the sensor plate, which is floating on a number of permanent magnets (green lines show the bottom two magnets).
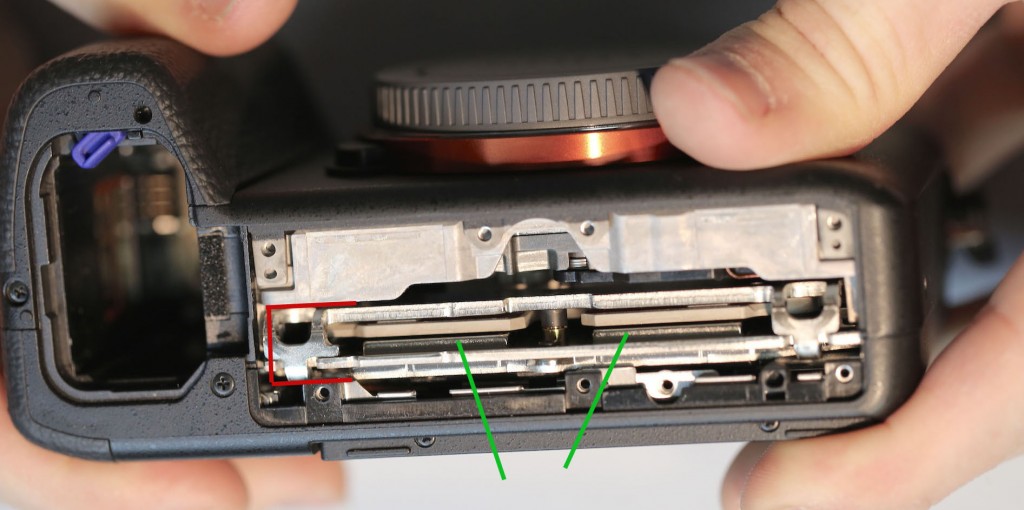
- All images Roger Cicala, Lensrentals.com, 2015
Continuing the disassembly, the back comes of with just a few screws.
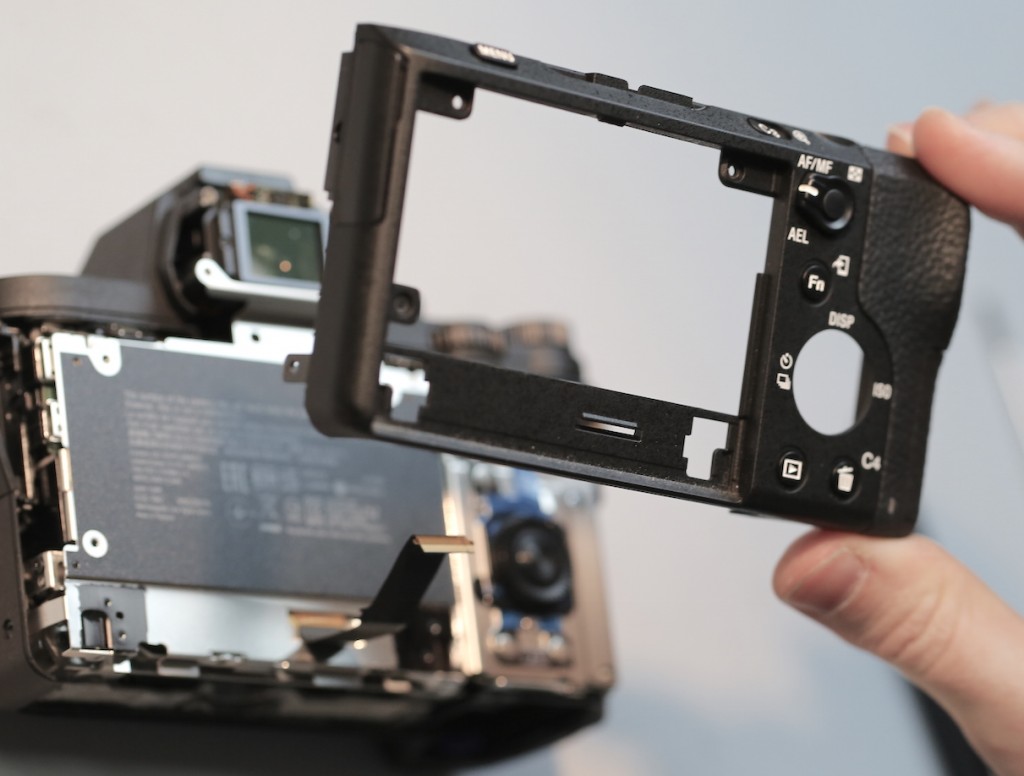
- All images Roger Cicala, Lensrentals.com, 2015
Revealing a thick electrical shield protective plate.
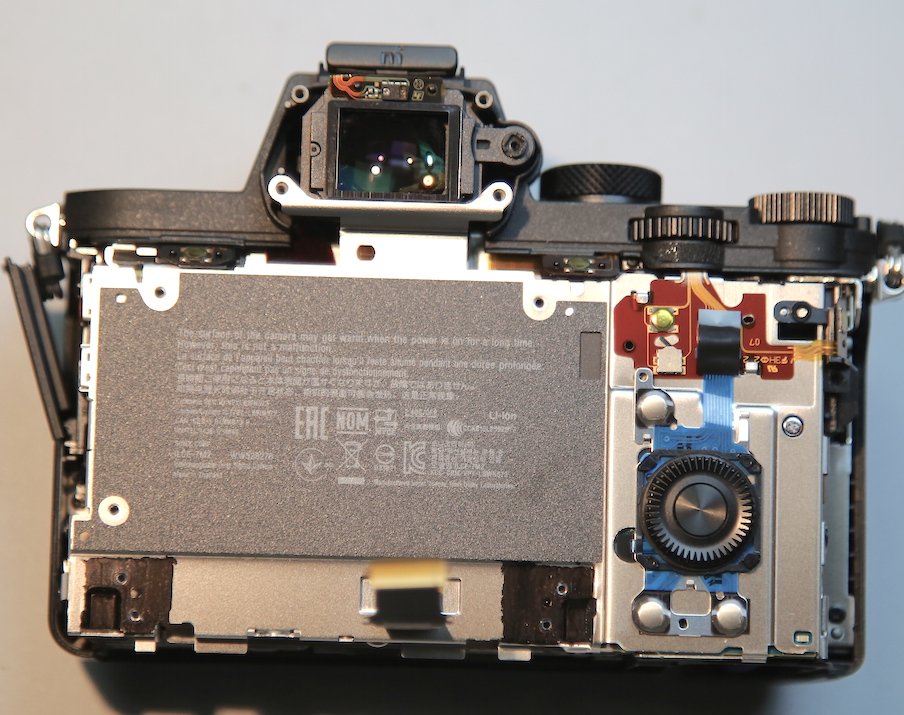
- All images Roger Cicala, Lensrentals.com, 2015
Sony states that the buttons on the new camera are sealed, and this is definitely the case for the back push buttons – they are rubber within the back plate, matching up with the pressure sensitive buttons on the board above.
There is no such seal around the mode dial, though. Speaking of the mode dial, it comes off by just disconnecting its flex.
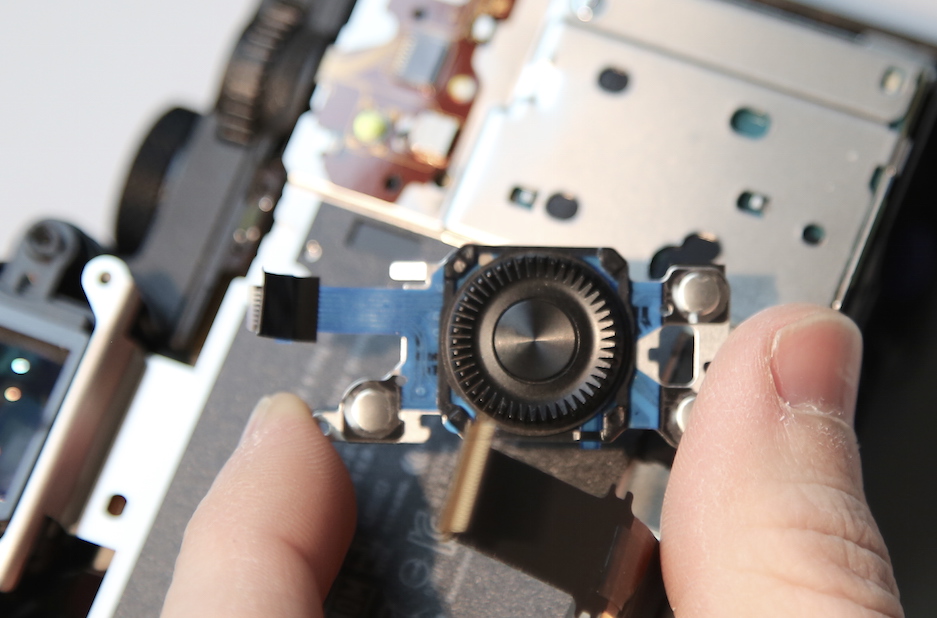
- All images Roger Cicala, Lensrentals.com, 2015
With that out of the way, remove a couple of screws and the electrical shield comes right off . . .

- All images Roger Cicala, Lensrentals.com, 2015
. . . exposing the SD card board (the small blue circuit board above), which gets removed next.
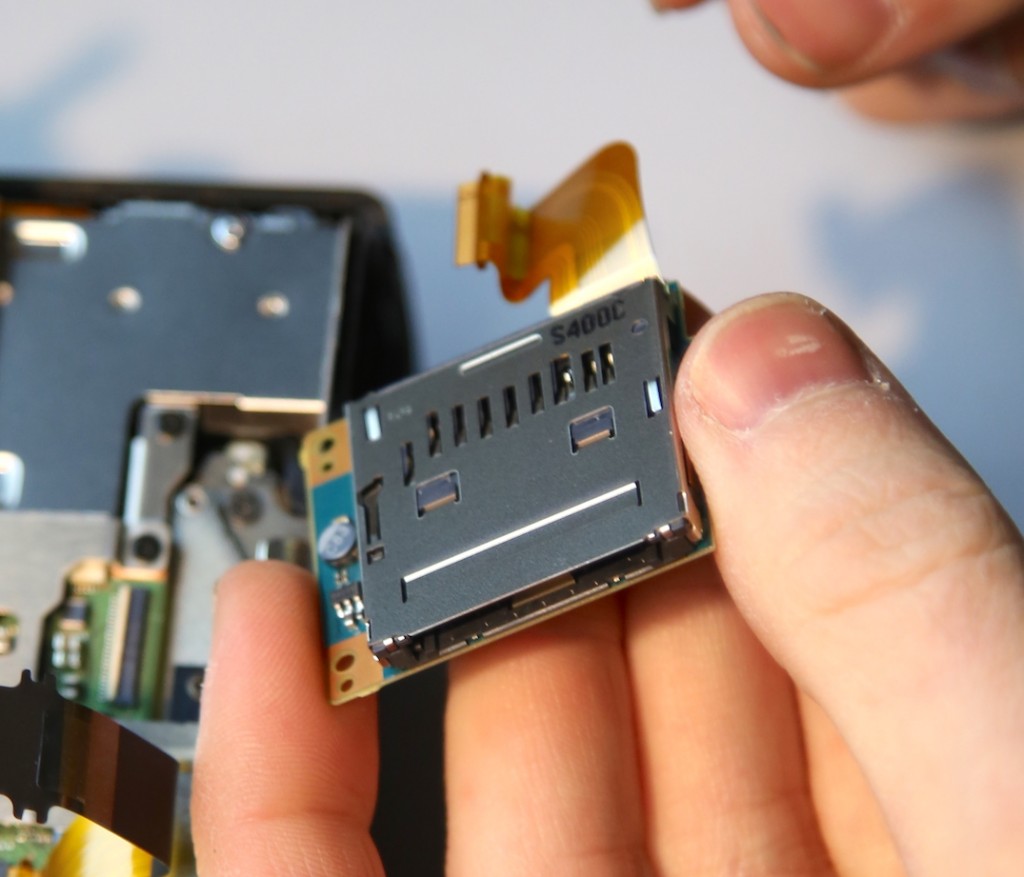
- All images Roger Cicala, Lensrentals.com, 2015
Then we disconnect the WiFi antenna and a couple of flexes.
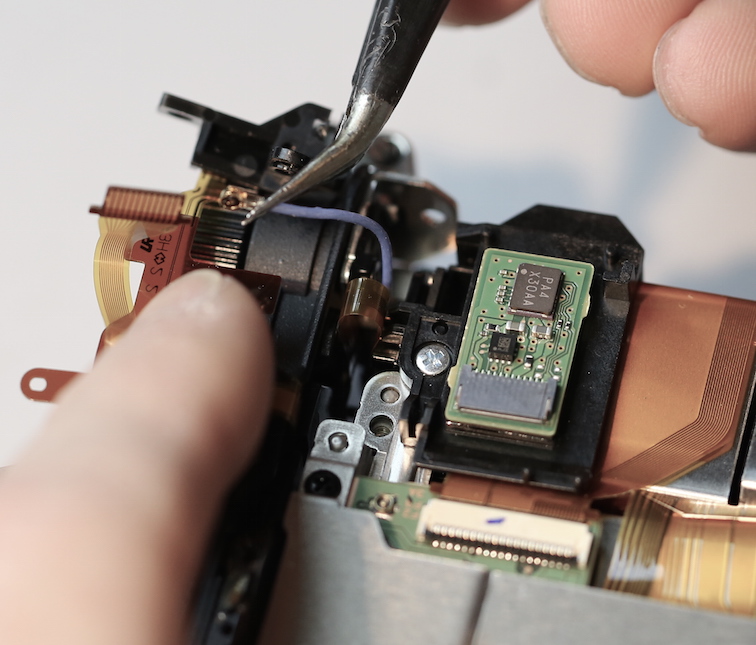
- All images Roger Cicala, Lensrentals.com, 2015
Which lets us remove the circuitry around the battery box,
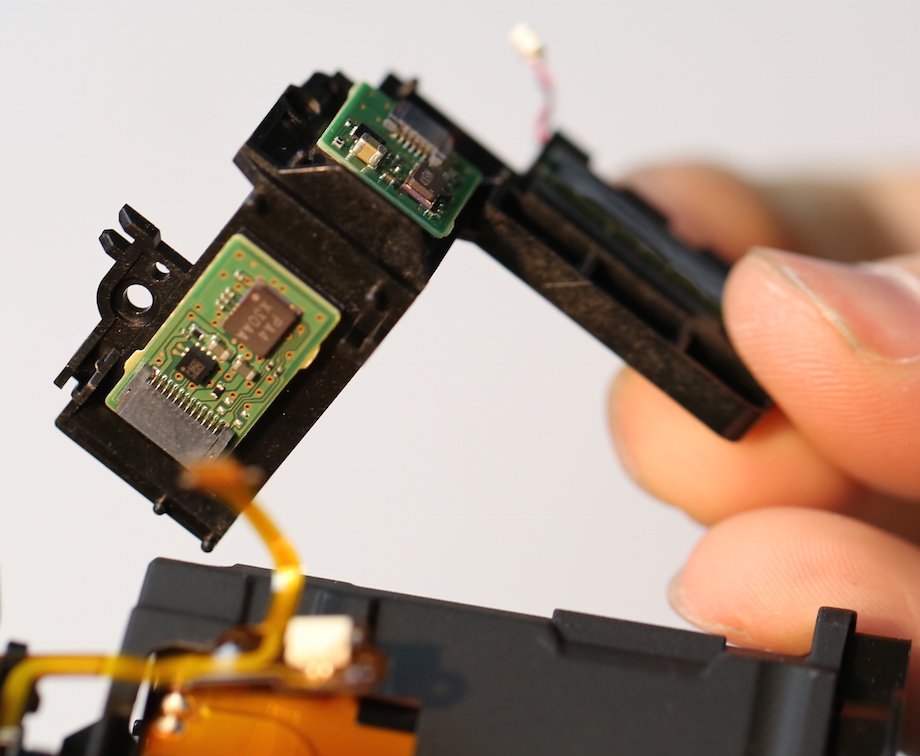
- All images Roger Cicala, Lensrentals.com, 2015
and gives us access to the last screw holding the grip on.
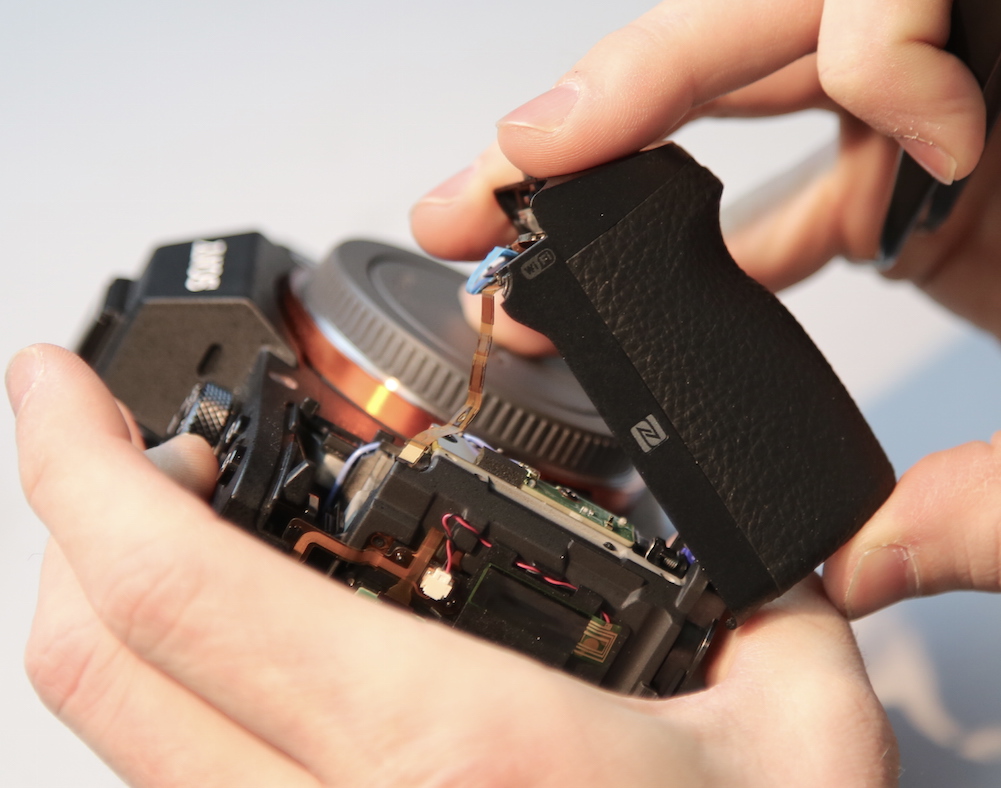
- All images Roger Cicala, Lensrentals.com, 2015
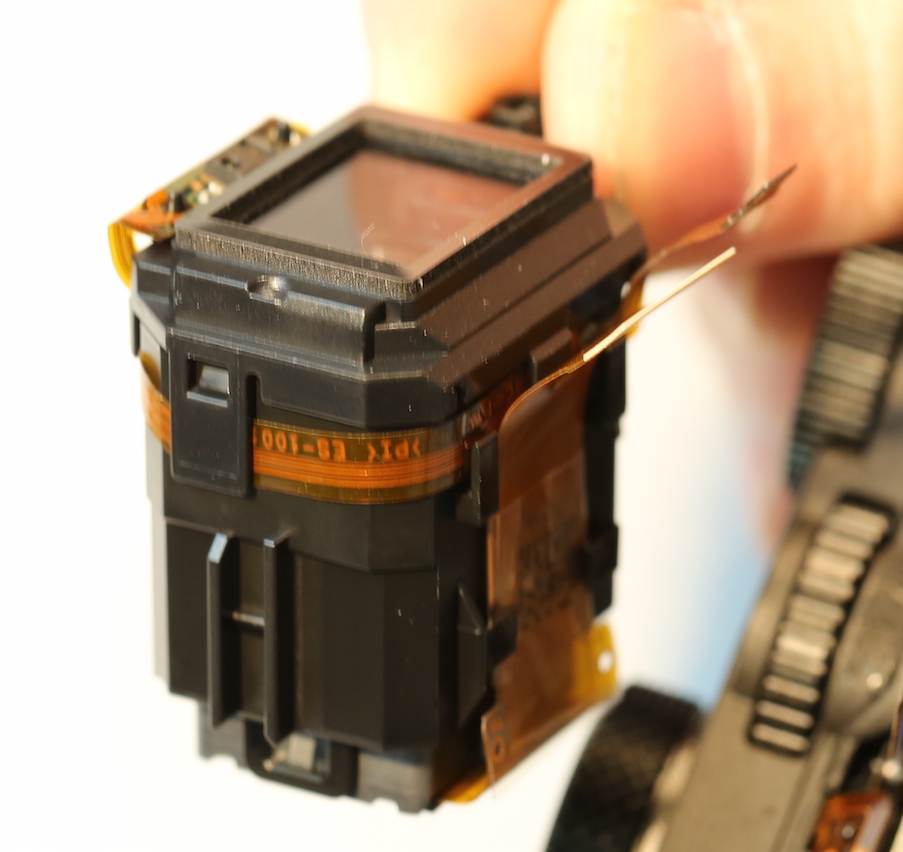
The next part to come off is the top. The EVF is a one-piece unit that just slips out after you disconnect its flexes.
- All images Roger Cicala, Lensrentals.com, 2015
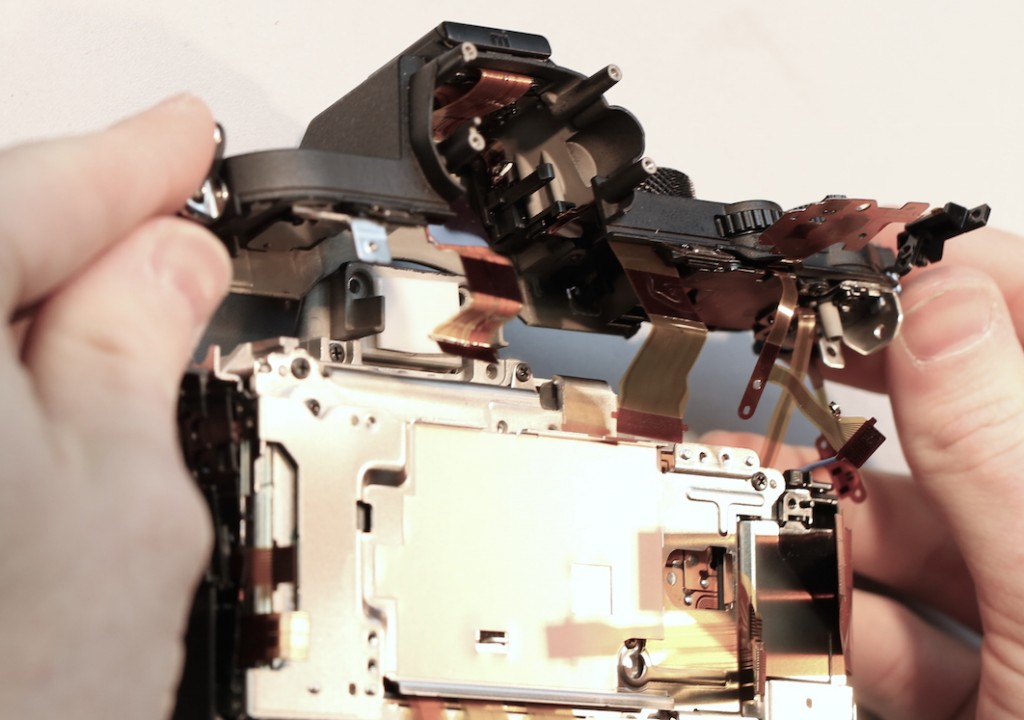
With it out of the way, the last screws holding on the top assembly can be reached. Once those are out and the top flexes disconnected, the top assembly comes right off.
- All images Roger Cicala, Lensrentals.com, 2015
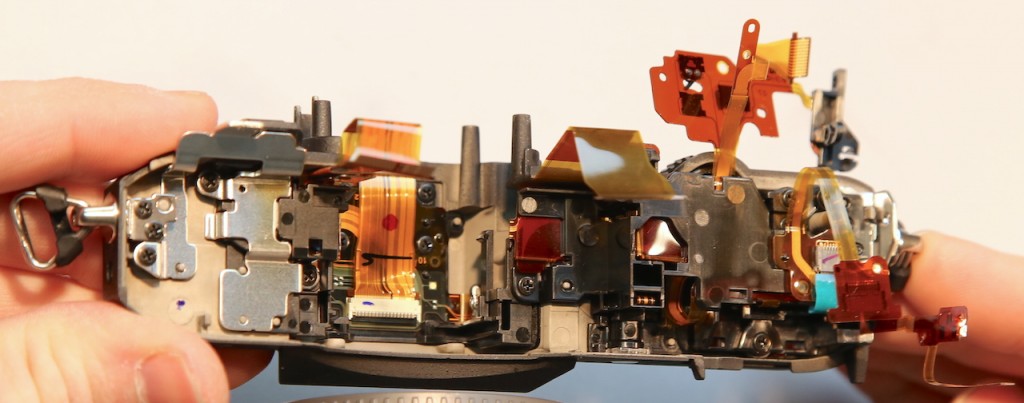
Top assemblies are amazingly complex things. We follow the service center’s example and don’t mess with disassembling them. If a top switch breaks, the entire assembly usually gets replaced.
- All images Roger Cicala, Lensrentals.com, 2015
I Know, I Know, You Want to See the Lens Mount
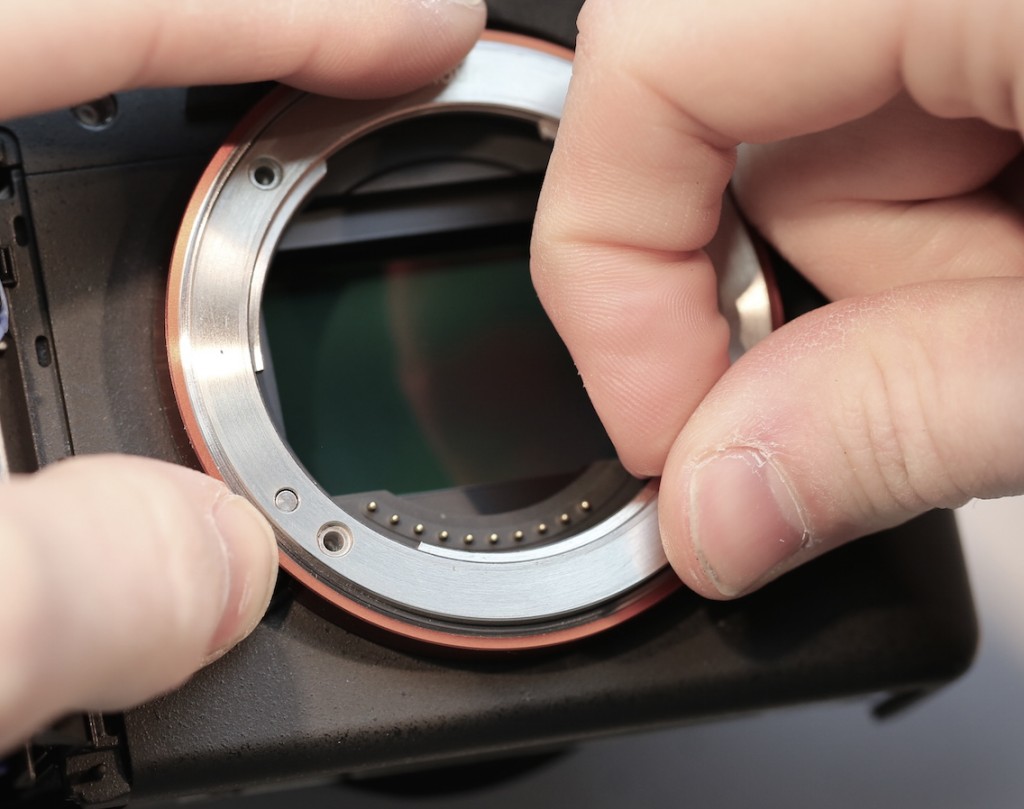
There’s been a lot of discussion about the lens mount in previous A7xx cameras being a bit flexible. There was a plastic spacer in the previous mounts and we all wanted to know if changes had been made in the newer models.
- All images Roger Cicala, Lensrentals.com, 2015
And they have. The mount is now directly screwed into the magnesium frame of the camera with no plastic spacers, all metal to metal, with just the metal lock spring in between the mount and camera frame.
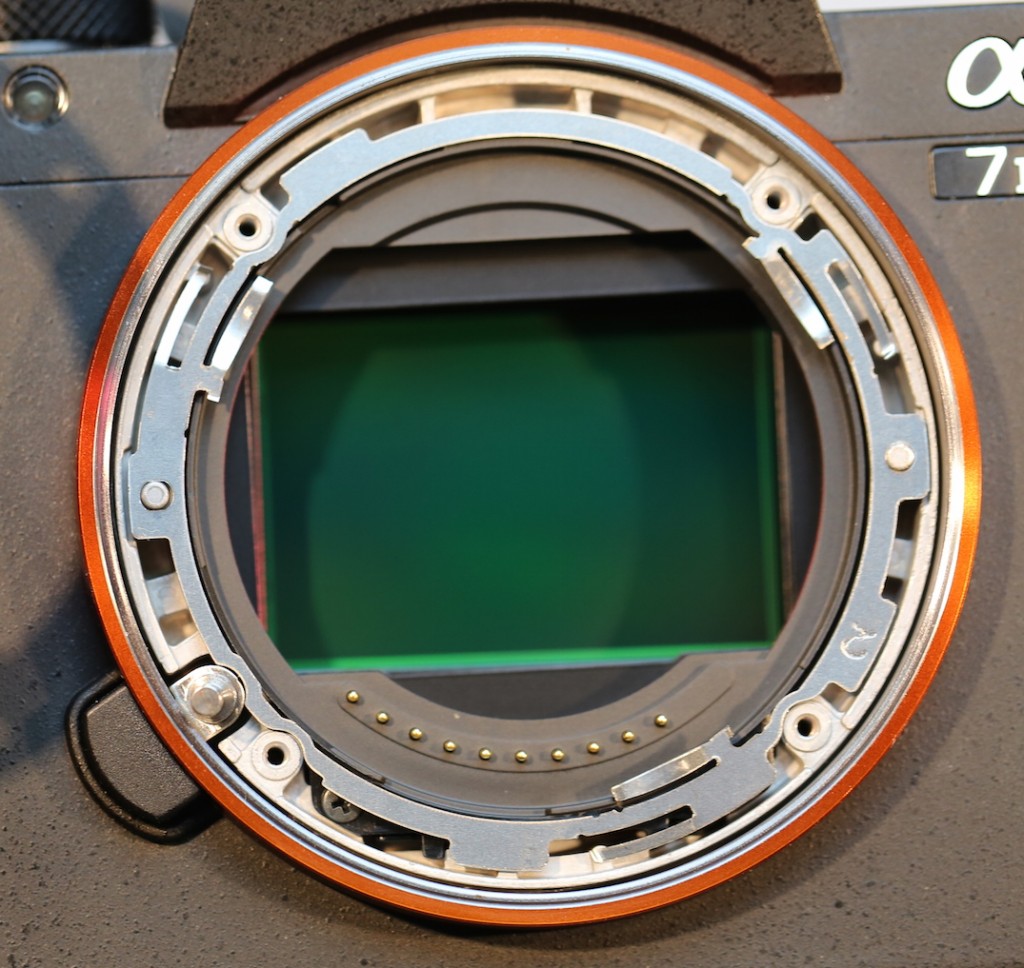
- All images Roger Cicala, Lensrentals.com, 2015
Now the Good Stuff
Ok, with all the external doodads disconnected, we can get down to the meat of the camera. The heat sink comes off next, exposing the main circuit board below.
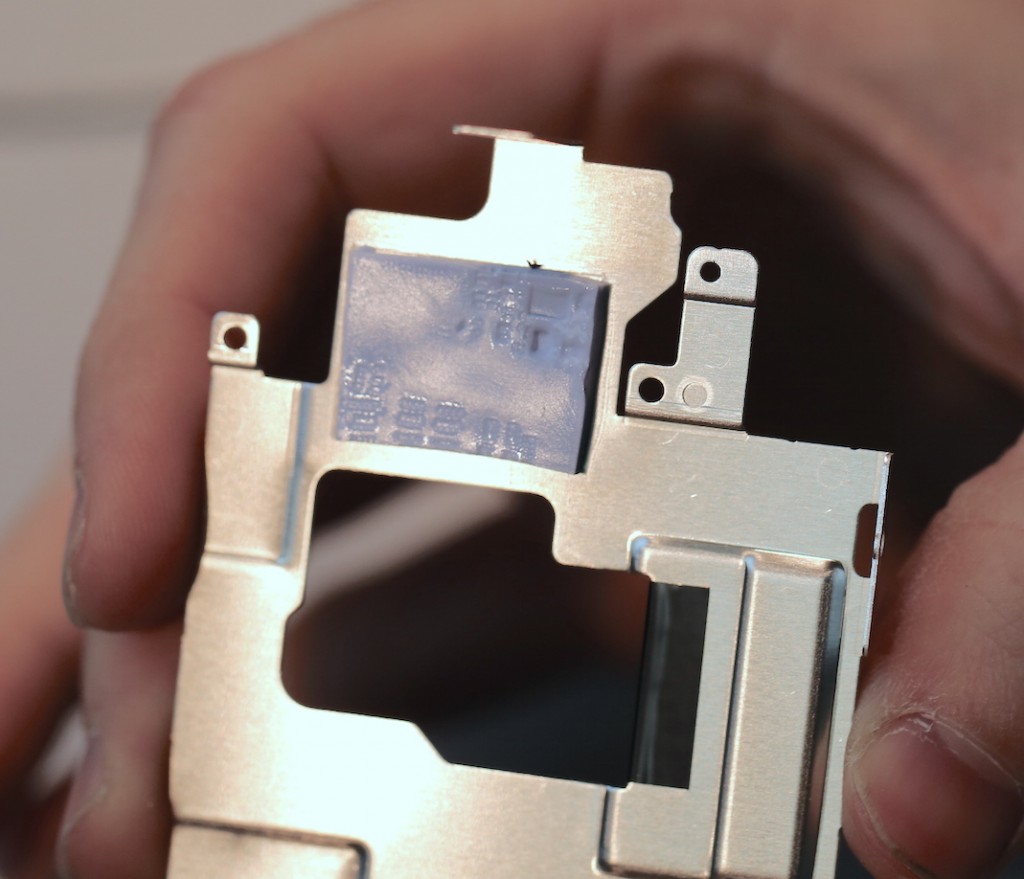
- All images Roger Cicala, Lensrentals.com, 2015
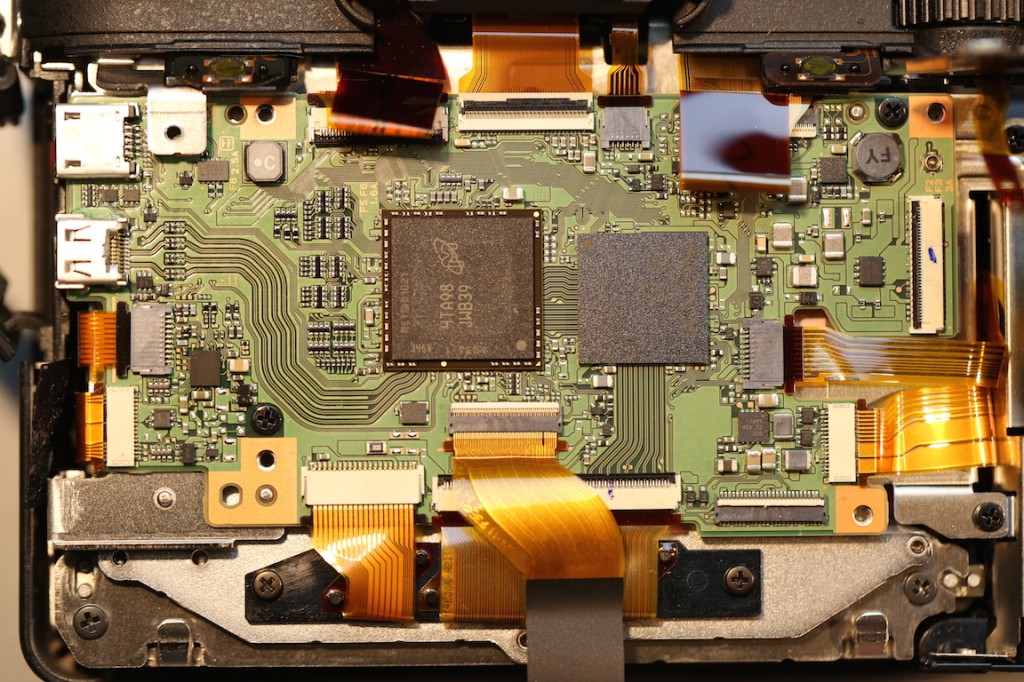
- All images Roger Cicala, Lensrentals.com, 2015
To give you an idea of the electronic complexity of the new camera, there are a total of 16 flexes (not all visible in this image) connecting to the main board now, a marked increase from the earlier A7s. Most of these new flexes are concerned with the IBIS system.
The bottom side of the board is nearly as densely etched as the top, and contains the date-time battery, so changing that is not going to be something you can do at home.
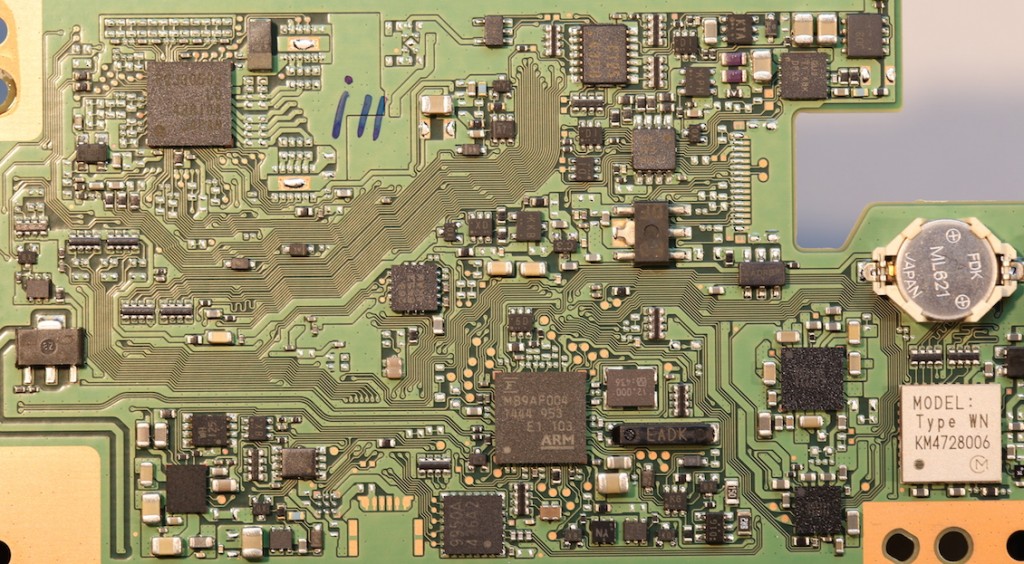
- All images Roger Cicala, Lensrentals.com, 2015
There is yet another electrical shield to be removed after the circuit board is out.
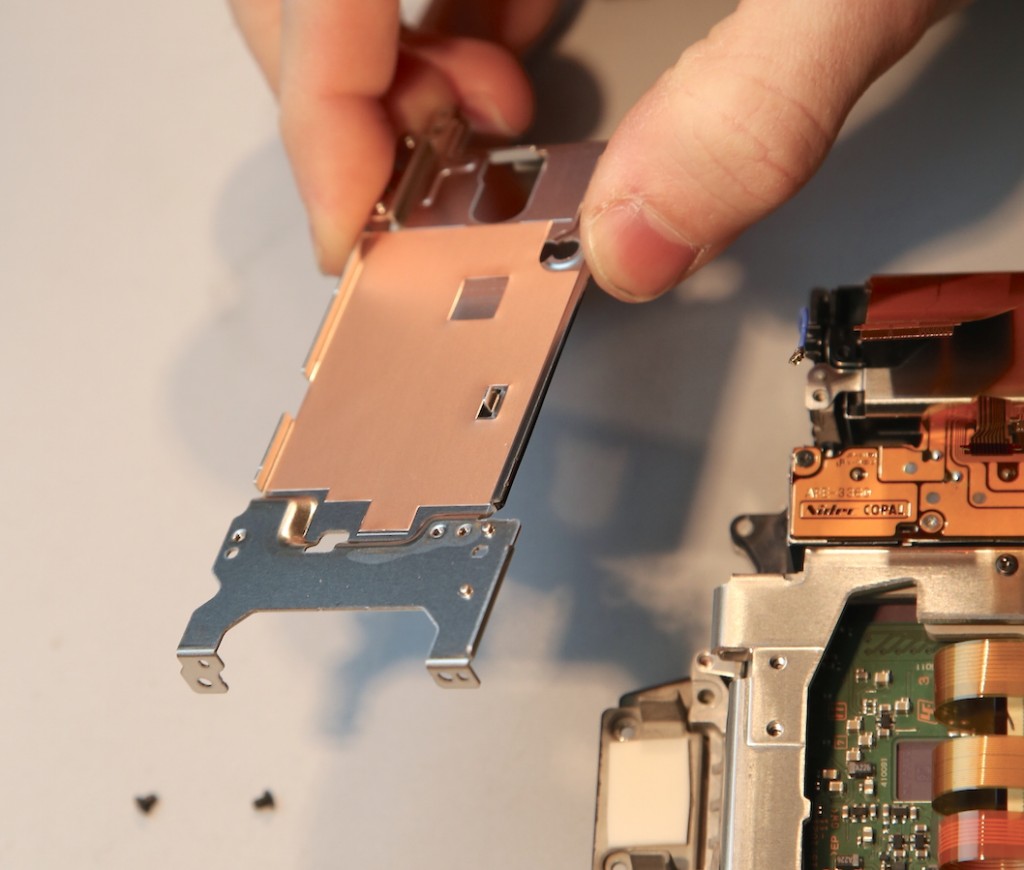
- All images Roger Cicala, Lensrentals.com, 2015
And now we can finally see the shutter and sensor modules.
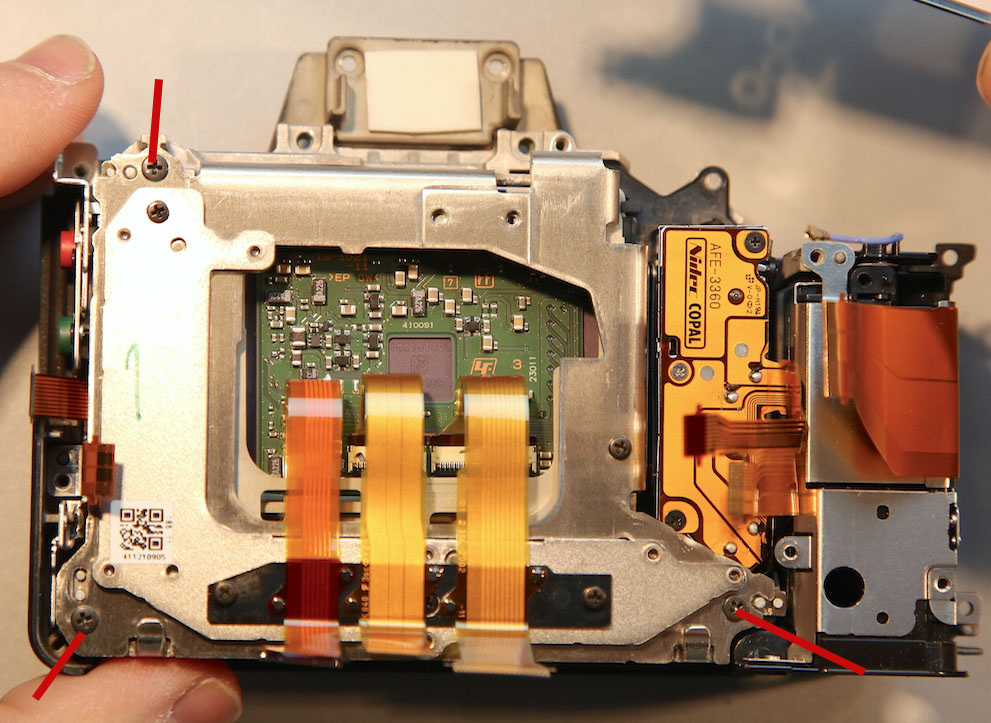
- All images Roger Cicala, Lensrentals.com, 2015
What you see above is the back plate of the metal sandwich we saw in the first image in the Let’s Look Inside section above. The green circuit board with three large flexes is the back side of the image sensor. Notice the red arrows pointing to three screws. These are the mounting screws for the entire sensor image stabilizing system. The shims that are used to make the sensor parallel to the lens mount are under those. (In this camera the shims were 40, 35, and 30 microns thick respectively, so not a huge amount of correction was required.) To the right of the sensor assembly, you can see the Copal shutter mechanism.
Removing those three screws lets us remove the entire sensor – IBIS assembly.
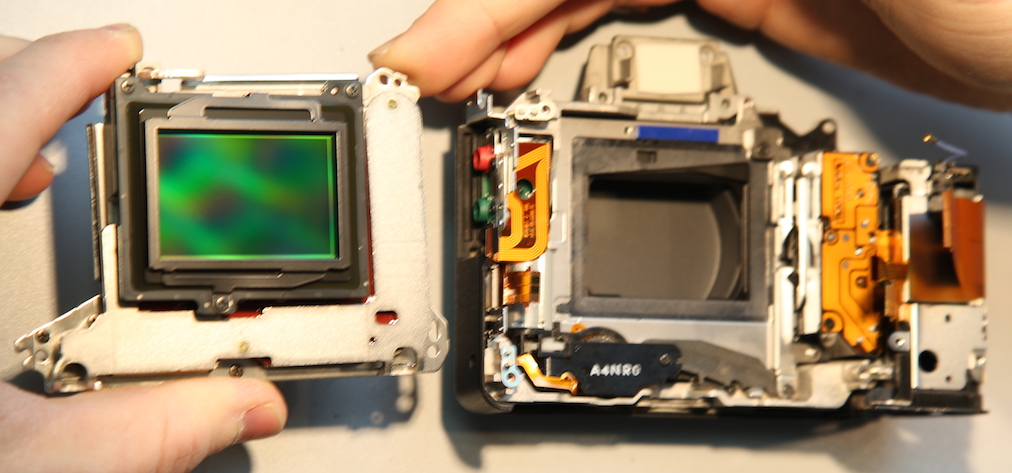
- All images Roger Cicala, Lensrentals.com, 2015
Here’s a close up of the shims, obviously custom made for this camera, not off-the-shelf shims.
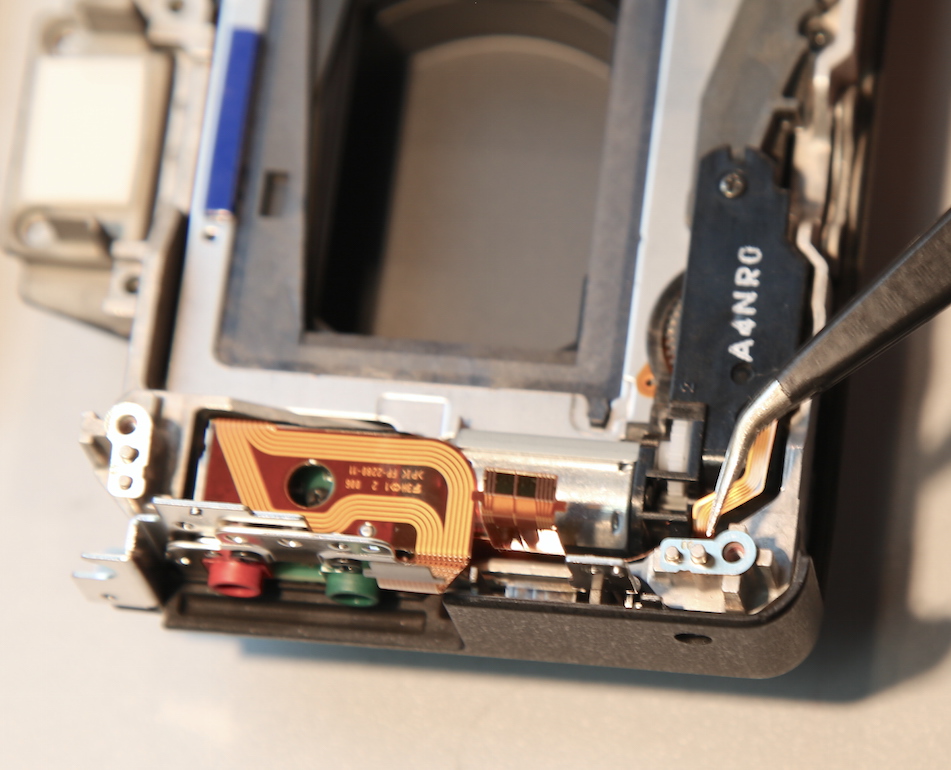
- All images Roger Cicala, Lensrentals.com, 2015
The sensor – IBIS assembly is a big, heavy piece. You can compare it to the sensor assembly in the A7r in our previous teardown of that camera.
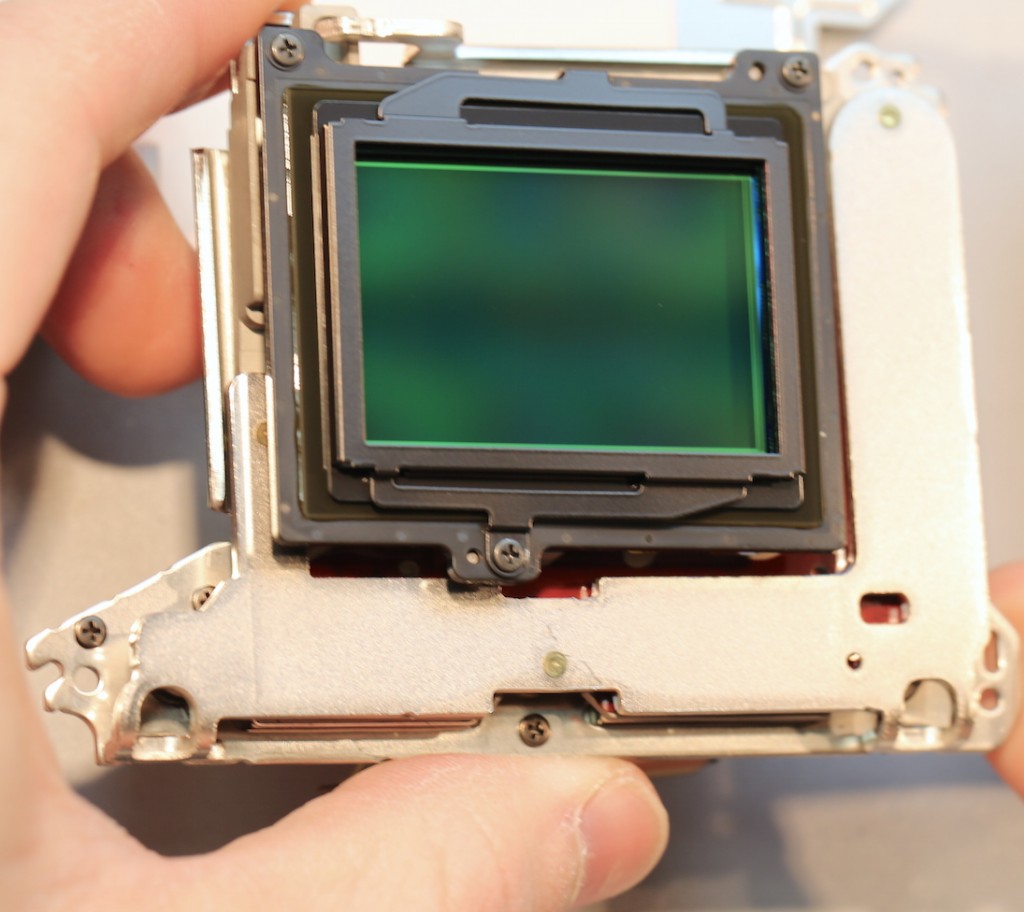
- All images Roger Cicala, Lensrentals.com, 2015
While we can’t demonstrate all five axis at which the stabilizer functions, I was a bit surprised at just how much range of movement the sensor has. If you don’t notice the movement in the two images below, look along the right side of the sensor.
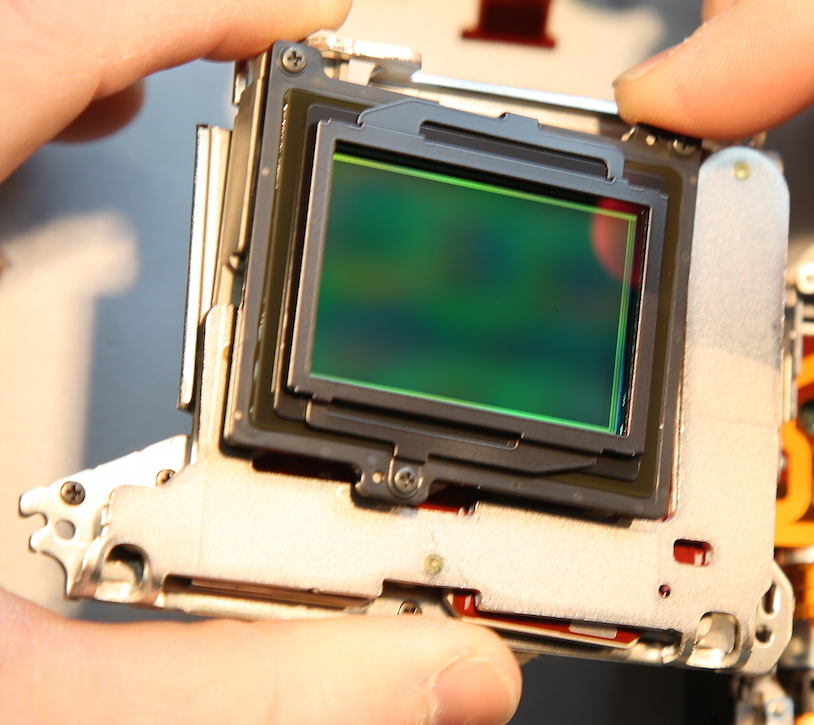
All images Roger Cicala, Lensrentals.com, 2015
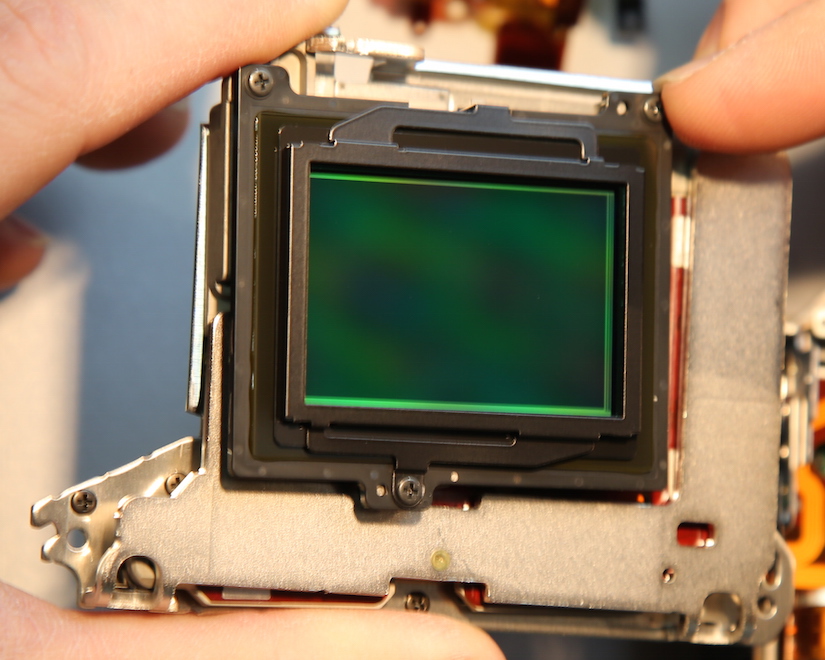
- All images Roger Cicala, Lensrentals.com, 2015
A lot of the magnets in the image stabilization system are permanent, rather than electromagnets. I assume this is to help prolong battery life. Looking from the side you can see the robust rubber-over-metal posts that keep the sensor from moving too far.

- All images Roger Cicala, Lensrentals.com, 2015
Finally, with the sensor out we can remove the shutter assembly. Again, like the earlier A7s, there is a lot of modular construction in this camera.

- All images Roger Cicala, Lensrentals.com, 2015
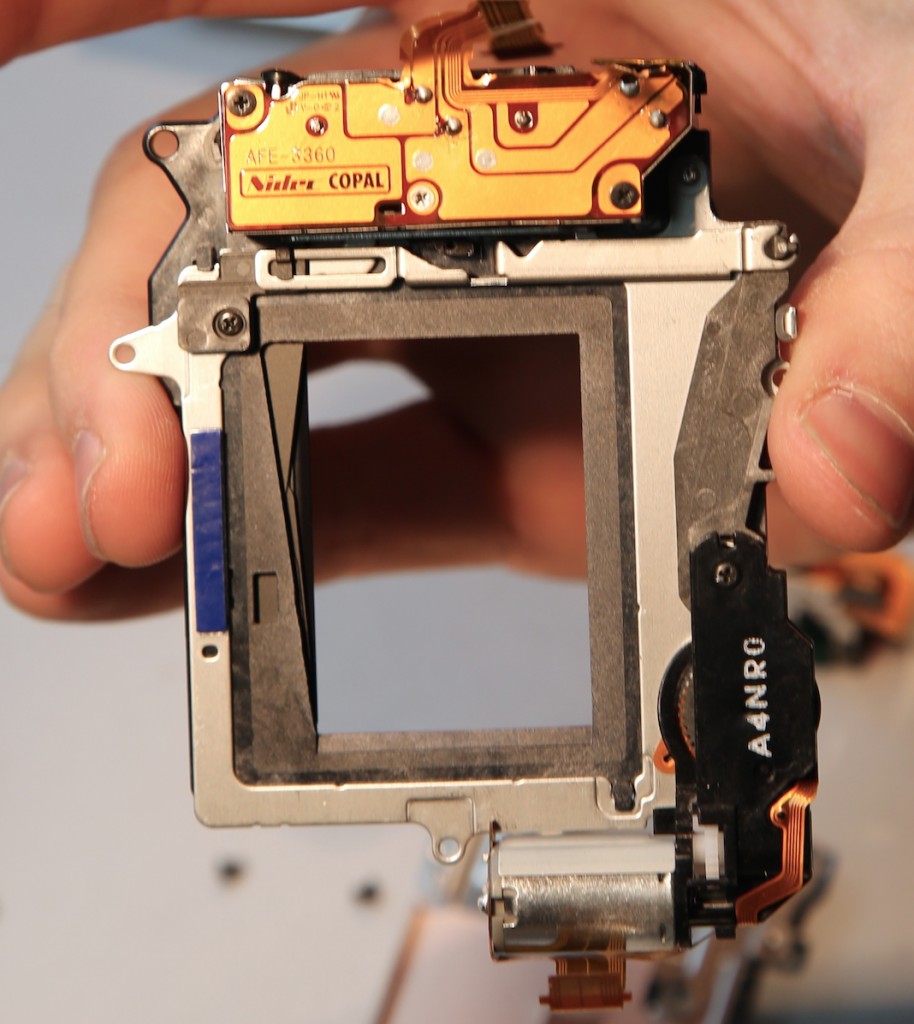
- All images Roger Cicala, Lensrentals.com, 2015
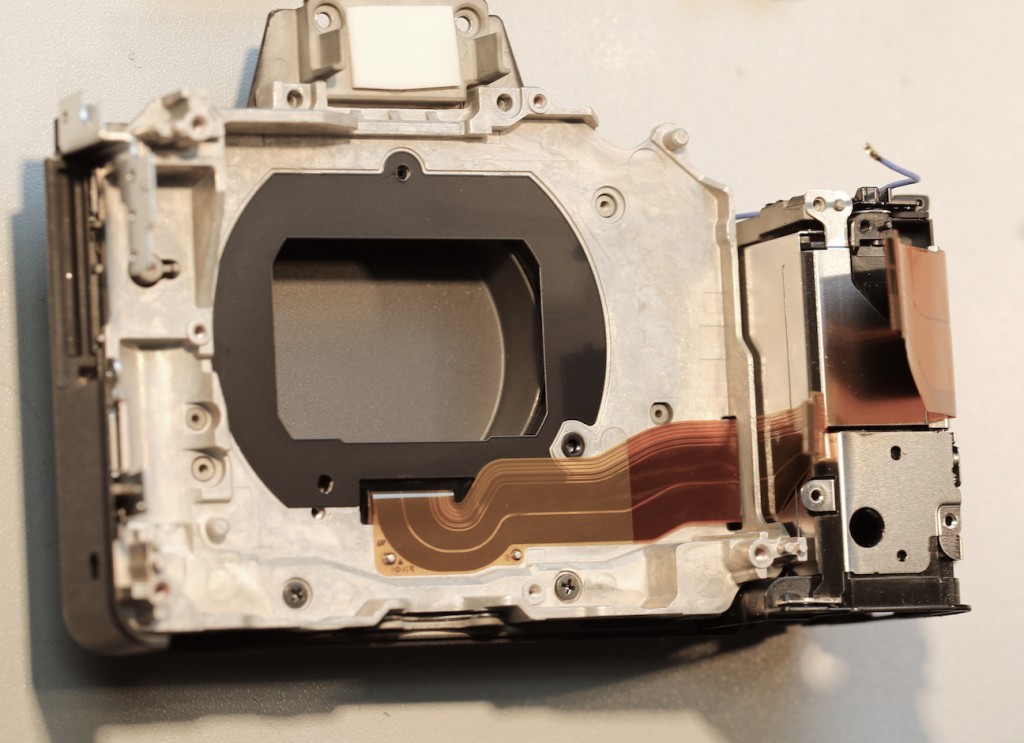
With all of the modules out, you can see how robust the chassis is. That’s the lens-power flex going from the battery compartment to the electrical pins in the lens mount.
- All images Roger Cicala, Lensrentals.com, 2015
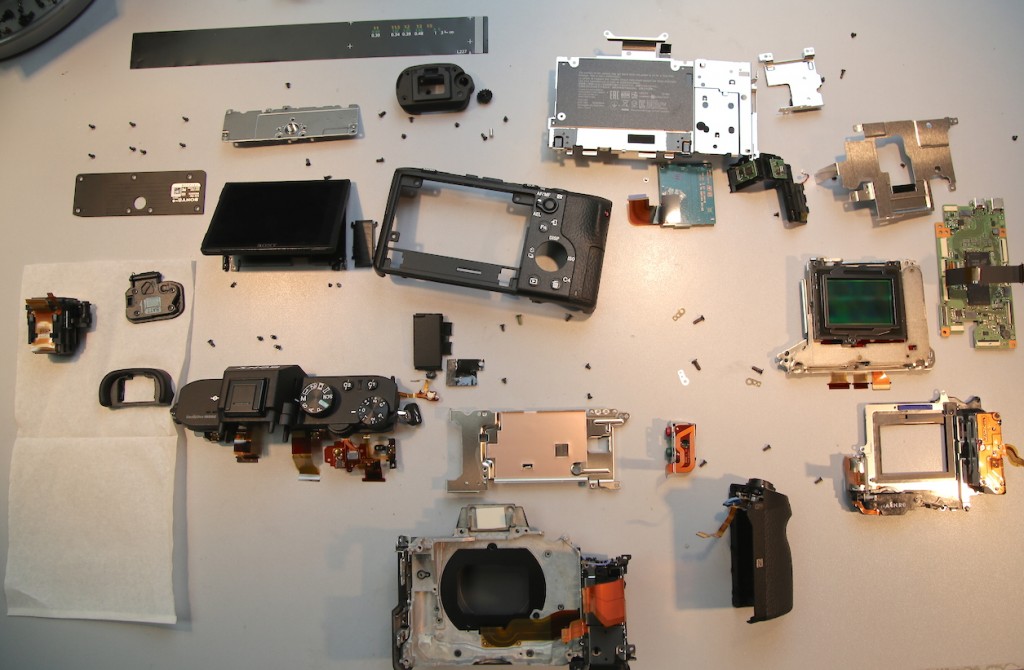
This was a much more complex disassembly than the A7r was, largely because of the increased electronics used by the image stabilization system. There were a lot more flex connections and a few more screws, but the overall modularity of the design is still very apparent, especially when we lay out the disassembled parts.
- All images Roger Cicala, Lensrentals.com, 2015
Summary
It’s not surprising that the inside of the A7II is more complex than the previous A7 cameras. The in-body image stabilization takes up space and adds circuitry. The camera does largely retain its modular construction, but clearly is more complex to assemble and disassemble.
The A7II is clearly more robust than its predecessors, too. The lens mount seems designed to eliminate any wobbling or looseness that was noticed in previous models and the chassis seems stronger.
We don’t see any real increase in weather sealing, except around the battery door, and even that is incomplete. However, it is certainly possible that Sony has such tight plastic-on-plastic seals that they don’t think rubber gaskets are necessary. Like I said at the beginning, though, I’m pretty cynical about manufacturer’s weather sealing claims.
Roger Cicala and Aaron Closz
Lensrentals.com
February 2015
Author: Roger Cicala
I’m Roger and I am the founder of Lensrentals.com. Hailed as one of the optic nerds here, I enjoy shooting collimated light through 30X microscope objectives in my spare time. When I do take real pictures I like using something different: a Medium format, or Pentax K1, or a Sony RX1R.
-
Mark Blum
-
Gabriella Aguirre
-
Mr. Black Tickle
-
billyjack
-
Tony
-
Mari
-
Jay – sonyalphalab
-
Mk.82
-
George S.
-
Geoff
-
Carol Teater
-
Matt
-
Romano Gtti
-
KeithB
-
KeithB
-
A Ronald Gallant
-
Brian
-
Ian Norman
-
Dalibor Mrkic
-
Lee Saxon
-
Rob
-
NancyP
-
Lasse Beyer
-
John
-
Damodara
-
Eric
