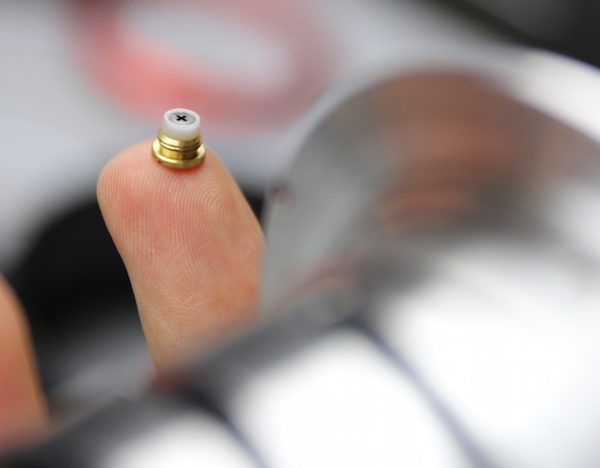
I was pretty excited when I first heard about the Rokinon Xeen line of Cinema lenses. For several years now, Samyang / Rokinon photography lenses have given photographers with reasonable expectations some superb alternatives. They sell optically excellent lenses at amazingly low prices. There are compromises made to accomplish this goal, of course, but they are reasonable compromises. You can complain about copy-to-copy variation, or that they are more fragile, but the simple reality is you get a quality optic at a price that is a fraction of the lenses they compete with.
My expectation for the Xeen line would be similar to the photographic lenses. I expect the optics will be excellent, but inevitably some compromises would have to be made to reach the price point at which these lenses sell. I assume they will be smart compromises and cinematographers with reasonable expectations will be able to expand their equipment list.
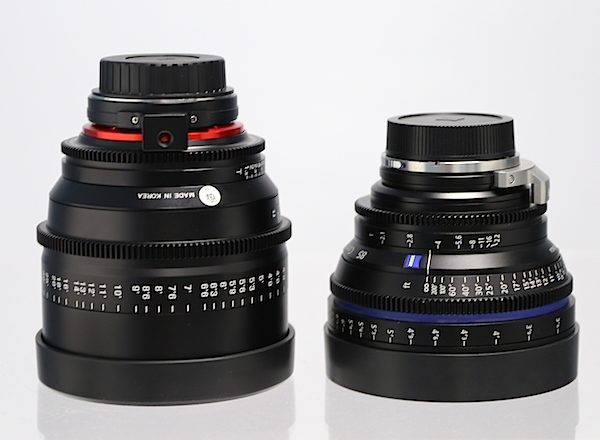
I’ll admit I have a little bit of fear, though. Photographers tend to treat lenses like, well, glass. They consider them a big investment and baby them. Cinematographers are a lot rougher on their equipment. So one of the first things I wanted to do was look inside and see how these things were built. Since Zeiss CP.2 lenses have a long history as a (relatively) low cost yet very durable cinema lens, we decided to use a CP.2 as a comparison. Since it’s the ‘standard’ we’ll look at it first.
Zeiss 85mm cp.2 Teardown
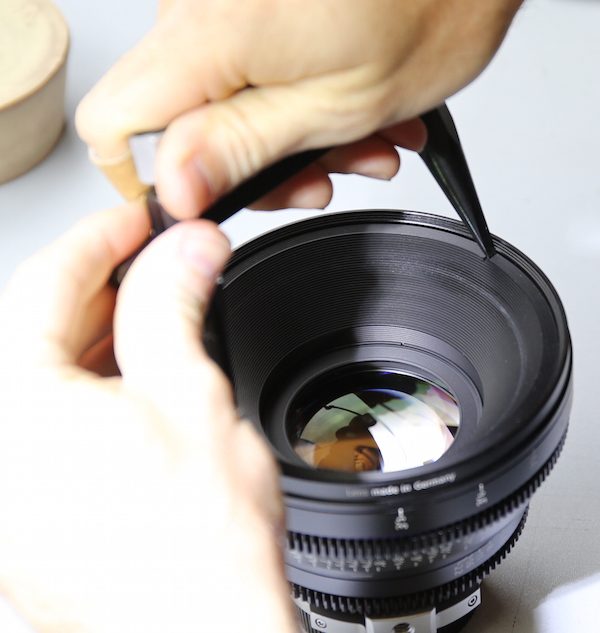
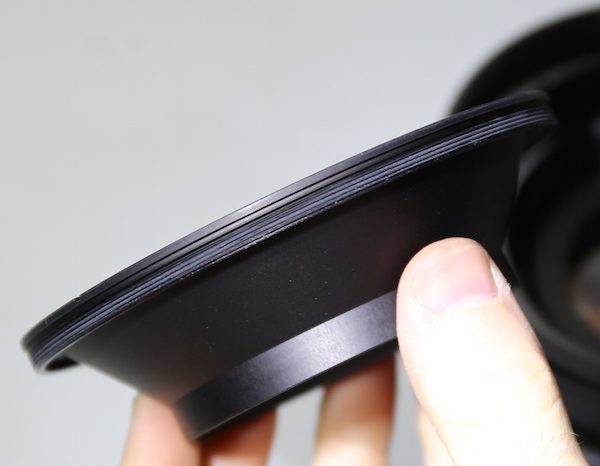
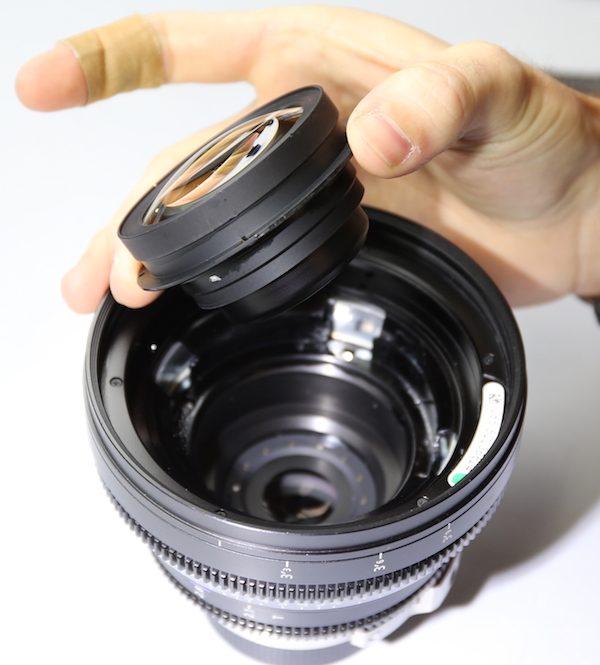
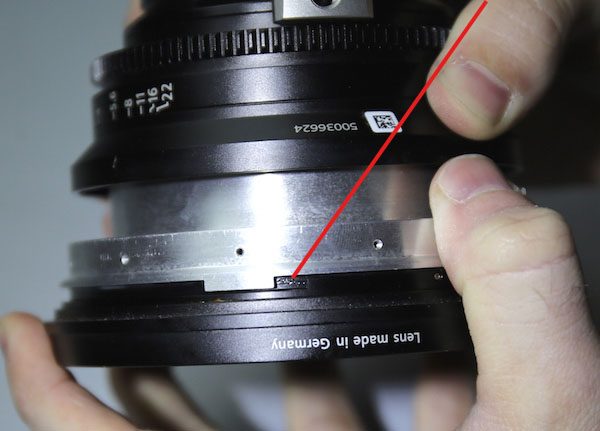
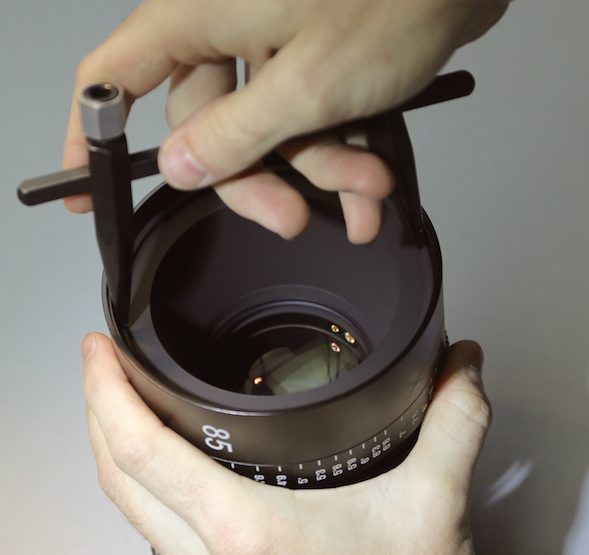
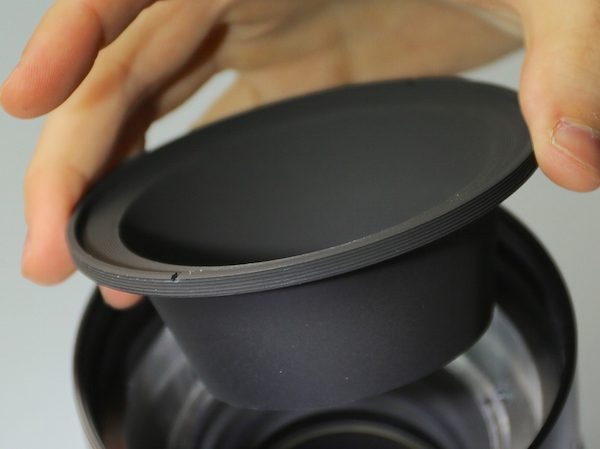
The first step with opening this lens is removing the front light baffle, which comes off easily with a spanner wrench.
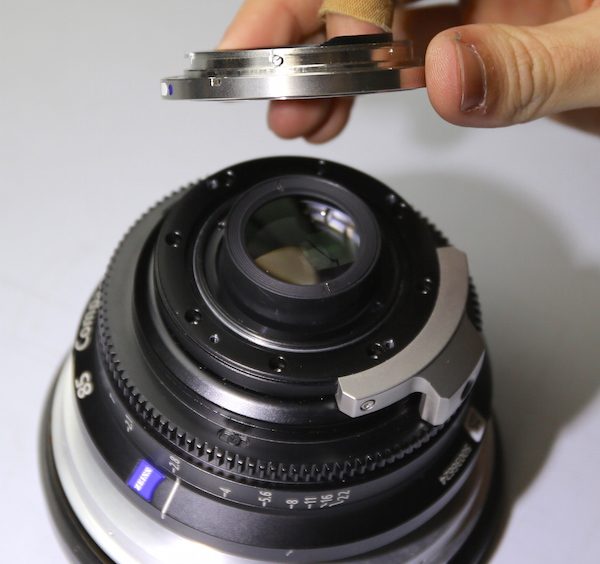
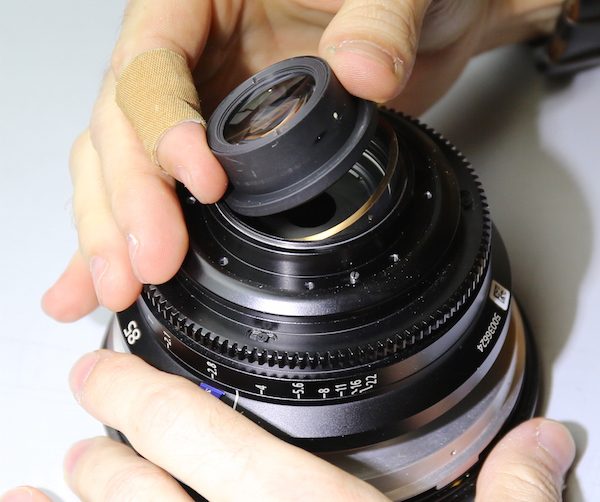
With that removed we can see the front group which is held in by 4 fairly large screws (they’re down in the slot and not visible in this photo).
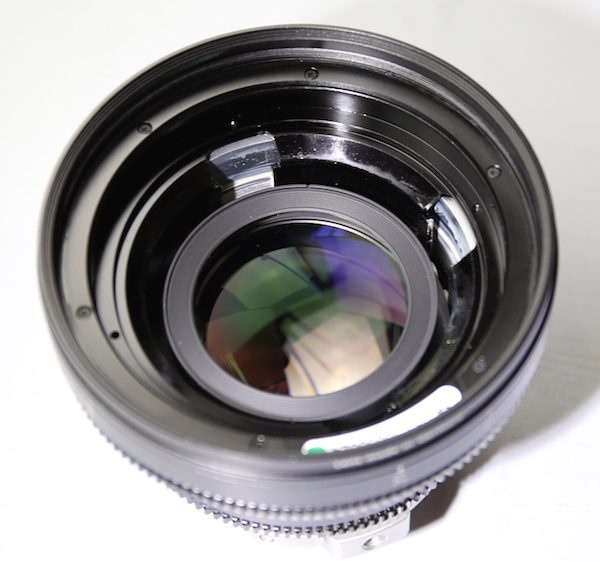
The front removes easily, but I’ll warn those of you who are following along at home, disassembling their own CP.2: this is a centering element and if you don’t have the equipment needed to recenter it then leave it alone. If you do have the equipment needed, then the entire front group comes out in one piece. This is all of the glass in front of the aperture.
Now we can look into the front barrel down to the aperture. Aaron’s forceps are near two nylon rollers on an adjustable tensioner. These help keep the resistance of the focus ring smooth and steady.
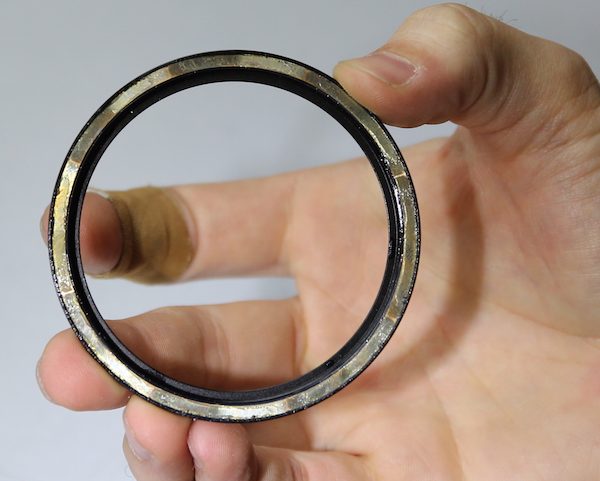
Next we peel off the double rubber and nylon rings that serve as a dust / weatherproofing seal.
Giving us access to the screws we need to take off the focus ring.
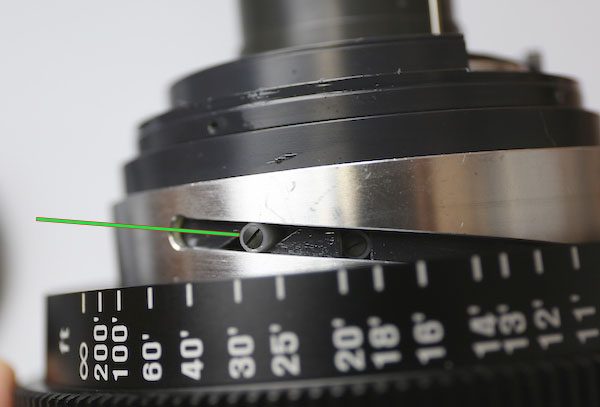
You can now see the hard stop for the focus system (red arrow) that gives you that satisfying, clear ‘thunk’ when you’ve focused to the end of the range.
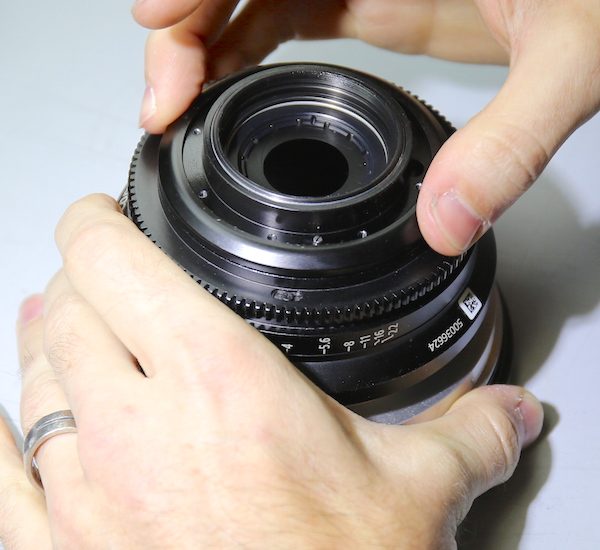
Now we change to a torx driver and flip things over to remove the rear bayonet mount.
After which we to remove the lens mount.
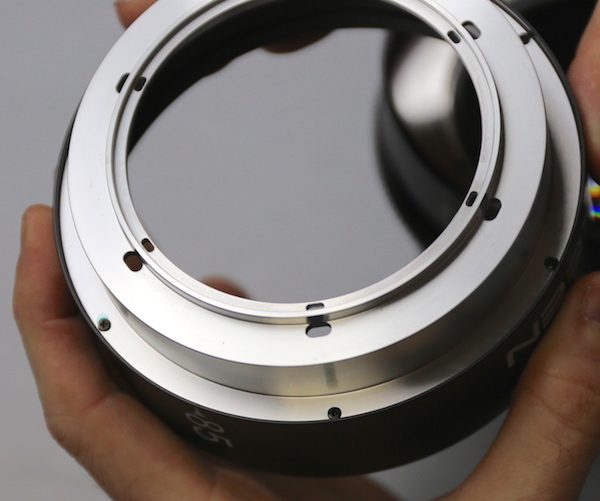
Notice there are 6 long, thick, screws (we’ve left them in the mount, you can see them sticking out below it) holding the lens mount in place. Cinema lenses are made to a standard of robustness you just don’t see in photo lenses. The copper rings under the lens mount are the shims to adjust infinity focus.
Next we loosen the spanner ring holding the rear element in place.
And then remove the rear optical group. Notice the white dot on the side of the group. Zeiss marks each group that way so that you know exactly how it should be aligned during reassembly. Which means, actually, that they checked to see at which rotational position the elements were a ‘best fit’ for each other.
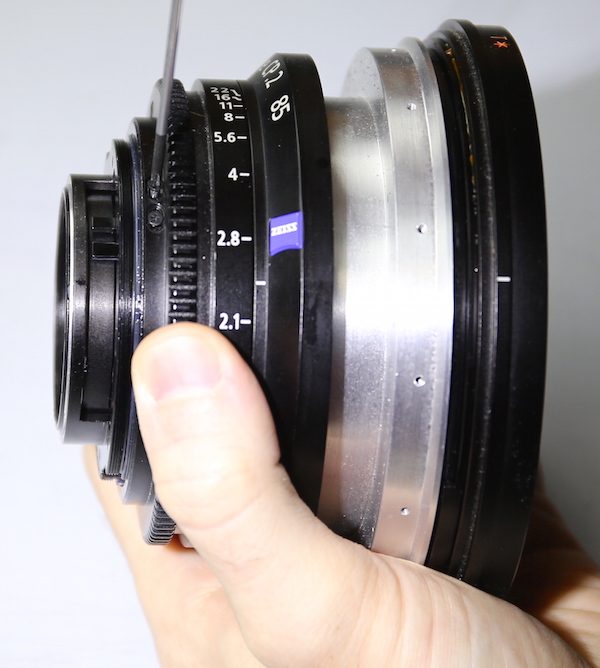
Back on the outside of the barrel, there’s a retaining ring that unscrews.
Now we have access to the screws holding the aperture key in place.
Allowing us to remove the aperture control ring. Notice the copious amounts of thick lubricant under every ring. You can see the lighter white lubricant on the barrel itself.
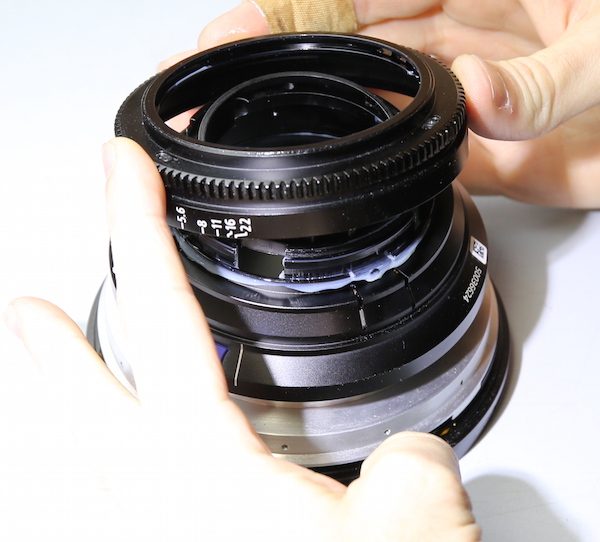
And a thicker grease on the bottom of the ring.
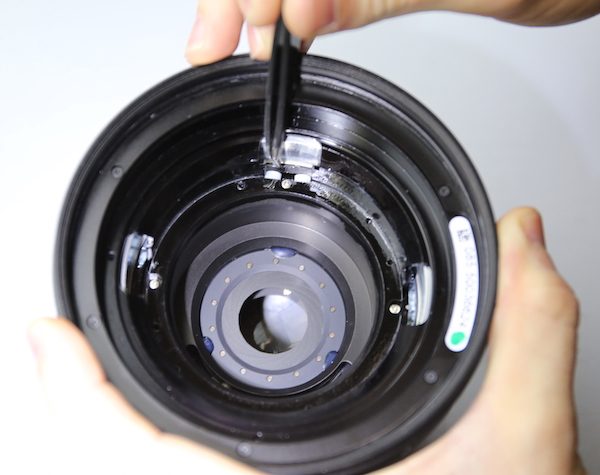
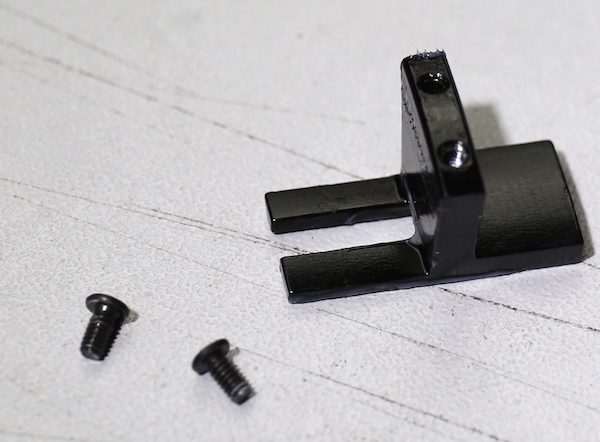
The aperture key (shown below) is a heavy, thick metal piece and also heavily lubricated.
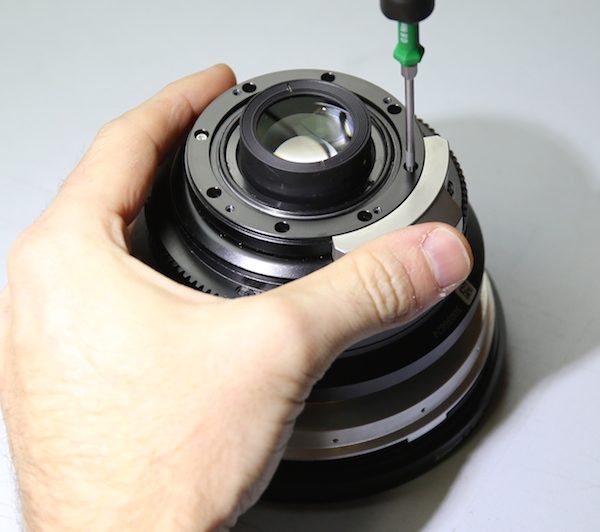
Finally, we go back inside the barrel and remove the aperture assembly.
With the disassembly complete, there’s not a huge number of parts. With no electronics, things are simpler. But the parts are big, robust pieces of metal from one end to the other.
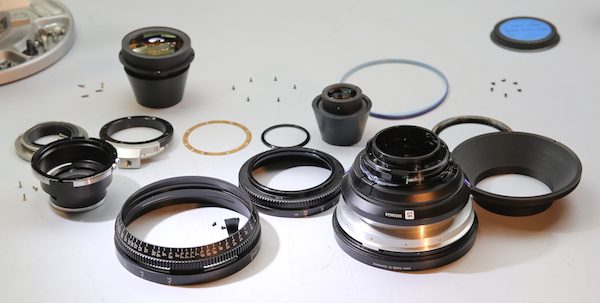
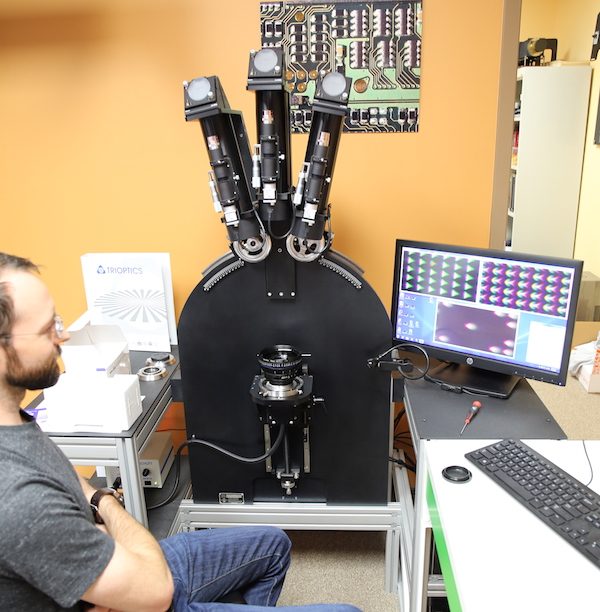
Finally, just because someone is going to ask if the lens is OK after we put it back together, once it was reassembled, it got placed on OLAF, our adjustment bench.
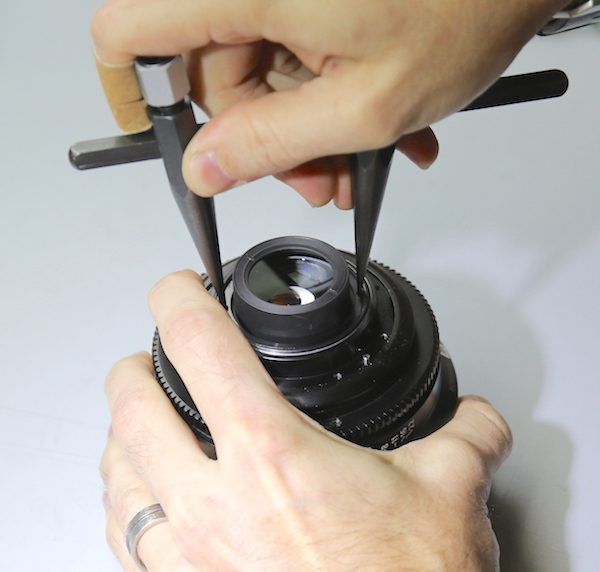
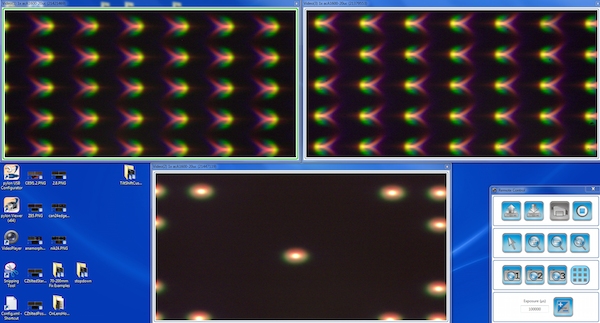
For you do-it-yourselfers, this is what the pinholes looked like with the lens reassembled and the front element ‘eyeball’ centered.
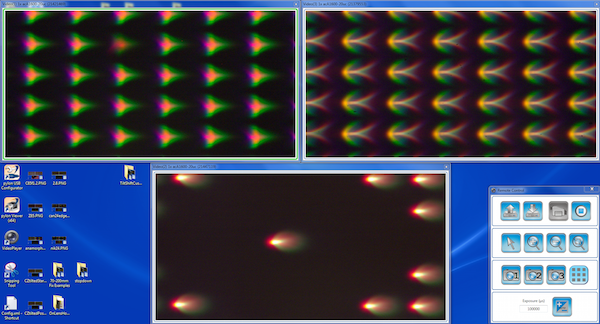
And this after being optically centered.
Xeen 85mm T1.5
We have a lot of questions about the Xeen lenses, but the one we’re interested in today is “How is it built?”. Is it going to work as smoothly and easily as a Cine lens should? Does it seem likely to hold up reliably? Only time and use will tell on the latter question, but a good look inside will give us some strong hints.
Before we start, let me get one thing out of the way. A lot of reviewers are going to say the Xeens are “built like a tank” without ever looking inside them. That just means they’re made of metal and heavy. It has nothing to do with how the working parts are made — those are all inside where you can’t see them.
But the Xeen lenses are not only made of metal, they focus quite smoothly and the feel is very good in your hands. As far as external inspection, feel, and usability goes they’re quite good.
Since I know a lot of video guys hate reading, I’ll give you the TL; DR version now. These lenses are well made. Considering the price, they’re very well made. But they have an Achilles heel that’s going to cause a problem eventually, I suspect.
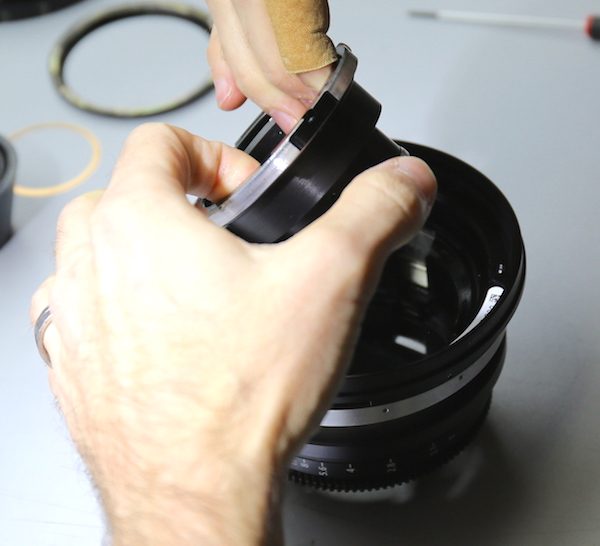
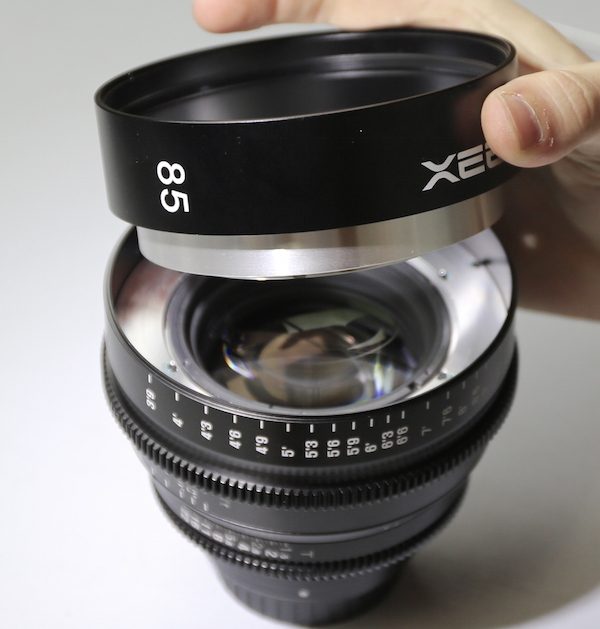
For those of you who do want to read and look at pictures, let’s get started! Opening these lenses starts of quite similarly to the CP.2 we did earlier. The front light baffle comes off easily with a spanner wrench.
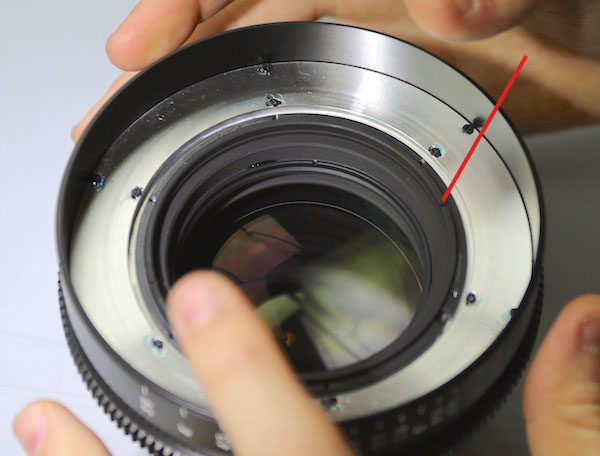
With the light baffle (which is a nice, solid piece of metal) out of the way, the inner front barrel is exposed. There are two sets of screws here. The inner ones hold the front barrel onto the lens. The outer set (red arrow) hold the focus ring on.
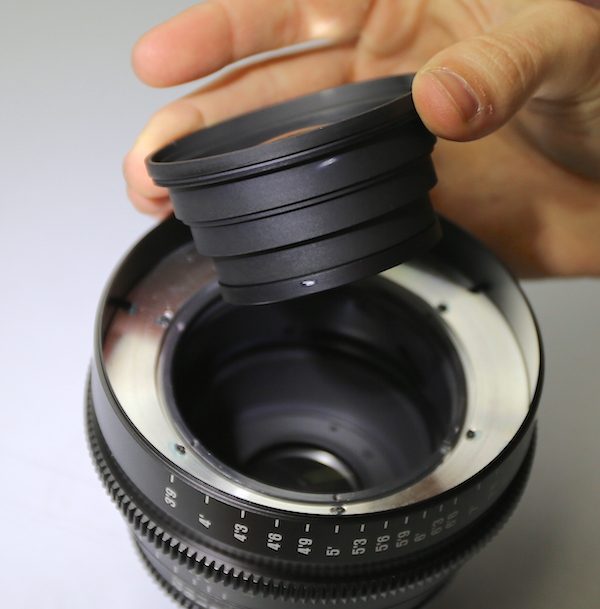
Removing the inner screws lets us remove the front barrel.
The front barrel is, again, all-metal construction and feels very solid. It’s actually in two pieces attached together by six screws. This is a nice touch – if the lens gets dropped the filter barrel will be easy to replace.
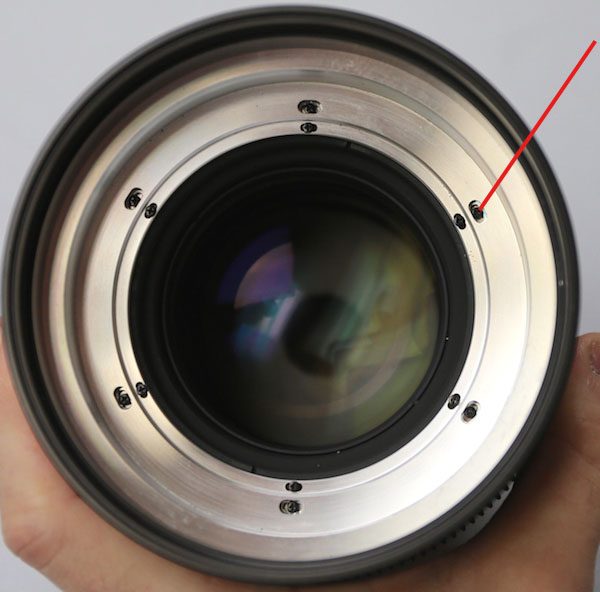
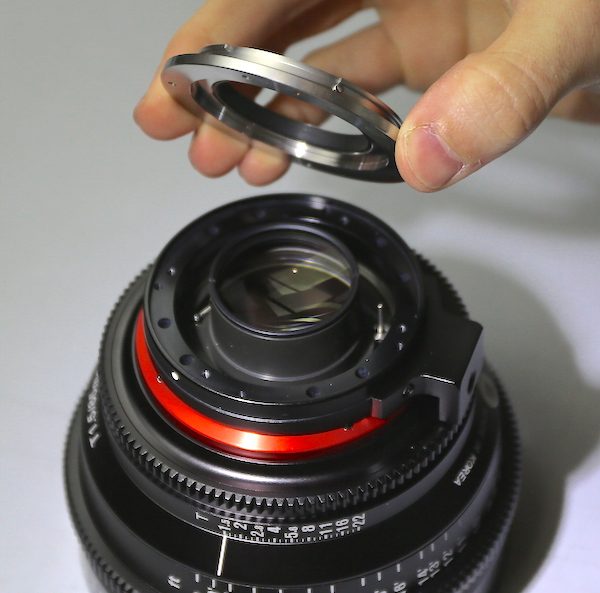
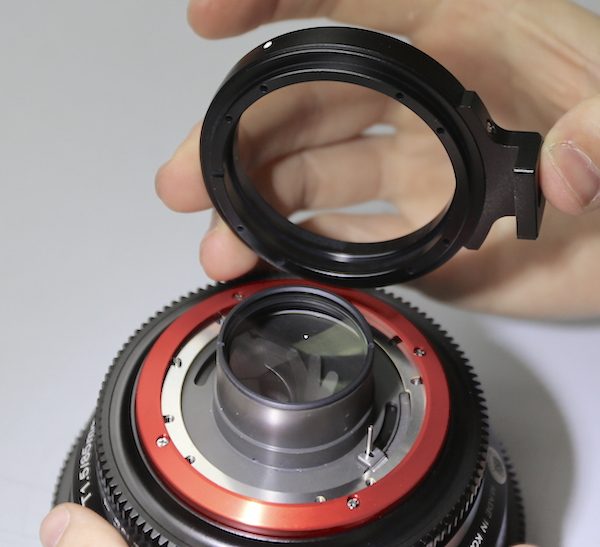
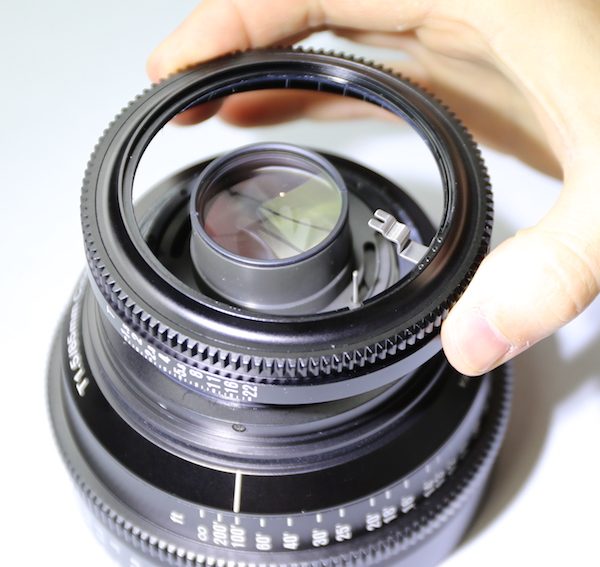
With the front barrel off we can see the spanner slots (red arrow) for the front group.
The front group is easily removed. The group appears to be a simple stack with screw-on front and rear caps holding everything together. We saw no purpose in pulling it apart.
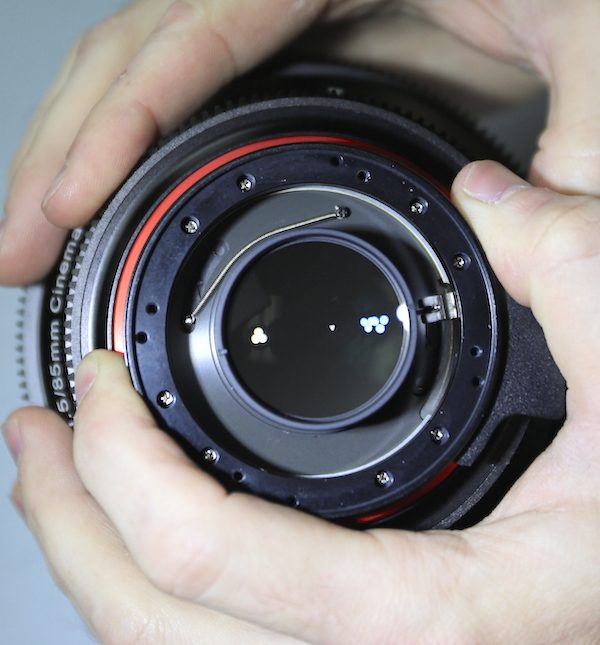
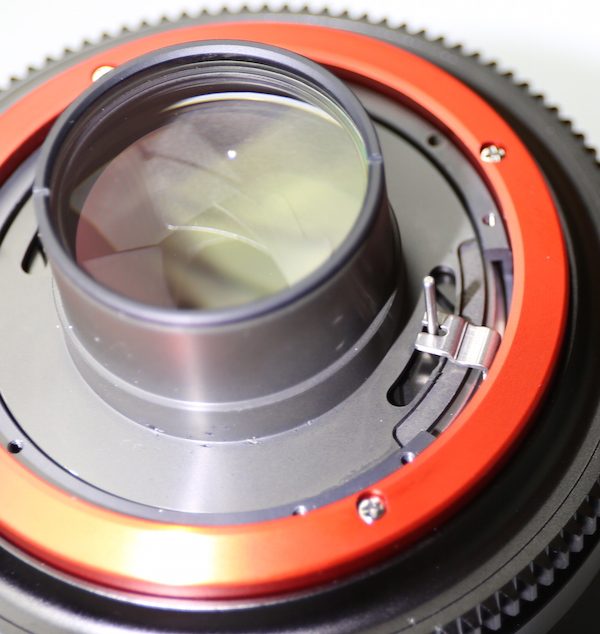
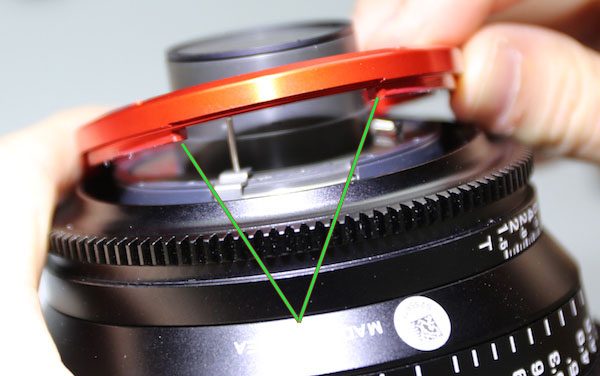
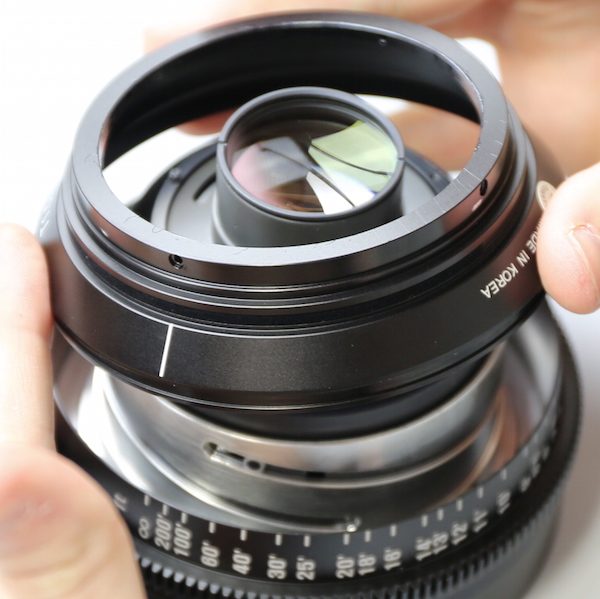
Looking down into the front barrel, we can see that, unlike the Zeiss 85mm, there is another element between the front group and the aperture assembly.

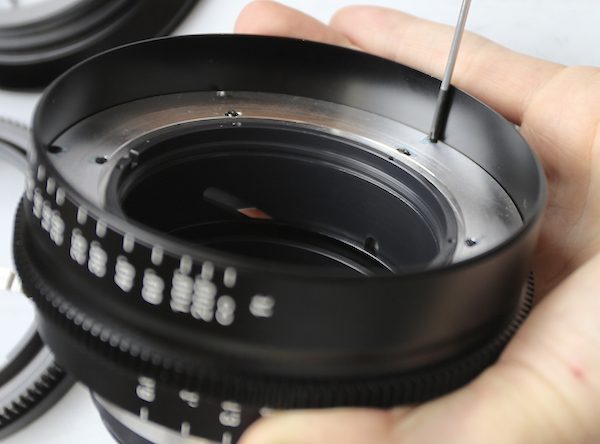
This doesn’t look difficult to remove, but we didn’t think we’d learn anything by taking it out so we left it alone and moved to the rear of the lens. The bayonet mount comes off with the usual 4 screws.
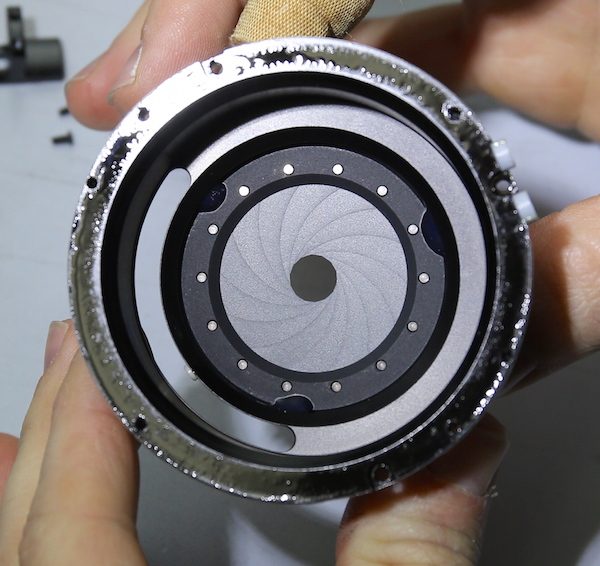
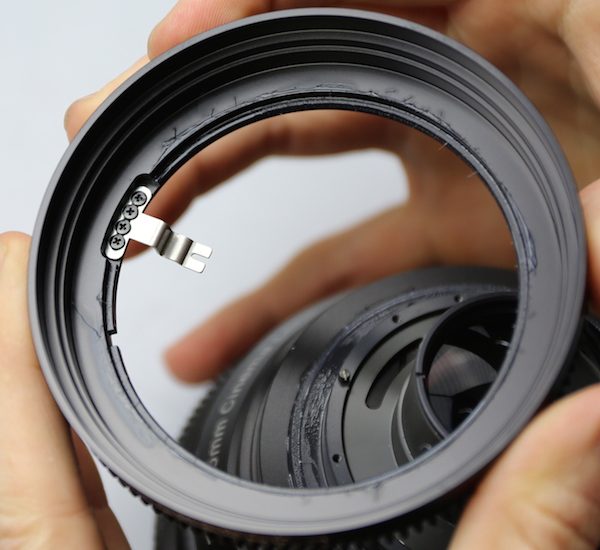
With the bayonet off we get a good look at the internal aperture mechanism. Where the Zeiss used some very robust keys to connect the aperture ring to the actual mechanism and heavy lube to keep a smooth turn (scroll up if you want to compare), the Xeen uses a post and counter spring to accomplish the same thing. Not quite as robust but I still think it should function perfectly well. It’s similar to what we see in Nikon photography lenses and those work just fine.
The lens mount itself is a thick piece of metal attached with 6 long sturdy screws. This is the same thing we saw in the Zeiss CP.2 and other cinema lenses.
Under the lens mount you can see the silver shims used to set infinity focus, just like most other cinema lenses.
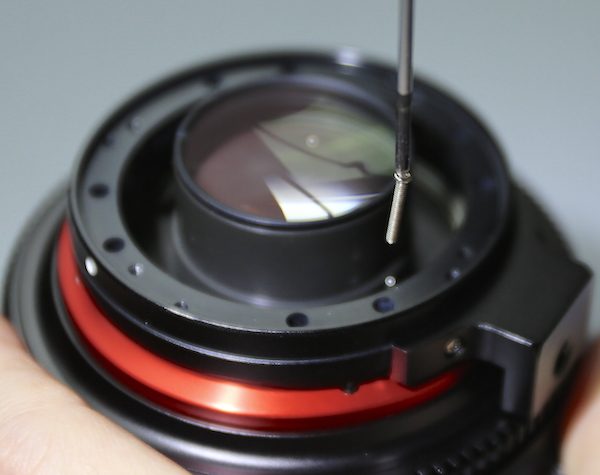
And here’s a close up of the aperture post nestled in the fork of the aperture key.
Removing the orange ring lets us see the hard aperture stops (green arrows) under the ring. Again this looks quite sturdy and similar to what we see in most cinema lenses.
With this ring removed, the aperture ring slides right off the lens.
Looking underneath the aperture ring gives us another look at the key, solidly held in place with 4 screws.
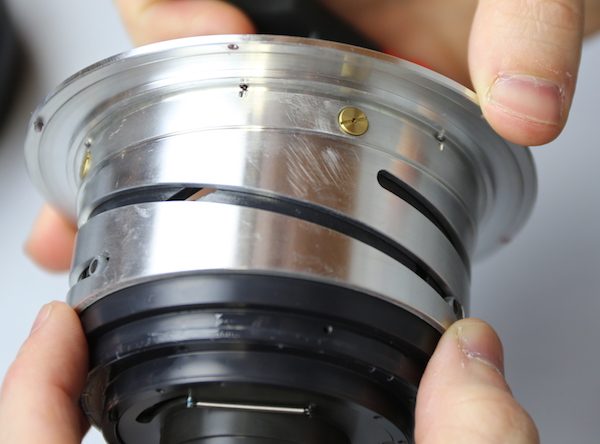
We next removed a set of 4 screws that hold the mid barrel in place, after which we could slide the mid barrel off.
Which gave us a good look at the focusing helicoid. The helicoid barrel (silver barrel) and helicoids themselves are very solid looking. The collars (green arrow) that slide within the helicoids, moving the focusing groups, made me pause, though. These are pretty thin, more like what we’d expect in a Samyang photo lens. with the longer throw of a cinema focusing helicoid they’re going to get more wear than with a photo lens. I was a little concerned about how they would hold up when we first saw them.
So we removed one to get a closer look. My concerns were not relieved. In addition to the collars being thin, there are only about 2.5 turns of screw thread holding the collar into the lens element.
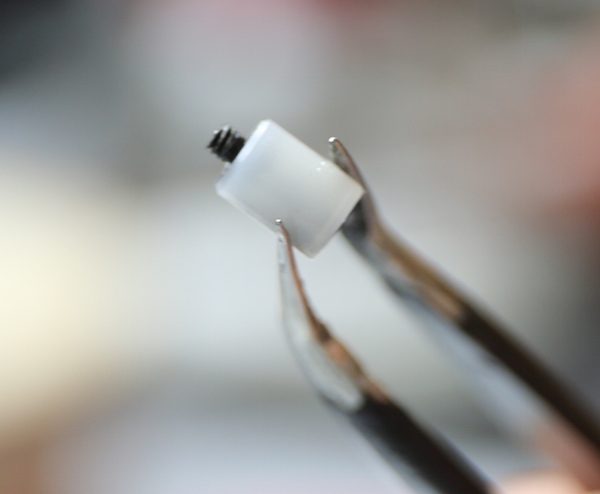
And the screws themselves aren’t too robust. It may be that I’m wrong and these screws and collars are going to hold up very well. But if I’m correct, when these lenses are a year or two old, we’ll be seeing a fair amount of focus roughness from worn collars or focus jams when screws come loose. Hopefully I’m wrong. And if not it should be an easy repair, assuming repairs are available.

Finally, we removed the external focus ring. It attaches to the focusing barrel (which is silver) by those 6 screws we saw when we were working in the front.
Once those are out, the focus ring slides off the back of the lens. The screws take the place of any focus key and they certainly is never going to break. This is a solid way to do things.

We were interested in the brass screws at the top of the barrel, since it seemed simple screws would have attached things just as well. They’re pretty and all, but this isn’t a place anyone would see them.
When we took one out we were pleasantly surprised to see there nylon bushings on the back side. The thick screws and bushings keeps the focus ring moving along smoothly. It’s a nice touch. It occurs to me that perhaps this also takes some load off of the helicoid collars we talked about earlier. I hope so anyway.
One last thing to look at and it’s kind of hard to see. But looking under the focus barrel you can see the hard stop for focus is a set screw (red arrow). It slides under a thinner area of the barrel during focusing, but when the limit is reached the thicker part of the barrel (green arrow) hits the screw, giving a hard stop.
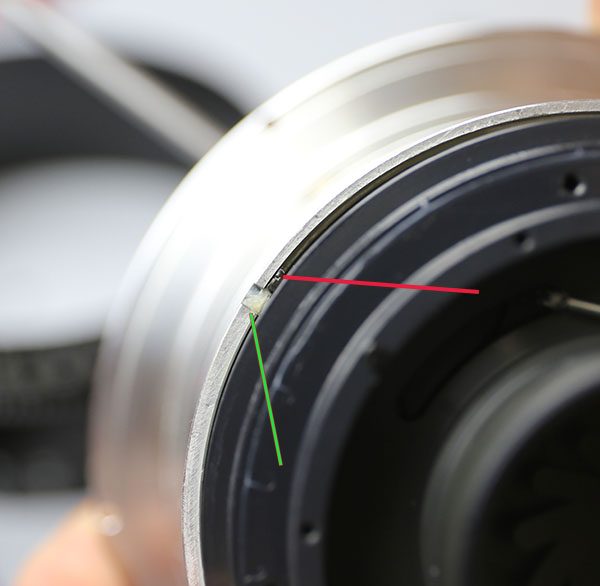
Does it work? Yes, quite well. Will it hold up? Well, I have my concerns. Screw heads are made of soft metal usually. Hopefully this is a special screw with a really hard metal head that won’t wear down with repeatedly hitting the stop. But I’d prefer a solid big metal-on-big metal stop like the Zeiss had.
So what’s the verdict on build quality? Overall, it’s very good, especially given that it’s selling for about half of what other cinema lenses sell for. I do have some very real concerns about how the focus system will hold up over time and with hard use, but the compromises made seem very reasonable overall. Put another way, I wouldn’t hesitate to buy one based on what I saw today, but I’d be make sure my focus puller was gentle and didn’t ‘slam’ focus. Over time hard use, especially hard focusing use, will take a toll on this lens I think.
One other thing I’ll mention is that we didn’t see any possible optical adjustment in these lenses. There may be spacing shims inside the front or rear groups. We didn’t open those to check. So I’ll be interested to see what the copy-to-copy variation is like. But the optical results will have to wait until tomorrow when we can get these on the optical bench.
Roger Cicala and Aaron Closz
Lensrentals.com
August, 2015

30 Comments
Jeff Cowan ·
Nice breakdown.
Do you think those collars are made of a durable material, like a Ultra High Molecular Weight Polyethylene?
Roger Cicala ·
Jeff, I don’t know for certain, but they sure look like Standard Molecular Weight Nylon 🙂
Jon Wolding ·
I really love these breakdowns.
Thank you, Roger!
Scott ·
Wow! Taking those lenses apart would scare the $#!* out of me! I imagine you get quite a bit of training before being let loose on lenses that expensive.
Do you check (and correct) the optics of all lenses before renting them or just those that have reported problems?
Thanks SO much for posting this!
Roger Cicala ·
Scott, we test before and after disassembly to make sure nothing has changed, and then test after each rental.
Optically, the Xeen’s aren’t great wide open, lots of spherical aberration. They’re quite nice by f/2.8 though. Basically they’re optically the same as the Rokinin photo lenses. I haven’t tested the Veydras so I can’t compare.
Scott ·
BTW, I forgot to ask in my other post, but how do these Xeen lenses compare to the Veydras, both optically and build-wise?
mrc4nl ·
Ive looked at the mtf charts of the 24mm to see of the xeen is opticaly different from the normal 24mm “photo” lens.
unfortunately they looked both the same to me, so if you want the same quality and dont need fancy stuff, the normal 24mm or geared cine version will do just fine
Allen Achterberg ·
Just as I expected. The Cinealtas are better priced than the Rokinon junk. Xeens are sadly targeting newbies by mimicking a cine lens. These will be on eBay shortly for cheap and as is/for parts
The D. Man ·
The ABSOLUTE No-1 most important question we Cinematographers want to know is, Do the New lenses produce a “Visibly” Better image then the already existing Rokinon lenses.
Roger Cicala ·
The answer is absolutely NO, The D. Man. Same optics, same MTF curves, same amount of variation.
Achim Kostrzewa ·
Hi Roger,
What about all These lubricant Grease within the Barrel?
Will it work outdoors in Arctic or desert (Hot) environments?
My mamiya 645 super was once blocked, due to frozen lubricant while I was Photographing Icebergs in North Western Greenland….
Like allways, very useful Article , Thanks
Achim
Roger Cicala ·
Achim,
I don’t know for certain, but many types of lubricant do perfectly well in sub-zero temperatures.
Jonas ·
Did you ever do the same test for the Cinealtas?
Roger Cicala ·
Jonas, nope, we didn’t.
Alex ·
What an incredible waste of time. I mean seriously how amazingly dumb it is to review a lens by a breakdown?!
Personally im much more interested on how does it performs on a human face. I mean assume that what you guys would buy a lens for wouldnt you ??
Or are you the kind of monkeys that would judge a cuisine by the quality of the pans the chef uses ?
Roger Cicala ·
Alex, we’d not judge the cuisine: we’d test the pans and decide which ones would hold up to rough restaurant use and which wouldn’t. Except with a lens, when it doesn’t hold up, you don’t get a pretty picture of a face, you get a blurry decentered one.
BTW – we didn’t review the lens. We did a teardown. That’s what we do. Do you usually go to sites that compare mining equipment when you want to select a diamond?
Casey Preston ·
Thank you for the tear down. I really wish Samyang had gone away from the use of the nylon collars for the focusing mechanism on the Xeen lenses. It looks very similar to the focusing mechanism on their photography lenses. I know it looks very similar due to the number of times I’ve taken apart their photography lenses trying to get rid of slop in the focus ring or the inevitable whirring noise or inconsistent tension that pops up due to the design. Not good.
Jojo ·
@ Alex: what a waste of time to go to a place where teardowns are made, looking for a lens review and being rude to the guy who is doing it? Is this the way to talk to people who are sharing things? If you don’t like it, nobody is forcing you to read it. But if you read it, read carefully and don’t call names.
@Roger: great teardown â usual …
!Olivier ·
Hi Roger,
In this article, you insist on how important it is not to try dismantle lenses that have centering elements.
Since I havn’t find a teardown of the Canon 100mm Macro L IS USM on the blog, could you tell me if a “normal photographer” (aka me) can try to dismantle this lens or if it has to be done by professionnals ?
I have focusing issues on my lens and was wondering if changing the USM block myself was reasonnable…
Thanks a lot for all the work done on this blog, this help the geek part of me to understand how my tools work !
Olivier
Roger Cicala ·
Olivier, I doubt changing the USM block would help, and even if you did I believe it requires factory software to calibrate. The disassembly to the USM is difficult, but not impossible for a first timer, but I doubt it would fix the problem.
!Olivier ·
Thanks for your answer Roger !
I should have been more specific about my “focus issues”. It’s not about FF/BF.
My problem is that sometimes the manual focus ring does not move the focus point (the ring moves, but the focus point don’t). This phenomenon often occurs in the “proxy” (0.34 – 0.48m) zone. Most of the time, switch to AF and make the USM work unlocks the mechanism, but sometimes even the USM motor is blocked.
Right now, everything works just fine, but sometimes the lens is totally blocked (the temperature seems to have an influence).
That’s why I think that something’s wrong with the USM.
But I understand that I’m probably not equipped to try such a reparation myself…
Thanks again.
Roger Cicala ·
Olivier, now I understand. Sorry. Yes, that probably is a USM replacement. It’s done through the back of the lens and while it’s not an extremely difficult operation, if you haven’t opened lenses before I wouldn’t try it. If you have a bit of experience and want to order the new motor from Canon it’s doable. If you have a LOT of experience and want to try restocking the motor – well I assume you don’t.
Anyway, it’s a big project and Canon states that AF may not be accurate after changing the motor and it MIGHT need to be reprogrammed using factory software. Most of the time it doesn’t, but it might. Plus the motor is a fairly expensive part (over $100) so I’d suggest sending it to Canon for an estimate. You can always decline it and get the lens back and try to do it yourself later.
Omesh ·
Aviation greases are designed to work in a wide range of temperature extremes. Given the impact/shock at the hard stops I think one containing moly would provide good wear protection. Perhaps a product like AeroShell Grease 33 MS. (operating temperature range –73°C to +121°C)
Gery Teague ·
Great teardown. I’m looking everywhere to try and find out if there is a threaded ring in the xeen lenses for screwing on a uv-filter or nd-filter. I know normally this is done with a matte box, but I do a fair amount of run and gun and want something to protect the lens.
Thanks,
Gery
Gery Teague ·
Hey guys, just wanted to check in and see if you saw filter threads on the lenses.
Thanks again,
Gery
Colin Elves ·
So what were the optical results? I keep looking for this proposed post, but can’t find it!
Bertus Kirsten ·
Hi Roger.
Thank yo so much for this detailed review on the inner workings of the Xeens. It has been very helpful. We have a set of six Sony Cine Alta 4K’s as well as a 50 & 85mm Xeen.
The following is my understanding of the lens technician’s explanation of repairs to our Sonys o may have some slight inaccuracies: He has found that the single plastic helicoid/drive pin inside the 85mm snapped off completely, the 50mm’s was on it’s way. This pin has no partner and thus solely bares the friction and impact of all the focus racks and stops. In the 35,50 and 85 mm it runs in a plastic helicoid barrel whilst those in the 20, 25 and 135mm are metal(strange that the more used lenses are less robust). Given, our lenses have been working 12hours, 5 days a week for about 14 months. But we had problems since the first week, including with the more metallic constructed 135mm, and they have been in for multiple services and repairs since then.
Now my two questions:
1. I see from your review that the Xeens also have vulnerable heliciods. How many of these do the Xeens each have?
2. In you experience how does the Xeen’s internal robustness compare with the Sony Cine Alta 4k’s, especially the more plastic 35, 50 and 85mm?
Many Thanks
Roger Cicala ·
Bertus, it’s a good question, but you probably won’t like my answer. Both the Sonys you had and the Xeens you are considering have fairly non-robust Cine housings. If one or the other are your only two choices, I’d probably go with Xeens because Rokinon has better support. They don’t actually repair, but they will exchange a broken one for a refurb. It costs more than a repair but at least you aren’t on eternal parts hold.
My actual answer, though, is neither. In my mind you asked me ‘which gun should I take into Grizzly Bear country, a Smith and Wesson .22 caliber or a Ruger .22 caliber. My answer is neither, although I guess either one is better than not being armed at all.
You say you use your lenses frequently and hard. Neither of these lenses are designed for that kind of use and neither is going to hold up under it well. They are built for the ‘occasional’ user, or the person who wants good Cine optics at a relatively inexpensive price and realizes they are going to give up robust build to get the price they want. Under your kind of use, if you get 6 months out of any of them I’d be a bit surprised. If you want the focusing scale to be accurate, I’d say 3 months.
Personally, I’d get a set of Zeiss CP.2s. They are far more robustly constructed and would have a fighting chance of holding up under your kind of use. They do two years of rental use with ease. We have no thoughts that a Xeen or a Sony Cine Alta would do that. Not going to happen.
I expect if you add the repair costs over a couple of years plus the purchase price, you’ll find CP.2s are by far the less expensive option. We certainly do.
Roger
Omesh Singh ·
Hi Roger, I can’t seem to find any spec sheets which show the optical formula. How many elements and groups does the 85mm XEEN lens have? Is there a block diagram?
Martin Mikitas ·
Hi Roger!
I decided to take apart my Xeen lens due to focusing issues but i’m having a hard time taking off the light baffle. It seems like Samyang are using some shellac or super glue. I was wondering if you encountered that in your disassembly ?
Thx