Sigma 35mm f/1.4 DG HSM Art Lens Teardown
Last week we did a tear down of the Canon 35mm f/1.4 Mk II, an expensive, large, weather-resistant lens. Then we did a tear down of the Sony FE 35mm f/1.4 ZA lens, and expensive, weather-resistant lens with very different technology.
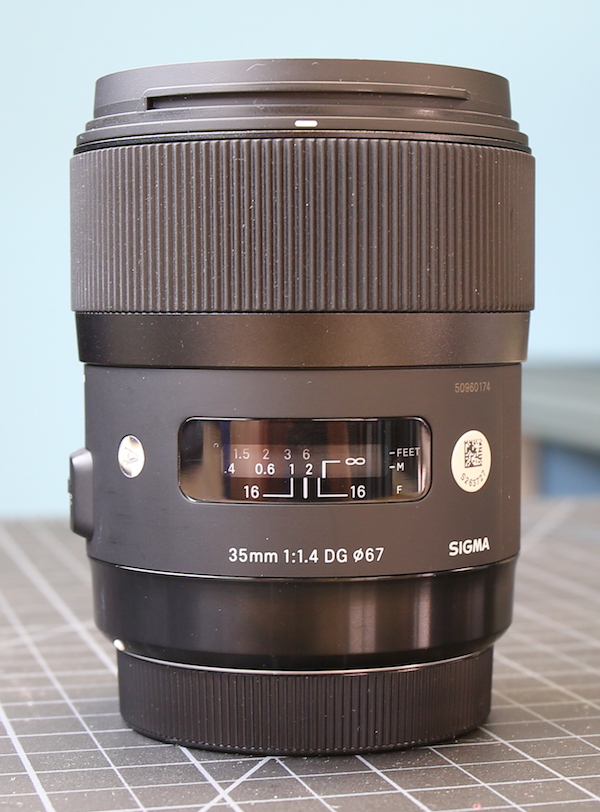
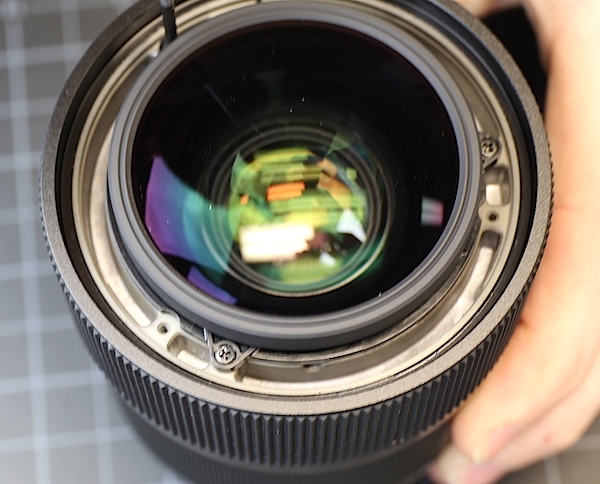
Today we’re going to tear down the Sigma 35mm f/1.4 DG HSM A1 (Art) lens, a less expensive lens that is not weather resistant. We know from its size, weight, and price that it won’t have the massive construction of the Canon, but it will have a ‘normal’ lens construction with rotating focusing elements in helicoids, etc. So we think this should provide a nice comparison showing what a normal, reliable 35mm f/1.4 lens looks like inside.
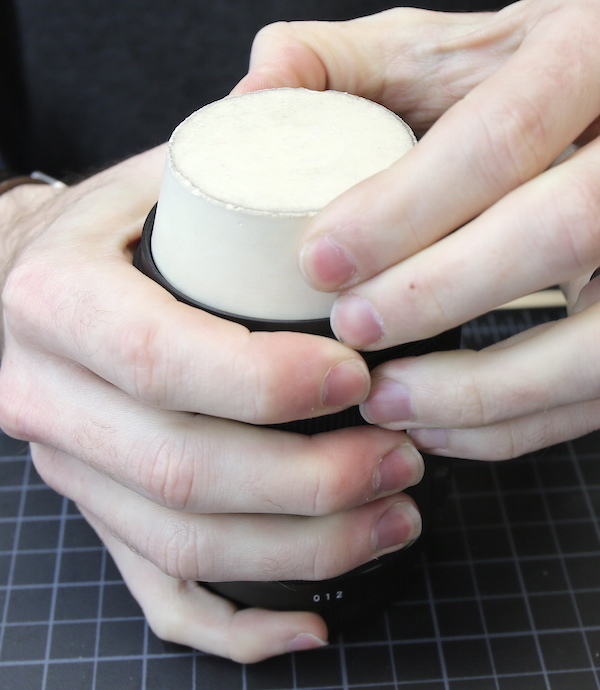
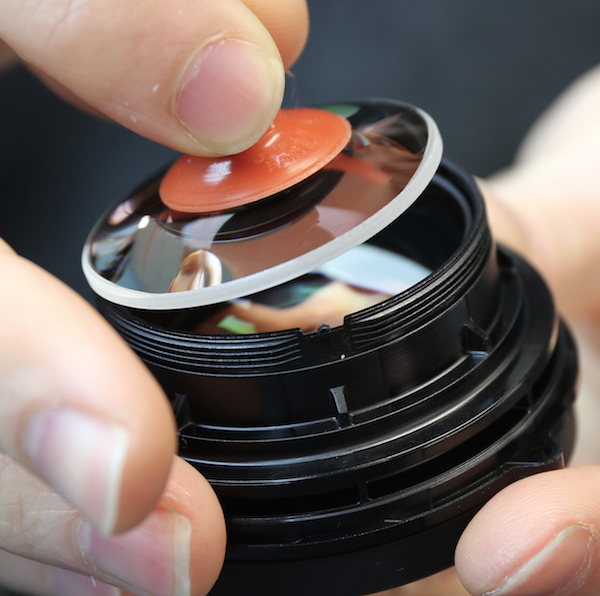
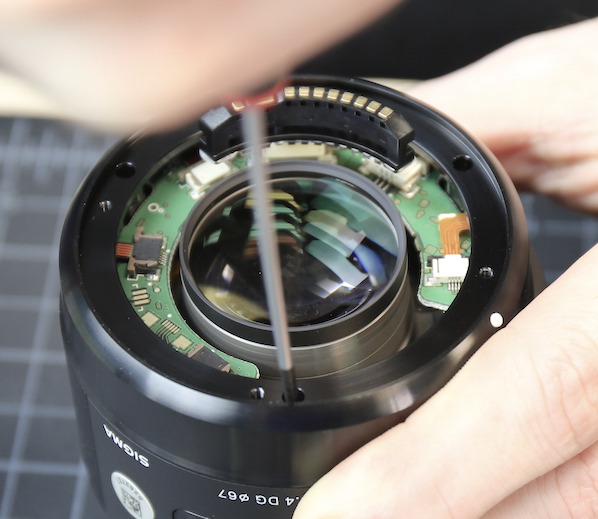
The front makeup ring screws off using friction, not spanner wrenches. Just because someone will ask, you can buy rubber stoppers like this at scientific supply houses, or, if you live in my part of the U. S., from moonshiners.
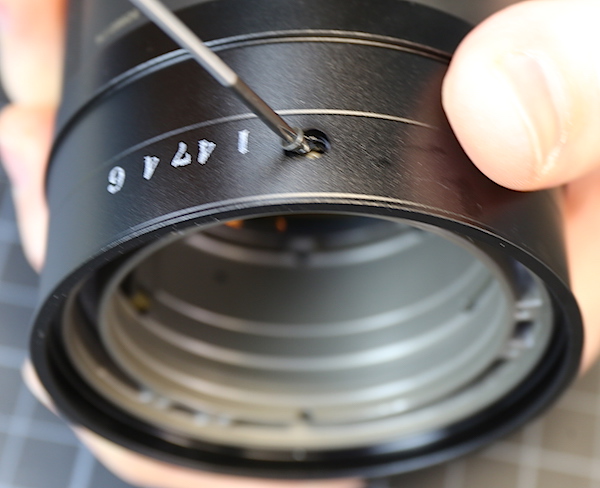
Once it has been removed we can see two sets of 3 screws each in the front of the lens. One set holds the filter barrel in place, the other holds the front lens group.

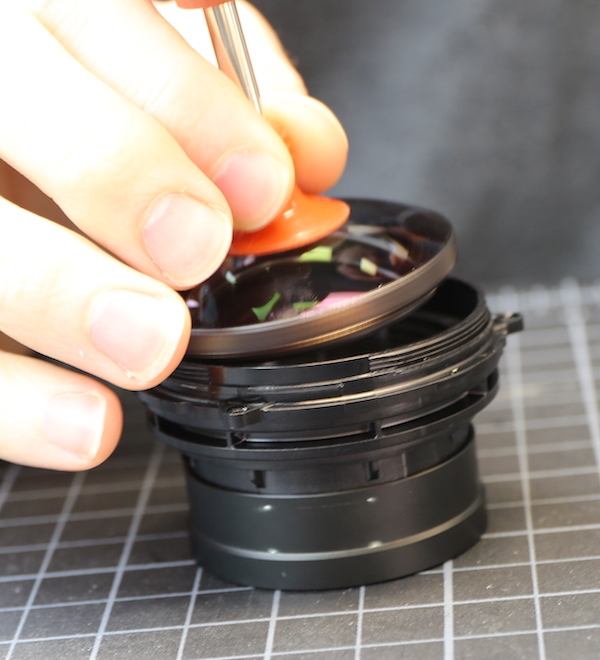
Removing the 3 filter barrel screws lets us slide it right off.
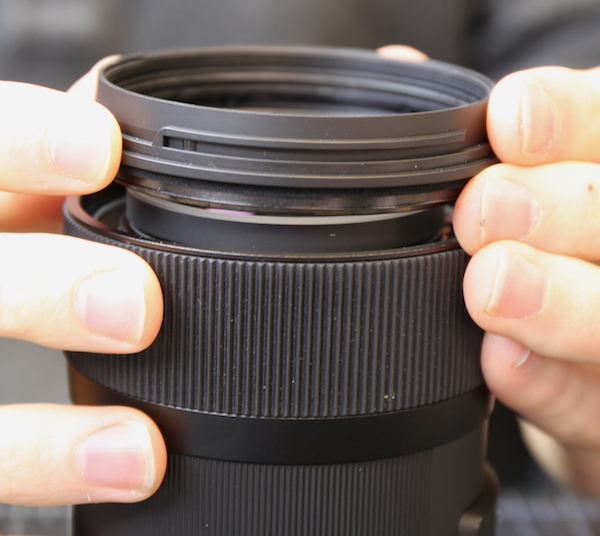
Despite the fact that Sigma clearly states this is not weather resistant lens, there’s still some foamed gasket material around the filter barrel. If you look carefully, straight down from the tip of the forceps there’s a small peg near Aaron’s middle finger. This is a nice little touch that makes certain you put the filter barrel back on in the correct position. It sounds silly, but without it, it would be possible to put the filter barrel on in any of 3 rotations, only one of which is correct. It probably means nothing to you, but it ‘idiot proofs’ reassembly a bit and as someone who reassembles lenses I appreciate that someone was thinking of this kind of thing during design.
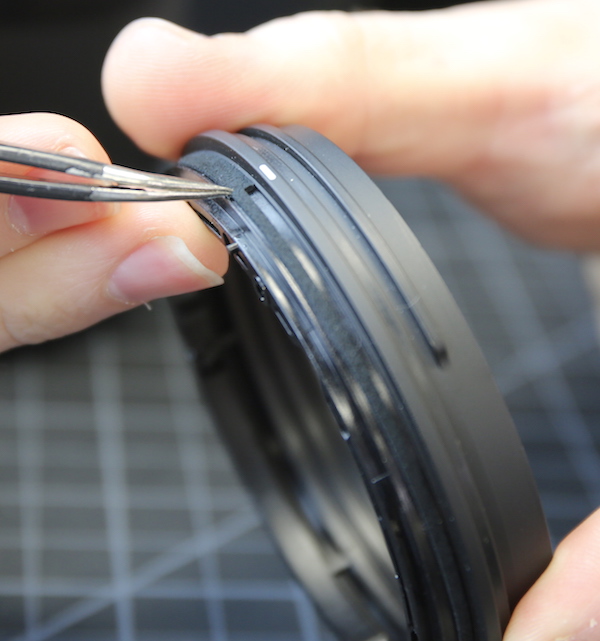
Anyway, with the filter barrel off, we can remove the three screws holding the front element in place.
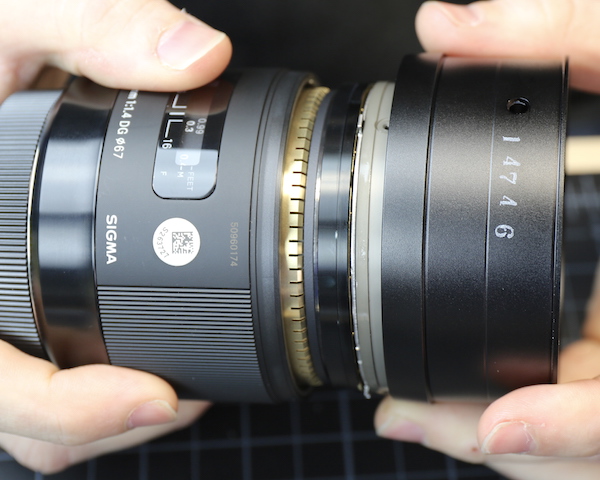
The front lens assembly is removed in one piece. There are front and rear screw-on caps holding the front and rear element groups in place.
The rings were both glued into place. The glue for the rear ring softened enough with just heat to let us remove it. Electronics gurus will use an $89 heat gun to do this. We use a $14 blow dryer. Best line ever: When I checked out with it, the clerk looked at my bald head, looked at the blow dryer, and said, “You know those cheap ones will make your hair fall out.”

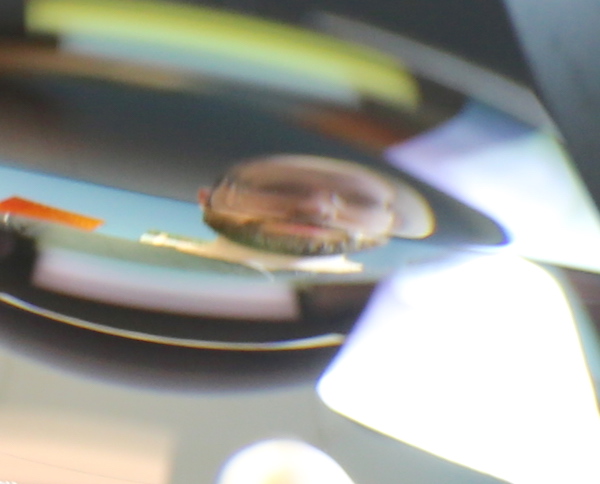
An Aaron selfie during disassembly has become our version of a programmer’s Easter Egg.
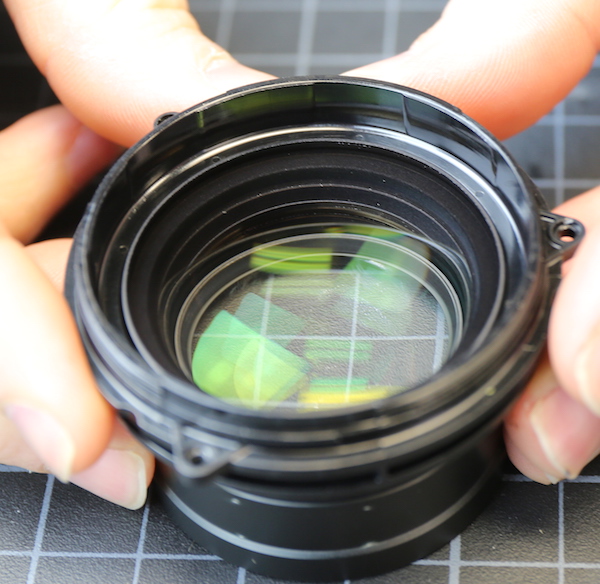
After removing the ring, the rear element could be removed.
The front retaining ring required both heat and a little alcohol to soften the glue, but once the ring was off the front element group could be removed.
Looking inside the front assembly from the rear it seems the next group is held in place by a compression spring.
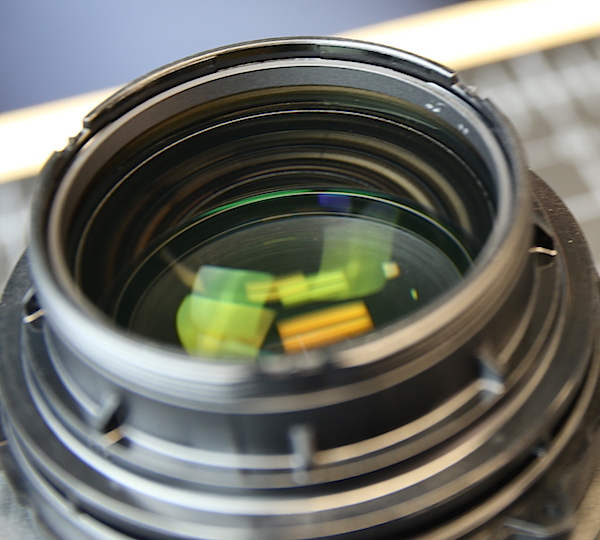
And the second group from the front is firmly inserted and probably glued. Our quest in opening this group was to see if there were any optical adjustments to be made here, which there are not, and to see how easy the front element should be to replace (very straightforward).
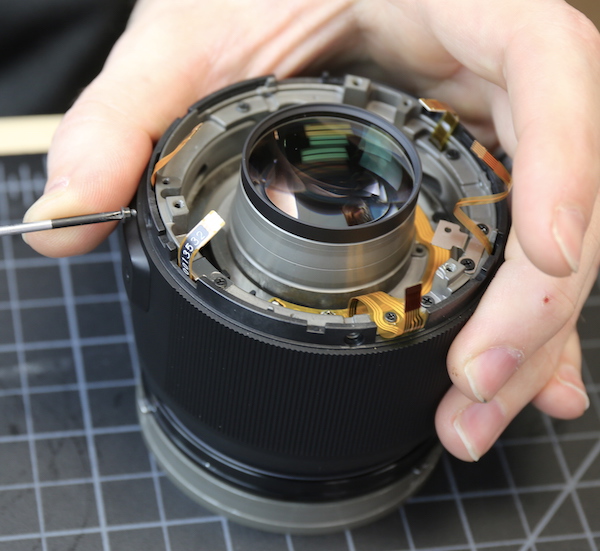
Setting the front lens assembly aside we can look back into the lens barrel. This is the level of the focusing ring and you can see the brass key from the ring, inserting into the fork of focusing lever that passes down to the outer barrel of the focusing group. Both of these are sturdy metal pieces.
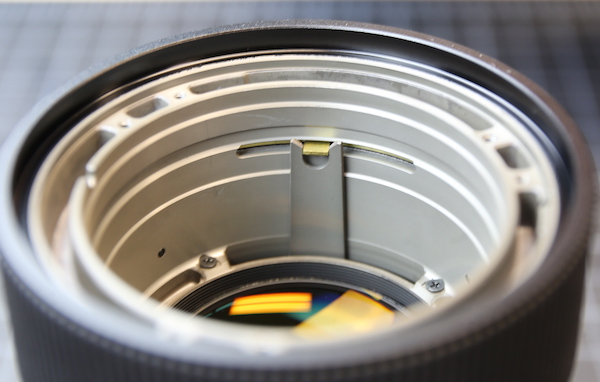
Looking into the barrel, you see there are two of these focusing assemblies on opposite sides of the lens. I should mention, while we’re here, that the inner barrel is metal, not polycarbonate. All of those screws we’ve removed so far were sunk into this metal barrel.

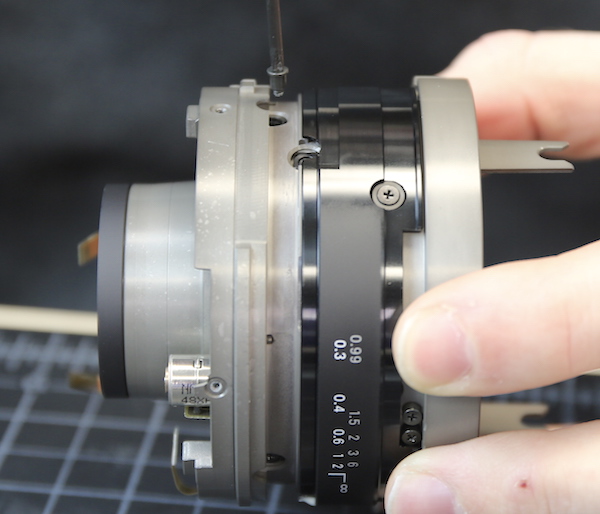
The focus ring is held on by a set of three screws.
Once they are removed the focusing ring slides right off of the lens exposing the focusing motor beneath.
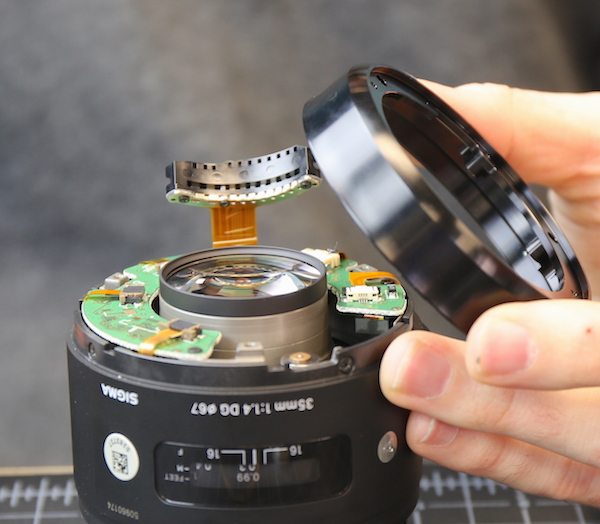
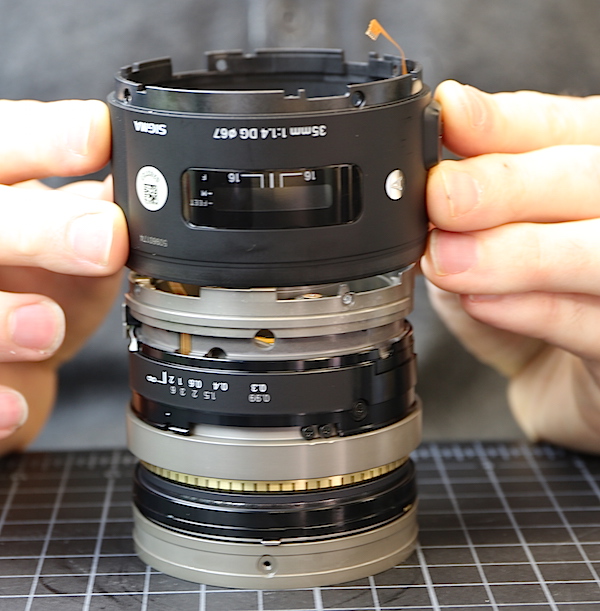
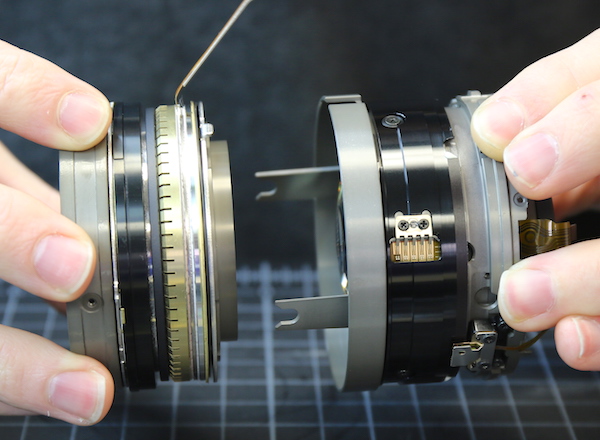
Now it’s time to start disassembling the back end of the lens. The rear light baffle is held in place by 3 screws.
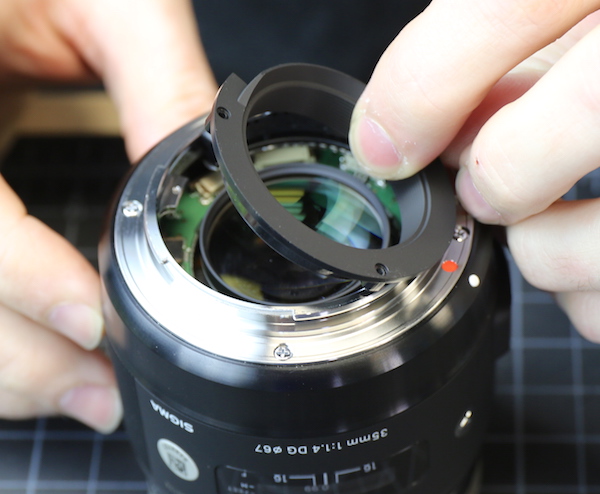
Then the bayonet can be removed.
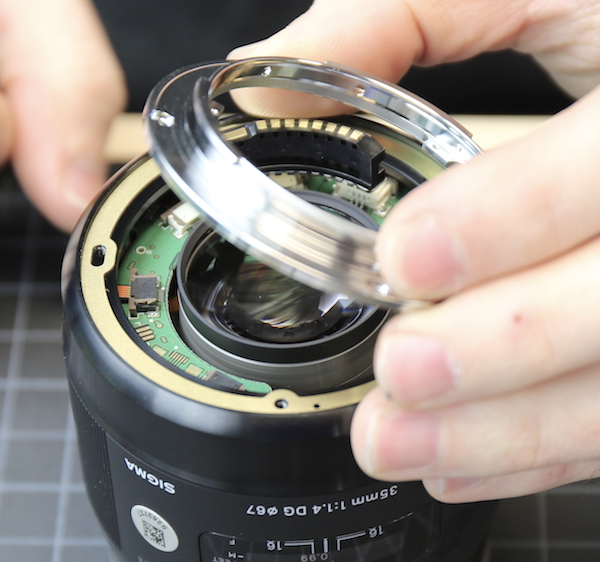
There are some circular shims underneath the bayonet, which would be used to adjust infinity focus. With the shims out we can access the 4 screws that hold the rear barrel in place.
And remove the rear barrel.
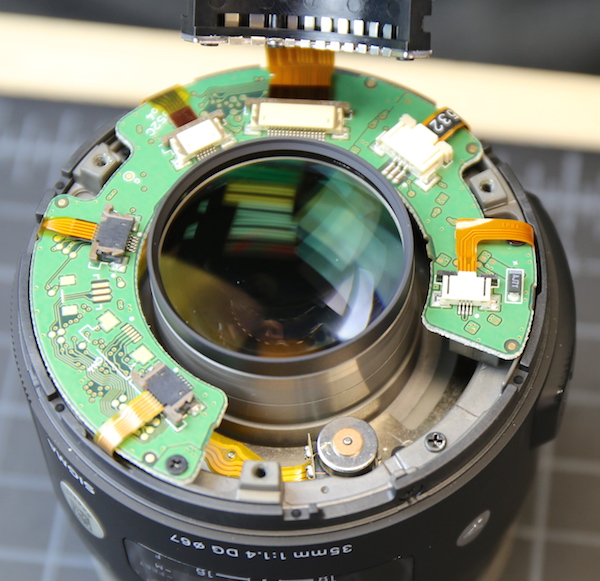
The Sigma PCB looks much like everyone else’s PCB. Note the aperture motor in the lower part of the picture.
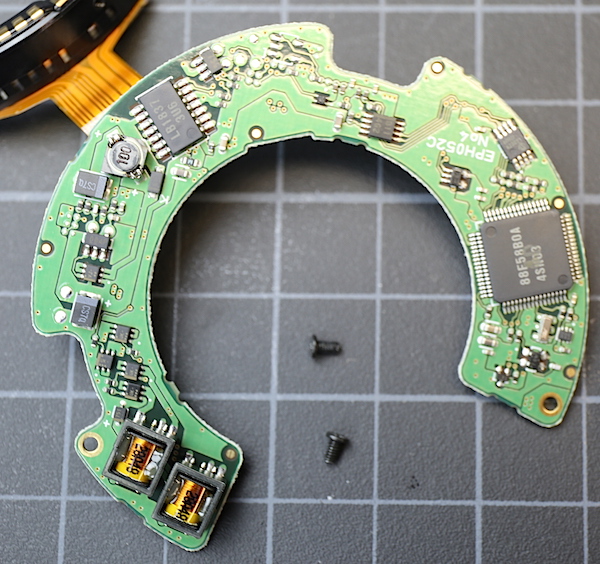
The underside of the PCB shows a bit more electronics than most. I don’t know enough about electronics to comment other than they are there and do electronic stuff. Somebody will tell us in the comments soon enough. Knowledgeable people always explain stuff I don’t understand in the comments section. Less knowledgeable people explain stuff they don’t understand in the comments section. Sometimes it’s hard to tell which is which, though.
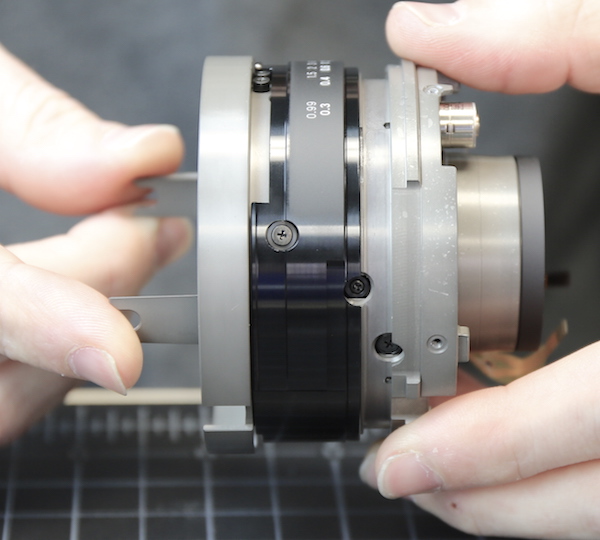
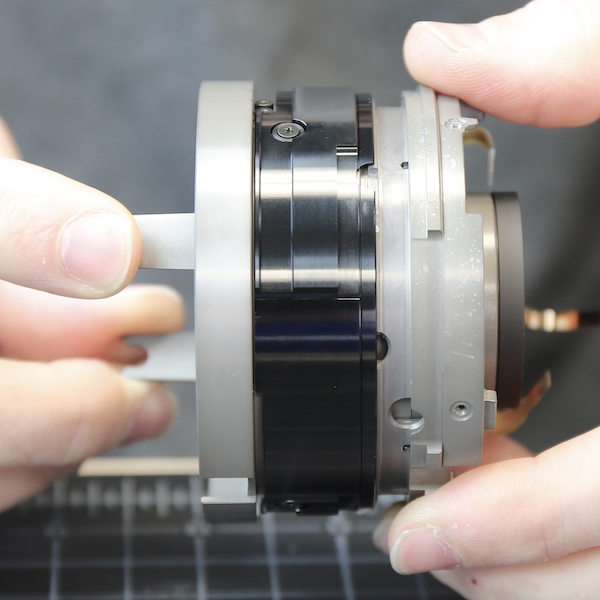
The mid barrel is attached by screws coming in from the side.
After taking those out, it slides right off.
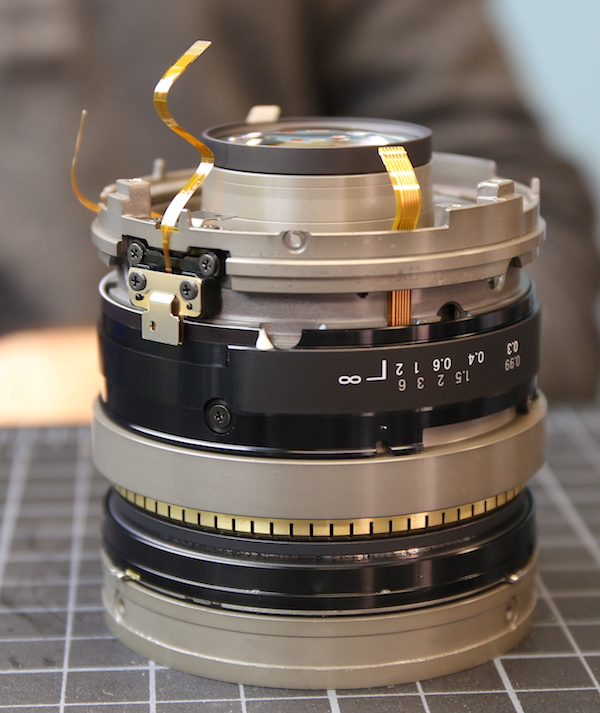
Leaving the inner barrel nakedly exposed. Notice the small brass cover secured with two screws with the long flex coming out in the upper left. That covers the GMR detector that tells the lens focus position changes. GMR stands for Giant Magneto Resistance and is kind of a lie because they aren’t so giant but what they are is delicate. If you let almost anything touch it when you are working on the lens, it doesn’t work anymore. So spending a couple of pennies to cover it nicely like this is most appreciated. More importantly, in case you can’t tell from the picture, all of the inner barrels here are solid metal.
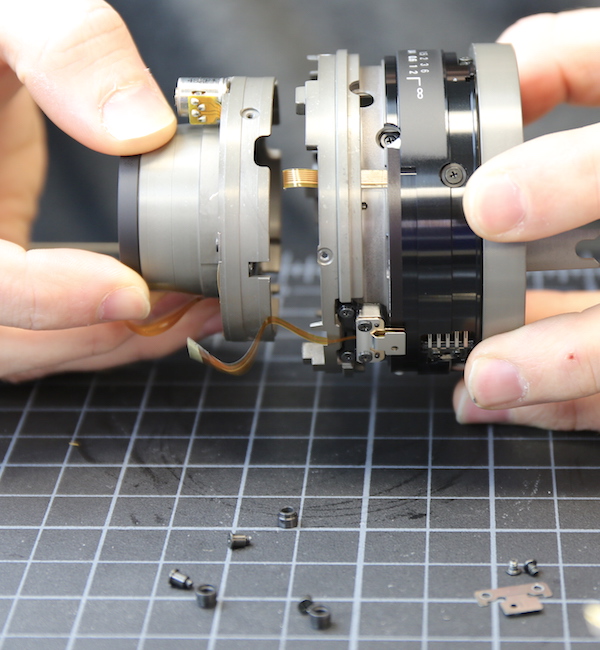
Now that we have all the flexes out where we can unthread them as they travel around, we can go back and take out the screws holding the two halves of the inner barrels together, the ones we exposed from the front.
And separate the front and rear halves. In Aaron’s right hand (left side of the image) is the front half which contains the AF Motor. The other side contains the focusing group. You can see the two focusing forks (I don’t know what else to call them, they have forked ends and connect the focusing ring to the focusing element) coming out of the other half of the lens. Those are position sensor brushes you see held down by two screws on the focusing barrel.
From above you can see the exit from slots that allow them to move the focusing group.

A quick demonstration, as the focusing forks turn the focusing barrel rotate and the rear element extend and retract.
Examining the collars in the rear group showed us there aren’t any optical adjustments to be made back here either. So we’d reached the point we usually do where I say, “Well, let’s put it back together. No reason to take anything else apart.” And Aaron keeps taking stuff apart while I’m talking. The screws and collars holding the rear group in place were out before I’d gotten to ‘no reason’.
And the rear group was out soon after. You can see the screws and nylon collars that held it in place on the mat in front. They’re pretty standard ‘what we usually see’ screws and collars.
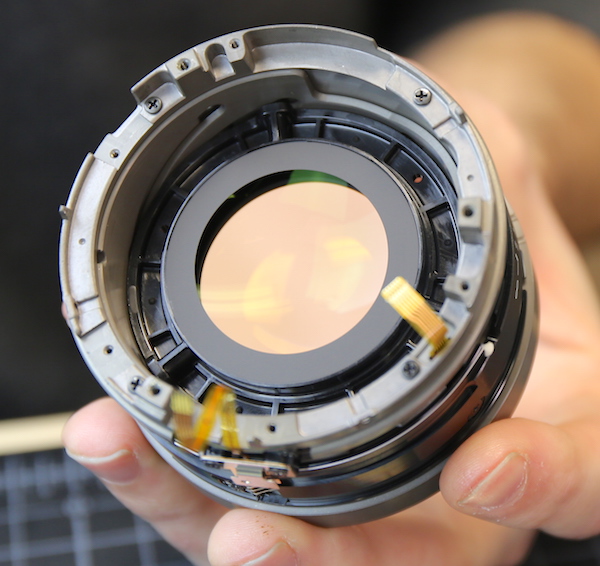
The aperture assembly is on the front of the rear group assembly we just removed. This is a bit of a different look at the aperture than you usually get to see. You’re looking at the rotation plate. The aperture blades are beneath it. Each blade has a small metal post that you see poking up through the plate and another post that connects the blade to the barrel. Rotating the plate moves the aperture blades so that they open and close.

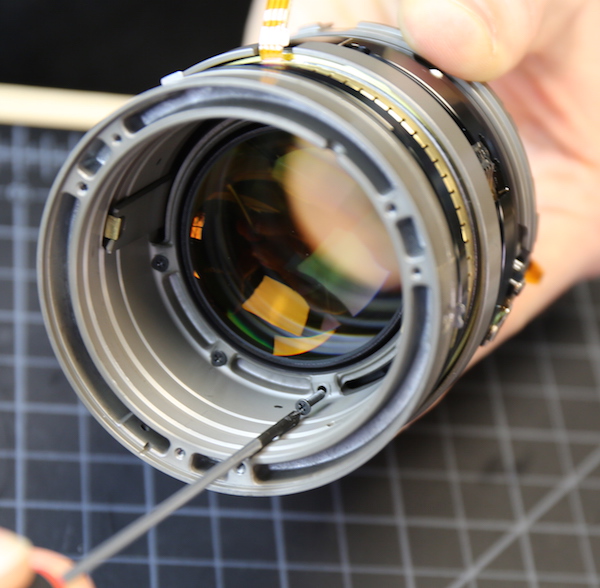
Looking up into the remaining barrel you can see the focusing element in its helicoid track. The closer (rearmost) helicoid was for the rear group, so both of these move during focusing. I assume one is acting as a floating element to help keep things sharp during near focus. On the other hand, the two helicoids are very similar in motion, so it could just be that the focusing groups are split into two elements for optical reasons.
The usual closure. Of course, the lens is reassembled, retested, and working fine. And just like every time, someone is going to comment online that we killed a lens to do a teardown.
Conclusions
For the most part, there weren’t many surprises in this teardown. We’ve seen how Sigma has remade themselves as a company making only superb optics at very reasonable prices in the last few years. This lens is constructed very well. There isn’t the amazing heavy-duty construction of the Canon 35mm f/1.4. Instead, I’d characterize the construction of the Sigma as very efficient and carefully laid out. There’s a solid metal core with other parts all connecting directly to that core. Little touches like pegs to make sure a part is inserted in the proper rotation and shields over critical parts didn’t add much expense or weight, but show care was taken in the design. There’s nothing in this teardown that looked like a weak point.
Many people are going to compare this lens to the Canon 35mm f/1.4 teardown we did and say that’s why they chose the Canon. That’s legitimate reasoning. The Canon is weather resistant, twice the price, and twice the weight, roughly. If I was going to subject my lens to harsh conditions and use, the Canon looks like the way to go if you can afford it. But if I want to carry several primes in a convenient size and at a convenient expense, the Sigma is a superb choice and I expect it will hold up very well. As always, horses for courses.
There’s another thing that needs to be discussed at some length. There are no optical adjustments in the Sigma 35mm f/1.4 Art lens that we can find. The Sony 35mm f/1.4 had a single tilt adjustment of the front group. The Canon 35mm f/1.4 had two separate adjustments. So the simple view that many people are going to take is “Roger, you should hate this lens.” There’s truth in that and I am very disappointed that we can’t optically adjust it. That’s what we do. We like taking an optically bad lens and making it better.
I am going to make a point by comparing our variation curves for all three now.

I knocked the Sigma 35mm f/1.4 for its variation when we initially reviewed it, but Sony fanboys will be correct when they get out their pitchforks and claim how I made much more of a fuss about the variation in the Sony FE 35mm f/1.4. In my defense, I’ll just point out that the Sigma has a much better MTF curve than the Sony. I’ll also add that the Sigma costs $900, the Sony $1,600 and the Canon $1,800. I’m not happy about it, I wish they had it, but I’m more forgiving that the $900 lens with higher MTF has more variation than I’d like.
Roger Cicala and Aaron Closz
Lensrentals.com
December 2015
56 Comments
CarVac ·
I’ve always wondered this: how do the focus clutches work so that when the camera autofocuses, the outer ring doesn’t turn, but as soon as you move the ring even the slightest bit, it applies the focus change?
Do both parts of the USM rotate freely relative to the lens barrel? I’m imagining one linked to the focusing ring (with brushes to conduct electricity to it?) and the other with the moving groups. Autofocus leaves the motor part of stationary (just from friction), while manual override turns both the motor and the driven part. Does this sound right?
How do the Nikon lenses that have A/M and M/A work? I know that Nikon lenses often have slack in the focus ring, so it might be different?
Anders Persson ·
The lenses I’ve taken apart have had Canon’s ring type USM focus motor. It’s a planetary gearbox design, where the sun wheel is the USM motor inside the lens and the ring wheel is the manual focus ring on the outside. The planet wheels are connected to the rotating focusing barrel.
Hence it takes only that either the motor or the manual focus ring rotates, with the other one stationary, to rotate the focusing barrel in the lens.
CarVac ·
Ohhhh I forgot about planetary gearsets.
That’s so awesome.
Roger Cicala ·
The clutch mechanism varies with different lenses and most mechanisms really are difficult to describe in words or even still images. Older versions, where you flip a switch or move a clutch have two different systems, mechanical and electrical. Newer lenses with ‘constant manual focus’ are more complicated and there are several ways they do it (I’m guessing some are patent workarounds but I don’t know).
Albert ·
Twice the weight? Methinks you need to take a closer look. 15% heavier would be closer to the truth.
Jo Jundt ·
If you care for the truth, you could as well mention “not twice the price, but 2.6×” 😉
Thanks for another cool teardown, Aaron & Roger. If I play Advocatus diaboli, one could say Sigma entirely trusts their assembly line and filters bad lenses by checking them 100% on their Foveon measuring machines?
Albert ·
Why 2.6x? Sigma is listed at $900 and the Canon at $1800, so twice the price is correct. However the Sigma’s weight is 660g while the Canon is 760g, which is a far cry from ‘twice the weight’.
Jo Jundt ·
I agree with the weight but where I live I get the Sigma at 771.- and the Canon at 1868.- Swiss francs. And that were not the cheapest prices. One discounter offers the Sigma for less than 700.-
Listed at 900$? Meanwhile the Sigma is nearly “old” compared to the fresh Canon and therefore special prices are much more likely. Anyway, I think we both agree the price difference is really massive whereas the weight hardly noticeable in a bag with some other primes?
Bob B. ·
You can pick the Sigma up for considerably less. I got mine for $767.00 shipped.
That’s about 42.6% of the price of the Canon lens. So mine was 2.4x.
At any rate..Roger’s math could be improved in the weight and price departments….
outkasted ·
lol i was wondering about that. I was like huh? You can’t be serious…lol
dyna ·
Now I’d like to see the Tamron 35mm f/1.8 VC torn down. It’s not a 1.4 but it’s a hell of a lens that manages to compete head to head in many respects with the 1.4 class. Definitely interested in that “because, why not?” fashion.
Eddy Warburton ·
nice construction to… but is this not near the same pricepoint of the sigma 35mm F/1.4?
dyna ·
The Tamron is listed at $599 which is about $300 less than the Sigma pre-rebate or otherwise, and about 1/3 the Canon L… Which makes the Tamron a pretty extraordinary value considering what its capable of.
I’m really digging the fact that third party are coming to the table with superior glass, these days. Much like Sony is doing on the hardware front, Tamron and Sigma are telling Canon and Nikon people expect more out of their investment other than rehashed versions of old products.
Buc Nelson ·
unreal yet another post about tamron, do you work for them? check his discus post history, unless he’s turned privacy off by now.
J.M. Stearns ·
Awesome disassemble guys, love the humor, always fun to read. Fascinating to see how different lens makers design their lenses.
Roger Cicala ·
Jo, I think that’s likely.
Roger Cicala ·
dyna, a Zeiss is next but we’ll probably wait till after the holidays.
Roger Cicala ·
Albert, you are correct.
Martin Pot ·
Although there aren’t any optical adjustments in the lens, with Sigma’s USB dock, you can adjust the focus settings at 4 different focus distances (0.3m, 0.4m, 0.7m, infinity). Maybe that’s why they decided there was no need for optical adjustments.
Bob B. ·
The dock won’t fix a de-centered element. That is a totally mechanical/physical adjustment. I have this lens…but the Canon is a better lens….one of the many things you are paying all that money for is the adjusters and the skilled person making the adjustment. Clearly better quality control.
…but for what I paid I am impressed with this lens…it’s incredible…( it crushes the previous Canon 35mm), and hey…the Canon does not have a dock to fine-tune the lens to your specific camera body…:-)
In the end…if you have a great image…chances are that no one will ever mention the minutiae.
Dave Hachey ·
I’m genuinely in awe of modern lens design and construction. The level of complexity, precision and performance seems to outpace the price paid, especially for Sigma Art lenses.
Roger Cicala ·
Martin, adjusting focus and adjusting optics are two entirely different things. Not related at all.
almeich ·
One simple question: What glue do you use when you reassemble?
Thinkinginpictures ·
Three sets of two screws…..
Great article.
whereisaki ·
Well, on the plus side, anyone buying this lens won’t have to wonder if their copy could perform better.
Lacknafta ·
Thanks for doing the same thing on these three lenses, it’s cool to see different innards and workings. I’ve managed to take apart a Rokkor 58 1,4 and put it back together successfully and a Volna 9 resides in bits in a plastic bag (some of those teeny tiny screws were made out of mildew I think) so color me impressed by what you are doing to significantly more modern and complex things.
Haven’t seen a Loxia autopsy or reversible disassembly yet; wonner if some of that price premium is reflected on the inside.
Vladimir Khudyakov ·
May thanks, amazing :))
Lynn Allan ·
Which mount? Is it Canon or Nikon? Does it matter? I’m mostly ignorant about Nikon. Also, my understanding is that this lens isn’t made for the Sony mount (or anything else besides CaNikon). Or not?
Panacea ·
Canon EF.
Lynn Allan ·
Thanks …
FWIW: I looked again that the photo, and noted it states the baffle is being removed. I too quickly thought that piece was part of the mount, and guessed incorrectly.
I’ve never done more than glance at a Nikon mount in 40+ years of SLR photography.
Lynn Allan ·
LR has provided incredibly useful objective information about “Lens Variation”. Thank you, thank you, thank you.
But …. (isn’t there always a but? … sorry) …
It’s been a looooooong time since my “quantitative methods” courses in grad school when we calculated variance by hand. Still, it seems just WRONG for high values of variation to be better than low values. JUST WRONG.
It’s “late in the game”, but there will never be a better time to re-calibrate how variation is reported, so that low values are better than high values.
Or not?
Note: further discussion on DPR forums and possibly email. and … Merry Christmas!
Fred4d ·
This was discussed when the method was first revealed. They could adjust the math procedure so low variance gave lower values. but they seemed happy with the current method. Higher score is better does make some sense for those not into the math.
Lynn Allan ·
Sort of agree. The word “Consistency” wasn’t really used in the original article (or maybe a follow-up), just a comment. IIRC, it wasn’t until a subsequent article that “Consistency” was discussed.
Since then over the past year or more, LR blog articles involving OLAF have used “variants of the word variance” much more than “Consistency”.
I haven’t gone through all the “just the lens” articles and teardowns with the browser “Find” capability enabled, but I don’t think there are more than a handful of uses of “variants of the word Consistency”.
If you look at most of the OLAF Consistency/Variance charts, the number value will be in juxtaposition to “variants of the word variance”. So … a high value comes across as being “good variance”. Still seems flawed. Or at least confusing.
Or not?
For full disclosure, Roger C. and have I have discussed this via email, and it may be fair to say … “all three of us are both correct and in heated agreement” 🙂
High consistency is good and non-ambiguous to convey good q/c.
High variance is bad from a statistical purist pov (pita?) regarding q/c.
High variance values are confusing if that conveys good q/c.
Bob B. ·
My favorite part of the article:
“The underside of the PCB shows a bit more electronics than most. I don’t know enough about electronics to comment other than they are there and do electronic stuff. Somebody will tell us in the comments soon enough. Knowledgeable people always explain stuff I don’t understand in the comments section. Less knowledgeable people explain stuff they don’t understand in the comments section. Sometimes it’s hard to tell which is which, though.”
I am still smiling about that comment. 🙂
I like my Sigma lens..(I have 3 now: 35mm, 50mm & 20mm)..They do a very good job of consistently delivering a very sharp image to the sensor on my 5D III. (After adjustment on The Dock). NOW…If I could just be as consistent with what is recorded on the sensor….
Roger…have you considered tearing down a human brain to observe its graphic creating potential? There may be adjusters…(Left open for wisecrack!).
Thanks for the laugh!
chrisgull ·
With humans, docs do the adjustments rather than docks.
jcov ·
As far as electronics, as expected…
An MCU (chip label 88Fxxxxx). The MCU is like the “brains” and holds the firmware. It controls how the lens behaves depending on inputs. A very bored and clever person could logic analyse the chip…but this is expensive (equipment wise) and very time consuming.
Chip label LB1xxx is the diver for a motor. It translates signals in to a movement signal to control the lens motor.
I can not see the labels on the smaller ICs, but I assume there will be logic level converters, Protocol ICs or whatever.
EDIT: For example a Serial USB -> Parallel converter for the MCU.
Adam Palmer ·
What size are the tiny screws on the lens mount. I just tightened my loose mount and one of the screws is destroyed. (It’s the 50 art but I’m assuming it’s the same). Was thinking if I knew the size I could order more.
Jimbo Pichardo ·
Great tear down. Have you ever taken apart the original 35mm f/1.4L I?
If so, how does it compare to the sigma when it comes to build quality and robustness?
AaronClosz ·
Yes, many times. The Canon has a very heavy duty metal front. So much so that if the filter ring gets bent it is an incredible pain to dissect. But this area of the lens contains all the adjustable optics and I would guess the metal housing adds to the longevity in performance. That being said, the back half of the lens is mostly plastic.
T Kaare Smith ·
Thanks a lot! One of the screws holding the rear barrel in place was loose and your photos made it so simple to solve my problem!
Enrico I. ·
If you refer to the rear collar, this is a VERY COMMON issue on this lens. I had to swap in my first perfectly working 35 art.
Adam Fo ·
Where are the optical variations coming from on the Sigma ? Some of the metal parts seem to be high precision injected molded, presumably machined to finer tolerance on the critical parts.
Roger Cicala ·
Adam, optical variation can come from so many factors I can’t list them all. Literally hundreds per lens. But we can start with every batch of glass being slightly different, every polished surface being slightly different, etc. etc. etc.
Adrian Vasian ·
By no optical adjustments in the sigma lens you mean that there’s no way to correct a front/back focus by manually tearing it down and adjusting it ? (does the canon version have such a way to correct that ? )
thanks 😛
Andrew Sempuego ·
What size of rubber stopper did you use?
Yannig Van de Wouwer ·
Hi Andrew,
Did you ever succeed in getting the front makeup ring off?
Mayank Khanwalker ·
See my comment and picture of the ‘tool’ I used to get the ring off.
David Reeks ·
Hi Roger, I’m on a film shoot in Brazil and am using this same lens. Today the focus ring became tough to turn, quite different from the smoothness of all previous use. I’m sure a dust or sand particle got in there. I tried blowing it with dust off and an air compressor but cant see where the dust got in or any other reason for it to stick. I’m looking for a quick fix, because we still have days of shooting and no time to find a repair shop. Will removing the front makeup ring give me access to the focus ring so that I can try to blow in there. I don’t have experience with this sort of work and do not want to sacrifice the lens, but right now there’s too much friction for a steady focus while operation with camera in hand.
Kenneth Mackay ·
Do you know if the 50mm Art 1.4 The front makeup ring is the same? My filter ring cracked and Sigma wants $200 to fix, but the part is $50, and it looks like I could do it easily if it’s the same as the 35. Thanks so much.
Yannig Van de Wouwer ·
Hi Kenneth,
Did you ever succeed in getting the front makeup ring off?
J4 M ·
I have this lens but it has a stiff focus. Does anyone know what the fix could be?
The AF is snap fast and accurate and the photos are sharp so no problems there.
Yannig Van de Wouwer ·
Hi Lensrentals,
I have a loose filter barrel. I’m trying to remove it the front makeup ring, but I don’t succeed. Any tips on how to get it off?
I tried turning CW and CCW but to no avail. What way does it turn?
Mayank Khanwalker ·
Turns CCW to unscrew.
johnny corcoran ·
Hi can you explain more about how to remove the top. do it in CW or CCW? i couldnt do with my barehand. and could you explain what this stuff you have as try and seach on the site as nothing there!
Péter Orbán ·
Hi Roger!
What did you do with the rubber stopper to fit on the lens? Did you make a hole on the other side of the stopper, what we can’t see on the picture?
Mayank Khanwalker ·
I recently had to open this lens so I 3D printed a hollow cylinder and put a rubber gasket between that and the filter ring. Worked like a charm. https://uploads.disquscdn.com/images/2cc855d2fb08c0b399e53e47c77721c770db056517130296c4482915541e9a68.jpg https://uploads.disquscdn.com/images/285f6b4fad373fbc15041fcb3dcea57cbe65f93c78e5c63ab56ecf382162e786.jpg