Today the Canon 5D Mk IV cameras are out and I’m sure by this afternoon there will be unboxing videos all over YouTube. Aaron and I decided to do an unboxing post, too. By unboxing, of course, we mean taking it apart. If you want to make comparisons, you can look at our old (2012) 5D Mk III teardown or the fairly recent 5Ds teardown.
The lawyers would like me to mention that even though we (often) make this look incredibly easy and fun, you should not do this yourself. If you leave a small leak during reassembly, then when you put the battery back in the smoke leaks out of the camera. It’s important to keep the smoke inside the camera. Trust us on this, for we have experience. Every time we’ve let the smoke get out of a camera, it never works again. And your warranty will be null and void.
Expectations
To be blunt, we didn’t expect a lot of surprises inside the Canon 5D Mark IV. From the outside, it looks just like the Canon 5Ds and Canon 5Dsr, which look a lot like the Canon 5D III. We expected to find some new chips inside, because, well, the camera does some new stuff that should need some new chips. And, of course, as with every camera ever made throughout history, this one has ‘improved weather sealing’. It’s not improved enough for the warranty to cover water damage, of course, but still, that’s worth a look. If nothing else, we usually enjoy opening up Canon cameras because the engineering is always nicely laid out and usually pretty. And we’re the kind of guys that value inner beauty.
So lets take some screws out!!!
Getting the Case Off
This was the first surprise we had and it goes on through the whole disassembly. Until now Canon cameras have all been pretty straightforward in their disassembly: you take out screws, that part of the case comes off, repeat for another part of the case. This time, we did the usual first step, removing the cover of the I/O ports.
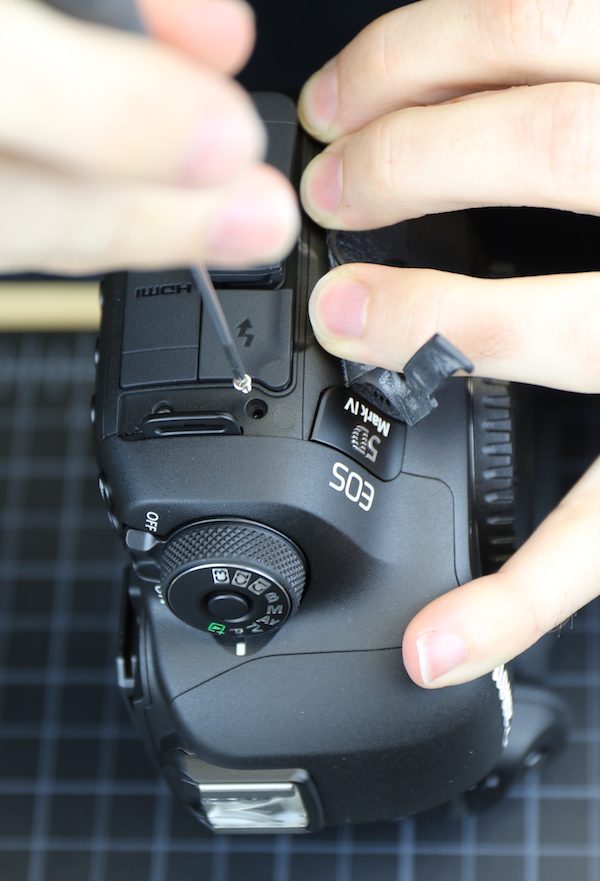
But it didn’t slide out. Next, out come the bottom plate screws.
It loosened, but it wouldn’t come out either. Peeled back the grips and went to work on the front plate. No joy again. The various plates all loosened but wouldn’t come off. And when you’re disassembling a camera for the first time, you don’t pull on stuck things because you don’t know what they may be stuck to inside.
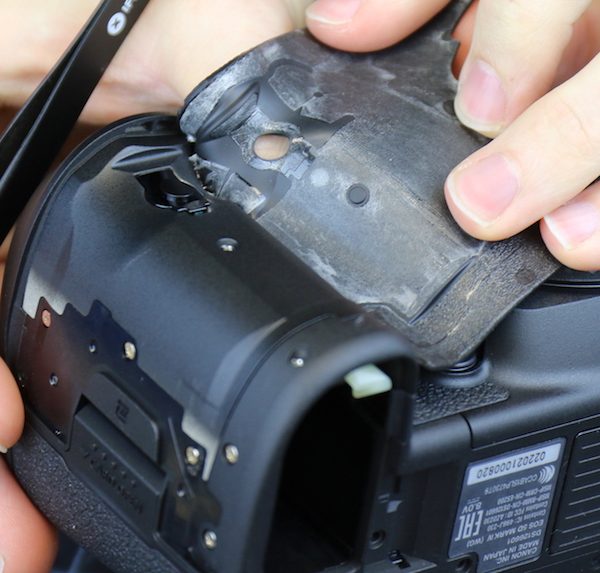
Finally, we did take off the one thing that came off in the usual fashion; the back cover assembly. Canon techs are reading this and laughing their butts off by now, I’m sure.
After we looked around a bit we realized that basically to take off any part of the shell, other than the back assembly, you had to take off most of the shell because Canon has added lots of plastic pegs and latches to the various parts of the shell, making it much more interlocking than in previous cameras.
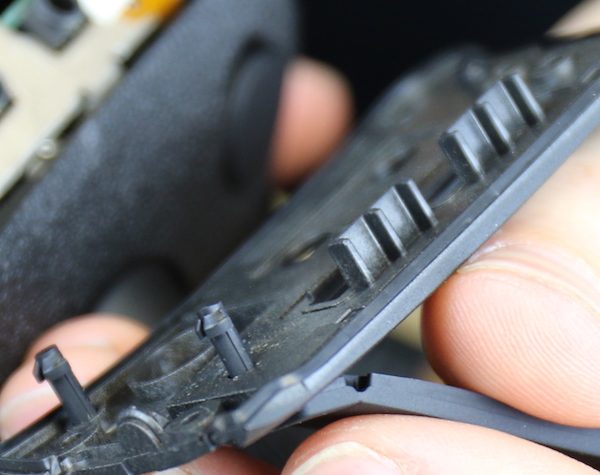
What does this do? Well, it certainly would strengthen the shell, making it more resistant to bangs and drops. It might, (I can’t say for certain), make the seals between the various parts tighter and more water resistant. From my point of view, (but not any of yours), it’s going to make it more difficult and time-consuming to work on this camera, but not hugely so.
Speaking of water resistance we did see, like we did with the Canon 7DII and Canon 5Ds, lots of foamed seals along doors and joints.

Even the inside of buttons has very thick rubber gaskets everywhere you might look.
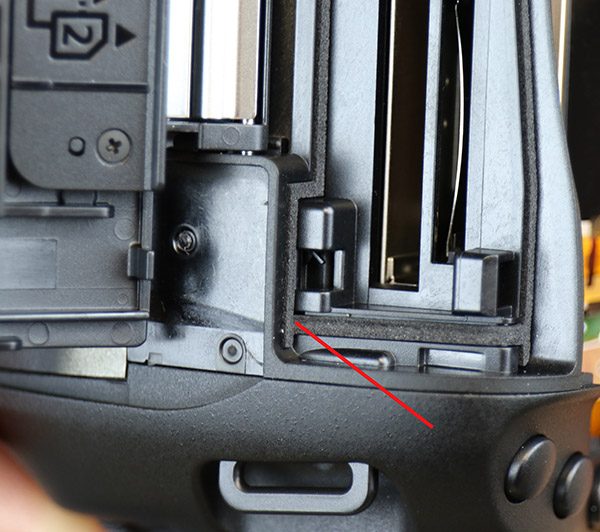
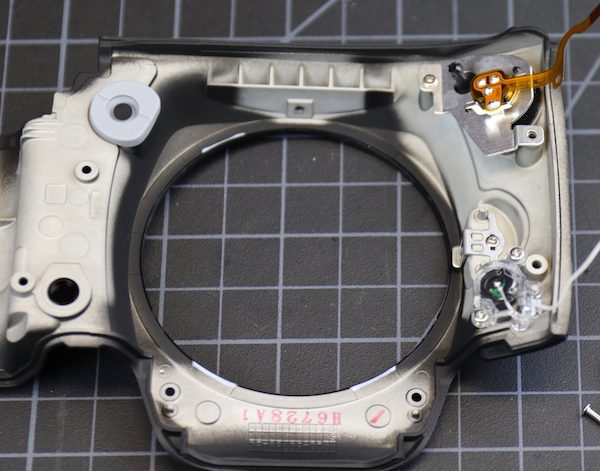
This next part might be useful to you, though. There was only one area where we didn’t see any seal except plastic-on-plastic. This was in the top right corner where the back plate and top plate come together. Between the two red lines, there’s just a plastic to plastic seal with no gaskets. This may be completely watertight because of pressure between the two shell plates. But I might put a bit of tape over it if I was going out in the rain. (OK, as you all know I don’t take cameras out in the rain without plastic covers. Because we write off ‘weather resistant’ cameras for water damage every week. But I know you young people live life in the fast lane and like to take risks.)

OK, Let’s Look at the Insides
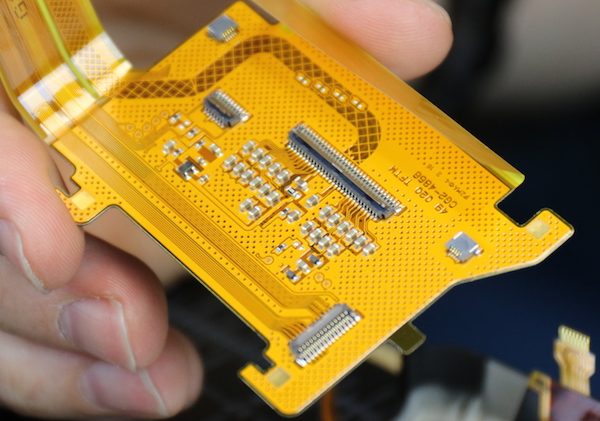
I mentioned earlier that we had the back cover off. Inside it looks very much like other Canon back covers. There are aluminum shields over the button panel and LCD. The flexes running to and fro over the LCD are more complex than other Canons because of the extra processing for the touch screen.
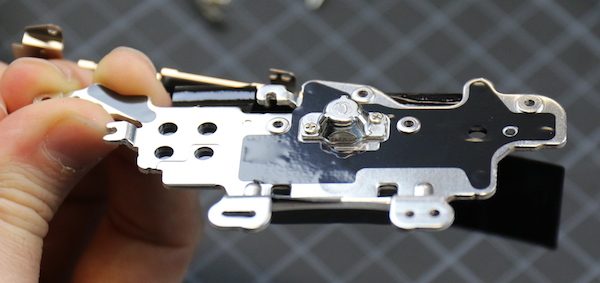
We took the back assembly apart a bit and you can see the button panel is similar to other 5 Series cameras, with the addition of the new focus select button added. It’s one of the two small, round, copper plates below (to the right in the picture) the tilt button.
Once all the connecting flexes have been removed we could slide off the large, stiff, main LCD flex, which really is a circuit board almost.
And now we see the LCD. Well mostly the aluminum shield/brace over the LCD with a little window with tape showing the LCD. Again we saw nice rubber seals all around the LCD panel. We didn’t remove it because we don’t yet have replacement double sided tape to make sure it stuck down properly, but other than the extra connections of the touch-screen, it was similar to what we’d seen before.
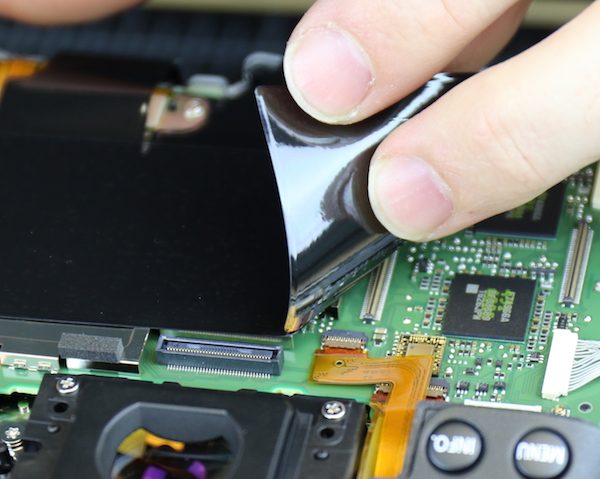
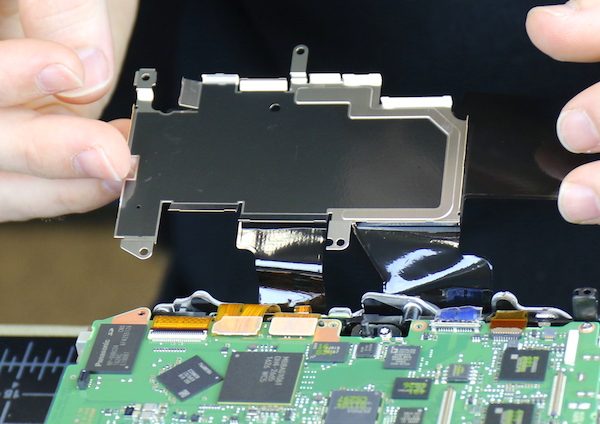
Turning back to the rest of the camera, we see a couple of interesting things on the back of the camera. First, there are more flexes connecting to the main PCB than most other models. Second, we were very pleased to see a thick, stiff, sheet of rubber covering the back of the PCB (it’s actually very shiny black; the lights give it that gray and blue appearance). Underneath it, you can see the aluminum shielding and protecting panel that covers chips on the grip side of the PCB.
You can get a better idea of how much nicer this is than the old foamed-tape flimsy thing that we dealt with in the Canon 5DIII in the picture below.
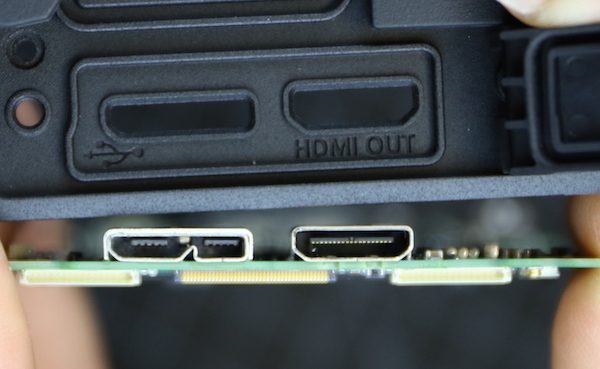
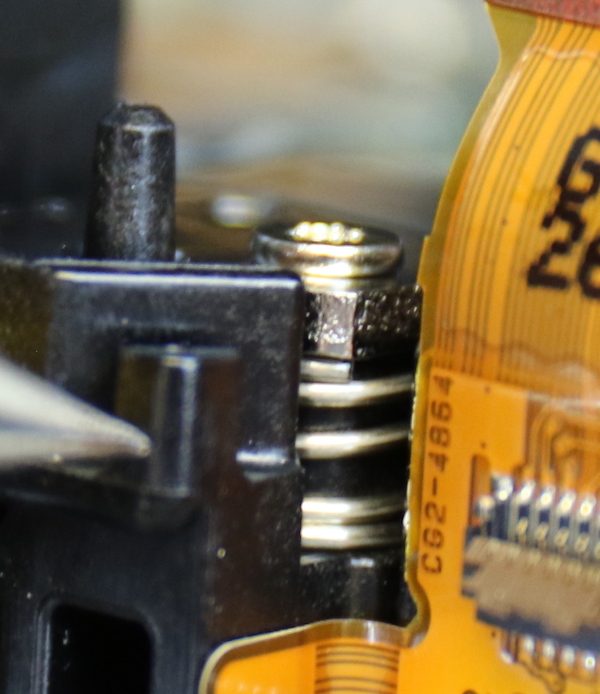
With the back, bottom, and front plates loose, we could now take the I/O cover panel off at this point and you can see the various ports.
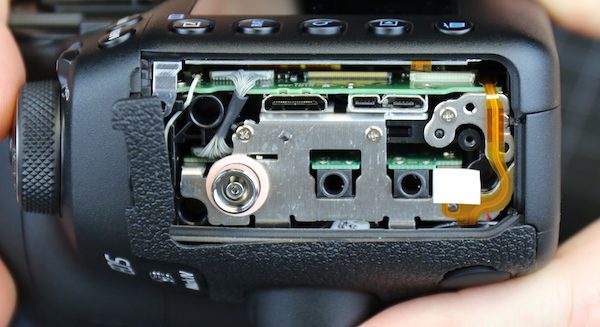
Here was our first real disappointment. Skipping ahead for clarity, the USB and HDMI ports are soldered to the main PCB. Only the flash sync and audio ports are on a separate board. This means (as often happens) when a USB or HDMI cable gets jerked hard the port can get pulled off it’s solders to the board. The repair, in this case, is a complete main board replacement. We’d much rather see these ports on a sub-board, but understand this is a lot cheaper to manufacture this way. Almost every SLR made does this, but I sure wish they’d brace the ports or something.
The CF card door came off next. Usually, this just requires removing the screws and the door slides off, you just have to be careful not to mess up the door position sensor. In this camera, though, there’s a flex right under the door that wanted to stick as we removed it. No harm was done, just another case of this camera being a bit tougher to disassemble than most.
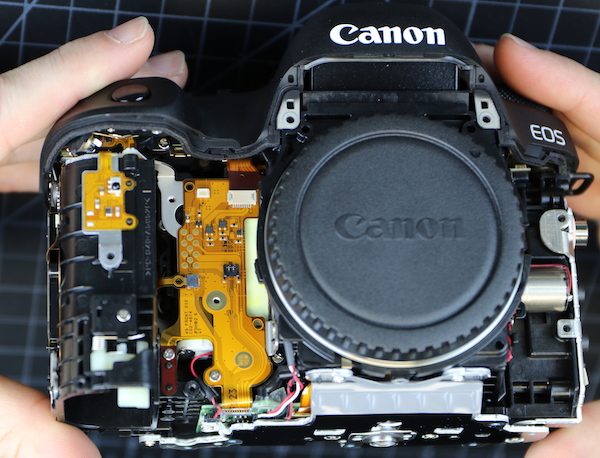
We next took the front cover off. This was a lot more complex than it would seem because Canon runs some connecting cables from the front cover, around the side of the camera, to the back PCB. This is one of those ‘why you don’t do it yourself’ moments. One good tug and some important parts would never work again.
But once those were unhooked, the front slide right off.
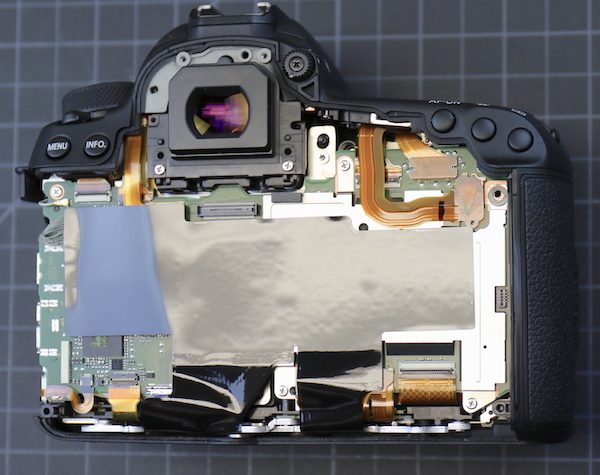
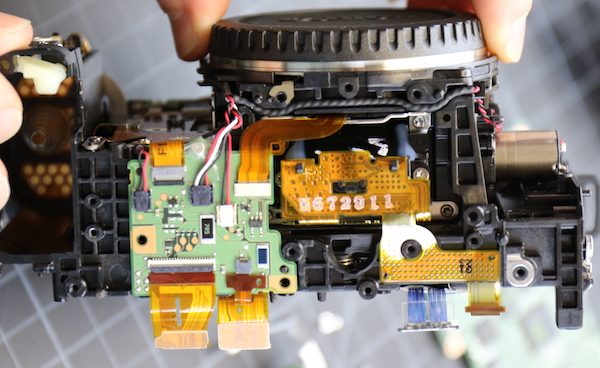
And now we have a nice look at the front of the camera.

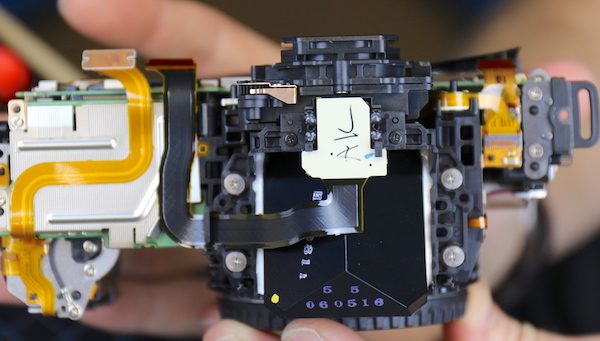
That’s the mirror motor over there under the EOS on the left side. Here’s a closer look.

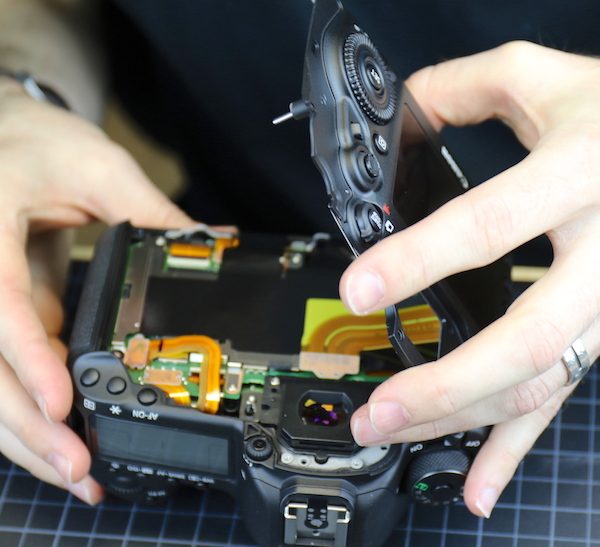
Finally we were able to remove the top assembly. From underneath, it looks pretty much like every other top assembly, and we’ve learned from long, painful experience not to take these apart unless we absolutely need to. In general, if something is wrong with the top assembly, you just replace the top assembly.
With the top off we have a nice view looking down onto the pentaprism. Again, we don’t disassemble these and further. There’s a lot of alignment and calibrating that needs to be done if you do. And no, I have no idea what the writing or initials are for.
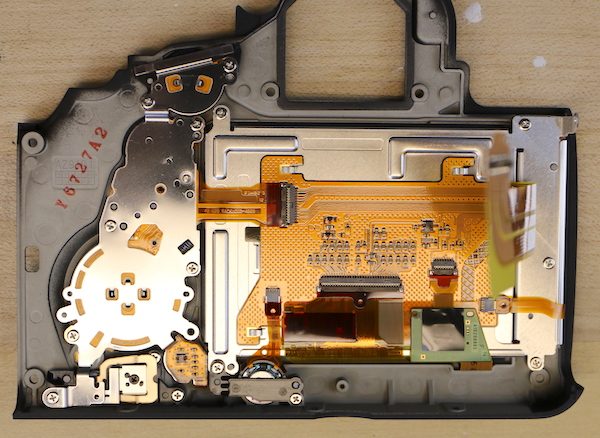
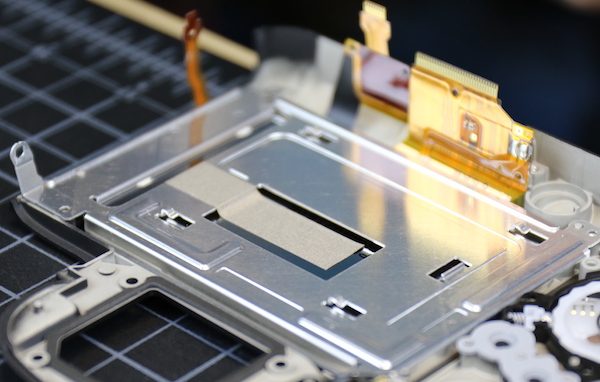
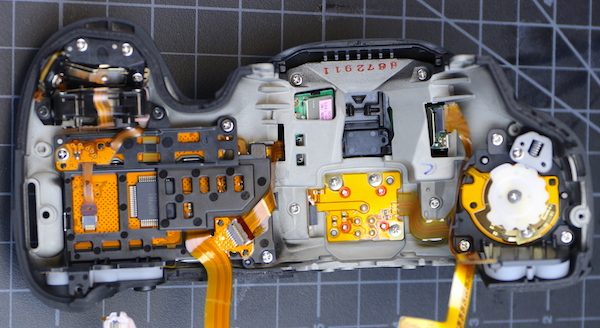
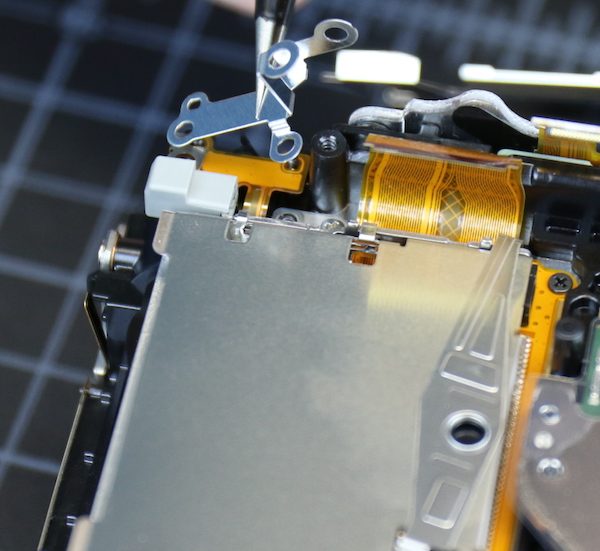
OK, let’s get back to the main part of the camera. After taking out some screws we can pull up the aluminum and rubber sheet shields in one piece, exposing the PCB.
There are a lot, a whole lot, of flexes connected to the board from every direction. They are thicker and more complex than previous cameras and a lot end up in thick ‘press in’ connectors instead of simple flex cables.
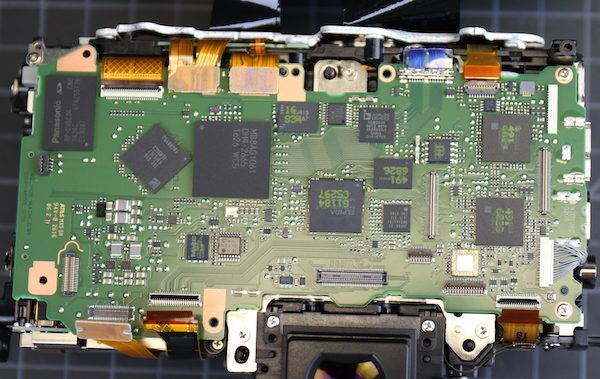
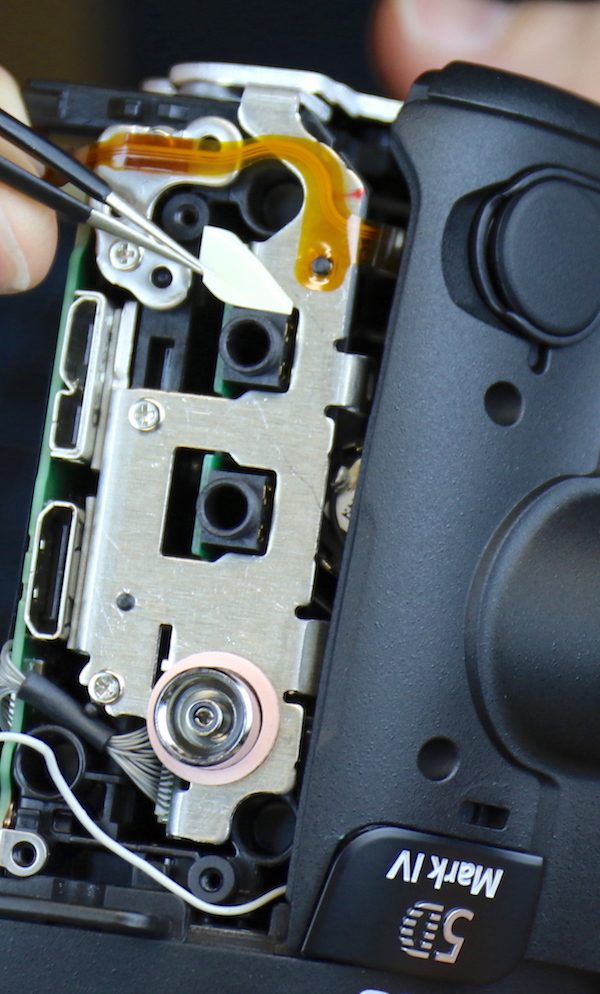
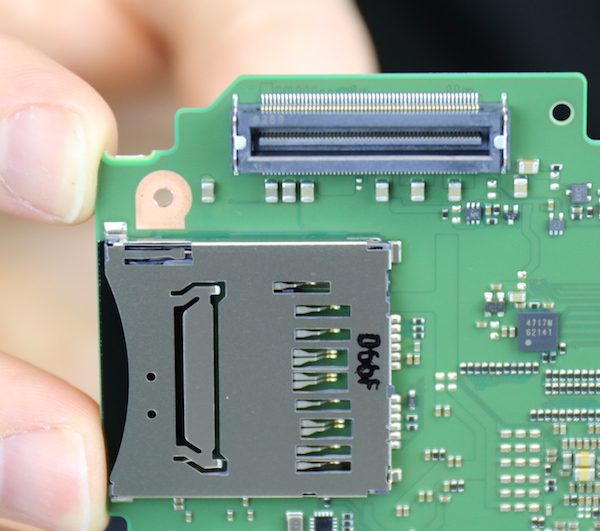
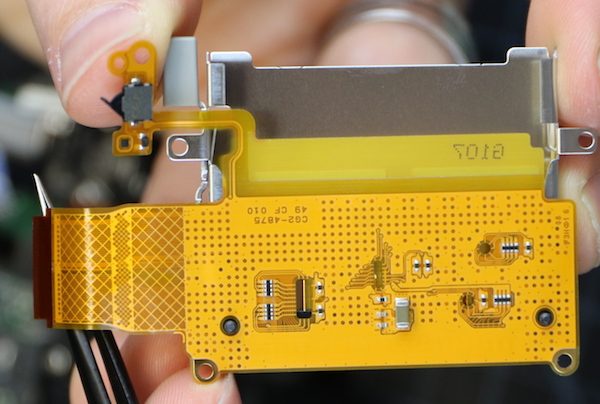
Basically, there was a lot of unhooking of connections and a few screws to remove before we could take the main PCB out. There was also a very large connector mounting from under the board that you can see here, just above the SD card. The SD card reader, as is usually the case, is soldered to the board. There wasn’t anything else very interesting on the underside of the board.
Underneath where the PCB was we now see the circuit board of the image sensor, and to the right of that the CF card assembly. You can see reflections from the clear plastic shield over the sensor circuit board.
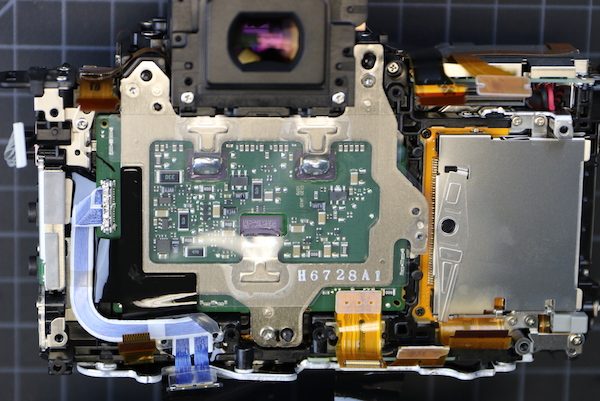
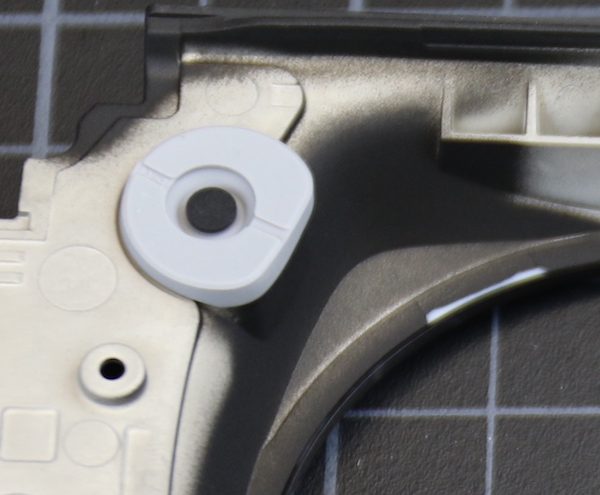
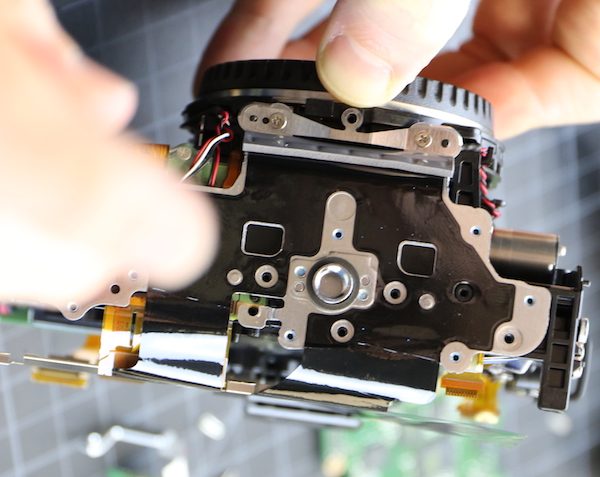
If you look closer at the sensor assembly you see three special screws, one on either side of the viewfinder, one at the bottom. These are the adjustment screws used to level the sensor so that it’s in exactly the same plane as the lens mount.
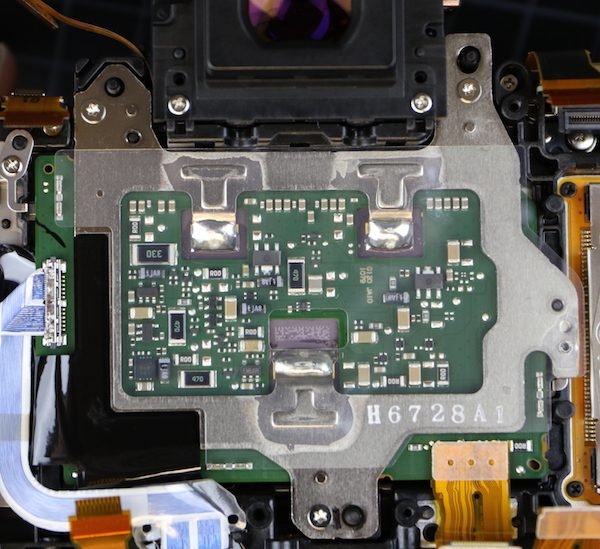
You can see from this not-so-great side view that it’s a simple screw-over-spring tension adjustment.
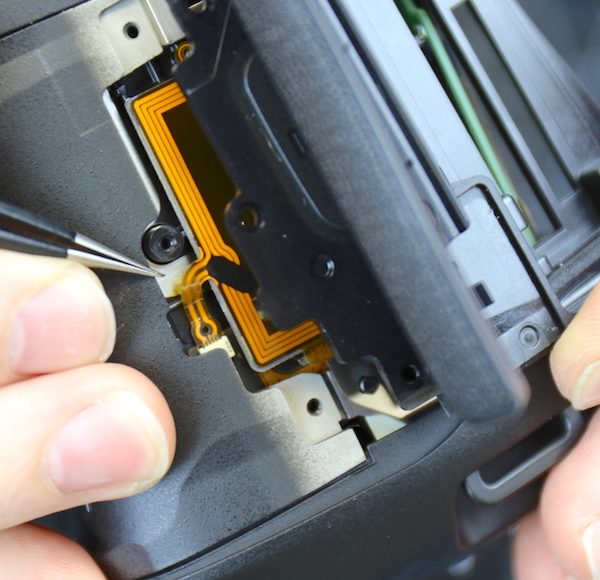
The next thing we wanted to do was remove the CF card assembly. Bent CF pins happen with some frequency and this is a common repair. We’d already seen that just disassembling the camera enough to expose them was going to be a chore. Removing the CF assembly actually ended up being more of a chore. Usually at this point removing the CF assembly is just taking out a couple of screws and unhooking a flex (the CF card door was removed earlier). In this case, we had to remove the battery door lock plate first.
And then could remove the CF assembly. Once it was out we saw why we had to remove the door lock: the CF assembly also contains the battery-door-closed sensor (in front of Aaron’s thumb). Not a big deal, just different, and well, we do replace CF assemblies a fair amount.
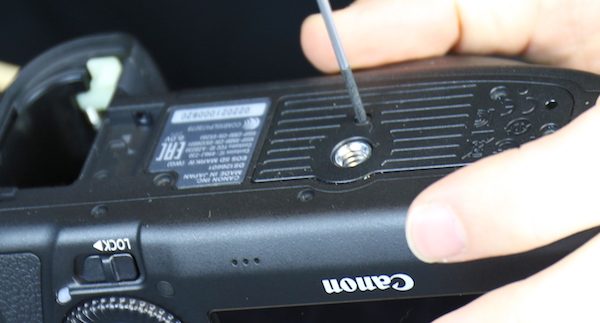
The last piece we took off was the bottom plate, just because we wanted to see how strong it looked. I should note even the tripod ring has a nice rubber seal around it.
And when the plate comes off it’s quite thick and sturdy as you can see. A lot of cameras have really thin metal plates here.
Now looking under the camera we can see the DC boards and other power boards, but not a lot more of interest. We really saw no reason to disassemble the mirror box and take off the battery compartment so we decided to quit while we were ahead.
So What All Did We Learn Today?
Well, let’s see. The weather sealing on the Canon 5d Mark IV appears pretty robust, although you know my opinion on weather sealing in general. The shell of the camera has an interlocking construction with lots of pins and clips and more screws than previous Canon cameras. This makes it kind of a pain to get into, but I’m sure it adds to the shell’s overall strength. It might make it more weather resistant if the parts are held together more tightly, but I couldn’t say for certain.
There are more chips, and more and heavier connectors moving electrons from board to board than even the Canon 5Ds cameras have. This kind of makes sense because there’s lots of new stuff in here: a touch screen LCD, dual-pixel technology, WiFi, GPS, the list goes on. One thing that didn’t really come across in the pictures, though, is there’s more air inside this camera than we’re used to seeing. There are some empty spaces that aren’t packed full of electronics. In other words, this camera probably could have been a bit smaller but Canon wanted to keep the form factor the same.
Construction is at least as robust as the recent 5 series releases and better than the Canon 5DIII, which is as it should be. There’s a little more complexity with cables running hither and yon more than in previous Canon cameras, but that isn’t going to affect operations at all. It may make repairs a bit more difficult. And I’m, as I always am, disappointed to see HDMI and USB ports soldered onto the main PCB. They get torn off a fair amount on every camera that’s made this way (which is most cameras that aren’t dedicated for video). On the other hand, the main PCB replacement may not be much more expensive than a sub-board replacement.
So overall, it was an interesting disassembly with a fair amount of new quirks and tweaks, rather than the rather straightforward upgrade I was expecting.
Roger Cicala and Aaron Closz
Lensrentals.com
September, 2016
Because people still insist on asking or speculating: Yes the camera is reassembled. Yes, it’s working just fine. No, it won’t go out on rental this week, we’re having some of the guys here shoot with it while they do their own write-ups about actually using it. But it will be rented after that.

62 Comments
Brad Andresen ·
Thanks Roger and crew, always love to see you dive into the newest offerings as I normally wait until my cameras and lenses are broken or obsolete before I tear them apart!
photos ·
To be blunt, we didn’t expect a lot of surprises inside the Canon 5D Mark IV. From the outside, it looks just like the Canon 5Ds and Canon 5Dsr, which look a lot like the Canon 5D III. We expected to find some new chips inside, because, well, the camera does some new stuff that should need some new chips. And, of course, as with every camera ever made throughout history, this one has ‘improved weather sealing’. It’s not improved enough for the warranty to cover water damage, of course, but still, that’s worth a look. If nothing else, we usually enjoy opening up Canon cameras because the engineering is always nicely laid out and usually pretty. And we’re the kind of guys that value inner beauty.
Brandon Dube ·
The beefier connectors with the little flaps for the flexes are called Zero Insertion Force (ZIF) connectors.
AaronClosz ·
…that name must be more of a warning than a description.
Roger Cicala ·
Yeah, that’s like two lies for the price of one. It takes more than zero force, and they’re a pain in the butt to reconnect.
Brandon Dube ·
With practice, young Padawan.
Jon ·
Lol @ padawan Dubes throwing down with Cicala.
Roger Cicala ·
You mean Dubes Vader?
Michael Clark ·
I thought his new nickname was “coverplate”?
akkual ·
If you need to use force with ZIF (or have problems/pain reconnecting) you are either doing something very wrong or not dealing with a ZIF.
ZIFs typically have some latch for releaseable press connection that requires unlatching before assembly or disassembly. Often they can be forced in while latched, but that requires a significant amount of force and has high risk of breaking the connector or the cable.
For example, typical desktop processor socket on motherboards is ZIF: you open latch, lay the processor on socket without any force, and then press the latch (which may require force, but you can’t break the connection nor the processor in this phase unless using ridiculous force.. on cameras, I have not encountered a ZIF that would require any force more than just slightly pressing with finger).
I recently fixed Sony Alpha 6000, and that had three different kind of ZIFs, which was a pain in sense that you had to carefully examine each ZIF of how to release the latch. But once I figured out each latch mecahnisims, disassembly and reassembly was painless.
Rick ·
wow you guys moved fast on this one.
was this a “It’s Better to Beg for Forgiveness than to Ask for Permission” move? 😛
Roger Cicala ·
Actually, Tyler was able to get more than enough to fill first orders, which is a little unusual.
Michael Burch ·
What’s the paragraph at the start all about leaks and smoke about? Am I the only confused by this!?
Tolot ·
how thick is the base plate on a sony a7r?
my friend managed to bend it somehow using it on a tripod.
AaronClosz ·
Tolot, the Sony plate is 0.95mm thick. We didn’t actually measure the 5D IV’s thickness, but Canon’s plates tend to be a little thicker at around 1.25mm or so.
Kai Harrekilde-Petersen ·
The initials over the pentaprism is most likely a QC step (after checking & approving alignment)
pedant ·
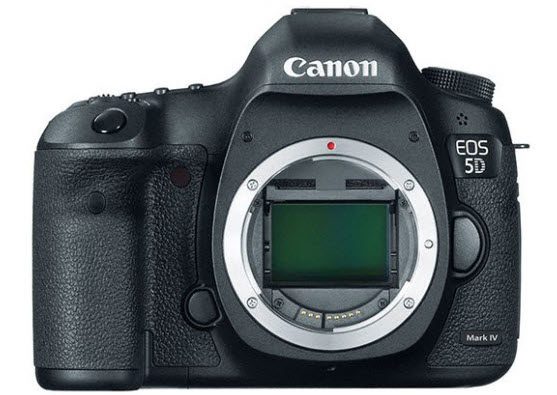
Ummm, that first picture at the top of the page… I don’t think that’s actually a 5d4 :-/
Canon dUSA ·
Yes, it is a 5d IV. Take a look at the microphone on a 5D III. It is right above the “5D” text.
On the 5D IV, the “EOS” is not in the same piece of plastic as the “5D Mark IV” is in. (On the 5D III, “Mark III” is on the very bottom of the camera). And, the microphone is below the entire logo. Vs on the 5D III the mic is above.
Pic from http://www.camerajabber.com/canon-eos-5d-mark-iv-better-5d-mark-iii/
https://uploads.disquscdn.com/images/0a2f2c6317b9b9fe834f6e31e7e820473236f2617df340f034a980d88ec05d85.jpg
Diko Jelev ·
Thank you so much for doing that tear down.
Question: Is it possible for the AA filter to be safely removed (by a pro service of course)?
Roger Cicala ·
Diko, probably not by someone like us. A specialist sensor replacement shop could.
Lee ·
Love when you guys do this
Mike ·
Is the Body still Metal? Where is the Wifi Antenna?
Adam Fo ·
Looks similar to the MKIII. Lens mount attached to the plastic mirror box frame which is attached to the plastic main frame.
The top, back and front covers are magnesium. The bottom cover a mixture of plastic and metal.
There are some good pictures of the all magnesium frame construction of the 1DX on http://www.fixyourcamera.org/teardowns-reviews/
Michael Clark ·
Even the 1D X ( and the Nikon flagship bodies, too) have engineering grade plastic light boxes. They’re stronger, lighter, and expand/contract less in varying thermal conditions.
Adam Fo ·
Can you point out which part photo you are referring to….
http://www.fixyourcamera.org/canon-1dx
http://www.fixyourcamera.org/nikon-d4
Michael Clark ·
All of the black pieces on the inside of the photos in the “mirrorbox” section.
Adam Fo ·
The baffle panels are not structural. The mirror box is metal. See here:
http://i2.photobucket.com/albums/y29/m444uk/FIXYOURCAMERA-ORG-Teardown-Review-Canon-1DX-130-Mirror-Box.jpg
http://i2.photobucket.com/albums/y29/m444uk/FIXYOURCAMERA-ORG-Teardown-Review-Canon-1DX-074-Disassembly.jpg
Michael Clark ·
That’s the front half of the Main Frame. What you are calling the baffle panels are the pieces of the light box. They’re what make it light tight.
Adam Fo ·
The first photo I showed was the BACK of the magnesium mirror box frame. The lens mount is attached to the front of the mirror box .This is screwed to the magnesium main frame shown bellow to form the complete chassis as shown in the 2nd photo.
http://i2.photobucket.com/albums/y29/m444uk/FIXYOURCAMERA-ORG-Teardown-Review-Canon-1DX-322-Main-Frame.jpg
These 2 parts are plastic or CRP on the 5 series and bellow
Class A ·
Very interesting, thanks!
Would love to see a Pentax taken apart (K-5 II or K-1).
Nic M ·
Another marvel of engineering… so many teams of people putting a modern camera together makes me wonder about it all.
When you compare say with the Sony mirrorless FF models that have relatively far fewer screws for example and less parts – what do think about cost to parts ratio? if there is such a thing? :- P They seem just as much an expense but somewhat less on number of parts yet still engineering feats to behold too. Curious if you’d think of comparing things on this line.
Somewhat OT and probably not on your roster, how ’bout doing a tear down with the Pentax K-1? I’m sure it’s a different beast altogether.
Cheers and thanks for your great coverage.
P.S. BTW, is the camera able to function well again after putting it back together, assuming that is even possible?
Roger Cicala ·
Nic, I don’t know the answer but what you say seems logical. More parts and a more difficult assembly seems likely to increase cost. But I don’t know how much.
We’re a little leary about doing a K-1 for two reasons. First, we’ve never been inside a Pentax so we’re a little more worried about messing it up, and second, we don’t have nearly as many of them.
This camera, is totally fine. One of our guys is shooting with it this weekend and I saw he’d taken hundreds of shots already.
Athanasius Kirchner ·
Please do the K-1, I’m sure there’s many of us wondering about its internals… Pretty please, with sugar on top? 😀
bdbender4 ·
No disrespect to Pentax, but in the world of minor brands I would be much more interested in the Fuji X-T2, including their approach to weather sealing. And I am sure others are equally interested in Panasonic and Olympus. Again, no disrespect and no flame war intended, but I understand why Roger spends his limited time on the major brands.
Athanasius Kirchner ·
Except Pentax is famous for weather sealing; they have shown models with transparent plastic that showcase the many seals placed in their cameras. They sort of have a reputation to uphold, unlike Fuji and Panasonic (but not unlike Olympus). That’s the reason me and some others want to see a disassembly of a K-1.
pest ·
It’s possible to do more with less parts. You have to study every single chip and PCB and check this with global body functionality. It’s possible too Sony has some adventages building smaller or higher integrated HW over Canon.
Vlad Bieg ·
When digital cameras appeared many years ago some engineers (myself included) thought: great! The digital age arrived to photography! Soon we are going to see completely new, imaginative designs, we are no longer restricted by pentaprism placement, dials and knobs position, etc. The camera shape can be virtually anything; controls can be integrated in modular design, easy to move to different position for left or right eye/hand operation. And finally we will have fully modular designs for easy servicing and upgrades.
How naive I was… Retro styling is back, dials and knobs stayed where they always were, there are more and more screws and mechanical components. We even see mirrorless cameras with central SLR pentaprism hump with electronics (no glass, but the familiar hump stayed). Just like horseless carriages: remove a horse, replace it with a combustion engine, proven, familiar, tested design, why change it. How sad and predictable.
Carl Eberhart ·
You are (over)reacting to where they noticed more air inside the shell?
Vlad Bieg ·
No, I am not concerned with empty spaces inside the shell. I am reacting to complete lack of modular design preventing easy servicing, upgrading and customisation. Comparing this design with similar pro level film SLRs manufactured many years ago I observe significant increase of mechanical complexity which in turn makes manufacturing and assembly more expensive, and increases the chances of mechanical failures.
Curtis Krawchuk ·
The 5d4 comes with a cable protector for the hdmi and usb connections so as long as you use it the risk of soldering those to the board should be less.
Roger Cicala ·
Totally agree. I wish people used it.
Omesh Singh ·
Is that a Digic DV5 chip on the main PCB?
Roger Cicala ·
Omesh, not sure, I haven’t done any ‘chip chasing’. But I can send you a higher res image if you want to. Just email me.
Nick Mays ·
Could it be, that the USB and HDMI are always native to the main board because the signals cannot be shielded properly in a ribbon cable, or similar? With the competitive nature of these cameras, every drop counts in signal quality.
Roger Cicala ·
Very possible Nick, with just a regular ribbon cable.
chris ·
I don’t know about the HDMI interface, but for USB maintaining the correct impedance for the signal line is critical, and pretty difficult. Adding additional connectors and cables internally makes this even harder and would be avoided as much as possible. Gaining USB certification on even simple PCB is not trivial. I think in this case Canon have decided the use case for rugged connectors for these two interfaces isn’t justifiable as they are generally not used in the field for photography. The number of users using external monitors for video surly is fairly small.
pest ·
It is possible to get the signal fine through connectors and cables with a good design but it’s more difficult.
Carl Eberhart ·
Bravo Roger and Aaron ! And nice job on the pics of this disassembly, too !
Regarding the image quality via the 5D4, according to DPReview, it looks like it SUCKS to me. Any thoughts on why their test image shots look so soft and lacking in contrast vs. all other cameras, such as 5D3, D810, and A7R2 ?
If this is indicative of the image quality, I am even more disappointed than I thought I would be, from this new sensor. The 5D3 was a relatively low bar already vs. competing newer cameras, but sheesh…
Roger Cicala ·
Carl, I’m not sure at all. The only early reports I’ve gotten are from a couple of our techs who are shooting video and absolutely raving about how awesomely it’s working for that, especially maintaining focus. But I have no in-house reports on photo work yet.
Michael Clark ·
It seems to me that since amazon bought DPReview the score of a camera there is inversely proportional to the profit margin per unit that amazon makes on a sell. I stopped reading the test and review articles seriously a while back. The forums are still useful for what forums do.
Keenan Adams ·
Why?
GriffinClubMerv ·
Thanks to this breakdown I now have a better understanding and appreciation for the included screw-in bracket to be used to support the USB and HDMI connection to the camera. I had been looking at it thinking “well that seems odd” – now I understand, and will use it religiously.
margo2000 ·
It’s very difficult to put HDMI on a daughter board, because the signal speed is in gigabits per second. HDMI transmitter IC’s are designed to be traced out a very short distance across a PCB to a connector, and sending them through board layers or internal cables can make them fail the compliance test. So there’s more at play than simple cost-savings.
Roger Cicala ·
Thank you, Margo, that’s good to know.
pest ·
I think it’s not the distance. It’s more about avoiding transition points (connectors) and holding the signal all the way into the specs. Take a look at HDMI design guidelines.
Michael Pistono ·
Is the lens mount screwed down into plastic like the D810 and D750? It’s kind of hard to tell if the mirror box is constructed from metal!
Arhire Adrian ·
It’s a stainless steel skeleton with a magnesium alloy body. I don’t think those Nikons use plastic either, and if they do it’s just for parts of the shell.
On a related note, i’ve disassembled an old Canon SLR that had a plastic shell and steel skeleton. The mount was screwed in to the mirror box which was a stainless steel construction.
Leonardo Gomes ·
Hey there. I just drop my 5d mkIV. The dial is hard to move, so the power button. You think that I will need to change the whole top part? Do you think that the weather selling can loose the effective if it is open? (I will do in a Canon Service repair, of course) thanks!!
Martin Davies ·
If I only want to replace the top cover, does the back and sides still have to come off?
Dan Farmer ·
If you leave a small leak during reassembly, then when you put the battery back in the smoke leaks out of the camera and it will never work again. Is that a joke? What smoke? I need to partially take apart my camera to dry it out due to water damage.
Austrian Bon Vivant ·
Dear Mr. Cicala,
with great interest I did study your teardown report on the 5d IV.
I am currently experiencing an issue with my tripod-socket that got worn out for whatever reason – never happened to me before. Long story short I was informed about the cost of the spare part itself as well as the cost of having it exchanged, and now I am wondering If I am capable of exchanging this plate by myself. As far as I understand the picture second to last shows the actual element as a whole that presumably will be the spare part to exchange. If the job is nothing more but unscrewing the few screws on the bottom as to access this part, I am confident I could do this on my own.
Would you mind elaborating if there is more to do as to extract and eventually replace this piece?
I highly appreciate your answer,
sending you best regards from Austria
stay happy and healthy in this difficult times.
Roger Cicala ·
It’s a pretty easy thing to do, the only real risk is resticking the sticky rubber down, but that usually goes just fine.