
Product photography might not always be the most glamorous job in the world but could be an incredibly useful and profitable tool to have in your quiver for when business in your photographic expertise is slow. For many, that time is winter – where weddings are non-existent, outdoor portrait photography is too cold and impossible for many of us, and we’re left with waiting for the seasons to shift so we can resume business. However, with the upcoming downtime, it might be time to experiment with product photography and learn some tools to help grow your photography business even when times are slow.
For this article, I’m going to focus primarily on studio photography. While product photography is also often shot on a subject, most products also need off-model shots, and each has their own name and technique. Tshirts, jumpers and other simple garments are usually shot hanging on a hanger (with the hanger removed in post) but are also sometimes shot as ‘lay flats’ (shot directly overhead, laying flat on a whiteboard). Jackets, dresses, coats and so on are usually shot on a mannequin, or with an insert to fill out the clothing to give a realistic appearance. The benefit of this type of photography is that is can be done in small spaces, be perfected with enough patience, and streamlined to shoot many products in succession once set up.
Preparation
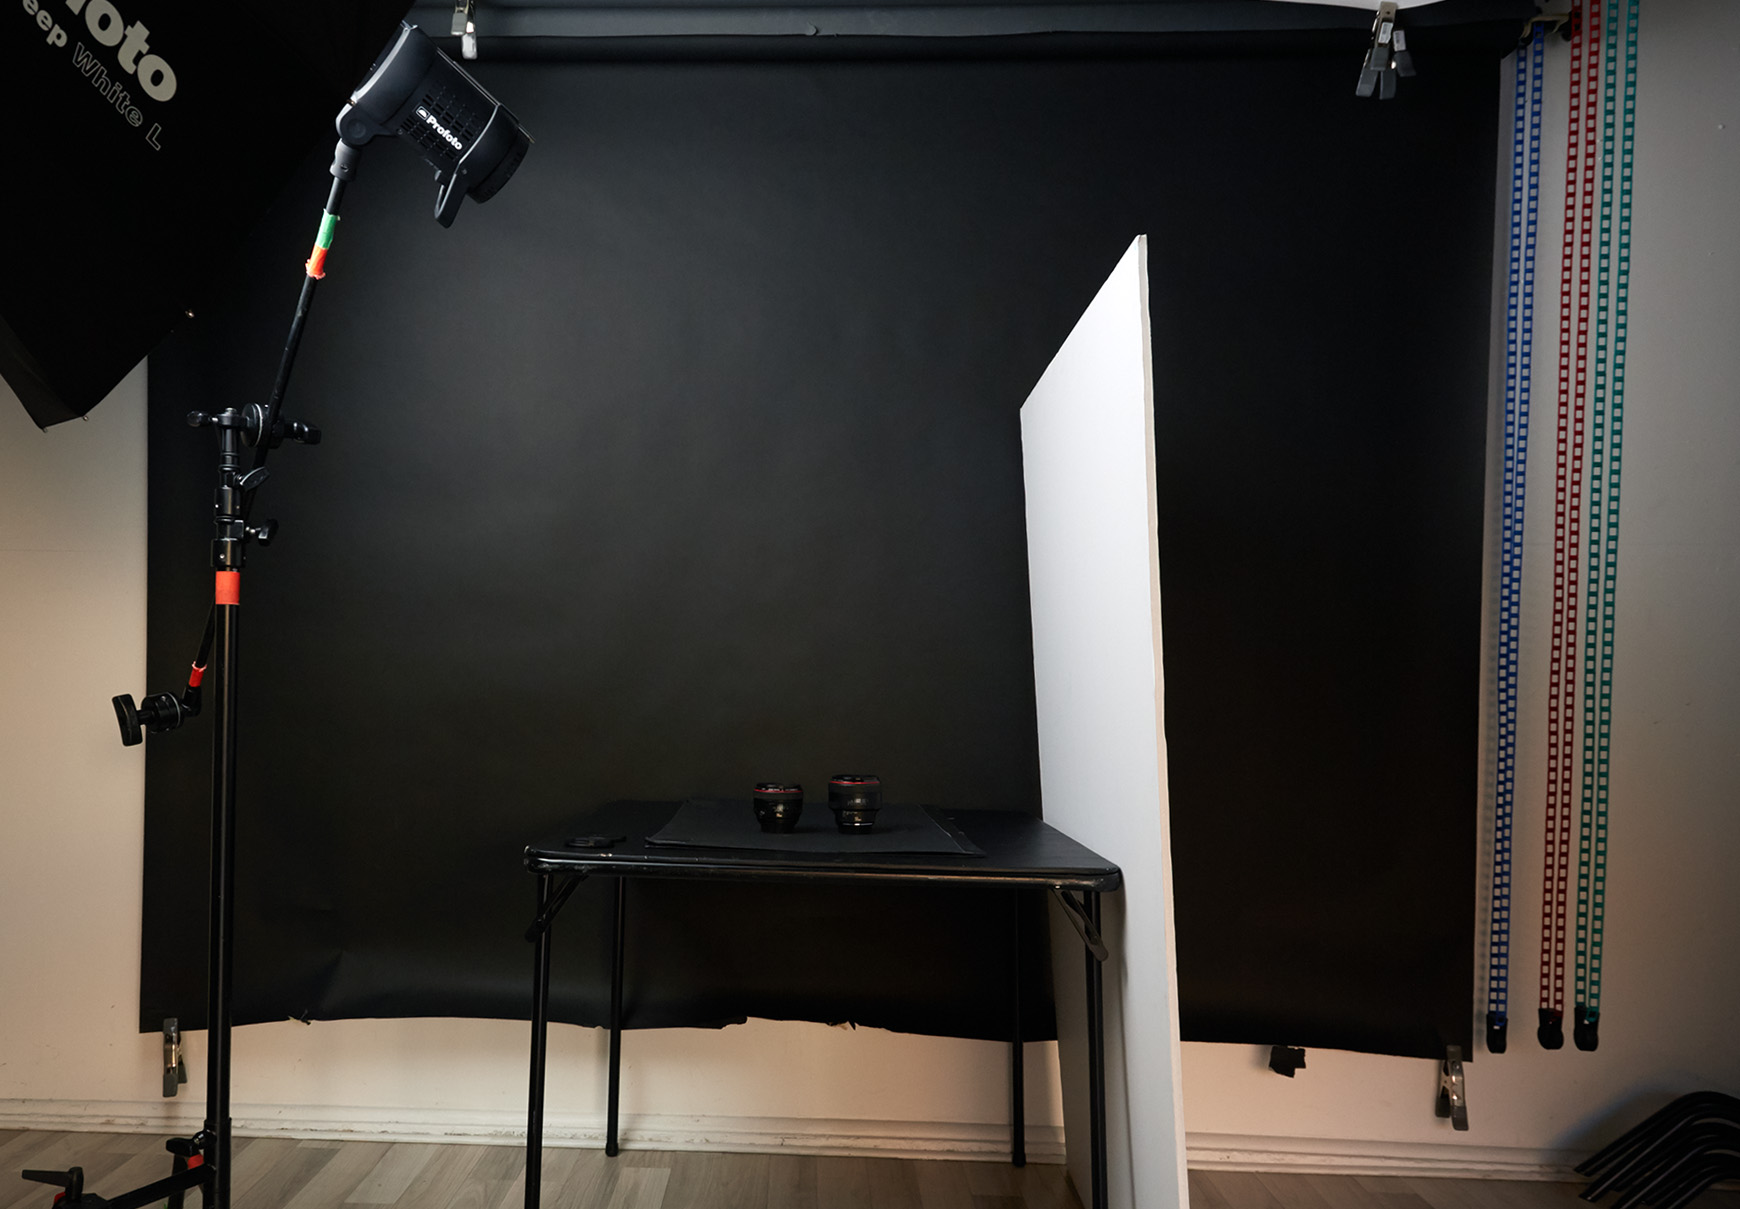
Like all photography, the most important part is probably the preparation before the shoot. For gear, you’ll want three important tools – a tripod, a lens at least 50mm in focal length (to avoid any barrel distortion), and a light source. As for lens choices, I usually prefer the Canon 85mm f/1.2L II or Canon 100mm f/2.8L Macro for their image quality and my own personal fandom, though any lens above 50mm will do, as you’re often shooting above f/8 to help maintain sharpness. When it comes to a tripod, all you need is something that allows you to shoot at a variety of angles, ideally, one that will enable you to shoot directly overhead if possible.
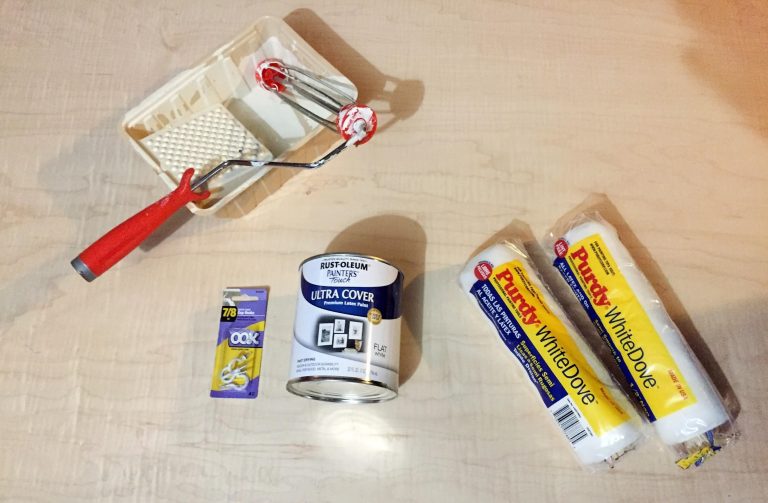
But your preparation doesn’t end with gear; you’ll also want to make sure you have a clean shooting space to work in. The easiest and cheapest way to do this is to make one yourself, using the tools found at a hardware store. For a few dollars in paint, a piece of plywood, and a couple of hooks, you’re able to quickly build a white board or black board that works as a great shooting backdrop for anything that may need to be hung or shot on top of. A simple roll of seamless can also be added as required, to allow for shooting at different angles. This technique is usually preferred over using a wall, as walls can sometimes have dirt and inconsistencies in color, depending on how long ago it was painted. This entire process of building your own only costs a few dollars, takes an hour or so the night before, and can save you hours in retouching if you’re not planning on cutting out the background in post.
When shooting product work, I also have plenty of other tools on hand, just in case I need them for one thing or another. A list of recommended items is included below.
- Fishing Line (to help hang things without being too obstructive)
- Various Sized Clamps (again, for attaching and holding things)
- A Steamer (Particularly helpful when working with clothing)
- Q tips / Toothbrush (To help clean up products before shooting)
- Glass Cleaner (for any reflective objects)
- Lint Roller (an asset when working with fabrics)
- Suede Brush (for general and gentle cleaning)
- Pins (to help place clothing and pin garments)
Lighting
While some product photography requires absolute precision when it comes to lighting and set dressing, most of the jobs can be done with soft, even lighting spreading across the entire scene. For those options, I tend to opt for a large, somewhat nondirectional light modifier like a Large Umbrella or PLM, along with a white or silver bounce card to help with fill. Using large light sources will give a nice soft light on your products, and help eliminate any strong shadows – giving the products a nice ‘true to life’ image. When looking to just light something with soft even light, I usually prefer umbrellas over softboxes. While softboxes will give you more control over your light, the splash effect of umbrellas provides a large lighting area, without much falloff.
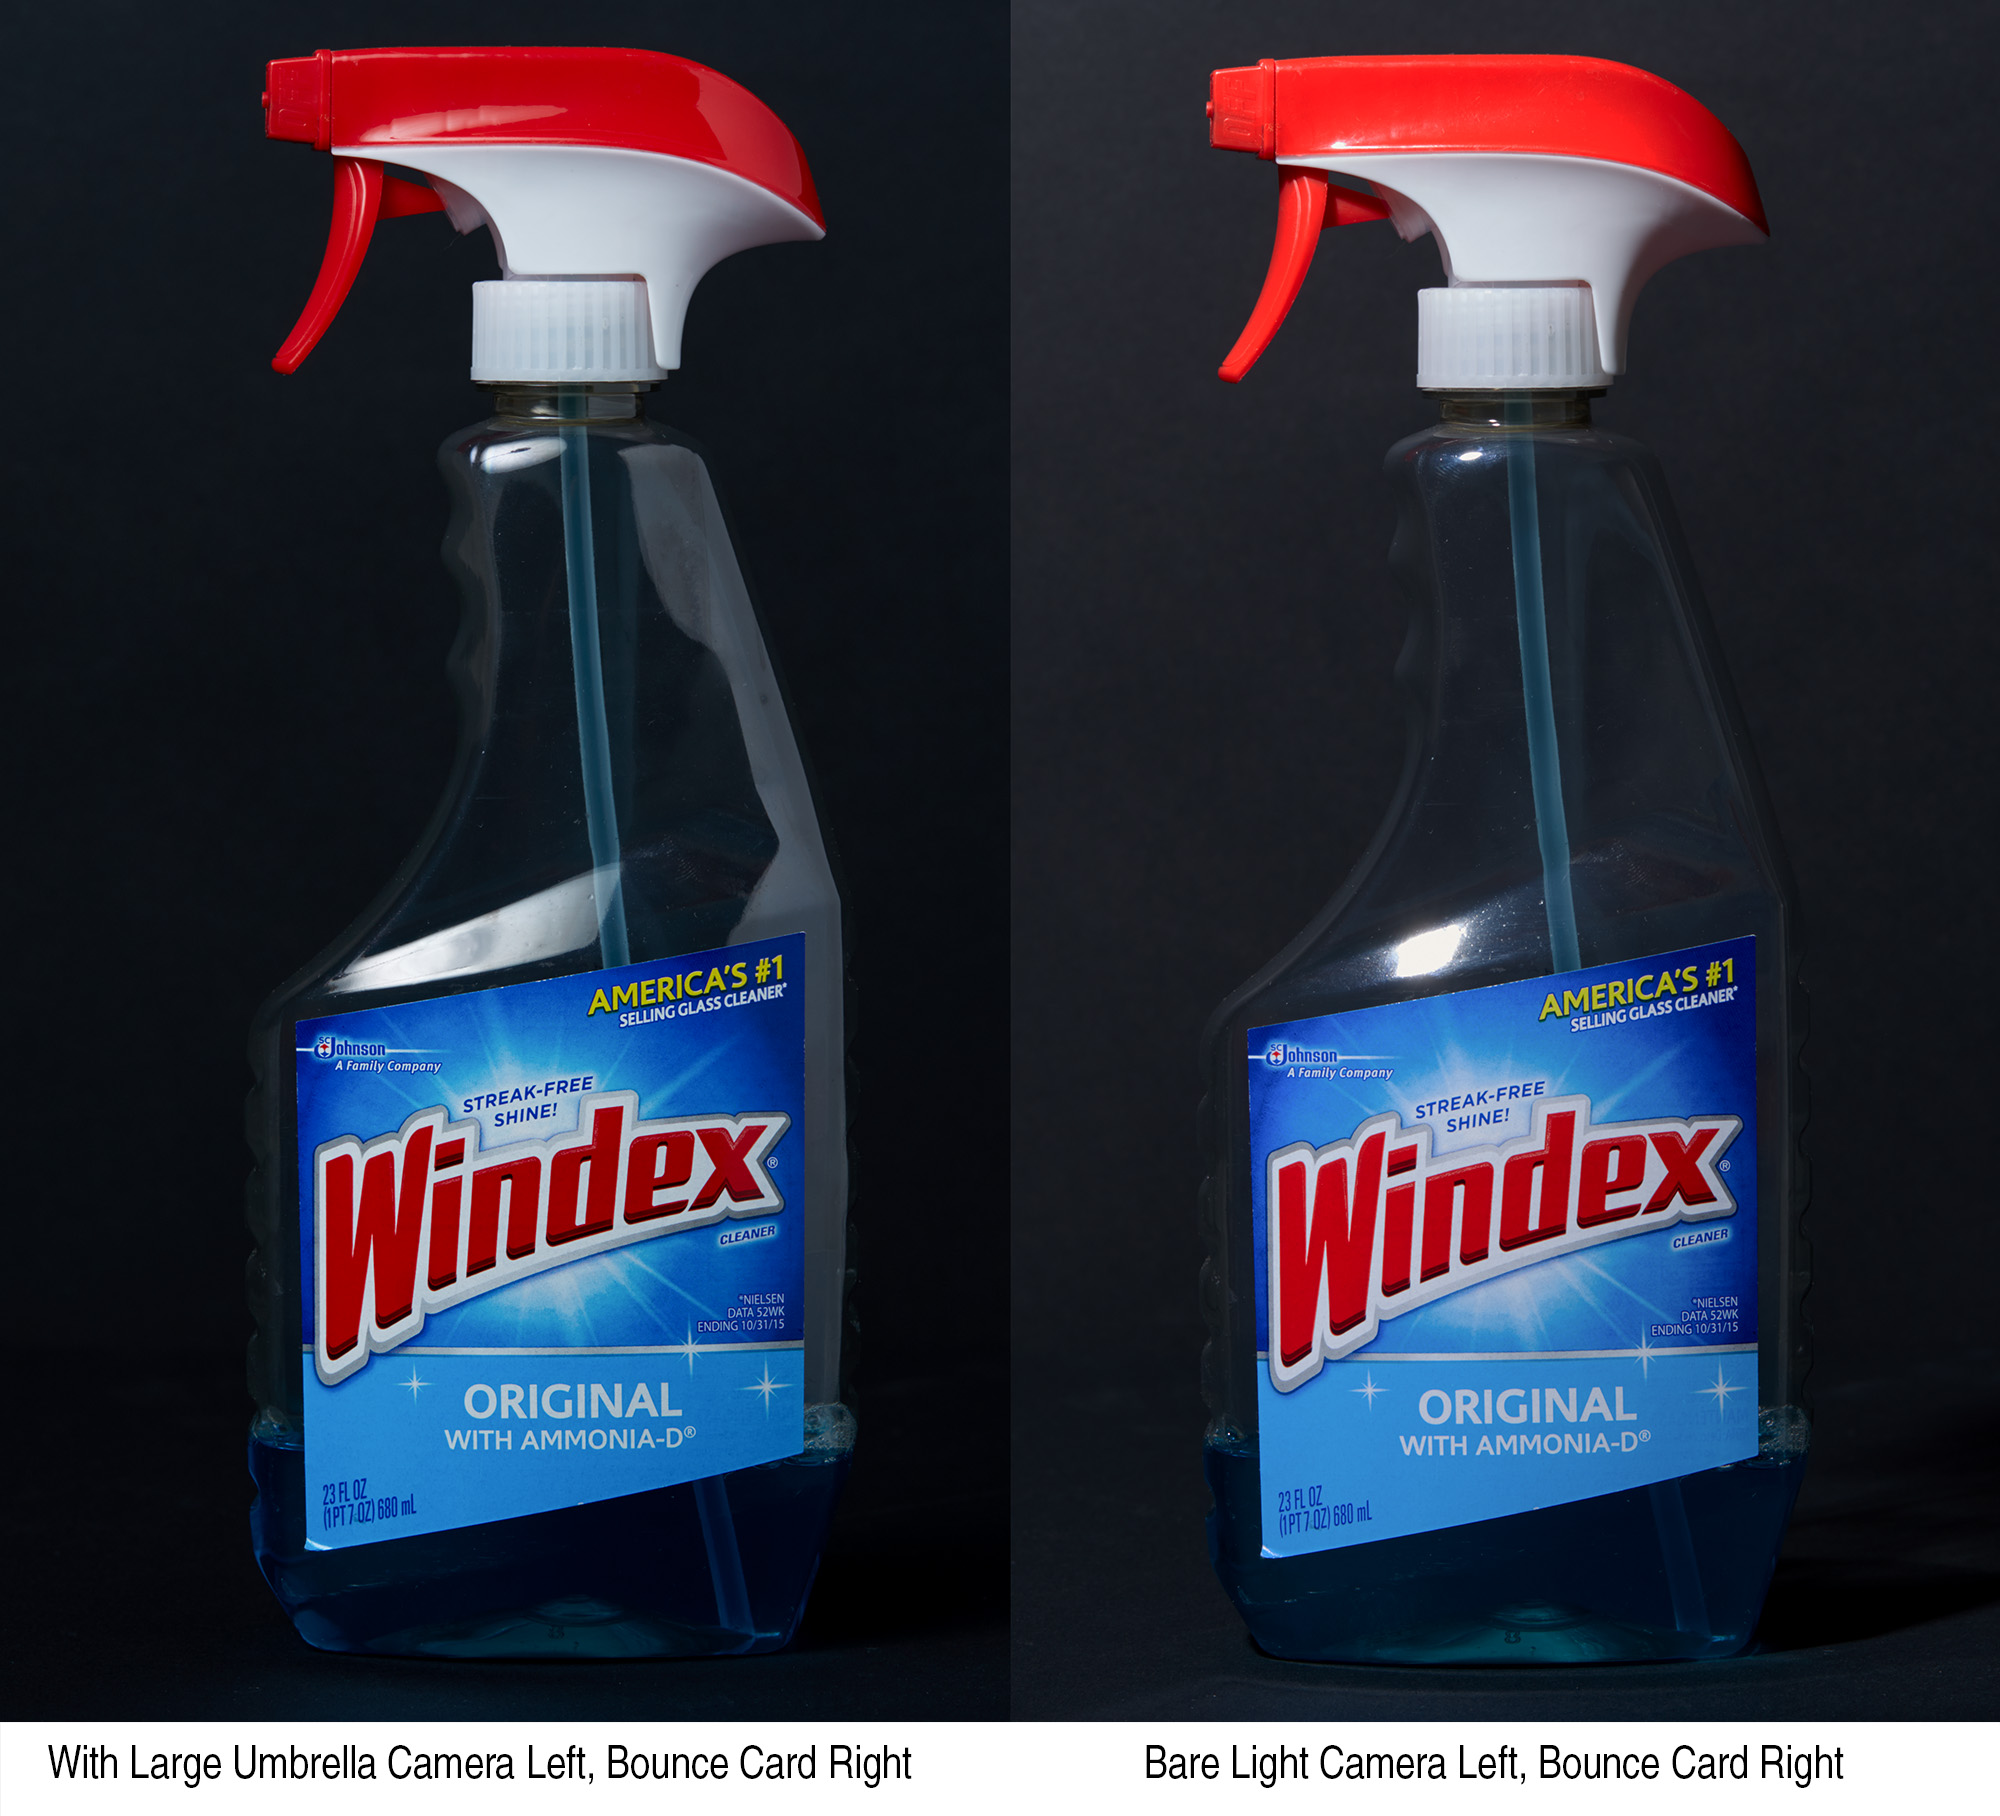
And my preference for soft light isn’t necessarily to minimize shadows, but rather, extend highlights. As you can see in the example above, larger light sources will provide more even lighting in the highlights, and give an overall more flattering image, especially when dealing with options that are more reflective, like this plastic bottle of glass cleaner.
Workflow
As mentioned before, preparation is vital because the goal here is to create a consistent lighting and style from one image to the next. Especially when shooting e-commerce, these photos will be lined up side by side in a grid array, so variations in lighting and crop will become significantly more apparent if it deviates from one image to the next. So for this reason, I often mark my places with painters tape to ensure I’ve placed the products in the same position each time, and make a note of all my settings on my light(s) and camera, as consistency is critical.
But to maintain the consistency, I also make sure none of the settings I’m using are set to automatic and use a grey card/color picker to help set my white balance. While generally, I consider auto white balance to work well for day to day work, I want to maintain absolute color consistency from one image to the next, and the only proper way to do that is to ensure your settings remain entirely unchanged.
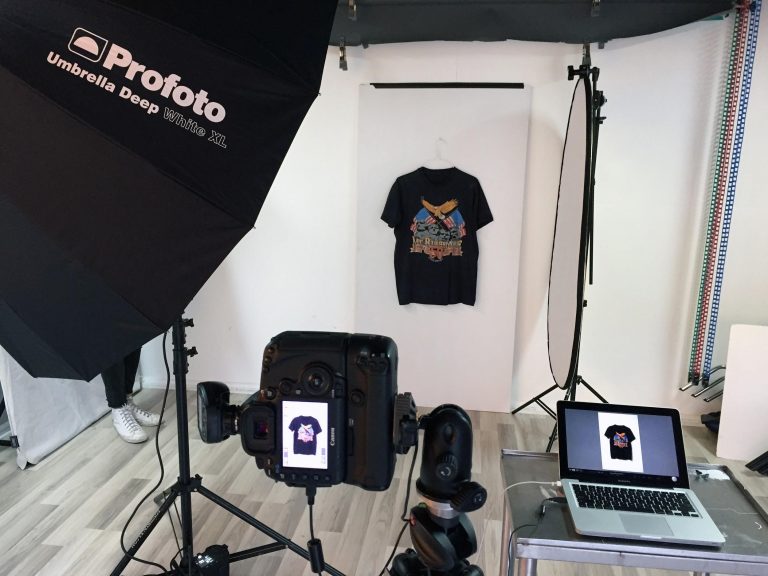
From there, I begin shooting in a consistent pattern (usually tethered, so I can quickly see any changes in lighting or style). Once everything is set up, and a workflow is established, you should be able to shoot products pretty fast. For this particular shoot, I made sure to shoot the front of the shirt, A detail shot of the design, and the back of the shirt. To make sure my crops were consistent, I taped the floor on where my tripod was placed, so that the front and back shot would be aligned properly after going in closer for the detail shot. While I shot this particular set using a Canon 100mm f/2.8L IS Macro, the same could be done with something like a Canon 70-200mm f/2.8L IS, and using the zoom functionality so that you do not need to move the tripod during shooting.
Post Production
With an active workflow up until now, the post-production should be simple. One technique I’ve implemented when shooting e-commerce and product photography is to use batch processing in much of my exposure and color work. Batch processing often gets a bad rep for being lazy, as it’s the process of blanketing settings across multiple images. But it has a lot of benefits when it comes to product photography. The main reason to use it for this kind of work is consistency. Assuming you changed no settings throughout your workflow, your images should look identical from one product to the next. So if you need to add 1/3rd exposure to the images, batch processing allows you to set that adjustment across all of the images. Doing so will enable you to make sure that upon exporting, all of your pictures look consistent from on to the next.
The one big benefit of product photography is that you can work at your own pace. Often (in the freelance world at least), you’re able to spend a day or two to capture the photos you need, which allows you to fine-tune and use trial and error to your advantage. With the right tools for the job, and plenty of patience, you’re able to quickly create a product book in your portfolio, and attract more clients in the offseason.

8 Comments
DrJon ·
Thanks for that. I’ve done quite a bit of product photography but I still found the comment about extending the highlights really interesting.
Zach Sutton Photography ·
Of course. While the example isn’t something to toss in a magazine ad, I do think it shows the technique well.
Arthur Meursault ·
What’s up with the Windex comparison? Clearly the EV or exposure has been manipulated. The right side is almost gray with a brilliant red sprayer while the left side is blackest black with other exposure and post processing changes evident. It’s just not an honest comparison whether by ineptitude or by deception. You spend half of the article discussing consistency (WB, EV, etc) across the products and then don’t manage that consistency in the one comparison you have.
Lastly, you can maintain color consistency better by having more color controlled lighting running at set temperatures in your studio and taking some of the strain off of your flash.
Additionally, since it’s a studio setting and flashes are known to change color temps on both power levels and shutter speed, it’s best to shoot manually to avoid those changing variables. Alternatively, one can set and copy WB settings in post if there are any changes due to other ambient and reflective changes in the environment, including all of those off camera.
Zach Sutton Photography ·
Exposure was manipulated in post, because I wasn’t able to get it perfectly in camera. From changing the light from a large bounce umbrella to bare lighting, I gained quite a bit in power that I wasn’t able to match perfectly in camera, without having a light meter on hand. As I mention throughout the article, I normally wouldn’t change the lighting throughout a product session, so the difference in lighting on the Windex bottle was to demonstrate the difference in light quality, not the consistency from one image to the next as already discussed.
Hope that clears that up for you. Thanks for reading, Arthur!
Oleg ·
Zach, you could have probably used a large softbox (Fotodiox folks make them super cheap 🙂 as a background for your t-shirts. It would give you a bright white background, a D1 or B1 @ 2 power setting or something so the light won’t leak through the t-shirts.
GuyWith ·
Great info. Thanks for creating it.
When you’re shooting on white, do you try to get your background to a specific RGB number like 255,255,255? Or do you just eyeball it? (I ask because I came up in print publishing where we couldn’t go above 244 on our whites and I’m wondering if anything has changed in the interim).
John Ledford ·
I've just read this amazing article. This is helpful especially to beginners and those who are willing to master their craft.
Thanks From
Clippingworld
Mixshot Fotografia Produktowa ·
A great deal of interesting information about product photography. I read with pleasure