Teardowns and Disassembly
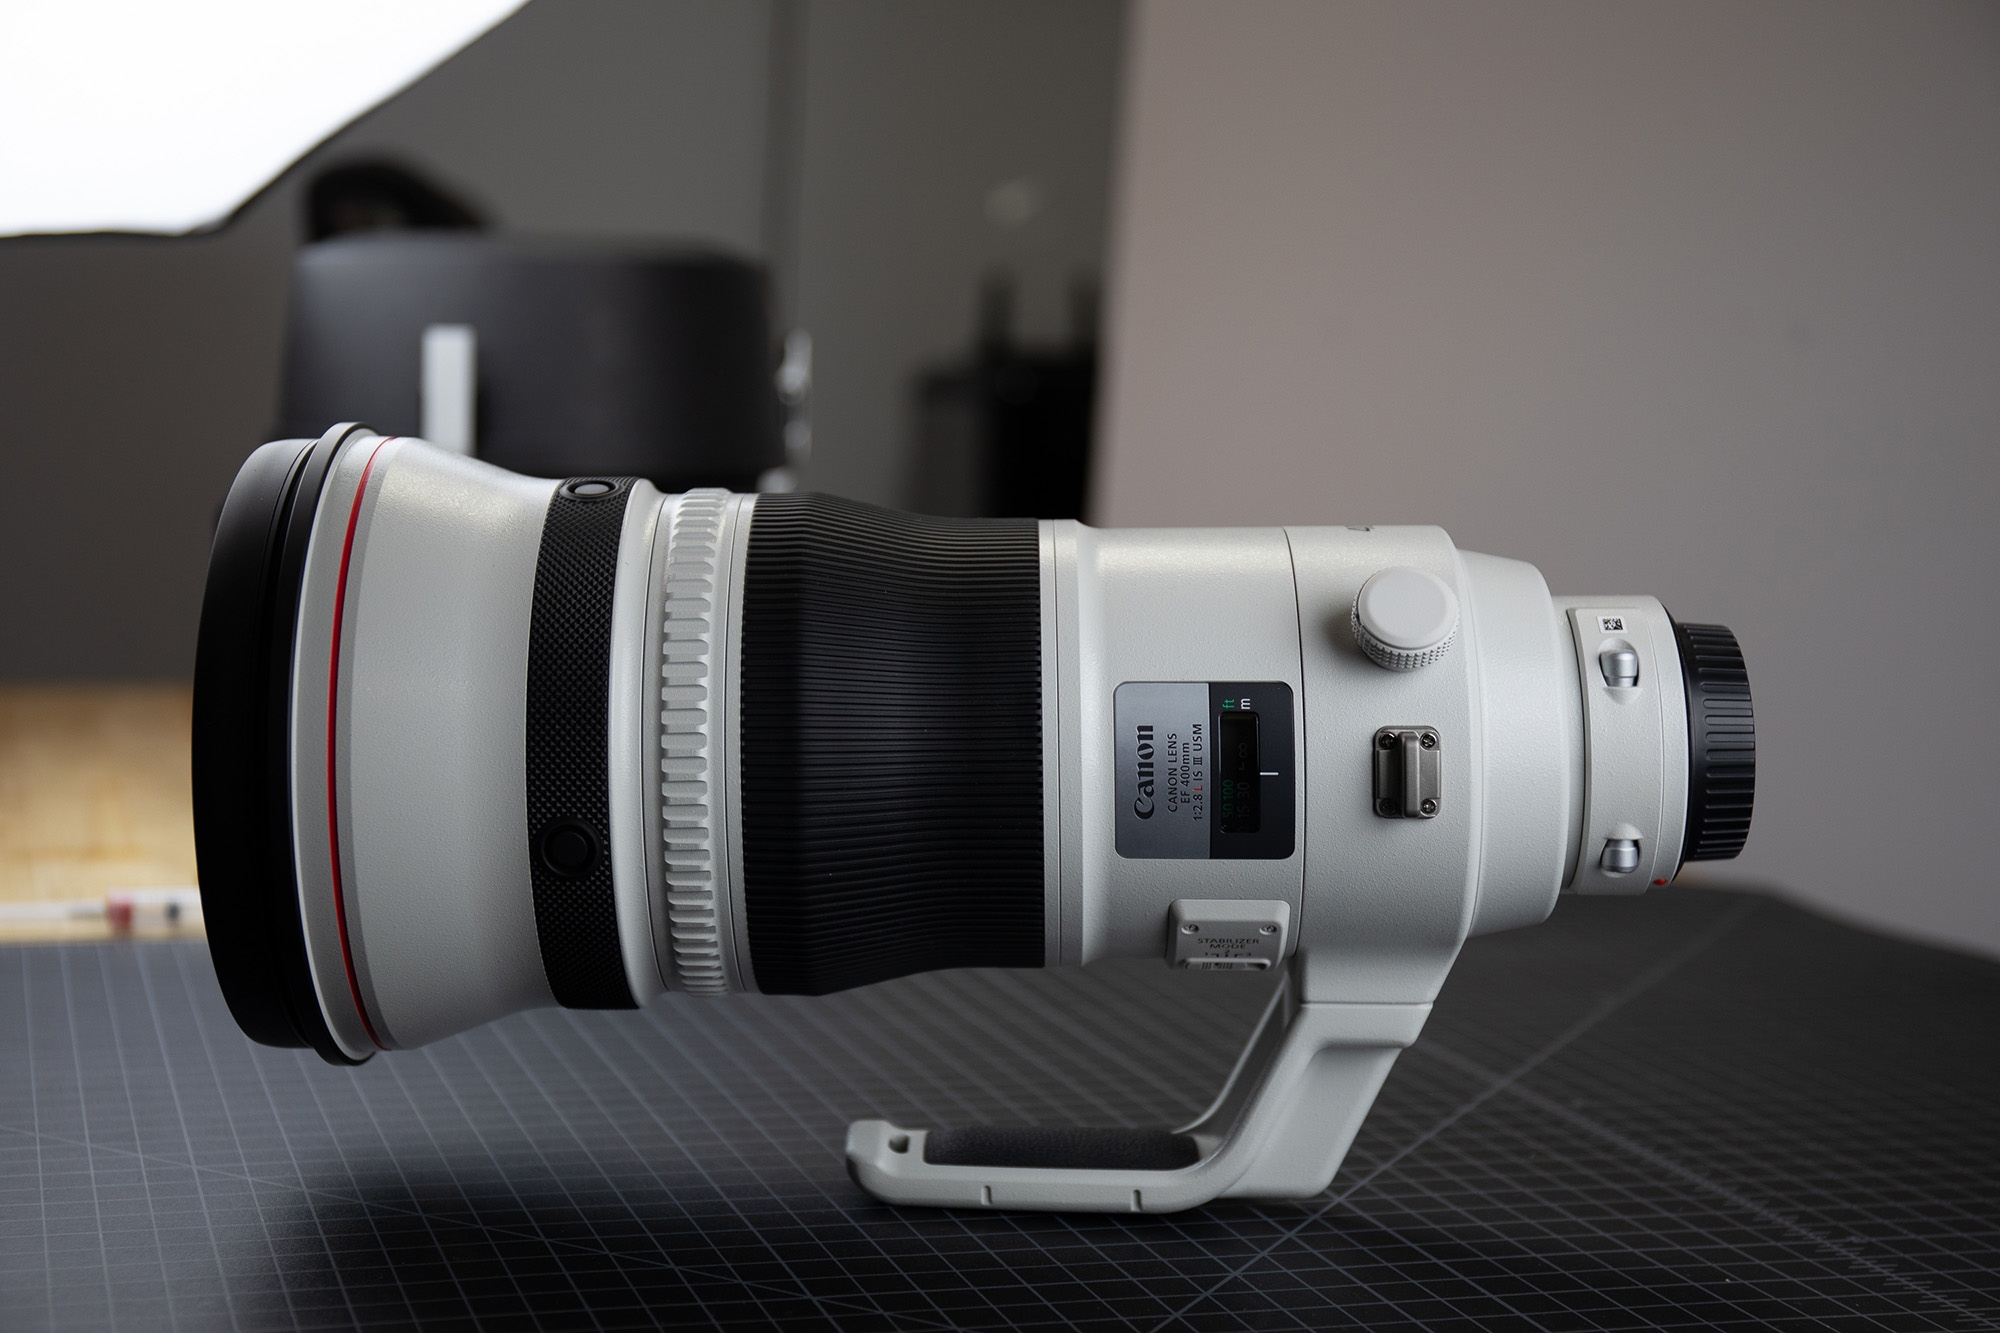
The Great 400mm f/2.8 Teardown Comparison. Part 1 – The Canon 400mm f/2.8 L IS III
We tend to not publish tear-downs of super-telephoto lenses. They’re big and heavy, always well made and well engineered, like you would expect in something that costs as much as a used car. Big, heavy, and boring don’t make for an interesting teardown. So we take them apart, make our in-house repair manual, and don’t put it on the blog.
But when the new 400mm f/2.8 lenses were released we decided it was finally time to publish a teardown of one. Largely, because they are amazingly light (you see what I did there? largely light?) and we were really interested in how they did that. I remember when shooting a 400mm f/2.8 was not only a statement about your disposable income or professional status (or both). It was a statement that you were a manly man, able to toss around a massive piece of optics and mount it to a tripod sturdy enough to double as a small crane on a construction site. Now they have one I can handhold. For a couple of shots, at least.
In this case, there was also the added attraction that both Canon and Sony released nearly identical, lightweight, optically excellent 400mm f/2.8 lenses at the same time. So this gives a chance to compare the two. Sony lenses have lagged a bit behind Canon in lens’ build quality, but they’ve been catching up. This looks like a giant leap for them.
We’ll do the Canon 400mm f/2.8 IS III first because Canon has been at this a long time and because there were several of the Canons in stock today. Also, this will give the Sony fanpeople a full week to bash the Canon lens, because that does seem to be what they live for.
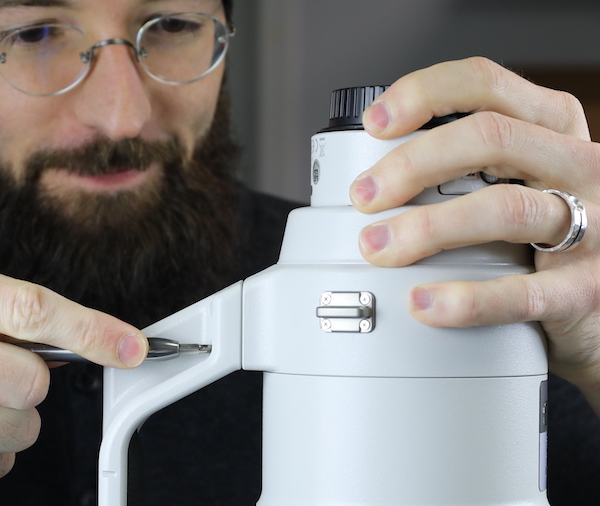
So, still stinging a bit from our near-disassembly of the Canon RF 50mm f/1.2 L, Aaron got out his favorite screwdrivers and hex wrenches and we began to open up $12,000 worth of Canon telephoto optics. (That we have favorite brands of screwdrivers and hex wrenches is a sad, complete, and accurate description of what kind of people we are. We’ve had 20-minute, bitter discussions on the relative merits of Wiha Precision vs Vessel Megadora screwdrivers that are as ugly as any Canon vs Nikon internet thread.)
The Tripod Ring
You know it’s a super telephoto when disassembling the tripod ring gets its own section. But they really are rather complex and actually, this is the part of the post a lot of people might actually use – cleaning out a gritty tripod ring is pretty easy and straightforward.
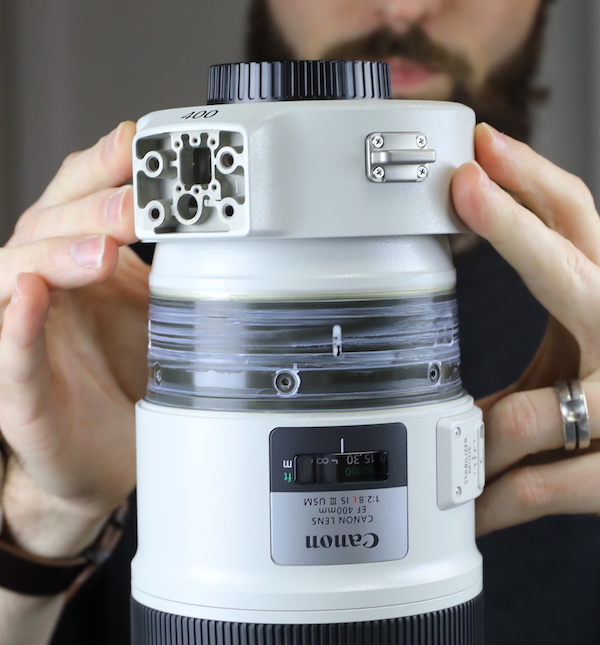
First, of course, we remove the tripod foot.
Lensrentals.com, 2018
Underneath the foot is a couple of plates that cover the click assembly.
Lensrentals.com, 2018
Taking off the upper plate releases the pressure spring. There’s plenty of lube in there, so the spring doesn’t try to leap across the room, as some springs do.
Lensrentals.com, 2018
The other four screws hold in the click assembly.
Lensrentals.com, 2018
This is a simple roller in a casing. The spring pushes the roller down against the lens barrel.
Lensrentals.com, 2018
And as you turn the tripod ring around, you feel that satisfying little click every time the roller passes over one of the grooves in the lens barrel.

Lensrentals.com, 2018
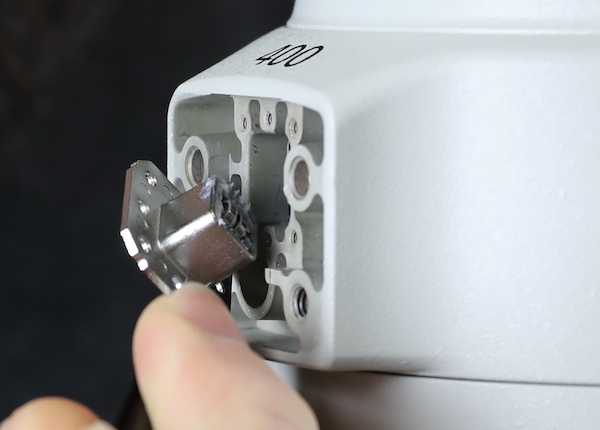
If you notice in the image above, there is a nice, round hole below the click mechanism. When you rotate the ring around you can line that hole up with the roller assemblies the tripod ring glides around on and remove them.
Lensrentals.com, 2018
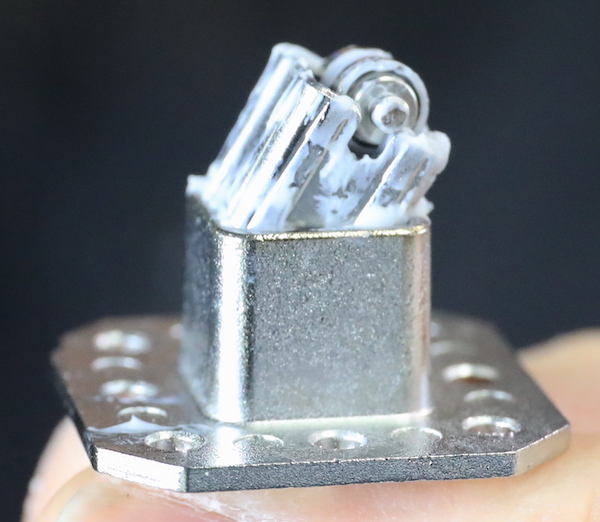
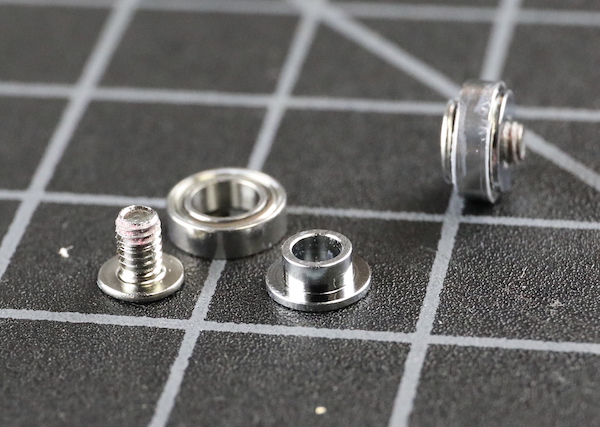
If your tripod ring starts to catch when you rotate it probably means that one of the roller screws got a little loose and backed out a bit. Simply tightening it should fix things. The rollers are in three pieces: the screw, a sleeve, and a ball-bearing roller.
Lensrentals.com, 2018
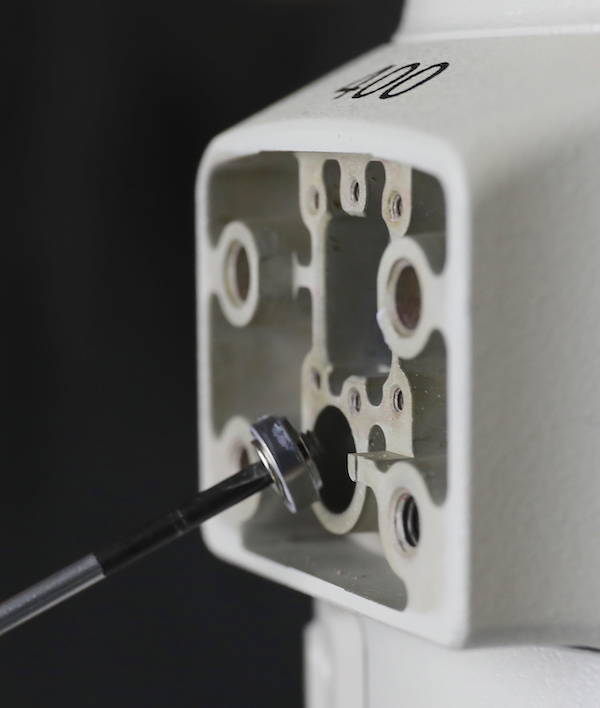
Once the rollers are removed, the tripod ring slides off. This is nice — some super telephotos won’t let you remove the tripod ring without removing the rear barrel. You can see one of the click slots in the barrel, filled with white lubricant.
Lensrentals.com, 2018
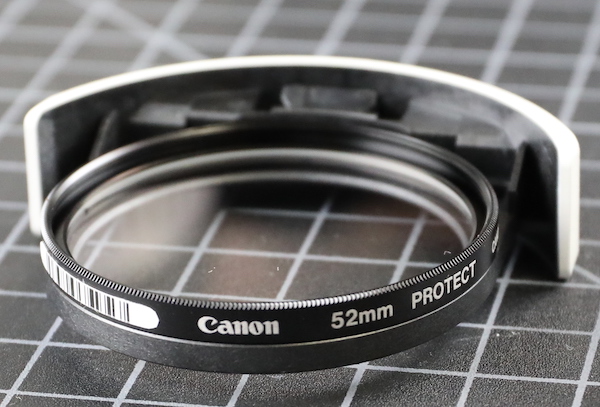
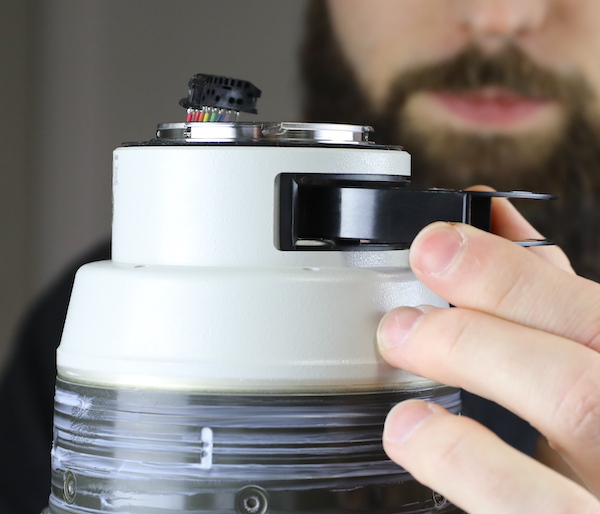
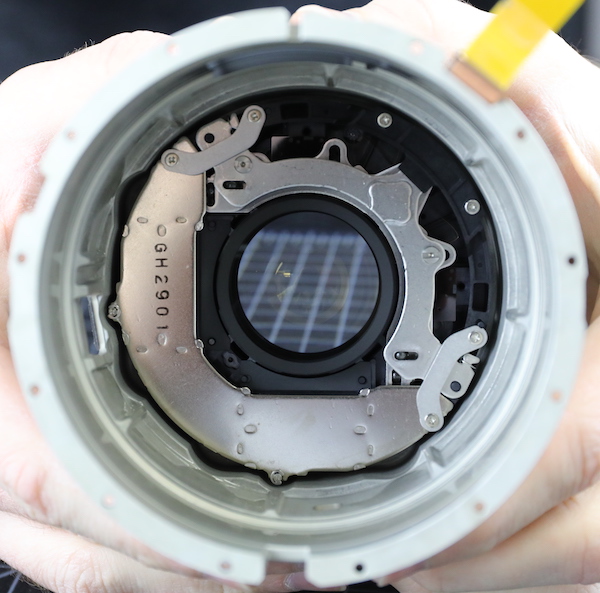
Before we get to the real disassembly, we took out the drop-in filter, which we really, really, really like. Why? Because instead of being a proprietary $200 filter, it’s a holder that you can attach any 52mm filter to. So if you scratch it or want a CP filter, just buy a standard 52mm replacement filter.
Lensrentals.com, 2018
Opening Up the Back
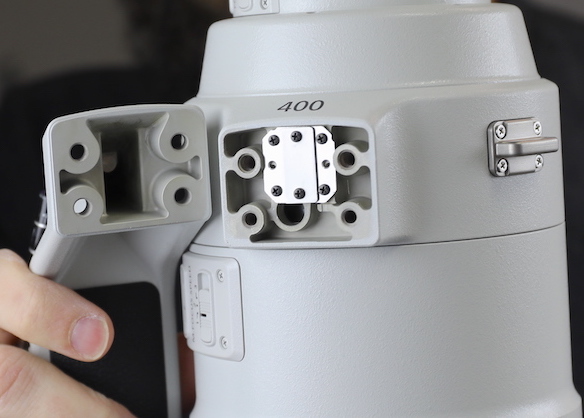
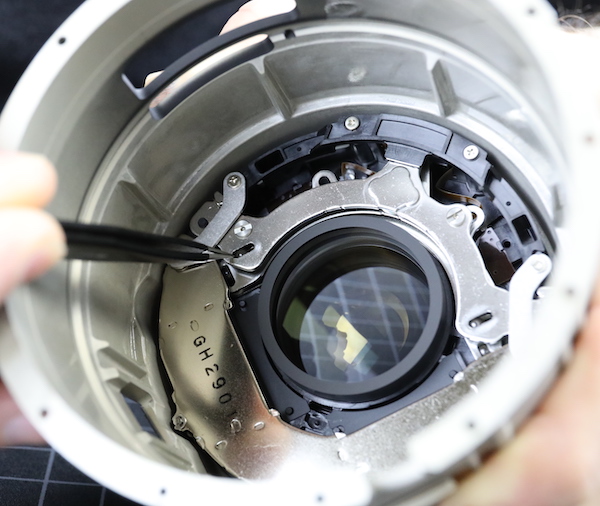
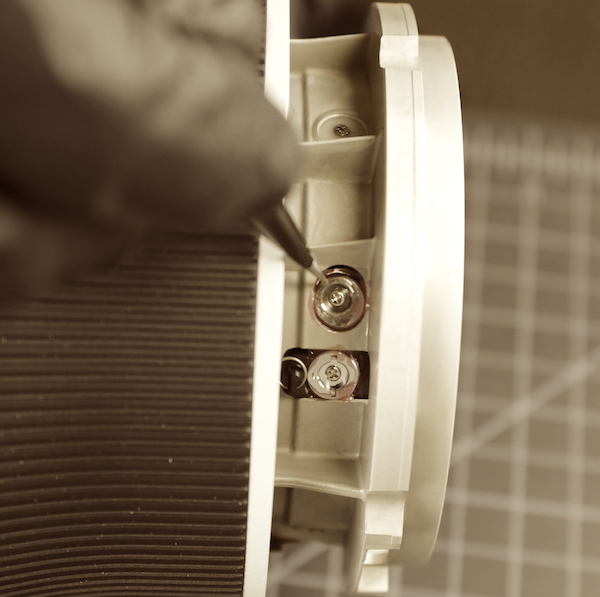
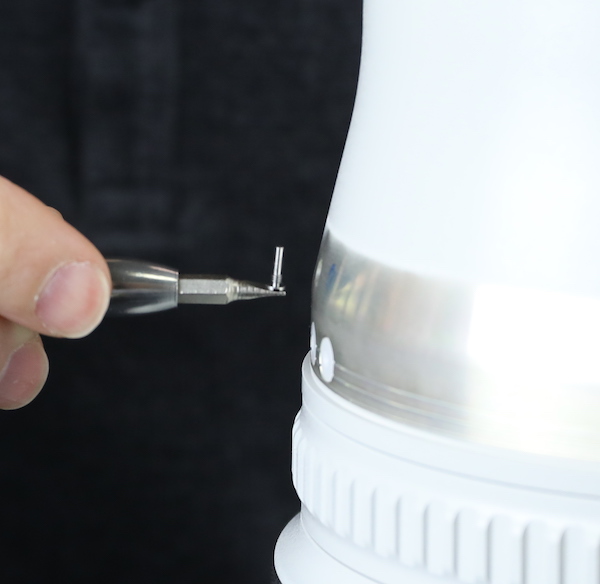
There’s a screw through the side of the lens that holds the filter holder assembly in place.
Lensrentals.com, 2018
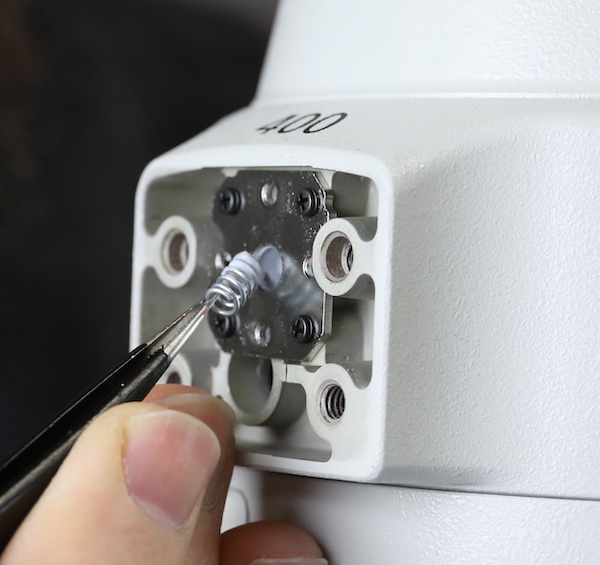
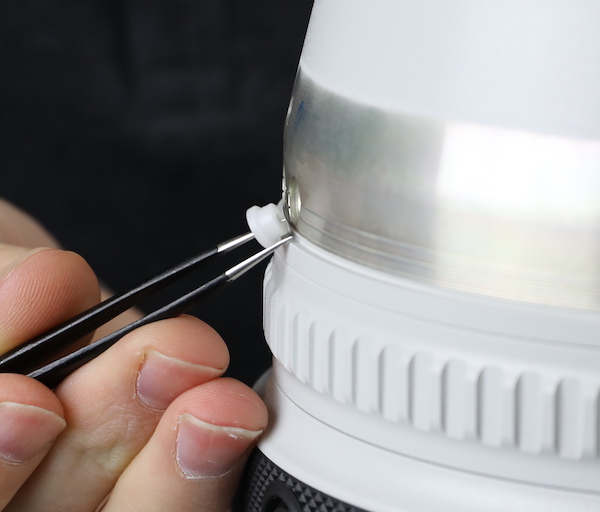
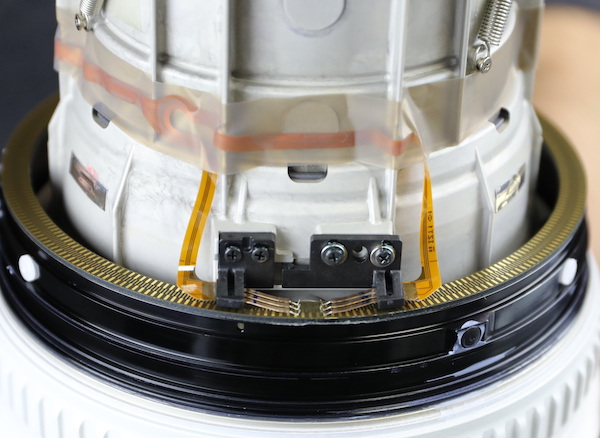
After this is removed, a couple of circuit connectors that are attached to the filter holder with double-sided tape must be freed up. We could have taken off the switch panel and disconnected the flexes there, but it wasn’t really necessary.
Lensrentals.com, 2018
After that, the filter holder can be popped out; it snaps into and out of place.
Lensrentals.com, 2018
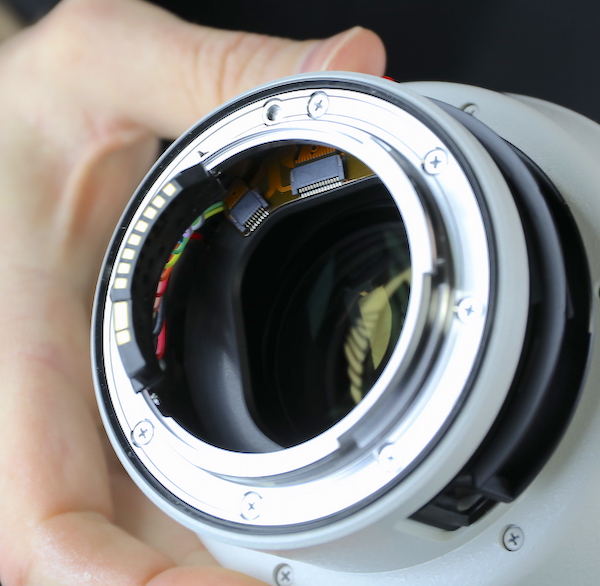
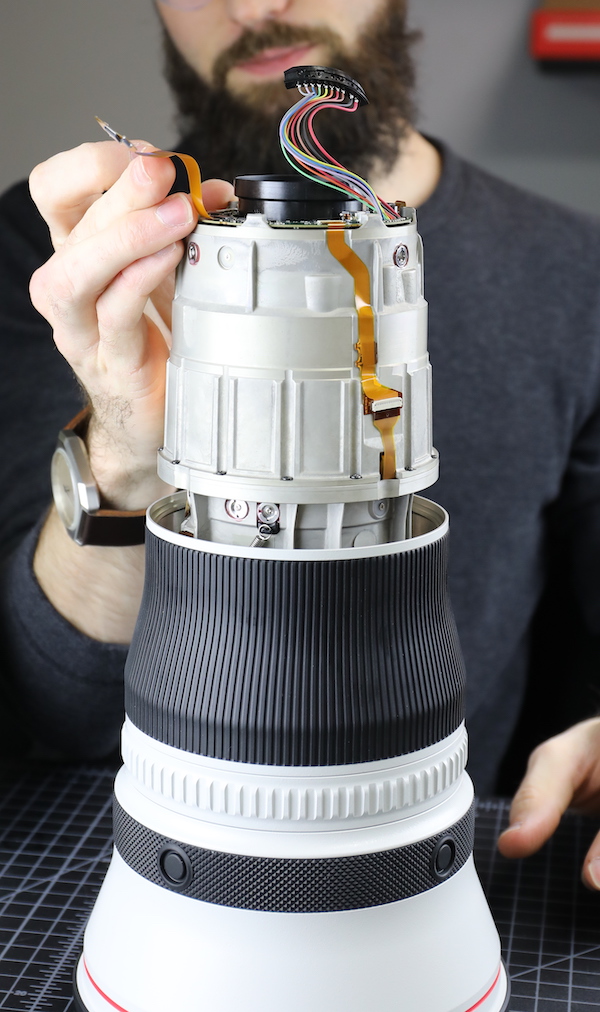
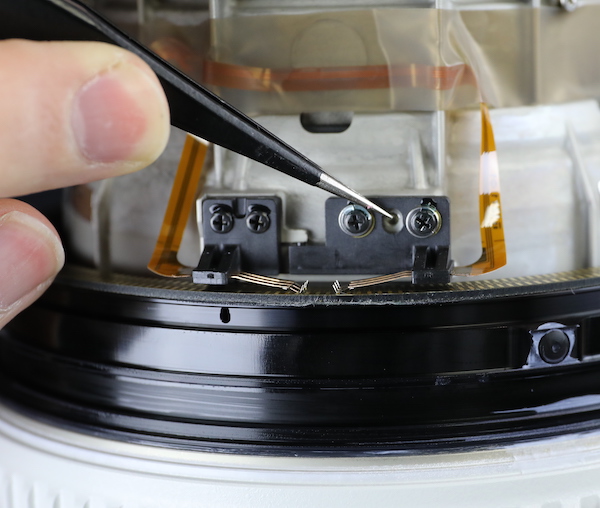
The electrical connectors are detached from the bayonet, and those circuit boards moved so the flexes are away from the barrel and free.
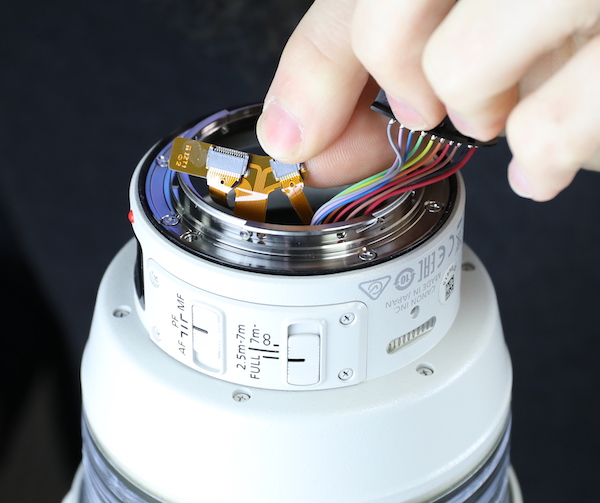
Lensrentals.com, 2018
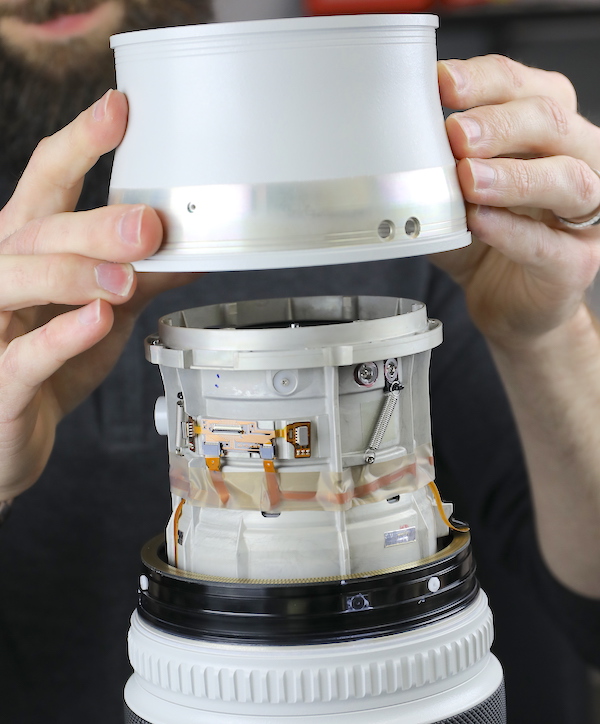
There’s no need to detach the bayonet mount or switch assembly from the rear barrel. The barrel is attached to the inner lens barrel with six large screws.
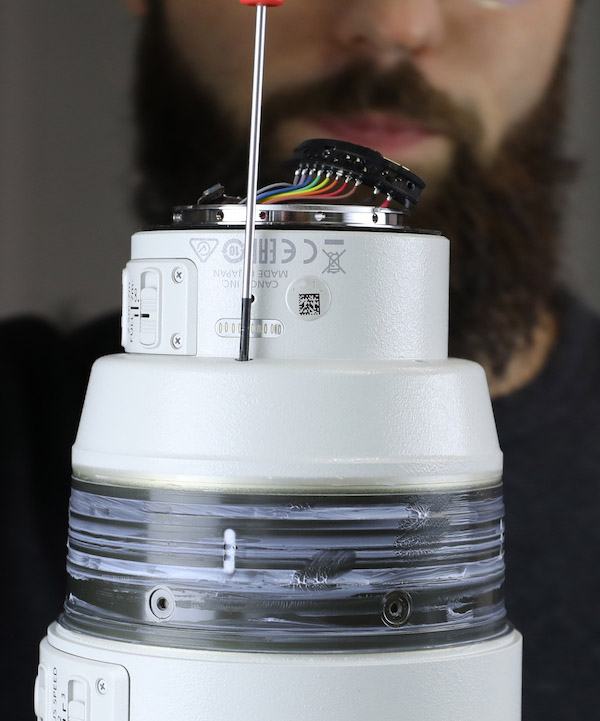
Lensrentals.com 2018
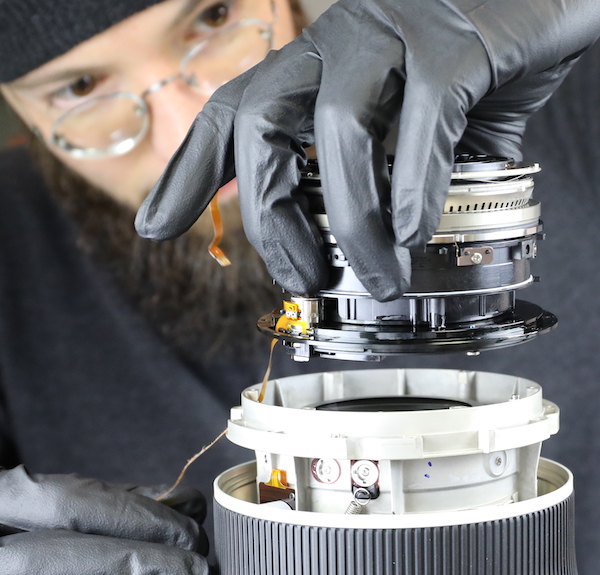
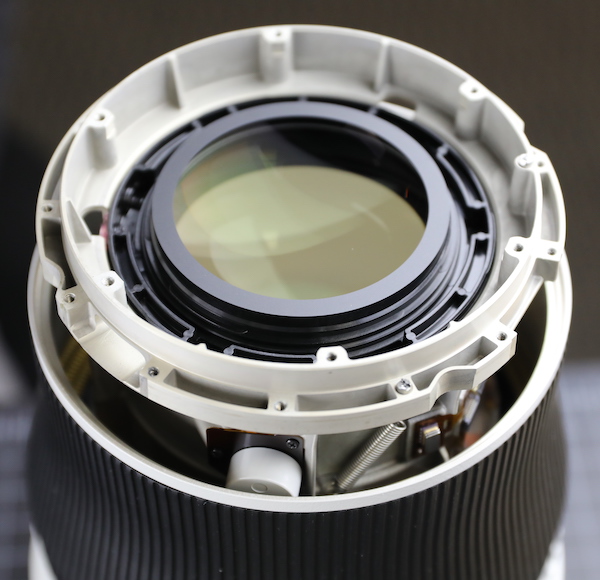
After those are removed, the rear outer barrel slides up off of the lens assembly.
Lensrentals.com, 2018
The lens is lightweight, but the inner, weight-bearing barrel is very sturdy magnesium alloy.
Lensrentals.com, 2018
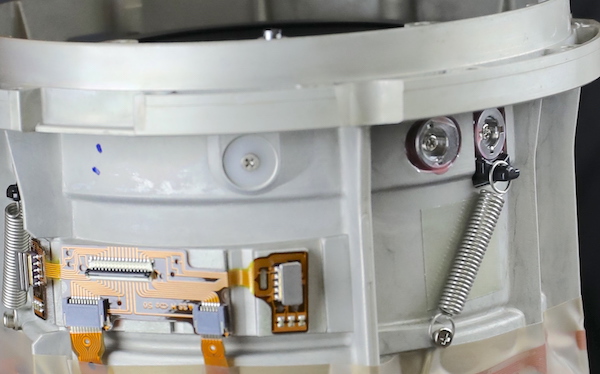
Already we see adjustable elements in two places. The first is just in front of the rear group. (The rear group you see poking up through the PCB is not adjustable.)
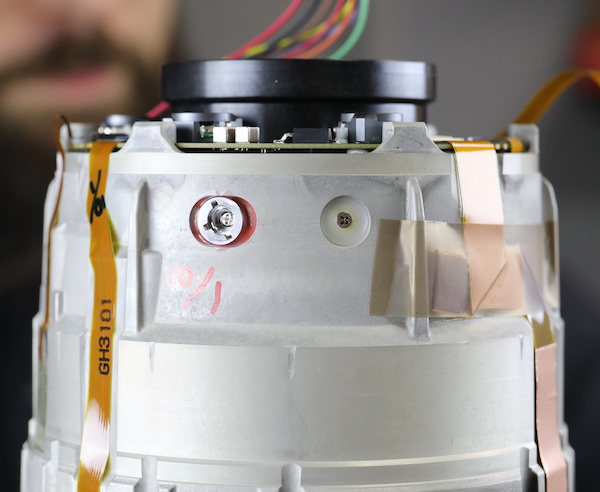
Lensrentals.com, 2018
And another set of eccentric collars near where the two barrel halves join. A couple of interesting things are in this image. First, you see the two barrel halves are joined without shimming and held tightly together with 12 large screws – it’s a very strong joint with interlocking pieces. Also, as we saw with the RF 50mm f1.2 tear down, there are springs going down to the focusing ring, we assumed to put tension on a ball bearing ring for a smooth focusing feel in this electronically focused lens. We assumed wrong.
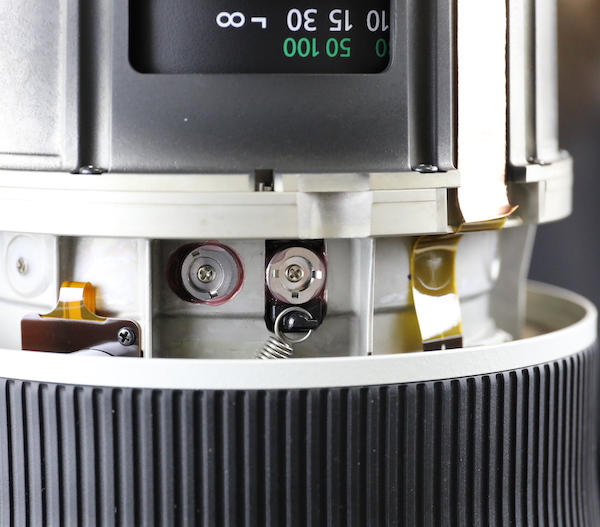
Lensrentals.com, 2018
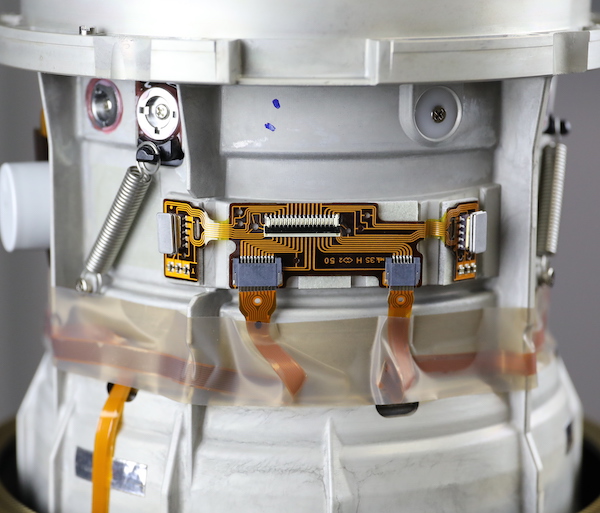
A quick view of the main PCB in place.
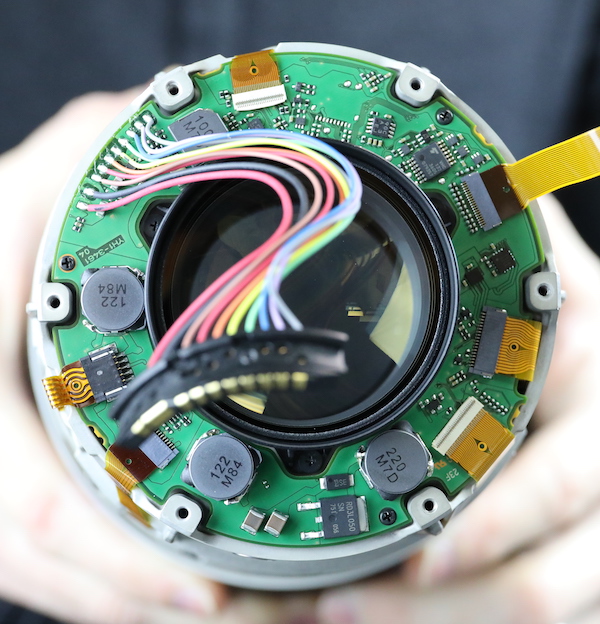
Lensrentals.com, 2018
Before Aaron takes it out of place.
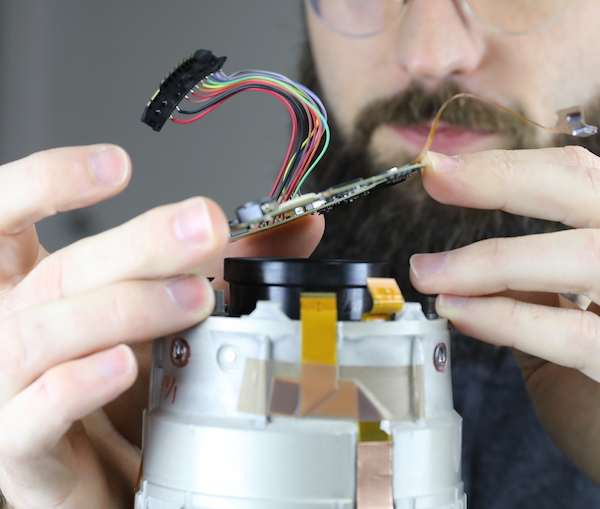
Lensrentals.com, 2018
Next, we detached the flex connectors around the barrel and take out the 12 screws joining the two halves.
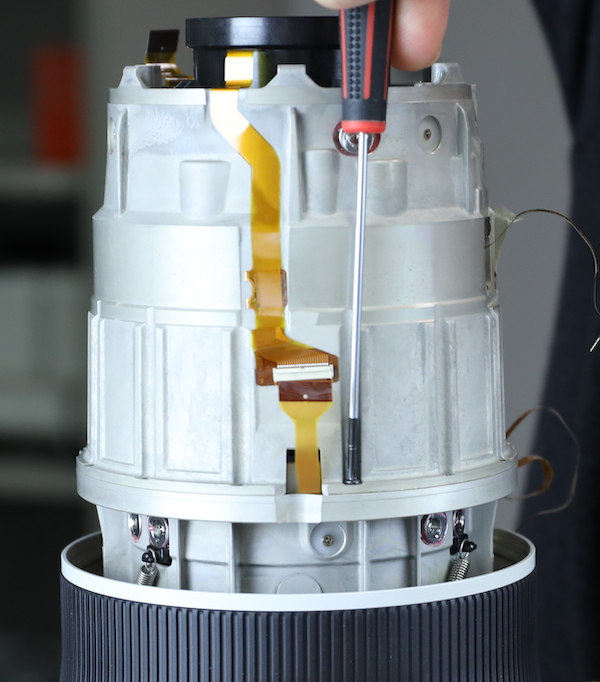
Lensrentals.com, 2018
Yes, 12 screws. I meant what I said about Canon engineering for strength.
Lensrentals.com, 2018
With those out the barrel comes apart.
Lensrentals.com, 2018
Looking up into the upper half of the barrel we see the IS unit. This is what those rear eccentric collars adjust. It amazes me that people consistently believe stabilizers work on the principle of ‘and then magic happens’. They are optical elements that have to be corrected for tilt and centering like other critical parts of the lens’ optics.
Lensrentals.com, 2018
An angled view gives you a better idea of how large this IS unit is, it’s close to 2 cm thick, filled with electromagnets, springs and sensor inputs. And optical elements. Did I mention that stabilizers are optics?
Lensrentals.com, 2018
Looking at the front half of the lens, we see the focus USM motor sitting proudly atop everything. It is, to all appearances, exactly the same motor we saw in the RF 50mm f/1.2 lens, with the same Tensioning Spring of Unknown Purpose along the side.
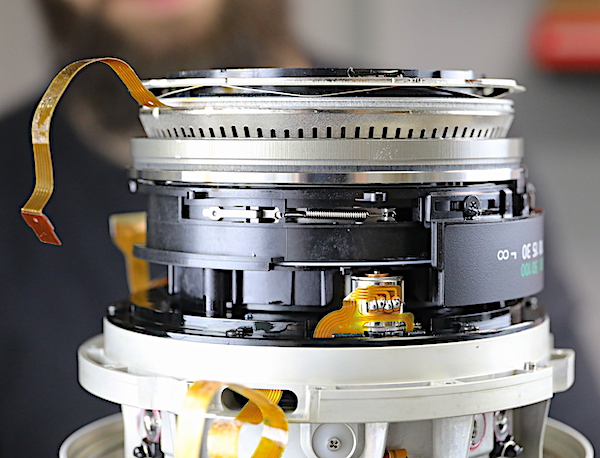
Lensrentals.com, 2018
This is really interesting information, that the same motor and electronic focusing system is used in both lenses. Of course, the 50mm has a lot of glass to move around so it makes sense that it gets a big-boy motor. But both of these lenses are high precision focus-by-wire focusing systems. Both have the same spring tensioning system and position sensors in the focus barrel.
Obviously, there is a business advantage in using the same subsystem in several lenses. But putting the same electronic focusing system in this EF lens makes me think that going forward Canon lenses may have a lot of internal similarity in either RF or EF mount. Converting the Canon 400mm f/2.8 to an RF wouldn’t be quite as simple as a different rear element and an RF bayonet mount, of course. The additional electronics for the RF Control Ring would have to be stuffed in here and probably some optical tweaks made, but the core structure could be very similar.
Looking around some more, we start to see this is really the electronics barrel, not just the focusing motor. The aperture assembly and motor are here.
Lensrentals.com, 2018
There are focusing position sensors mounted underneath the ring assembly, too.
Lensrentals.com, 2018
And a number of lens elements inside the motor assembly. Not surprising, since Canon let us know they had moved the glass further back in the lens, as much as was possible.
Lensrentals.com, 2018
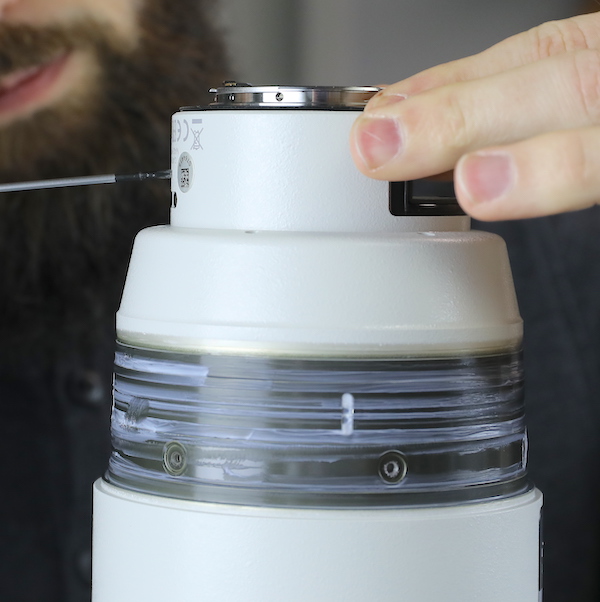
Getting back to our disassembly, we have to take off the distance scale just because it’s in the way.
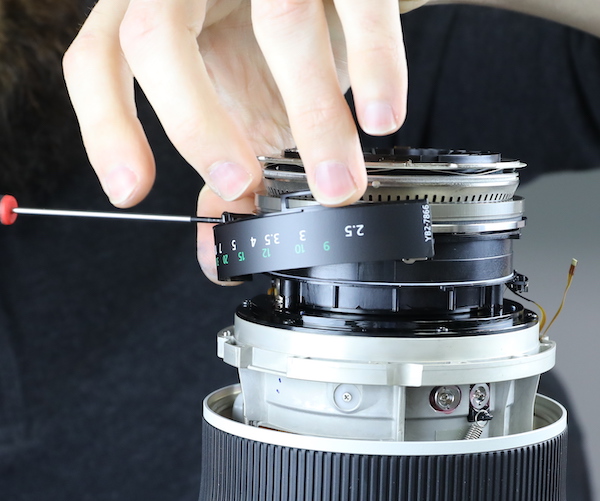
Lensrentals.com, 2018
Then we can remove the screws holding the focus assembly onto the front of the lens. Just six smaller screws here, since this is not a load bearing assembly.
Lensrentals.com, 2018
The entire module with focus motor and elements along with the aperture comes off as a single part.
Lensrentals.com, 2018
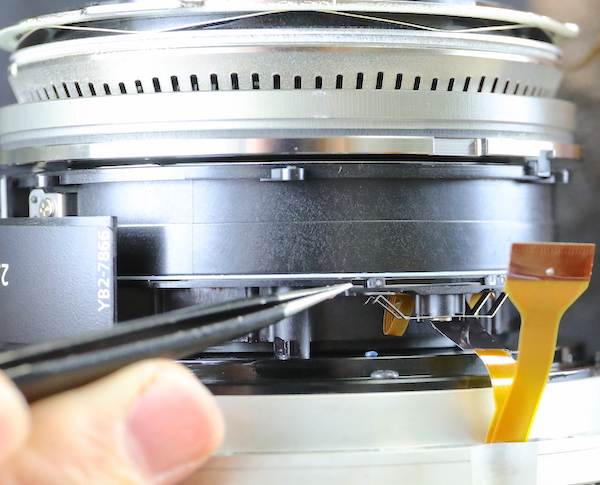
The long, winding flex to the aperture assembly is just begging to be torn, hence Aaron’s unusual degree of concentration.
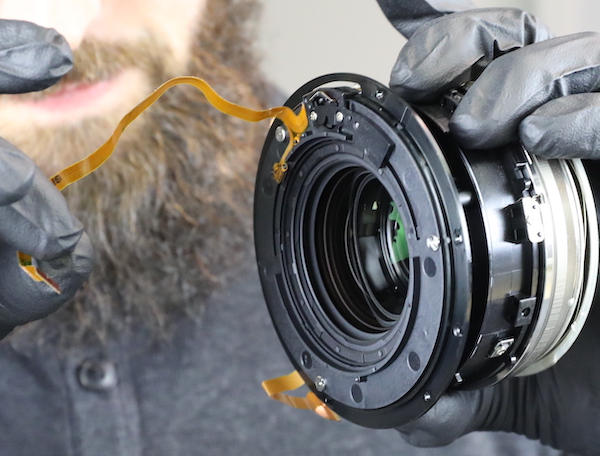
Lensrentals.com, 2018
The aperture assembly could be easily removed from the focusing portion of this part. It’s held in by three screws and obviously has its own electrical connections. But we really see no reason to take it off.
Lensrentals.com, 2018
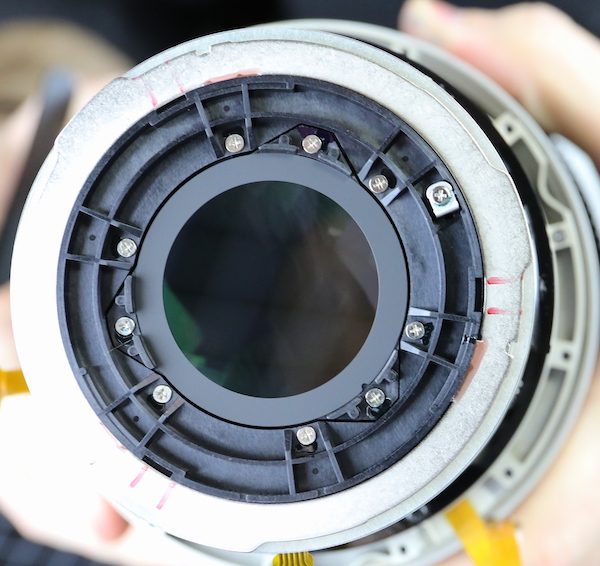
As expected, the lens has a nice, nearly circular aperture ring. The flex/sensor on the right side reads home position for wide open.
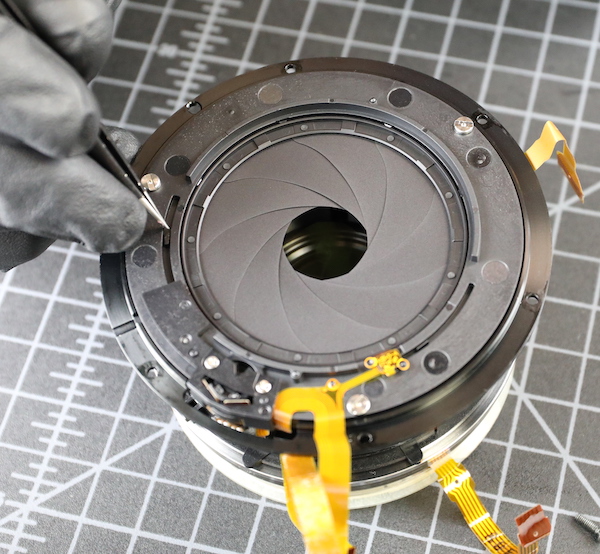
Lensrentals.com, 2018
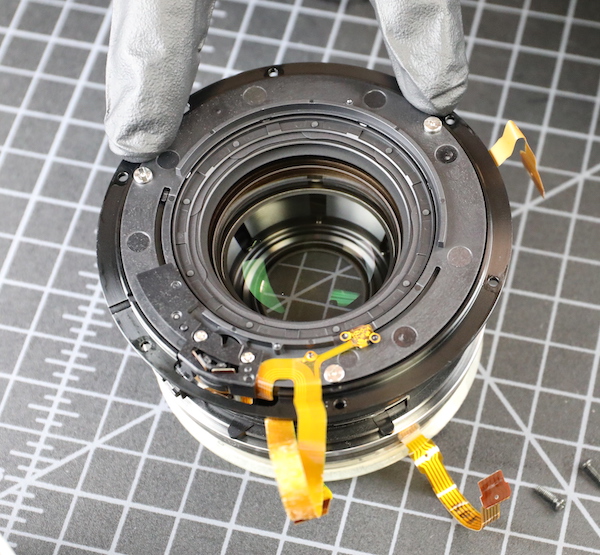
Looking towards the front of the lens we can see a good-sized fixed group. We can also peak down inside the focus ring where springs and rollers and such are apparent.
Lensrentals.com, 2018
From the side, we can see that this is yet another adjustable element, with large eccentric collars in pairs to adjust centering and tilt.
Lensrentals.com, 2018
The focus rubber does not come up without a fight, it’s accurately molded to the underlying ring.
Lensrentals.com, 2018
Once it has been removed, we can see the nylon posts that hold the outer focusing barrel to the inner barrel.
Lensrentals.com, 2018
There are two small flat-head screws, too.
Lensrentals.com, 2018
The posts are pretty snuggly popped into place and have to be plucked out.
Lensrentals.com, 2018
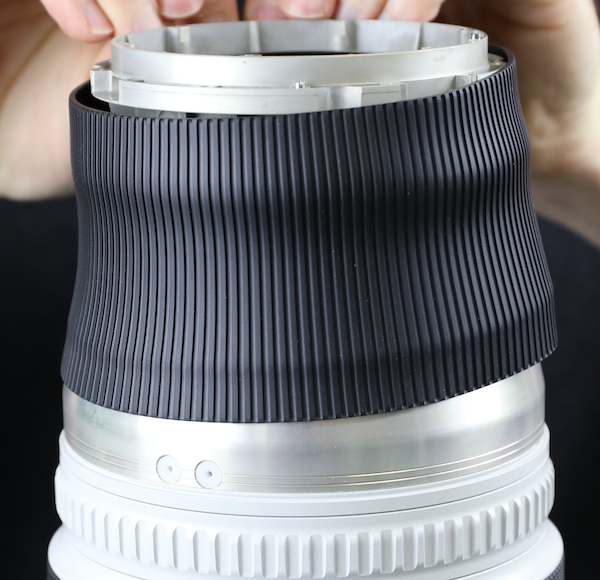
Once all the screws and posts have been removed, we can slide the outer focusing barrel off of the lens.
Lensrentals.com, 2018
Now we get a good look at the springs and adjustable eccentrics. And then spent about 20 minutes trying to figure out how it all works, because it just wasn’t what we expected. You can see above that the spring we thought might tension the focusing ring actually moves from that adjustable element to a post on the side of the inner barrel. There are three sets of post-eccentric-spring eccentric around this element.
Lensrentals.com, 2018
As best we can determine, the spring tension pulls the element toward the front of the lens. (To be clear, this isn’t an element that moves; it stays in one place. The eccentric at the spring adjust lens centering and the other eccentric adjusts tilt (and therefore moves the element against the spring’s resistance). We do not know why this is a better way than simply rotating an eccentric collar in a slot but we’ve seen it on a couple of Canon lenses recently.
Our best guess is it either allows a greater range of movement or works better with the separate glued in post. Actually, that’s Aaron’s guess. My guess is they just do it to confuse me. If that’s the case, they have succeeded. But one day we’ll spend 4 or 5 hours playing with them and figure it out. But don’t tell Canon that; they get aggravated when we do void-the-warranty stuff. Oh, wait, we already voided the warranty back when we first opened it up.
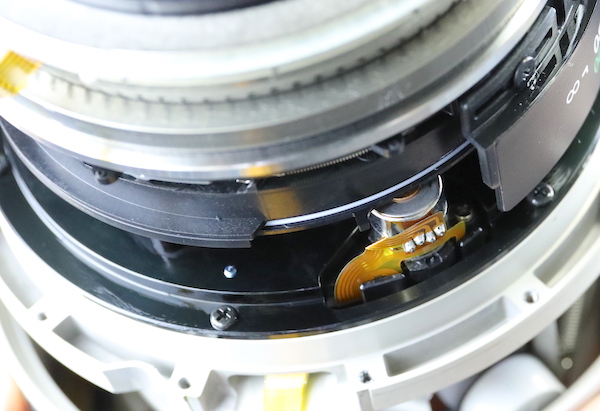
A couple of other sensors to show you before we go. Down at the bottom, there is an electrical brush sensor on the focusing ring. Why electrical rather than optical? Probably it has something to do with the large size of the ring, and perhaps because it may be a directional sensor.
Lensrentals.com, 2018
This is, like most electrical brush sensors, calibrated by slightly moving the sensor in relation to the ring and then fixing it in the proper position.
Lensrentals.com, 2018
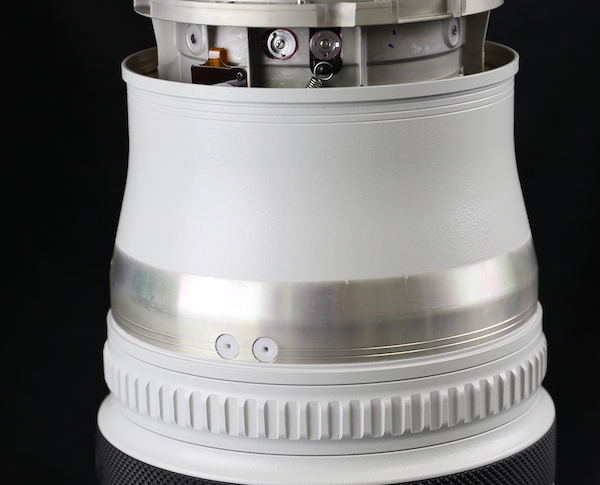
On the other side of the front barrel are some IS motion sensors.
Lensrentals.com, 2018
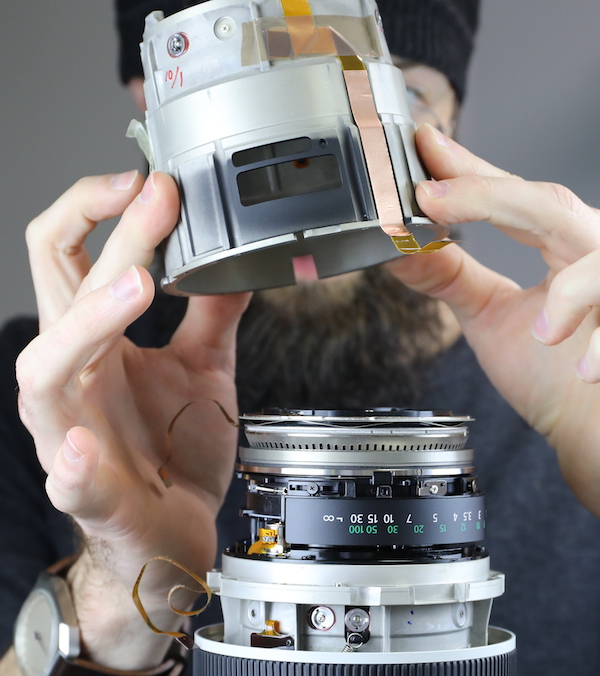
Further disassembly, honestly, would mostly show you air and a big front element; Canon did a marvelous job of moving most of the glass back towards the camera, which makes the lens feel even lighter than it is. So we’ll call our disassembly done at this point.
So What Did We Learn Today?
Some things we were already aware of or assuming. The lens elements are moved towards the mount side of the lens. There are lots of optical adjustments like all Canon lenses. Despite being far lighter, it’s still very solidly built with a very strong frame, tons of big screws holding everything together, and no weak joints that we can see. It’s what we expected; Canon’s been building super telephotos for a long time.
There were some other, more interesting things. The spring-loaded adjustable collar collection is something of a mystery to us and will remain so until we can spend some days doing optical adjustments on one. The use of the same motor as the RF lens is very interesting in several ways. Only some more tear downs will tell us if this is just a superior motor type that Canon is going to use in all electrically focused lenses (I suspect this is probably the case), or just in lenses with a lot of glass in the focusing element (another likely thing).
Canon has really been very quiet about this lens, despite the known changes inside. I had a lot of trouble finding out which elements are fluorite (two of them are, apparently). There has been some talk about improved focusing speed and accuracy, which I assume has something to do with the new electronic focus system, but not much. But even if the marketing is simply ‘as good as before and 25% lighter’ that should be plenty to make this lens, and it’s 600mm sibling, very popular. Well, you know, super telephoto very popular.
Probably the more interesting teardown will be comparing this one to the Sony 400mm f/2.8 G lens. Hopefully, it is awesome and for once the Sonyfans* won’t line up 6 deep to explain how what I find is wrong again.
Roger Cicala and Aaron Closz
Lensrentals.com
December, 2018
Puritanism: The haunting fear that someone, somewhere, may be happy. H. L. Mencken, 1917
*Sonyfanism: The haunting fear that someone, somewhere, may be happy with other equipment. Roger Cicala, 2018
Author: Roger Cicala
I’m Roger and I am the founder of Lensrentals.com. Hailed as one of the optic nerds here, I enjoy shooting collimated light through 30X microscope objectives in my spare time. When I do take real pictures I like using something different: a Medium format, or Pentax K1, or a Sony RX1R.
-
David Cockey
-
Roger Cicala
-
Roger Cicala
-
Nick Podrebarac
-
Nick Podrebarac
-
Scott
-
entoman
-
David Cockey
-
HF
-
Renaud Saada
-
DrJon
-
DrJon
-
Fillkay
-
Roger Cicala
-
Roger Cicala
-
Mike
-
Lacknafta
-
thelastredshirt
-
Sarah Müller
-
Mel Gross
-
Tomáš Andraš?ík
-
entoman
-
Ross McLendon
-
Roger Cicala
-
Sarah Müller
-
Baconator
-
Baconator
-
Thom Hogan
-
Thom Hogan
-
Roger Cicala
