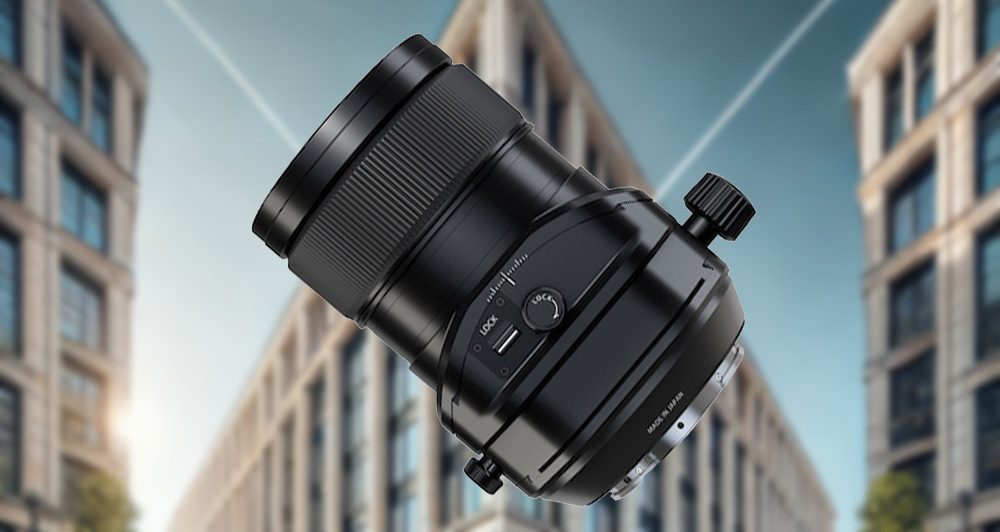
I’ve had a Fujifilm 30mm GF f/5.6 tilt/shift lens on loan from Lensrentals for about three weeks, and I’ve done the basic testing. I had hoped to get some time using the lens the way it was intended, but testing this complex lens turned out to take all the time I’d allotted to the task. I will first address mechanical and usage aspects, then optical performance, and finally, some advice on how to handle tilt.
This is a big (105mm filter), heavy (three pound), slow-to-operate lens. It has no autofocus. It is difficult to use when not mounted to a tripod. What reasons besides contrariness and masochism would a sane photographer use a lens like this? The most common reasons are to eliminate unwanted converging features and to put the focal plane in other places besides perpendicular to the lens axis.
Say you’re taking a picture of a building from street level, and you must tilt the camera up to get it all in. With a normal lens, the sides of the building at the top of the picture will be closer together than at the bottom of the image, making the building look like it’s falling over backward.

To eliminate the converging verticals with a tilt/shift lens, zero the tilt adjustment, put the camera on a tripod with the lens axis horizontal, and shift the lens upwards with respect to the sensor until the top of the building hooves into sight.

Simple, and you can see the finished image in the camera’s finder. This is a more elegant solution to the problem than correcting the perspective in postproduction.
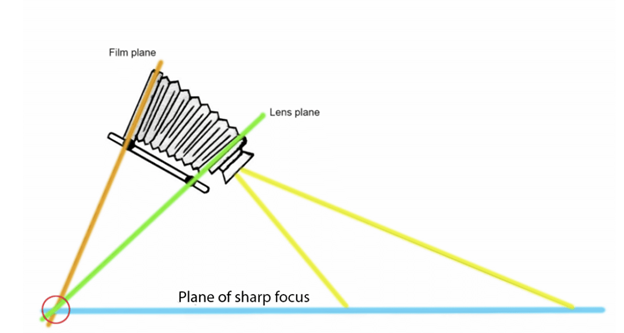
Here’s another common situation. You’re making a landscape image of a field with a prominent foreground element. You want both the foreground and the background in focus. You could use focus stacking if there’s no subject motion. You could stop way down and accept the diffraction penalty. Or you could tilt the top of the lens down a bit while leaving the sensor in the same place until the focal plane passes through both the foreground and background elements.
The above is just the beginnings of what a lens like this can do. Using it well takes care, knowledge, and planning, but you can achieve effects not possible with conventional lenses.
The 30 GF T/S lens allows up to 15 mm of shift in any direction, and up to 8.5 degrees of tilt, also in any direction. Control of the shift and tilt directions interacts, but it is possible to adjust them independently. Thus, this lens is more versatile than many tilt/shift lenses. The lens comes with a tripod-footed rotating collar. If you attach the collar to the tripod, the tilt control inclines the sensor to the scene and leaves the lens axis alone. If you attach the camera body to the tripod, the tilt control affects the lens axis, but not the angle of the sensor to the subject. It’s the same with shift.
There are indices for both tilt and shift on the lens. Tilt is marked with a hash mark for each degree of angular change. That’s pretty crude for setting tilt via calculations. I would like it better if there were a vernier so that tilt could be set more precisely.
There are two ways of talking about adjusting a T/S lens. For those with no view camera experience, it’s natural to discuss the amount of shift and the direction of the shift, as well as the amount of tilt and the direction of the tilt. View camera users employ different terminology: tilt means moving the lens axis or sensor plane up and down, while swing is used to discuss moving those things from side to side.
It can be confusing, but I’d advise any serious practitioner of this kind of photography to learn both sets of terminology, even if they never intend to use a view camera or technical camera. Understanding the view camera argot will allow you to read classical books on photography and benefit from the lessons therein.
If you are familiar with the way photographers talk about view cameras, here’s an analysis of what you can do with the 30 T/S. It can emulate any two, and in some cases, even more, of the standard view camera movements. I’ll go through the common view camera movements and explain how to achieve these with the Fuji T/S lens.
- Front rise and fall. Mount the camera body to the tripod. Rotate the shift axis so that the shift is vertical.
- Front left and right shift. Mount the camera body to the tripod. Rotate the shift axis so that the shift is horizontal.
- Front rise and fall combined with front left and right shift. Mount the camera body to the tripod. Rotate the shift axis so that the shift direction is at the desired angle.
- Front tilt. Mount the camera body to the tripod. Rotate the tilt axis so that the tilt is vertical.
- Front swing. Mount the camera body to the tripod. Rotate the tilt axis so that the tilt is horizontal.
- Front swing combined with front tilt. Mount the camera body to the tripod. Rotate the tilt axis so that the tilt is at the desired angle.
- Rear rise and fall. Mount the lens to the tripod. Rotate the shift axis so that the shift is vertical.
- Rear left and right shift. Mount the lens to the tripod. Rotate the shift axis so that the shift is horizontal.
- Rear rise and fall combined with rear left and right shift. Mount the lens to the tripod. Rotate the shift axis so that the shift direction is at the desired angle.
- Rear tilt. Mount the lens to the tripod. Rotate the tilt axis so that the tilt is vertical.
- Rear swing. Mount the lens to the tripod. Rotate the tilt axis so that the tilt is horizontal.
- Rear swing combined with rear tilt. Mount the lens to the tripod. Rotate the tilt axis so that the tilt is at the desired angle.
It takes more planning to use this tilt/shift lens than it does to operate a view camera. Using a view camera that has symmetric front and back movements, you can achieve the desired results by just manipulating the camera controls, whereas with the T/S lens, you may have to remount the camera and start over again with the movements to achieve what you want. But you can probably get there with this lens.
Locks
When you’re working with a T/S lens, or a view camera for that matter, it is desirable to be able to zero and lock tilt and shift adjustments. The Fuji GF 30/5.6 T/S lens provides locking mechanisms for both. However, on this and any T/S lens, you should not count on the controls being truly zeroed when the lens says that they are. There’s more tolerance for slop in T/S lenses than there is in lenses with no tilting or shifting capabilities. It doesn’t take much tilt to create significant errors in the focal plane. Take a look at this graph.
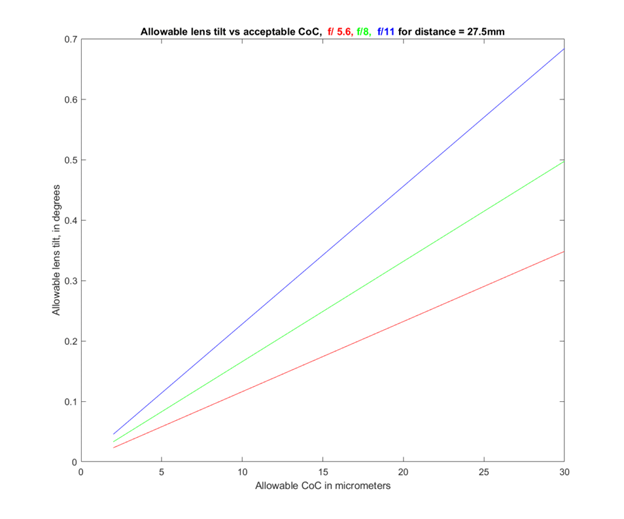
To use the above graph, first decide on how much blur you’re comfortable with. Say you are OK with a circle of confusion (CoC) diameter of 10 micrometers on the sensor. Trace a vertical line above the 10 on the horizontal axis until you come to the f-stop you’re using, and read the vertical axis to see how much inadvertent tilt you can tolerate. For f/5.6, at 10 um CoC, you can have up to a tenth of a degree of inadvertent tilt. The CoC is measured 27.5 mm away from the focus point. If you focus on the center of the image, the CoC is computed at the corners of the 33x44mm format.
If you have a bit of an inadvertent shift, there’s no real harm done. You’ll see the shifted image on your finder, and you can frame the shot properly. However, inadvertent tilt can cause the focal plane that you expect to be parallel to the sensor surface to be oriented differently from that, and things that you might expect to be in focus could be out of focus and vice versa.
That said, the copy of this lens that Lensrentals supplied to me appears to have very little tilt when zeroed and locked, and in most circumstances, I expect the focal plane to be that of a normal lens when the tilt mechanism is locked.
Other Controls
In addition to the hard locks, there are friction locks on both tilt and shift. These are important, because the gearing, especially the shift gearing, has very little friction. In fact, with the shift friction lock completely disengaged, and the shift direction up and down, gravity will provide maximum shift sooner or later. So get used to putting some friction on the locks even when you’re manipulating the controls, if you want the lens to stay where you set it.
If you’re not careful, you can pinch your fingers when the lens changes tilt or shifts. That’s another reason not to disengage the friction lock entirely.
Despite the one-foot minimum focus distance, the focusing control is usefully fine; I had no problem focusing the lens under any conditions.
I’ve discussed the mechanical operation of the Fujifilm 30 mm f/5.6 GF tilt/shift lens. Now, I will summarize its optical performance.
Light falloff
The Fujifilm GF 30/5.6 T/S lens has a very large image circle for such a short focal length. This almost always comes with significant light falloff off axis. I ran some tests. Here’s an averaged set of images made at f/5.6:


Stopping down to f/11 smooths things out somewhat.
To make it harder on the lens, let’s look at what happens with a full 15mm of shift.

Stopping down helps there, too.

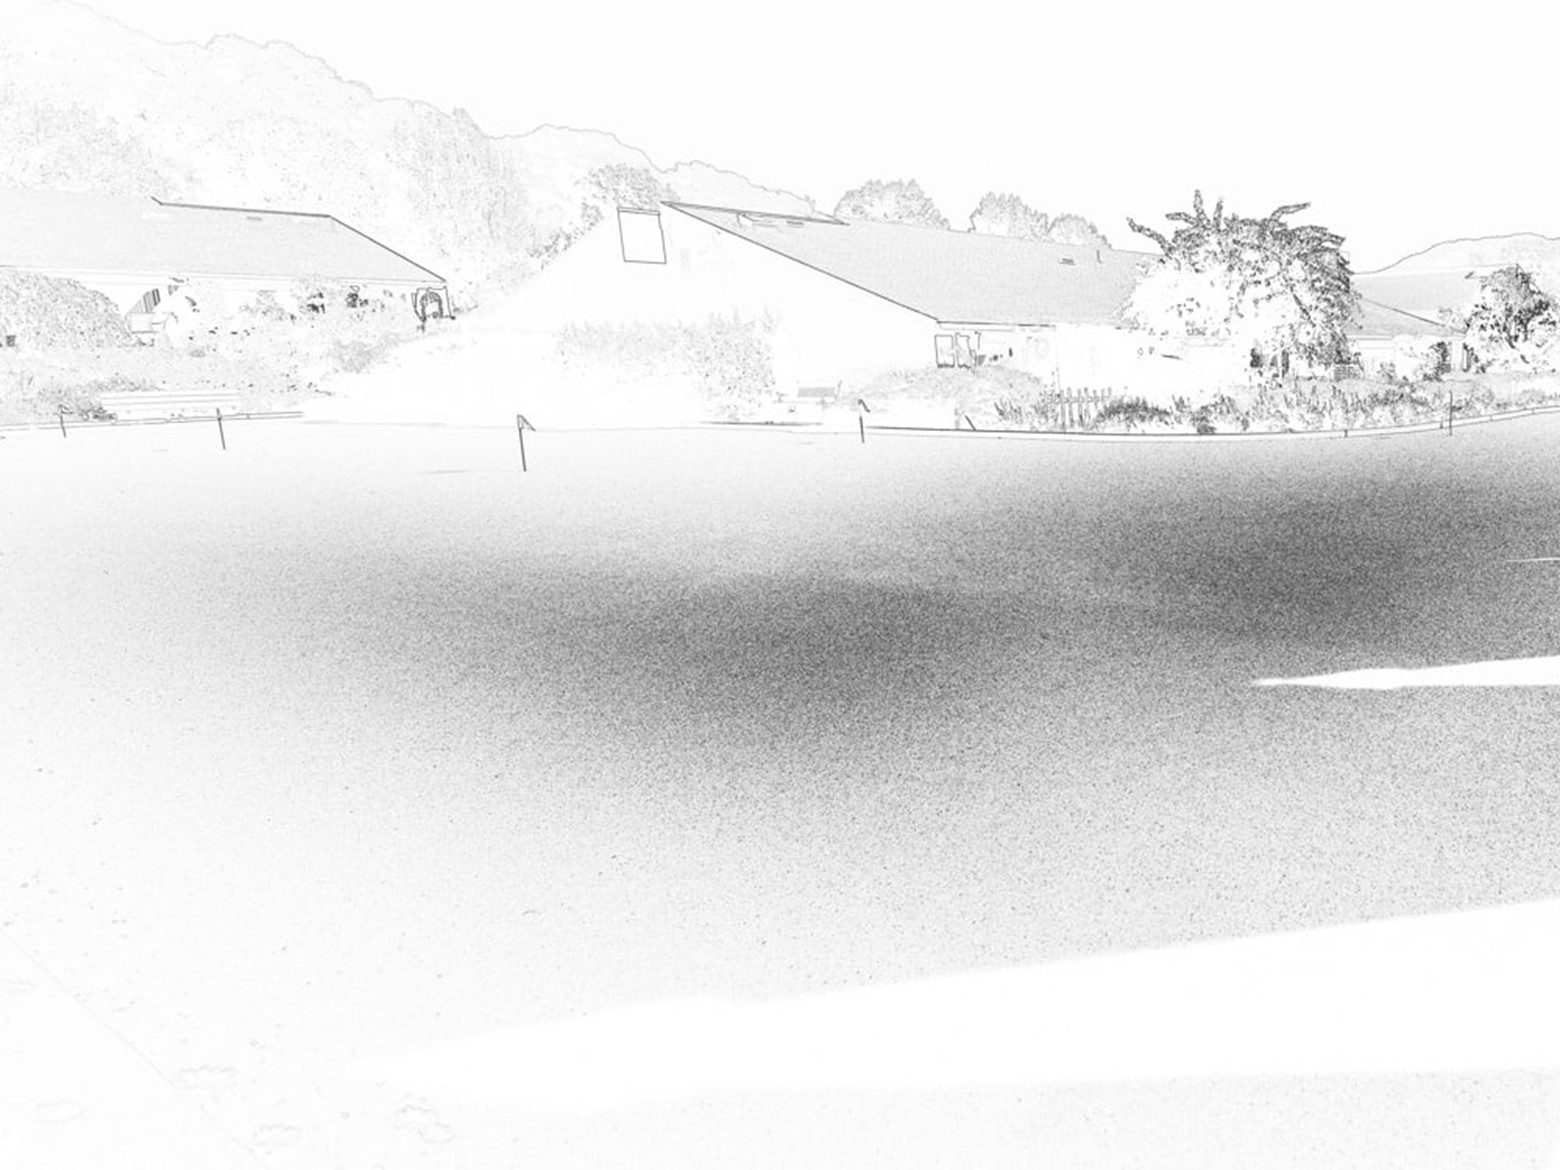
Field curvature
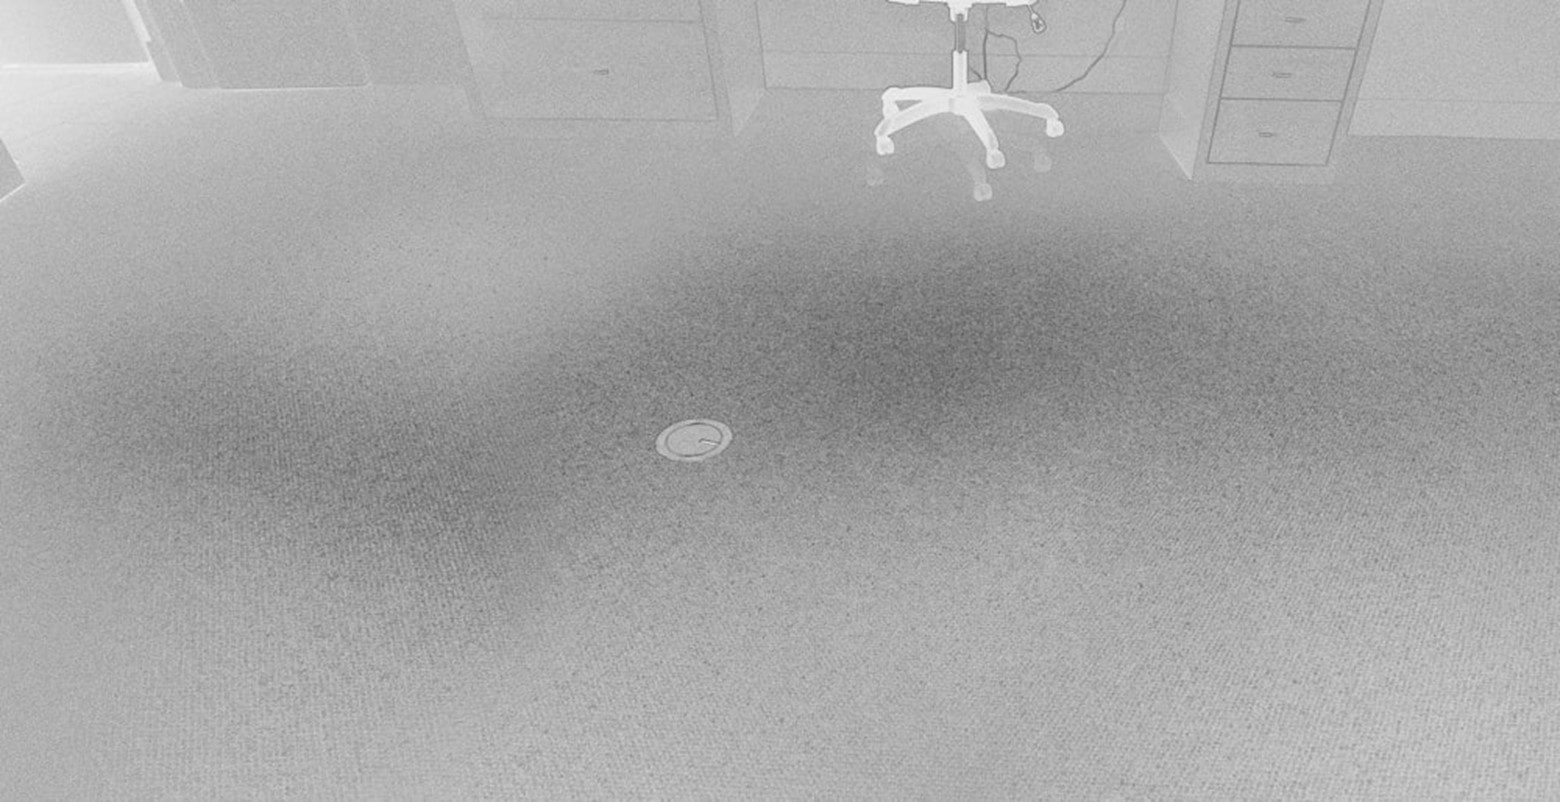
It’s also hard to make short lenses with wide coverage that have flat focal fields. The 30/5.6 T/S has some odd waviness to its focal plane, shown below using the Roger Cicala field curvature test (Photoshop>Filter>Stylize>Find Edges). The images are composites of one-shot made with the shift zeroed out and one with the maximum shift.
Distortion
Like with field curvature and light falloff, it’s hard to make short, wide coverage lenses with low distortion. The GF 30/5.6 T/S lens has a bit of distortion when shifted, but in general is a good performer in this respect.
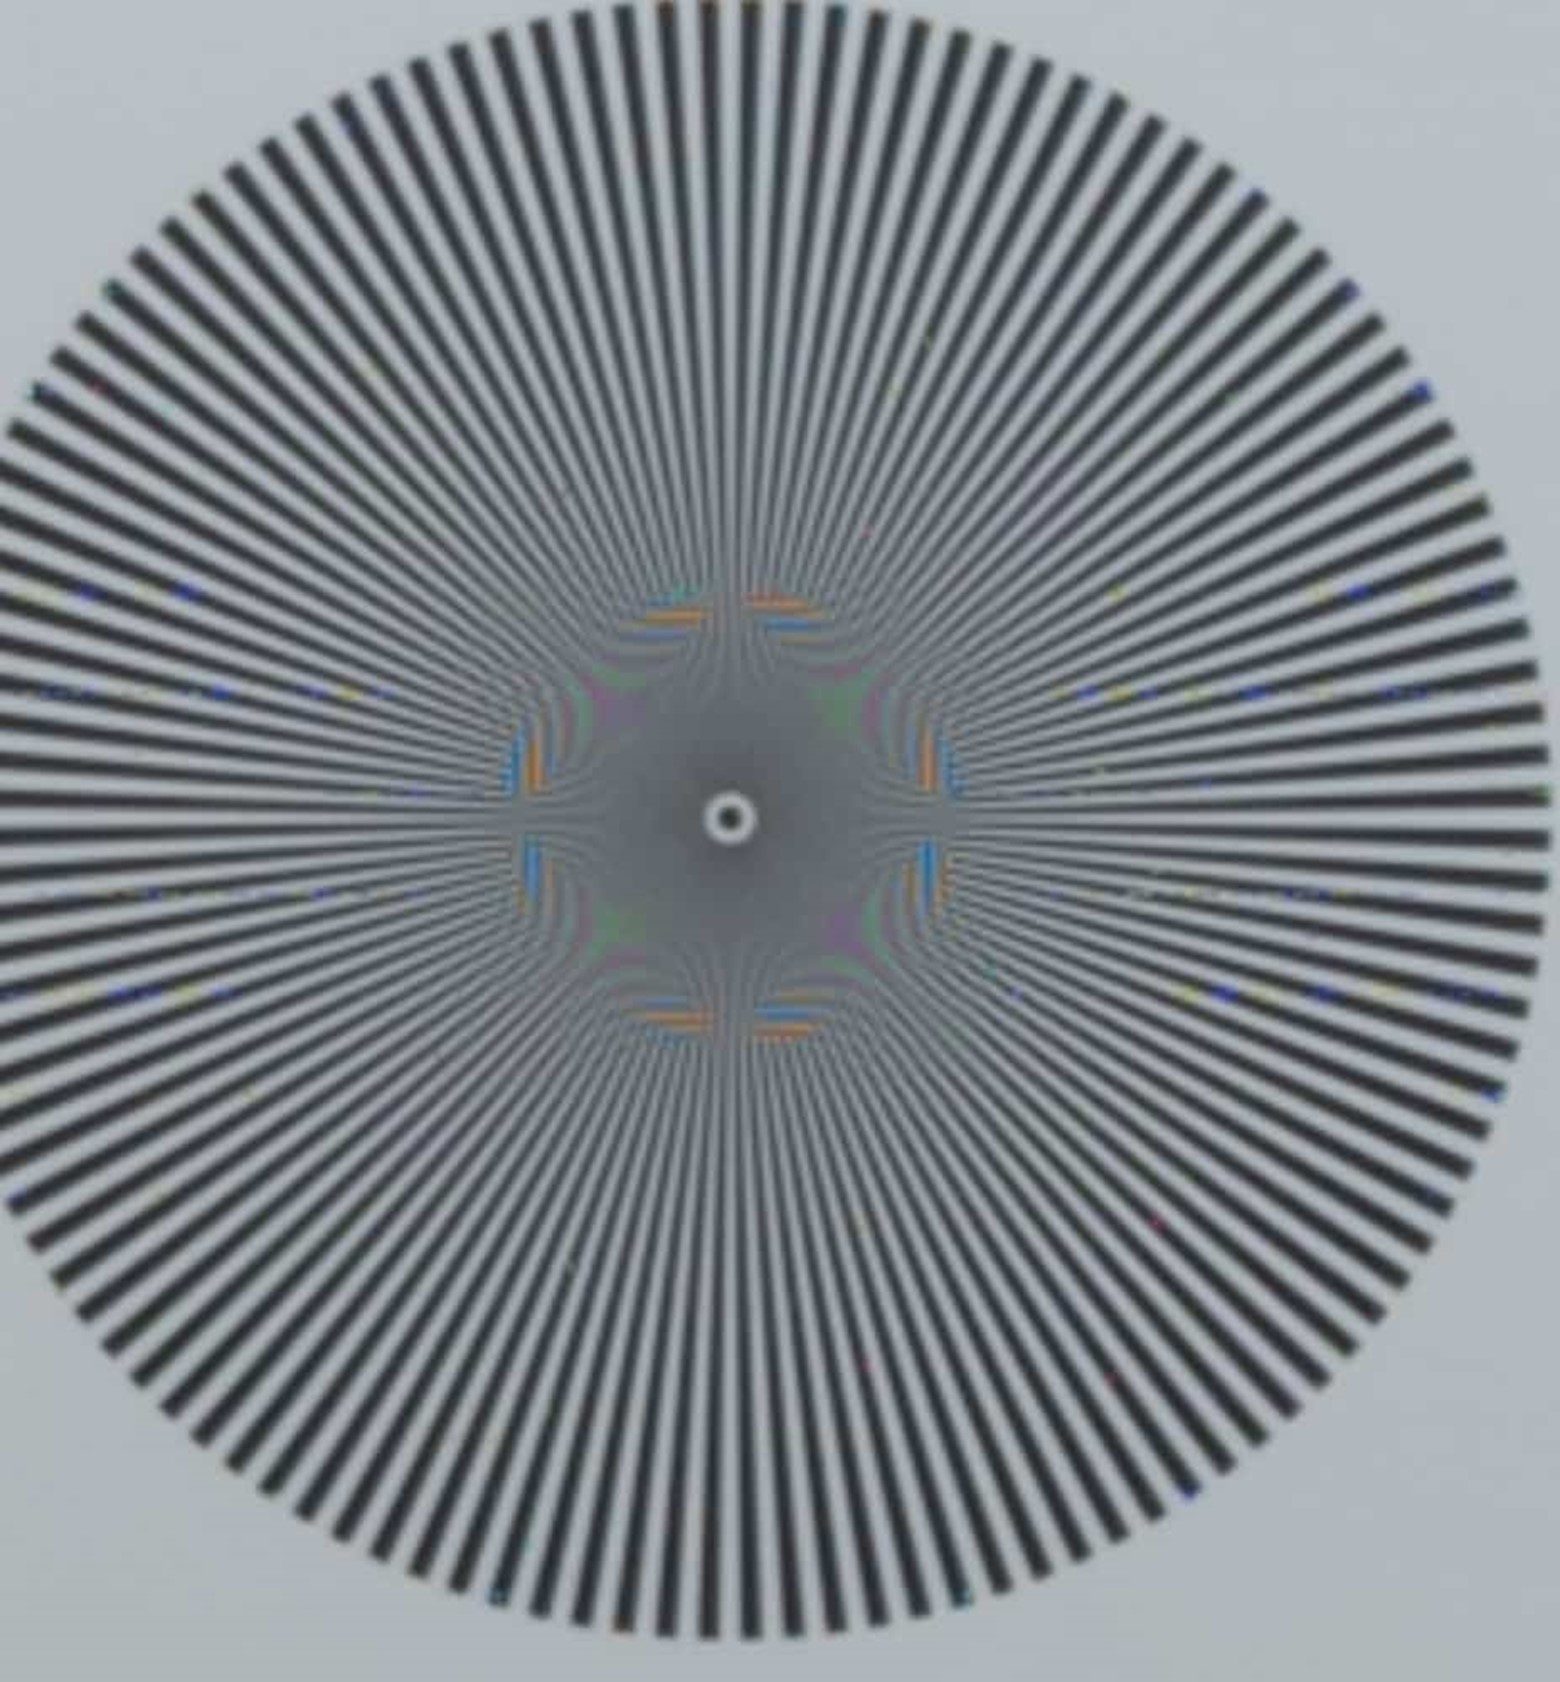
Sharpness
On axis, wide open, this lens is sharp as the proverbial tack.
Stopping down to f/8 provides no significant improvement, and stopping down further reduces sharpness due to diffraction.
Looking at the right edge with no shift also yields good performance and a bit of astigmatism.

Shifting to make the above test more difficult:

It’s still pretty sharp, but there’s more astigmatism. There’s enough astigmatism that when focusing, you need to decide which direction you want to favor.
Let’s look at the edge with maximum shift at f/8:

Not really any better.
Stopping down another whole stop makes things worse.

This is a very impressive lens!
If you have no experience with a tilt-shift lens or a view camera, here’s a short tutorial on how to handle tilt. It’s not about the Fuji 30mm lens in particular but applies to using the GFX cameraswith any tilt-shift lens.
- Examine the scene and decide where you want to place the focal plane. For the purposes of this discussion, let’s imagine that the lens must be tilted down to make the focal plane where you want it.
- Rotate the lens mechanism until the tilt axis is horizontal, so that when you twist the tilt knob, and lens will be tilting up or down.
- Lock the tilt mechanism rotation.
- Decide how much shift you want and in what direction.
- Set up the right amount of shift in the right direction, and lock that down.
- Then pick two places in the intended focal plane, one near to the bottom of the finder, and one near the top of the finder.
- In your mind, associate the top place with either tilt or focus, and the bottom place with the movement you didn’t pick for the top place. For example, associate the top place with tilt, and the bottom place with focus. I’ll assume that choice as I go on.
- Frame the image.
- Using the focus ring and magnified focusing with peaking, focus on the bottom place in the focal plane.
- Using the tilt knob and magnified focusing with peaking, focus on the top place in the focal plane.
- Repeat the two steps immediately above this one until the image is in focus in both places. At first, don’t bother trying to get the focus perfect, but as you iterate, toward the end get more picky. Stop iterating when you are satisfied that both areas are in focus.
- Check the framing again and adjust if necessary.
- Double-check the focus accuracy of the two areas you used above and repeat the iteration if necessary.
- Check a few other places in your intended focal plane to make sure they’re in focus.
- Take the picture.
Don’t get in a rush. At first, this will seem painfully slow. After a while, it will get faster, but let that happen organically with experience.
Erik Kaffehr has come up with a way that is probably faster:
- Decide on the plane of focus.
- Find some object to focus on along the centerline and focus on that using magnified live view.
- Go out of magnified live view and shift to peaking and adjust tilt until I have peaking across the field, preferably at largish aperture.
- Stop down and check important focusing points using magnified live view, possibly with peaking.

4 Comments
Vocaliv ·
Absolutely feel you—creating quizzes and assessments can be a total time sink. What’s helped me a lot is using AI tools that auto-generate quizzes based on your lesson objectives or materials. Some even adjust the difficulty based on how students respond and give instant feedback, which is a game-changer. Plus, combining that with real-time Q&A or lesson plan suggestions makes everything flow smoother. If you want to try something like that, check out this feature page I found super useful: https://vocaliv.com/assessments-quizzes . Definitely saved me hours!
Ab Ark Private Limited ·
Want AI agents that really get things done—like automating responses, scheduling, or managing real-time Q&A? Those game-changing features are powerful, but only if your team knows how to build them right. When I needed help fast, finding developers who could craft intelligent assistants saved me weeks of trial and error.
Here’s a resource I found handy: https://www.abark.tech/services/ai-agents . It helped me connect with engineers who deliver robust AI agent solutions—ready to go from day one.
Ab Ark Private Limited ·
Scaling up without the hiring chaos? Been there. Bringing on a pre-vetted, dedicated team was a total game-changer—members arrived in sync, understood each other’s flow, and clicked right into our development sprints.
If you're looking to expand quickly and smoothly, this might be your shortcut:
Hire Dedicated Teams
Horshack ·
I went online hoping for a decent review of this lens but wasn't expecting much since it's so niche. When this link came up and I saw it was written by Jim I clicked faster than a mouse pounding on a sugar-water lever in a serotonin experiment. Incredible review Jim, thanks for taking the time to test and share your thoughts.