Equipment
How to Use AF Microadjustment on Your Camera
The most common questions and complaints I hear almost always have to do with AF accuracy, in one way or another, even if they don’t seem like it at first. “I’m trying to focus on this person’s eyes, but the ears are in focus instead,” or, “This lens is front focusing like crazy,” or, “This fast aperture prime was soft the whole time I used it.” Roger has written some rather lengthy, detailed posts about how phase-detection AF works (phase detection being the kind you use on a dSLR in normal, everyday shooting) so I won’t go into a full explanation here. But the gist of his articles is basically this: phase-detection AF isn’t always that accurate. Here’s some light reading, if you feel so inclined:
Why You Can’t Optically Test Your Lens with Autofocus
Autofocus Reality, part 1: Center Point Single Shot Accuracy
That last link is the first in a 4 part series, but right there in that first part is a really good example of what AF microadjustment can do. You can read that if you like technical stuff, but I’m about to summarize it in the next paragraph.
So what is it and why is it necessary?
Lenses and cameras are made to certain specifications, and those specs fall within a narrow range of tolerances. Because of the way phase-detection AF works and how it relies on physical calibration for accuracy, if lens and camera tolerances stack up in one direction or another and things are off by minute amounts, then you might see consistent front or back focusing with that particular lens and camera combination. It’s important to know that this front or back focusing is a combination specific issue. You can take 20 copies of the same lens and test them on one camera body, and you might find that most of them are pretty close to dead on, one or two will probably front focus varying amounts, and one or two more will back focus varying amounts. You could then take those same 20 lenses and test them on a different camera body and get completely different results. This doesn’t mean the lenses or the cameras are broken. They just need adjustment, and this is something you can probably do yourself in camera.
How do I do it?
The procedure for making the necessary adjustments is pretty simple, and it’s the basically same across camera brands. Here’s a list of things you’ll need:
- Camera
- Lens or lenses to be adjusted
- Tripod
- Focusing target
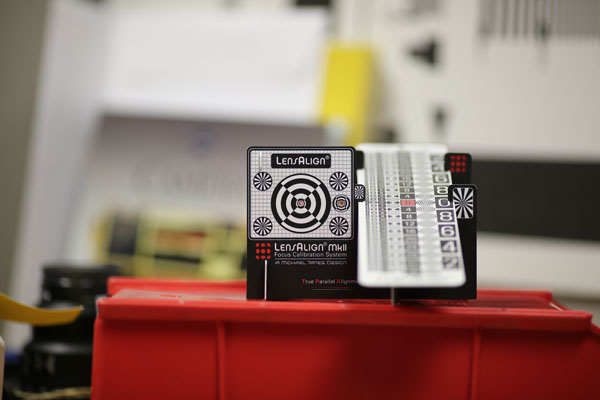
The target can be something as fancy as a LensAlign, or as simple as a book and a yardstick. All you really need is something with a high contrast, flat face you can stand parallel to the sensor plane, and something next to it that will give you a scale to provide a gauge for the plane of focus.
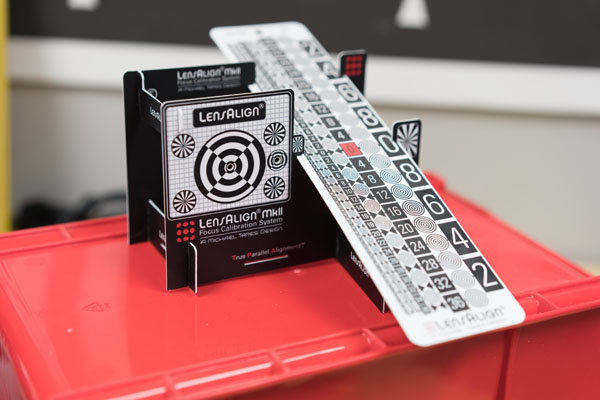
This is a LensAlign.
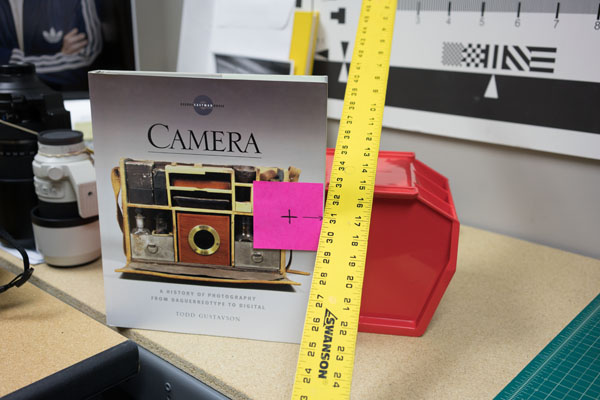
This is how you do it on the cheap.
Once you have your target, get your camera set up on a tripod and have it level with your target. If you’re using a LensAlign, there are holes in the front face of the target that line up with red circles on the panel behind. If you’re using the book method, try to get the book and sensor plane as parallel as you can.
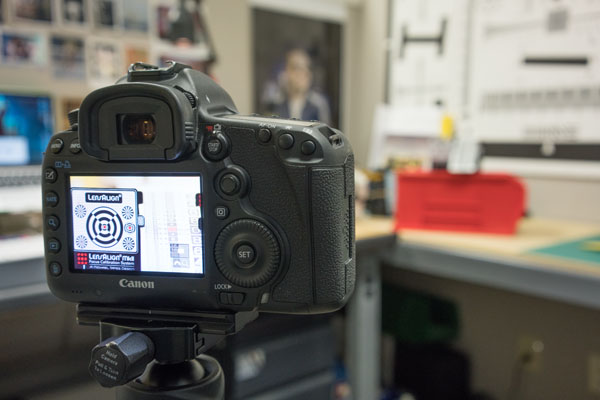
Here's a 5D Mark III on my trusty tripod, with the image review zoomed in to check accuracy.
Then line up your camera, initiate AF and take a shot. Make sure you’re using the center focus point for this. Using outer points can create all sorts of problems if the lens you’re calibrating has any field curvature. I like to focus, take a shot, rotate the focus ring, refocus, take another shot, repeat a few times to gauge consistency.

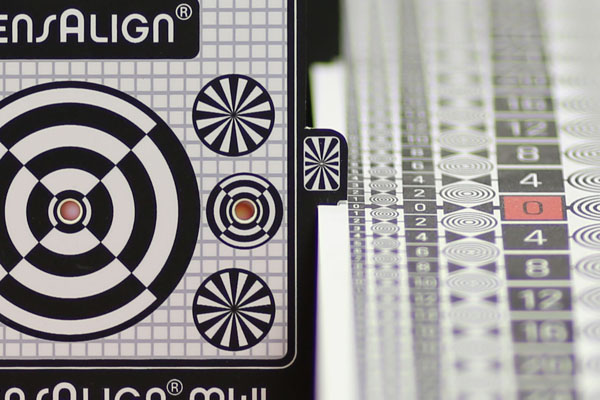
Your test shots will look like this.
Zooming in to the image in camera let’s us see how accurate this lens/camera combination is.

Zoom way in there to really see how accurate focus is.
Look at that! This Canon 135mm f/2L is spot on! But they aren’t always like that. Let’s try another copy.

Another 135, another test shot.

And this one ain't doin' so good.
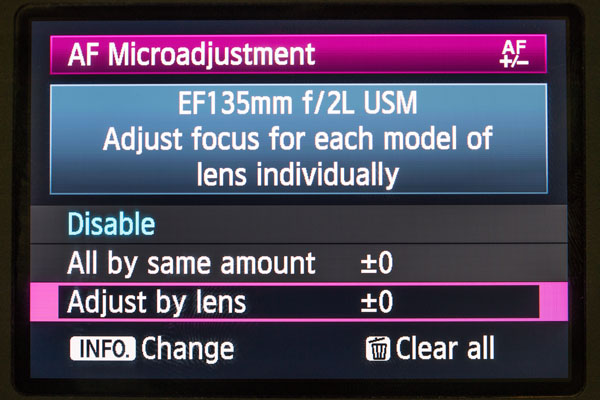
This copy is front focusing on this camera body. Look at the smaller numbers to see the difference. Should be pretty easy to adjust. First go into the adjustment menu. On Canon it’s called AF Microadjustment. On Nikon, it’s AF Fine Tune. On most other camera systems it’s called microadjustment as well. Nikon just likes to be fancy, I suppose.

This is what it looks like on the Canon 5D Mark III. Your mileage may vary.
You’ll almost always see two options, one for a default setting that affects all lenses universally, and one that’s lens specific. I don’t think I’ve ever used the default setting because every lens will be different.
Don't adjust everything by the same amount OR ELSE...you'll just frustrate yourself.
Setting the actual adjustment will look like this:
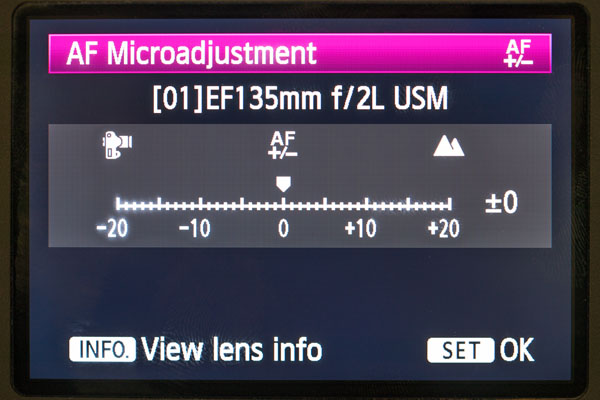
The little camera and mountain icons are there for easy reference.
If the lens is front focusing, you move the adjustment to the right, away from the camera. For back focusing you go the other way. To get this lens dialed in, I found I needed an adjustment of +9:
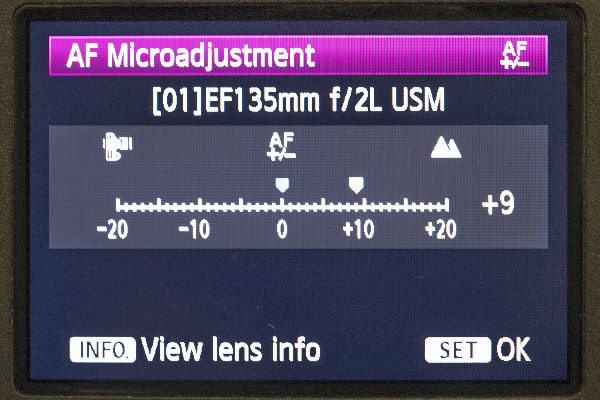
Number 9, number 9, number 9...
Once you’ve set it, make sure the camera shows the adjustment is turned on:

ON is good.
And here’s what it looks like after adjustment:
Looks great, right? Can't you see it?
Oh, right. Maybe this will help.
Now it matches the first lens! And that’s it. Once you’ve set the adjustment, you shouldn’t have to think about it again.
Is there anything else I should be aware of?
Prime lenses are generally the easiest to deal with. When it comes to zooms, you may be a little more limited. Most current Canon cameras that have the AFMA function can now adjust for both ends of the zoom, with a corresponding W and T setting. If an adjustment for each end is not available in your camera, you can either adjust for the end you use the most, or find a compromise you can live with. I’ve seen zooms where one end was fine, and the other was off, or both ends were off different amounts in the same direction, or both ends were off in different directions. There’s often no universal solution, unfortunately.
When it comes to 35mm and 50mm primes, you’ll often find that making an adjustment at shorter focus distances may cause longer distances to be off. It’s not that other lenses aren’t the same in this regard, but for some reason it seems to be more noticeable on these focal lengths. There isn’t really a good solution to this in camera, unfortunately. You’ll want to make your adjustments fit your needs, which may be difficult with some lenses. But if you have the Sigma Art series lenses and the Sigma USB Dock, you can actually adjust for both closer distances and longer distances. The dock and related software allow for four adjustments at four different distances with those Art (A1) series lenses. On Sigma A1 zooms, you can make those four distance adjustments at four different focal lengths, for a total of 16 possible adjustments! It’s time consuming, but if you want everything as spot on as possible, this is really the way to go.
The example above needed a moderate adjustment, +9. Larger adjustments aren’t indicative of something faulty, though. On very rare occasions you may find a lens is beyond adjustment. I once owned a Nikon 20 f/2.8D that was like that. I ended up selling it to someone who had zero issues with it on their camera. If you own a lens that’s beyond adjustment, you can either do what I did, or you may be able to send your lens and camera to the manufacturer to have them adjust it for you, as long as both lens and camera are from the same manufacturer. Just know that adjustment won’t be free.
Is that it?
Yep, that’s pretty much it. If you’ve never experienced front or back focus issues before, you’re either extremely lucky, or you just haven’t noticed it. It’s incredibly common, so it’s good to be aware of it. I’ve had countless discussions that started off with, “Well, none of my lenses have any problems on my camera, so your lens must be broken.” And 95% of the time the lens just needed a little AFMA to get it right in line. Whether you’ve been shooting for one year or 50 years, you will have to deal with this at some point. If you’re ever in doubt about whether you’re having focus problems or resolution problems, switch to live view and try using manual focus or AF (in live view your camera most likely reverts to contrast detection AF, which is much more accurate but slower). If your images get sharper, the lens is most likely front or back focusing on your camera. And now you know how to fix that.
Author: Joey Miller
I’m Joey. I love cameras, especially old film cameras, and I can’t remember the last day I didn’t take a photo. Digital cameras are great, and they keep me employed, but I also still like processing my own film. I’m stuck somewhere in the middle. I shoot every single day, no matter what.
