Teardowns and Disassembly
Canon 100-400mm IS L Mk II Teardown: Best Built Lens Ever?
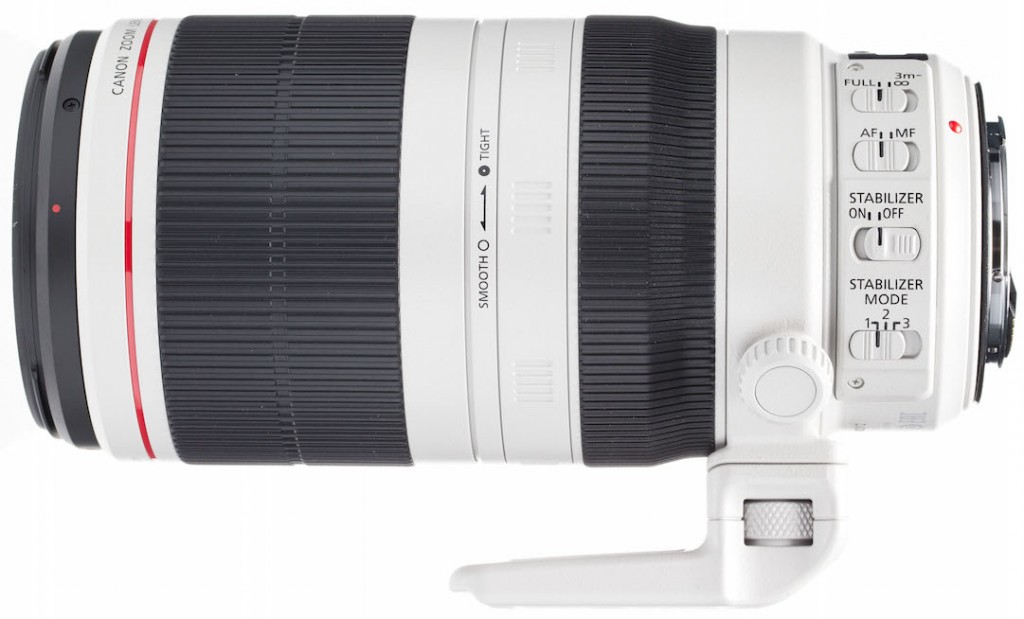
- Canon 100-400mm IS Mk II, Lensrentals.com, 2015
You know Aaron and I love doing teardowns of almost anything. The two types we look forward to most, though, are Sony cameras and Canon lenses, because those tend to be on the cutting edge of engineering elegance. For a couple of weeks now, we’ve been wanting to sink our screwdrivers into the new Canon 100-400mm IS Mk II lens, and yesterday we finally got a few free hours to do it.
For those two or three of you who don’t like a little lens strip-tease I’ll give you the quick summary: the build quality on this thing is amazing. I usually laugh when people describe a lens as “built like a tank” because what I know is the lens they are describing has a thick, heavy outer metal shell filled with tiny delicate pieces that break and wear out with great frequency. But this lens is built like a tank inside and out.
The New Tripod Mount
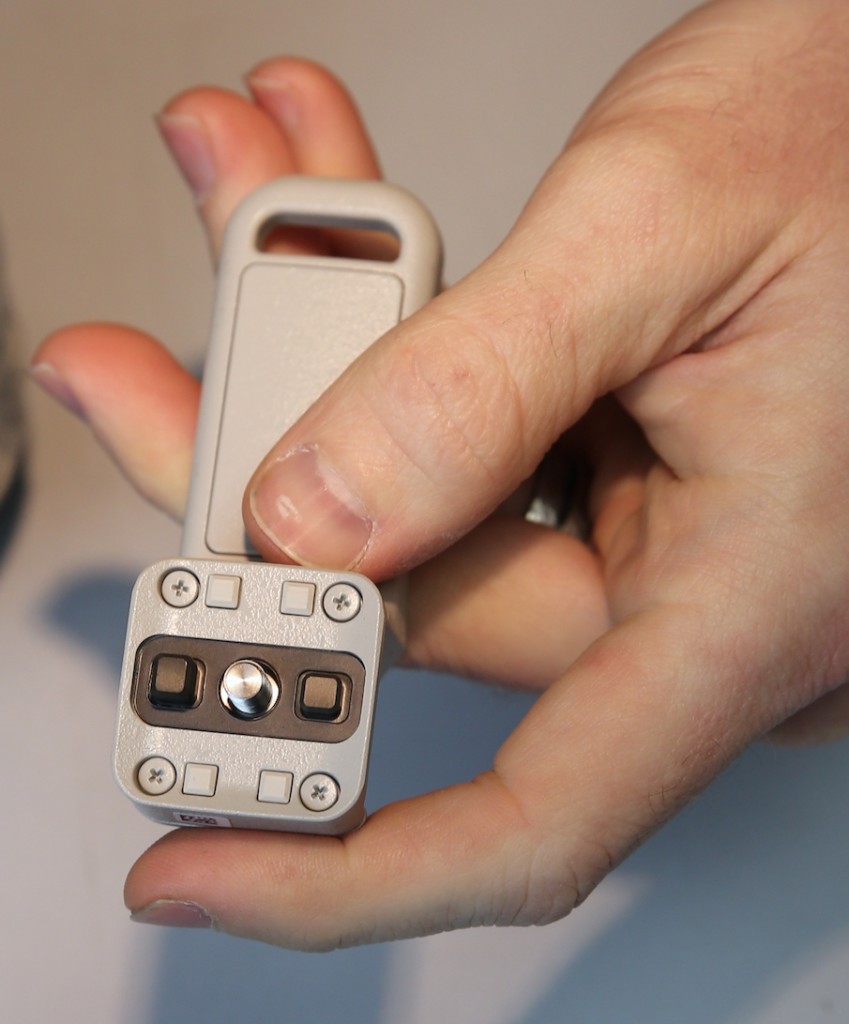
Yeah, I know, taking off the tripod mount isn’t part of the teardown. But this mount is entirely new and different, plus it kind of gives notice of the build quality to come. The actual foot removes, of course, via the little thumbwheel.
- All images credit Roger Cicala, Lensrentals.com, 2015
It’s just a foot, but note that there are two large and four small locking posts to keep it from slipping. It also can’t be mounted in reverse fashion, but I’m sure not too many people will want to do that anyway. It’s also nice that where the foot mounts to the ring is a replaceable locking plate, meaning that if you are strong enough to strip out the female threads, just the plate can be replaced, not the entire ring. That’s the difference between a $10 part and a $150 (my guess on costs, but probably accurate) part replacement.

- All images credit Roger Cicala, Lensrentals.com, 2015
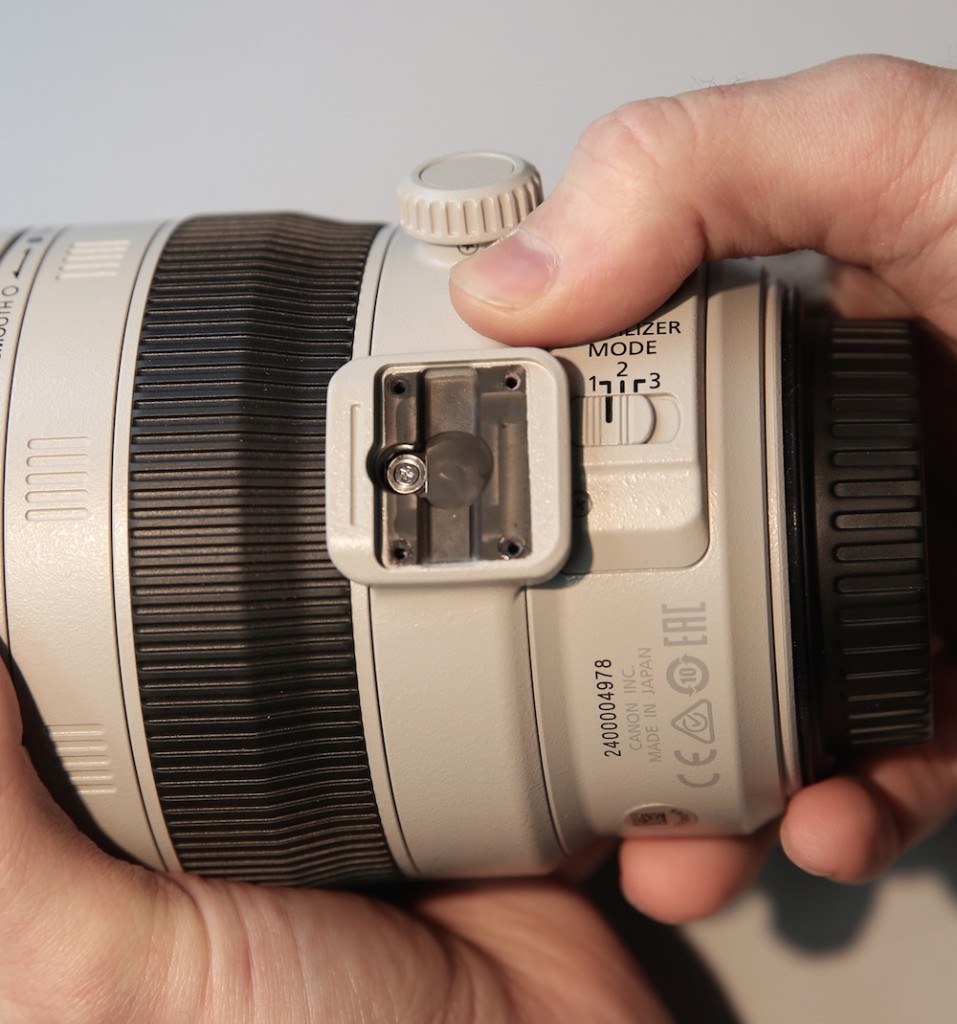
With the plate removed you can loosen the ring and slide it around to reveal the large screws that mount the ring to the barrel. I’ll note here that you can’t remove the ring without partial disassembly of the barrel, so no need to try taking them out at home. Again, I’ll point out those are big screws with washers around them, double the size of the screws we usually see assigned to this kind of task.
- All images credit Roger Cicala, Lensrentals.com, 2015
Taking the Back Off
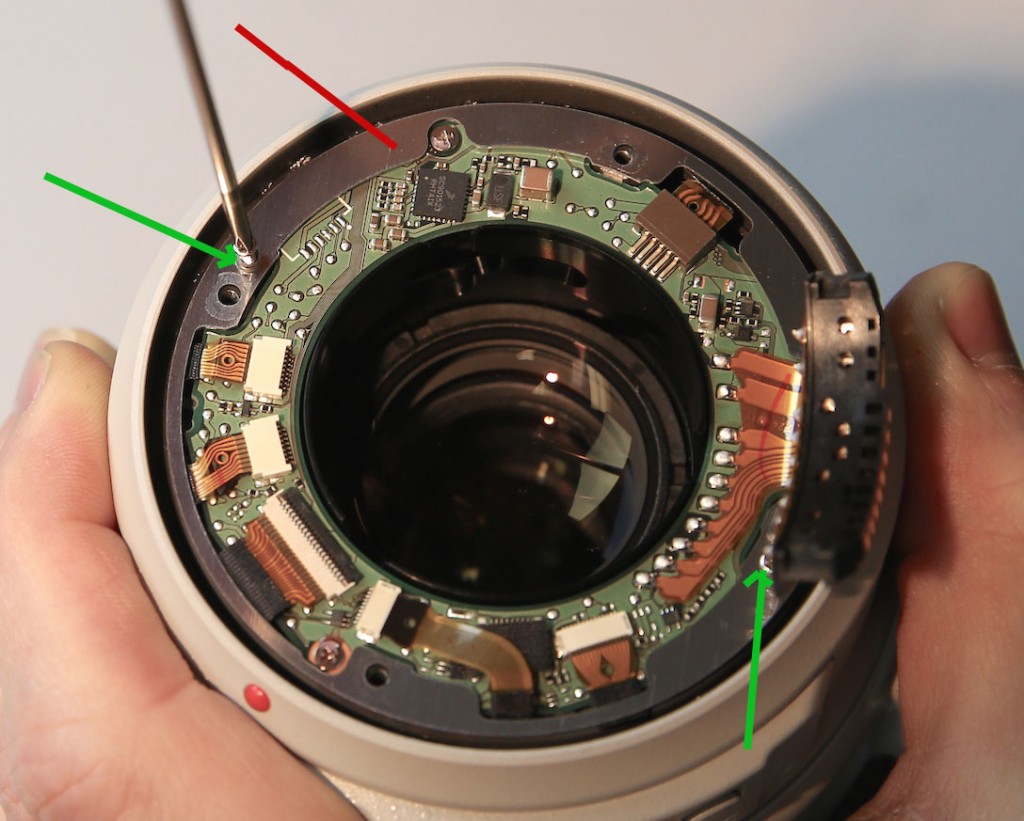
The lens mount comes off in the usual fashion so I won’t take up bandwidth with pictures of that. Once it’s off, though, we saw one thing we’d never seen before. The shim (red arrow) that is used to space the mount properly for infinity focus has screws (green arrows) holding it in place. I have no idea why, the mount screws pass through the shim and would hold it just fine, but there must be some purpose.
- All images credit Roger Cicala, Lensrentals.com, 2015
With the shim removed, a normal Canon main circuit board is revealed.
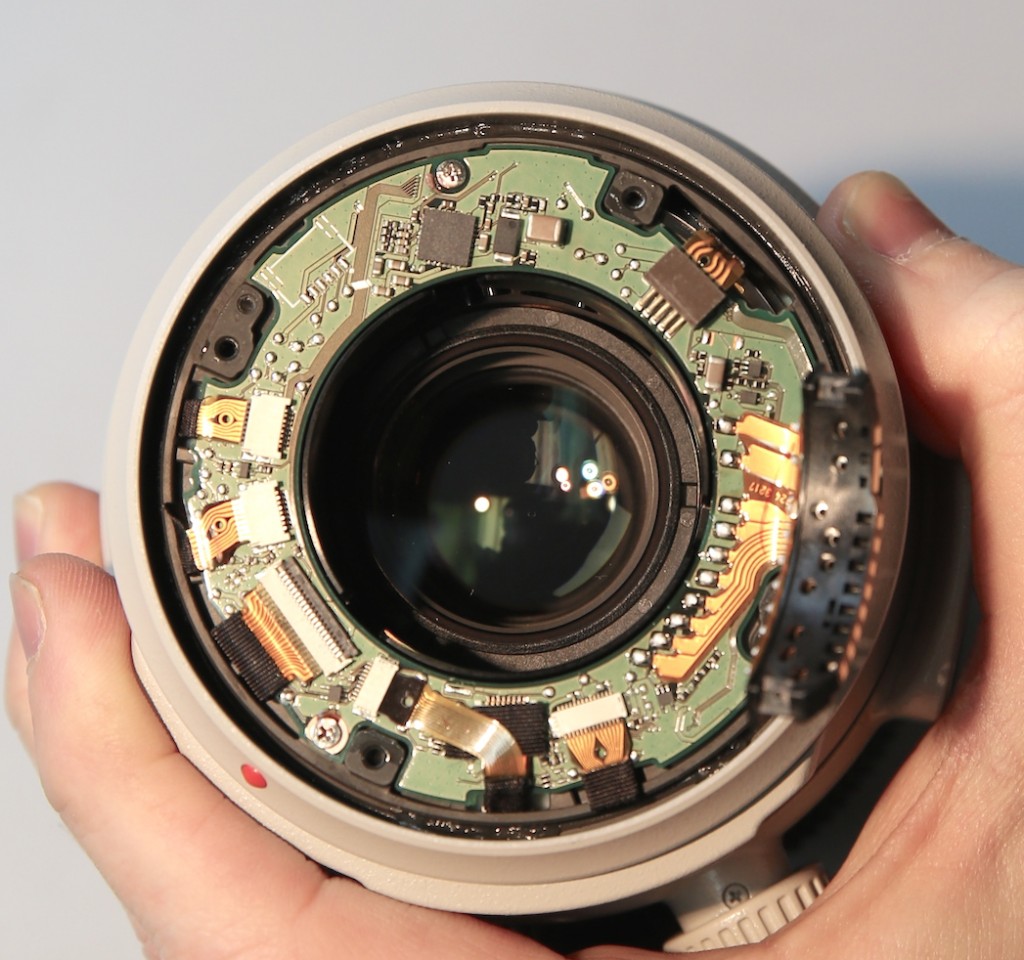
- All images credit Roger Cicala, Lensrentals.com, 2015
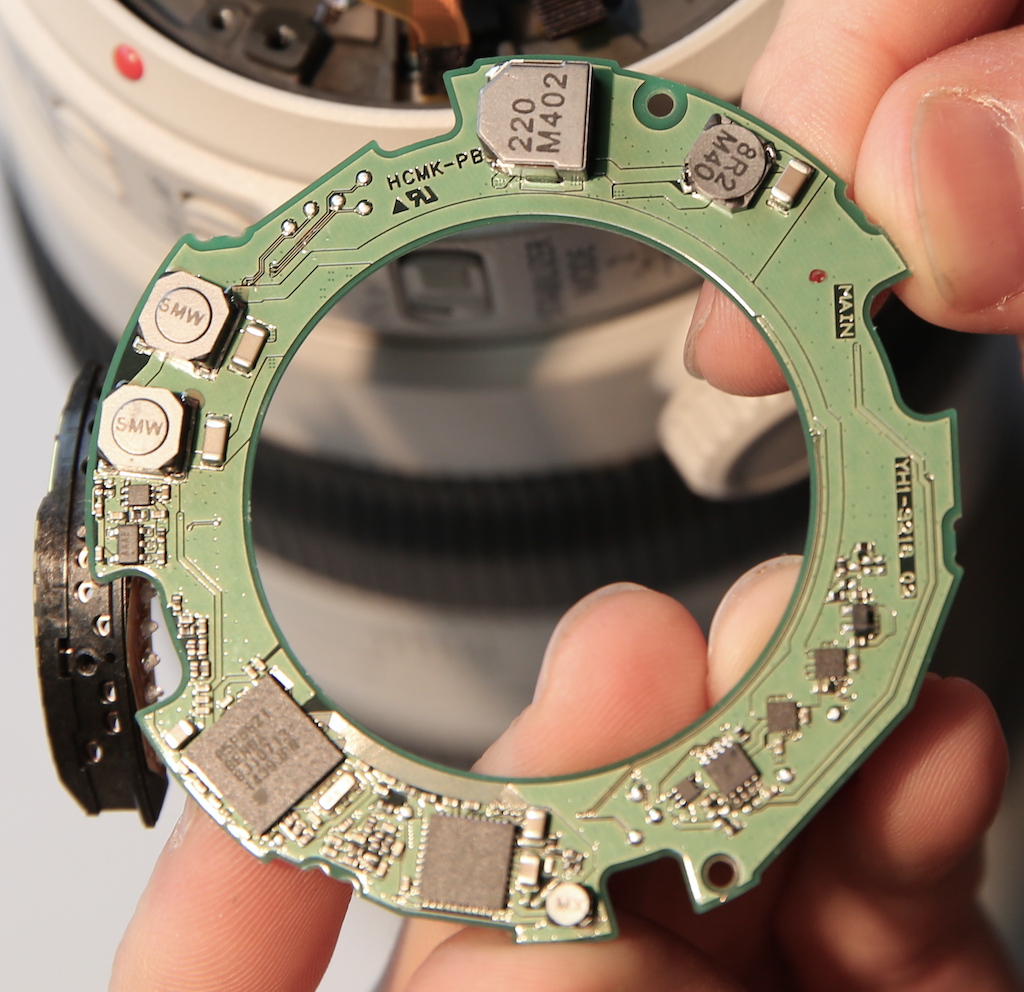
- Underside of the PCB. All images credit Roger Cicala, Lensrentals.com, 2015
Removing the board gives access to the eight large screws (four to six is what we would have expected) holding the rear barrel in place.
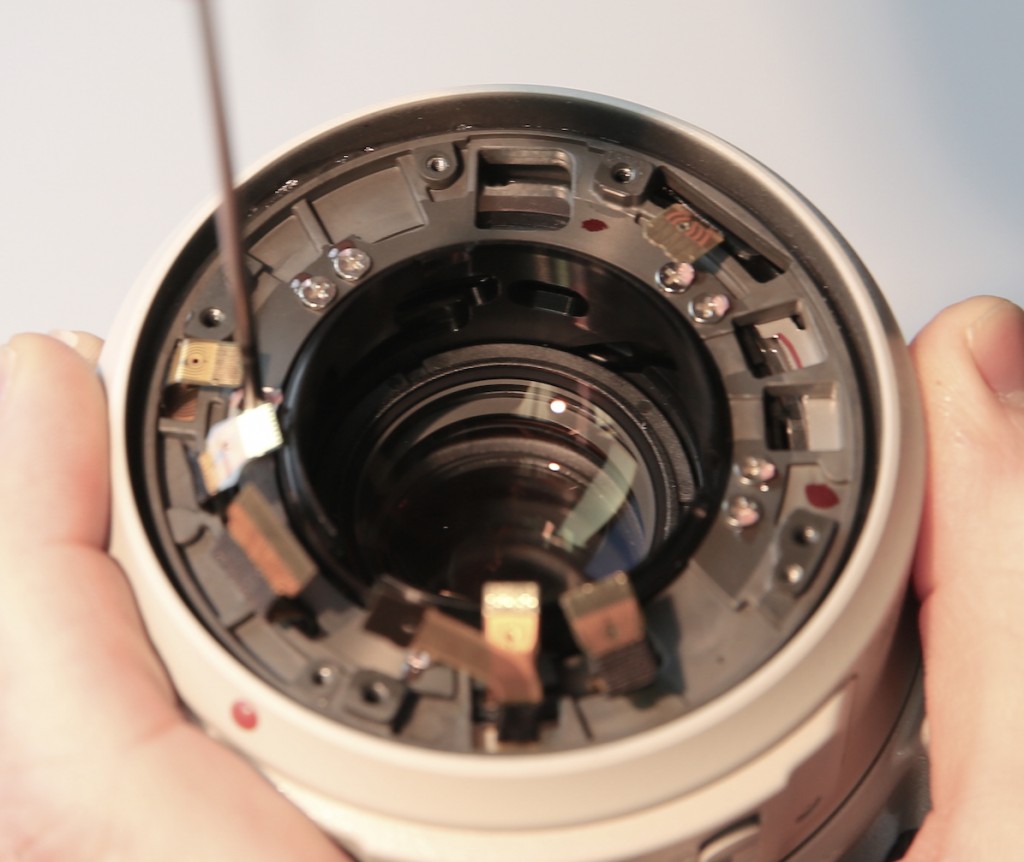
- All images credit Roger Cicala, Lensrentals.com, 2015
Removing these lets the rear barrel slide right off.
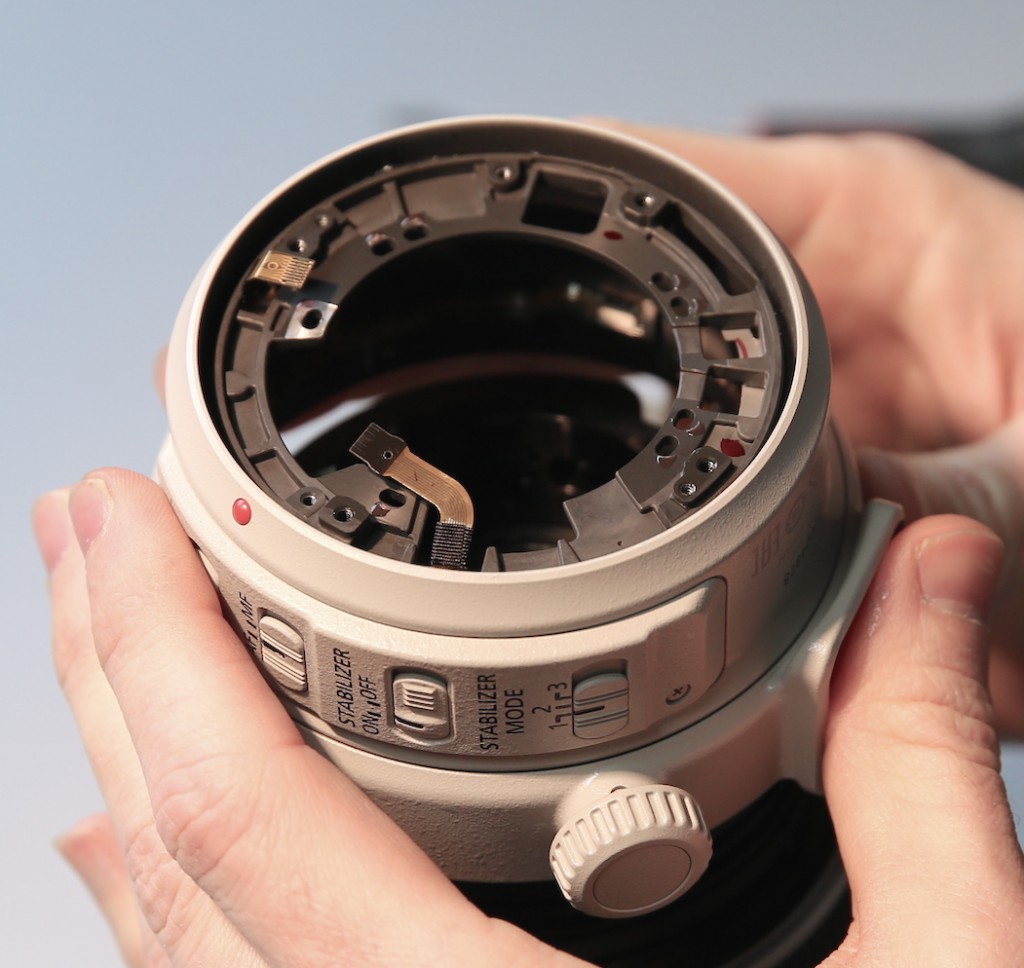
- All images credit Roger Cicala, Lensrentals.com, 2015
The design here, like most Canon designs, is nice and modular. The rear barrel assembly includes the tripod ring (which could now be removed if we wished) and all of the switches, meaning the flexes and connections are all contained in this replaceable assembly.
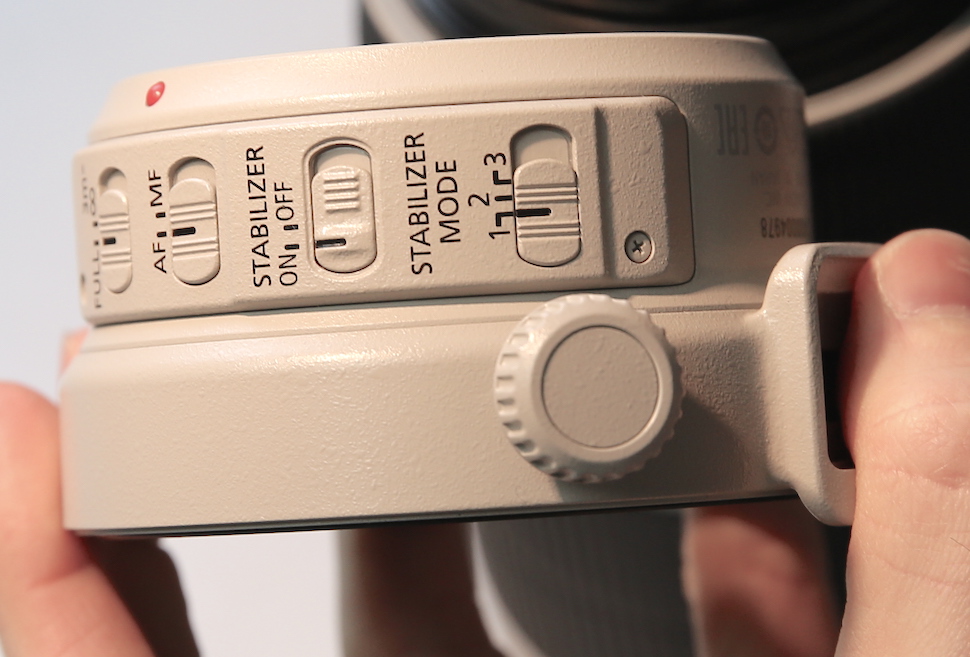
- All images credit Roger Cicala, Lensrentals.com, 2015
Taking the rear barrel off lets us see one of the first examples of the robustness engineered into the new 100-400 Mk II. The rollers (red arrow) that the focusing assembly rotates on are huge metal bearings, about twice the size of what we see in most telephoto zooms. These are more the size we’d expect in big super telephoto prime.
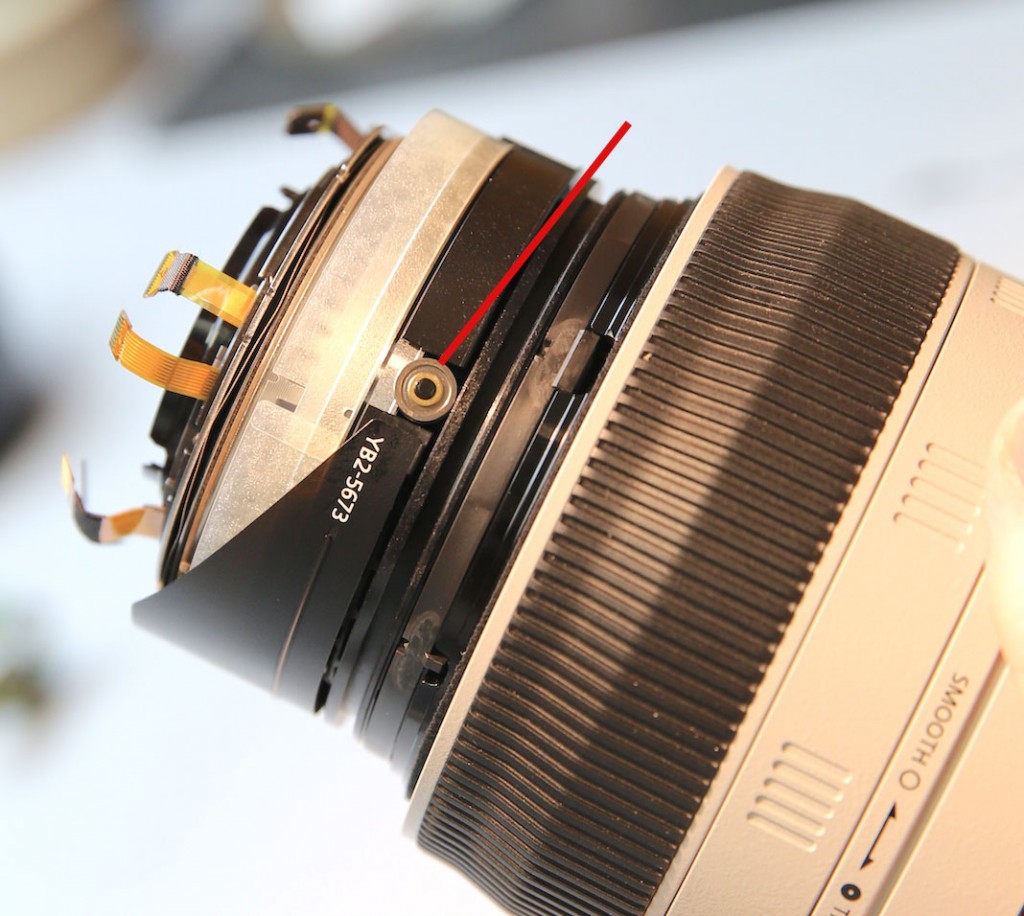
- All images credit Roger Cicala, Lensrentals.com, 2015
Back to disassembling now. Removing the focus rubber gives access to small openings that let us remove the collars under the focusing ring.
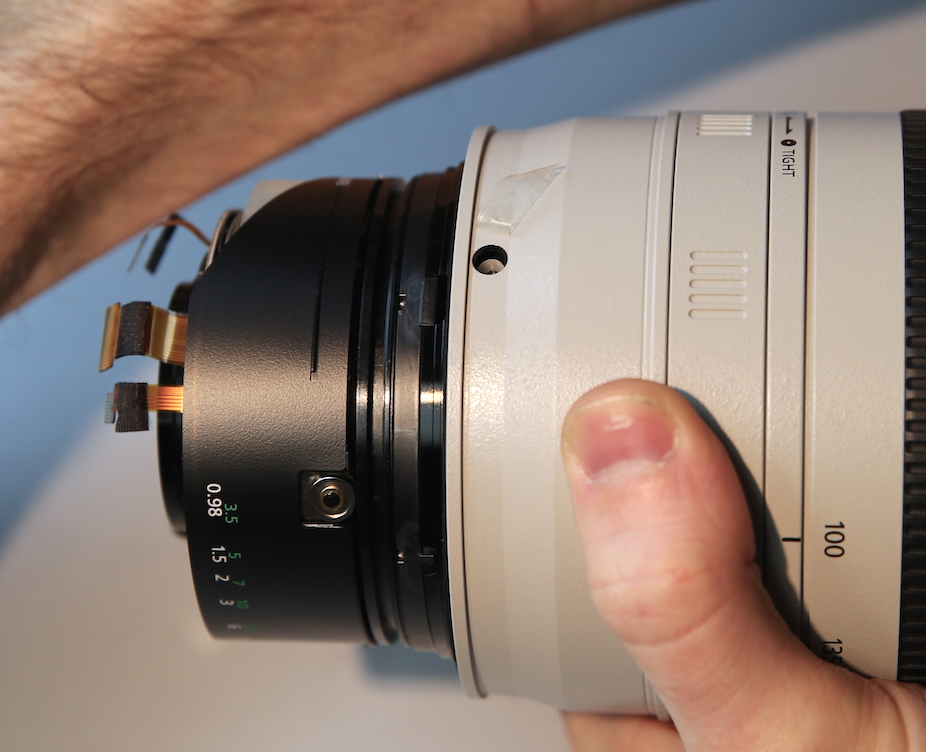
- All images credit Roger Cicala, Lensrentals.com, 2015
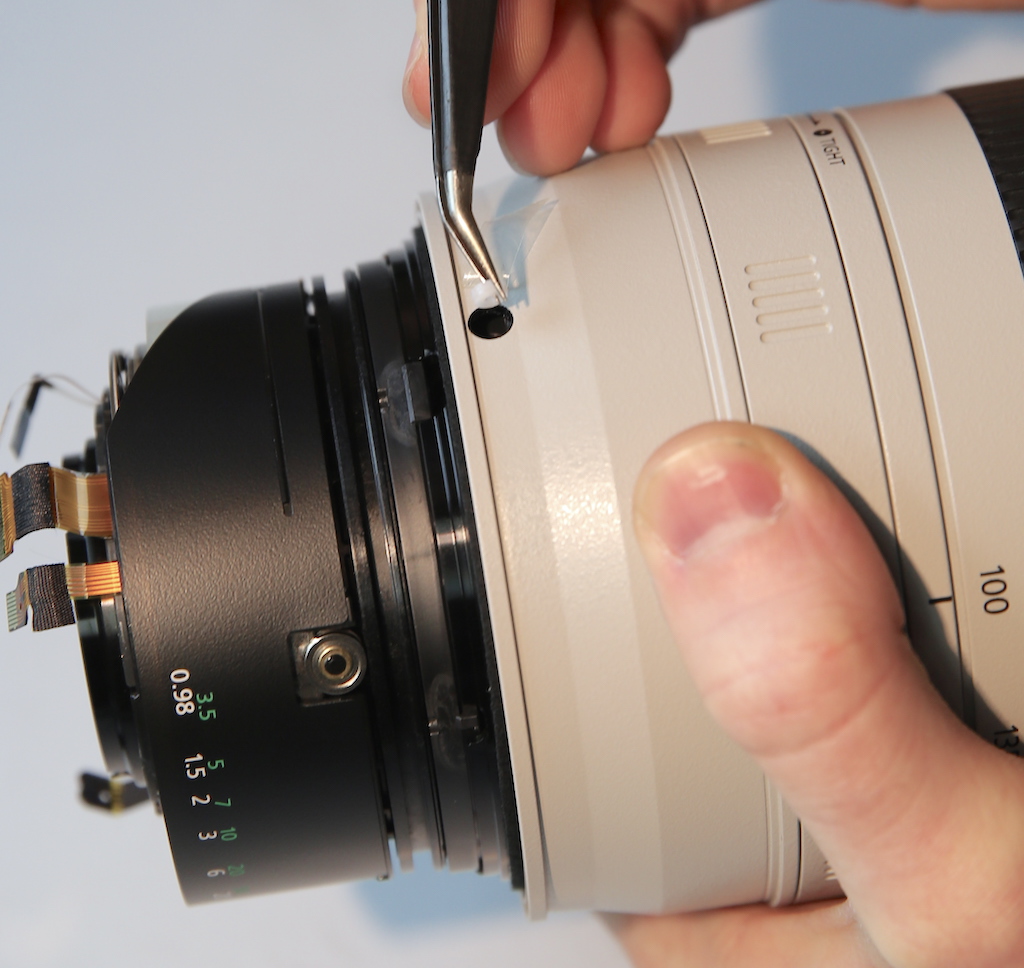
- All images credit Roger Cicala, Lensrentals.com, 2015
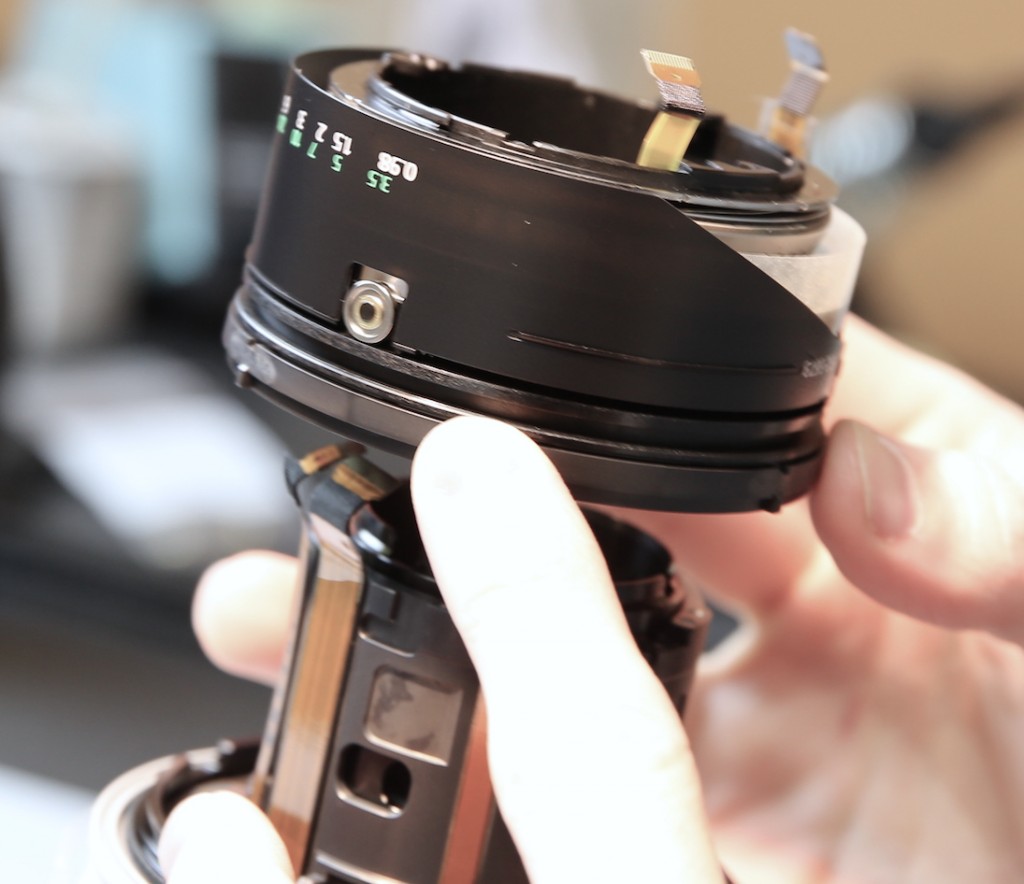
With those out of the way the USM motor assembly lifts right off in one modular piece.
- All images credit Roger Cicala, Lensrentals.com, 2015
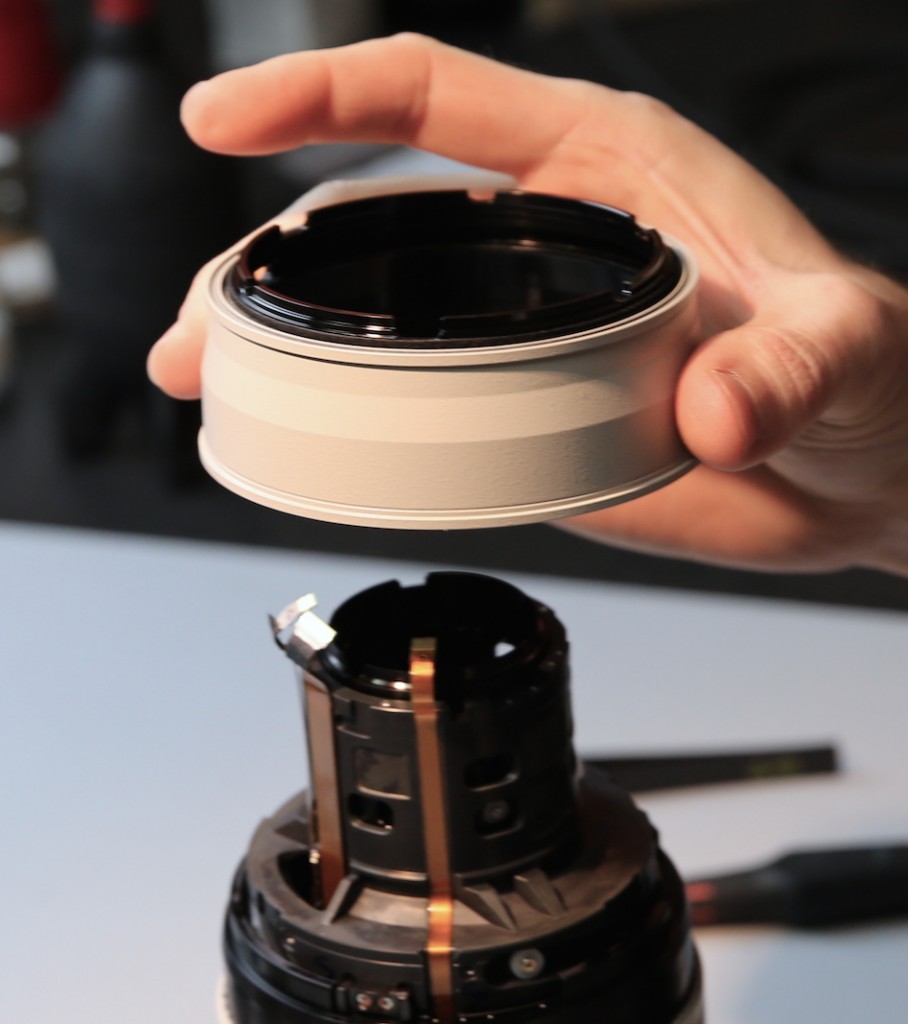
After which the focus ring can be taken off.
- All images credit Roger Cicala, Lensrentals.com, 2015
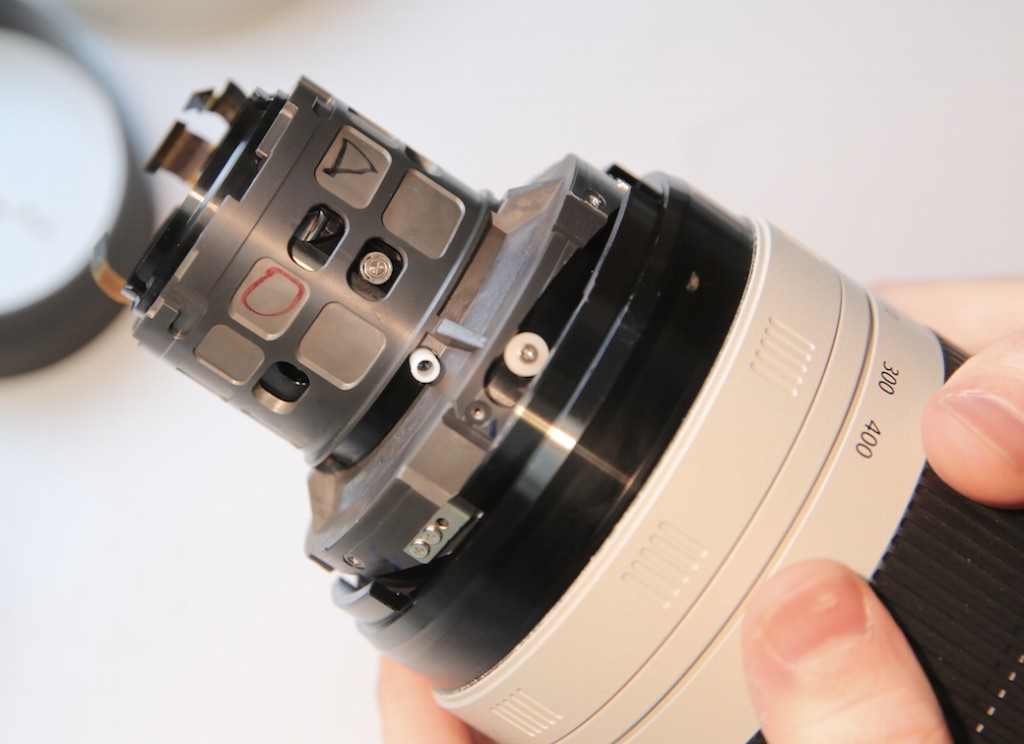
With all of the back assemblies off, the bulk of the lens looks like this. You can start to notice how large the various collars and rollers are. And everything we’ve removed up until now has been an electrical or mechanical assembly. All of the glass and optics are still intact.
- All images credit Roger Cicala, Lensrentals.com, 2015
Smooth-Tighten Ring
Normally I wouldn’t spend so much time on this assembly, but in the original 100-400 IS L, the smooth-tighten ring was a part destined to fail eventually, using about 1,000 tiny ball bearings to move friction pads around. The new lens has a very different and much more durable (at least in appearance) mechanism, which is entirely different.
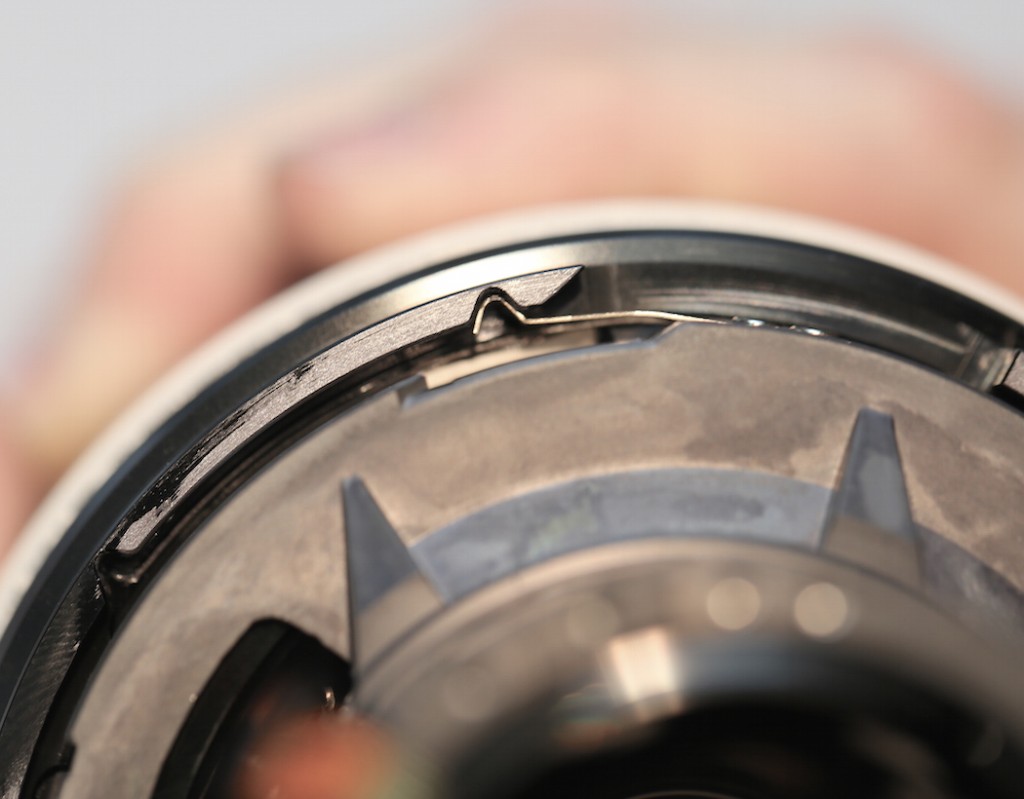
Looking up into the smooth-tighten ring from below you can see the spring clips that hold it in place at the stop.
- All images credit Roger Cicala, Lensrentals.com, 2015
Removing a plastic stop lets us rotate the assembly and remove it from the lens.
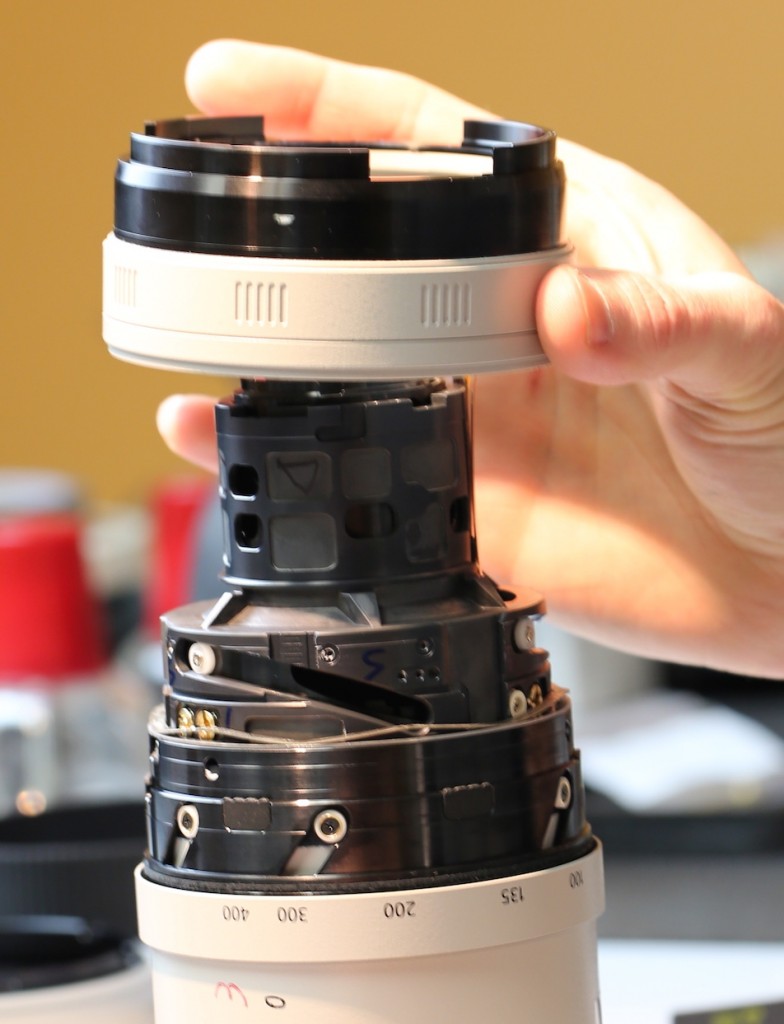
- All images credit Roger Cicala, Lensrentals.com, 2015
Back on the lens barrel, you can see how thick and firmly attached the spring clips are – and those are just so you feel when the ring moves into certain positions, they don’t have a tightening function.
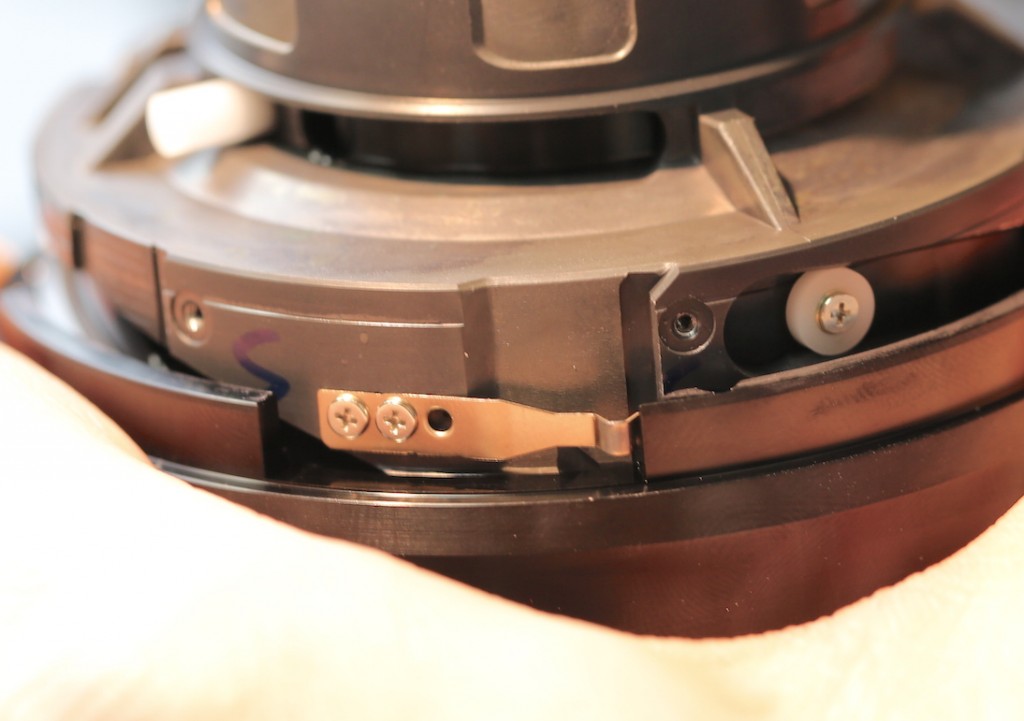
- All images credit Roger Cicala, Lensrentals.com, 2015
The smooth-tighten ring itself separates into two parts.
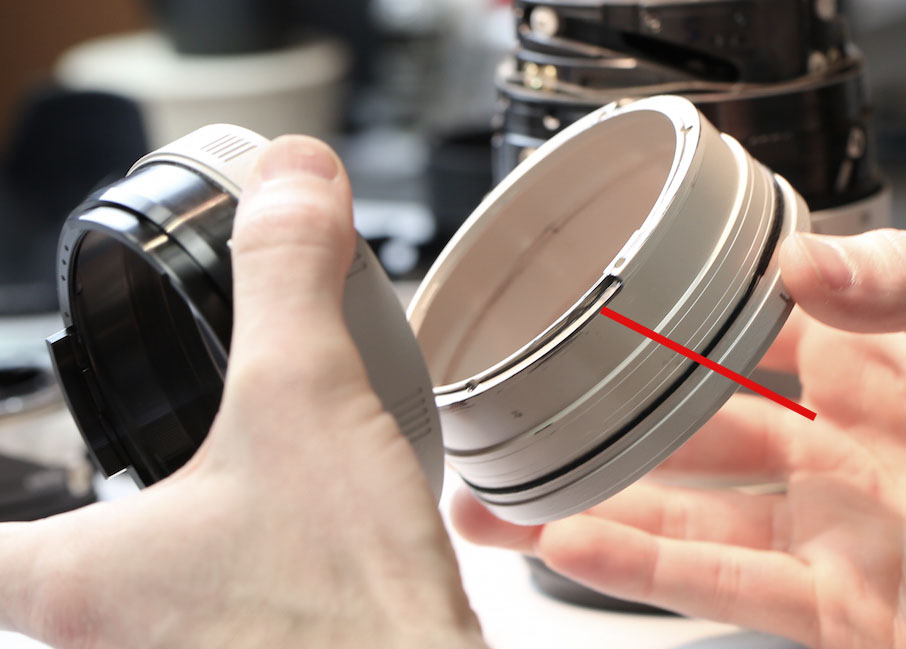
- All images credit Roger Cicala, Lensrentals.com, 2015
Which lets us see how friction is generated by two thick ramps (one on each piece) – sliding the ring increases tension. No ball bearings to fail. I guess the metal ramps could wear over time, but that shouldn’t have a great effect; you just slide them a bit further.
The Optical Assembly
This is where things get fun. Before we do anything else, let’s just take a look at the back of the lens, where the various barrels, helicoids, and helicoid collars are largely visible. First, look at the helicoid collars for the focusing and zoom groups (I believe) identified by the red arrows. Those are huge and robust things; I’ll show you a comparison in a second. Additionally, look at the lower helicoids – there are six channels, of which two are visible (one marked with the lower red arrow). Most lenses have three channels and collars. That’s a huge amount of increased stability when the barrel extends away from the lens.
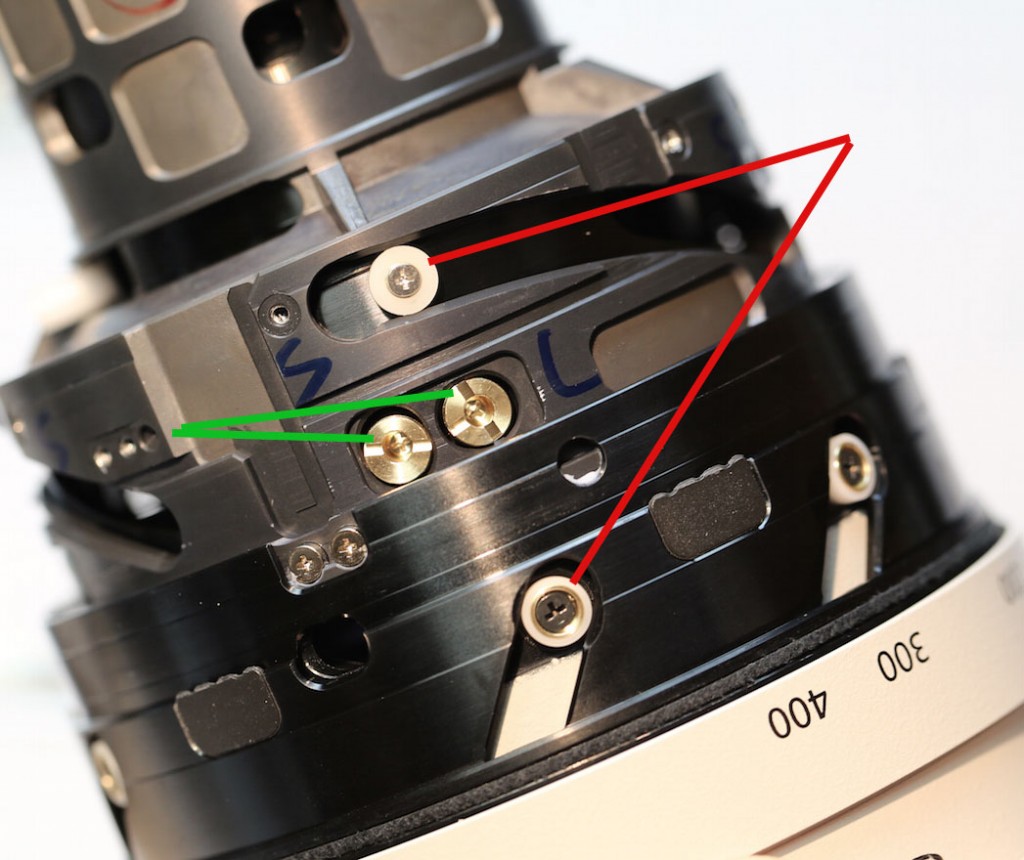
- All images credit Roger Cicala, Lensrentals.com, 2015
Next look at the eccentric optical adjustment screws identified by the green arrows. Those are much larger than usual, which allows for much finer adjustments. They’re also separated into tilting and centering screws at each of three locations around the lens. This should allow not only more accurate adjustments, but adjustments that are less likely to slip over time. I’m extremely impressed.
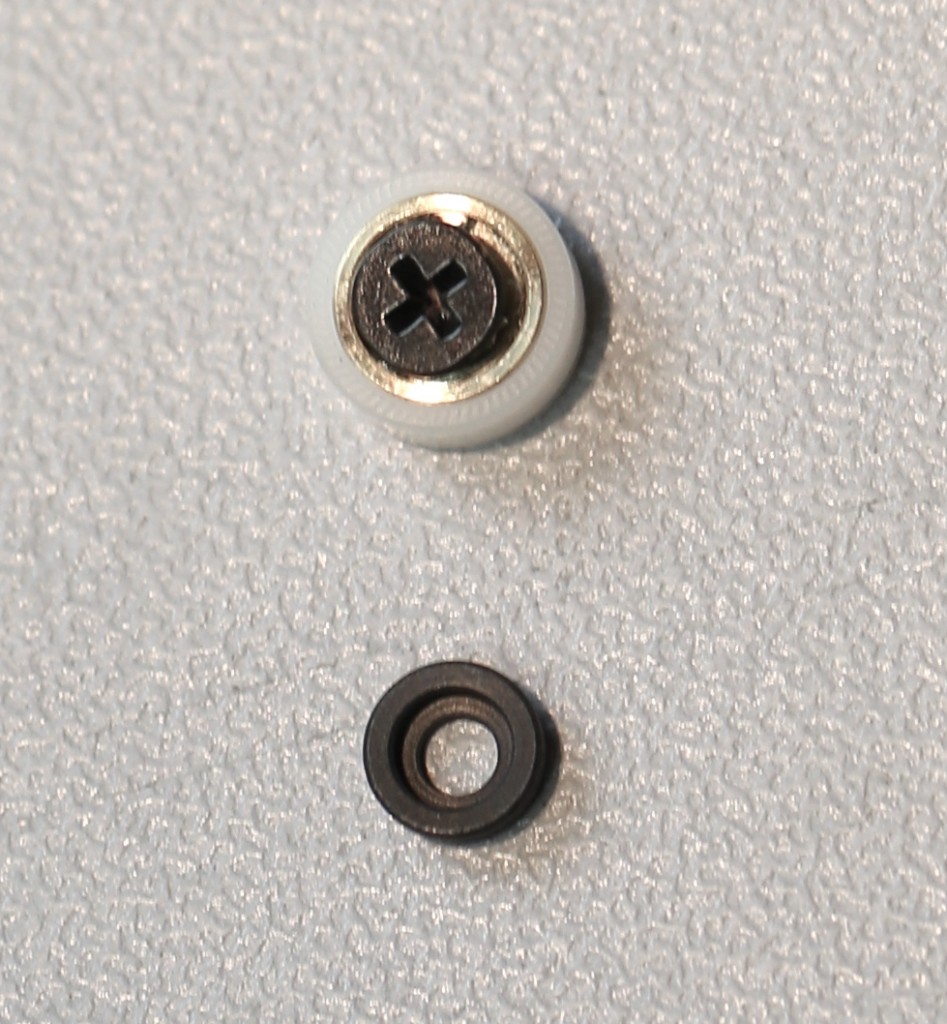
Below is a size comparison from one of the smaller 100-400 Mk II collars and the largest collar in the original Canon 24-70 f/2.8 lens, which until now I would have called a fairly large collar. Notice the 100-400 collar (the white one) is not only larger and thicker, it’s made of a very tough nylon and has a brass center, compared to the simple composite of the 24-70 collar.
- All images credit Roger Cicala, Lensrentals.com, 2015
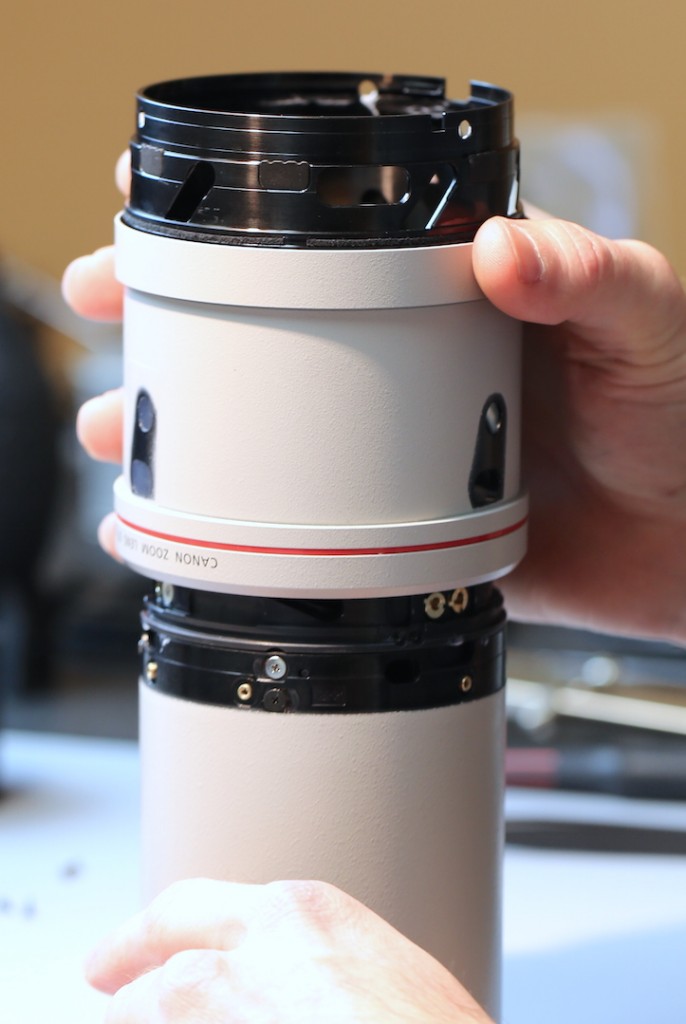
OK, back to our regularly scheduled disassembly. Removing the front makeup rings and a stop key lets us slide the last outer barrel (zoom ring) off of the lens.
- All images credit Roger Cicala, Lensrentals.com, 2015
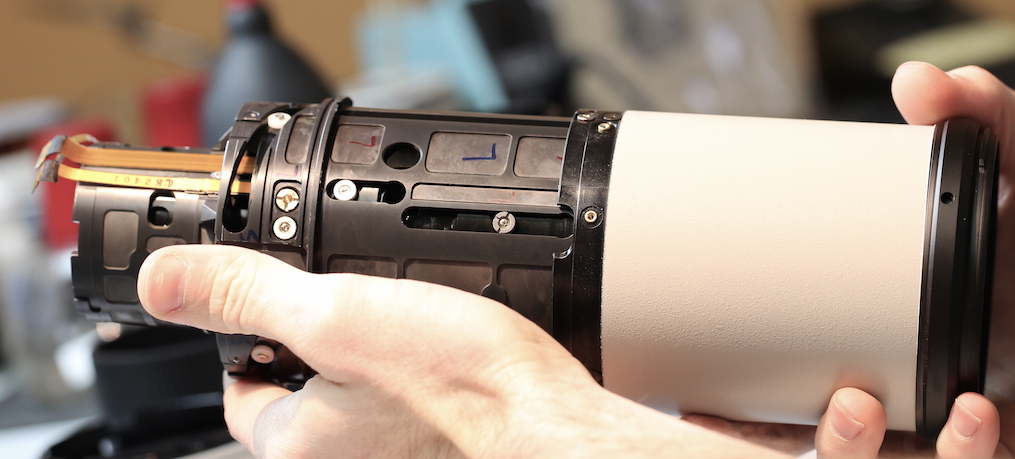
Which now looks like this with the barrel fully extended.
- All images credit Roger Cicala, Lensrentals.com, 2015
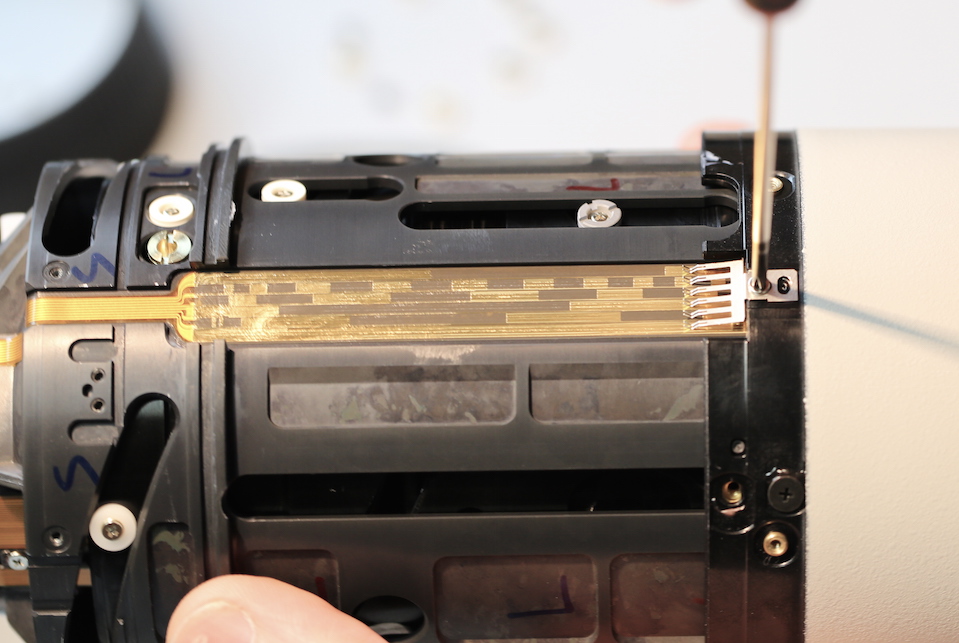
We have to remove the zoom locator brush, and then a series of screws and sliders (the black screw below the brush Aaron is removing in this picture is one of them) to remove the front barrel.
- All images credit Roger Cicala, Lensrentals.com, 2015
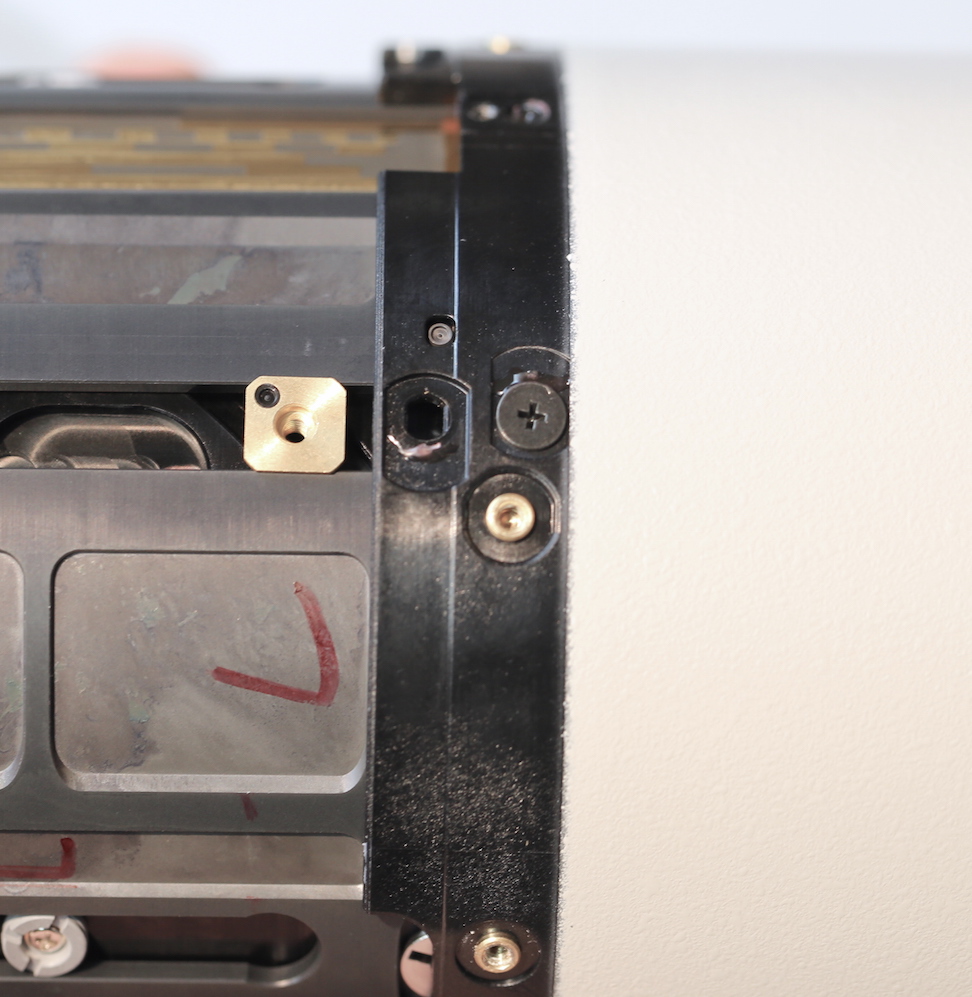
Here is a close-up of the thick brass sliders that are under the screws. They keep the barrel straight when it zooms, which is critical for keeping the optics in line. Most zoom lenses just have plastic guides, not brass, and not nearly this robust.
- All images credit Roger Cicala, Lensrentals.com, 2015
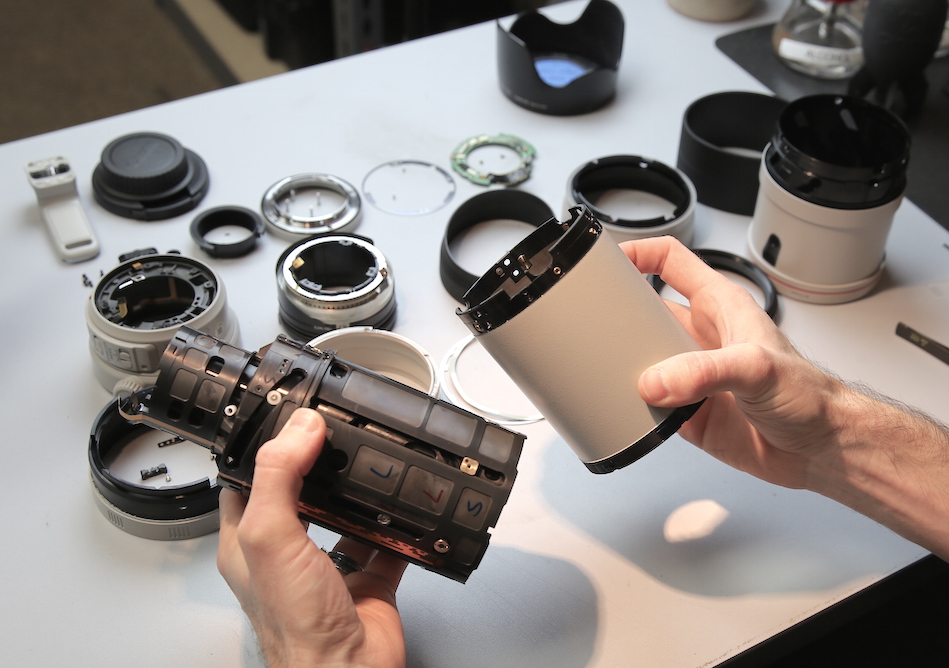
That’s got everything disassembled down to the individual lens elements. The front element is still in the extending barrel in Aaron’s right hand. The front element in this lens is not adjustable other than a distance slider, the optical adjustments are in the other elements.
- All images credit Roger Cicala, Lensrentals.com, 2015
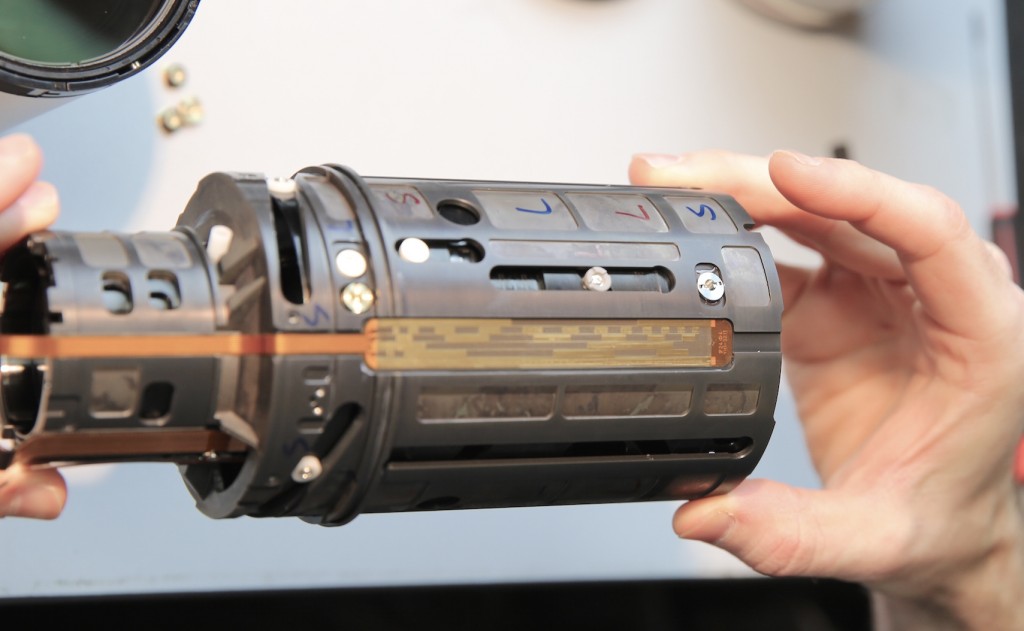
All of the other elements and all of the adjustable collars are in the main optical assembly in Aaron’s left hand.
- All images credit Roger Cicala, Lensrentals.com, 2015
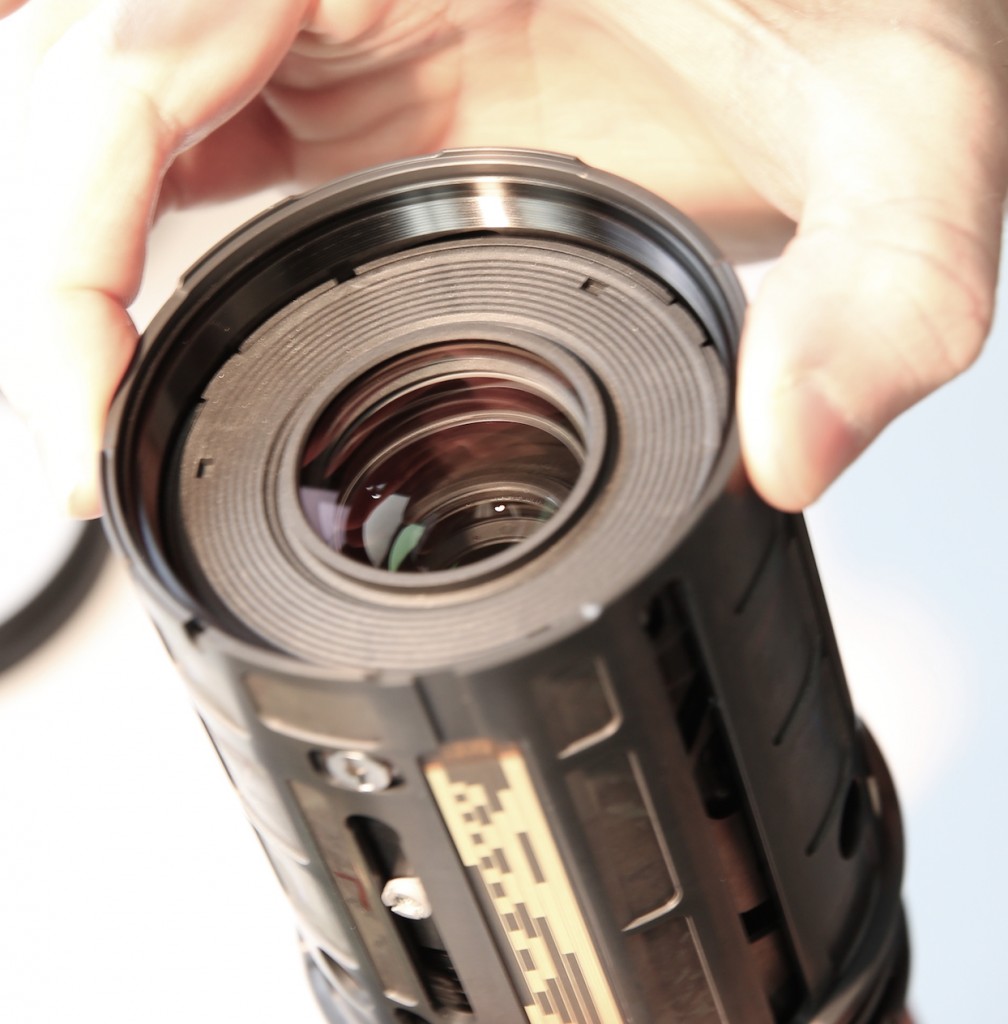
You can’t see all of them in one view, but there are a number of different optical adjustment locations. It will take us a while to figure out which control what types of issues. The IS unit, by the way, is the top group in the optical assembly, the second group overall from the front.
- All images credit Roger Cicala, Lensrentals.com, 2015
I know I can’t really, without showing you dozens of other lenses, do a good job of impressing you with just how robustly engineered this lens is. I will say that the insides look more like what we’d expect to see in a 500mm f/4 or 600mm f/4 lens, rather than a telezoom. It’s by far the most heavily engineered zoom lens Aaron and I have ever seen; and we’ve seen the insides of dozens of lenses in this range.
Well done, Canon engineers, well done!
Roger Cicala and Aaron Closz
Lensrentals.com
February, 2015
Author: Roger Cicala
I’m Roger and I am the founder of Lensrentals.com. Hailed as one of the optic nerds here, I enjoy shooting collimated light through 30X microscope objectives in my spare time. When I do take real pictures I like using something different: a Medium format, or Pentax K1, or a Sony RX1R.
-
Shane Castle
-
Wayne Young
-
Notna
-
Ralph Hill
