Last post, we took apart the Canon 35mm f/1.4 Mk II lens. Continuing the 35mm theme, today we’re going to do the same to the Sony FE 35mm f/1.4 ZA lens. And chill out, we’ll do the Sigma 35mm DG HSM f/1.4 Art lens next and one of the Zeiss after that.

Before we start, let’s be sure we’re all on the same page because this teardown is going to be very different from the other lenses we generally tear down. The outside of the Sony lens may look fairly similar to the Canon in the picture above, but their internal construction is very different.
Sony FE lenses do NOT have all of the same things inside that other lenses do. Sure, they have glass elements, barrels, and weather seals. But where other lenses have helicoids that move focusing elements along grooved tracks, Sony FE lenses use electromagnets to move the focusing elements along a set of rails. Which system is better? I have no damn idea and neither do you. I doubt Sony does either, yet. But give credit where it’s due: Sony thinks outside the box and tries new stuff no one else is trying.
Last week we opened up a Canon 35mm f/1.4 mark II lens and were excited about the great build quality. Today we’ll open up the Sony FE 35mm f/1.4 lens and I’m excited about seeing some new and different technology.
There are a couple of specific things I am curious about. We’ve noticed is the 35mm FE f/1.4 doesn’t seem to have autofocus failure as frequently as some earlier FE lenses did. We did a teardown of the Sony FE 24-70 f/4 lens, showing some weaknesses in the electromagnetic AF system. We’ve been inside the 55mm FE f/1.8 lens and it has a very similar system. So we suspected the system was different in the 35mm lens, which hardly ever fails. Sony also states this lens is dust and moisture resistant, and I’m always interested in seeing how well those claims are backed up.
So Let’s Take Stuff Apart!
I usually make a joke about getting out your own lens and following along at home as we do teardowns, but really, don’t try this one at home. It’s a complex and difficult teardown and if you mess it up, well, repairs for this lens, in the U. S. at least, are breathtakingly expensive.
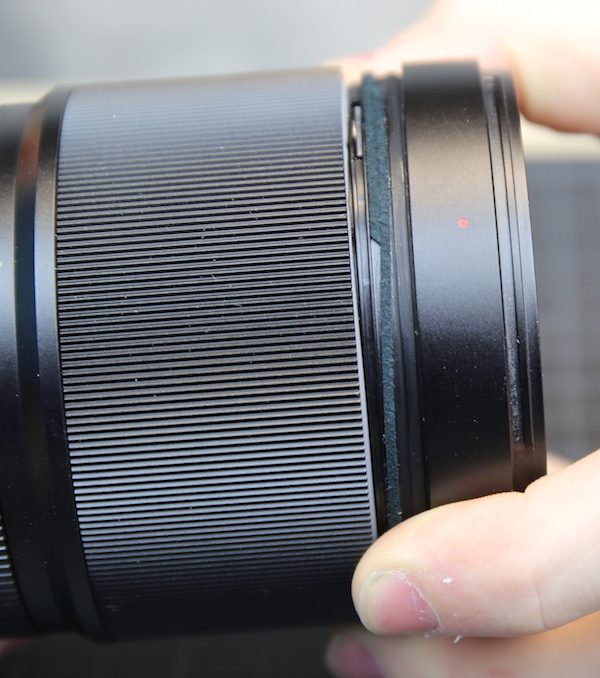
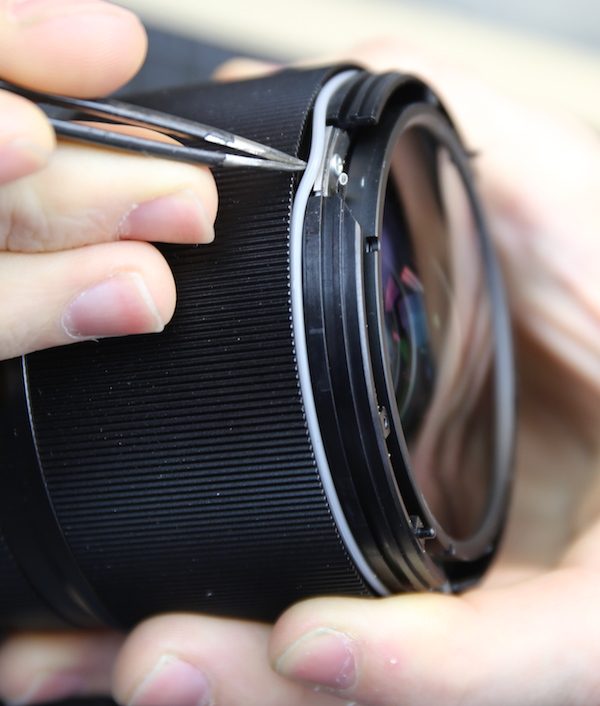
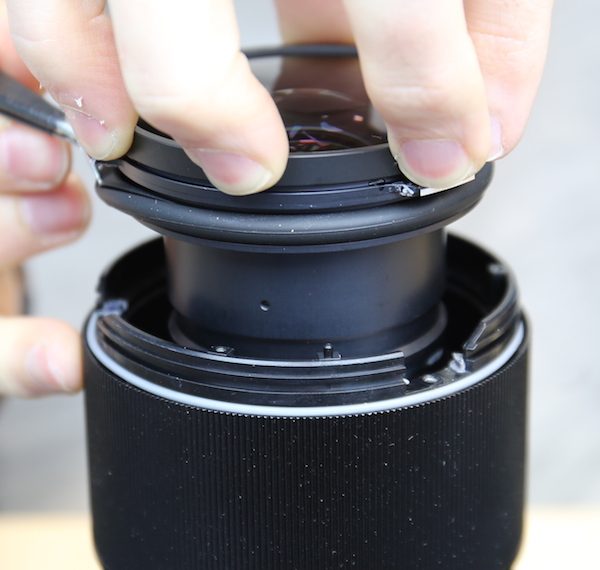
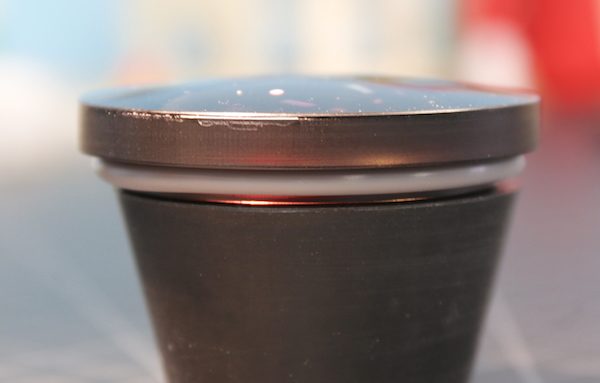
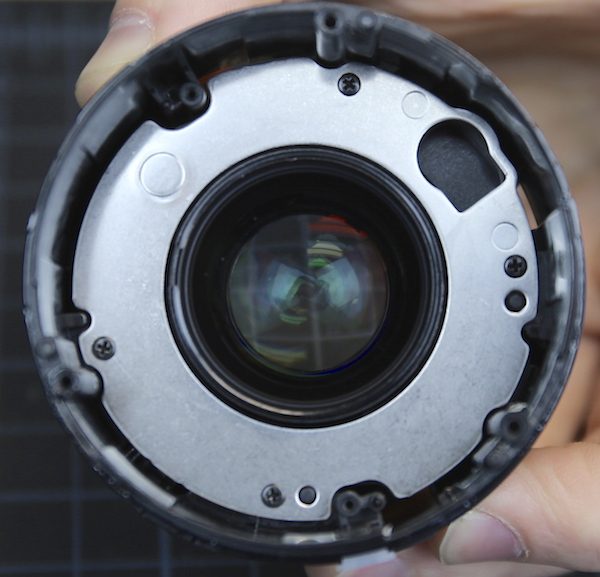
The first step in this disassembly is simple but hard to do. As with most lenses, the front makeup ring has to come off. But on the Sony isn’t a simple decal, it’s a metal ring stamped with the serial number and heavily glued in place. Removing it requires heat, glass friendly prying tools, and patience.
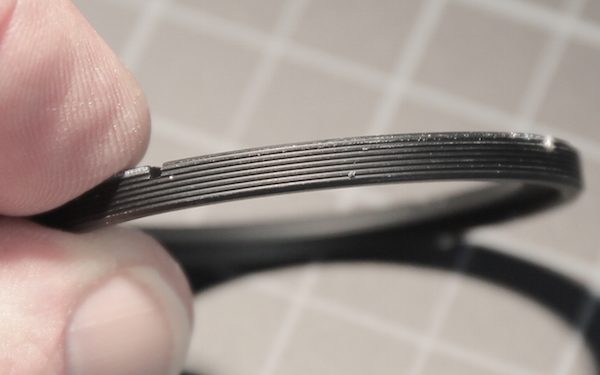
Looking under the makeup ring, we see the usual 3 screws holding the filter barrel in place. Like the Canon lens we just tore down, this makes replacing a dented filter barrel (this lens has a metal shell, so a dent is more likely than a crack or break) simple.

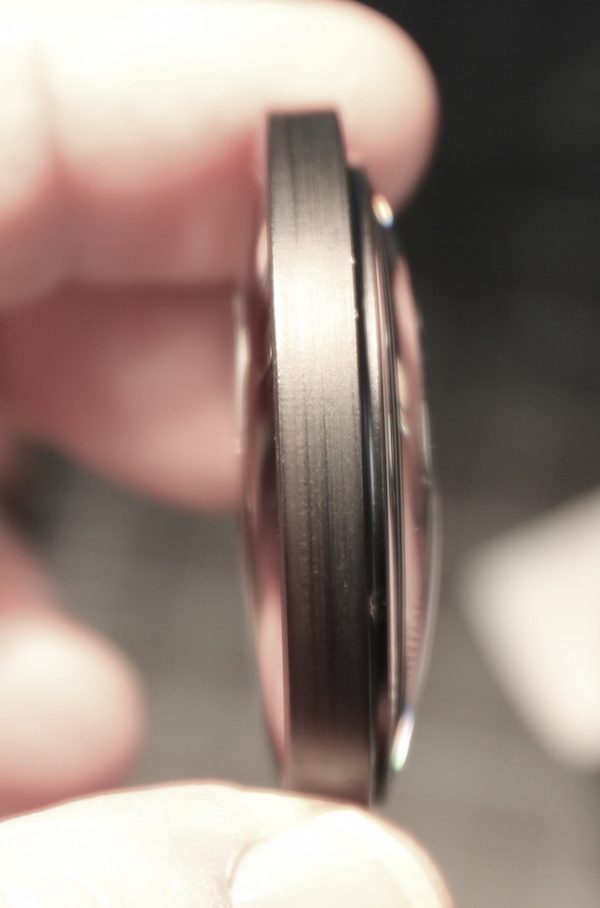
The filter barrel fits snugly but comes off easily, and there is a nice ring of foamed rubber to provide sealing.
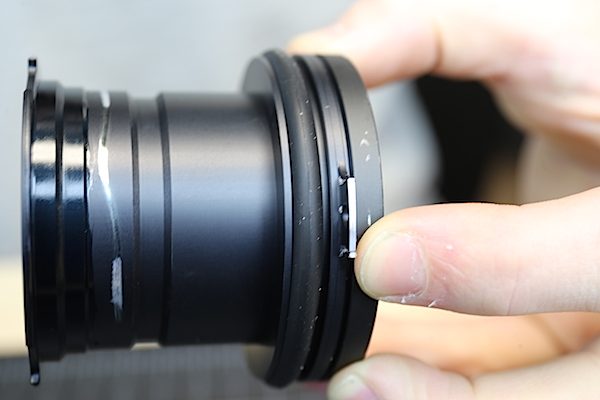
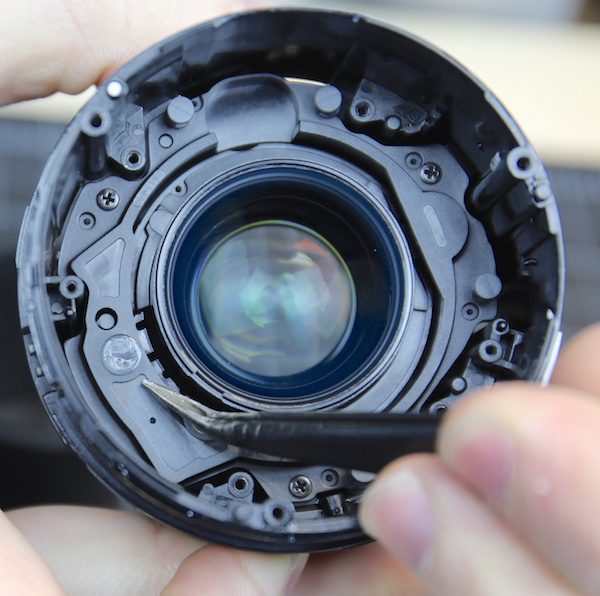
Once the filter barrel is removed, we got an impressive surprise. Underneath the filter barrel, around the top of the focusing ring, is a thick rubber seal providing another weather shield.
Now that we can examine the front group we can see there are shims underneath each of the three screw locations holding the group in place.
After removal, it’s apparent that there are different numbers and sizes of shims at each of the three locations, so these are adjusting the tilt of the front group, not just the spacing between lens groups.
The front group can be removed now. Probably the thickest rubber seal we’ve ever seen in a lens is in place around the base of this group. With all of the seals we’ve seen already, I’m most comfortable this lens is really weather resistant, at least in the front.
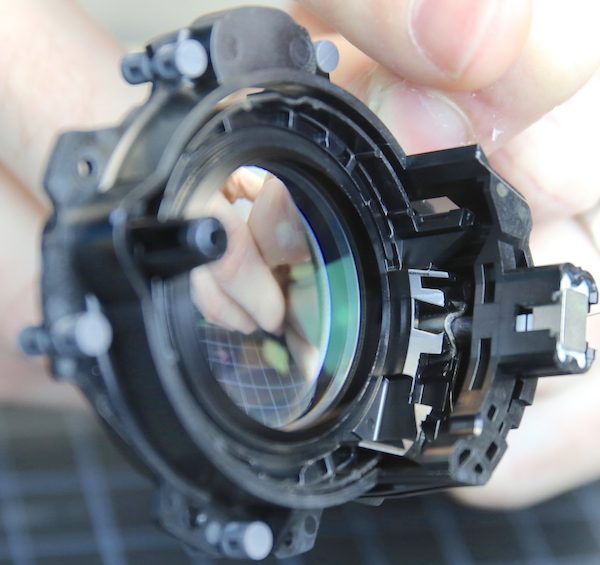
I want to emphasize that what we call the front group is the optics for the glass for the entire front half of the lens in one unit — everything in front of the aperture assembly.
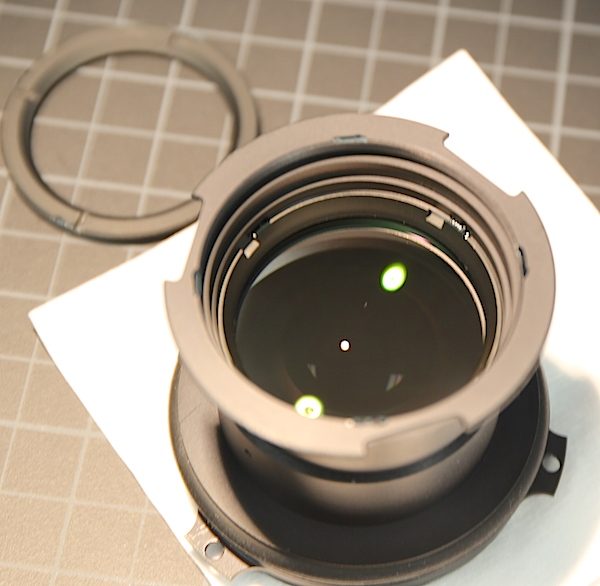
There are spanner rings around the front element and the rear element (shown in the picture below).
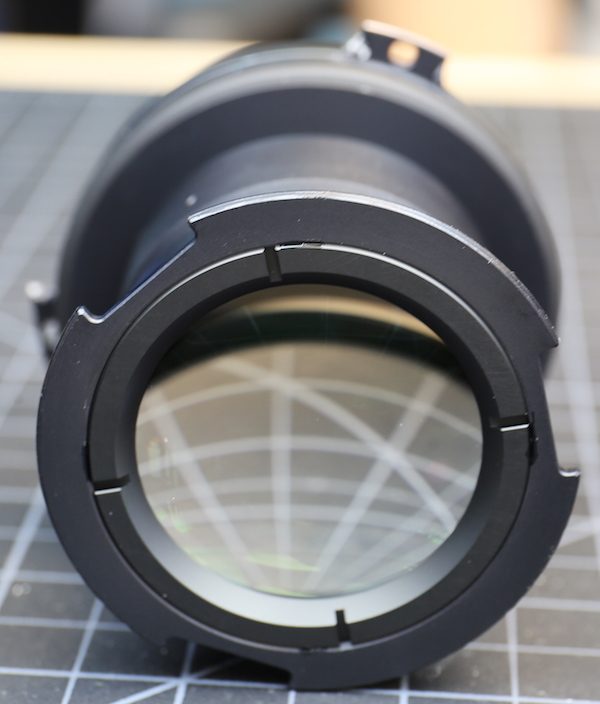
Removing the front spanner ring lets us take out the front element (sitting in a rubber cone in the photo below).
You may have noticed the white ring under the front element. That is yet another thick rubber gasket, both seating the element firmly in the barrel and of course, providing more weather and dust resistance. You can see it more clearly from beneath the element in the image below.

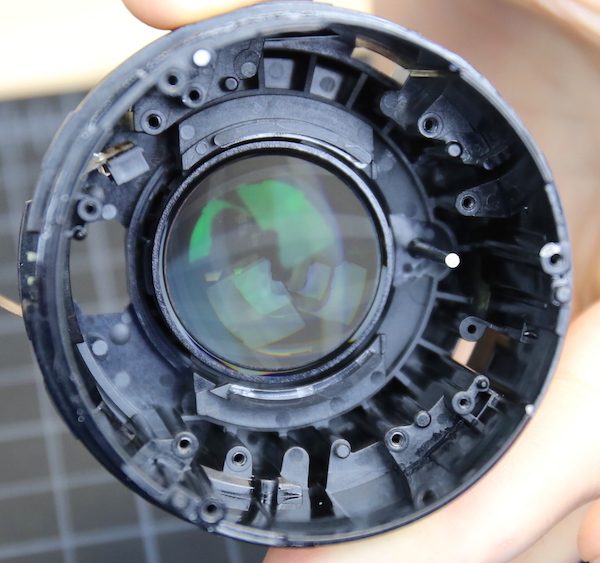
The internal spanner holding the rear group in place is nice and sturdy.
The rear element is fairly thick and tightly seated in the barrel.
There is one element left inside the front assembly, held tightly in place from a spanner ring behind it. We had a reason to check for all this: In some lenses the central elements are simply stacked with spacers, only the front and rear groups are held in place with threaded spanners. Internal groups can shift around with a drop or jar in that case. With the FE 35mm f/1.4 that won’t happen, each group has its own spanner ring. On the other hand, there are no optical adjustments that can be made here. The entire group can be tilted on shims in the front. The group can also be rotated and inserted in one of 3 directions (which may help with tilt if the shims don’t adjust it enough). But that’s it.
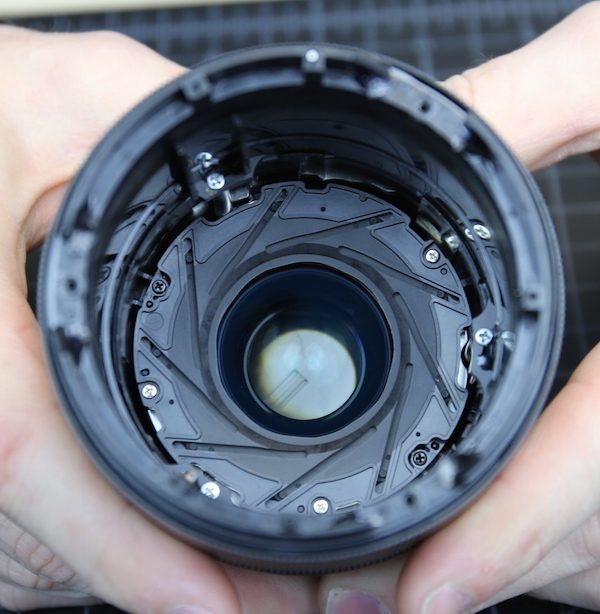
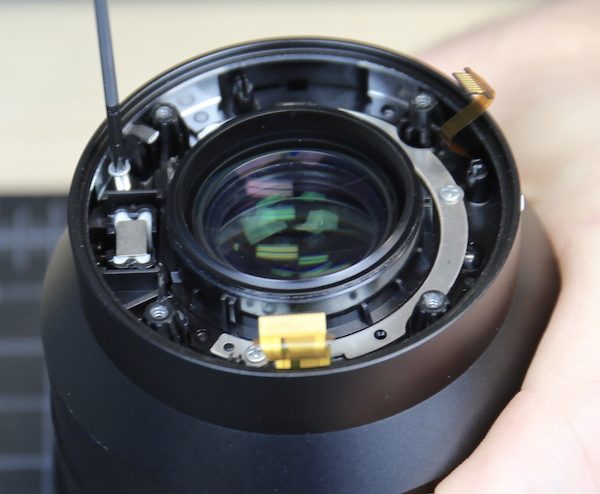
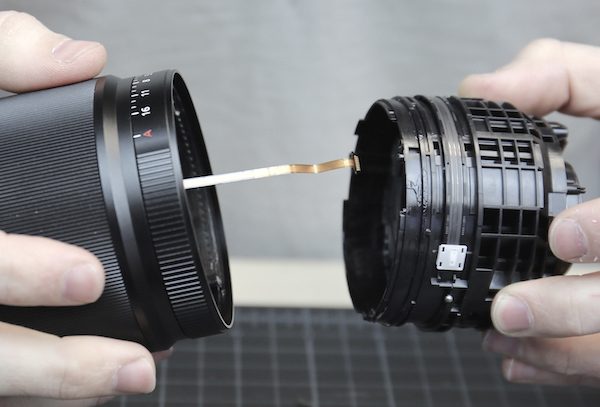
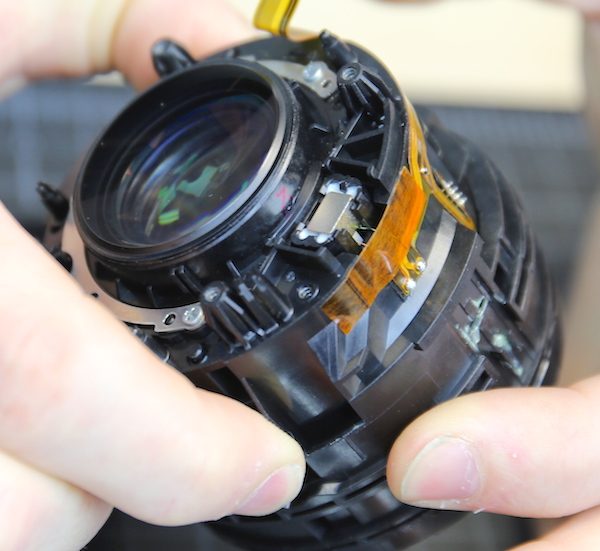
With the front completely disassembled we can look into the barrel and see all the way down to the aperture ring. You can see several screws holding the filter barrel and aperture assembly in place, but we can’t remove them yet because their flexes are still attached to the rear barrel.
it’s time to get around to the back end of the lens and start taking that apart. The bayonet mount comes off in the usual fashion.
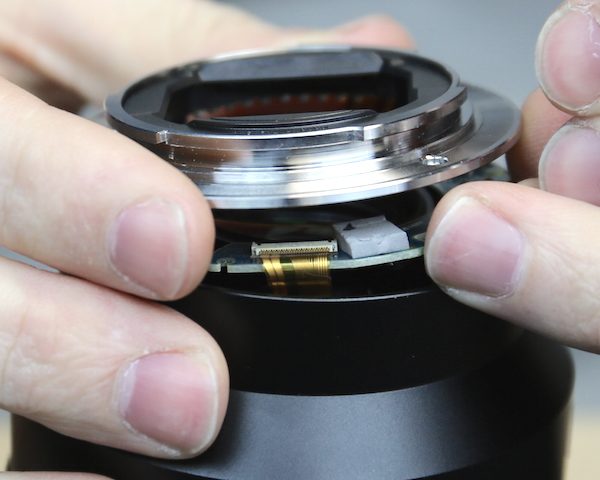
With Sony lenses, it’s generally simpler to unhook the flex from the electrodes to the PCB, rather than remove the electrodes from the mount.
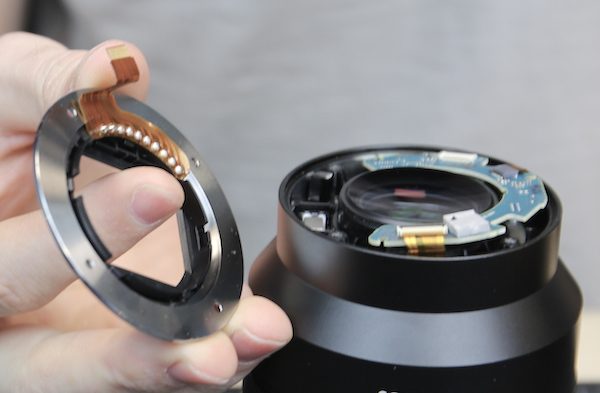
The PCB is pretty usual, although it has one interesting feature: there is some heat-sink putty behind one of the chips, I assume to avoid any overheating.
With the PCB out the 4 screws holding the rear barrel on can be removed.
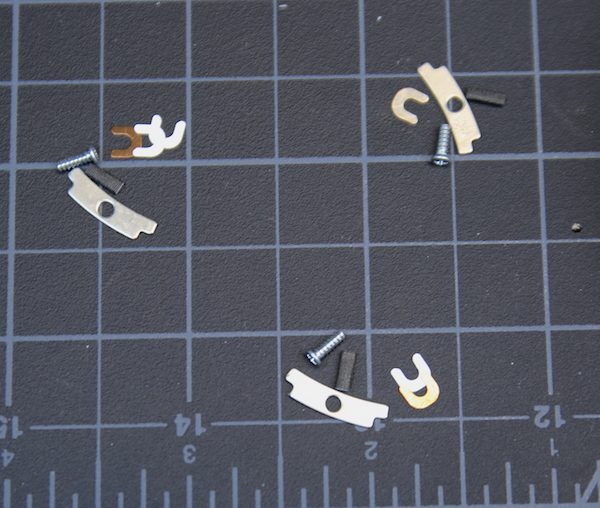
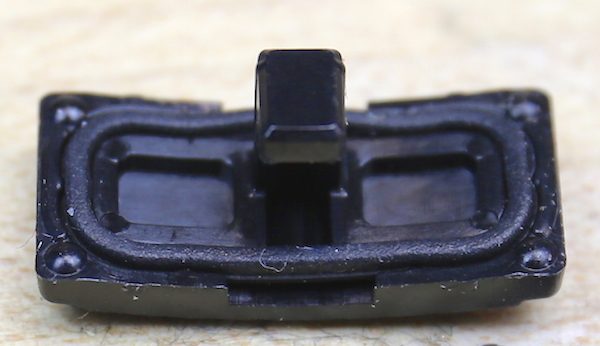
The aperture click switch is then taken out as the rear barrel is removed.
The switch itself is strictly a mechanical lever with no electronics. It’s good to see that even this switch has a rubber gasket.
With the switch removed, the rear barrel slides right off. Notice there’s another rubber foam gasket sealing the rear barrel to the aperture ring.
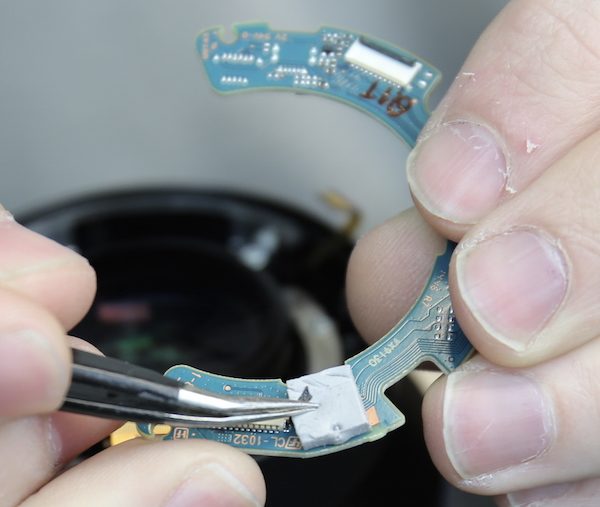
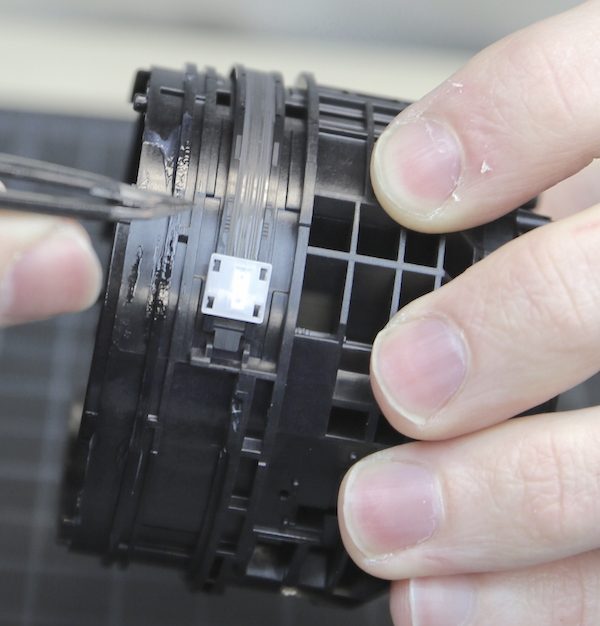
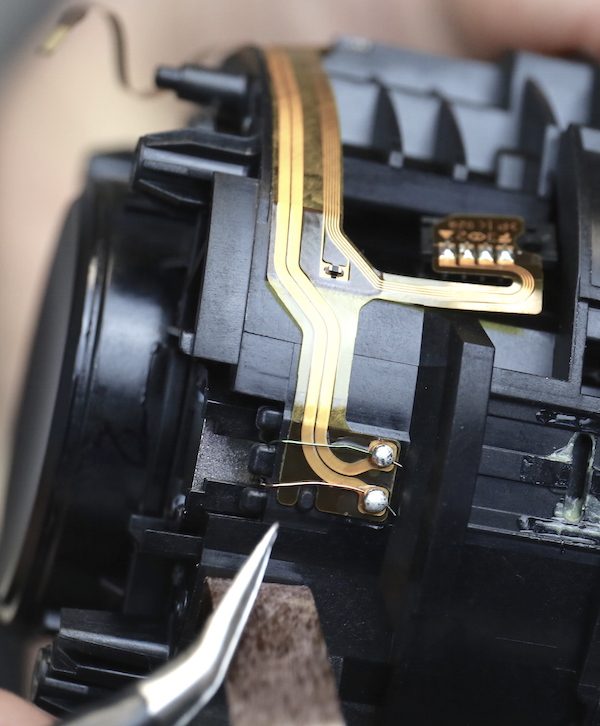
Now we can see where all those flexes from the PCB were going.
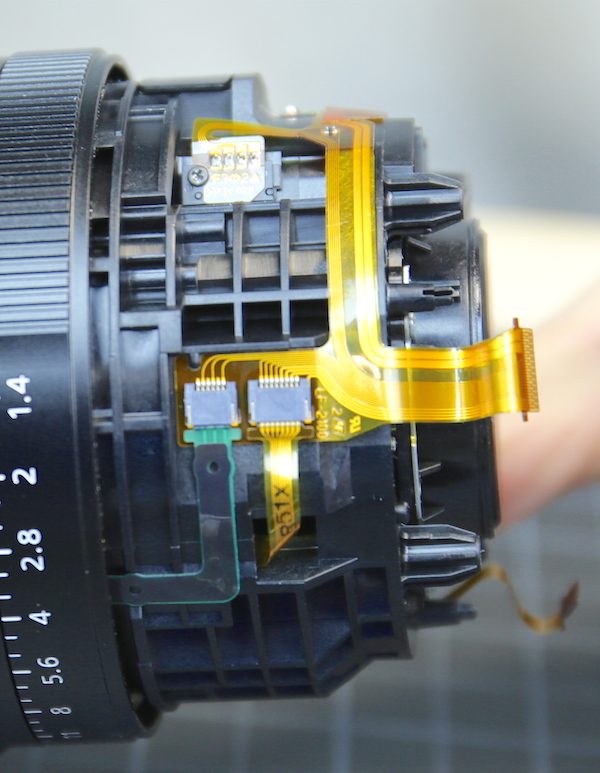
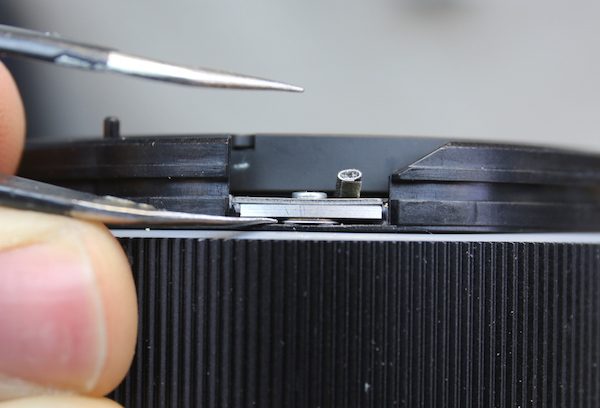
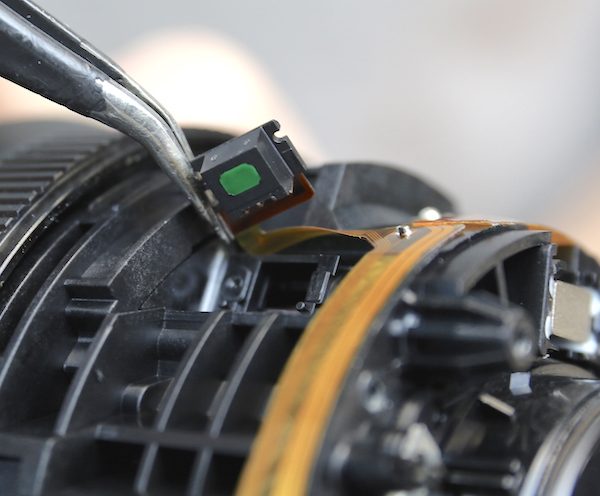
The one held in place by a screw perked our interest right away. It is the sensor detecting focus position. If you look to the right edge of the picture below, you’ll see a small silver square. That is actually the back end of the focusing electromagnet.
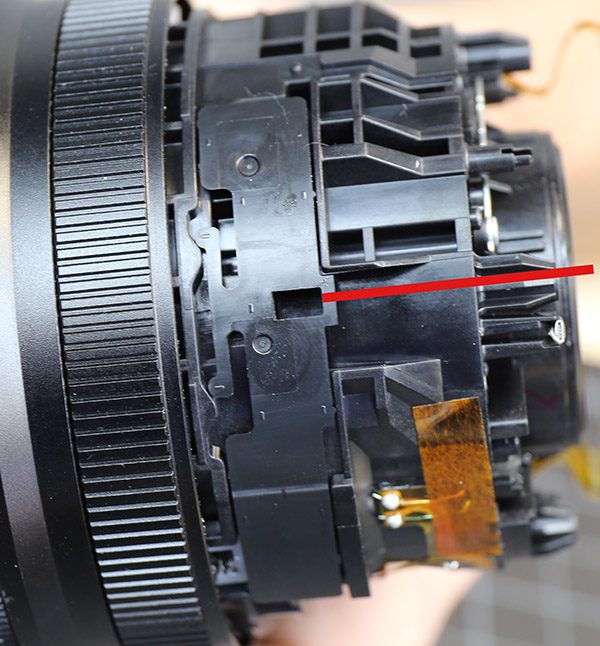
While we’re looking around the rear barrel, here is the slot where the aperture click mechanism, which we removed earlier, inserts (red line). Moving the click-declick switch shifts the plastic tabs of this inner piece from one slot to the other.
With the barrel off, this piece lifts right out of its location.
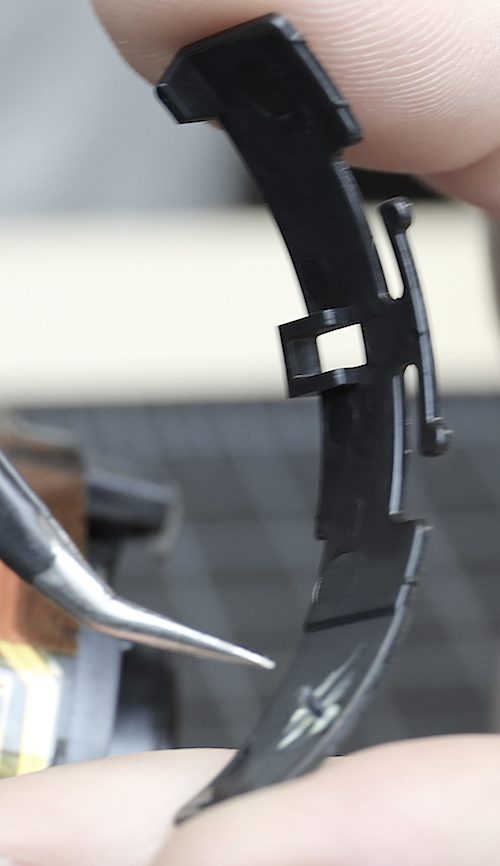
The little post (out of focus and pointed to with the forceps) inserts into a white plastic plate with spring loaded ball bearing that actually provides the clicking sensation you feel when you turn the aperture ring. There isn’t a lot of stress on any of this and it may well hold up forever, but I’m always a little nervous when I see a plastic post moving another plastic post that moves a lever.

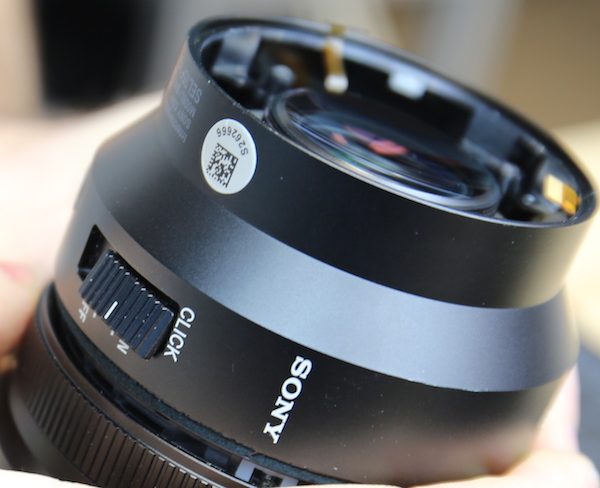
There’s one long flex to unthread through the rear barrel, then the filter barrel and aperture ring can slide off. The long flex cable relays manual focus adjustments to the PCB. Despite the mechanical ring with its nice mechanical clicks, the aperture is controlled electronically.
This white plastic slider with brushes underneath is the aperture sensing / controlling mechanism.
With the focusing barrel removed the screws holding the aperture assembly in place are exposed.
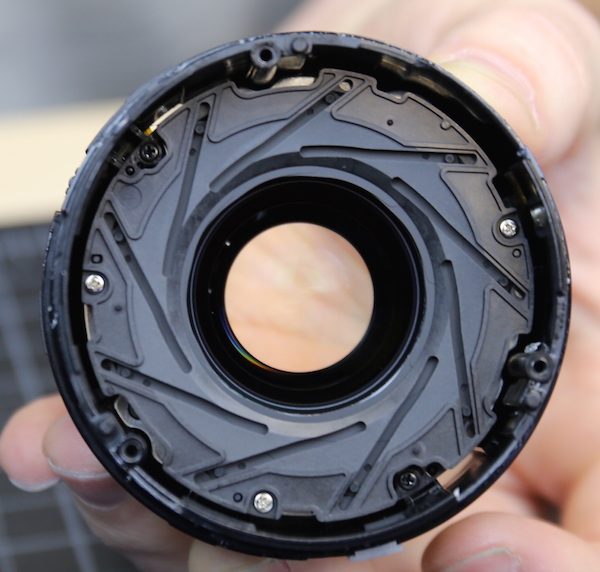
The aperture assembly comes out in one piece.
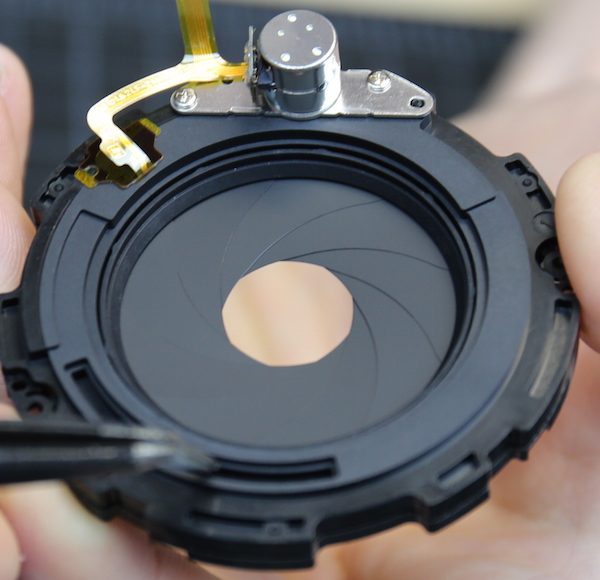
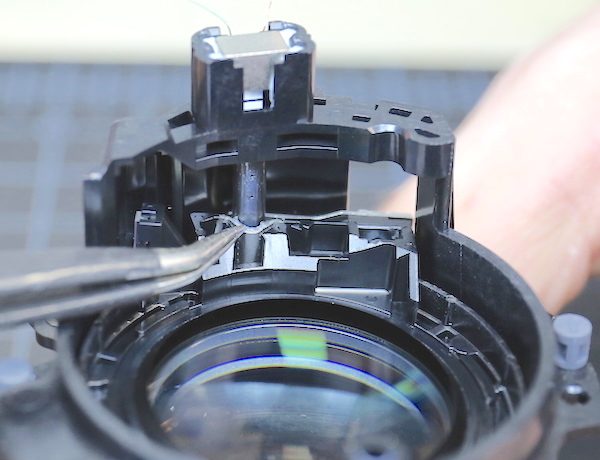
Underneath where the aperture assembly was, is a thick metal plate, held in place with 4 screws.
With the metal plate removed, we’ve exposed the plastic plate that is the top of the focusing assembly. You can see the indentation for the aperture motor at the top. The forceps are pointing to a round area where one side of the AF system anchors, while the half circle across the lens from that is the other side of the AF track over the electromagnet. The glass element we’re seeing here is the actual focusing element.
Notice also there’s a set of soft rubber bumpers on the plastic housing of the focusing element, separating it from the metal plate we just removed. You can’t see them yet, but there’s an identical set on the other side of this plate.
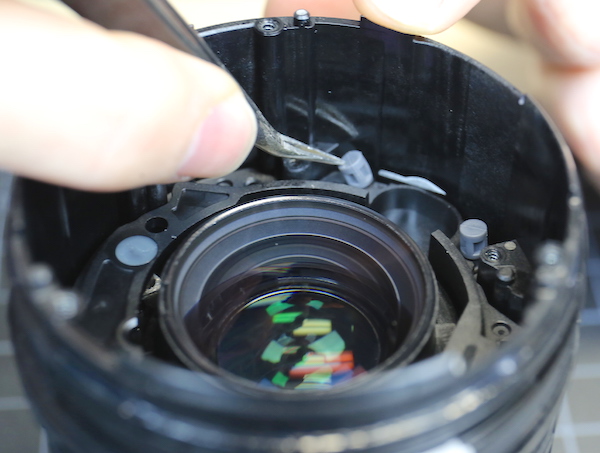
To take the focusing system out, we have to desolder the electromagnet from its electrical supply.
With the motor wiring disconnected we can remove the screws holding the focusing assembly in place and slide it out of the barrel.
You can tell already that this is a very different from what we saw in the FE 24-70 f/4 lens. The magnet is is deeply encased in a plastic holder, the rods the focusing element moves on are thicker, and the plastic encasing the focusing group is wider and thicker. Notice the (out of focus) peg across from the motor. When you look at the now empty barrel you can see the metal post that inserts inside the peg, across from the hole the electromagnet fits in. The inner ring in the assembly above slides up and down on the two poles (the second pole is just visible under the electromagnet) when the lens is focusing. Even these are a lot sturdier than what we saw in earlier Sony lenses.
Looking back at the focusing group we also note that the focusing element is secured not just by a dot of glue (as with the 24-70), but also by a screw tightened metal C-clamp where the forceps are pointing.
That’s what the Sony FE lenses do instead of having rollers, collars and helicoids, and why you won’t read comments about how heavy duty the collars are in this lens. It doesn’t need any. All I can compare this focusing group to are the two other FE lenses (24-70 f/4 and 55 f/1.8) that we’ve taken apart. Compared to those this does indeed appear to be a much more solid construction and I can see why we don’t see AF failures with this lens.
Summary
Let me start with the things that are obvious. This lens has the most rubber gaskets I’ve ever seen. The weather and dust resistance in the lens itself should be superb. I’m still concerned that there is not rubber gasket where the lens mounts to the camera or under the bayonet mount. I would suggest, therefore, if you’re taking this out in weather a little additional seal at the lens-to-camera mount would be a good idea. A thick, snug, rubber band would probably do the trick, or a plastic bag around the camera and lens mount. Other than the mount, I think the rest of the lens would be fine in a hurricane. I’m always cynical about weather sealing, but this lens is amazing in that regard.
The lens has a ‘metal shell over polycarbonate internals’ construction, which is pretty standard for ‘metal’ lenses. The inside components do seem well constructed, held in place with numerous long, heavily threaded screws through fairly thick polycarbonate pieces. That metal plate that separates the focusing assembly from the aperture should add additional strength and stability (although I doubt that is its primary purpose). Overall, I think this lens is well made and should hold up well to normal use and abuse.
From a repair standpoint, the filter barrel should be easy and inexpensive to replace. The front element could be too, but Sony doesn’t sell just the front element; the part for replacement is the entire front group, which is unfortunate. Front elements get scratched and in this case, it’s very expensive to replace. This is one of the rare lenses where I would recommend using a protective front filter and keeping the hood on. (I will add this may not be just an arbitrary decision on Sony’s part. We’ve replaced just the front element in-house and found that the front group then had to be reshimmed and rotated to get the optics back to OK. It was time consuming.)
The one negative is that the Sony 35mm f/1.4 does not have much in the way of adjustable optics; just some shims to adjust tilt in the front group. That doesn’t make the optics bad, and some good, low variation lenses don’t have much in the way of adjustments. But that is why I’ve said several times that optically adjusting a decentered copy of this lens isn’t likely to be successful; there’s not a lot of adjustment to work with. Whether this is just the norm for all lenses made for this mount, or whether other manufacturers making lenses for FE mount cameras have more adjustment options I can’t say. Yet. We have some more teardowns to do.
And let me close by saying the malignant fanboyism, both pro and con, that the hate that the new Sony lenses are generating is just inappropriate and not useful. Sony is boldly going where no camera manufacturer has gone before. They’ve brought out more new technologies in the last couple of years than everyone else combined. We all want new technologies. But new technology often takes a couple of generations to fulfill its potential.
The Sony 35mm f/1.4 doesn’t give me everything I want in a lens. But it really does show that Sony is learning and improving with each product. The autofocus system is much more robust in this lens than in previous ones. The weather / dust resistance is phenomenal. The build construction is good. The optics, well, I think perhaps that may be a generation away.
NOTE: I should have been more clear when talking about the optics (yes, pun intended). A good copy of this lens is superb. But the copy-to-copy variation problem will, I think, take another generation to clear up.
Roger Cicala and Aaron Closz
Lensrentals.com
December, 2015

42 Comments
Snikt ·
You mentioned the FE55 and FE24-70 have the “earlier” AF system which seems more prone to failure. I’m curious do you know which system the FE16-35 uses or how the AF failure rate of that lens compares to the others? Thanks
Roger Cicala ·
Snikt, not yet, no. I’m guessing it’s more like the 35 because we haven’t seen much AF failure with it. But right now that’s just a guess.
Lynn Allan ·
> “The build construction is good. The optics, well, I think perhaps that may be a generation away.”
Just good? Generation away?
Would this be an example of “damning with faint praise”?
Did you find evidence of what might account for the so-so MTF variance in the previous article?(which opened up a hornet’s nest on DPReview forums)
OT? As an owner of the zony FE 55mm f1.8, I’d definitely appreciate “tear down notes” about this lens. My inference is that the teardown was for a repair, rather than a blog article with accompanying photos to aid put-back-together.
Andre Yew ·
Roger, thanks for the very interesting teardown. Those gaskets are crazy. How does the Sony AF motor compare to Olympus’s MSC linear motor system used for some of their m43 lenses? It looks similar in concept.
Roger Cicala ·
Lynn Allan, I hope not damning with faint praise. I meant to praise one and damn the other.
I meant to say the build construction was good. Not awe-inspiring. Good.
The optics are good but the variation is awful. I hope they get that fixed next go around. It’s a great lens if you don’t mind a soft corner right now. But if it was on another brand at that price, a soft corner wouldn’t be OK.
Roger
Roger Cicala ·
Andre it is similar in concept but I don’t have enough experience with this kind of focusing system to compare. The micro 4/3 are obviously much smaller, they move a lot less mass.
Butanding ·
“I usually make a joke about getting out your own lens and following
along at home as we do teardowns, but really, don’t try this one at
home.”
I didn’t know you were joking!
Butanding1987 ·
"I usually make a joke about getting out your own lens and following
along at home as we do teardowns, but really, don't try this one at
home."
I didn't know you were joking!
Ayoh ·
Roger, great post as always. However that AF actuator is not an electromagnet but a linear piezo system. Have a closer look. The is probably why the design seems so different
PVC ·
I just don’t understand closing with a remark like that after saying how inappropriate the hate has been. This lens may not be what you like with tons of adjustment points but to dig the optics again just restarts the rhetoric. I’ve used the lens, rented from you, and thought it was superb as many others have proven with stunning pictures. I love your work and your company but some of your comments appear disruptive and unnecessary.
Panacea ·
People have taken stunning pictures with a potato, but that has no bearing on whether said potato is actually optically-excellent enough to allow for large prints (or deep crops) that people will remain stunned by. Or whether that potato will last and remain serviceable over the years though heavy… perhaps rough, and maybe even abusive usage that was necessary for a dedicated/driven photographer to “get that shot”.
There is a difference between slurring a target by fanboys and fair criticism by an expert well-versed in many aspects of the equipment in question. Your response to Roger’s warm-overall-regards-but-less-than-total-gushing suggests that any criticism is unacceptable to you.
Thinkinginpictures ·
I like potatoes.
Oleg ·
I guess you won’t be renting from Roger anymore since his Sony lenses are not good enough? 🙂
Vit ·
Can someone explain to non English speaking people ‘The optics, well, I think perhaps that may be a generation away’ is ‘lagging behind or ‘the best’?
Jon ·
Vit–
Looking back to the October 20 blog post, Roger found that the 35/1.4 FE is not quite as sharp as the Sigma 35/1.4 or the Canon 35/1.4 Mk II. In addition, there was greater copy-to-copy variation with the Sony as well. This teardown gives some potential reasons for the high variation, such as the lack of adjustment available for the optics in the front group.
http://www.lensrentals.com/blog/2015/10/sony-e-mount-lens-sharpness-bench-tests
So, while the auto focus design of the FE 35/1.4 is a big improvement, the “next generation,” over the previous FE lens (55/1.8 and 24-70), it is optically still not quite as good as the best lens at this focal length (nor as adjustable).
Vit ·
Oh, what a detailed answer, thank you.
Lucas M ·
“it is optically still not quite as good as the best lens at this focal length” – it’s also less expensive than Canon and Nikon, lighter than Canon and Sigma ( by a hair ) …! I wonder how the Sony handles and performs in real world use.
Roger Cicala ·
Ayoh – thank you. Not my area of expertise and I appreciate the help.
Roger Cicala ·
PVC I see a difference between hating on and stating a fact. It’s not a bad lens by any means, it’s quite good. It’s superbly weather sealed and has interesting and perhaps superior new technology. Optically it has a lot of variation and for some this is an important fact to know. I’m glad it worked well for you.
Leo ·
Continuing the 35mm theme, the most interesting and exciting teardown must be… tearing down the Sony RX1R II!
Some say this lens is of terrible construction quality that the manual focusing often fails and some say this is the best engineering Sony Imaging can offer… I’d really like to hear from an expert on it’s construction.
There_Is_No_Spoon ·
Nice! This puppy was the 3rd one I bought in the FE lineup and for me, it’s the best 35mm I can slap on the A7 bodies. Big and heavy…eh, it’s all relative. IQ and handling – fantastic. As always, I don’t a crap about internals, but this is plain interesting. Thanks Roger!
Craig John ·
The optics, well, I think perhaps that may be a generation away.
If that’s the case, then the next generation of this lens is going to be stratospheric. My 35/1.4 FE is simply stellar – better than any Nikon 35 AF lens I’ve ever used. And I’ve bought and sold them all, including the Sigma 35 Art for Nikon mount.
Just calling it like I see it based on my experience. …and those experiences go back long before the Sony a7 cameras were even available.
Jorge Torralba ·
After looking at this. It’s apparent that Sony put a great deal of design effort into this lens with a very intricate build. Having said that. I am very glad to own manual focus lenses which will undoubtedly outlast anything electronic.
Y.A. ·
There are AF lenses from the 80s still doing their thing. And high end electronics like this have only become more robust. Not to mention unless you shoot an old mechanical film body your bodies will be susceptible to electronic failure too. I think it’s a non issue to be honest.
Turniphead ·
Another interesting teardown – thank you Roger!
If the Canon 35mm is one of the best constructed lenses you’ve seen – out of curiousity, what’s the worst? Are the Rokibowyang lenses signficantly worse than average? How does their 35mm f1.4 look inside?
I must admit I’m happy with my Samyang 14mm in terms of image quality, but I’m curious as to whether it’s mostly made of cardboard and gum internally 😉
Panacea ·
I hear that the Rokibowyang lenses eventually develop excessive slop with their focusing helicoids (made out of cardboard and gum?), which makes accurate manual focus difficult.
I am loathe to pop apart both my Rokibowyang 24mm f/1.4 and 14mm f/2.8 to confirm. I am just accepting it as the cost of doing business for coma-free astro. And relegating them to purely night/astro duty to extend their service life.
Gabriel ·
I hope my Samyang
135mm F2 holds up. It is an AMAZING lens for sure.
Mark Harris ·
I hope my Samyang
135mm F2 holds up. It is an AMAZING lens for sure.
Roger Cicala ·
Turiphead, the Rokibowyang lenses cut the most corners, I don’t think there’s much question. Really great price, but they need to be treated most carefully.
Roger Cicala ·
Craig John, the optics as far as sharpness on a good copy are stellar, it’s the copy to copy variation in the optics I think will improve.
Maxim Podtopelny ·
Nevertheless such a graceful avoiding of any comparison to previous experience with 35 L II silently tells much more than whole of this teardown itself. I bet it was damn hard to find appropriate words to stay polite and constructive as usual in this article, but real conclusion is read between the lines quite well and pictures of gear internals also speak for themselves. That’s just my personal opinion of course.
Now waiting for 35 Art teardown, it promises to be very interesting.
Panacea ·
I think the relative absence of comparison to the EF 35mm f/1.4L II USM is more natural than you might be insinuating.
The fact that the SEL35F14Z’s mechanicals is a clean-slate, purely focus-by-wire design means that no focusing helicoid is needed, which is a structure central to the heart of a dSLR lens, and dominates much of the discussion of the dSLR lens’ build. Basically, their internal mechanisms are not comparable.
[A focusing helicoid is both a development/legacy (depending on how you see it) from the manual-focus mechanisms of “legacy” lenses in which a rotational motion (i.e. turning the focus ring) needed to be mechanically-translated into linear motion (i.e. moving the focusing group fore/aft). A modern dSLR lens AF system merely consists of an ultrasonic ring motor added to the helicoid drive, and a separation of the focus ring from the helicoid drive with a clutch mechanism.]
Could the SEL35F14Z be built better? Sure. But so could the EF 35mm f/1.4L II USM. It’s hard to say how they rate relative to each other, esp. considering that their stressed and wear points are probably completely different, and in-the-field durability will only reveal itself with time. Roger does take the time to talk about the (dearth of) optical adjustments available, as that is comparable and relevant regardless of their focusing mechanisms.
binary animal ·
Nevertheless such a graceful avoiding of any comparison to previous experience with 35 L II silently tells much more than whole of this teardown itself. I bet it was damn hard to find appropriate words to stay polite and constructive as usual in this article, but real conclusion is read between the lines quite well and pictures of gear internals also speak for themselves. That's just my personal opinion of course.
Now waiting for 35 Art teardown, it promises to be very interesting.
Roger Cicala ·
Panacea, I wouldn’t take them apart. Getting them back together is, well, challenging. 🙂
Lynn Allan ·
Regarding “weather resistance” … my working expectation is that the camera + lens will most likely be ok on a tripod overnight in falling temperature when minor to moderate condensation is a possibility half-way through the star trails.
Or not?
Gabriel ·
Awesome job,! I would love to see the FE 16-35mm too
Mark ·
Do you put it back together afterwards?
gmarmot ·
When I was about 18 I took a lens apart (now in my 60s and surprisingly am still alive) and it was worlds simpler than this. That modern technology can create such an intricate mechanical and electronic device for anywhere near the asking price really is incredible. Nevertheless, I’m still not able to buy very many of these.
l_d_allan ·
I would appreciate a blog article that showed “scatter diagrams” of the notoriously inconsistent Sony 35mm f1.4 to a much more consistent prime such as the Canon EF 35mm f1.4. Or perhaps to the Sony 85mm GM?
In order to show the level of variance, could such charts go from the full range of lp/mm (or what you use) from zero to the maximum.
Javi Neiro ·
Hi Roger, I just read your article, very interesting, thank you for sharing. I bought this lens a year ago, unfortunately I drop it and I start to realize corners where not in focus when autofocus pointed that area (a pretty big one by the way, basicly only on the center focus 100%). Funny thing is I’m not really sure if this issue was there from the beginning… Anyaway I went to a repair shop and fixing it is about 800£. Wich is very close to the price of a new one. They told me that maybe the Helicoid is broken. Does it sound good to you? Do you think it deserves the repair?? Best regards
Roger Cicala ·
Javi,
That sounds like the ‘replace the entire optical assembly repair’. Personally it’s not a lens I love and I wouldn’t invest that kind of money in it; but if you do love it, I’d tend to buy a new one if the price is within 10% of the repair cost.
Javi Neiro ·
Hi Roger, thank you very much for your reply. Yes I love the rendering of it but I think is too expensive to repair, I think I have better options for that price. Thank you very much again.