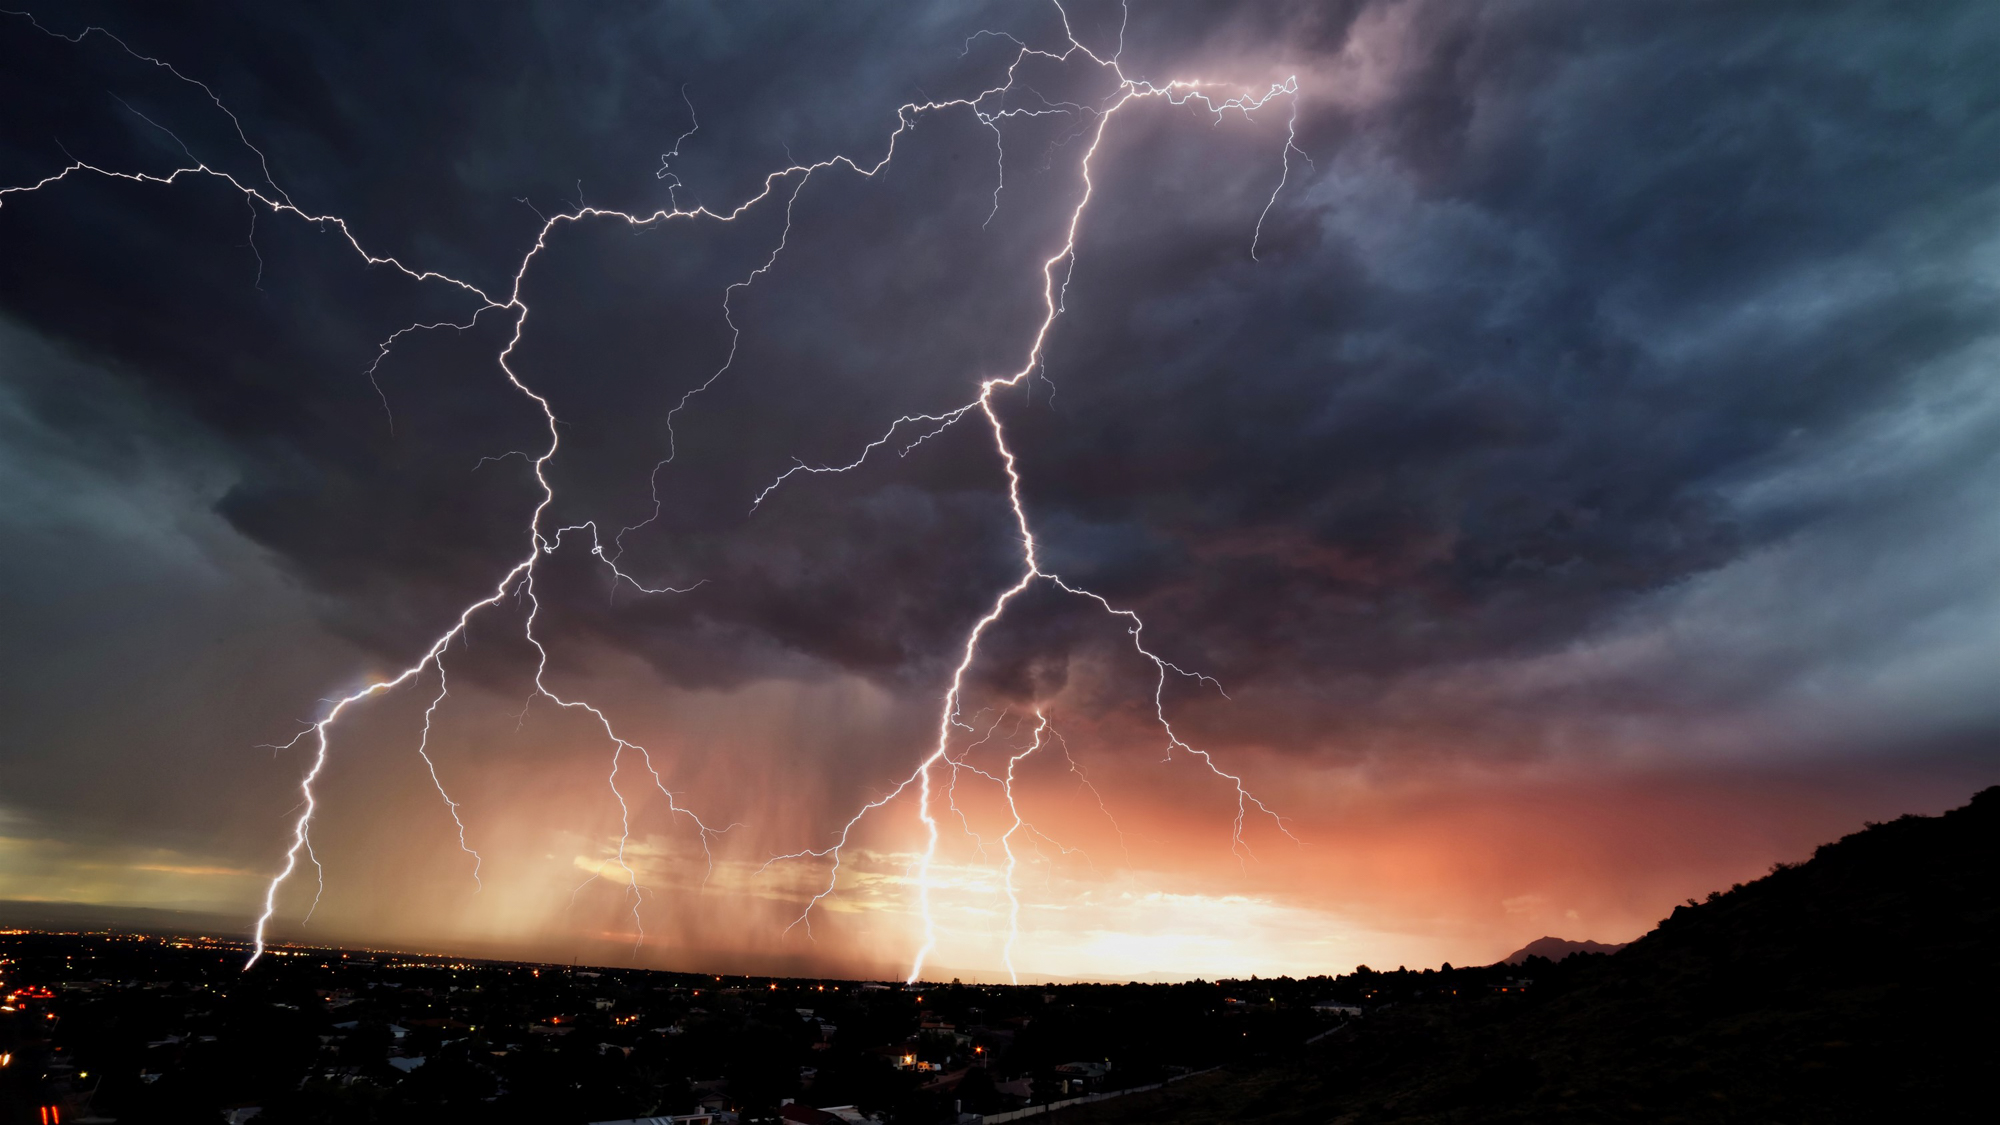
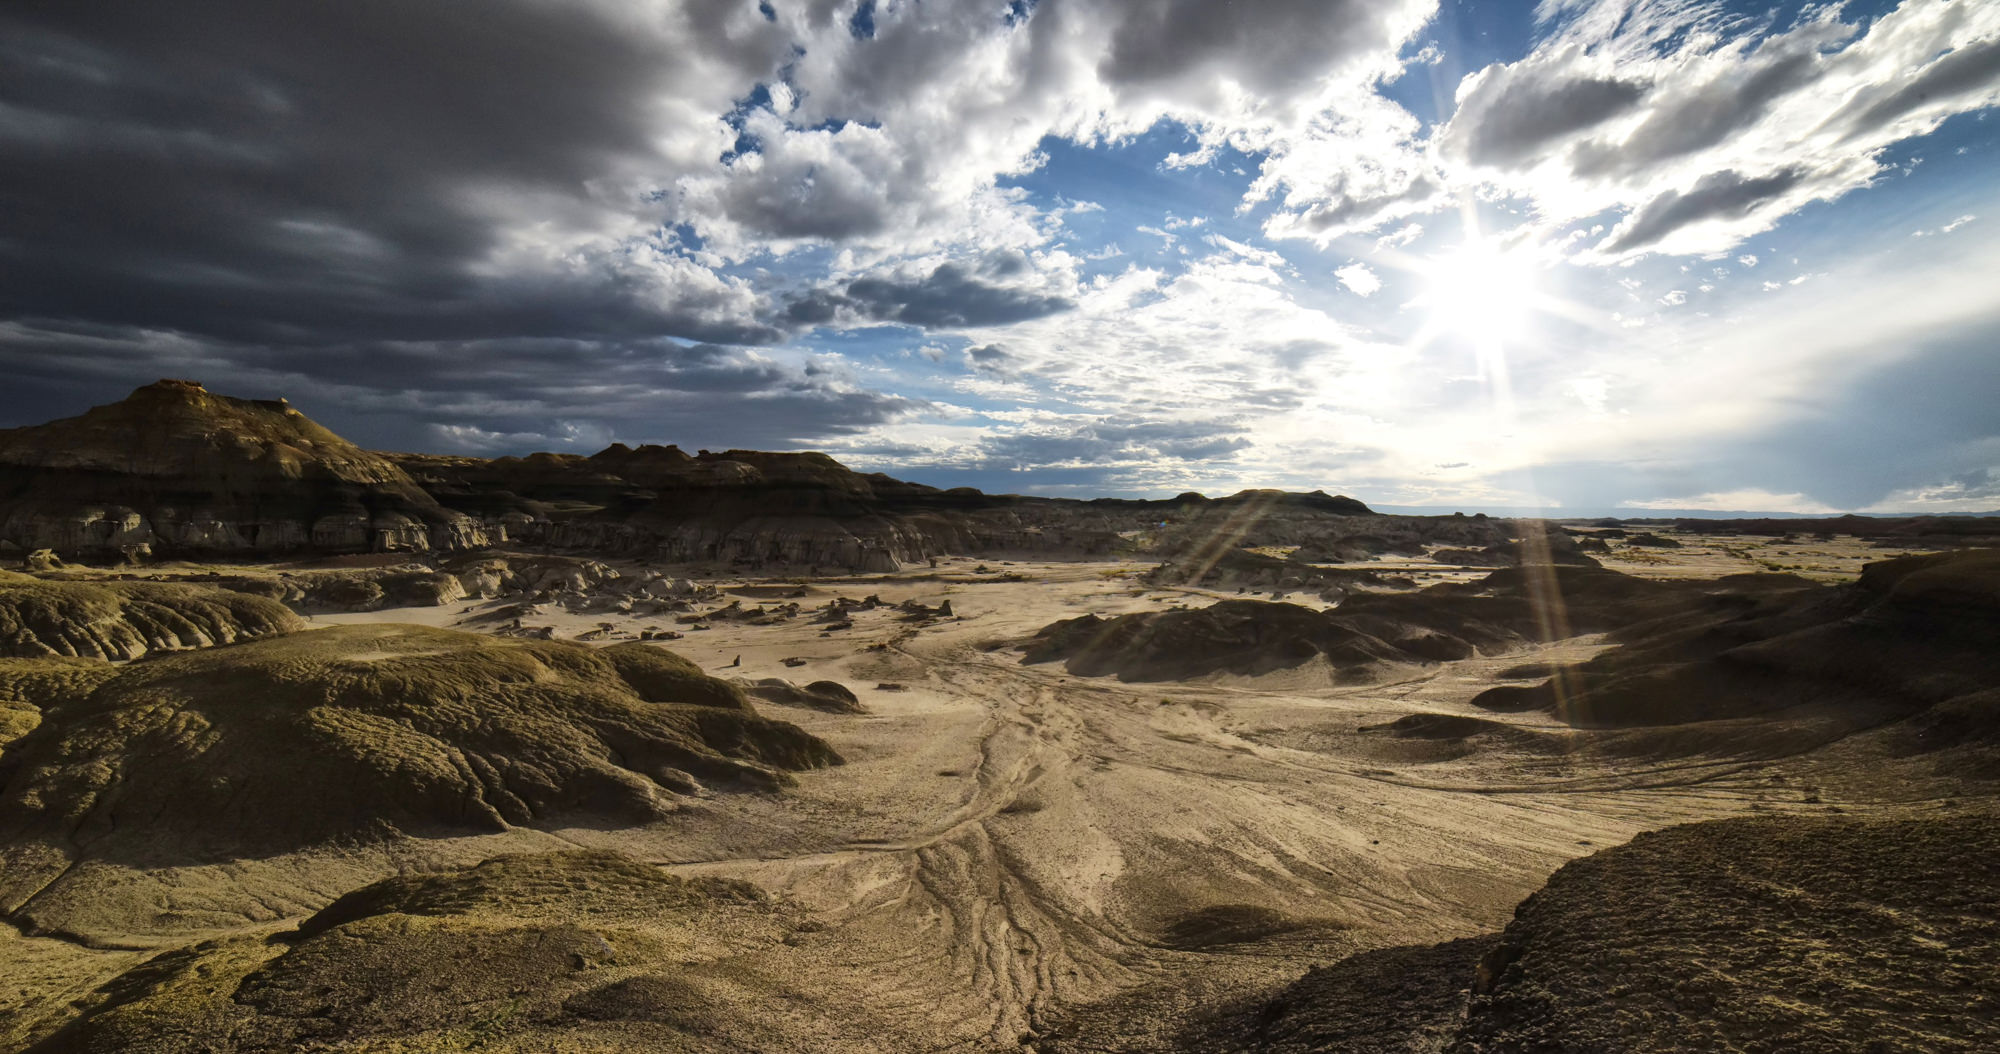
I enjoy getting outdoors to backpack, hike, and camp. I love to find a quiet spot among the trees or in the desert and just sit and take in the quiet and beauty of the landscape. I find it therapeutic to get away from the noise distractions of the city and I also enjoy photographing those scenes and taking them home with me. Most of my trips center around photography and I’ve found that I’m more motivated to get out, exercise, and explore if the possibility taking home a great photo is there. And there is ALWAYS a great photo.
For me, landscape photography has always been a great opportunity to get out in the world, relax, and take some exceptional photos of the beauty that surrounds us. I’ve been involved with landscape photography, and the art of exploration for a number of years, and have learned a number of tips and tricks to help make the most of the tools I have. In the Army and recreationally I’ve been hiking, trekking, and exploring for 30 years and I’ve always taken a camera along. My first camera was a Minolta X-700 with (if I remember correctly) a Vivitar 28-210. These are some of my suggestions and tips when it comes to taking photos in the field.
Every trip is different, and I pack my camera bag or my backpack based on weight, time, distance, and subject. For example, if I’m backpacking and in addition to all my camping equipment, I’ll take very minimal photo gear to keep the weight in my pack below 40/45 pounds; a camera body, two lenses, and tripod. If I’m taking a day trip, I’ll take a camera bag with two bodies, three lenses, two tripods and other equipment. I also pack my bags based on subject. If I’m leaving late in the day and photographing the night sky, I’ll leave my medium zoom and bring along two bodies, two tripods, and two ultra-wide 14mm lenses.
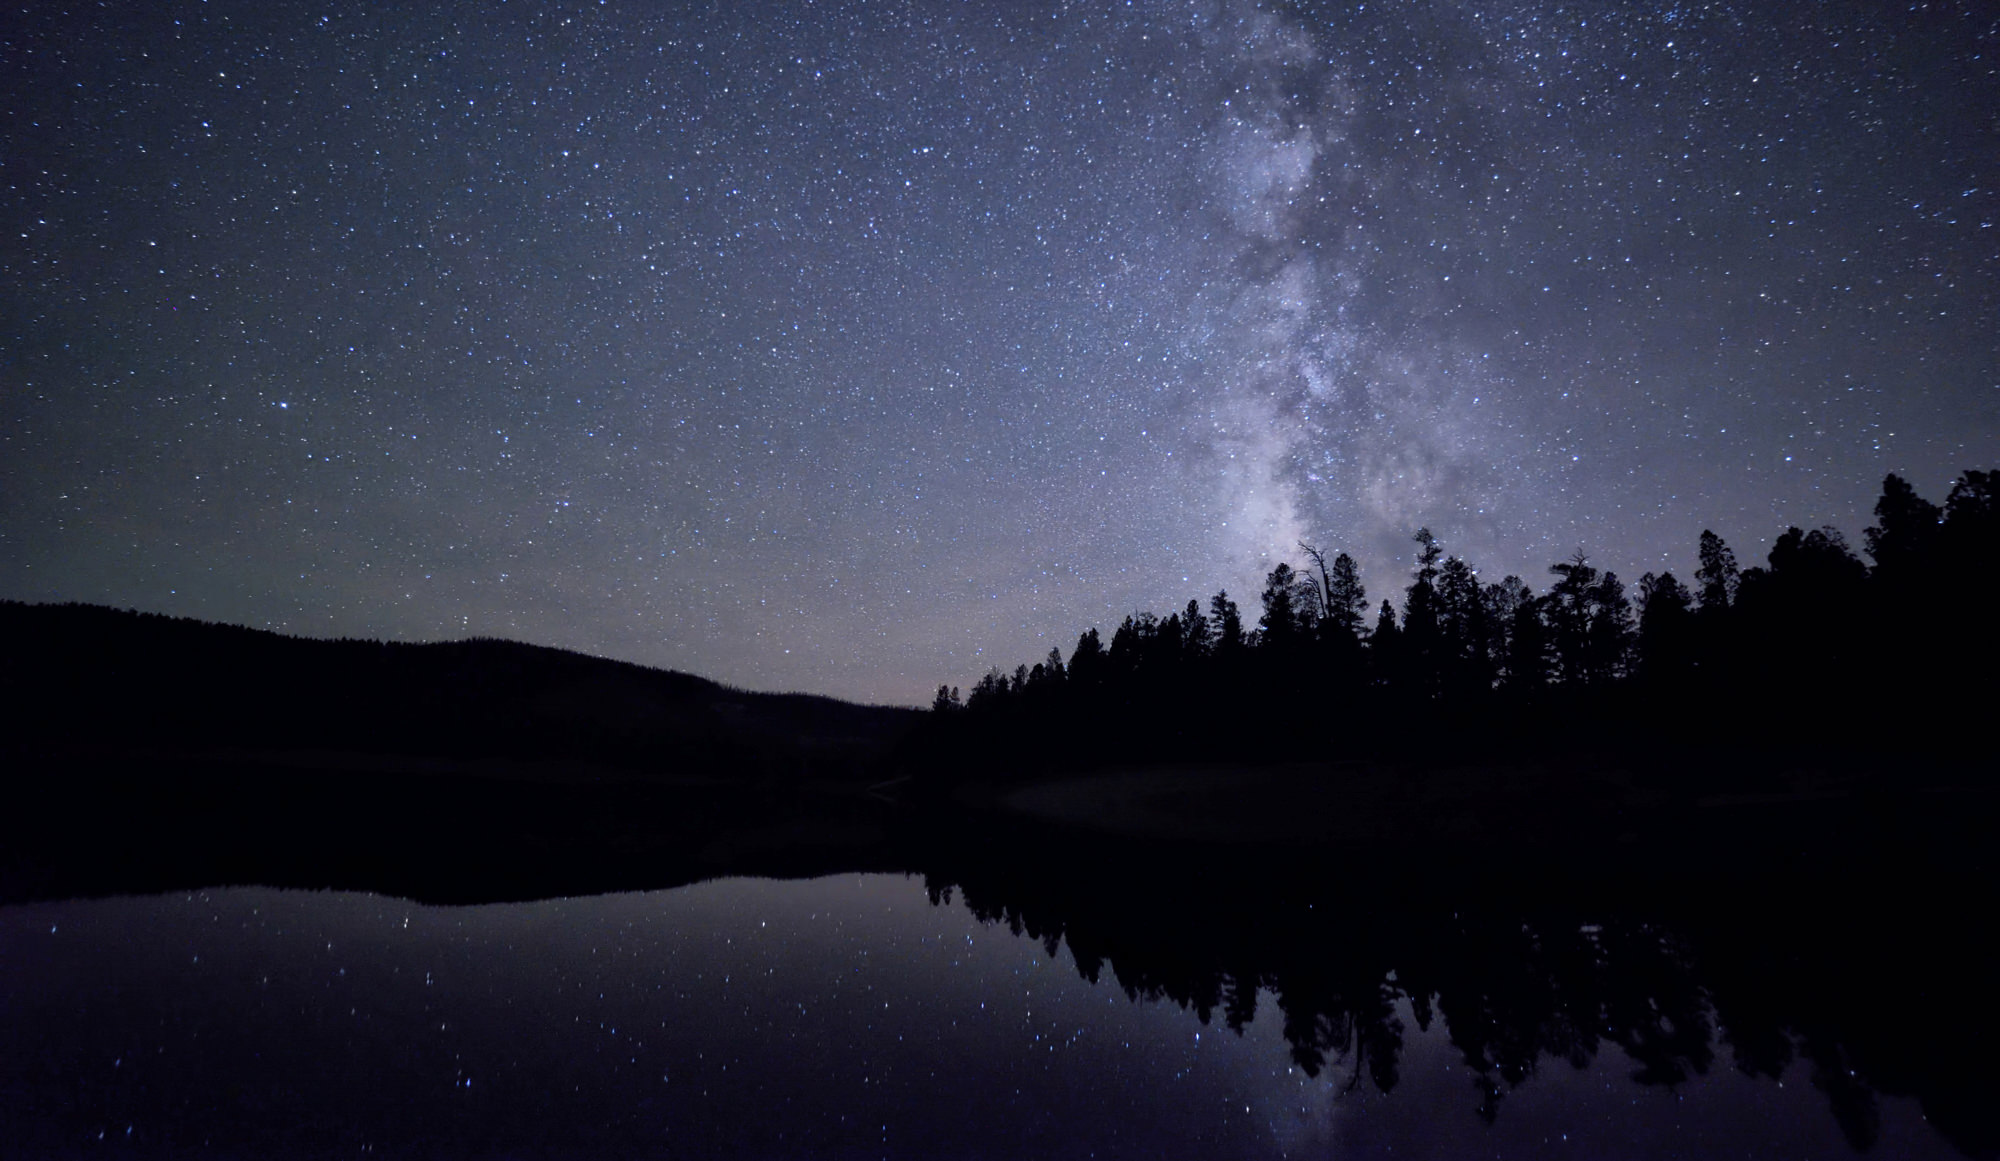

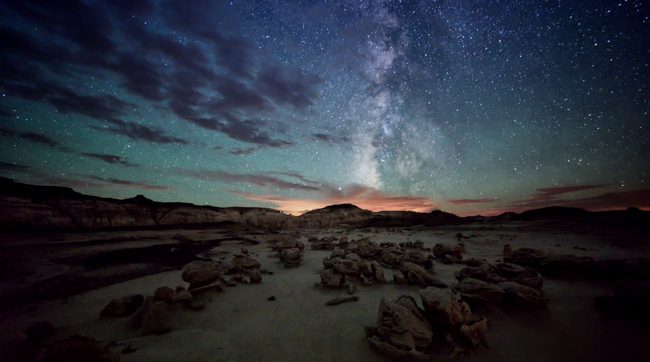
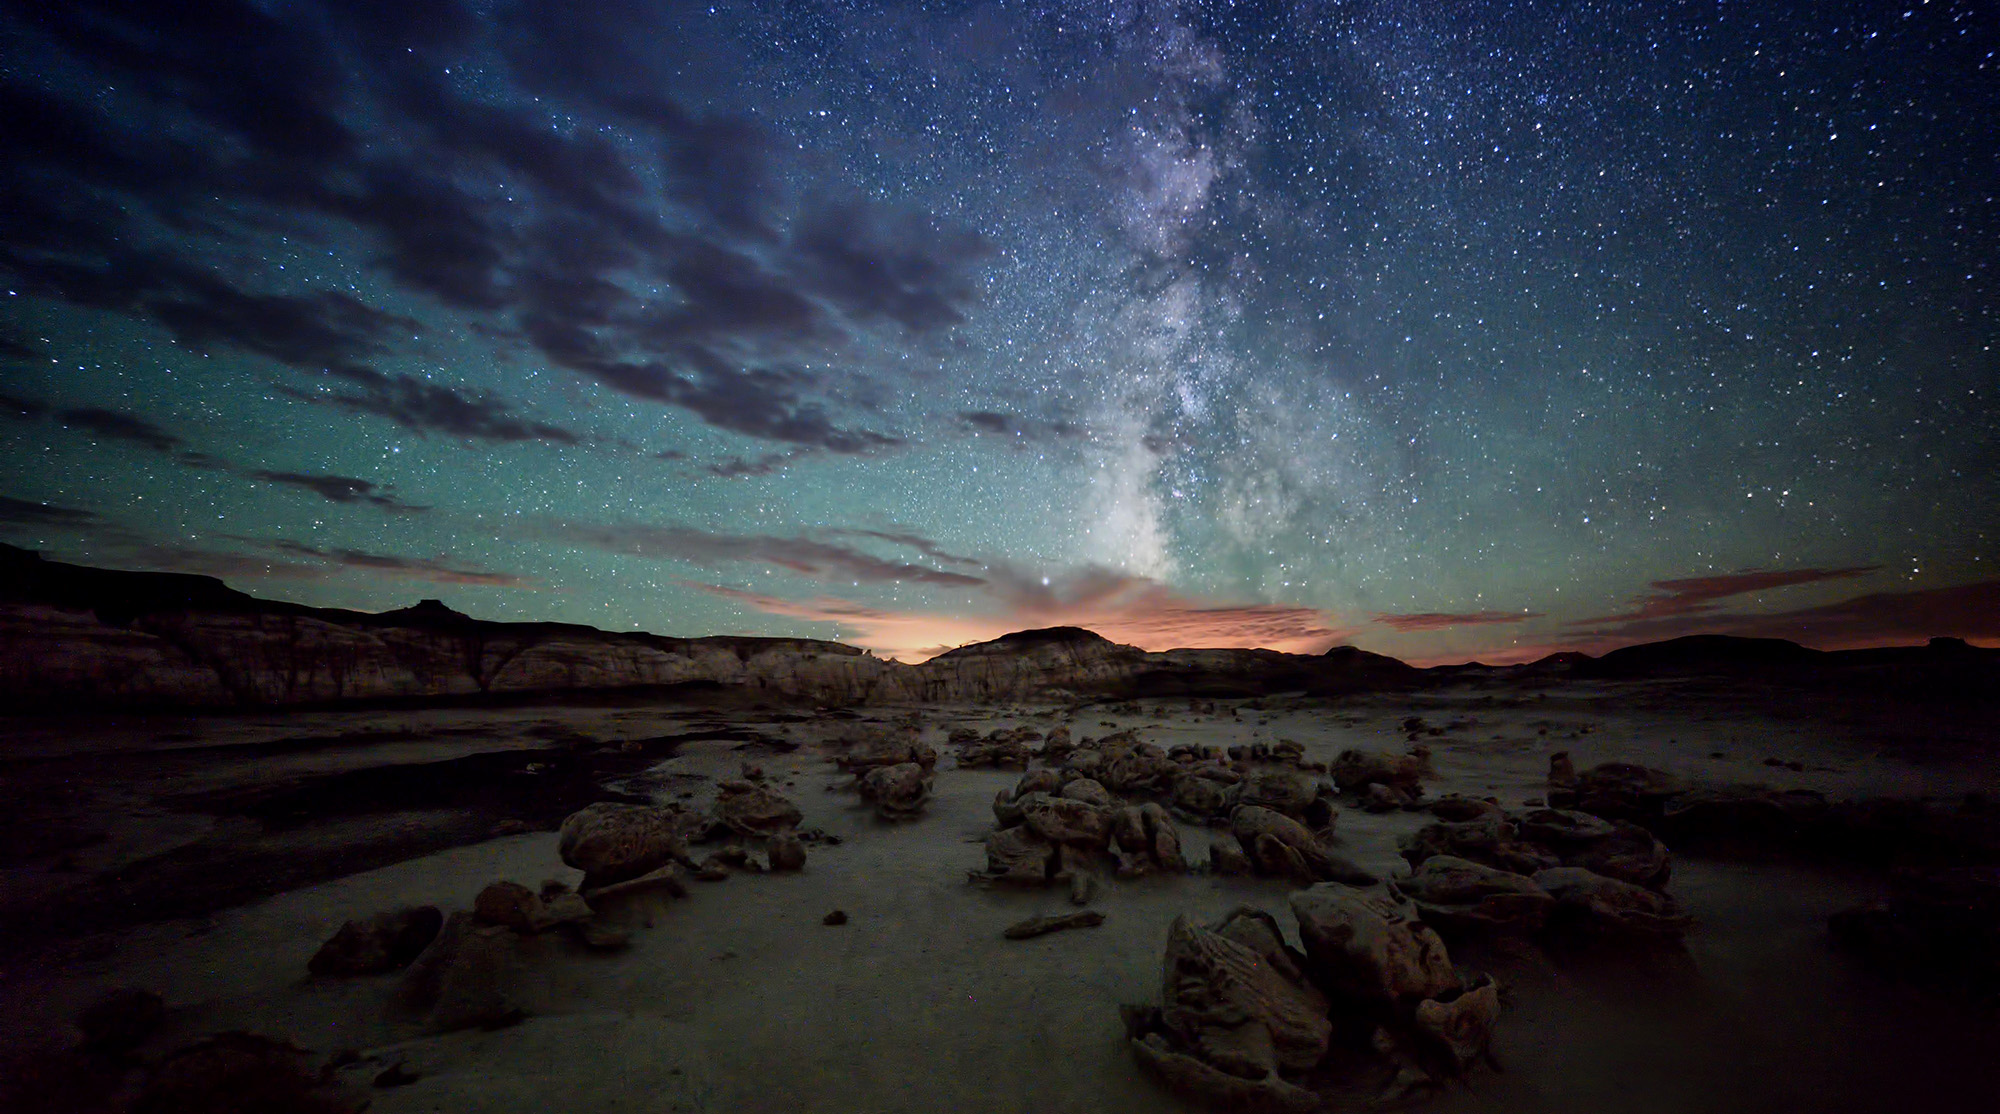
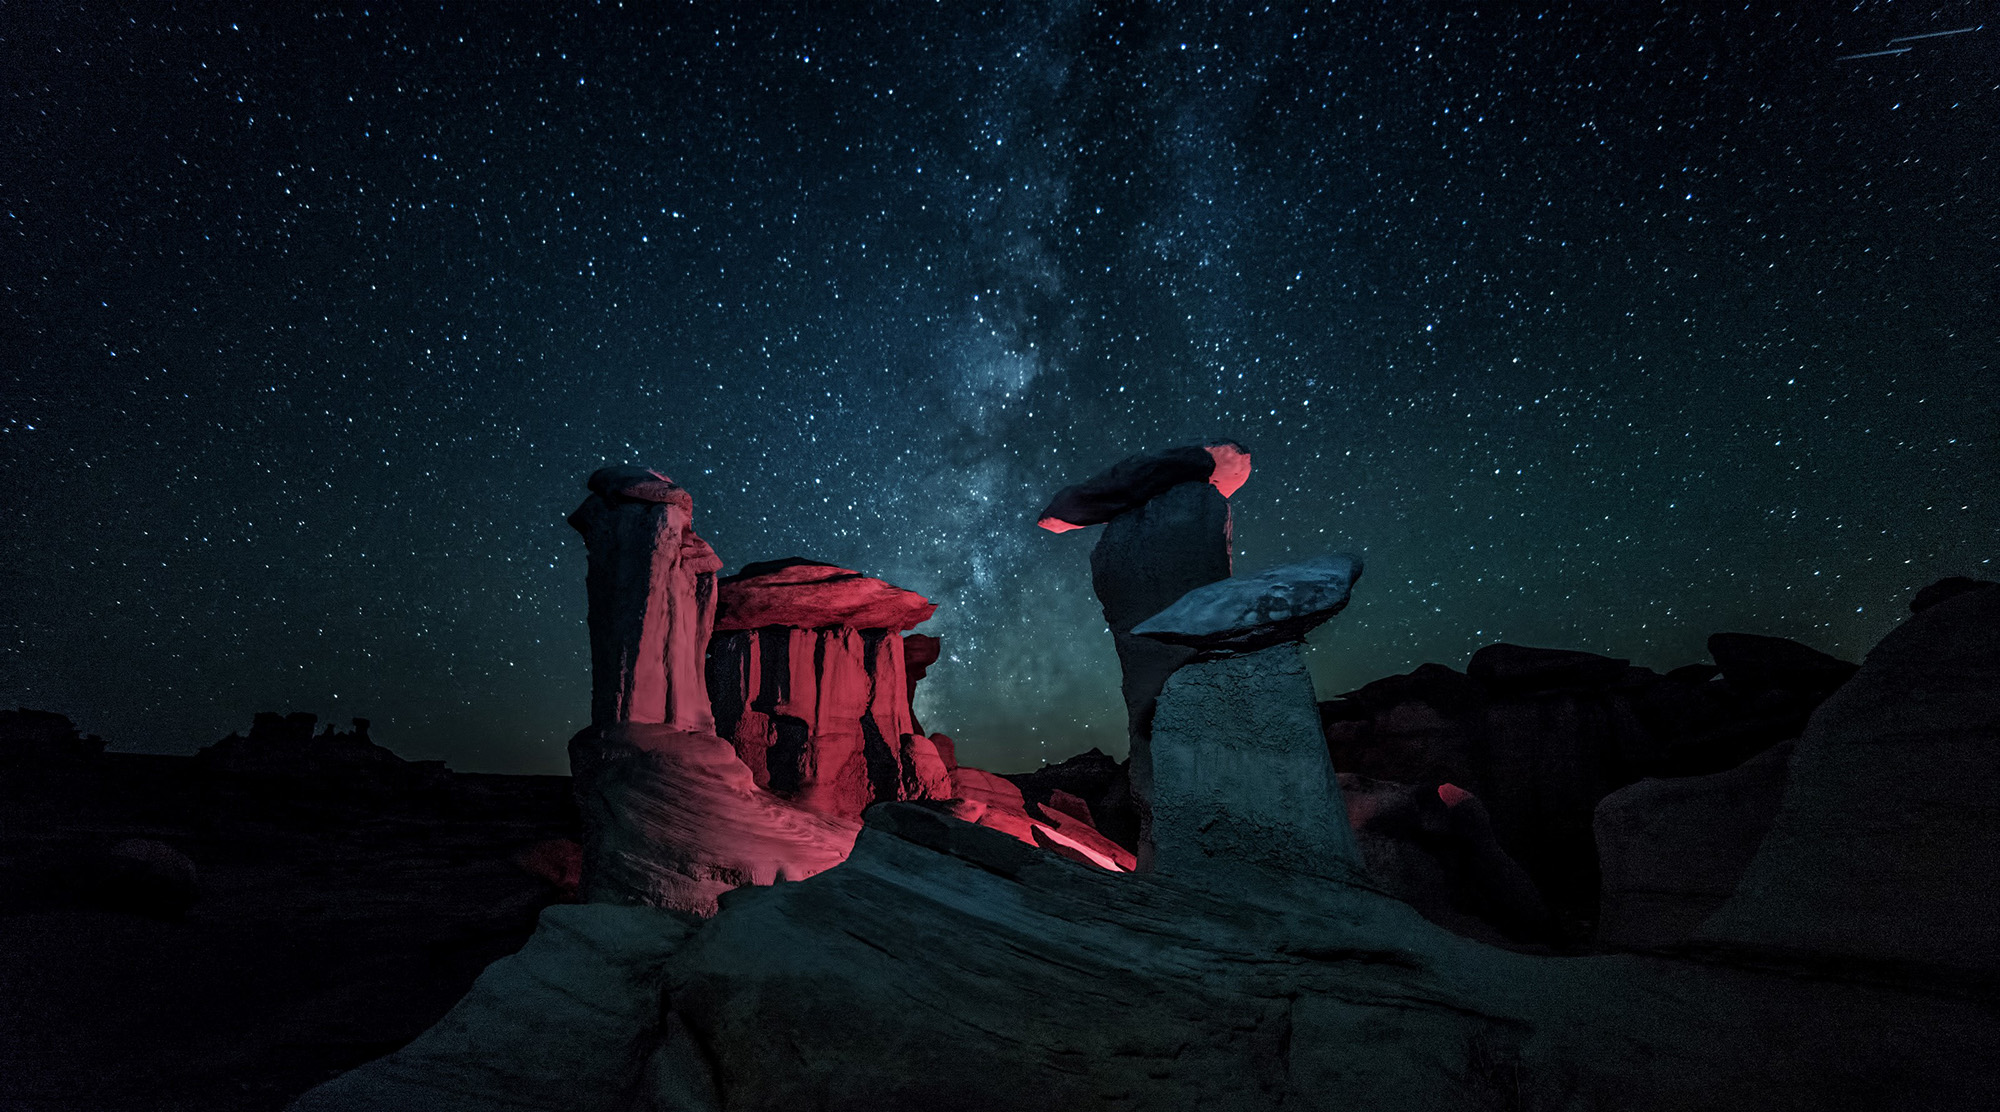
Professional grade photo equipment is essential, and I use full frame DSLR bodies for a number of reasons. The first and foremost is high ISO performance. I do a lot of night work, which is some of my favorite types of landscapes, so having cleaner files at higher ISO’s is a must. If I’m exposing for the Milky Way, I want a sensor that will produce low ISO noise at ISO 5000/6400. Other reasons include better dynamic range, quality of depth of field, autofocus speed, dual memory card slots for backup, etc. Dual memory cards are especially important for me as I might be out for days taking thousands of RAW photos. Every time I fill up two cards, I swap the cards in the camera and then split up the memory cards in two different packs, bags, etc. I want to make absolutely sure I have my photos when I get home.
Likewise, my lens selections are based on convenience and expandability. With my three picks, I can cover all focal lengths from 14mm to 200mm. And If I take along a Nikon TC-20E III, I can extend the reach of my 70-200 to 400mm and the TC-20E III will maintain metering, autofocus, and VR capabilities.
So What is in my Camera Bag?
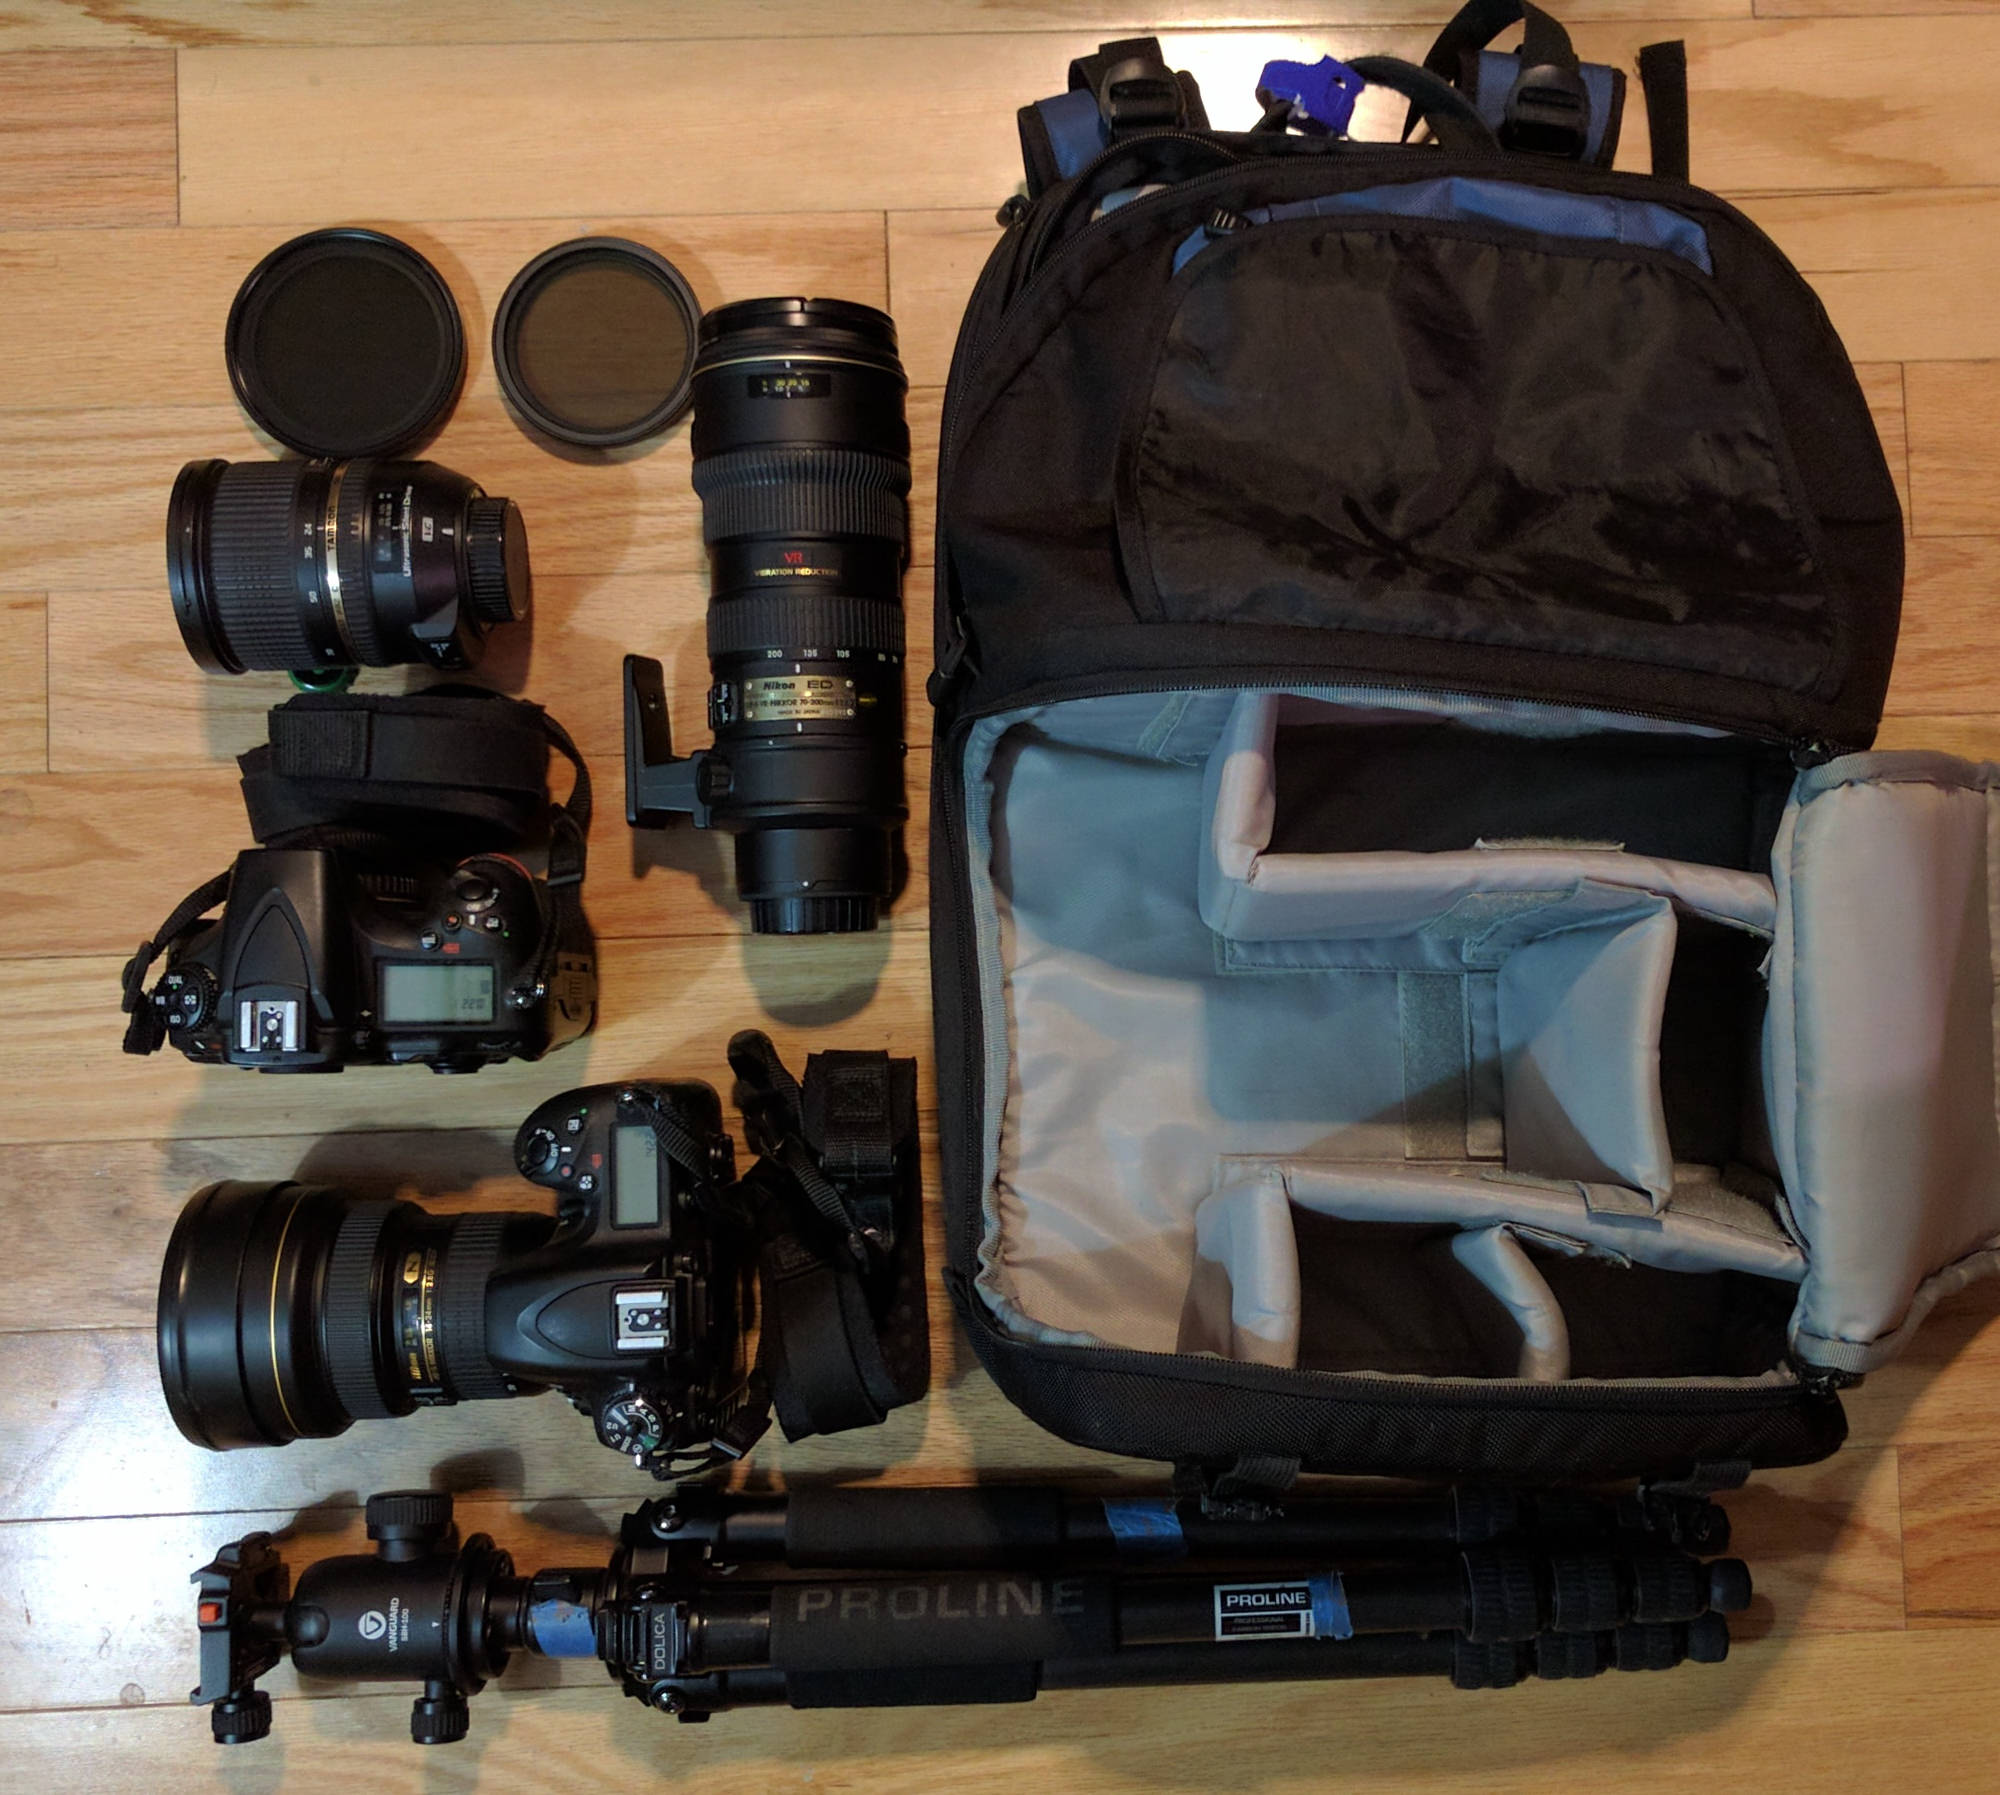
Tripod
I tend to rent and buy the best lenses and DSLR bodies I can afford. The quality of the photo is the goal. But a tripod is the one piece of equipment I won’t spend a lot of money on. Why? 90 percent of the time I’m using a wide or ultra-wide lens and a 10th of a millimeter of movement on the tripod makes no difference in my shot. I also choose tripods with ballhead and a single knob to adjust the camera. Tripods with multiple adjustments make it difficult to work with the camera and tripod at night. Tripods are heavy and sometimes bulky and hard to manage with respect to backpacking and hiking. I don’t want to hike around hand carrying a heavy tripod for miles into the desert. Some photographers are all about finding the toughest and sturdiest tripod they can get their hands on and that’s fine if they want to carry it, but most lenses like my Tamron 24-70 f/2.8 and my Nikon 70-200 f/2.8 are image stabilized these days, so the VERY sturdy requirement of the tripod falls off the list at least for me. I stick with a medium or lower cost tripod for my landscapes when hiking and backpacking. I need to keep the weight down and it makes the trip more enjoyable. I’ve taken tens of thousands of photos using a 3.5 pound, 100 dollar tripod. I even use cheaper tripods with my carbon fiber time lapse slider with fantastic results. You also have to keep in mind this really doesn’t apply to bird photographers and others using long heavy pieces of glass. They do need a big sturdy tripod because of the weight of some lenses like the Canon 500mm f/4 and the requirement of the lens to be perfectly still when capturing a shot at 500mm or longer. So yes, a big sturdy tripod is a must for them, but I’m not backpacking or hiking with a beastly 500mm f/4 lens.
Lenses
Nikon 14-24 f/2.8
This lens is heavy but exceptional optically. I’m a wide angle junkie and for me, this lens is required on every outing. I use it for both my night sky work and daylight snaps. I can always find a reason to photo anything at 14mm. It’s sharper corner to corner than any other Nikon mount at 14mm. It has very little distortion. Flair, ghosting and chromatic aberrations are all kept in check with Nikon’s Extra-low Dispersion glass and Nano Crystal Coat. Image quality is gorgeous and perfect for landscapes. There is a touch of dark corners (fall off) at f/2.8 but that starts to disappear at f/4, f/5.6, etc. AF is fast and constant on my Nikon D810. If you’re a Canon shooter the equally exceptional Canon 11-24 f/4 is a perfect option.
The front of the lens is an exposed protruding piece of glass protected by permanently attached petal hood and has no screw on filter options. However, there are a couple of manufacturers that make filter adapters for slide-in neutral density (ND), graduated ND, UV filters, and others.
Tamron 24-70 f/2.8 VC (Vibration Control)
I purchased this lens a year or so before Nikon released its version of the 24-70 f/2.8 VR (Vibration Reduction). Shooting handheld, I really wanted an image stabilized lens when I got into the 50mm – 70mm zoom range while working low light and the Tamron filled this for me. This lens does it all and I can use it for photographing landscapes, people, weddings, etc. The autofocus is not the fastest in the business, but I’m not shooting sports or birds with it. It does have a bit of fall off at f/2.8 but that’s easily fixed in post process and doesn’t both me. Sharpness is excellent. Not the best distortion performance but again easily adjusted in post. But at this price point, it’s perfect for me.
Ultimately, this is my number 2 lens choice when hiking or backpacking. It’s got enough zoom to capture that one scene that is just too far away for my 14-24mm or grabbing some great portraits of my friends and family while out hiking.
Nikon 70-200 f/2.8 VR (Replaced by the Nikon 70-200 f/2.8 VRII)
Fast aperture, Image stabilized, fast autofocus. It’s a bit heavy and I won’t pack this on long hiking trips, but I don’t mind carrying it a few miles on day trip in a backpack. As I mentioned earlier, I can mate this with a Nikon TC-20E III, extend my reach to 400mm all while maintaining metering, autofocus, and VR capabilities.
This lens is super versatile and is known as one of the best all around lenses on the market. It’s mated perfectly with my Nikon D750. With all this said, this is the last lens I will take on trips because I’m not a big zoom guy and sometimes it’s a bit heavy on longer hikes. If I want to photo something that’s far away, I’ll just hike over there. At 200mm, a quick 1/8th-mile hike will make a better photo with a 24-70mm.
Tamron 90mm f/2.8 Macro
Occasionally I’ll carry a Tamron 90mm f/2.8 macro for some interesting close-ups of flowers, insects, etc. This lens is pretty small, light and easy to pack for a day trip and it’s SUPER sharp. This lens has been around for a while and has been replaced by a new Image Stabilized version, but I’m holding on to mine because it’s been a workhorse for macros and is still going strong. If I had to do it all over again, I’d probably go with a smaller lens like the Nikon 60mm f/2.8 micro.
Cameras
Most full frame professional cameras these days (for the most part) all have the same options and performance within reason. What it all boils down to is preference and the glass you’ve invested in. I’ve been shooting Nikon for years and love the menu system and the controls. Because most of my work is at night I have no problems finding exactly what I want within the menu system. I know what to expect from Nikon and I can make my changes quickly and start taking photos. This is not an extensive review of camera bodies. There are many of reviews on the internet for that. These are just a few items that are important to me when shooting in the field.
Nikon D810
The Nikon D810 is a feature rich and fantastic general purpose platform. But a couple of my favorite things about this camera are the super clean images at its base ISO of 64, 36-megapixel image size, and sharpness. I find this perfect for landscapes because I can crop and blow up the image to print and see very little noise if any at all. I wouldn’t consider the dynamic range of the D810 as good as the D750, but then again the Nikon D750 has a newer image sensor. Unlike most DSLR’s the Nikon D810 has no optical low-pass and anti-aliasing bypassing, so the images will be sharper than cameras with those filters. I use this camera mostly for dusk and dawn shots, I find the images at ISO 5000/6400 for my night work are a bit noisier than the D750, but some will attribute this noise to the size of the sensor or the absence of optical low-pass and antialiasing filters. However, I do notice my night images are a bit sharper than the D750 – so it’s a tradeoff. Ultimately the difference is negligible. The Nikon D810 is a beefy camera and a bit bigger than the D750 but feels good in the hands. But if you’re shaving weight everywhere when backpacking, grab the D750. The Nikon D810 is a better choice than the Nikon D750 for working outdoors in semi or wet conditions because of its dust and moisture sealing. It’s not waterproof, but I’ve never had a problem with a bit of rain getting on the body. I even slipped and dropped it in the mud once. I cleaned everything off and it’s been fine. The Nikon D750 is sealed but not like the Nikon D810.
Nikon D750
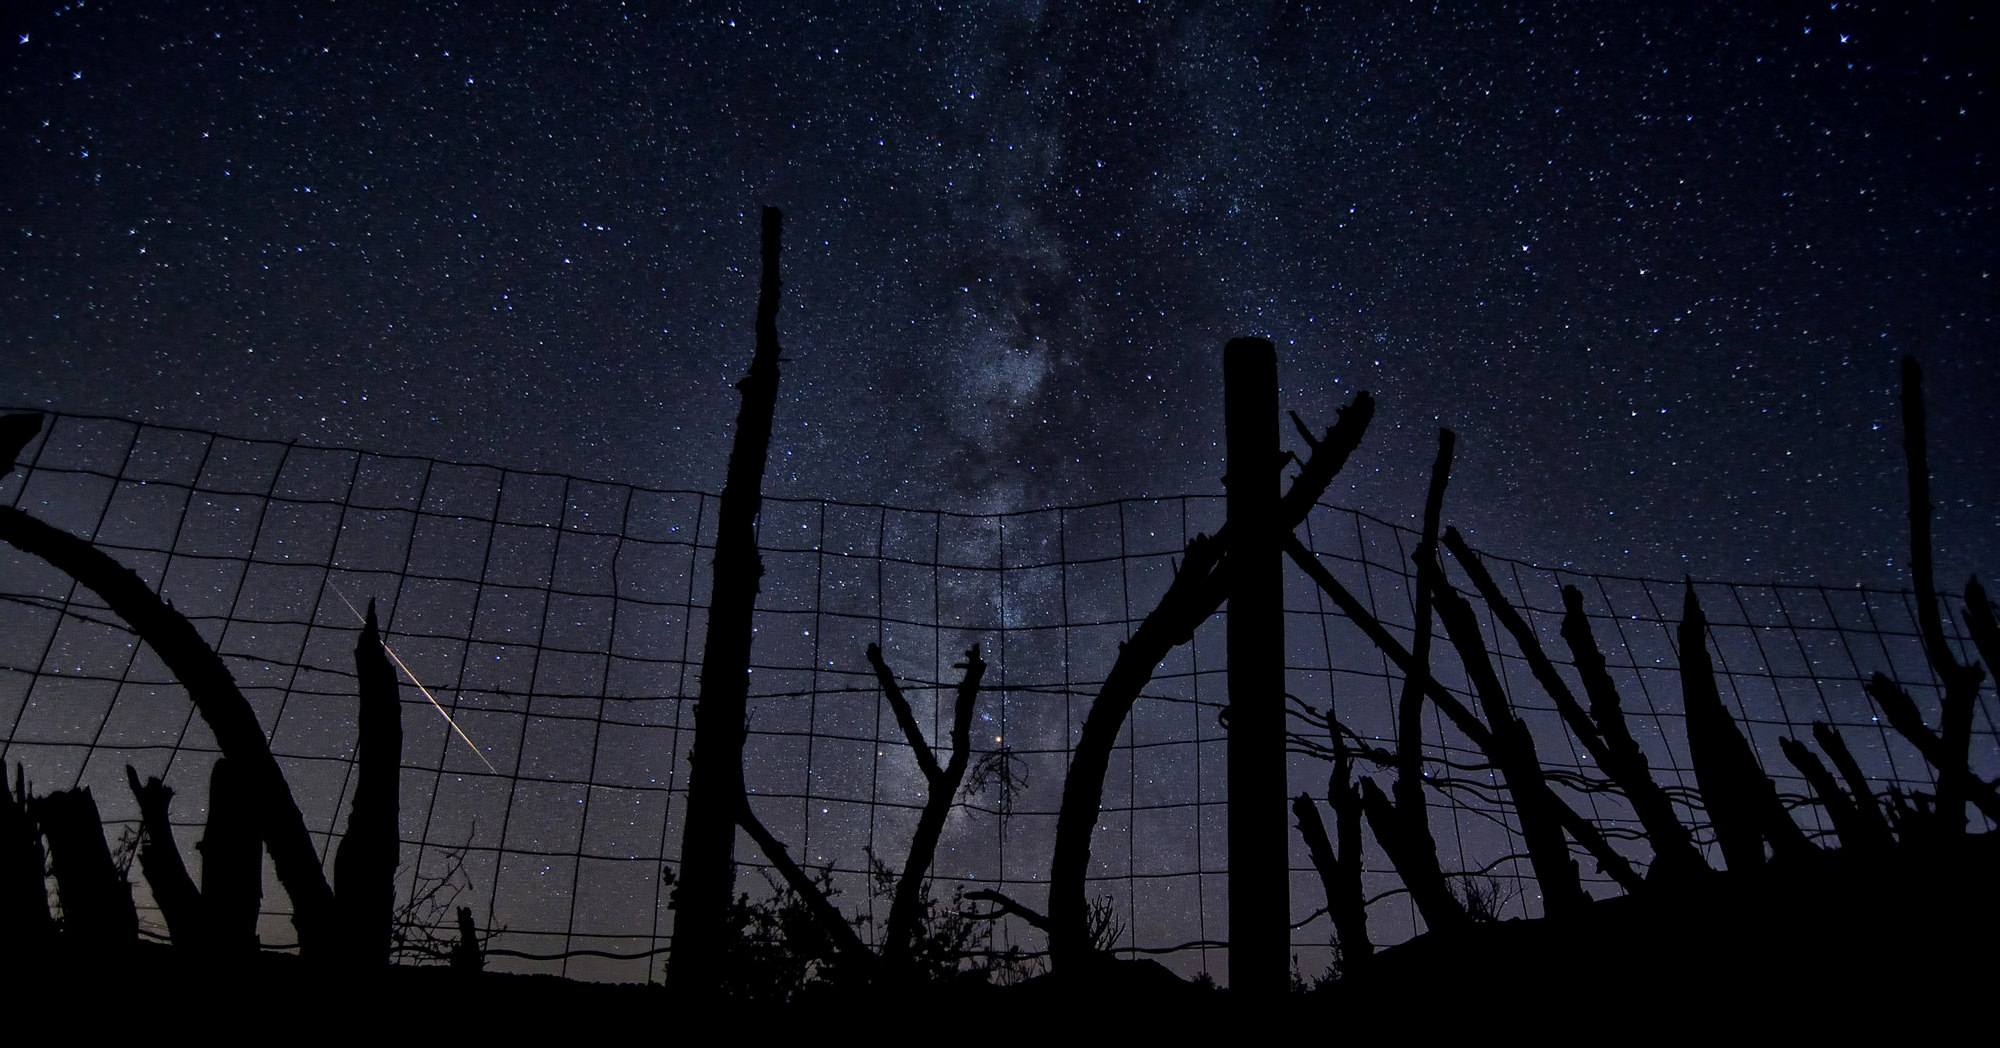
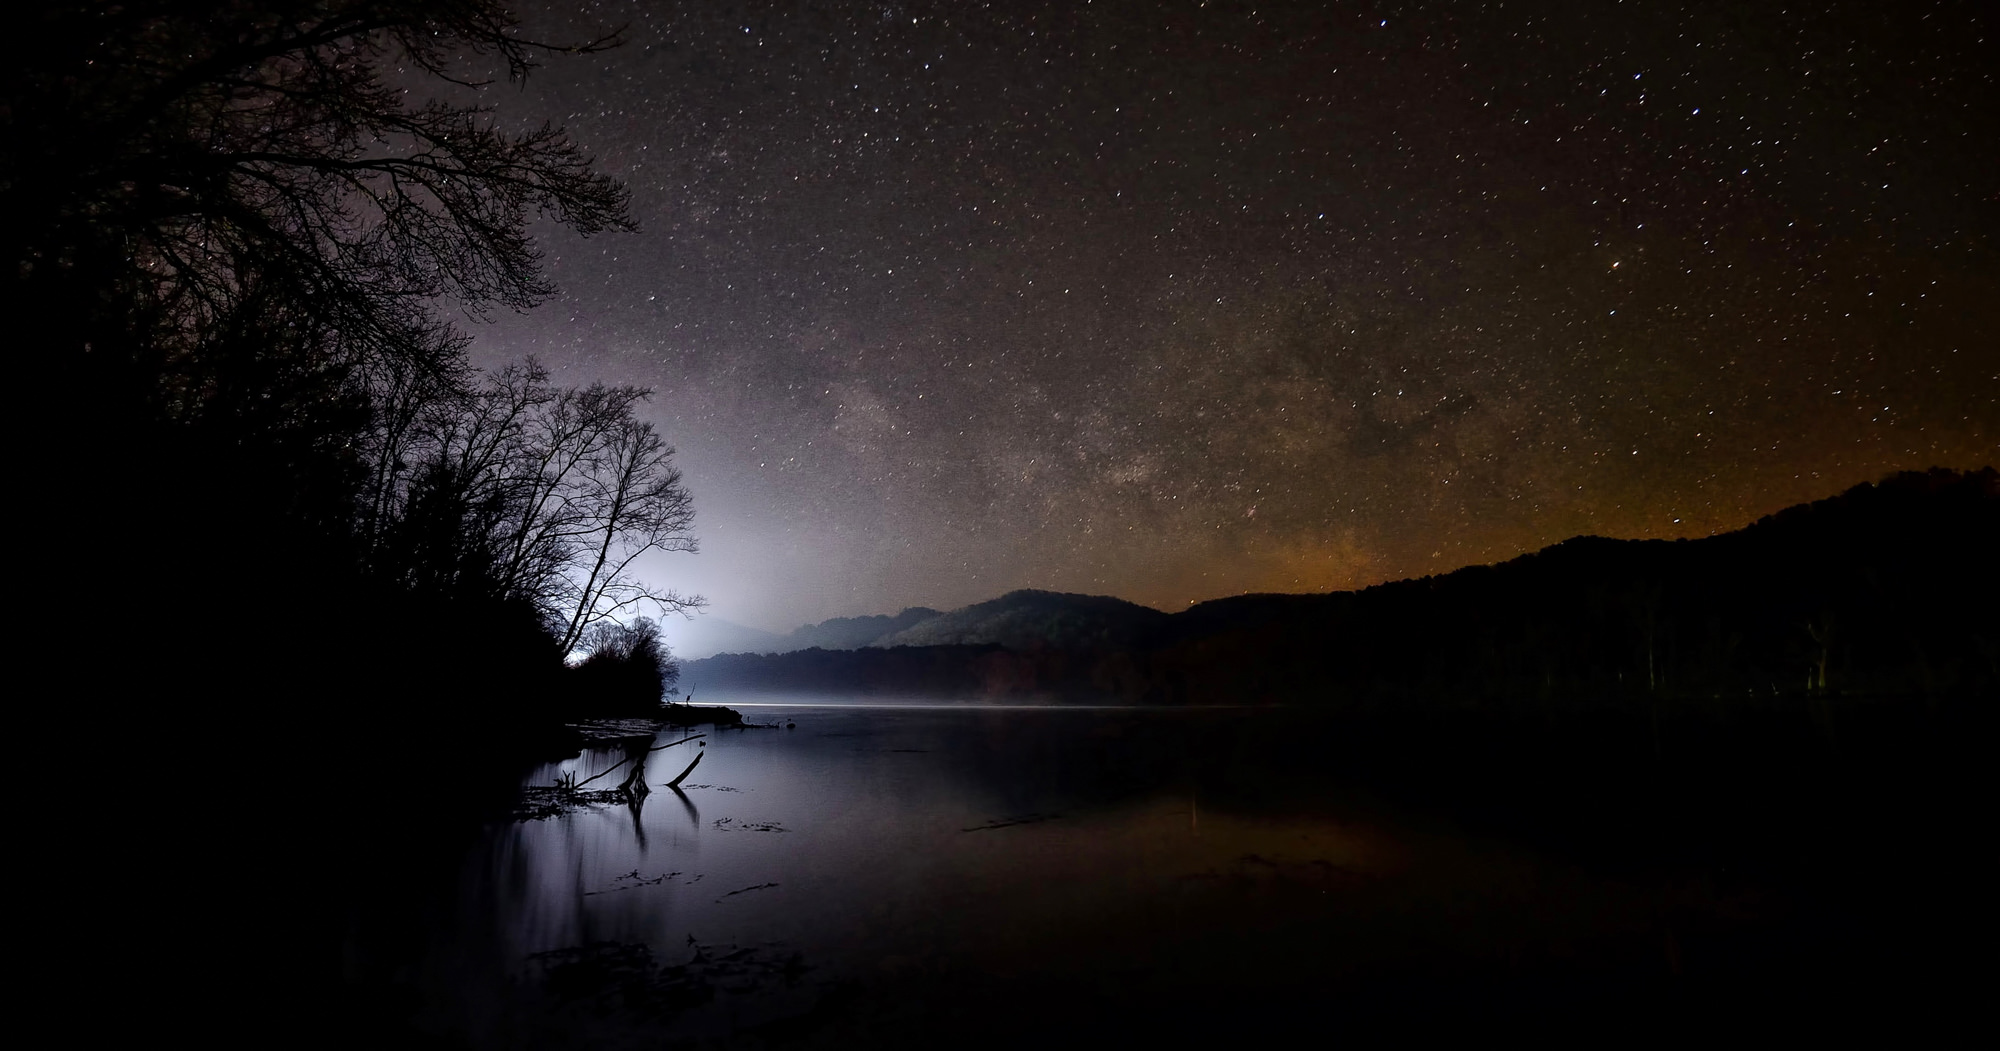
I do a lot of night work. I love to get out, set up my tent and then stay up all night running three cameras pointed at the night sky. I’ll come home from one overnight trip with 3 to 4000 photos or more. My night trips center on making time lapses. Sure, it’s awesome to take one really well-exposed photo of the Milky Way but it’s even better to see our Galaxy moving through the night sky. My go to camera for this is the Nikon D750. It’s hands down the best I’ve ever used with regard to high ISO performance and low noise at ISO 5000/6400. Some will argue that the new Canon 5D MK IV or the Sony A7RII or the A7SII are equally stellar or better, and they are in different respects. If I had one of the Sonys, I’d probably be running my night sky exposures at ISO 10,000 or higher to decrease my exposure time and thus achieve sharper images (because the stars are moving). Some call the Nikon D750 a dynamic range monster. It is and I love it. Why?
- Dynamic Range
- Fast autofocus, shadow and highlight recovery in RAW files
- Excellent high ISO performance.
- Ease of use. I really like the Nikon menu layout and I’m used to it
- Tilt screen. Some done like tilt screens – but when I’m running this on my time lapse slider, it super useful
- It’s smaller, lighter and more compact compared to other full frame DSLR’s
ND filters/Variable ND/Graduated ND
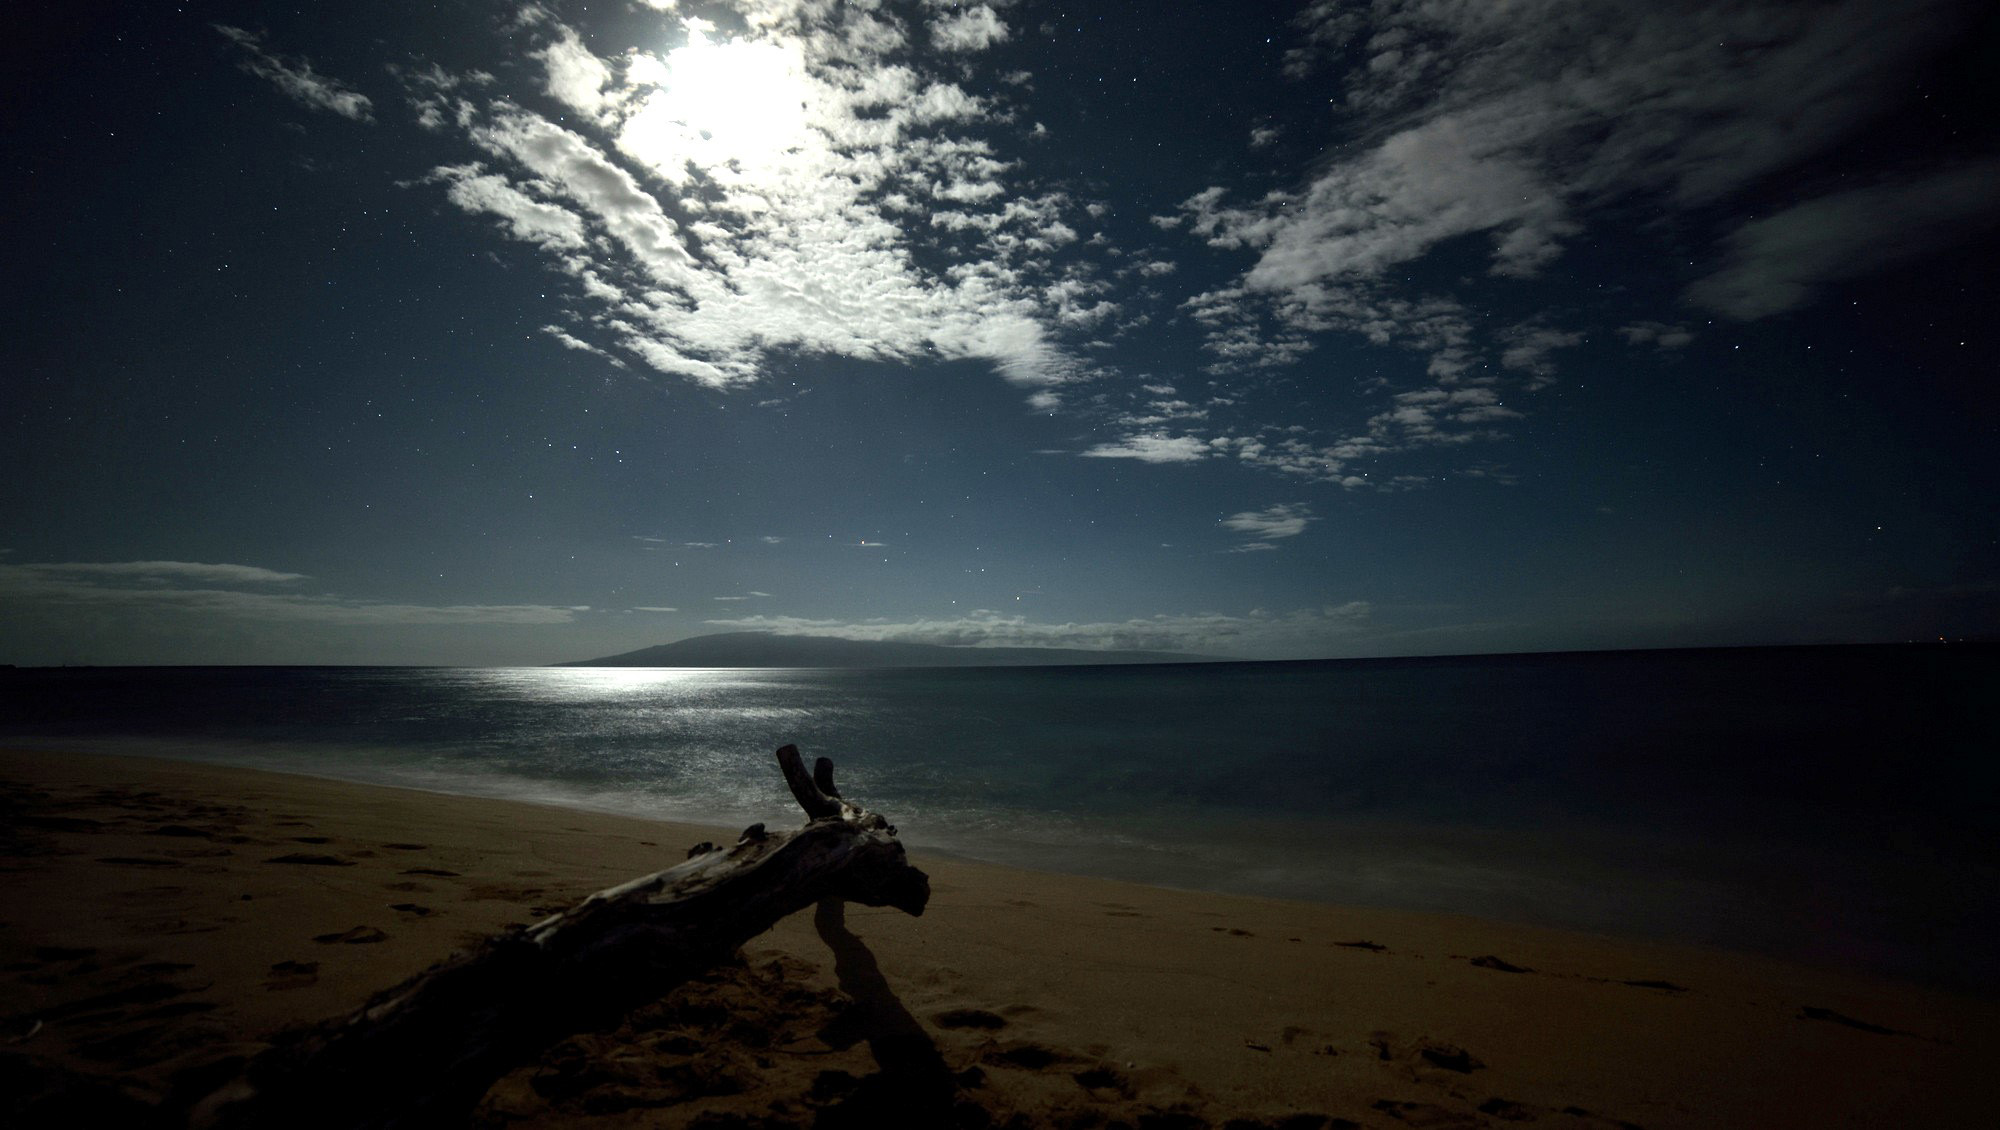
What are neutral density (ND) filters? Basically, I call them sunglasses for my lenses. I carry one variable ND that provides 2 to 8 stops of light control. This filter darkens the lens so you can, for example, expose for a few seconds in daylight at the lowest ISO and with the smallest aperture like f/22. ND’s and Variable ND’s are a must for the classic milky waterfall shot or the smooth looking beach shot with the waves coming in. I also carry a graduated ND. Half of the filter is neutral density and transitions gradually to clear. I use this filter to darken the sky at sunset so I can increase the exposure to reveal more of the foreground/landscape. ND and Graduated ND filters are also available in adapter holders for lenses that don’t have a screw on filter option. Although with modern cameras like the Nikon D750 I can easily achieve the same effect in Lightroom with the shadow and highlight sliders.
Wired Remote/ Intervalometer
This is one of my favorite tools. Most but not all DSLR’s have one built in. But some don’t. I shoot a lot of time lapses at night and I use an intervalometer to take a photo every 10, 15, etc. seconds. I usually take about 450 photos and then put them together at 29.97 fps to make 15 second time lapse clips. This is also a handy tool if you have your camera on a tripod and are just taking random shots of a particular scene in low or no light.
Backpacks and Equipment Protection
For short day trips, I carry a water resistant Lowepro Fastpack 350. This pack has been bulletproof; I’ve had it for years and it’s still going strong. I love it for a number of reasons. It’s got a waist belt, chest strap, side slinging ability to grab equipment without taking off the pack, and adjustable inside organization partitions. These are a must for me as when I’m out trekking around. The waist belt holds the weight off my shoulders and the adjustable chest strap is perfect for keeping the shoulder straps close and tight but comfortable. If you are considering a day camera pack, get one with the above options. Like I said, this pack is water resistant to light rain, etc – but it’s not waterproof. With that said, I never shoot in the rain – There is just no point. Rain gets on the lens, equipment gets wet, etc. I’d rather wait until the rain passes and then shoot. However, I do carry tall kitchen plastic bags with me to protect the pack in case of a big downpour and I’m away from shelter, but that’s never happened.
Planning your Shots, Safety, and Other Equipment
Always plan your shoots. Ask yourself the following questions; Can I take a camera? Do I need a permit? What is the weather like? How long is the trail? Is the location safe? Do I need water? Should I take snacks? Is the place even open? Do I need to tell someone where I’m going (yes – always). Do I need a GPS:
Do I need a GPS?
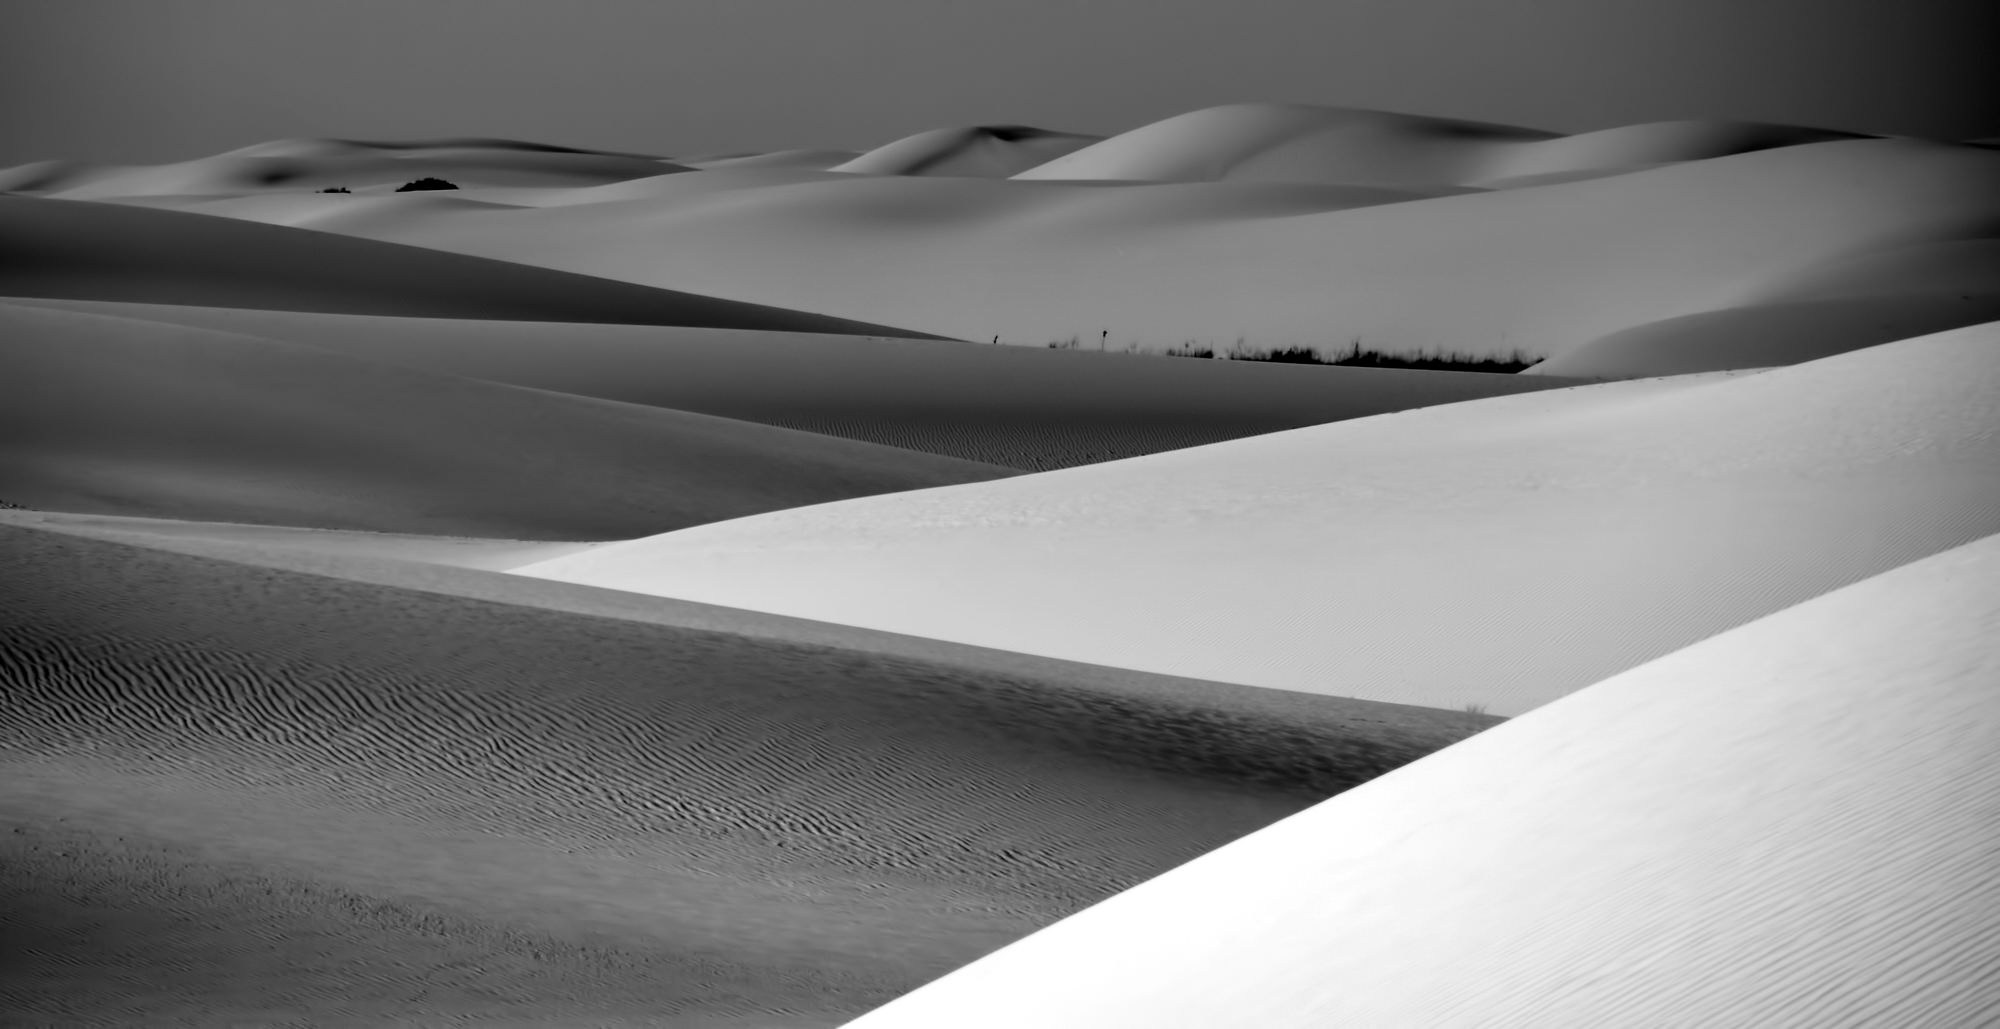
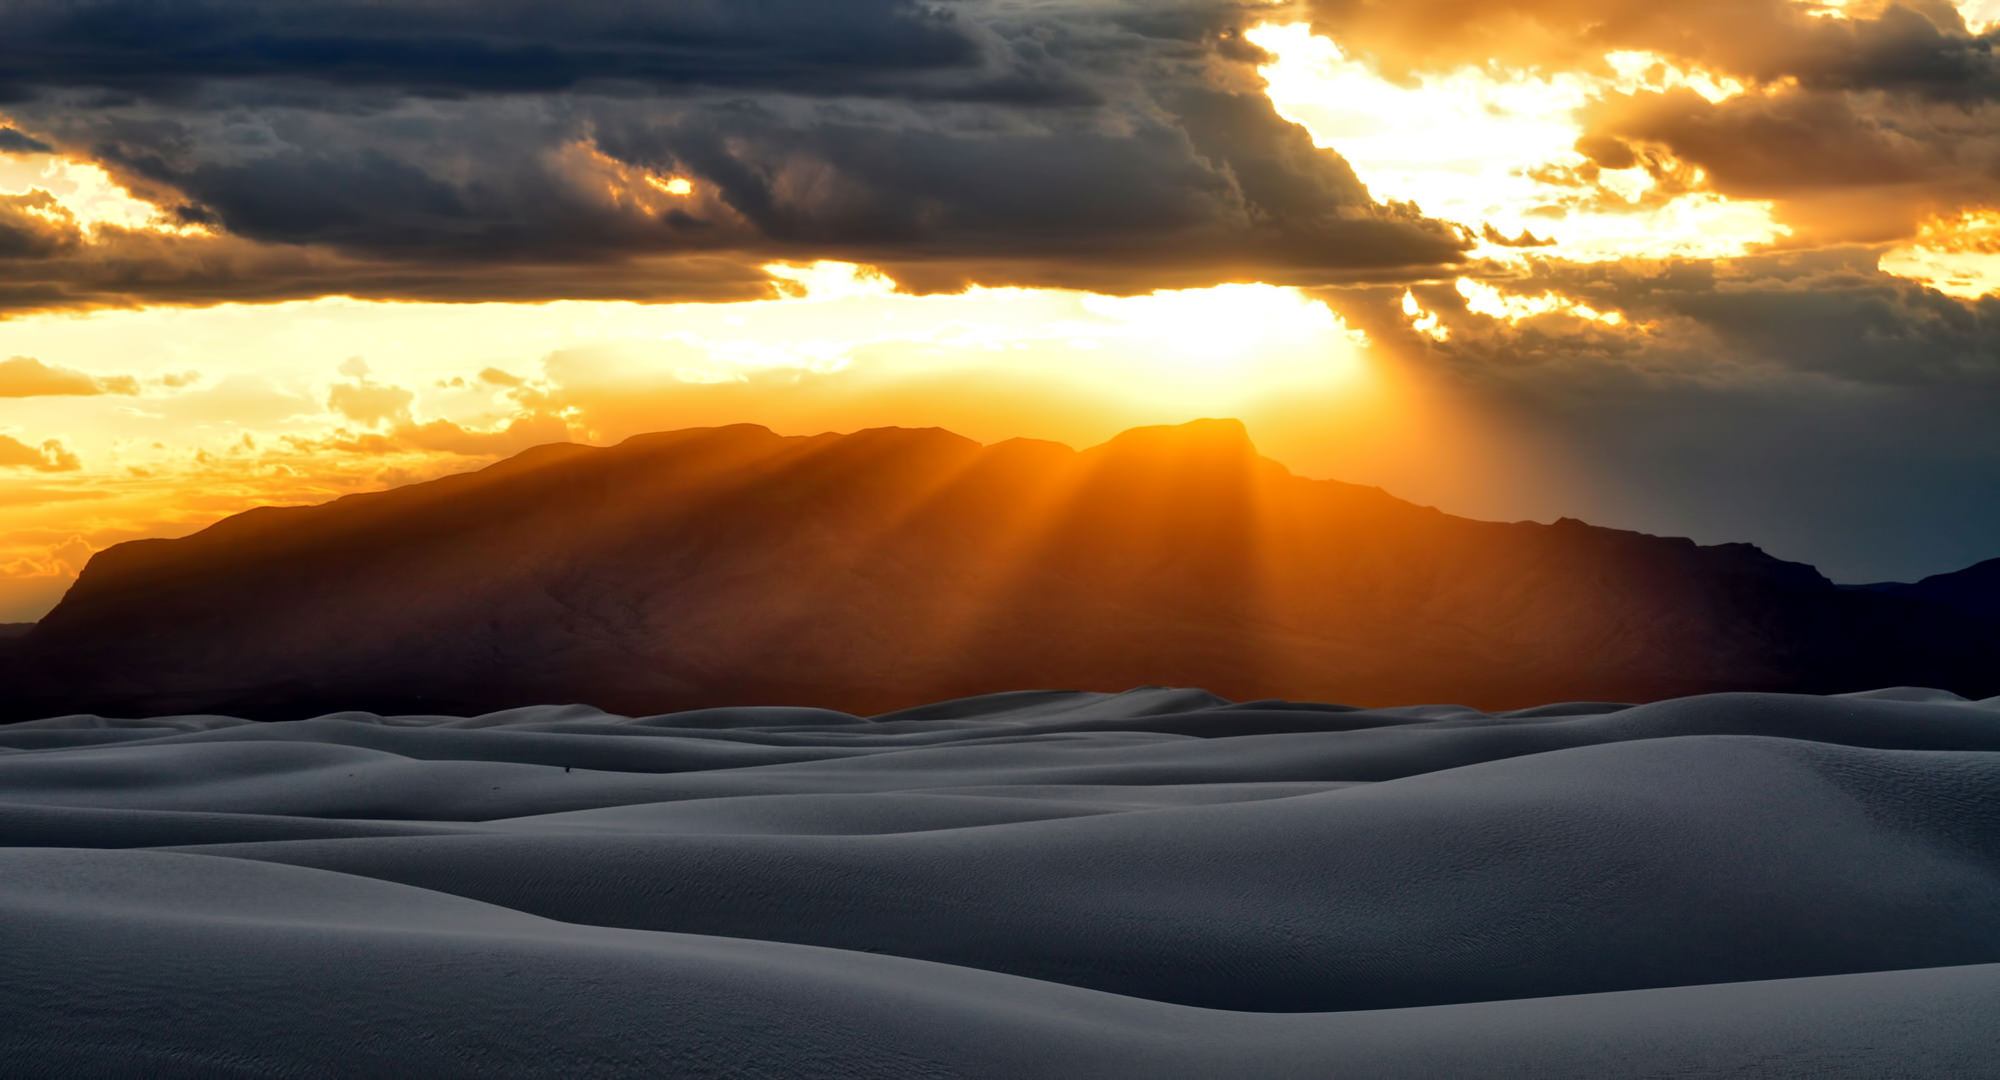
If you get out and you’re hiking around enjoying the scenery and having the best time taking photos, you might get off the trail, lost, etc. If you’re not staying on clearly defined trails, always take a GPS and mark your parking area or start as a waypoint on the GPS. On second thought, you should always take one. If you haven’t used a GPS before, use it, practice with it and know it well before you venture out. I spend a lot of time hiking around wilderness areas and even in some National Parks like White Sands National Monument in New Mexico. You can become easily lost if you aren’t paying attention. And, as always, tell someone where you’re going.
Flashlight
I always take multiple red and white led lights and flashlights with me for both safety and seeing in the dark as I’m hiking or working with my equipment.
Unless you’re a seasoned hiker/explorer, if you can, hike and explore with friends or groups. Take handheld radios, cell phones and always stay together. Always take snacks and water. Food and water will keep you alert and sure-footed when hiking around on uneven ground.
It’s taken me years to figure out what I wanted on my trips with respect to bodies and lenses and I’m still learning and growing. Some will disagree with my setup and that’s fine. Everyone is different when choosing their equipment, setups and ultimately how they take their photos. But this is what’s really great about photography – it’s an art form and process and everyone will approach it differently.
Lastly, if I wanted just one body and one lens to take hiking that would achieve 98% of what I wanted to do? I’d probably go with a Nikon 28-300mm f/3.5-f/5.6 mated with a Nikon D750. Have fun and go explore.
Guest Contributor

12 Comments
Ralph Hightower ·
To me, as I get older, the weight of my gear makes a difference. I haven’t done any backpacking with camera gear.
I overdid it when I photographed the final Space Shuttle launch; technically, it could be called “landscape photography” since I was six miles away. I brought my fully loaded camera bag and tripod; the tripod was a necessity. My camera bag, a LowePro Magnum 35, had my Sunpak 522 flash (which was superfluous), 50mm f1.8, 80-205 f4.5, 400mm f6.3, Canon A-1, and film, besides Cokin filters (including B&W contrast filters). I should’ve left the flash at home. My tripod was a 3-way pan/tilt and I got a great tip to mount the lens backward on the tripod (where the tilt handle is under the lens) so it doesn’t impede upward movement.
When my wife and I visited the Smithsonian Udvar-Hazy Air & Space Museum, I had my A-1 with the 522 mounted, and I used pockets in my cargo pants to carry either the 28mm f2.8 or the 80-205mm f4.5.
For The 2015 Masters, I brought two cameras purchased in 2013, a Canon New F-1 bought used with AE Finder FN and AE Motor Drive FN, and a 5D Mk III. I removed the motor drive from the F-1 and the battery grip from the 5D to lessen weight; I used a shoulder harness to carry both cameras. I had my FD 28mm f2.8 mounted on the F-1 and the EF 100-400mm f4.5-5.6L II (rented from LensRental) on my 5D. The shoulder harness made a difference after walking Augusta National for a day; I was relaxed the next day and didn’t need a chiropractor.
Brian Spencer ·
Ralph – Yup, weight is becoming more and more of a consideration as I get older. However, I’ll put up with a little pain to grab a shot I’m passionate about. Good tip about the shoulder harness for all day camera work. 😀
Ralph Hightower ·
I had my F-1 on the right strap so that my thumb would fall under the film advance leaver; the 5D was on the left and it doesn’t have a film advance lever.
T N Args ·
What is the total cost of this kit for new components?
T N Args ·
No answer. Looks like cost is not a factor.
Brian Spencer ·
I havent tallied the total cost. But you can check out lens cost on Amazon.
Ian Goss ·
Flair? Huh.
Brian Spencer ·
😉
Rory ·
Nice list. But what about a circular polarizing filter? To me that is the most important landscape photography item. You can then leave the graduated ND filter home. The polarizer takes care of daytime sky contrast issues and water glare.
Brian Spencer ·
Thanks, Rory – I used to carry CP filters, but I dont shoot much water and most of the time I just take care of the rest in PS or LR. 😀
Dave Stabley ·
Incredible photos Brian, and great information! You never cease to amaze me my friend!! –Dave
Tom ·
Great article, though IMHO, a high quality carbon fiber tripod/ballhead/and L-plate are essential. Maybe you have had better luck with bargain tripods than me?