Geek Articles
An Inside Look at the Rokinon 50mm AF FE Autofocus Lens
Lensrentals.com, 2016
I have had a love-hate relationship with Samyang / Rokinon lenses for a long time now. (We carry the Rokinon brand, because the distributor, Elite Brands offers repair services in the U. S.) Rokinon lenses provide good optics at an incredible price. They aren’t ‘built like a tank’ and aren’t going to take a lot of abuse. But the price of a new one is often less than the cost of repairing a brand-name lens. So I think they are an amazing value and own a couple myself.
On the other hand, people’s expectations are often unreasonable. A lot of people think that a $500 Rokinon lens should be every bit as good as the $1,500 lens it can be used in place of. That’s not the case; some compromises have to be made. Quality assurance simply can’t be the same, nor can the components be engineered to the same standards as the $1,500 lens. So I love the value these lenses bring to the table, but it’s a bit more work trying to keep them in service.
When we heard Samyang / Rokinon was releasing autofocus lenses for Sony FE mount, Aaron and I just looked at each other. FE-mount lenses are pricey, and we loved the idea of having some affordable alternative lenses. But autofocus was going to add a new level of complexity to the lenses, and we were a little concerned about how robust the construction would be.
We were also interested in what kind of AF system they would have. Would it be a standard electric motor AF system, or did they use the electromagnetic system most Sony and Zeiss FE mount autofocus lenses use? So we decided to take a look inside and find out for sure. I won’t give away everything up front, but after the teardown, we were so interested we decided to run a batch through testing on our optical bench.
Let’s Take Out Screws Now!
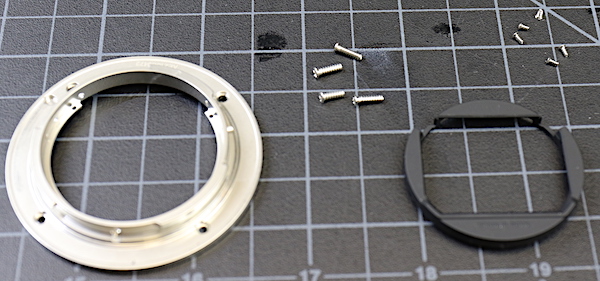
The rear light baffle and bayonet mount come off just like every other lens on the planet. The bayonet is rather thin aluminum, but it’s mounted to the lens with four large screws, which is a good sign.
Lensrentals.com, 2016
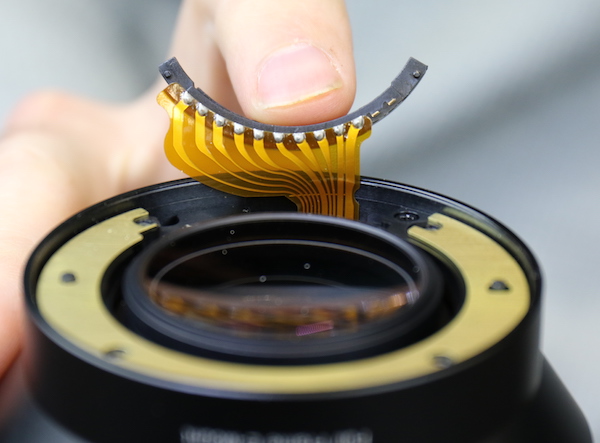
With the bayonet off, we can see the electrical connections in the back. There’s also a ring shim, which is probably adjustable to get proper back focus distance.
Lensrentals.com, 2016
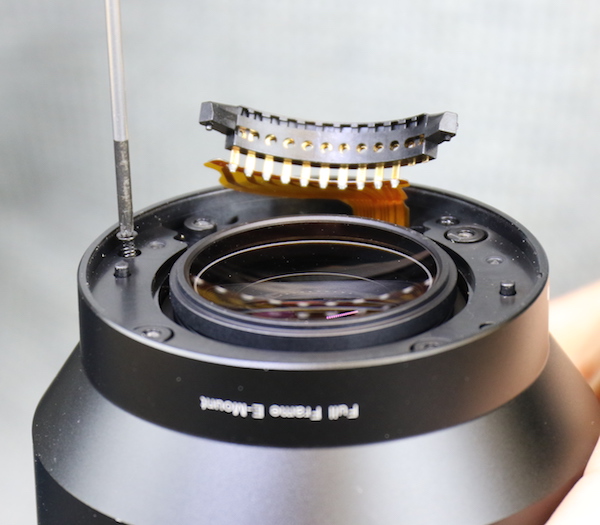
The rear barrel is held together with another set of reasonably robust screws. In other words, I don’t have any fear this lens is going to break off at the mount with minor impact; it looks pretty well made back here.
Lensrentals.com, 2016
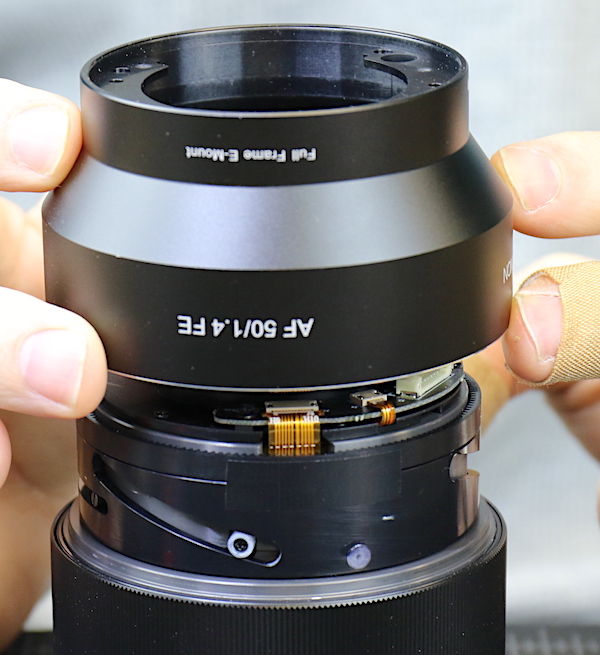
With the screws out, the rear barrel slides right off.
Lensrentals.com, 2016
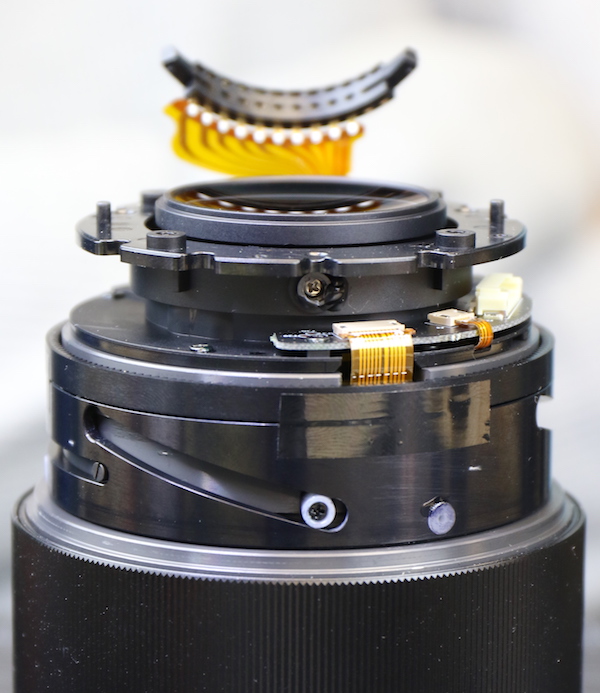
With it off and out of the way, we get a nice look at the inner rear barrel and focusing mechanism.
Lensrentals.com, 2016
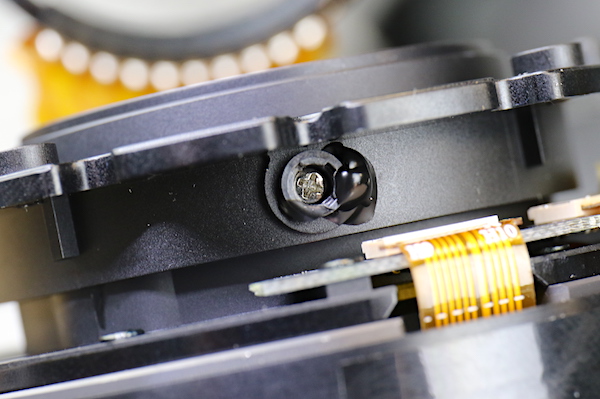
Here, we got our first surprise of the disassembly. The rear group in the Rokinon 50mm f/1.4 AF has eccentric collars, meaning it can be optically adjusted. Not just can, but apparently was adjusted at the factory and then sealed in place with a big glob of black glue! This may not seem like a big deal to you, but it is to us. In many, if not most, inexpensive lenses the elements are just stacked together. Whatever you get optically is what you get. So this bodes well for lower copy-to-copy variation.
Lensrentals.com, 2016
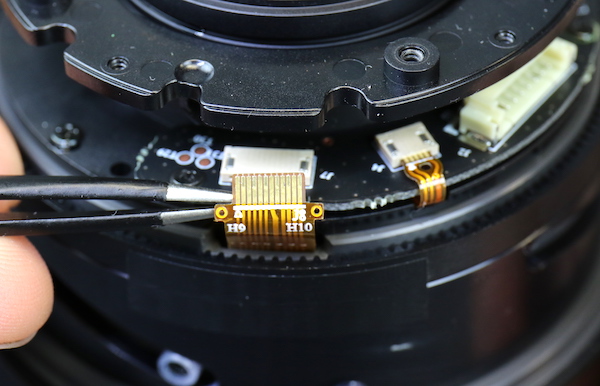
The next step in the disassembly was to remove the PCB board after disconnecting all of the flexes. The flexes have a nice touch that absolutely no one will care about except those of us who work on the lens; there are some reinforced holes to help connect and disconnect the flexes without crushing or tearing them.
Lensrentals.com, 2016
The PCB itself looks just about like every other PCB.

Lensrentals.com, 2016
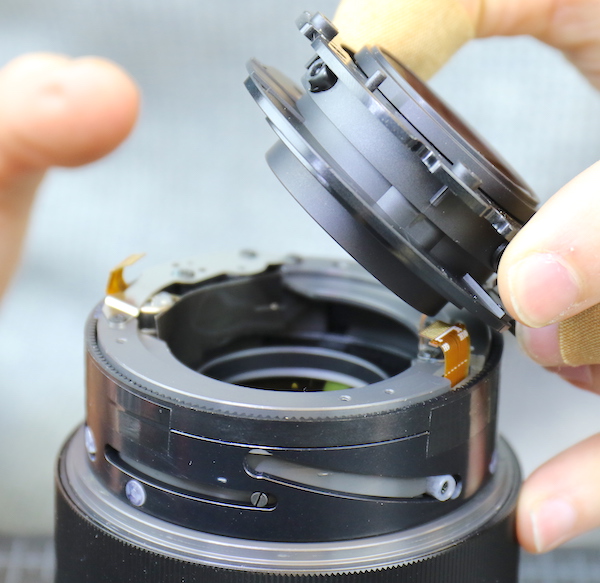
The rear group, which contains the adjustment element, was then removed from the center barrel by taking out a few screws. The center core of the lens, light gray in the image below, is metallic.
Lensrentals.com, 2016
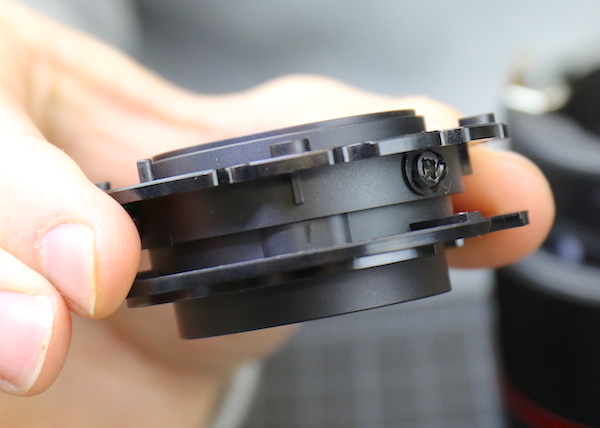
The rear group assembly is plastic, of course, but a closer look shows there are thicker sleeves where the screws from the mount enter, giving some additional strength where it is needed.
Lensrentals.com, 2016
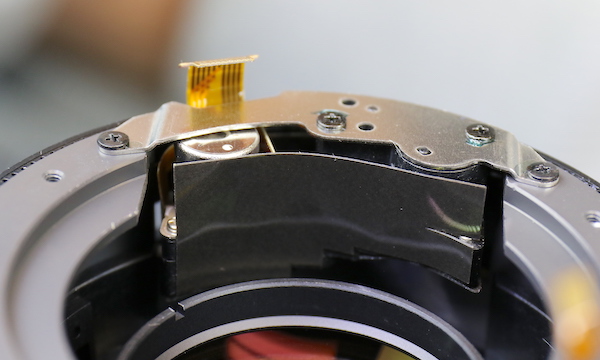
Looking down into the center of the lens, we see the autofocus micro motor with some black electrical shielding tape in front of it.
Lensrentals.com, 2016
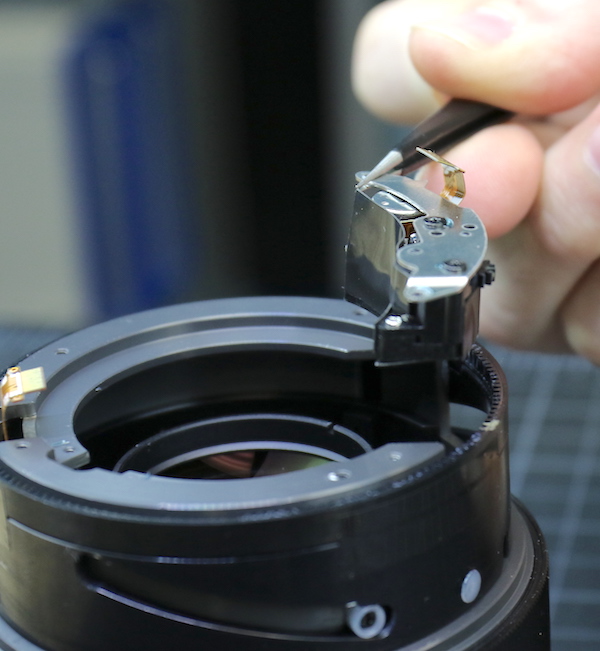
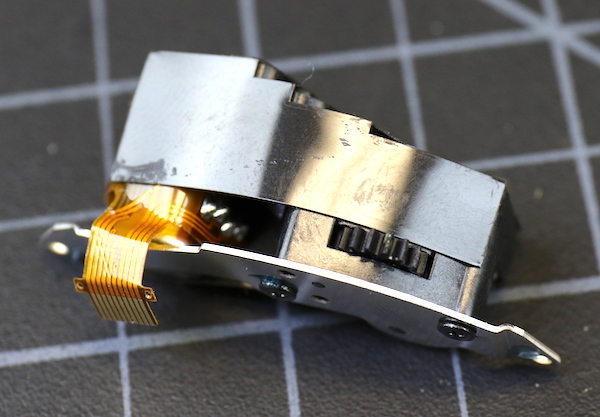
The motor is very straightforward to remove since it’s all one self-contained unit. You can see the gear coming out the back of the motor and the gearing of the focusing ring on the barrel.
Lensrentals.com, 2016
And a closeup of the motor assembly itself.
Lensrentals.com, 2016
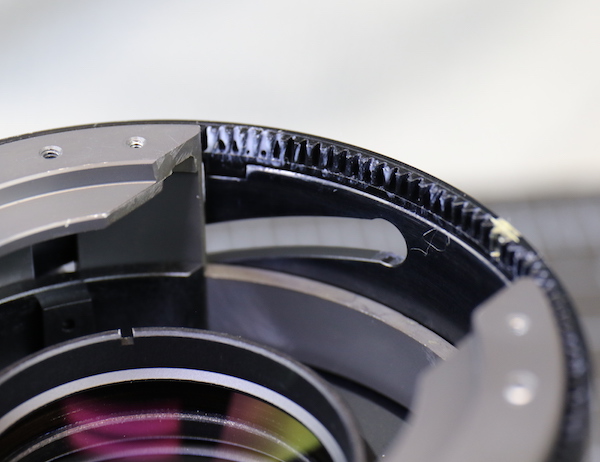
And one of the geared focusing ring.
Lensrentals.com, 2016
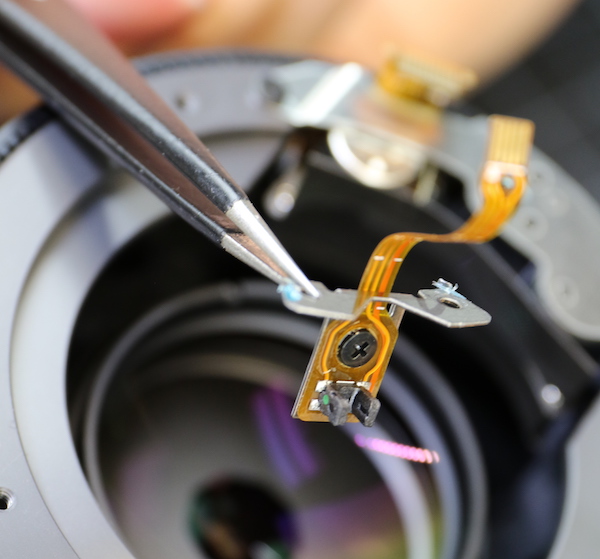
While we were here, we also removed the focus assembly position sensor.

You can see the U-shaped sensor itself. A vertical metal bar attached to the focus assembly slides up and down, giving feedback to the camera about the lens’ focusing position.
Lensrentals.com, 2016
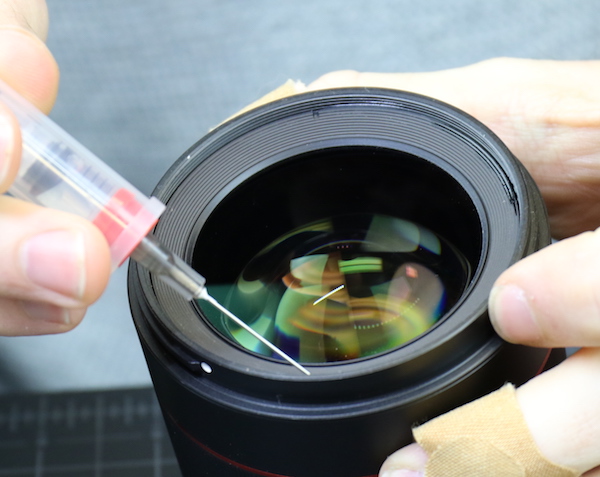
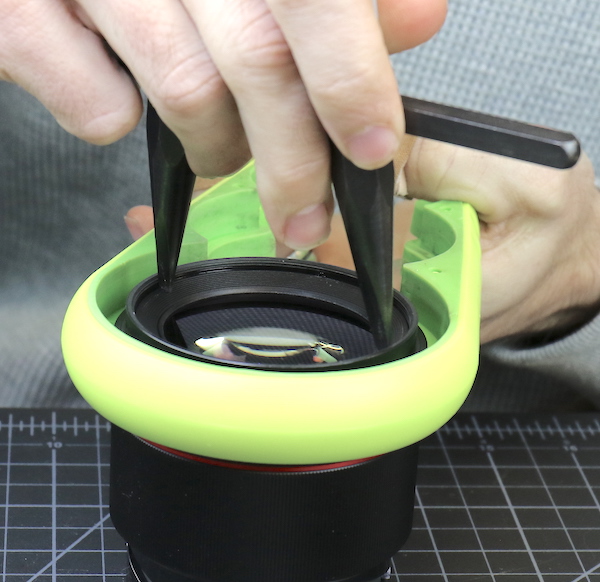
At this point we’d done most of the obvious disassembly of the back of the lens, so we turned our attention to the front. The makeup ring had prominent spanner wrench notches but was tightly glued down, so we applied a little alcohol.
Lensrentals.com, 2016
Even after that a fair amount of torque was required to get the ring off.
Lensrentals.com, 2016
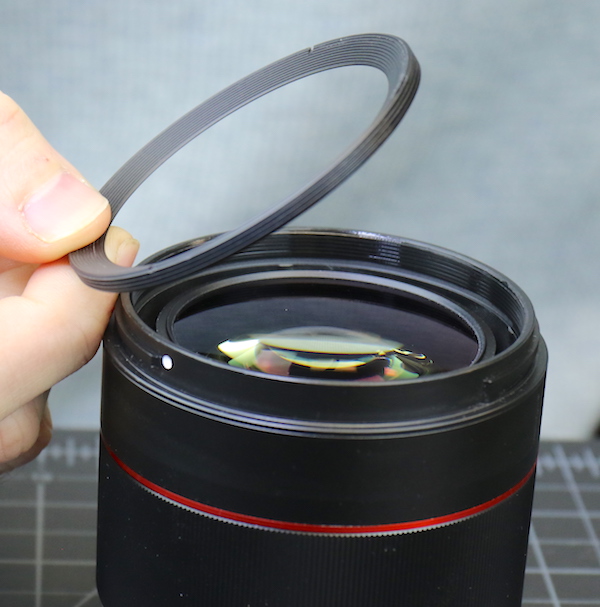
The makeup ring is a thick, solid piece of metal. At first, you might wonder why they used metal for the makeup ring, but if you think about it, that ring braces the front of the lens, adding quite a bit of stiffness.
Lensrentals.com, 2016
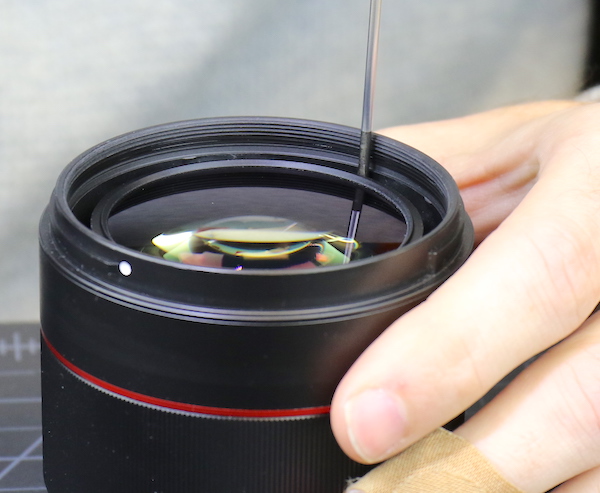
With the makeup ring removed, the screws that hold the filter barrel in place are accessible.
Lensrentals.com, 2016
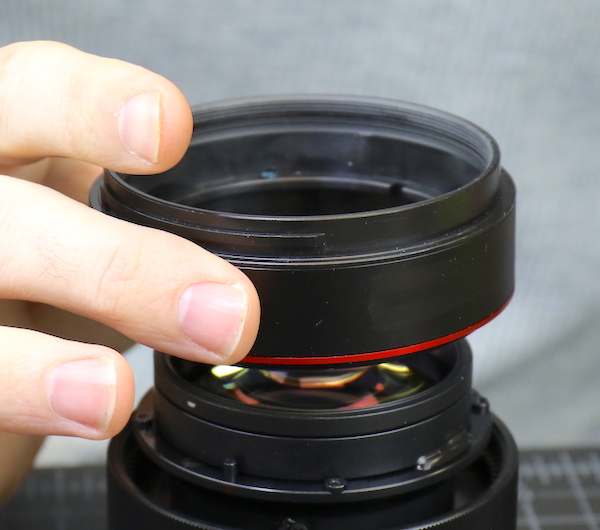
The filter barrel comes right off once they’re removed.
Lensrentals.com, 2016
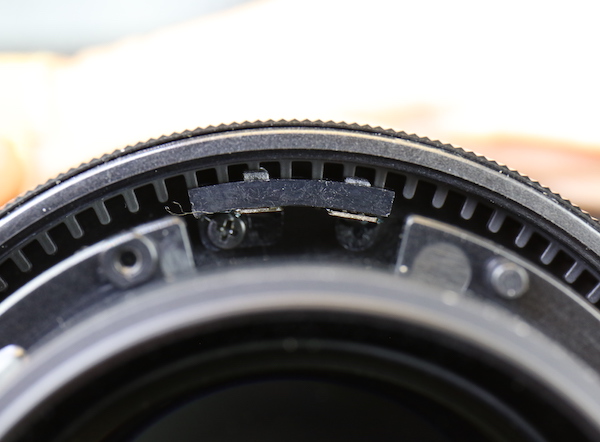
Now we can see the focusing ring rotation sensor, which has to be removed.
Lensrentals.com, 2016
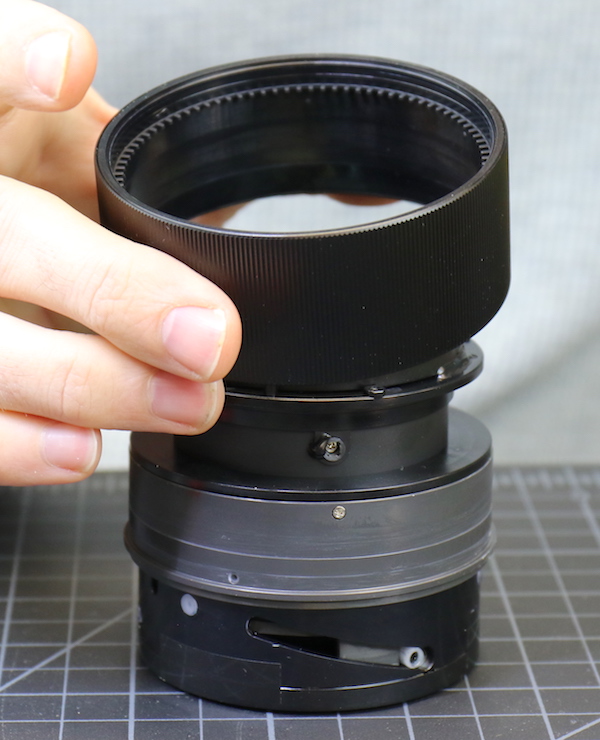
After that we can slide the filter ring off, exposing all of the inner lenses.
Lensrentals.com, 2016
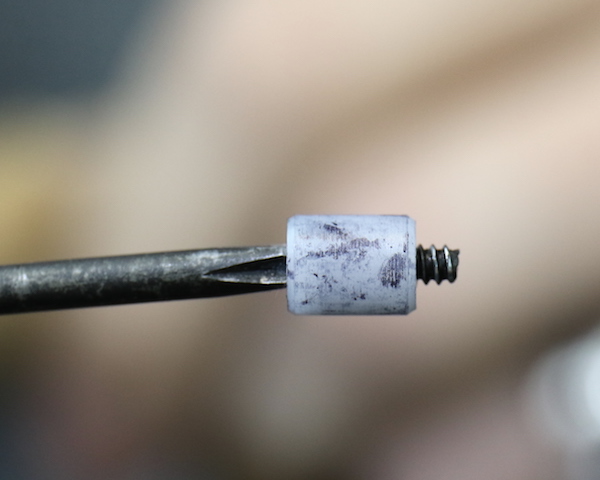
We removed one of the focusing element bearings (you can see it in the image above at the bottom right). It’s a nice sized piece of nylon held in place with a reasonably robust screw. Again, not over engineered, but certainly reasonable for the task.
Lensrentals.com, 2016
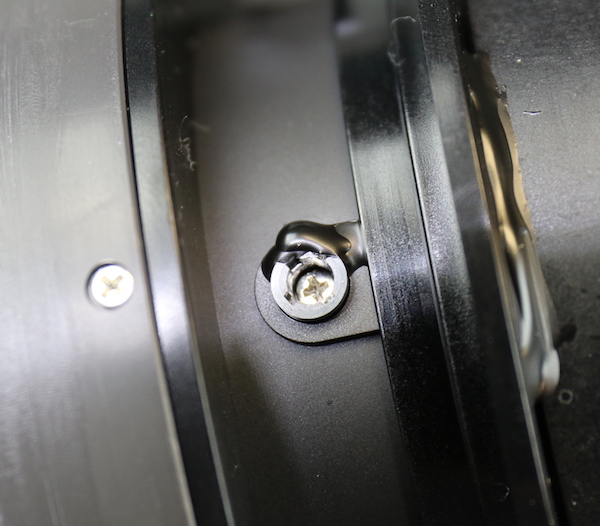
You may also have noticed another surprise in the image above. The front group also has eccentric adjustment collars, locked in position with more black glue.
Lensrentals.com, 2016
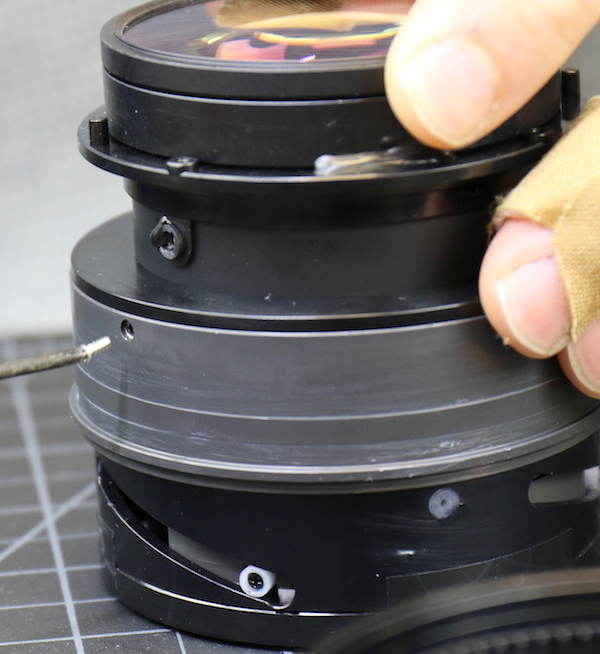
There are a couple of screws holding the two halves of the inner lens barrel together here, so, of course, we took them out.
Lensrentals.com, 2016
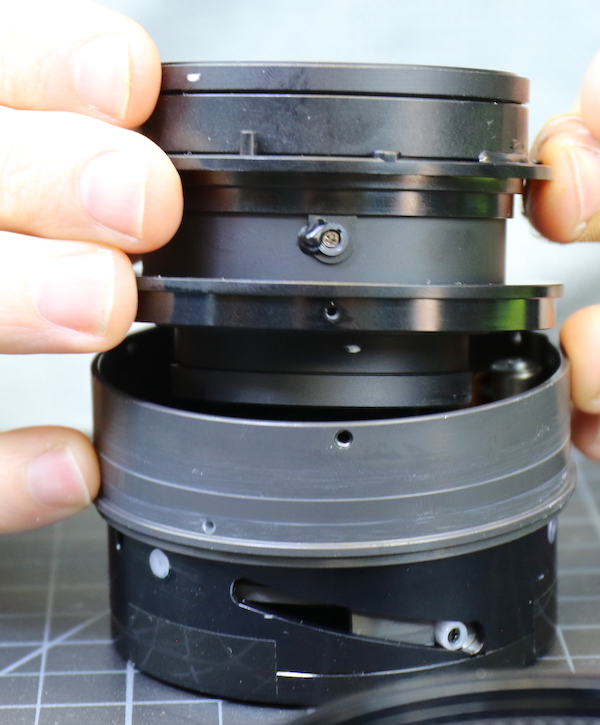
And took the inner core apart.
Lensrentals.com, 2016
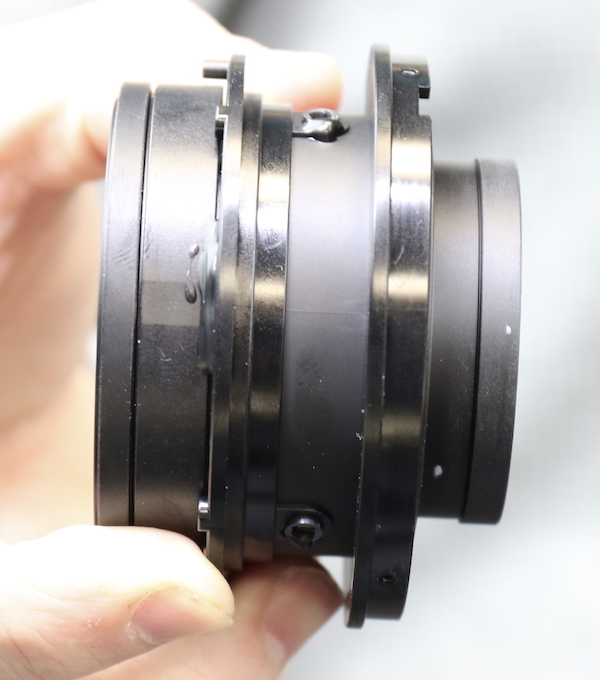
The front part contains most of the lens’ optics.
Lensrentals.com, 2016
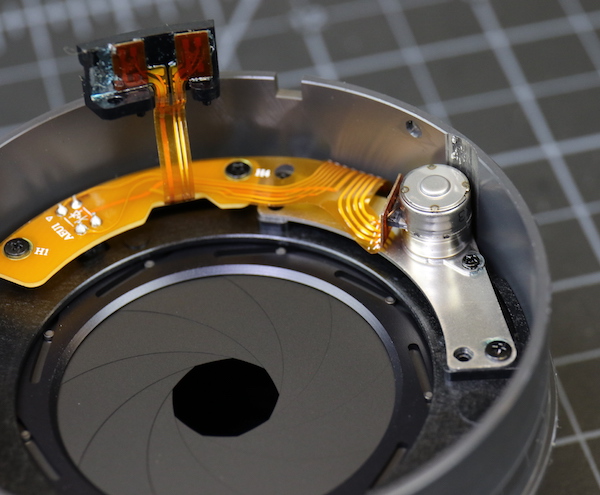
The other portion contains the aperture assembly, which you can see below, and focusing element.
Lensrentals.com, 2016
There were a couple of sheathed screw pins that seemed to hold the aperture assembly in place.
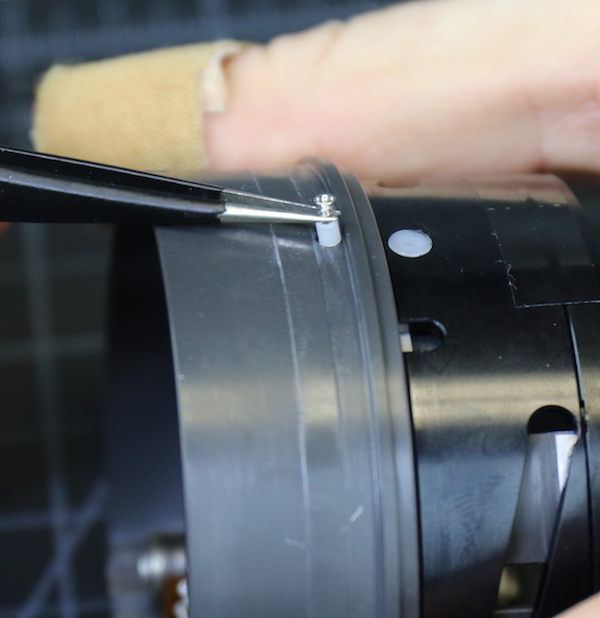
Lensrentals.com, 2016
With that done we can remove the aperture assembly and separate it from the focusing element.
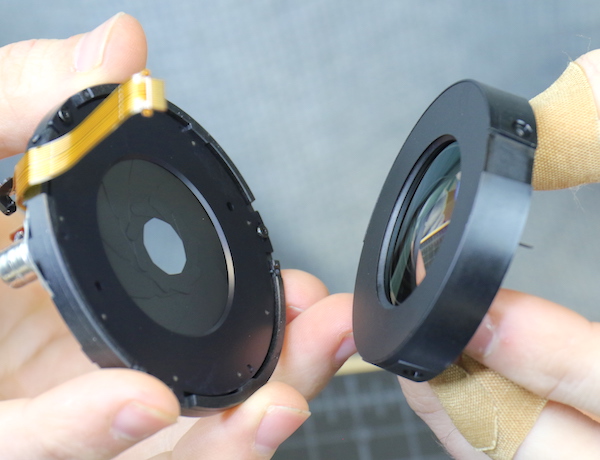
Lensrentals.com, 2016
The aperture is a nice, smooth, 9-bladed affair.

Lensrentals.com, 2016
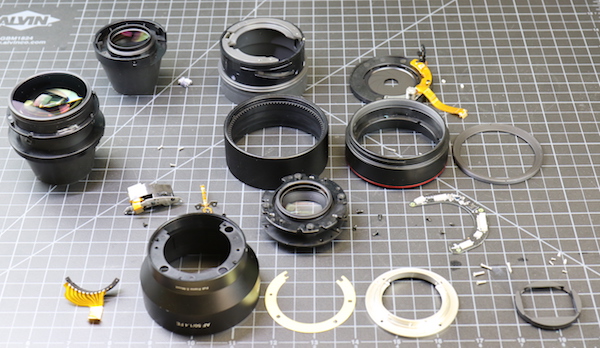
And now we can set all the pieces out on the table where you can see how complex a very simple 50mm lens is.

Lensrentals.com, 2016
Conclusion
This lens was a pleasant surprise. No, it’s not built like a tank. But it is built like a small, efficient, well-constructed lens. With some of the previous Samyang / Rokinon lenses we disassemble them going “Oh, that’s going to break. This could be a problem.” We didn’t see any obvious weak points like that with this lens. It’s a clear step up in construction quality. It should be, it’s also a step up in price point.
We also were very, very pleasantly surprised by the adjustable elements in this lens. For those of you who don’t know, many inexpensive lenses (and some quite expensive ones) are often simple stacks of ‘element – spacer – element – spacer.’ There’s no optical adjustment that can be done. What you get is what you get, and what you get is often decentered. So another pleasant surprise.
In fact, we were impressed enough that we ran a set of the Rokinon 50mm f/1.4 AF lenses through testing on the optical bench. We only had eight copies available, not the ten we usually run, but still, that should give us a reasonable idea of what the lens should be like. Several reviewers have reported that it’s decent, but not amazing wide-open, and then sharpens up considerably at f/2.0.
Here are a couple of comparisons, just to give you some MTF examples. First, we’ll look at it compared to the Sony 55mm f/1.8. Please take into consideration that the Sony is being tested at f/1.8. The Rokinon would have a bit higher MTF at f/1.8.
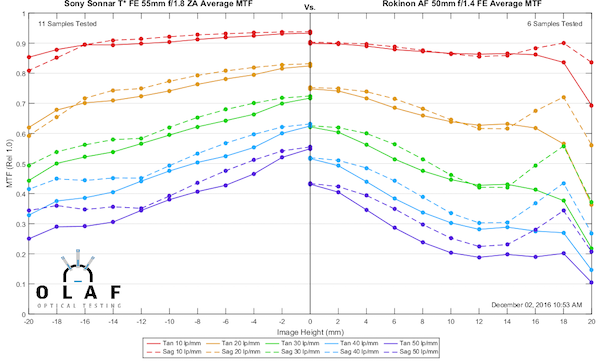
Olaf Optical Testing, 2016
Probably a more reasonable comparison is to the Canon 50mm f/1.4 lens. The Canon is not an FE mount lens, of course, but it’s a decent, low-price autofocus 50mm lens. It gives Canon shooters an option for a wide-aperture prime at low cost, just like the Rokinon does for Sony Fe shooters. The Rokinon holds up in this comparison very well.
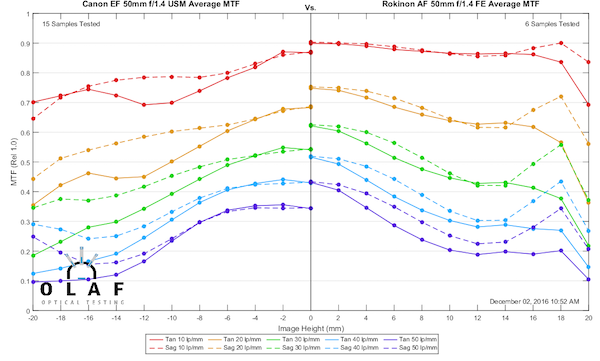
Olaf Optical Testing, 2016
There’s obviously a lot more to deciding if you want a lens than how it looks on a teardown and what it’s MTF charts look like. But based on just those two things, I think it’s worth considering. It’s always nice to have choices.
Roger Cicala and Aaron Closz
Lensrentals.com
December, 2016
Author: Roger Cicala
I’m Roger and I am the founder of Lensrentals.com. Hailed as one of the optic nerds here, I enjoy shooting collimated light through 30X microscope objectives in my spare time. When I do take real pictures I like using something different: a Medium format, or Pentax K1, or a Sony RX1R.
-
VPR
-
pl capeli
-
Francesco
-
l_d_allan
-
m r
-
Ian Goss
-
Ed Bambrick
-
Carleton Foxx
-
Y.A.
-
Ralph Hightower
-
Harvey
-
Roger Cicala
-
Roger Cicala
-
Brandon Dube
-
Harvey
-
Athanasius Kirchner
-
Harvey
-
Brandon Dube
-
Harvey
-
Roger Cicala
-
Roger Cicala
-
Søren Stærke
-
speedy fisher
-
JJ
-
Brandon Dube
-
Roger Cicala
-
Roger Cicala
-
bdbender4
-
Ilya Zakharevich
-
Omesh Singh
