Equipment
The Minolta 40-80mm f/2.8 Gearbox Zoom; The Clockwork Lens
Lensrentals.com, 2017
There were giants in the earth in those days . . . They were mighty men, men of renown. Genesis 6:4
I’ve always been fascinated by the history of lenses. I write about it a lot. To me, the most fascinating items are those made many years ago, with what we would consider wholly inadequate technology, which did things we can hardly reproduce today.
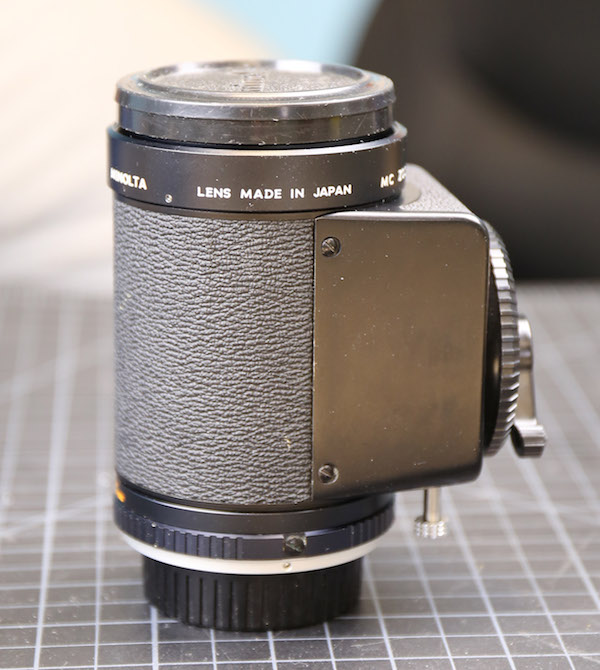
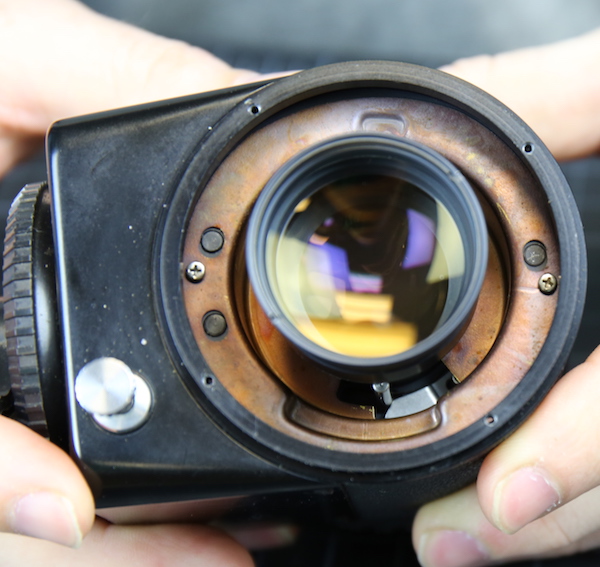
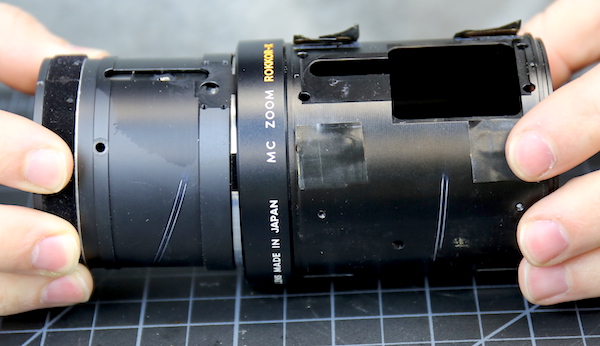
Not long ago, I learned of a lens I’d somehow missed, the Minolta MC Rokkor X 40-80mm f/2.8 zoom(1, 2, 3). Let’s pay a little respect to the innovation of this lens. It’s an f2.8 zoom, but has an only 55mm front element diameter, is about 10cm (4 inches) long, and weighs 560 grams (just over a pound) despite being all-metal construction. From many reports and examples, it has excellent image quality.
It is also completely unique (as far as I know) in being the only zoom lens driven by an external gearbox. There have been a few telescoping zooms. The first zoom, the Voigtlander Zoomar, used a sliding ring set on thick rods. Almost all other zooms have used a rotating helicoid to move the zoom groups.
But only the Minolta put a mechanical box on the side of the lens to drive the focusing and zoom elements.
Lensrentals.com, 2016
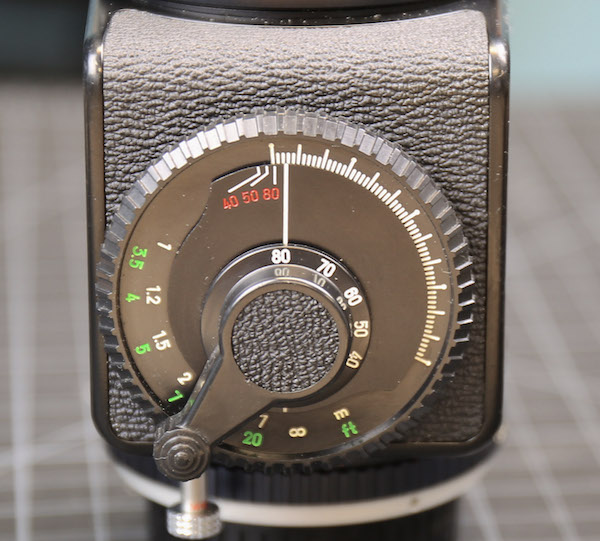
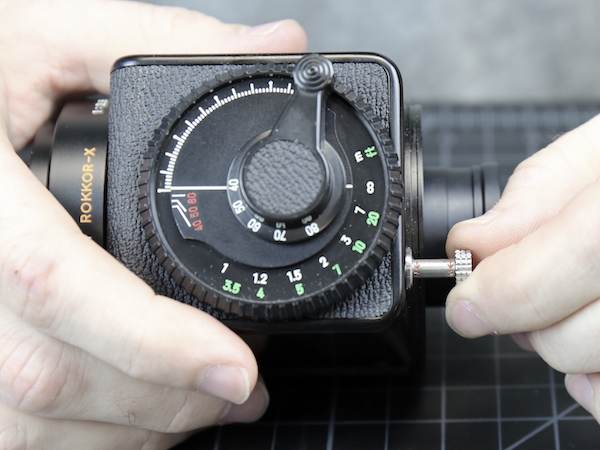
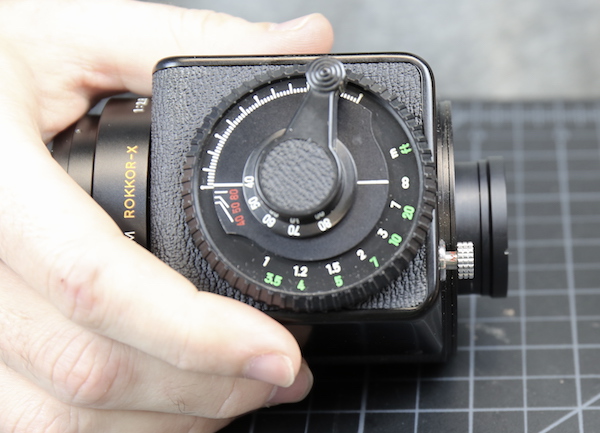
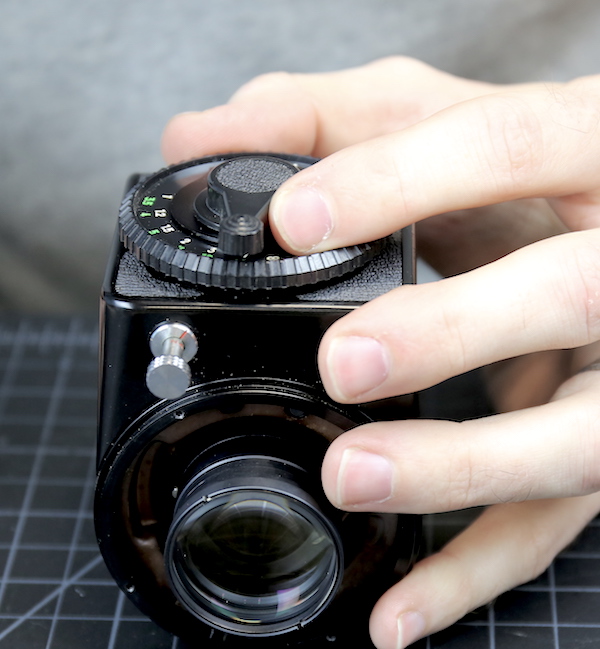
Moving the lever with your thumb to zoom the lens, spinning the wheel with your fingers focuses it, and moving the metal thumbscrew at the bottom in and out, puts the lens in macro mode.
Lensrentals.com, 2017
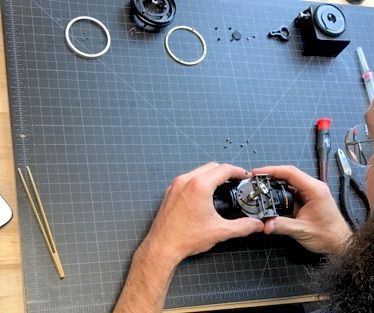
So when I got my hands on a copy of this unique lens, I had two questions. First, was it as good as they say it was? Second, how the hell does that gearbox thing work? Luckily, we had the capabilities to answer both questions.
Optical Testing
We didn’t have exactly the right lens mount for this lens but were able to make something work. At 40mm, though, the very edges of the test circle were cut off, but still, at 40mm and f/2.8 this is a pretty impressive performance for a 40-year-old zoom lens.

Olaf Optical Testing, 2017
At 80mm things were less impressive. This is a 40-year old lens, and things could have happened to it that affected performance, but further tests showed no decentering or field tilt. Still, it’s possible there’s a spacing error at the long end of the zoom range.

Olaf Optical Testing, 2017
When we stopped down to f/5.6 at 80mm, though, we were pretty impressed again. (This makes me think it unlikely that there is any real optical maladjustment here, it cleans up too nicely at f/5.6 to have a major optical issue.)

Olaf Optical Testing, 2017
My summary is it looks just like a good film zoom from the 70s would be expected to look. It’s pretty good at the wide end, needs to be stopped down at the longer end, but overall is a very usable lens. To get that in such a small package with macro capabilities, well, that’s impressive.
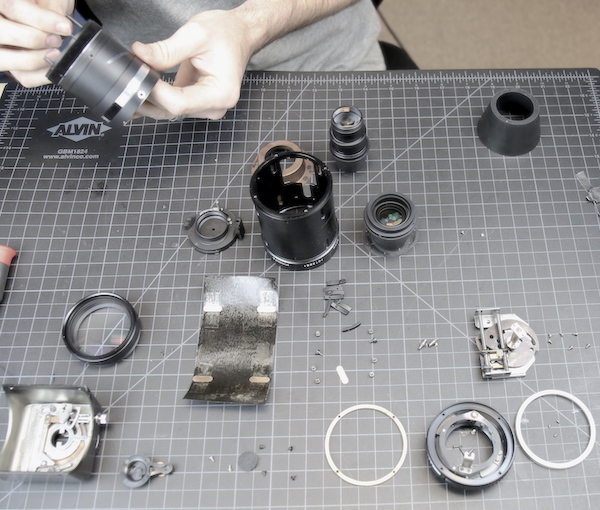
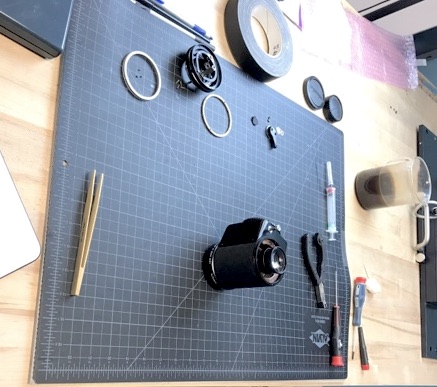
Of Course, We’re Going to Take it Apart
Be patient, though. We’ve never seen a lens even slightly like this, so we have absolutely no idea what we’re doing today. Most days we have at least a vague idea.
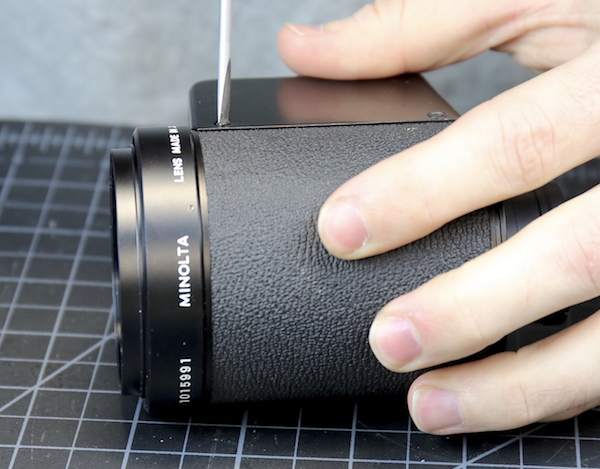
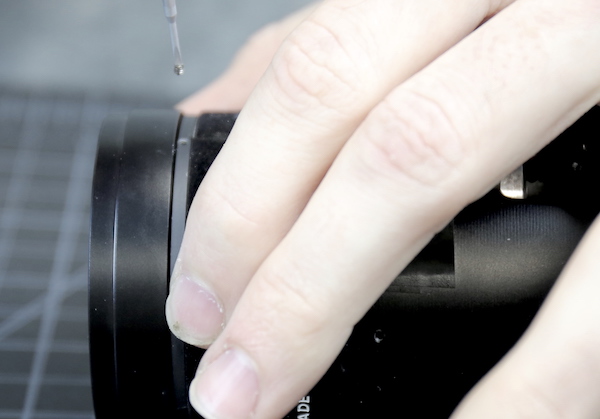
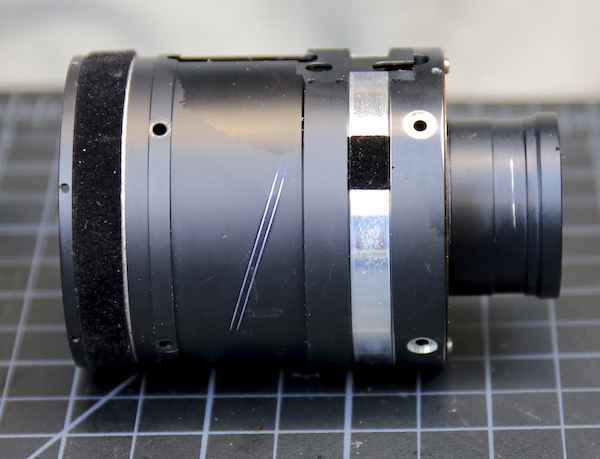
We had two hints, though. First, the lens is covered in a nice leatherette, like a camera body of the times. Leatherette is usually there to cover screws. Second, we could see some set screws around the barrel. You don’t see set screws in lenses today very often, but when you do, well, they need to come out.
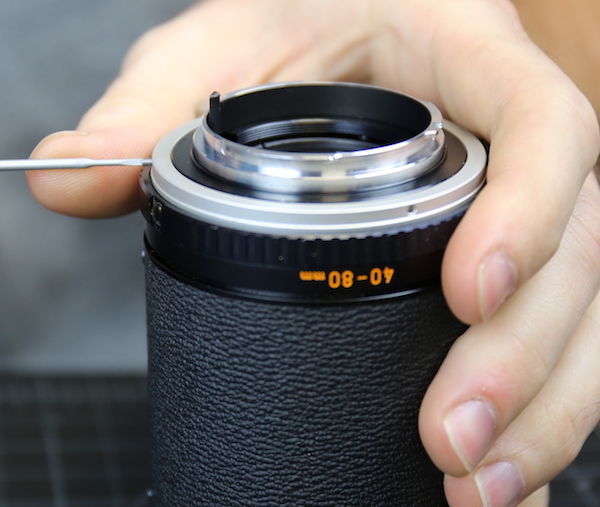
So We Started with the Obvious
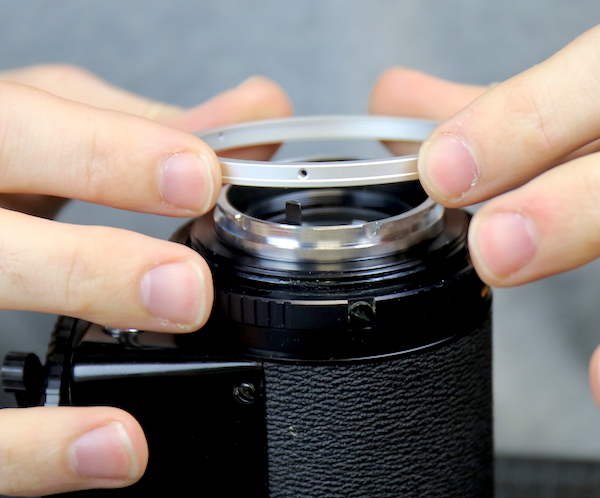
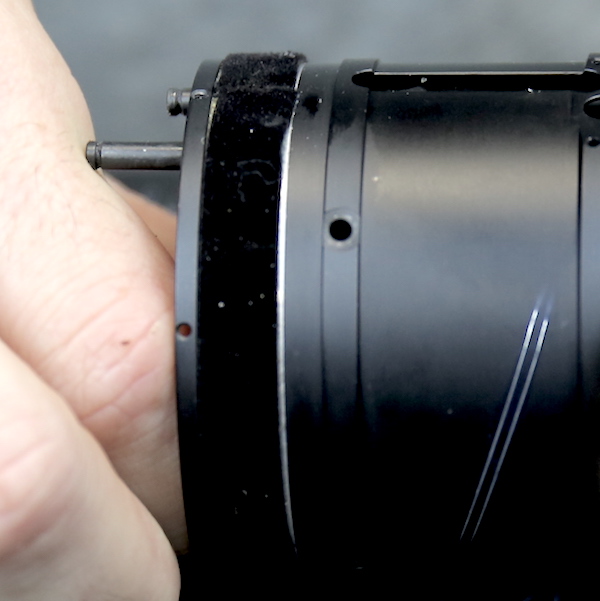
We removed the 3 set screws around the rear barrel.
Lensrentals.com, 2017
We were kind of impressed with these 1970’s set screws. As my friends from Boston would say, ‘they’re wicked sharp.’

Lensrentals.com, 2017
With the set screws out, a rear ring, we’ll call it a makeup ring, came off.
Lensrentals.com, 2017
With that out of the way, we could see some real screws underneath.
Lensrentals.com, 2017
Taking them out seemed a logical next step.
Lensrentals.com, 2017
After removing those, Aaron could slide off the aperture control ring. We were starting to feel a little confident now. That confidence, as you will see, was entirely misplaced.
Lensrentals.com, 2017
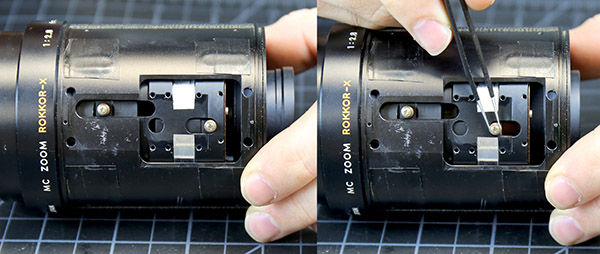
The aperture control assembly is pretty routine. There’s a relatively long slotted key that inserts into the aperture ring. You can see a spring underneath it and a counter spring on the other side.
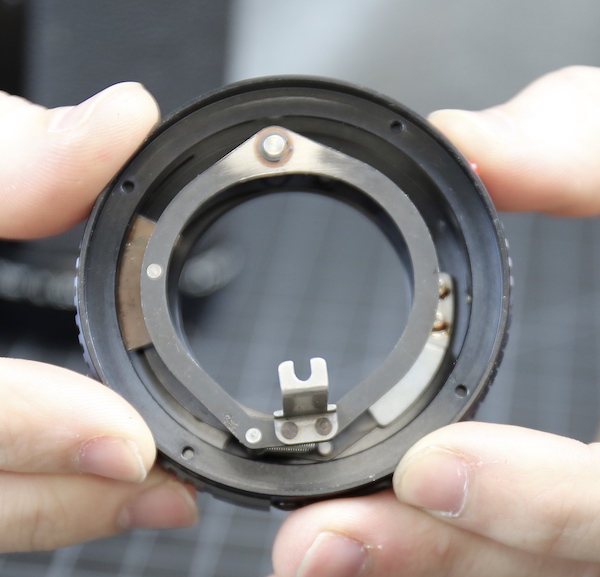
Lensrentals.com, 2017
Lensrentals.com, 2017
You may have noticed the thick, brass spacing shim under the aperture ring. It’s in a location where it could be an adjustment for infinity focus, but we aren’t certain given its thickness. It might just be a standard, non-variable spacer.
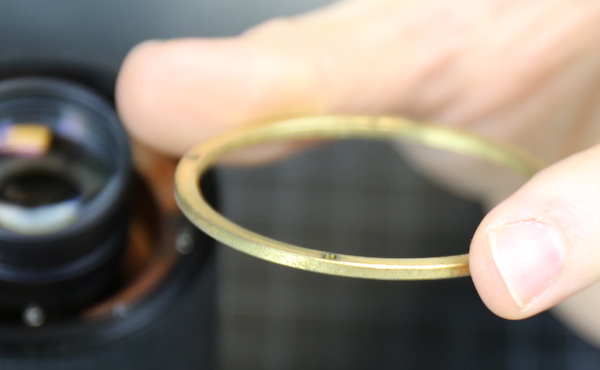
Lensrentals.com, 2017
Then We Came to a Fork in the Disassembly Road
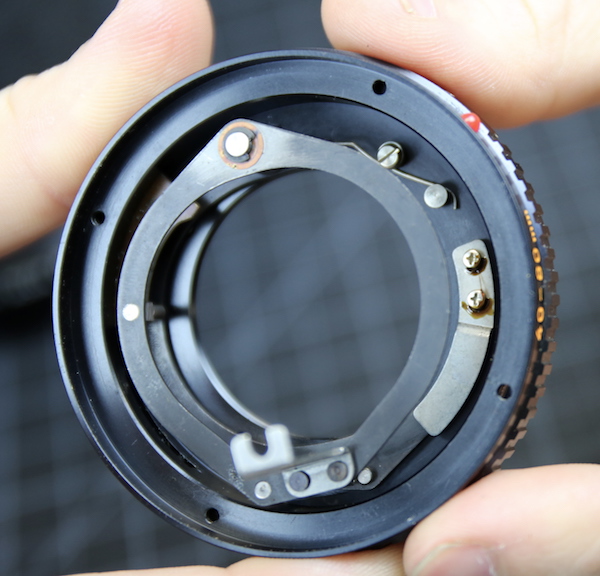
With the aperture control assembly off, there was a rear group sticking out that looked like it could be removed.
Lenrentals.com, 2017
There was also a rear metal plate that looked like it was made of tarnished copper. There were a couple of screws in the plate that looked as though they wanted to be removed. You may also notice the three black plugs in the plate. We weren’t sure what they were, but assuming the moving elements slid along some type of rail, we thought that could be the rail ends.
Lensrentals.com, 2017
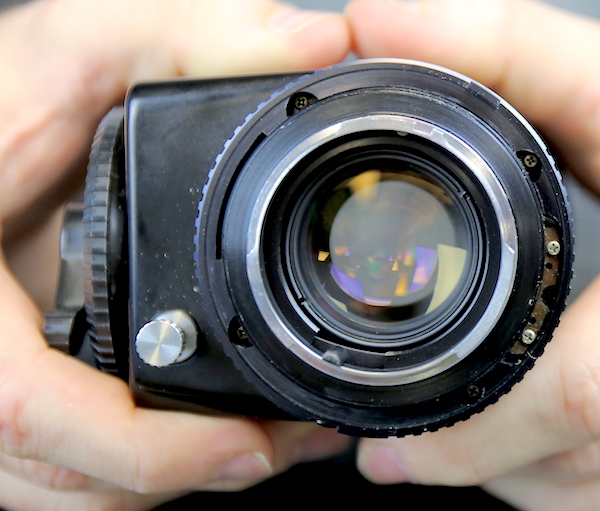
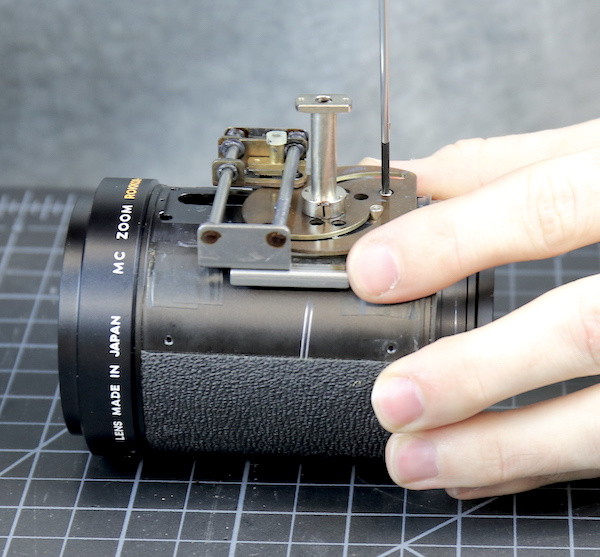
While we decided which way to go next, we played around with the gearbox a bit, because with the rear of the lens barrel off you can get a nice, clear look at what the silver thumbscrew lever does. Turning it and pushing it in moves the lens’ optical assembly forward, basically like putting a built-in extension tube on the lens.
Lensrentals.com, 2017
Lensrentals.com, 2017
This was done by Minolta in 1975. It was done again in 2013 when Canon released the 24-70mm f/4 IS Macro. (Mock me if you must, but the 24-70 f/4 IS is the lens I use most.) Minolta, in the 1970s and 80s, was arguably the most innovative camera company, with Nikon and Canon often playing catch-up.
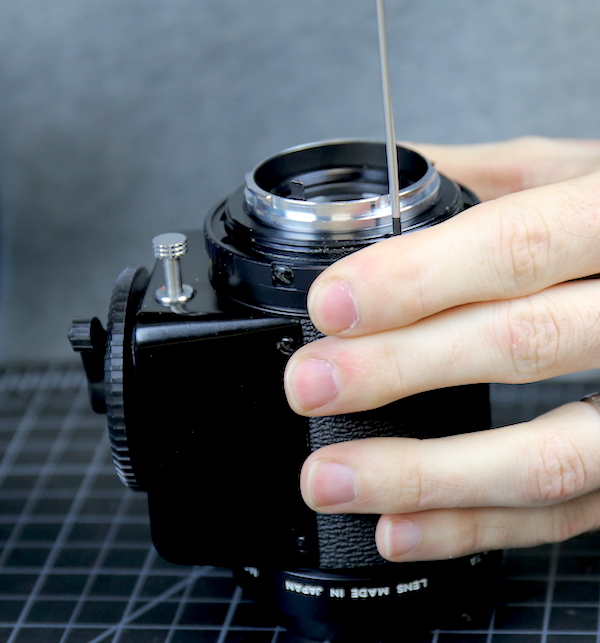
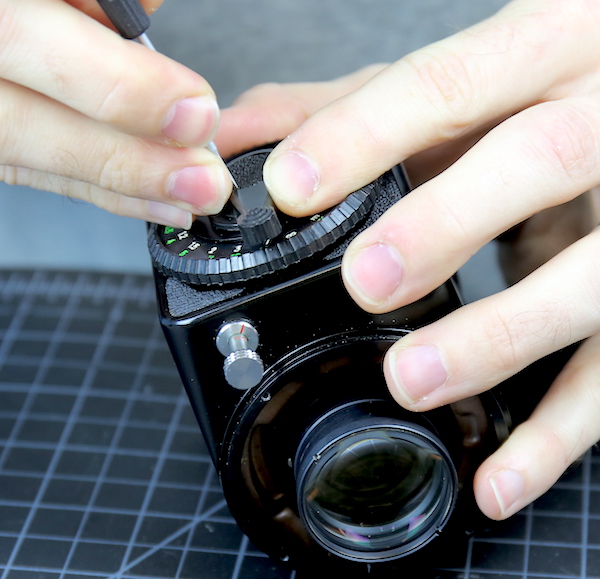
Anyway, after playing around with the Macro button and turning the focus knob and zoom lever some more, we decided ‘neither of the above’ was the best option and started taking out the screws from the mechanical box cover. This is different for us because unlike today’s lenses, the screws were slotted, not JIS. We had to hunt around for a bit to find the right screwdriver.
Lesnrentals.com, 2017
Removing the screws loosened the box, but it wasn’t going anywhere because the zoom lever and focusing wheel were still fixed in place. The bit of leatherette on top of the focusing wheel seemed unlikely to just be decorative.
Lesnrentals.com, 2017
So we peeled it off.
Lesnrentals.com, 2017
And sure enough, there were some nice big screws under there.

Lesnrentals.com, 2017
The focus lever lifted right off once those were removed.

Lesnrentals.com, 2017
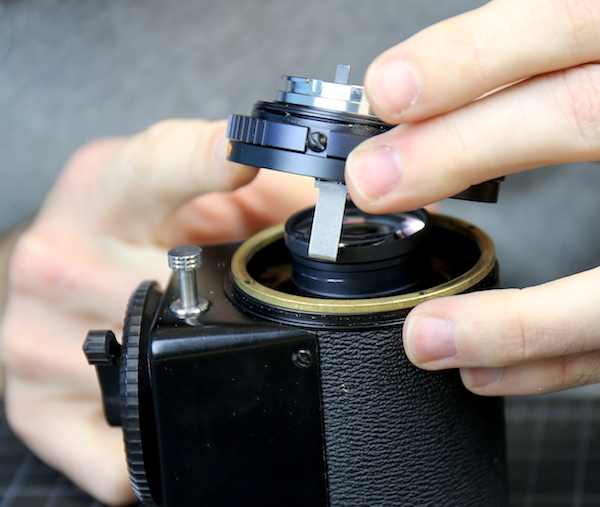
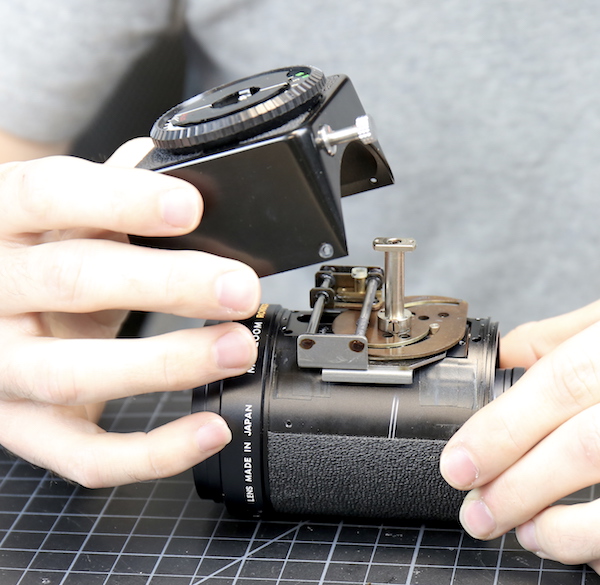
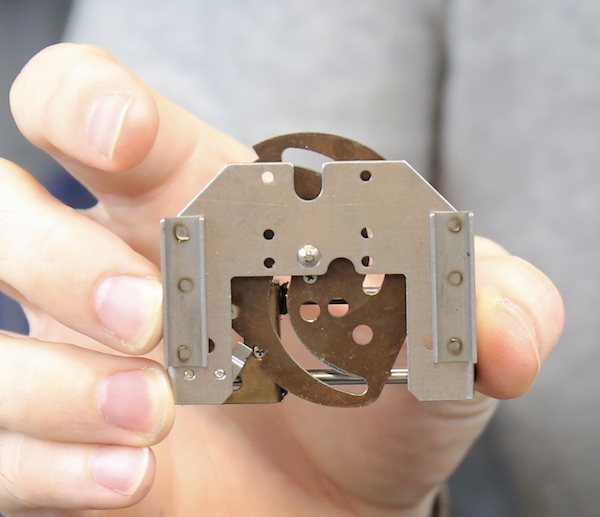
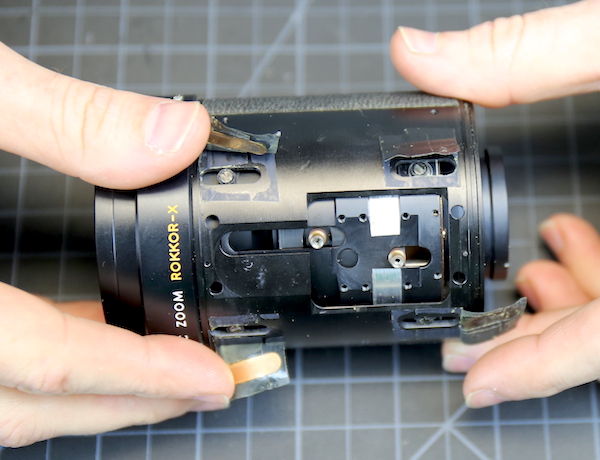
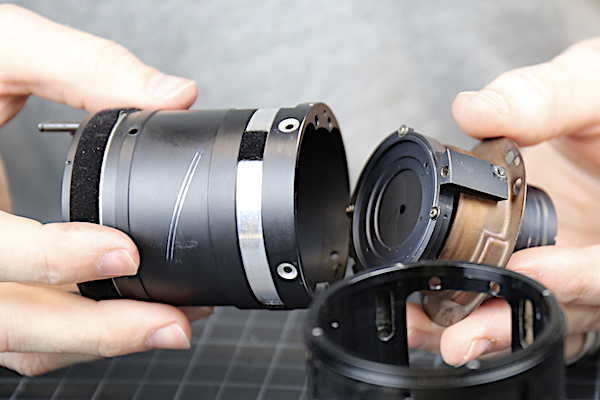
After that, we could lift the mechanical housing off. Notice that the center post, which controls zoom, is still part of the lens. The focus ring and macro thumbscrew mechanisms are part of the housing we took off.
Lesnrentals.com, 2017
Well, How Do I Work This?
If you don’t like fascinating mechanics, you can skip this part. But we will all think less of you if you do.
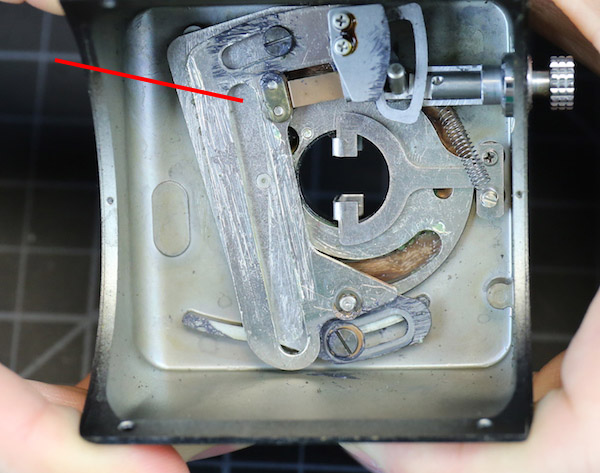
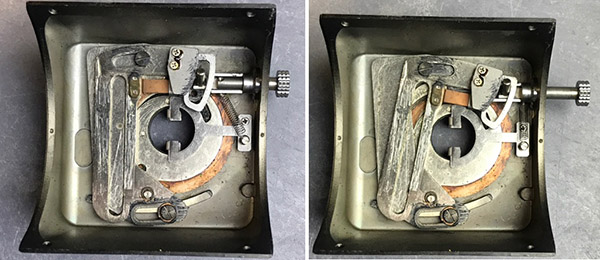
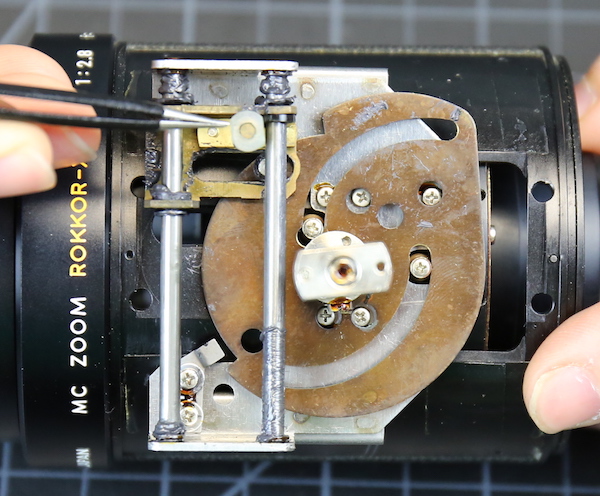
Let’s start with the case we just removed, which contains the macro and focusing mechanisms, both of which move what, for lack of a better term; I will call the Magic Slot (red arrow) in the top case. As an aside, I would very much like to buy whoever designed this a beer. This, my friends, is a mechanical art of the highest order.
Lensrentals.com, 2016
I’m going to compress the images a bit to show you how things work. First, when we move the lens from standard (thumbscrew out) to the macro (thumbscrew in) position, we move the top side (in the picture) of the lever forward.
Lensrentals.com, 2017
If we rotate the focusing wheel, we move the lower side of the lever forward or backward. Closest focus is the image on the left below, infinity focus on the right.
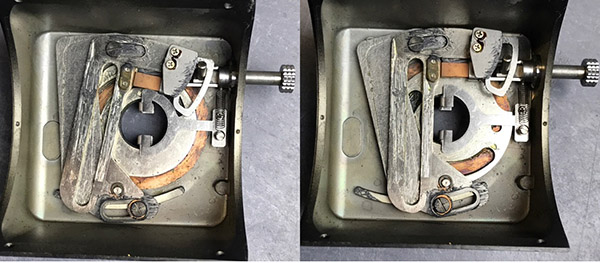
Lensrentals.com, 2017
If you think that’s a little confusing, maybe showing you what the Magic Slot does to the lens will help. Or maybe not.
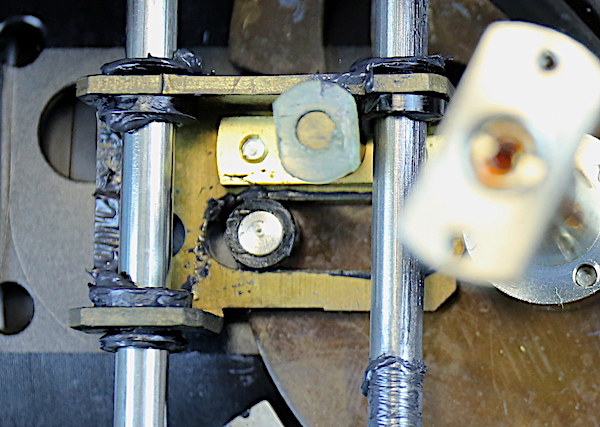
The green arrow points to the zoom stem, coming out of the field toward you. The red arrow is pointing to a heavy duty brass post covered with a white bumper, which I will call the Golden Post (because normal lens terms like helicoid and cams don’t work here). The brass base of the golden post slides up and down (in the picture’s orientation, it would be side-to-side on the lens) the two aluminum rods. And the rods are connected to the large aluminum base plate you see below everything else.
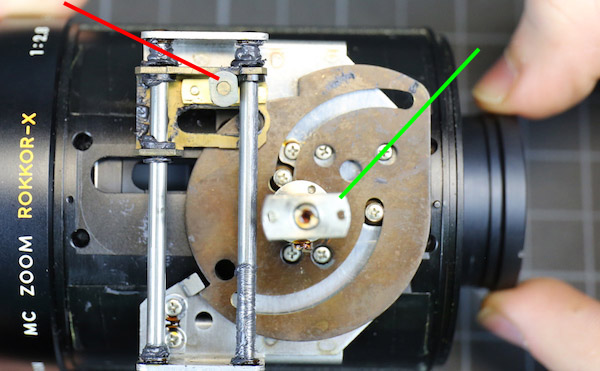
Lensrentals.com, 2017
The Golden Post inserts into the Magic Slot we showed you above. As we just pointed out, the Magic Slot moves forward and backward when you turn the focusing ring. This moves the Magic Post and therefore the aluminum baseplate, which is attached to the lens’ optical system forward and backward too, focusing the lens.
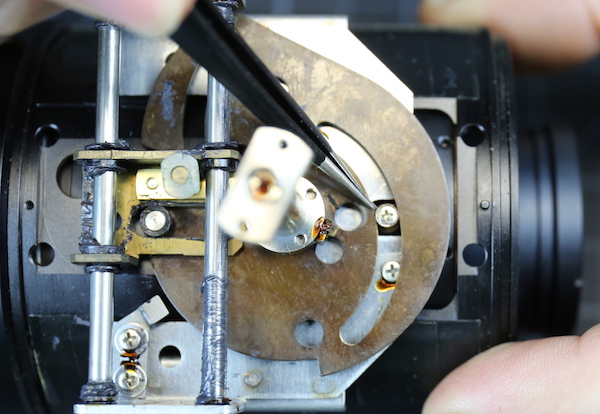
The copper plate with the curved slots rotates when you turn the zoom lever. (Helicoid plate sounds ridiculous, and I try not to use ‘thingie’ in these posts, so I’m going with a copper plate.)
You can see the two cam screws at the close ends of the slot in the pictures above and below. These move the zoom elements when the copper plate rotates. Aaron’s forceps are pointing to one of the cams in the picture below, shown with the lens zoomed about halfway. We honestly had assumed there was some type of worm-gear driving the zoom mechanism, but this is very similar to the slots you would see in the rotating barrel of a normal lens.
Lensrentals.com, 2017
In this position, you can also see a post with a black bumper that is sticking up from the copper zoom plate inserting into the base of the Golden Post. There’s a closeup in the image below.
Lensrentals.com, 2017
The position of the zoom slides the brass focusing post from one side to the other along the rails. The focusing post is sliding inside of the Magic Slot, the position of which has been adjusted by the focusing ring and the macro thumbscrew. So the post is not only sliding from side-to-side, but it is also moving forward and backward depending upon the position of the magic slot.
Lensrentals.com, 2017
So things work this way:
- The focusing ring (and the macro thumbscrew) move the Magic Slot towards the front or back of the lens. Since the Golden Post is in the Magic slot, the entire lens assembly moves along with it, focusing the lens.
- When the zoom plate rotates, it moves the two zoom elements further and closer from each other, zooming the lens.
- When the zoom plate rotates, it also slides the Golden Post along the Magic Slot, readjusting its focus position.
This is an intense little mechanical computer. Changing the focal length automatically changes the focus to an appropriate location. Some modern lenses do something similar, where a series of keys inside the lens move the focusing group when the lens is zoomed. Others do it with electronic programming in the lookup tables.
But this is simple and elegant. OK, maybe it’s just elegant. I’m pretty confident a lot of engineers burnt up a lot of slide rules figuring all this out, but once the calculations were made, the mechanics make all the corrections automatically and should keep the lens fairly parfocal when zooming.
As an Afterthought, Let’s Take Apart the Lens
Obviously, I was most interested in how the zoom and focus mechanisms worked in this lens, but as long as we’re here, we might as well take the damned thing apart. I could say we wanted to clean and lubricate it, but you’d all know that’s a bald-faced lie. There were screws not removed and that makes us a bit crazy.
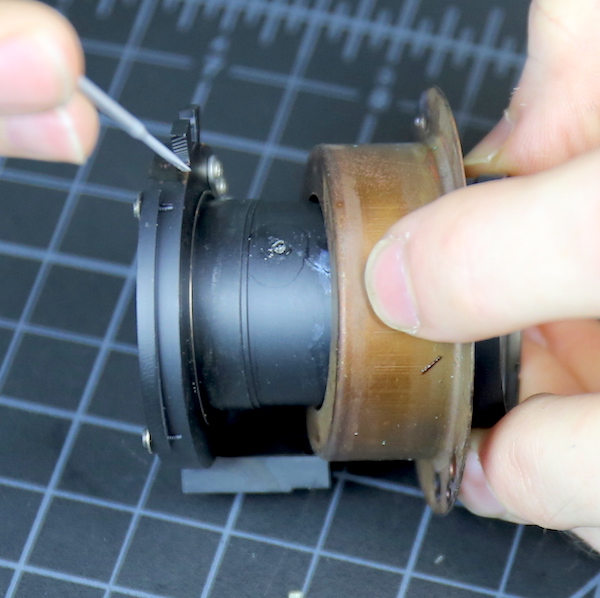
Anyway, by rotating the zoom plate, Aaron could access the screws that hold the mechanical assembly to the lens.
Lensrentals.com, 2017
And remove it.
Lensrentals.com, 2017
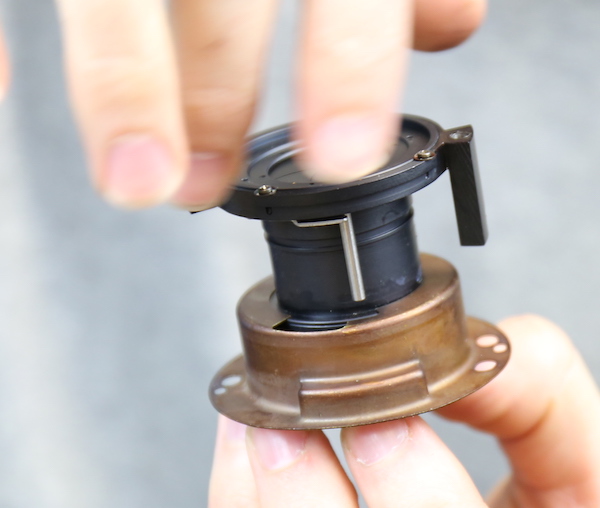
With that off, we can see how the zoom groups move. If you scroll back up to one of the pictures of the copper plate, you can see the two cams in their slots in the plate. With the pate removed you can see how each of those elements moves when the plate rotates.

Lensrentals.com, 2017
Lensrentals.com, 2017
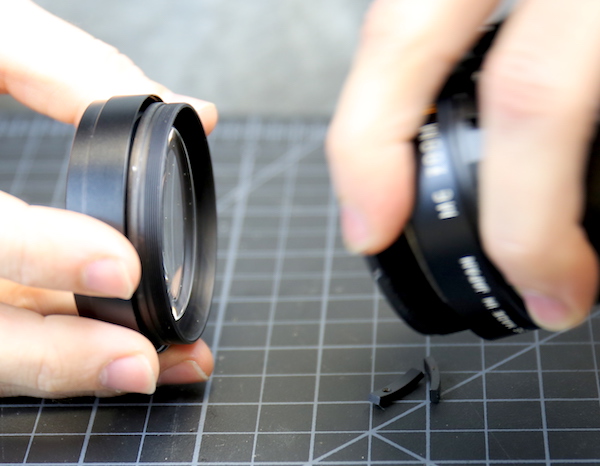
Now I could next show you a dozen pictures as we tried to, in order, remove the front ring, remove the copper ring from the back, remove the zooming cams. Well, we tried all of those things, but the lens didn’t disassemble. It rattled some but didn’t come apart.
Lensrentals.com, 2017
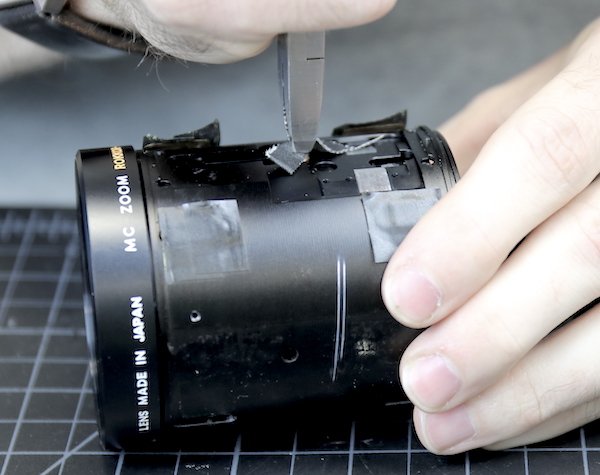
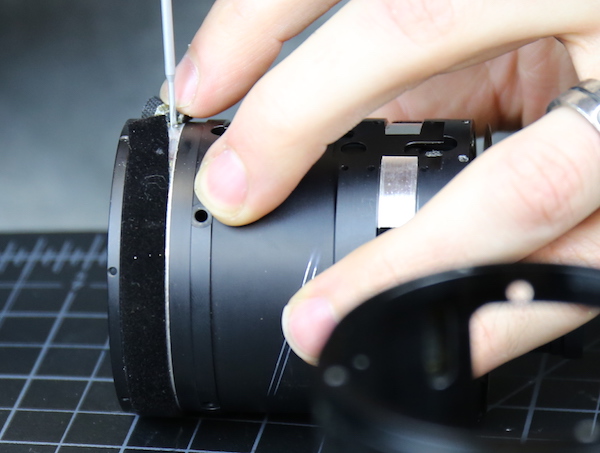
So next we went with Aaron’s Second Rule of Disassembly: All leatherette must be removed.
Lensrentals.com, 2017
This gave us access to nice, thick bolts that held most of the fixed elements in place. We removed these, of course, which wasn’t, perhaps, the best idea. (Actually it was our best idea, on the basis that it was our only idea. It just wasn’t a good idea.) When the first bolt came out, we heard the rather sickening sound of a nut of some type falling into the lens. This, my friends, was the point of no return. Now we had to get the lens disassembled, even if that meant using a circular saw.
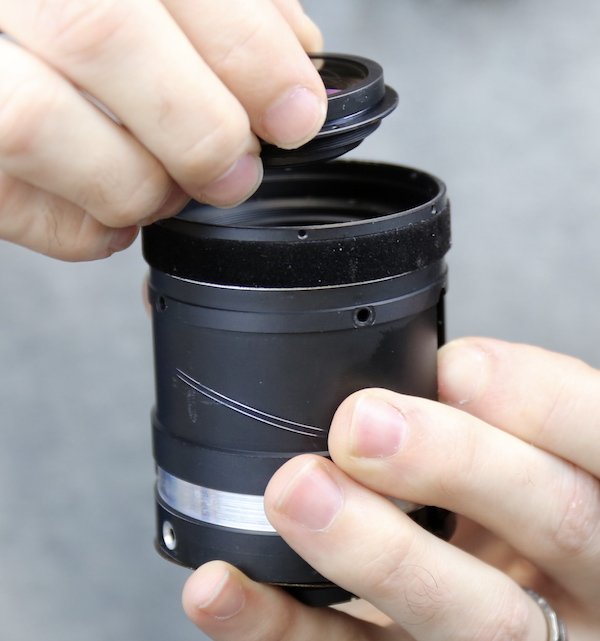
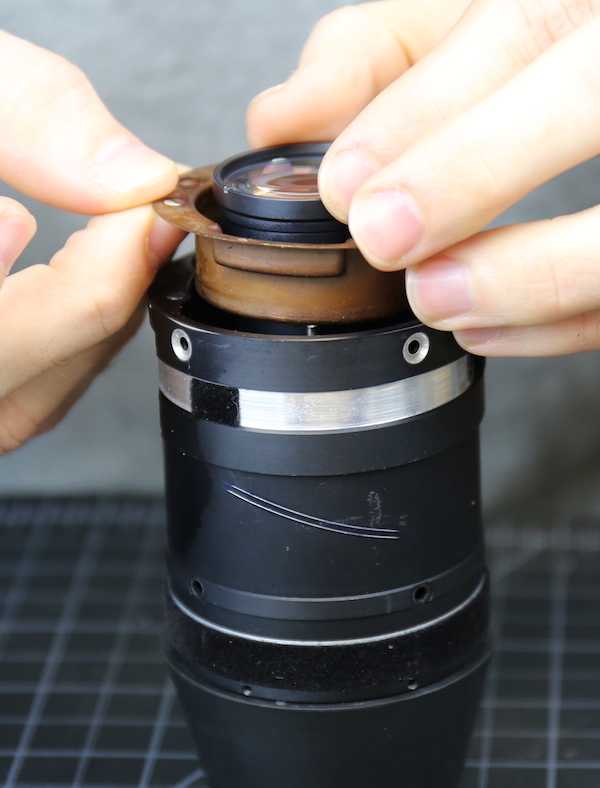
Acting like we were cool with all this, because people were walking through the repair space, we took out the rest of the bolts, after which we were able to slide the front group part-way out of the lens. It was nice to see, even at 40 years old, there was a nice felt ring protecting the insides of the lens from the outsides of the world.
Lensrentals.com, 2017
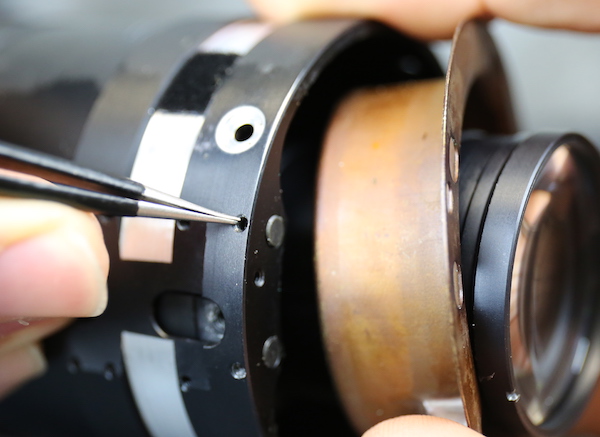
It would have been nicer to see the optical group just slide right out. But, of course, like everything else about this lens, things weren’t as we expected. Our last vague hope was that, with the front group partially out of the lens, some more set screws were exposed.
Lensrentals.com, 2017
And after removing those, we could unscrew the front element from the rest of the front group.
Lensrentals.com, 2017
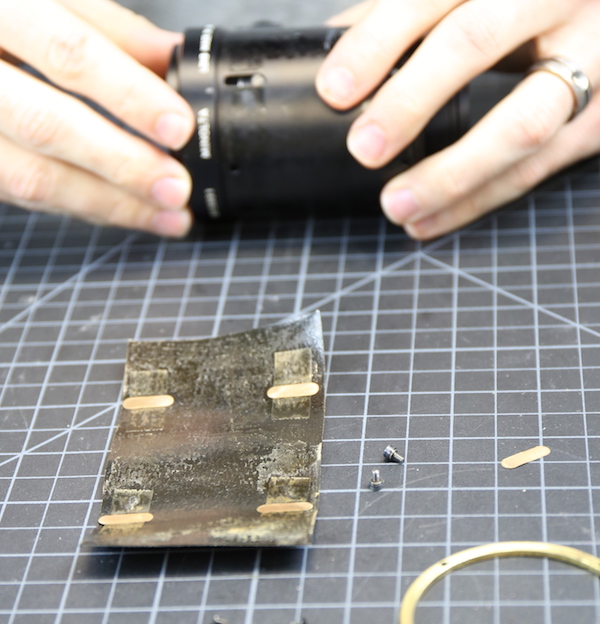
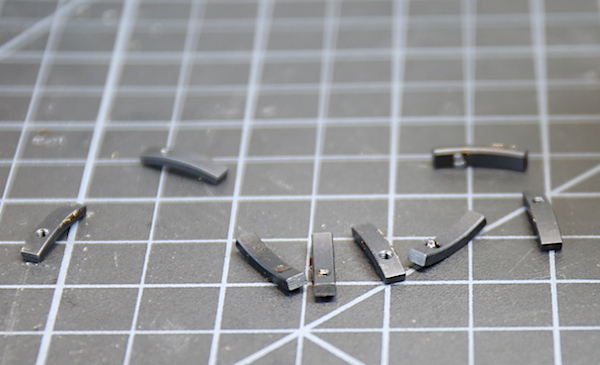
And, as you may have noticed in the picture above, this created enough of an opening to let us drop the ‘nuts’ out of the lens. All 8 of them.
Lensrentals.com, 2017
With the front group removed, we could see the remaining elements slide up and down on three relatively thick rods (you can see the ends in the image below, and the rods themselves in the next picture).

Lensrentals.com, 2017

Lensrentals.com, 2017
But the rods run inside the inner barrel. To get the outer barrel off, we still had to remove the focusing cams from their elements. We eventually accomplished this, using multiple applications of glue remover, heat, and torque.
Lensrentals.com, 2017
Finally, with those removed, we could slide the inner barrel out of the outer casing. These last few pictures represent about an hour of time and a thorough and complete use of our full lexicon of unprintable words.
Lensrentals.com, 2017
Lensrentals.com, 2017
This gave enough access so that Aaron could get a grip on the second element and unscrew it.
Lensrentals.com, 2017
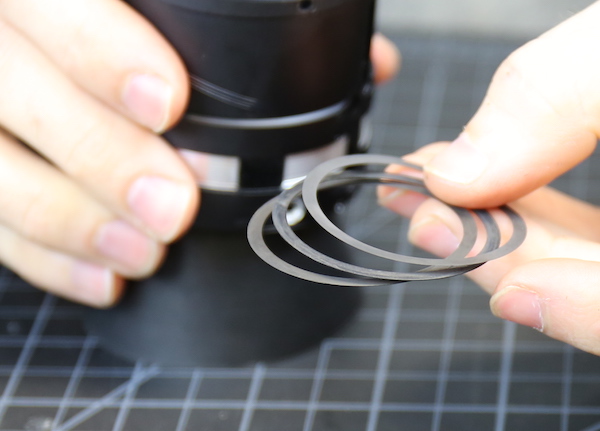
There were several spacing shims underneath that second group, which is the only true optical adjustment we found in this lens.
Lensrentals.com, 2017
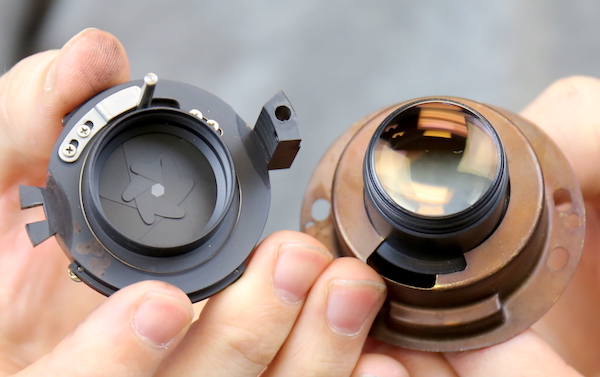
Now, with all of the front optics removed, we have an unobstructed view of the aperture blades. They looked just like aperture blades, and at this point, we were glad to see something that looked familiar.
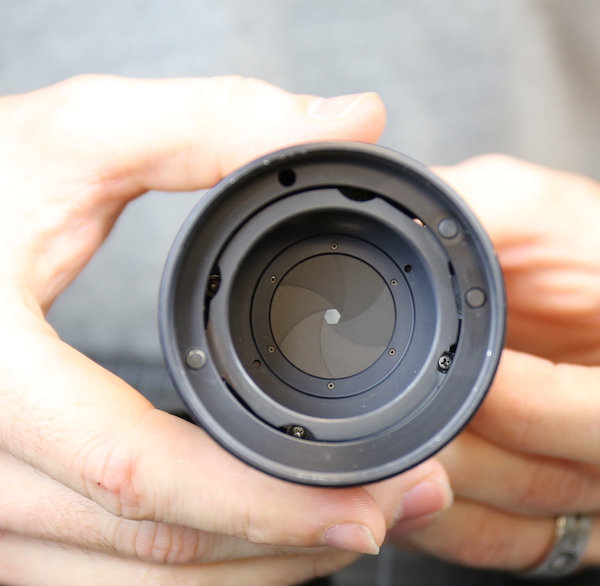
Lensrentals.com, 2017
We went to the back of the lens and removed the screws from the copper plate (well, copper looking, I don’t think it’s copper) at the back because those were the only screws left. Of course, it would not come off over the rear element.
Lensrentals.com, 2017
Pulling it back did expose the rear end of the rods passing through the lens though, so we removed the set screws holding the rods in place.
Lensrentals.com, 2017
Then finally found more set screws at the front of the optical barrel, under the felt.
Lensrentals.com, 2017
With all the set screws removed we could push the rods up from the back.
Lensrentals.com, 2017
And suddenly we were done! With the rods moved up, the rear group slid right out. In retrospect, we could have done this a lot earlier and saved, well, time, sanity, and curse words.
Lensrentals.com, 2017
There was, of course, one more set screw to remove.
Lensrentals.com, 2017
After removing that, the aperture assembly unscrewed from the rear group.
Lensrentals.com, 2017
And only then could we take the rear group out from the copper plate.
Lensrentals.com, 2017
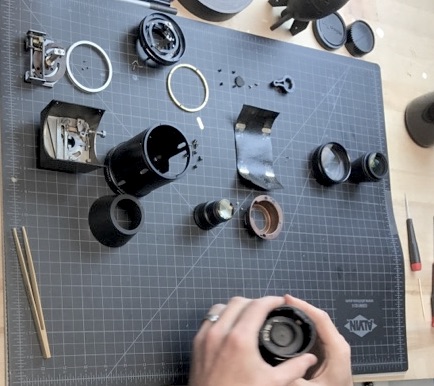
There was no reason to separate the rear group, so suddenly our disassembly was complete. (OK, you’re right. There was no reason to separate any of this stuff, except that’s what we do.)
Lensrentals.com, 2017
So What Did We Learn Today?
That there were some slick engineers working on things at Minolta back in the 1970s, thinking way outside the box. This was an entirely different way of making a zoom.
I have no idea why this didn’t catch on. It was smaller and in many ways simpler than competing lenses. It was, perhaps, too different. Or maybe just too difficult to assemble and disassemble (although I’m certain there were easier ways to do it than our fumbling about). It might have been more expensive to make. Or maybe it was too costly to keep making one clockwork lens when the others all used routine zooming and focusing methods.
But it’s an impressive example of some engineering gone wild, and I always love seeing designs that are outside of the box.
Roger Cicala and Aaron Closz
Lensrentals.com
September, 2017
Addendum: Because many people were worried we wouldn’t be able to get this classic lens back together again:
Author: Roger Cicala
I’m Roger and I am the founder of Lensrentals.com. Hailed as one of the optic nerds here, I enjoy shooting collimated light through 30X microscope objectives in my spare time. When I do take real pictures I like using something different: a Medium format, or Pentax K1, or a Sony RX1R.
-
Roger Cicala
-
Brett A. Wheeler
-
davev8
-
Roger Cicala
-
Joshua Koerner
-
jrsart
-
Athanasius Kirchner
-
Roger Cicala
-
Roger Cicala
-
Marty4650 .
-
William Dyer
-
Samuel H
-
Roger Cicala
-
Samuel H
-
Marc P.
-
prescient
-
Shane Castle
-
Brandon Dube
-
Brandon Dube
-
Roger Cicala
-
Amit Kotwal
-
Roger Cicala
-
Chris Jankowski
-
Roger Cicala
-
Max Rockbin
-
Deanaaargh
-
J L Williams
-
Roger Cicala
-
Clive Moss
