Years ago, I introduced Roger’s Law of New Product Introduction AKA The Fanboy Uncertainty Principle.
But what about new releases that really aren’t new? Usually, they fail to reach sufficient quantum energy to generate much of an opinion either way. They are the dark matter of photography, detectable only by the size of B&H’s website.
It has been my pattern, over the years, to slam any manufacturer that slaps a ‘II’ or ‘III’ on a product with no real changes except in the price. Sure, you changed the coatings or cosmetics, because you either changed suppliers or your manufacturing process. And now you want $300 more for the lens.
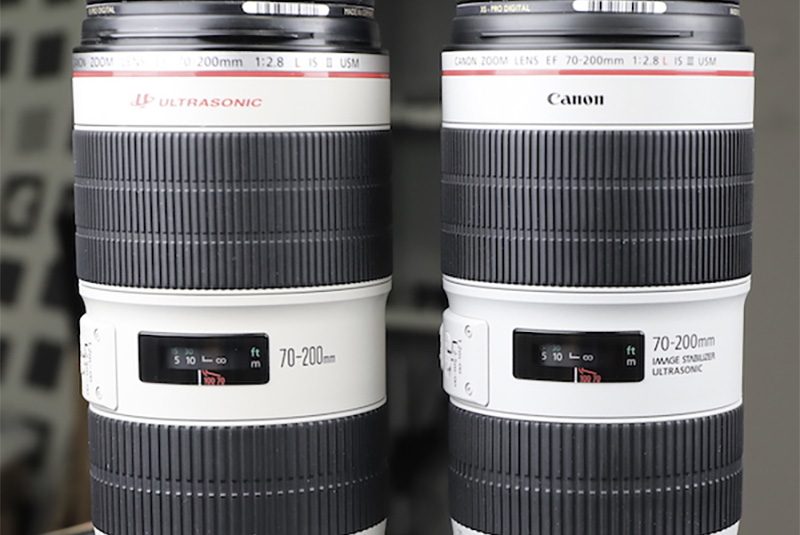
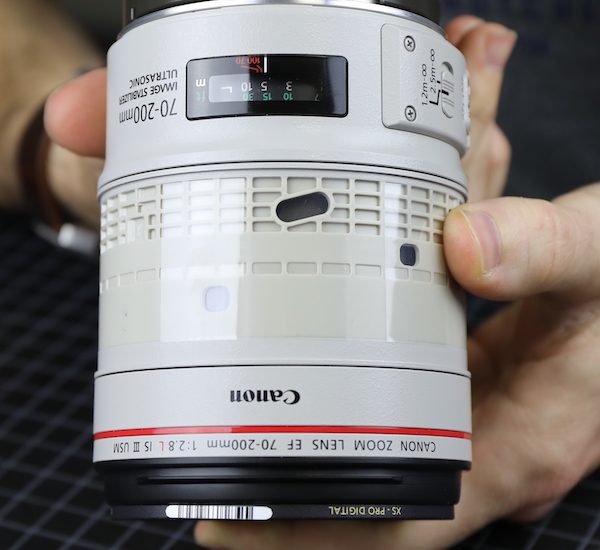
Canon ‘refreshed’ the ever-so-popular 70-200mm f/2.8 lens from a ‘II’ to a ‘III’ with new optical coatings and paint, but no major changes. While the price is higher than the current II, it actually is the same price as the II was sold at for most of its life. A meh moment for almost everyone except those who scooped up the ‘II’ at reduced prices.
I did wonder if perhaps there might be a bit more under the hood than what Canon had announced. These are arguably the most popular lenses Lensrentals.com stocks; hundreds of copies with constant turnover. Since we do in-house repairs, over the years we’ve noticed some minor upgrades that have taken place; an internal ring and some gears have changed, etc. Internally, the 70-200mm f/2.8 is also one of the ugliest bits of engineering in the Canon fleet. We can understand why it had to be that way; it’s an incredibly complex lens. But we figure this bothered Canon’s optomechanical engineers as much as it did us, so maybe they snuck some changes in.
But let me be clear, Canon made no claims that the Canon 70-200mm f/2.8 IS III is anything more than some fresh paint, a few new labels, and some heavily marketed coatings that are what they’ve changed all their lenses to anyway. (As an aside, we despise the new fluorine front and rear coatings and consider them a significant step backward in durability; but that’s just our opinion.)
While we take Canon 70-200mm f/2.8 IS II lenses apart almost every day, we’ve never published a teardown. So, having made a short story long, we decided to do side-by-side teardowns of the 70-200mm f/2.8L IS Mk II and 70-200mm f/2.8L IS Mk III lenses to see if there was any difference in the mechanicals. Probably there aren’t, but we had some hope. (Hope: a down payment on real estate in the Land of Eternal Disappointment.)
So for this exercise, we did a full teardown on a Mark II, then repeated it on the Mark III.
Opening Up the Mount End
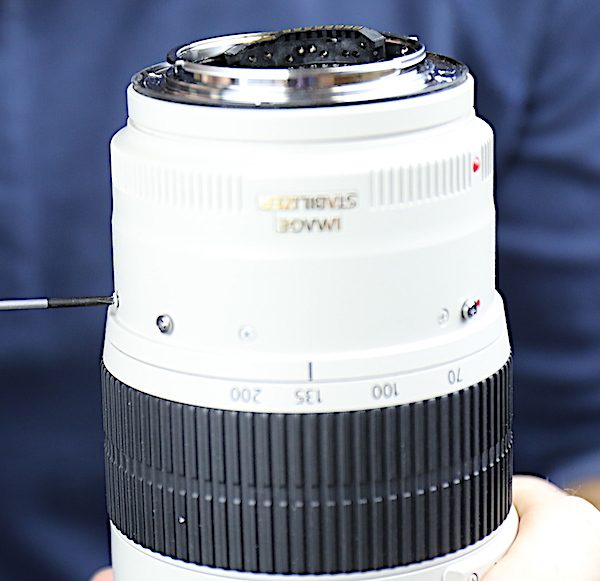
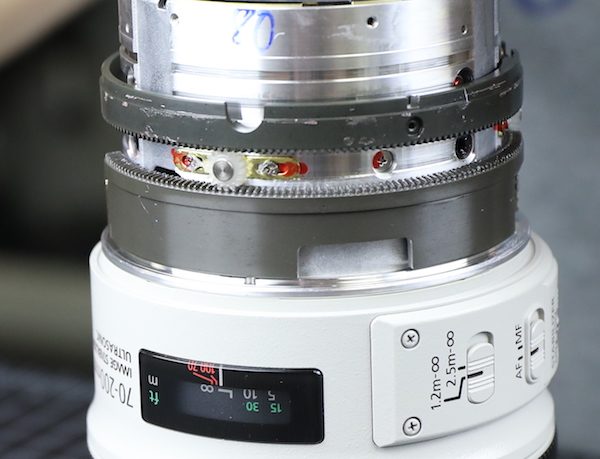
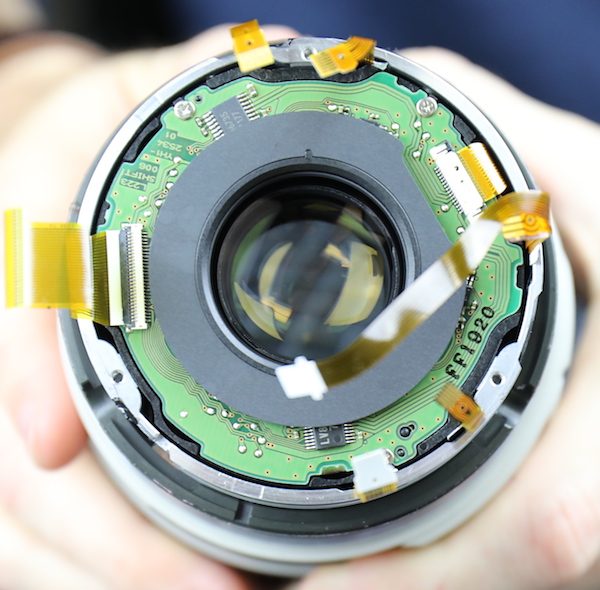
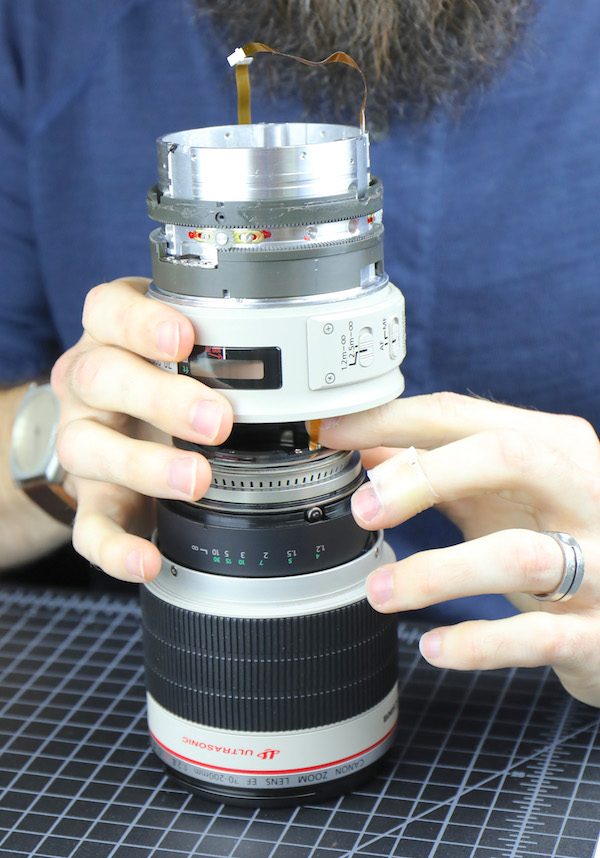
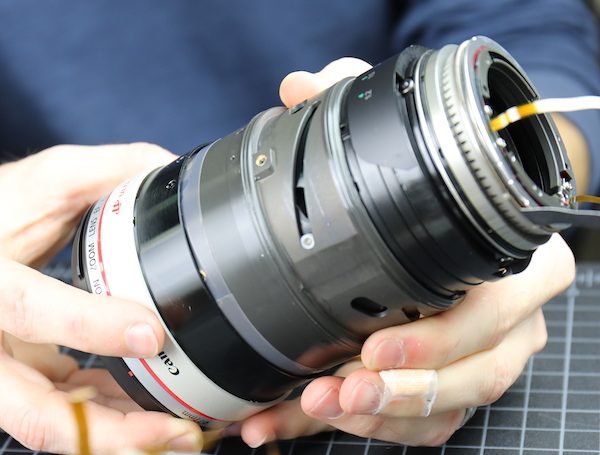
If you compare the 70-200mm f/2.8 Mk II to most other Canon lenses, the back (mount) end of the lens, well, it isn’t pretty. There are a lot of wires, a clumsy centering mechanism, shims, and all kinds of things that Canon has gotten away from in their other lenses. It works fine, but it’s crowded, complicated, and kind of a pain to work on.
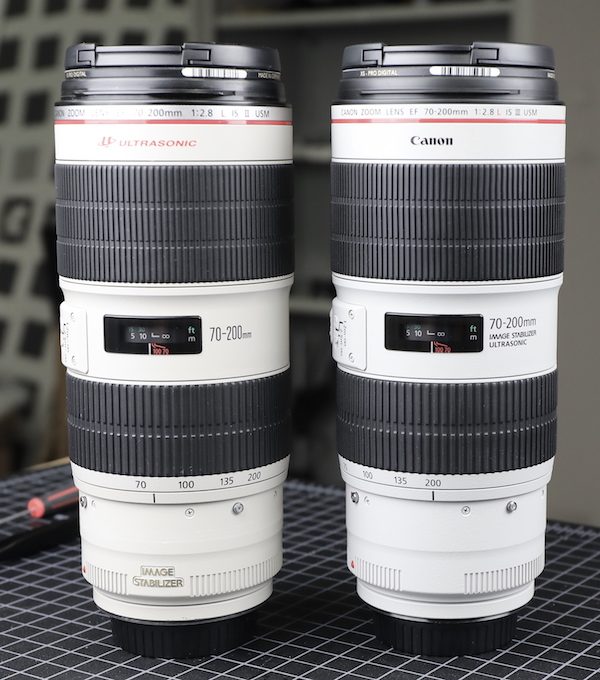
Canon 70-200mm f/2.8 IS Mk II
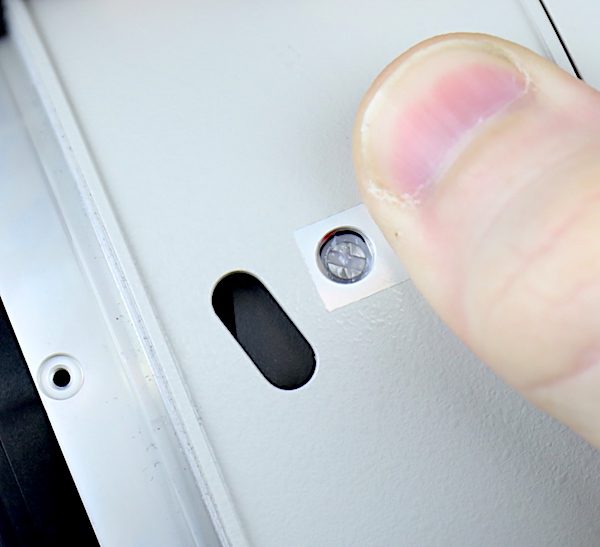
The one nice thing about disassembling the back end of the Mark II is the light baffle just pops right out.
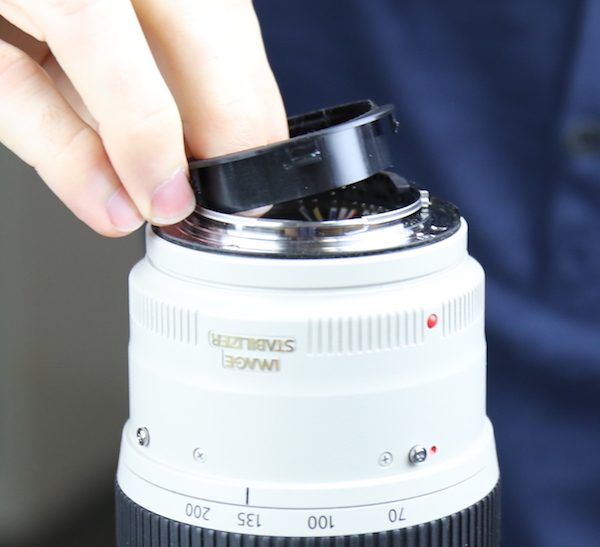
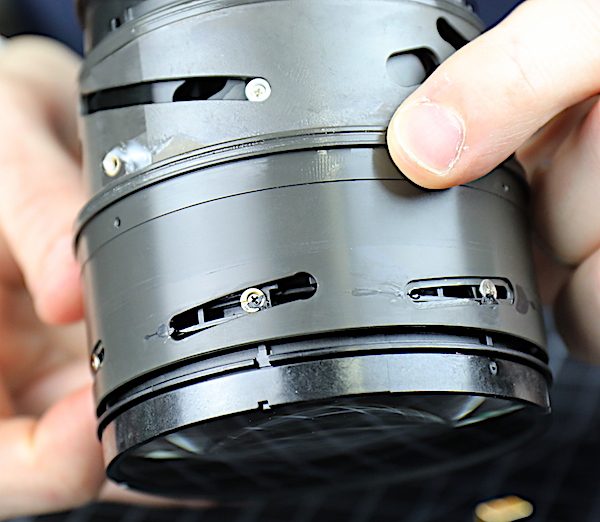
After removing the screws holding the electrical connection to the bayonet, you remove the 8 barrel screws to remove the rear outer barrel (these are the ones that come loose every so often, jamming your tripod ring).
With those out, the rear barrel slides right off. Revealing a very uncharacteristic (for Canon) wiring harness held in place by tape. Don’t mistake me; they’ve been doing it this way since the 70-200mm f/2.8 IS original version. It doesn’t cause problems, but nobody would call it elegant either.
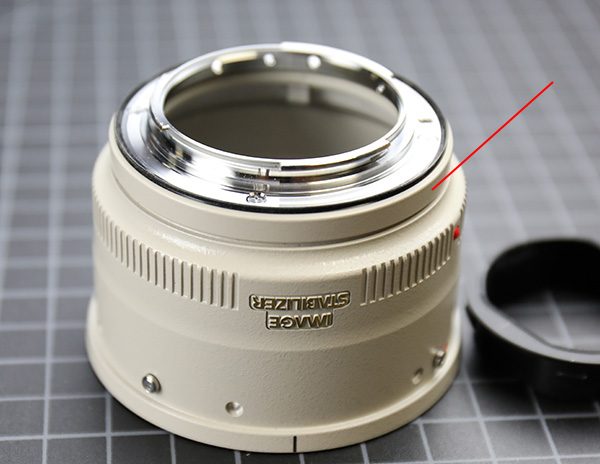
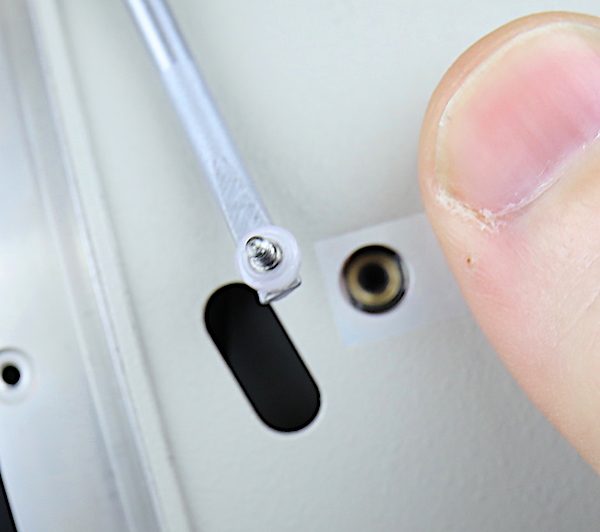
As an aside, while the rear barrel and bayonet are most easily removed as a single piece, it is actually a 3-piece assembly. There is a spacer (red arrow) between the bayonet and the barrel that comes in various thicknesses to adjust infinity focus.
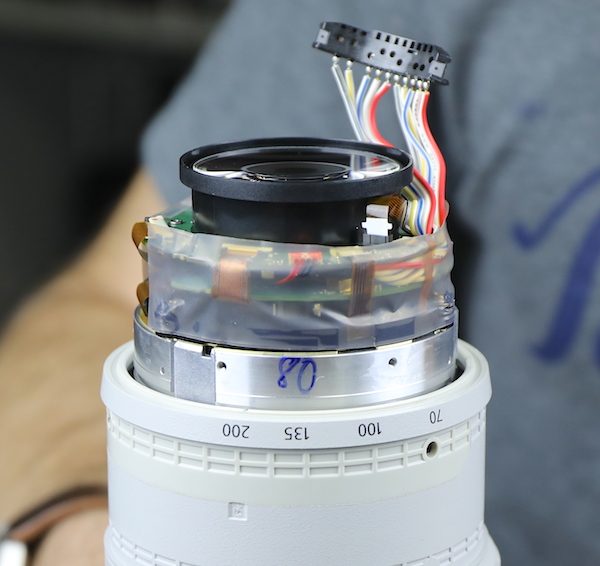
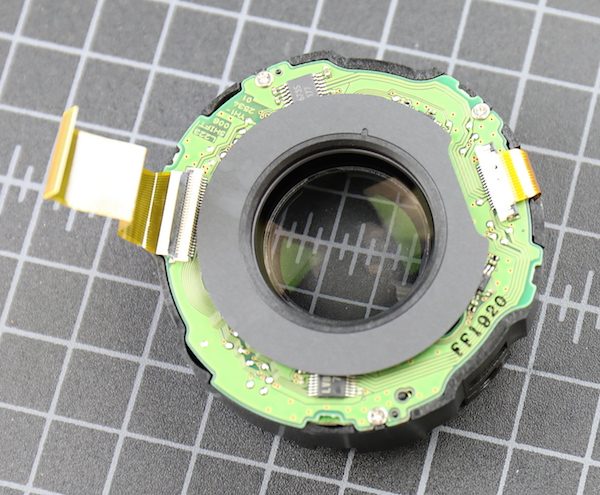
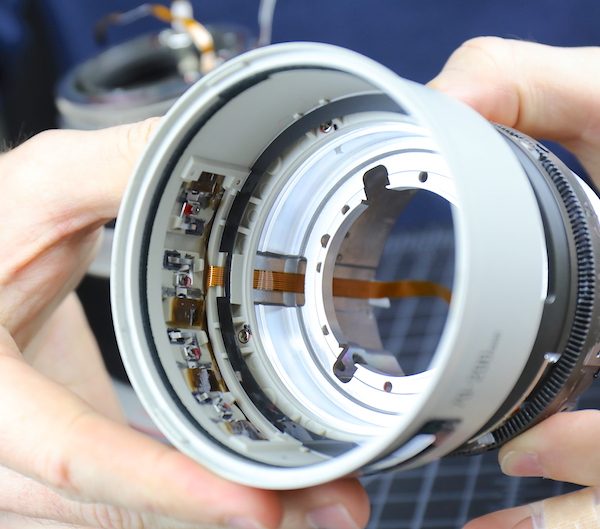
Let’s take a closer look at the tangled electronic complexity that is the Canon 70-200mm f/2.8 IS II rear end. The only thing that would make this better would be if that was duct tape around the back. Honestly, this tape works well and lasts forever. But if you ever find yourself in this position, just take it off very carefully. You can, I’ve heard, rip a flex in two if you aren’t careful.
Once the tape is off, you can see the double circuit boards, multiple flexes, and wandering wires that make this lens not much fun to work on.
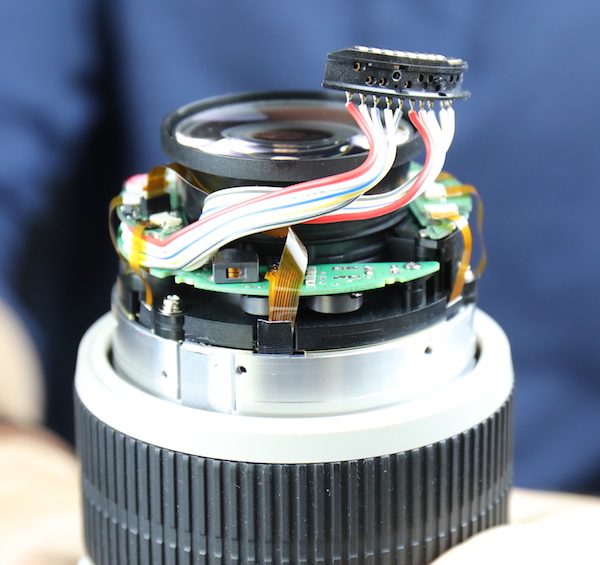
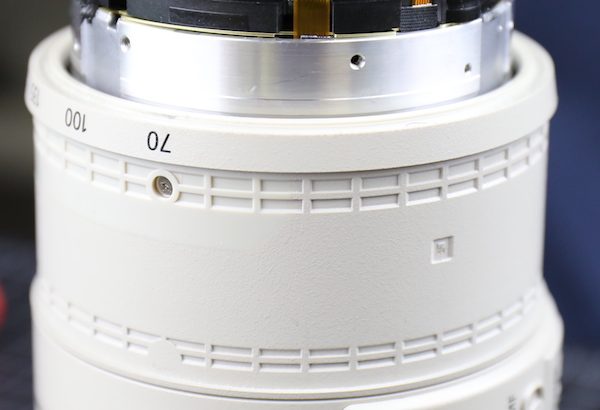
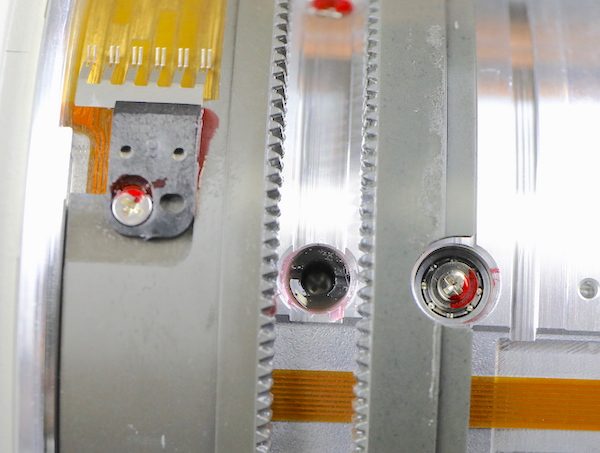
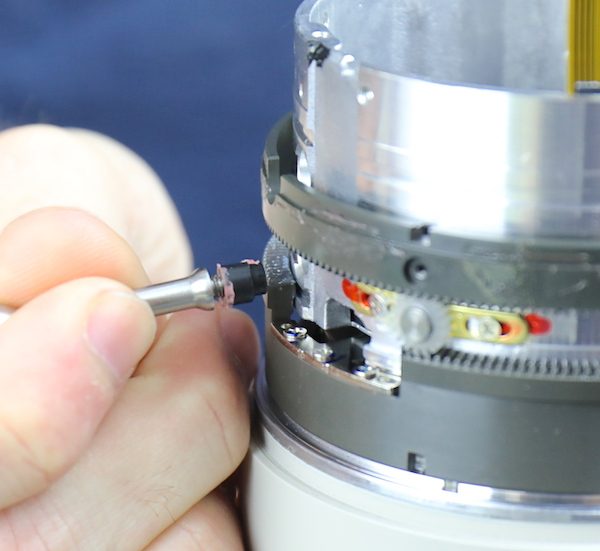
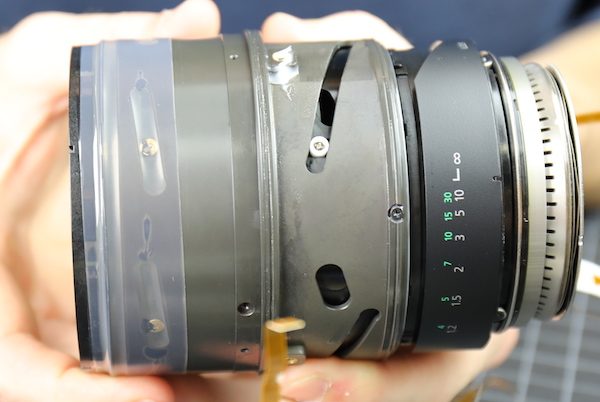
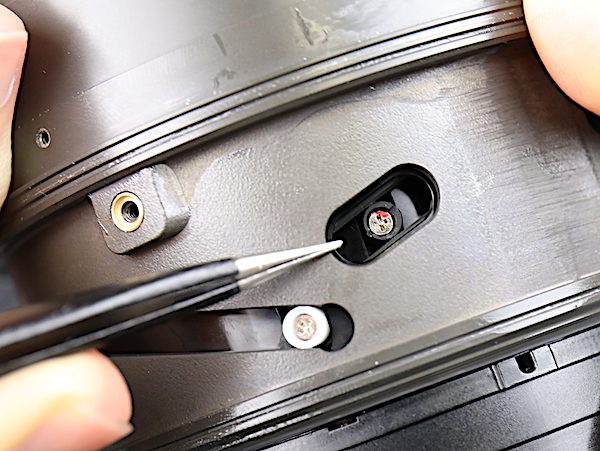
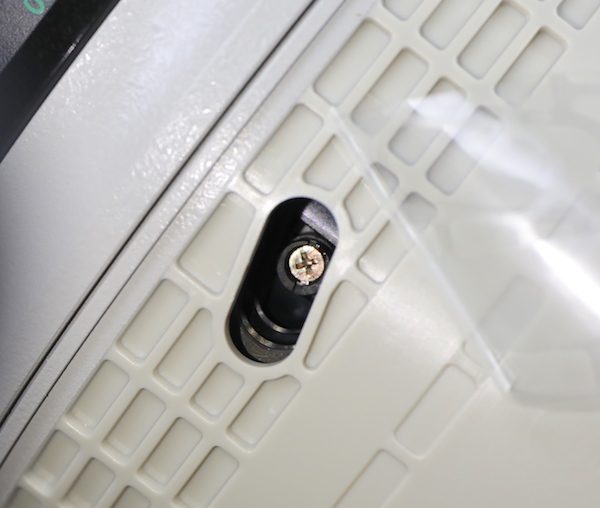
On the other side, we have a close up of one of the three ‘screws of the dark abyss’ that hold this rear assembly on to the rest of the lens (that’s it, sitting right above the 135 marker on the zoom barrel). Note to those of you who want to take your 70-200 f2.8 IS apart: once you remove those screws you are well and truly… going to have to do a lot of optical adjustments. But more on that later.
Canon 70-20mm f/2.8 IS Mk III
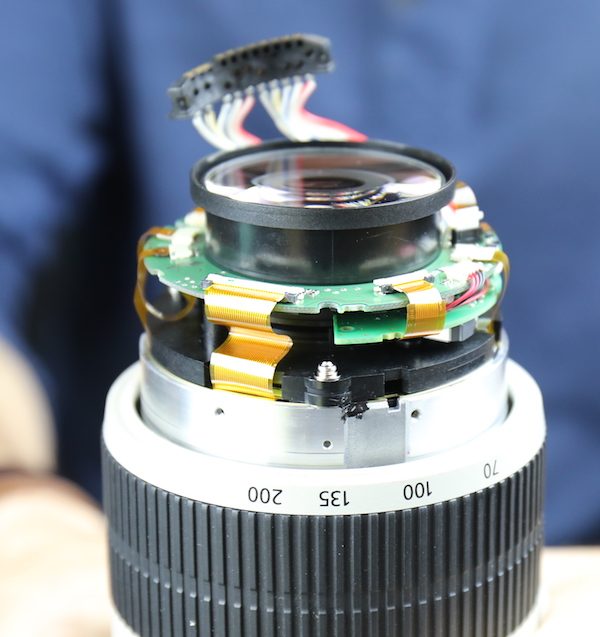
So, same rear baffle.
Same mount and rear barrel that comes off the same way.
Same wire harness and circuit boards underneath.
We took the tape off and looked around, but rather than clogging up more bandwidth with pictures; it’s the same rear centering and spacing system as before; if you want to see the internal parts of the Mk III, just look at the Mk II pictures.
Zoom Mechanism
Canon 70-200mm f/2.8 IS Mk II
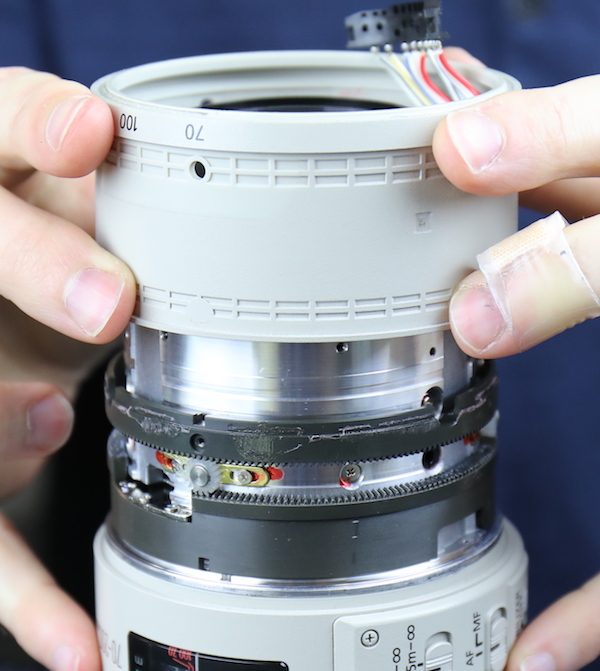
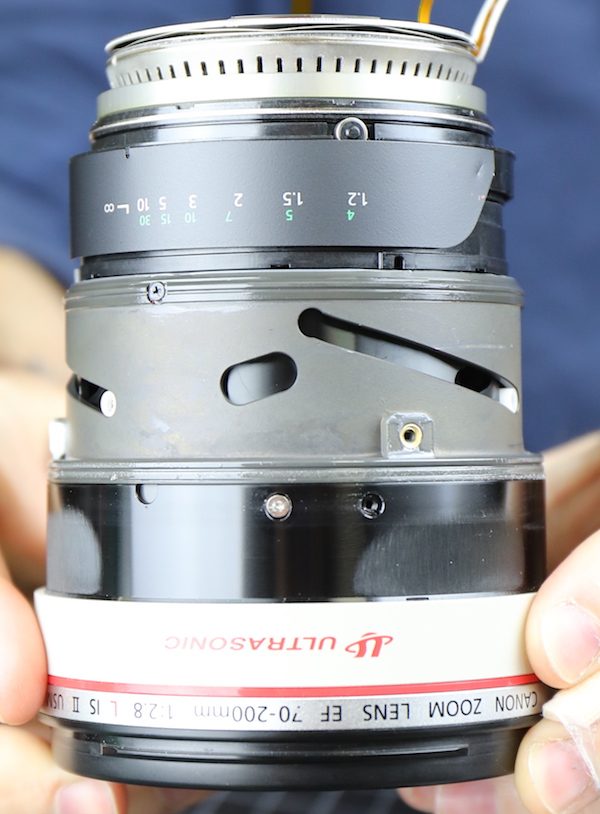
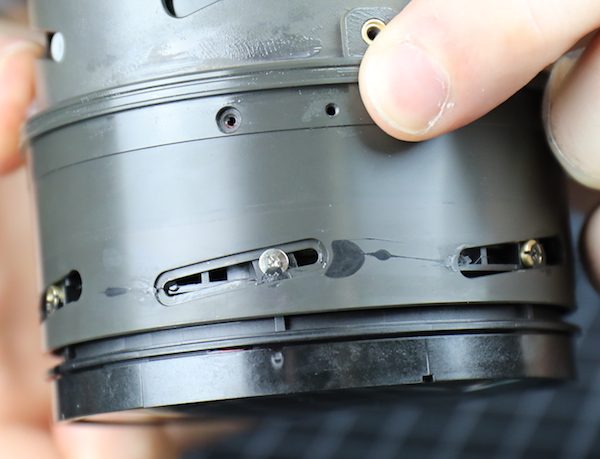
Peeling away the zoom rubber shows the actual zoom barrel and the screws that hold it on to the actual zoom mechanism inside. This is one of the parts that have changed over time. Early versions of this lens had a smooth zoom barrel, but later versions had the waffle-grip that newer Canon lenses have, like this one. Yes, we’ll wait while you peek under your zoom rubber to see which kind yours is.
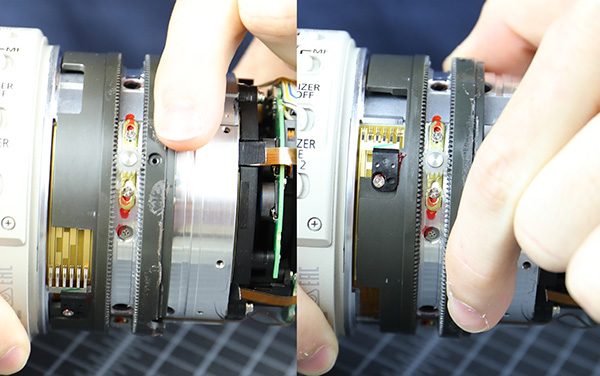
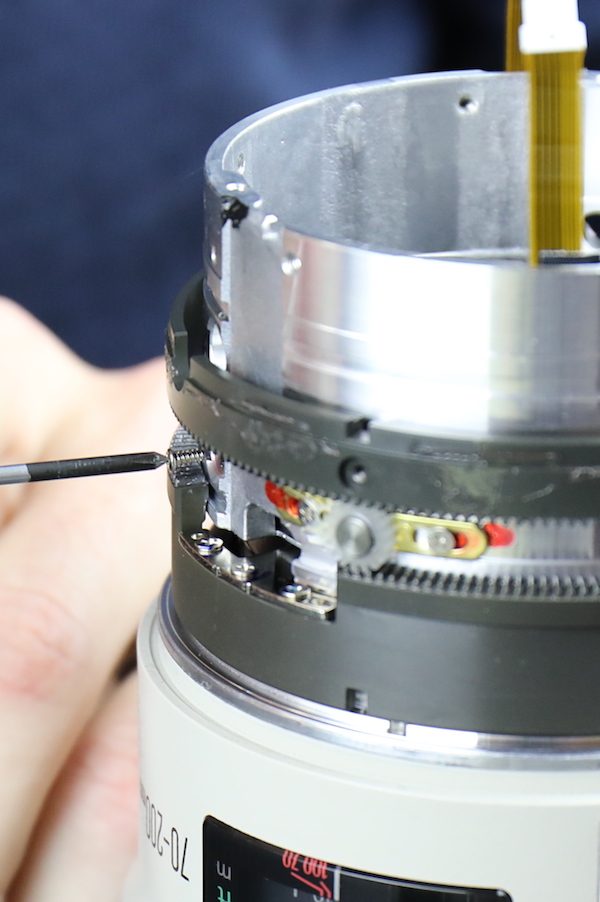
Removing those screws lets us slide the outer zoom barrel off, exposing the reverse gear mechanism. You can see the screw hole in the outer barrel directly above the screw hole in the black inner rotating ring.
The reverse gears purpose is so when you turn the zoom ring in one direction; the actual zoom mechanism turns the other direction. ‘Cause, you know, why make something simple when you can add a bunch of gears and teeth? Actually, it does have a purpose. The reverse gears are adjustable and help keep the zoom motion smooth and with just the right amount of resistance.
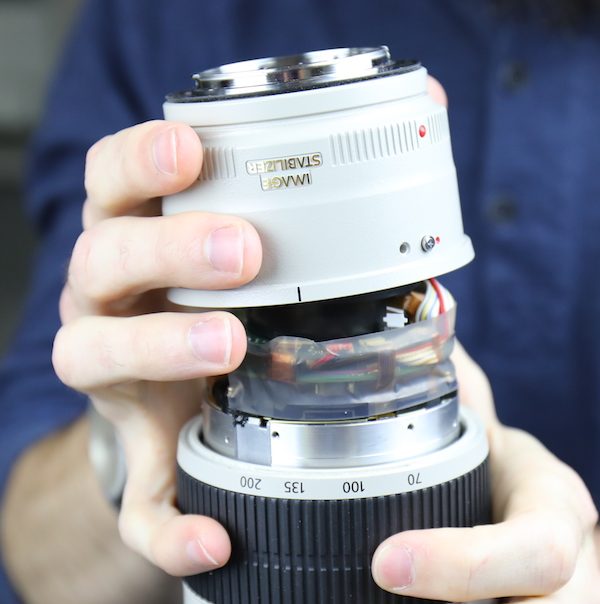
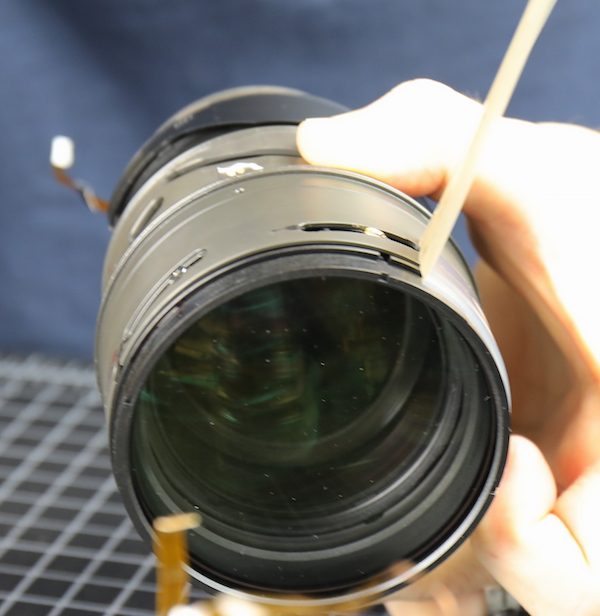
And let’s show a quick look at the Canon 70-200mm f/2.8 IS Mk II with the rear outer barrels removed before we start taking things apart.

Canon 70-200mm f/2.8 IS Mk III
Again, the zoom barrel comes off the same way. The reverse gears, position brushes, and tension mechanisms are all the same.
My real hope for a change in this lens was that we would see the eccentric optical adjustment collars would have incremental marks like the ones we saw in the Canon 70-200 f/4 IS Mk II, indicating some computer-aided optical adjustments. Alas, in this group at least, the eccentric collars were just as they have been, as are the roller bearings.
Rear and IS Groups
Canon 70-200mm f/2.8 IS Mk II
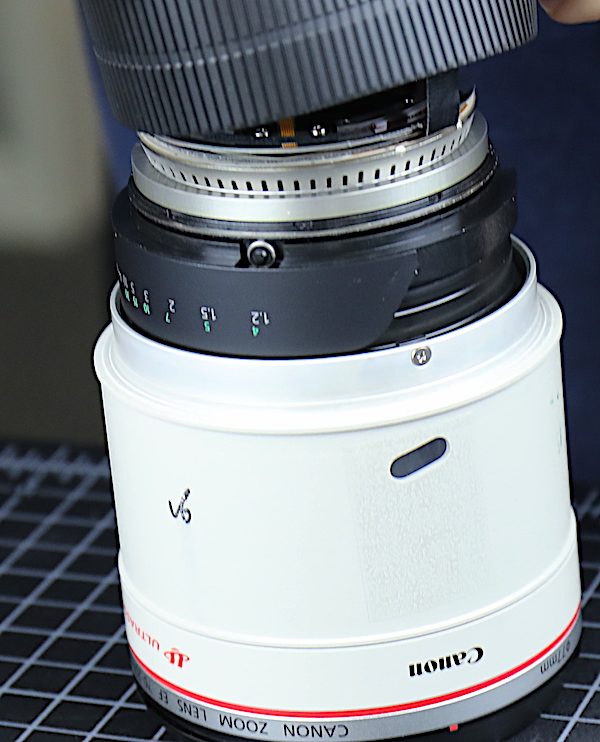
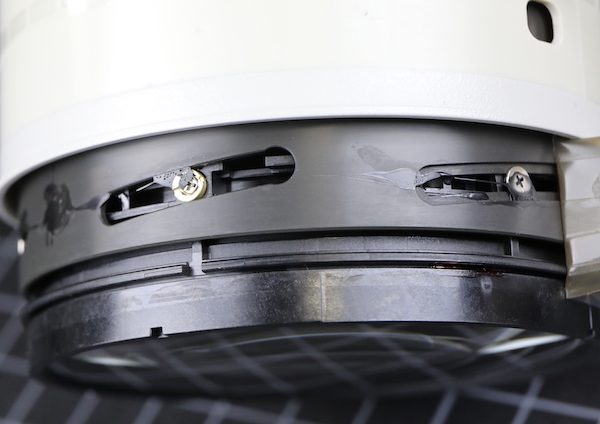
So it’s time to remove the screws of the dark abyss that hold the rear group onto the lens barrel. Once those are out, and the flexes carefully moved out of the way, the rear assembly comes right off. There are spacing shims underneath, usually two or three of various thicknesses. These are not infinity spacers but are of optical importance.
The entire rear group is a centering element and a bit of a pain for us to adjust: we have to estimate the centering move, then reassemble and test and often disassemble and readjust. It’s not hard if you have the right equipment, but it is time-consuming.
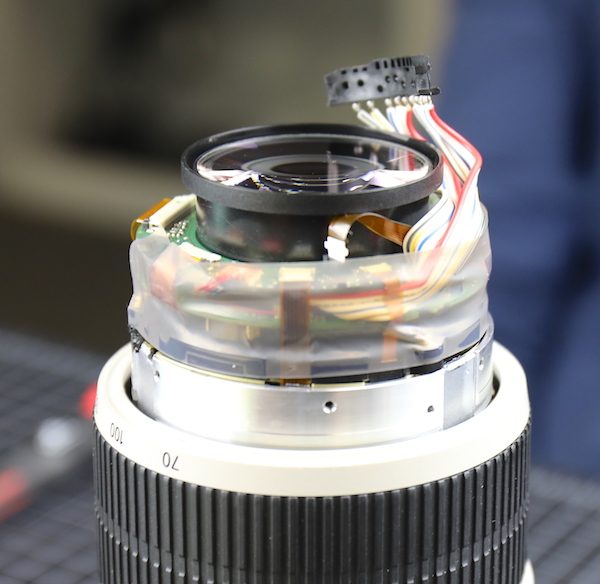
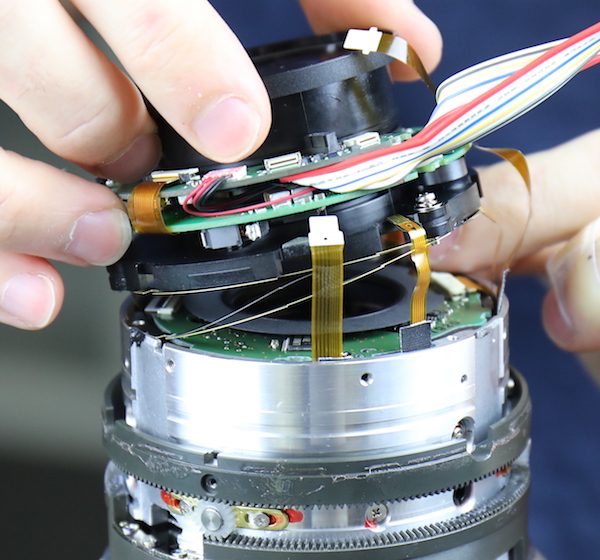
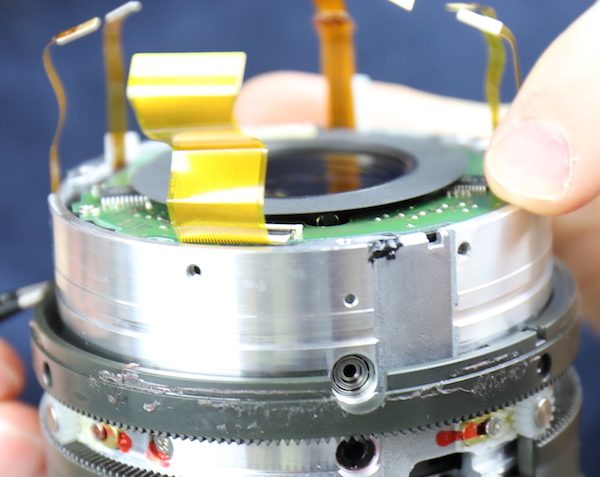
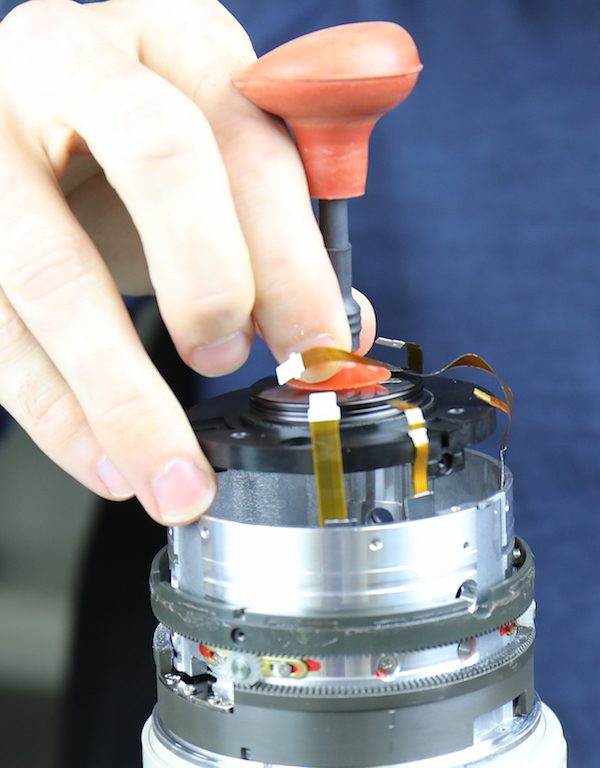
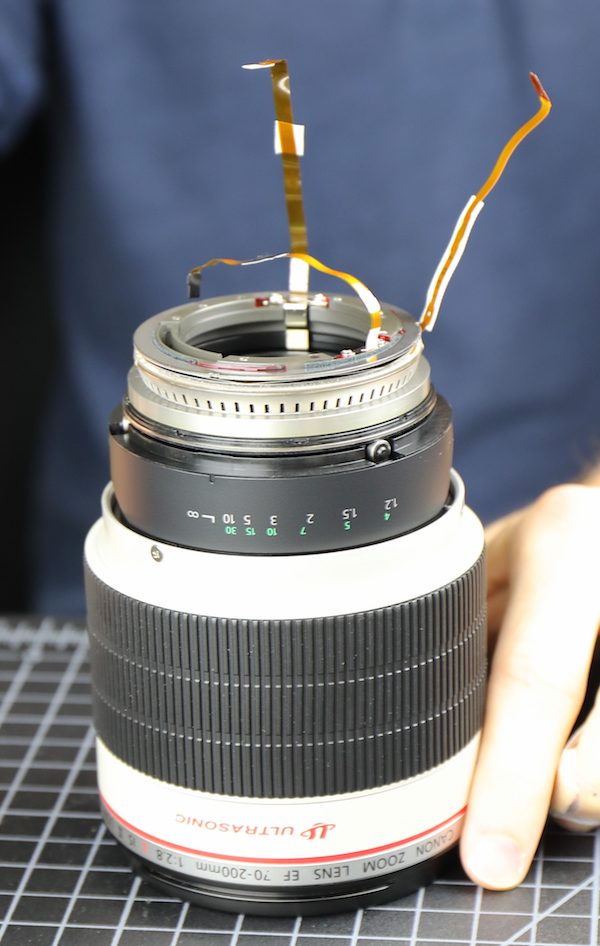
There’s a flex going into the IS unit that has to be disconnected before setting the rear group aside.
But now we have a nice look at the top of the IS unit, along with its circuit board.
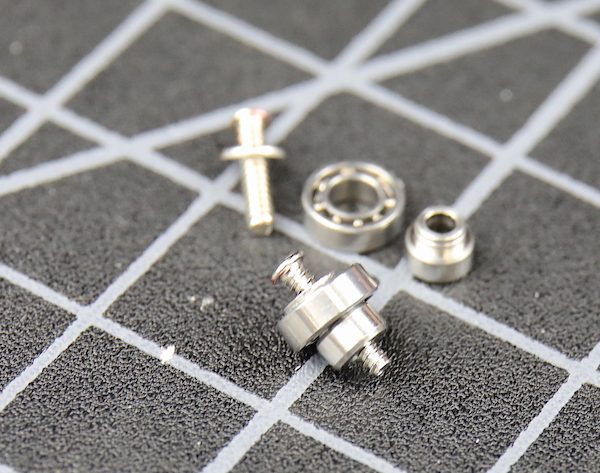
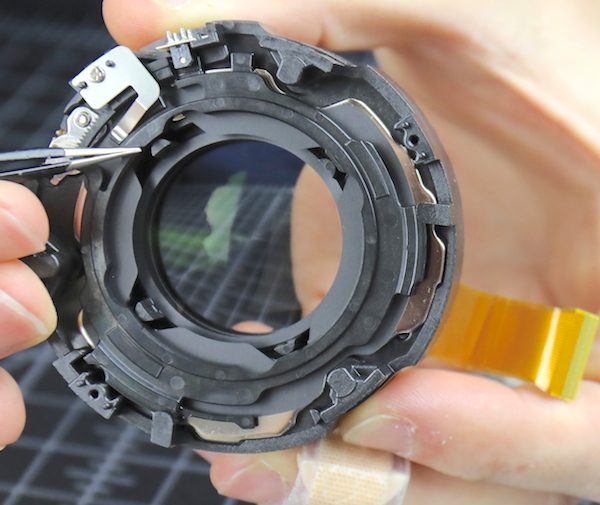
The IS group is held in place with three, three-piece roller assemblies. The screw is removed (see the opening centered below) but then a small extractor is needed to get out the roller and post.
Below is one assembly together and the three pieces that make up another one, just above and out of the plane of focus. It’s a robust bit of hardware, but I assume IS units stress hardware a bit, so that seems like a good idea.
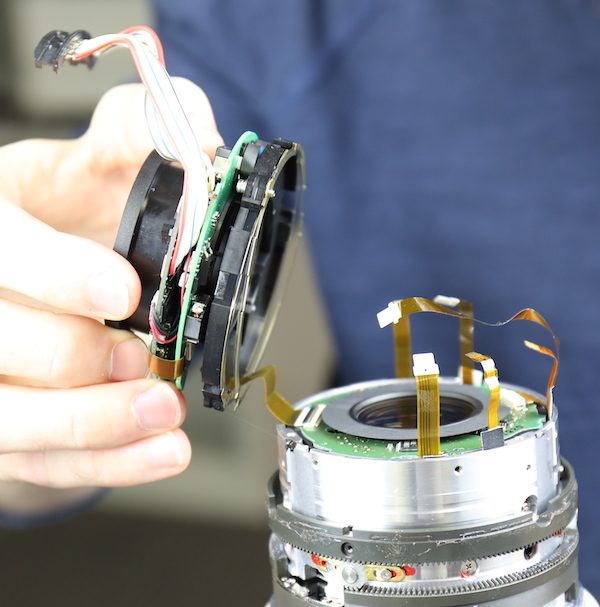
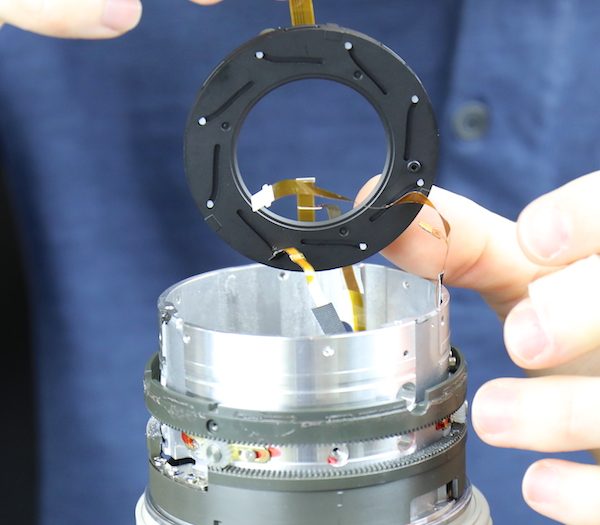
Once those are removed, the IS unit slides out of the barrel.
These are self-contained units that we generally don’t disassemble.
Looking from underneath, though, you can see the plastic posts that we sometimes mention. These occasionally break, possibly from shock during shipping. If the IS is not turned off, the lens group is free to bounce in all directions with only the posts to stop the motion.
Canon 70-200mm f/2.8 IS Mk III
Again, I won’t clog bandwidth. The internal components back here are the same.
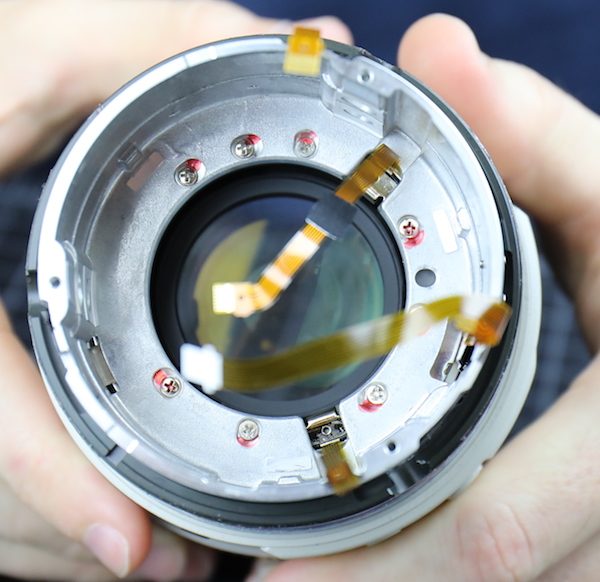
Mid Barrel Disassembly
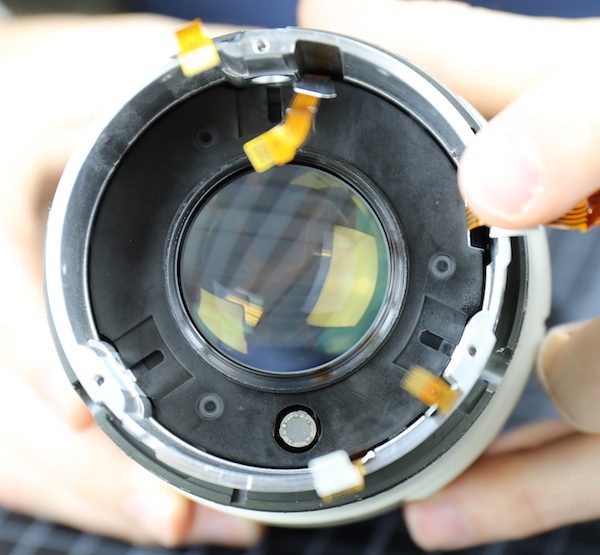
With the IS unit removed, we are looking down at a single optical element in the mid barrel. It’s just behind the aperture assembly; you can see the aperture motor peaking up through an opening at the bottom of this picture.
This element is adjustable for tilt, so both screw and black plastic eccentric collar have to be removed to take it out.
Once these three assemblies are out, we can remove this element from the barrel.
Now we have access to the aperture assembly.

Removing three screws lets us take the aperture assembly out of the barrel.
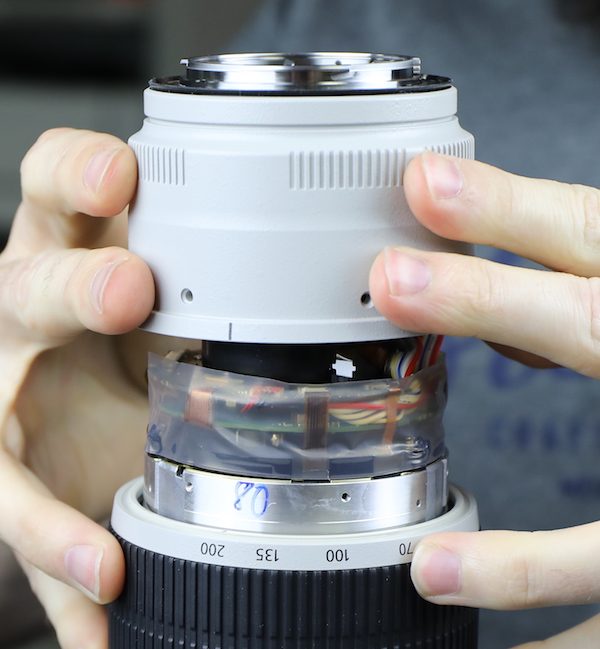
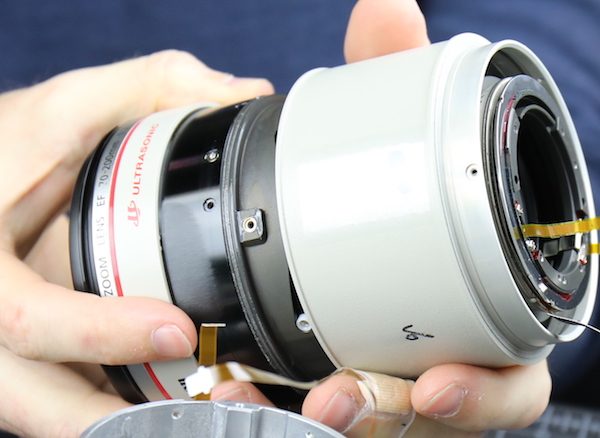
With the aperture assembly removed we can now see the eight screws that attach the rear barrel to the front.
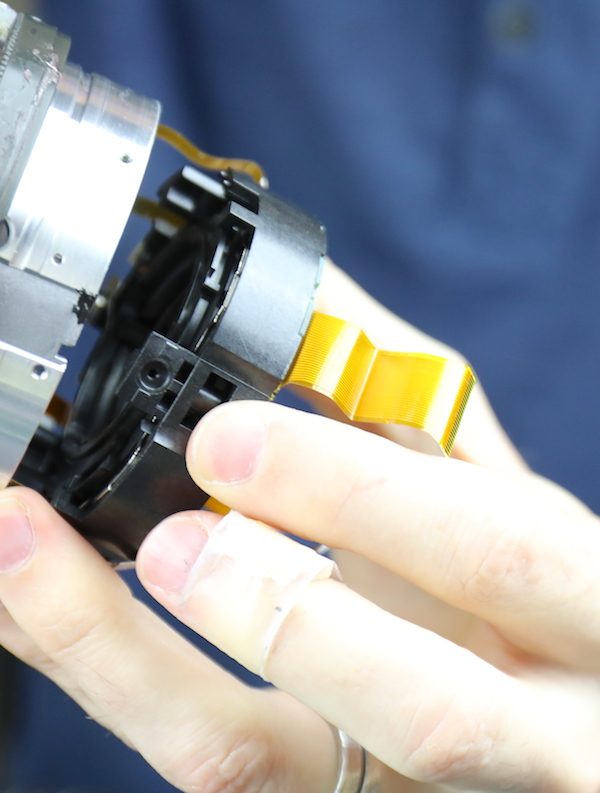
After removing those, we can slide the rear barrel off the remainder of the lens. That’s the AF motor you see under Aaron’s fingers.
The rear barrel is empty now except for the switch panel. This could now be removed from the outside, but there’s no reason to do that.
The remainder of the lens contains most of the glass elements and the AF motor.
Canon 70-200mm f/2.8 IS Mk III
Ditto
Front Disassembly
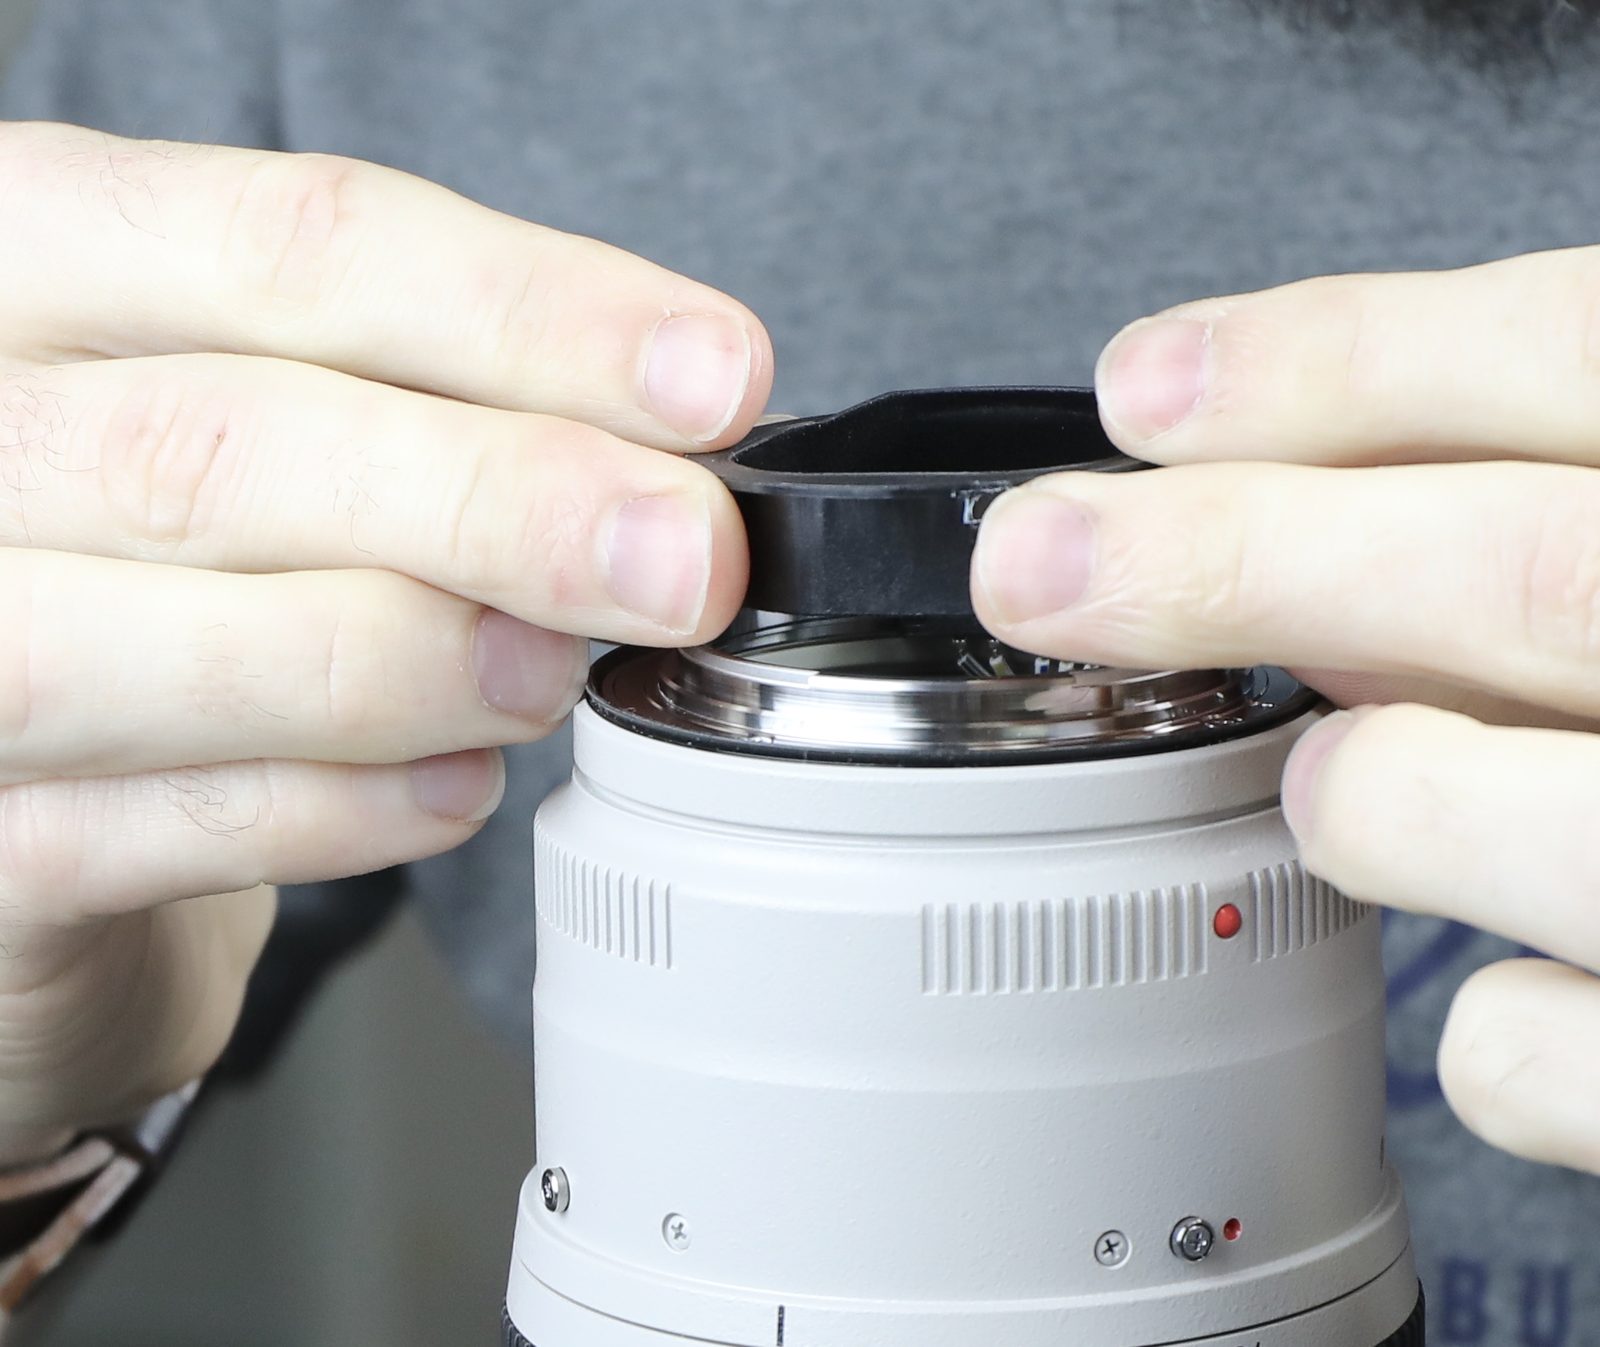
Of course, the rubber comes off first.
Underneath we find the only slot-head screws the lens has.
It’s hard to tell from the image above, but the screw is holding down a nylon collar. These impart a smooth feel to the manual focus.
With those out, we can remove the focus ring.
And now we can see the inner focusing barrel. The brass screw inset is where the nylon collar was, and you can see the slots and cams for the focusing group.
A couple of more screws out and the filter barrel slides off. (This can be done without any other disassembly if we were replacing a filter barrel or front element. We save it till the end when doing a full disassembly so we can set the lens down to work.)
There are two layers of weather resistance tape around the front group.
For those of you familiar with hockey tape, it’s pretty similar to that. (Yes, by similar, I mean interchangeable with.)
Now we’ve exposed the screws holding the front group assembly in place. This is a place we go a lot, whether to replace a scratched front element, clean out some dust, or make an optical adjustment. There are two sets of screws that adjust the group and hold it in place.
The first set of three (only one shows in the picture) is set in a ramp. Loosening them and turning the front group adjusts the spacing between the front group and the rest of the lens.
The second set is three eccentric collars (again, only one showing), used to adjust the tilt of the front group.
There’s one more set of adjustment screws for the focusing group we can see down under the focus barrel.
We didn’t see any reason to take the AF motor apart or remove the front group. We can see everything there is to see except for a set of adjustment screws for the zoom group that are under the focusing motor. It’s certainly enough for comparison purposes.
To kind of summarize how many optical adjustments Canon has built into this lens:
- Rear spacer for infinity focus
- Optical spacing in front of the rear group.
- Centering of the rear group with the rest of the lens
- Tilt adjustment of middle element
- Zoom group adjustment under focusing motor
- Focusing element adjustment
- The spacing of front group
- The tilt of front group
Canon 70-200mm f/2.8 IS MK III
There is a different focusing barrel on the Mk III with the newer waffled pattern. I got a bit excited, but the Aaron told me he’d seen several recent vintage Mk IIs that also had the newer barrel.
Again, all of the disassemblies of the front was exactly the same as with the Mk II, so I won’t bore you with details. The optical adjustments of the front and focus groups were unchanged also.
Conclusions
Well, as Canon stated, there is no difference between the Mk II and Mk III versions. If you think there’s an optical or performance difference, please contact me about some Tennessee Beach-front property I have for sale. If you’re in the market for one of these in the near future, I’d snap up a Canon 70-200mm f/2.8 IS II at discount price if you can find it.
If you really like the new color do what we do for touchup paint: take the tripod ring from your friend’s Mk III to your local paint store and have them color match some enamel for you. Canon claims the new fluorine coating makes it easier to wipe off oil and smudges. I think the new fluorine coating is easier to wipe off. Could be Canon and I are both right, could be just Canon is right.
As to the Canon 70-200 f/2.8 Mk two-three, it’s still a really excellent lens. It’s not pretty or elegant inside, but then, neither are most other manufacturer’s lenses. It takes great images, that’s what matters. Unless you are a Geek from the engineering-can-be-art school.
Roger Cicala and Aaron Closz
Lensrentals.com
September, 2018

55 Comments
Max Manzan ·
Thank you for publishing this, I find it very interesting.
???? ·
what does your comment about the fluorine coating mean? isnt it effective?
Roger Cicala ·
According to Canon fluorine coating makes it much easier to clean the front and rear elements, so dirt and oil can be easily wiped away. With at least some of the lenses Canon has released with this coating, our opinion is the coating is very fragile. We started putting filters on all of our lenses a year after Canon started putting fluorine coating on their front elements; the incidence of lenses needing front element replacements for coating scratches and peeling skyrocketed. Canon says it’s not so, so perhaps it’s just us.
DrJon ·
Which begs the question – which other Canon lenses have the damageable coating? The 100-400 II for example? (I actually have a front filter for mine arriving any second though. My 70-200 is a II so not an issue.)
Also which filters did you choose for the 70-200s?
Roger Cicala ·
The 24-70 f/2.8 II is by far the worst, 100-400 IIs were frequent flyers too. We went with B&W clear filters.
DrJon ·
Thanks. The filters I prefer are the B+W MRC Nano clear ones, but of course they have a similar coating!??!
(Plus at the price they are you probably then want to buy a cheaper filter to protect it from harm… I bought a 67 and a 77 and it was over a hundred quid.)
Oh and as the filter didn’t arrive and I’m off to photograph Peregrines with the 100-400 later – how do you spot coating damage over just a bit of a smear and how rough is okay?
David Hussey ·
I am curious if the front element on the 100-400 IIs is part of the optical formula or merely a plate of glass closing off the lens?
Roger Cicala ·
It is an optical element; a cemented group if I recall correctly.
David Hussey ·
Thank you Roger
DrJon ·
Any chance of an update on this for the new RF lenses?
I see the 400 and 600 teles just launched claim a fluorine front coating and you can’t add filters to those, could be exciting…
Peter Marcus ·
I was just showing my newspaper-photographer friend my new Sony ARIII and 55 1.8 lens. First thing he did when I handed him the lens was look at it, breath on it, and clean it with his shirt. I was so upset as I have 20+ year old lenses and binoculars that I have kept so naturally clean from caps that I have literally never cleaned them. And when they are ready to clean, I don’t do it in the field ever. Good thing I had a filter on it.
Eamon Hickey ·
You were lucky. Usually those guys clean lenses by scraping them along the sidewalk.
Hank Roest ·
Some guys just don’t make sure to use a clean section of sidewalk.
Fabio Riccardi ·
I always cleaned my lenses like that, for over 30 years, never had a scratch. And no, I don’t use “protective” filter either.
Zak McKracken ·
Somebody should start selling microfibre T-shirts for photographers 🙂
More seriously: I feel a good dedicated cleaning thing works better and faster than a potentially not-quite-clean shirt, but I’ve never seen any scratches or such on my lenses. But then, I don’t shoot daily (more like monthly, these days), and I don’t have either very expensive lenses, nor crazy quality requirements. I’d imagine that if I had a lens that cost several thousand bucks, and my income depended on it, I’d probably be a lot more nervous about it, too.
Michael Steinbach ·
Wow. Just wow. Seems a bit disingenuous on Canon’s part. Add a coating and Mark III it is.
Roger Cicala ·
To be fair, it is exactly what they said it is.
Michael Steinbach ·
Did the price increase?
Peter Marcus ·
You evidently didn’t read the article.
Michael Steinbach ·
Honestly no, I just skimmed.
CheshireCat ·
But… they also improved the whiteness, big improvement for weddings. /s
[Thanks Roger, great article as usual.]
David ·
From Nikon’s term glossary “…Thanks to Nikon’s original technology, it delivers higher durability and is more peel-resistant. Compared to other manufacturers’ coating of a similar kind, fluorine coat endures a higher frequency of lens surface wiping and provides longer-duration staying power…” Would you tend to agree with this?
Also, tres shade Nikon. Well played. ?
Abimanyu Boentaran ·
I had the mk2 when it first came out it was super sharp at 2.8 but the i.s failed to lock between 70 and 100mm it would just wiggle non stop but useable above 100mm, strange. Got a second copy but nowhere near as sharp as the first one and this was supposed to be a pro grade lens?
Sold it for thr 100-400mm mk2 L.
NgentotLu ·
I had the mk2 when it first came out it was super sharp at 2.8 but the i.s failed to lock between 70 and 100mm it would just wiggle non stop but useable above 100mm, strange. Got a second copy but nowhere near as sharp as the first one and this was supposed to be a pro grade lens?
Sold it for thr 100-400mm mk2 L.
Chris Charles ·
Thanks for a great read Roger. When you see what goes into them suddenly they are look like excellent value.
margo2000 ·
Roger, can you please explain the point about the IS unit possibly being damaged in transport if IS is turned OFF? Should we keep the IS in the ON position when we transport these lenses?
Roger Cicala ·
The proper thing to do is 1) Turn IS off at the lens while the lens is still mounted to a camera. This ‘locks’ the IS unit in place. If you have IS on and just remove the lens from the camera, then it does not lock and off the camera flipping the switch does no good.
You can confirm by gently shacking the lens; there’s very little noise if the IS is locked.
The locked position is safer for transporting the lens. If it’s not locked the IS unit can bounce around and cause damage. How big a deal is it? I can’t say for sure, but maybe 1 in 1,000 shipments that come back with IS not locked are damaged. But the incidence is 0 in 1,000; or very close to that, with IS locked.
Eric Calabros ·
Is it also true with Nikon lenses?
ITN ·
At least for Nikon 70-200/2.8G II, there is nothing the user can do to lock the VR group in place. It will flop around when shaken if the body is removed from the lens. No matter how the switches are turned.
However, in other Nikon lenses I have never managed to hear VR flop.
Gary B ·
All Nikon VR lenses have it disabled by default. Now I understand why.
ITN ·
It still flops around even if you never turn it on, in the VR II version of that lens.
Slavik @ geardads.com ·
Wow, never knew that about locking IS for travel. Super great tip, Roger!
Roberta Olenick ·
Does the camera itself have to be turned on when turning IS on the lens off in order to lock the IS mechanism?
Michael Clark ·
Yes.
ws808 ·
Does this also apply to other Canon lenses with IS, like the 17-55mm EF-S and the 100mm L macro? And does it apply to other brands as well (Sigma, Nikon, etc.) ?
Thanks for another great article!
Michael Clark ·
So what does it mean if I turn IS off when the camera is on and metering is active, then turn off the camera, then remove the lens, and it STILL rattles? That it is already broken?
AJ Borromeo ·
Great job breaking this down for us Roger. Thank you. Its nice to know that I won’t have to save up to get the III version. Maybe I’ll get that Canon 1DX Mark II yet. 😉
Chris Keats ·
anything worth doing is worth doing twice
i stole your line about hope (hahaha that was good)
i’ve never ripped a ribbon cable, but i’ve broken one or two connectors (much worse)
fantastic teardown article as always, that you have a sense of humour only makes it that much better
Jon Rolfson ·
In a market where annual model changes are not de rigeur there can only be some nebulous sort of determination as to when an accumulation of incremental changes and the passage of time require nomenclatural upgrade. That said, it is somehow comforting to know that my two-year old stabilized 70-200 f/2.8 Mark II L series lens hasn’t been rendered obsolete by the sort of un-imaginably phenomenal level of improvement which it was expected would underlay the Mark II to Mark III transition.
Roger’s Graph of Imaging Equipment Perceived Worth is admirably appropriate. I wonder what a graph of perceived worth specific to Canon’s series of EF 50mm f/1.8 prime lenses would look like. Some sources suggest the thirty-year old EF 50mm f/1.8 first version of that lens has a street value that is approximately twice that of the later mark II and STM versions.
Finally, the fiddly complexity commented on while the lens’ tear-down was explained led me to speculate on the possibility that some of these lenses might, over a number years, been assembled as lunch-box (?bento?) versions, a la Johnny Cash’s infamous purloined Cadillac
David ·
“If you think there’s an optical or performance difference, please contact me about some Tennessee Beach-front property I have for sale.” LMAO!!!! Thank you for yet another great article 🙂
David Alexander ·
"If you think there’s an optical or performance difference, please contact me about some Tennessee Beach-front property I have for sale." LMAO!!!! Thank you for yet another great article :)
Philippe ·
Hello Roger,
I have always dreamed of having a property in the Tennessee Beach-front 🙂
According to the video below there would be a small difference between the pictures taken with version ii vs iii (@ 1m 56 sec) :
https://www.youtube.com/watch?time_continue=114&v=OFTBw7-8gdk
Best regards.
Roger Cicala ·
I agree they should have better flare reduction.
Hugo van Duin ·
Your articles are one of the few things online I will read front to back, even when it is not my brand of optical equipment. Amazing how you can make a comparison between two identical lenses a good read. Good tip on parking the IS for travel, probably for any brand, thanks.
I would say the geek school is engineering-IS-art, some of it bad, some of it great and some of it dorky wordplay on stabilization.
Joe Blow ·
The new paint job must be the work of Canon’s famed color science engineers. 🙂
Miros?aw St?pi?ski ·
That’s hilarious!
Originaru ·
DA BEST
Tommy Van Dam ·
Great article Roger and thanks saving a bullet through my wallet!
taildraggin ·
Got a little queasy about 1/2 way into it. It’s good to know which diving board of complexity we’re on.
John ·
I’m not sure if I understand this right … I need to replace the front element of my 70-200 2.8 II because of scratches. Do I have to disassemble the whole lens or do I just take of the rubber ring, remove some screws, remove something and replace the front element? I have never done a lens surgery before, do you think I can do it by myself without damaging anything? It is much cheaper to order the front element and do it at home. Thank you so much for a help of any kind.
CharlesTheHammer ·
You may have already figured it out, but replacing the front element requires near complete disassembly. I’m in the process of repairing one now and it’s quite a task.
John ·
So far I removed the metal ring on top and found out I still can’t reach the front element. So do I have to start from the bottom of the lens? Is it too risky for someone inexperienced? Is there a high chance that I damage something?
Thank you
CharlesTheHammer ·
You will have to work from the mount to the front. Replacing the front element will most likely require professional calibration. I’m not replacing mine, but had to remove it to access the zoom element. It’s a challenging task, for me anyway.
Anton Largiader ·
Do you know if the distance scale changed from the original version to the II and III? I have a version 1 and the numbers in the distance scale window are missing. I don’t know if this was removed during a previous repair or is loose inside. It seems this area is not accessible without going through all of the steps you show, right?
Jehu McSpooran ·
Is there a way to remove the rear group and IS unit together so as to avoid re-centering? Have you had many MkIII units come in with the manual focus ring slipping issue? What was the fix?