Teardowns and Disassembly
Nearly Complete Teardown of The Canon 70-200mm f/4L IS II
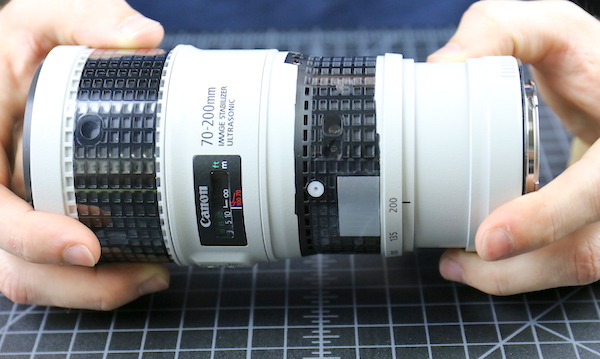
Lensrentals.com, 2018
So, some things happened recently. We got stock on Canon EF 70-200 f/4L IS II lenses, and even though they go out on rental the day we get them in stock, we were able to do MTF testing on them. The very low sample variation we saw made us want to take one apart and see how Canon did that. And finally, one of those Canon 70-200mm f/4 IS II‘s came back from its first rental with an Image Stabilization unit that didn’t function.
So, the logical thing to do was open that lens up and see if we could fix the IS unit. And yeah, we know we can hardly ever fix IS units. And it’s August, which is to the repair department what Black Friday is to WalMart. But we came in early and figured we’d be done in a couple of hours.
So you want to see what we saw? I knew that you did.
We start by taking the makeup ring off of the front (it’s stuck down with double sided tape, so it pries off).

Lensrentals.com, 2018used
With this out of the way, we can get to the three screws holding the filter barrel on.

Lensrentals.com, 2018
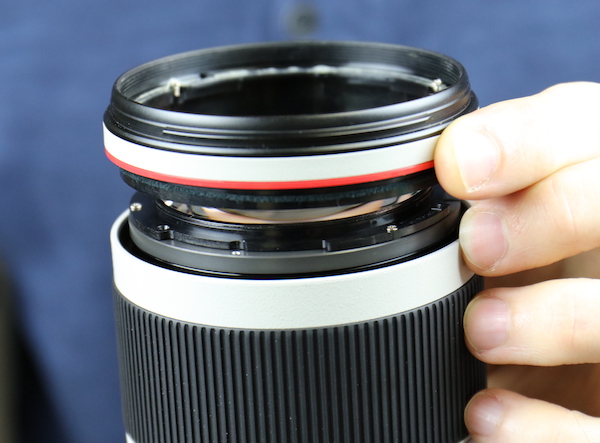
And lift it off of the lens.
Lensrentals.com, 2018
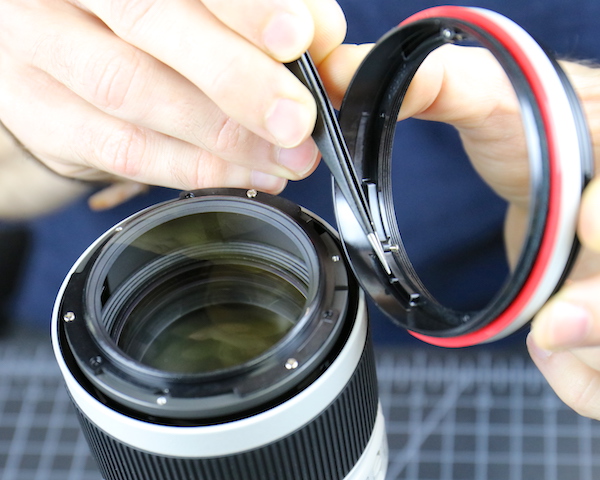
We always enjoy Canon disassemblies because the opto-mechanical engineers go to great lengths to make the inside even nicer than the outside. The first nice little touch is a post inside the filter barrel that inserts into a slot on the lens. Most lenses let you put the barrel on in any of three ways, two of which make the lens hood misaligned (and yes, that does happen every so often). Canon’s engineers made this part of the reassembly idiot proof.
Lensrentals.com, 2018
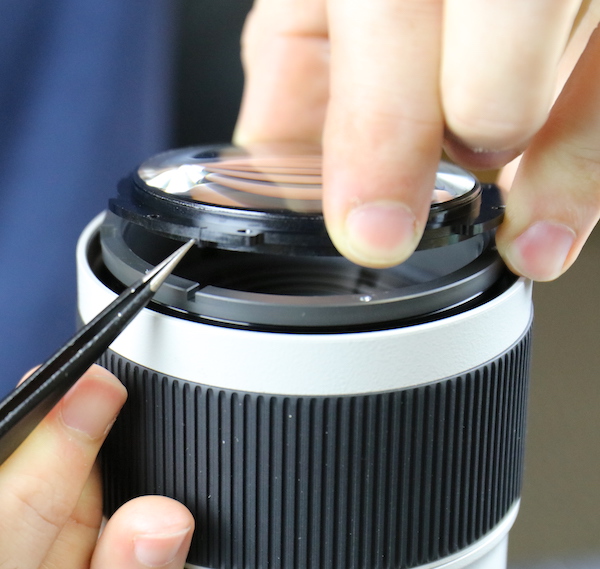
With the filter barrel off, Aaron could remove the three screws holding the front element in place. The front group is not adjustable, so replacing a scratched front element should be easy and relatively inexpensive.
Lensrentals.com, 2018
With the front element out of the way, you can get a clear look at how far the focusing group travels.
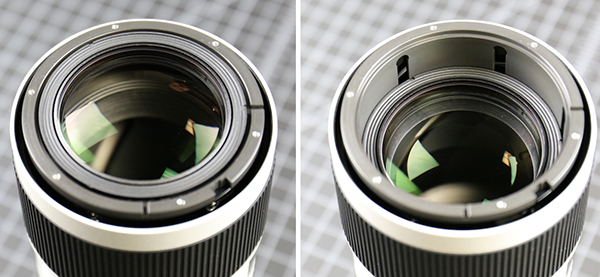
Lensrentals.com, 2018
Next, we took the zoom and focus rubber off. Underneath was the waffled polycarbonate barrels Canon has been using lately. They’re completely covered with a thick plastic tape, sealing over the various screw holes. I’m not saying water can’t get in the lens; I’m just saying it isn’t getting in through here.

Lensrentals.com, 2018
And finally, we get around to the business end of the lens. The bayonet mount comes off after removing the electrical connector screws and the four bayonet screws.
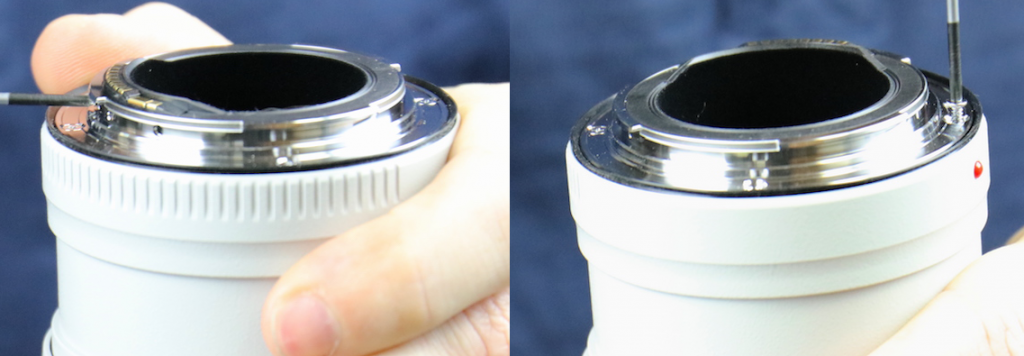
Lensrentals.com, 2018
With the screws out, the inner baffle comes out, and the bayonet with its thick rubber gasket comes off.
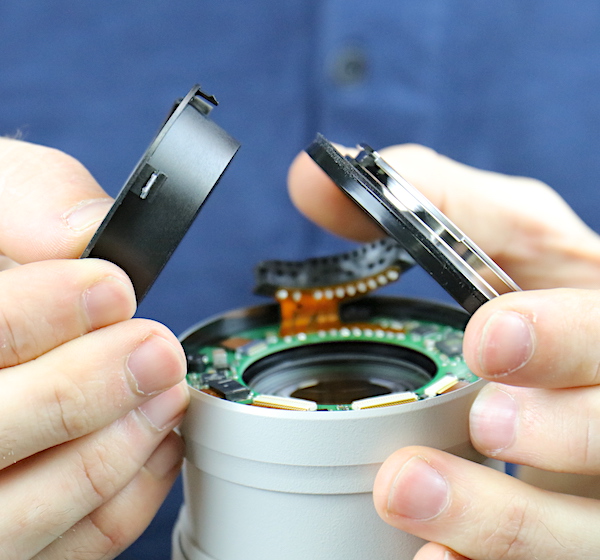
Lensrentals.com, 2018
This lets us look down at the PCB ring with its attending flexes. As always with Canon, flexes come in straight lines to their connector; no wandering 6-inch long flex that wraps around two posts and inserts on the bottom of the board.
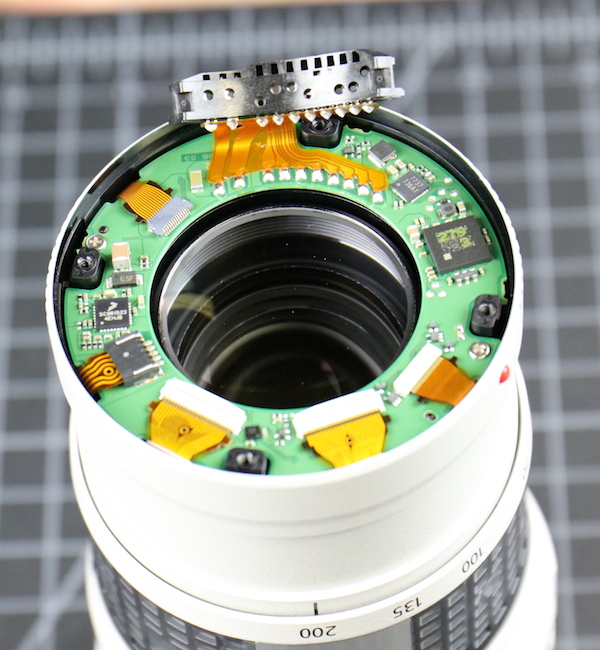
Lensrentals.com, 2018
For those who care, here are front and back shots of the PCB. It’s a busy board with AF and IS sensors and power, and all of the lens-reporting connections.
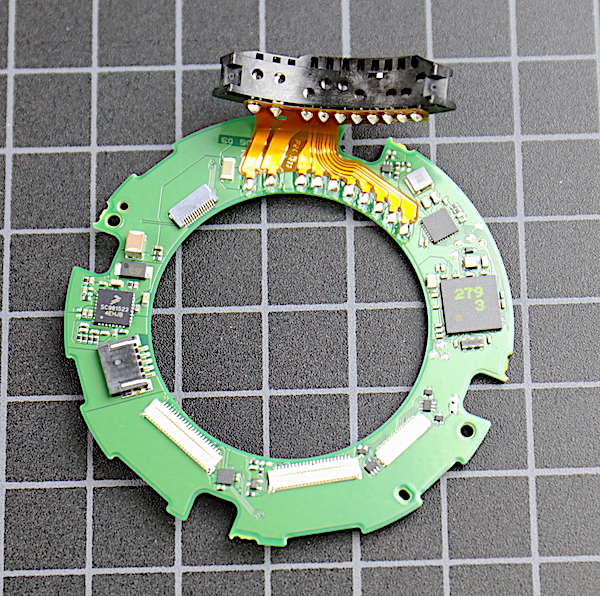
Lensrentals.com, 2018
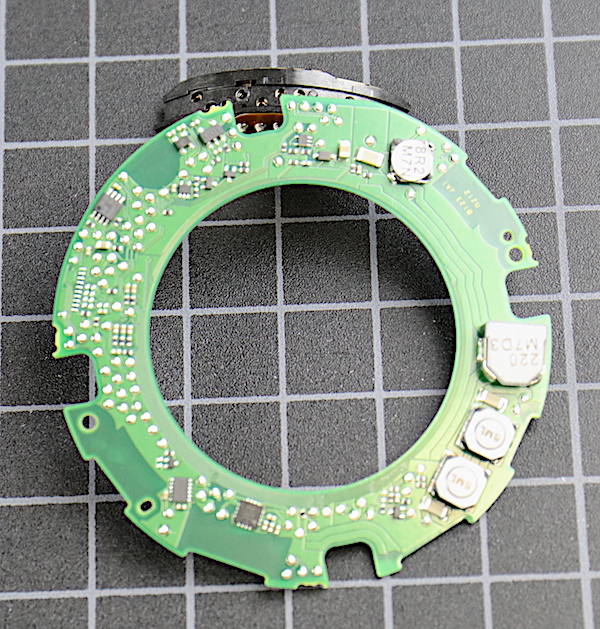
Lensrentals.com, 2018
There are eight deep screws attaching the rear barrel to the lens, another bit of overengineering we appreciate. With those out, the barrel slides right off.
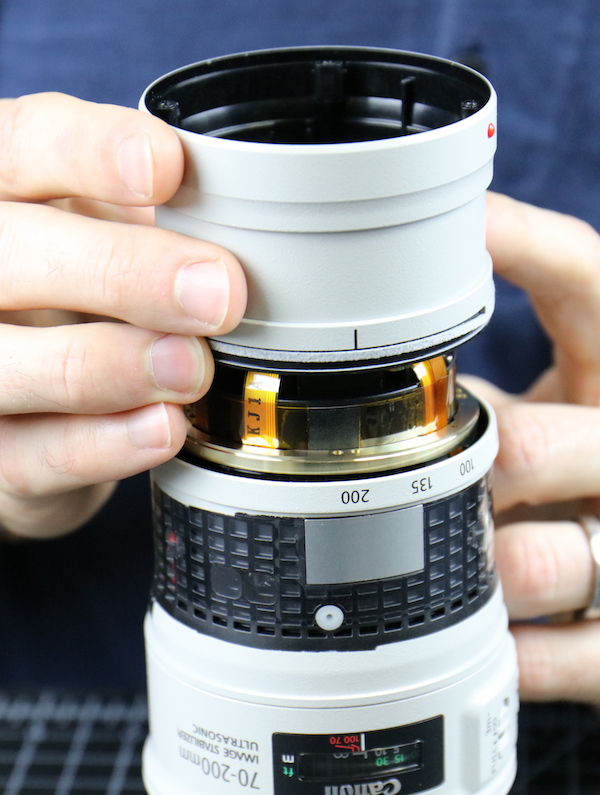
Lensrentals.com, 2018
As we would expect, there’s a nice ring of weather sealing felt where the two barrel pieces come together.
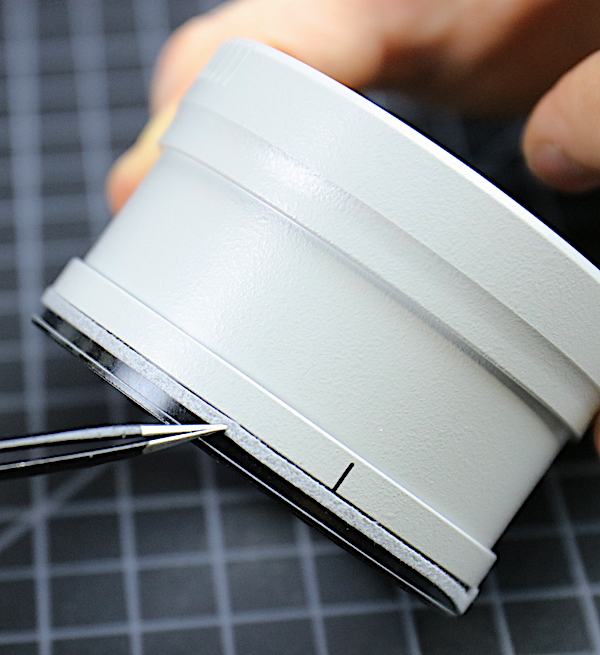
Lensrentals.com, 2018
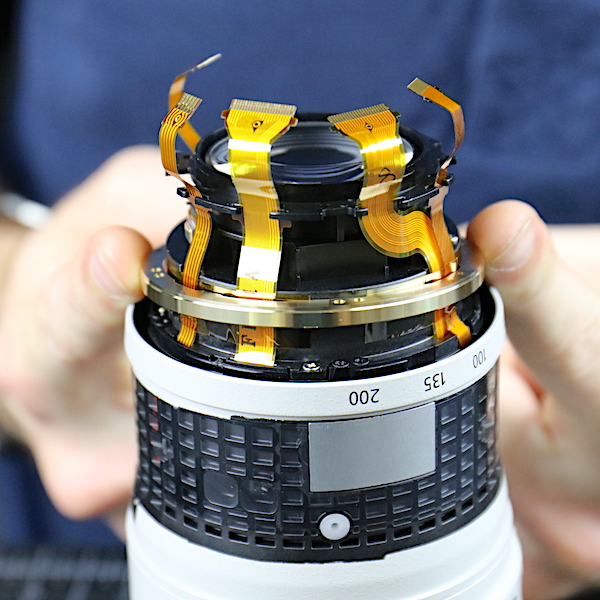
There is a brass spacer between the rear barrel and the rest of the lens. This isn’t a connecting plate as we see in some Nikon and Sony lenses. This is a spacer that comes in various thicknesses, probably to adjust infinity focus properly.
Lensrentals.com, 2018
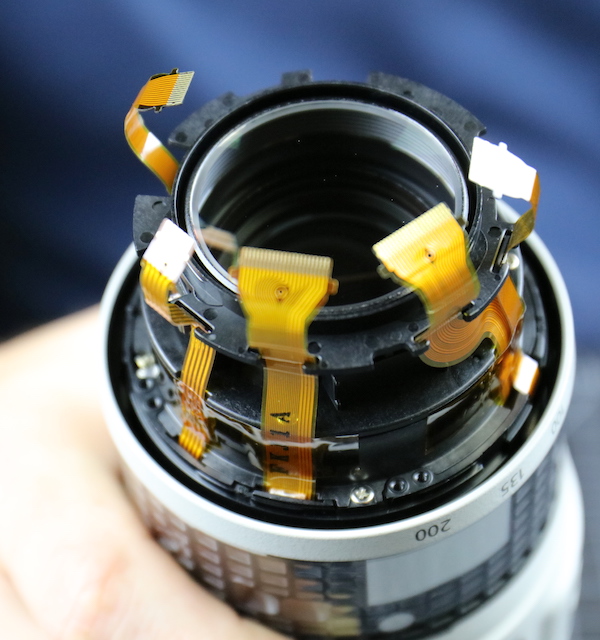
I’d like to take another moment to thank Canon’s engineers for the clean way all the flexes travel directly from point A to point B, with molded plastic slots to keep them in place. It doesn’t matter one tiny bit to someone using the lens, but to someone taking them apart, this is a massive improvement over Brand X’s wandering flexes taped to 12 different spots inside the lens.
Lensrentals.com, 2018
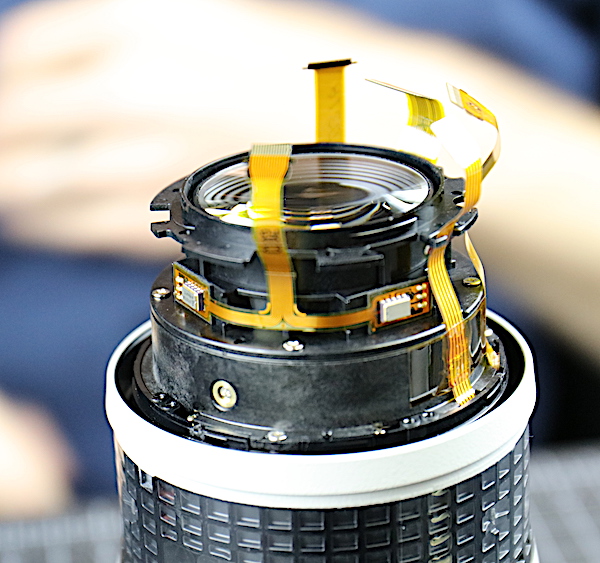
On the other side, we see the slightly more complicated IS flex with its two motion sensors.
Lensrentals.com, 2018
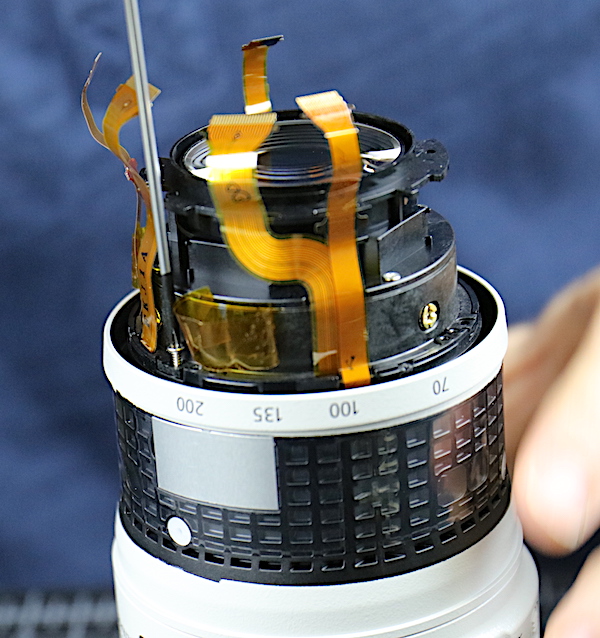
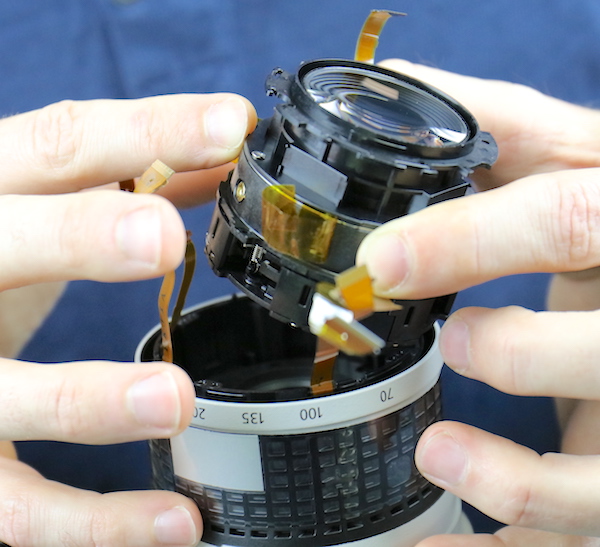
We get a good look at Canon’s usual modular design here. The rear inner part of the lens you can see here is a single assembly containing the rear element and the IS unit. It’s easily removed by taking out four screws.
Lensrentals.com, 2018
Like this.
Lensrentals.com, 2018
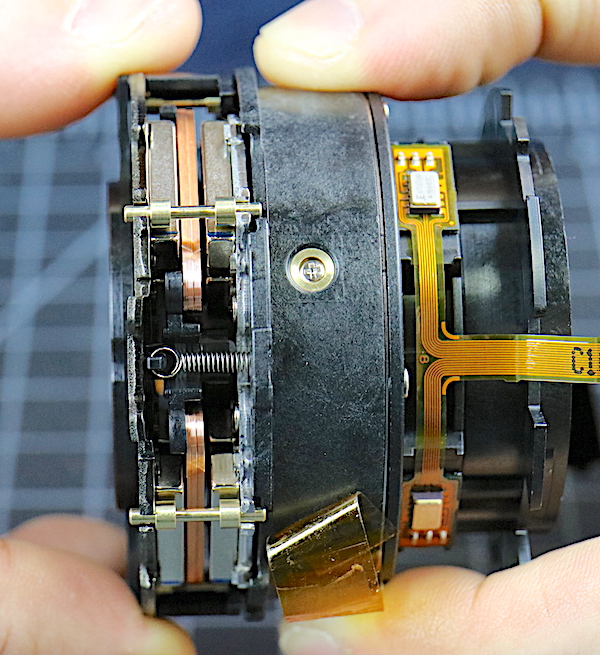
We can get a nice look at that 4th generation IS unit with its big electromagnets, plates, and springs peaking in from the side. You can see a large brass screw-and-collar in the image. On the other two sides the collars were eccentric so that the rear group can be centered here.
Lensrentals.com, 2018
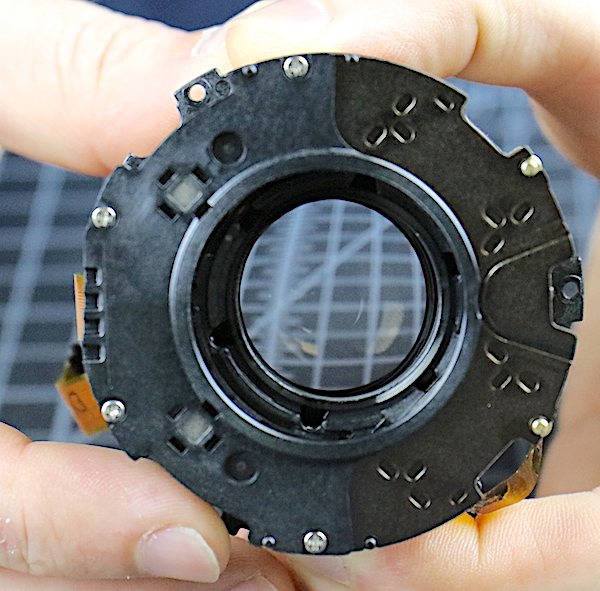
This was the supposed reason for our disassembly, the IS unit was frozen with the lens locked up to one side. In older IS units, this often meant a broken plastic post in the IS assembly, but as you can see above, this unit has some big brass posts that aren’t going to crack or break.
Lensrentals.com, 2018
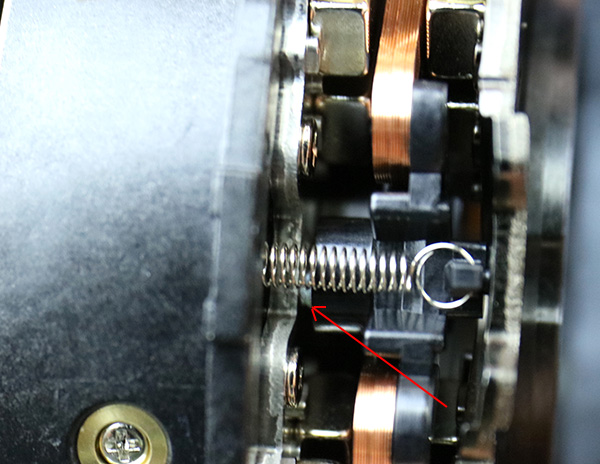
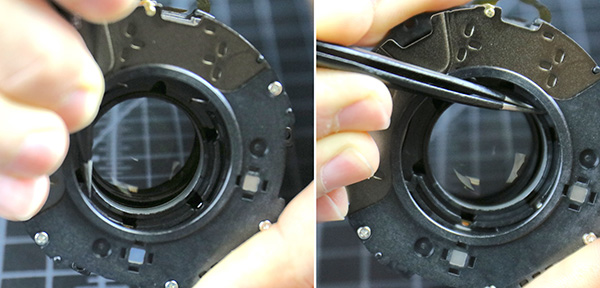
Somewhat to our surprise, though, we were able to see the problem. A nylon bearing had popped out of its recessed place and was jamming the IS optical assembly. You can barely see it here, so I’ve pointed to it with a red arrow.
Lensrentals.com, 2018
Aaron was able to pop it back in its normal location with just a push of his forceps after which the IS element moved around easily as it should. I’ll be honest, neither of us thought there was the slightest chance of a simple fix, but at this point, it seemed there was one.
Lensrentals.com, 2018
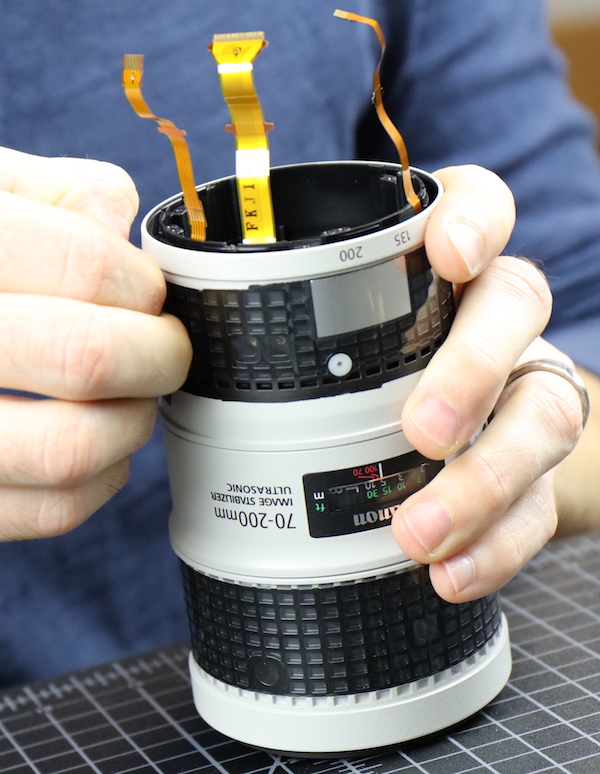
Moving right along, flush with the triumph of popping a plastic bearing back in place and feeling like the heroes we were, we moved on to taking off the outer zoom barrel. This starts with peeling off the weather resistant tape.
Lensrentals.com, 2018
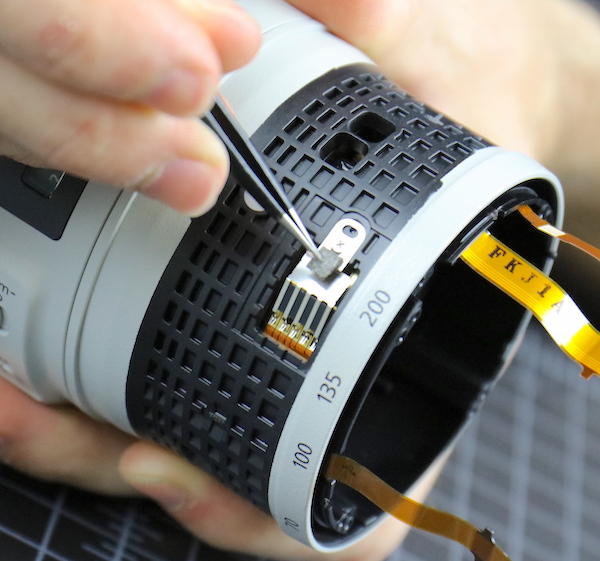
Which exposed the zoom position brush (it was under the aluminum plate above) which was removed.
Lensrentals.com, 2018
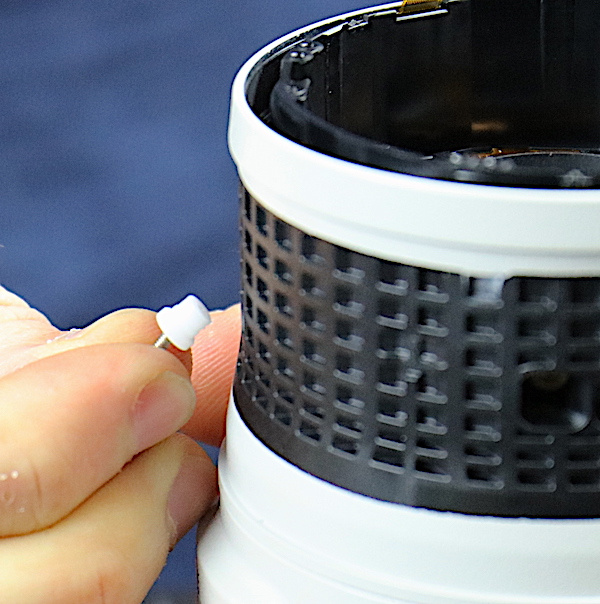
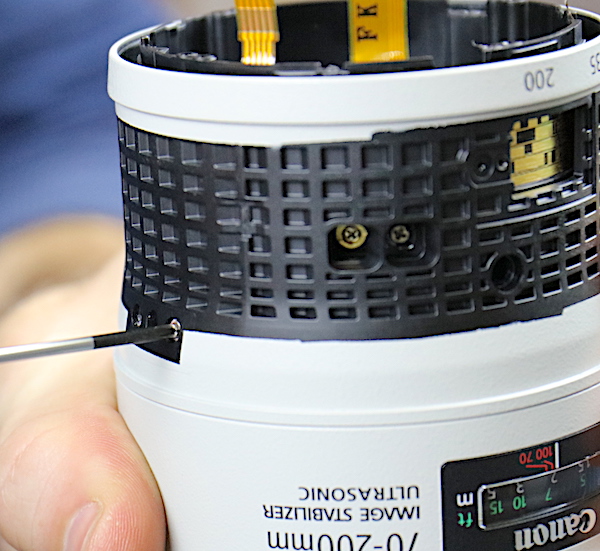
The outer ring is held to the inner ring with three plastic thingies (Canon calls them collars, but we try to limit collars to the things that adjust optics, so I’m going with thingie).
Lensrentals.com, 2018
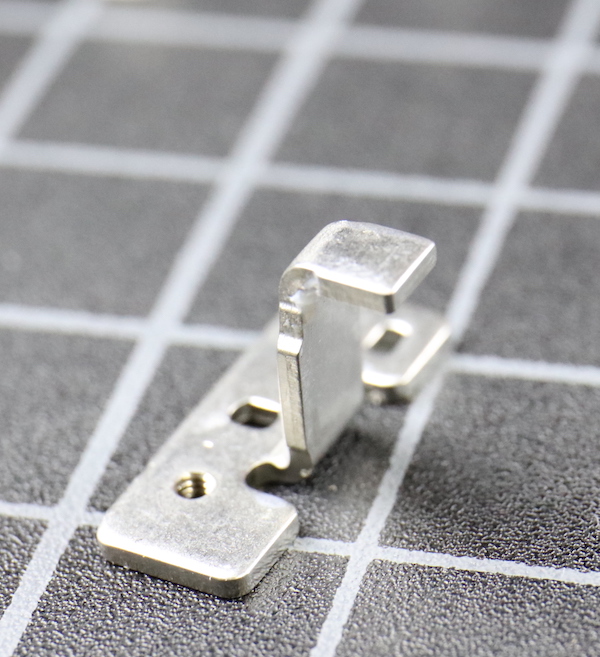
And finally, we removed the actual zoom key. This is attached to the outer barrel and actually moves the zoom mechanism when you rotate it.
Lensrentals.com, 2018
The key itself is a robust heavy piece of metal. That sounds inconsequential, but you’d be surprised how many lenses have little, thin, cheaply pressed keys; and how many zoom jams are caused by them bending.
Lensrentals.com, 2018
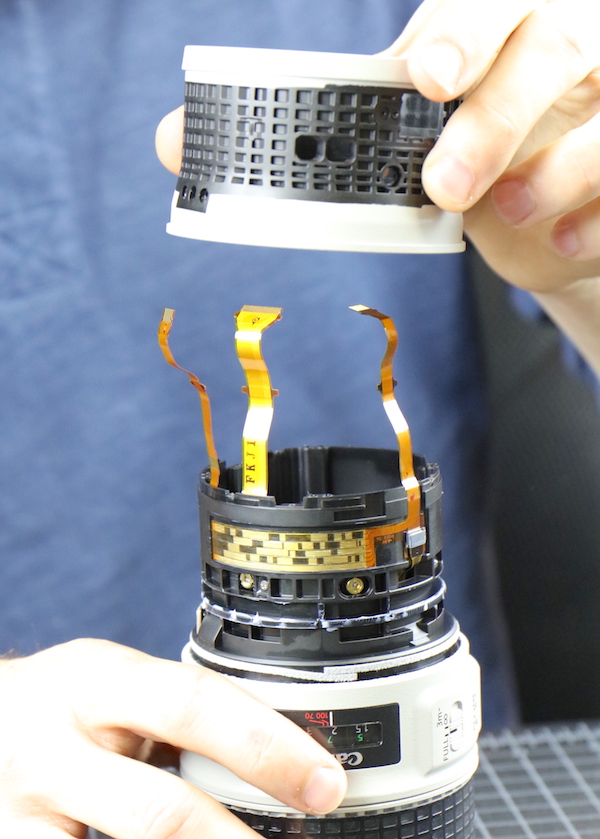
And finally, the zoom barrel slides off. On the inner barrel, you can see the electronic sheet the position brushes pass over, telling your camera the focal length you’re using. Below that you can see a set of optical adjustment collars. Those collars look routine at a distance, but close up there’s a revelation.
Lensrentals.com, 2018
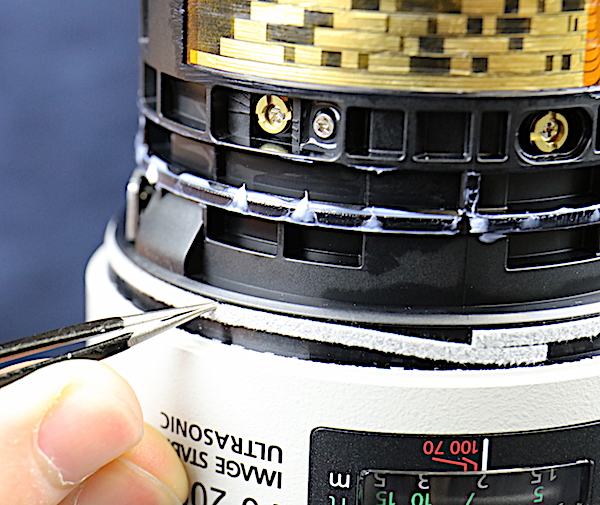
Before we move on to our revelation, the requisite ‘yes there’s nice weather resistant felt between barrel pieces. Because so many of you like to believe weather resistant is waterproof. (This is good weather resistance, though. Canon’s usually is quite thorough.) By the way, you can see the earth-shattering revelation in this picture. See if you notice it before scrolling down.
Lensrentals.com, 2018
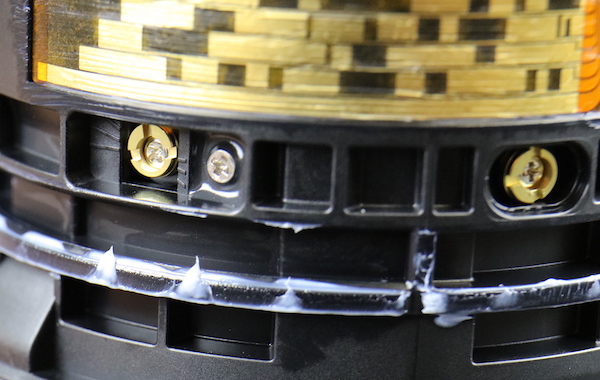
Didn’t notice it, did you? Well here’s a closeup of one of the adjustment sets under the zoom ring. The brass collar on the left is a centering eccentric; on the right a tilt adjustment eccentric. In between is a locking screw that is tightened after adjusting to help hold things in place. That locking screw is much, much, much, much nicer than flooding the collar area with a bunch of silicone caulk which has been the normal method for some years. We’ve spent untold hours picking out caulk to correct an optical adjustment.
Lensrentals.com, 2018
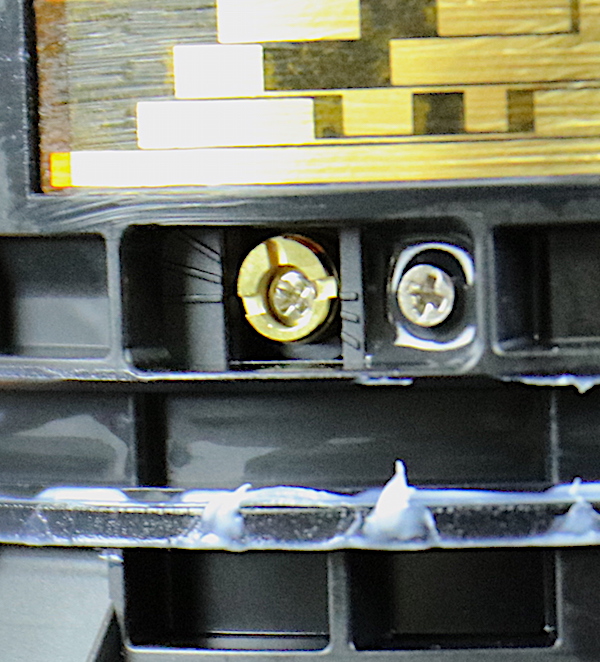
But the revelation is that there are guide marks on the outside that can be used to locate the adjustment position. This seems like a minor thing, but it’s actually a huge thing. For one thing, we get to stop putting little marks on the original position of a collar when we do a disassembly.
Lensrentals.com, 2018
What may be more important is adjustment during assembly. We know that Canon has the most computerized and robotized assembly process. The modular construction of Canon lenses has made me think for some years that as each section is optically adjusted as it is assembled. But assembly line workers aren’t optical engineers.
Marks like this may well indicate that the subassembly is put on a jig, a computer program reads the optics and gives a set of adjustment directions like top tilt one mark counterclockwise, right center one mark clockwise. I could also be wrong, of course, I often am. But after disassembling thousands of copies of hundreds of different lenses, this is the first time we’ve seen adjustment marks, ever.
Seeing these is really what we’d come for, but seeing these also made us decide to stop the disassembly at this point. There is still the AF motor to see in the front barrel under the focus ring, but further disassembly meant having to remove the adjustment collars and readjust the lens when we reassemble. That’s doable, of course, we do it all the time. But it is also time-consuming, especially on a lens we haven’t adjusted before, and we didn’t have all the time we would have liked today.
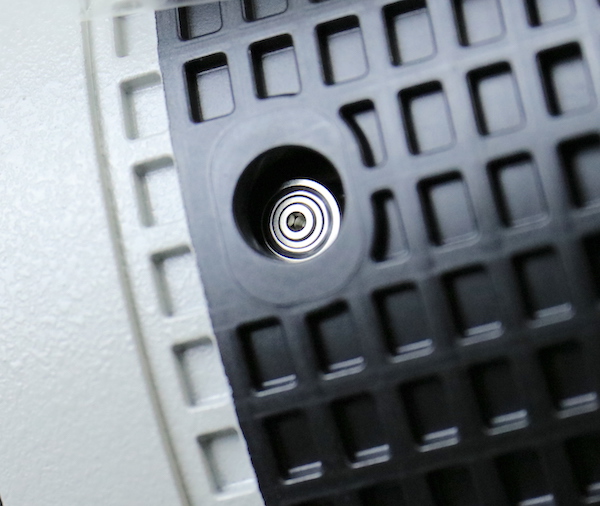
We did take the focus ring tape off and looked through the access holes and were able to note that the focus mechanism, like most recent Canon lenses, slides on very robust roller bearings rather than simple nylon collars. There was also a set of centering adjustments on the focusing element.
Lensrentals.com, 2018
Conclusions
First of all, this is, as we would expect, a very well built lens with robust roller bearings, large brass collars, heavy metal keys, and good weather sealing. Some non-Canon fanboys are going to love crowing about an IS unit breaking early, but it was during a rental, and well, IS units break some. This is the same unit used in most recent Canon lenses, and they are more reliable than most, honestly.
We have some hints, and a lot of Roger speculation, about how Canon is getting lenses with such low variance. Here’s what we know: Canon has more optical adjustments than most lenses, not less. So while they may have tighter tolerances (I have no clue), the key seems to be more in a careful optical adjustment of compensating elements than anything else.
Adjusting compensating elements is time-consuming and can be complicated. We sometimes spend half a day doing it on a complex lens. Canon seems to have made the process modular and logical. In this lens, for example, there are (we think):
- Centering for the focusing element.
- Tilt and centering adjustments for one or more middle elements
- Centering adjustments for the rear element.
We didn’t complete the disassembly, but past experience with Canon lenses has taught us there is often on deeper compensating element near the aperture assembly or AF motor.
It is clear that Canon is going with more, and more straightforward, adjustment of optics than the other manufacturers. Most lenses have a centering, or at most a centering and tilt adjustment. Many lenses have no optical adjustments at all. There are a couple of non-Canon lenses that have multiple adjustments, but it’s the exception, and often the adjustments are shims, which have more limited adjustment possibilities.
Roger Cicala and Aaron Closz
Lensrentals.com
August, 2018
Author: Roger Cicala
I’m Roger and I am the founder of Lensrentals.com. Hailed as one of the optic nerds here, I enjoy shooting collimated light through 30X microscope objectives in my spare time. When I do take real pictures I like using something different: a Medium format, or Pentax K1, or a Sony RX1R.
