Shooting with gelled or RGB lights can be a great way to expand your creativity and create new works of art. However, the process can be a bit more complicated than one might expect. Depending on the gels you’re using, you’ll lose a certain amount of light, making the process of light balance all that more difficult. I’ve talked about color theory on this blog before and have even broken down shoots using gelled lights in the past. But I figured it was worth talking about again, as I give you a full breakdown of a recent shoot that I did with my good friend Angel. So, let’s get started.
Pre Production
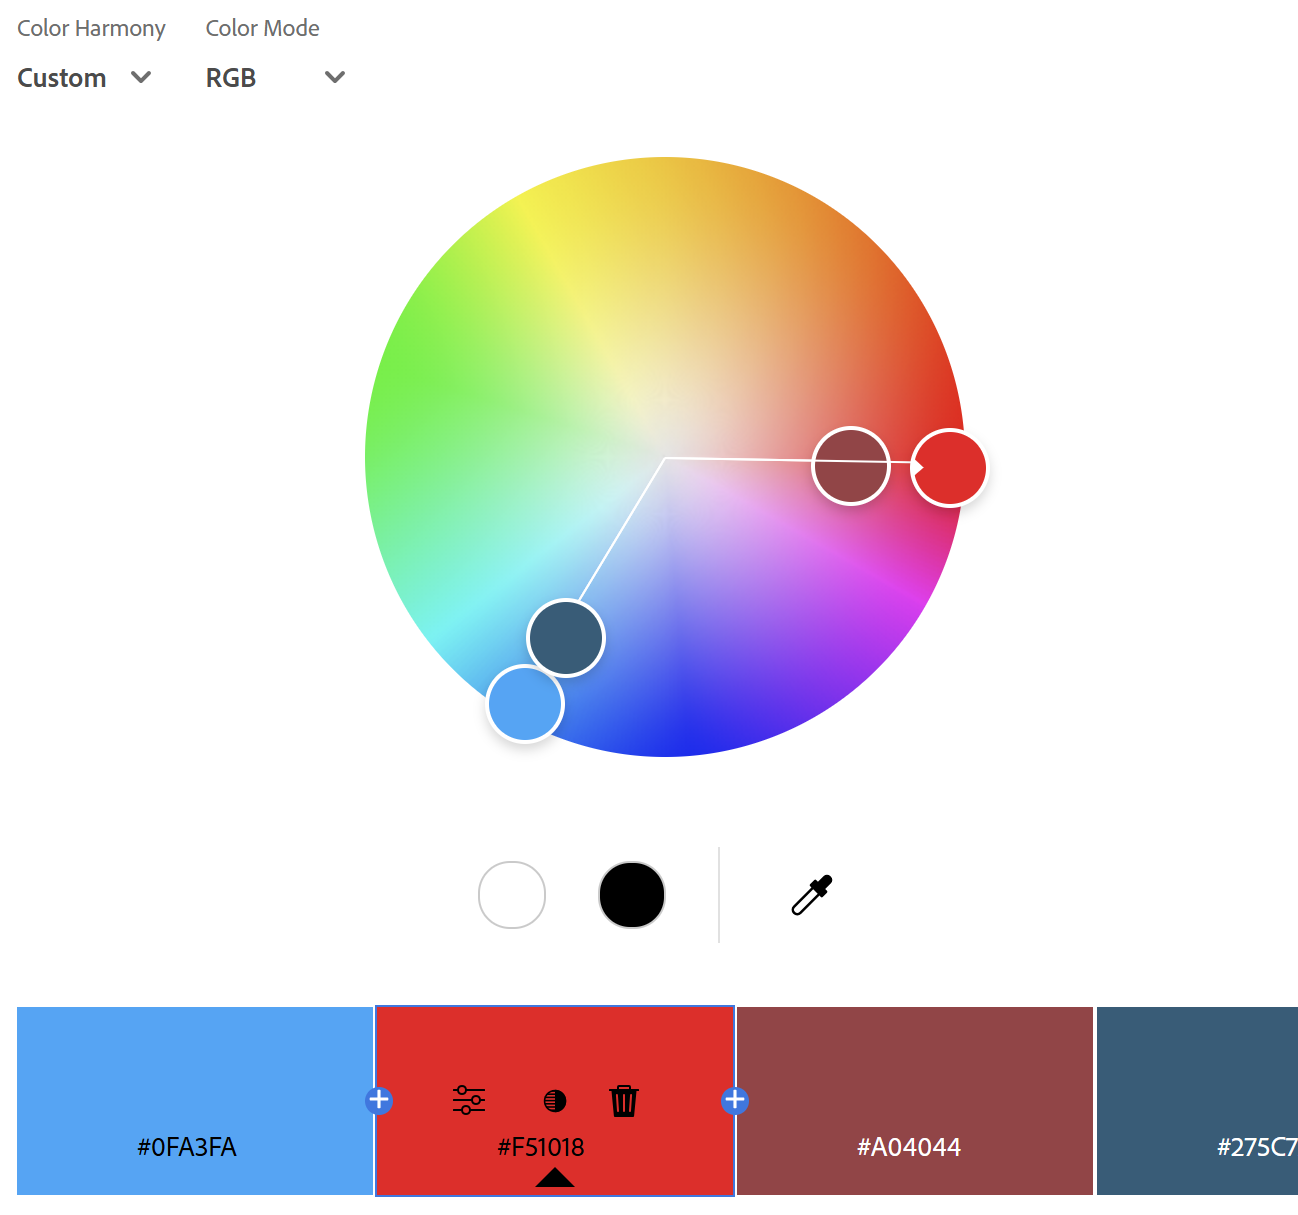
This shoot started like many of my other shoots, with some thought process that goes into what we wanted to do a few days before the shoot. I wanted to create some abstract, neo-noir work, and Angel’s always down to shoot something a little different. So, to start the process, I first looked at Adobe Color, a great tool that allows me to easily find triad complimentary colors in preproducing a shoot that will be cohesive in design.
After finding my color palette, I wanted to add a little bit more to the shoot, which I will discuss in the post-production section. But once we had everything scheduled, we booked a time that worked for everyone and got started on the concept.
Lighting the Scene
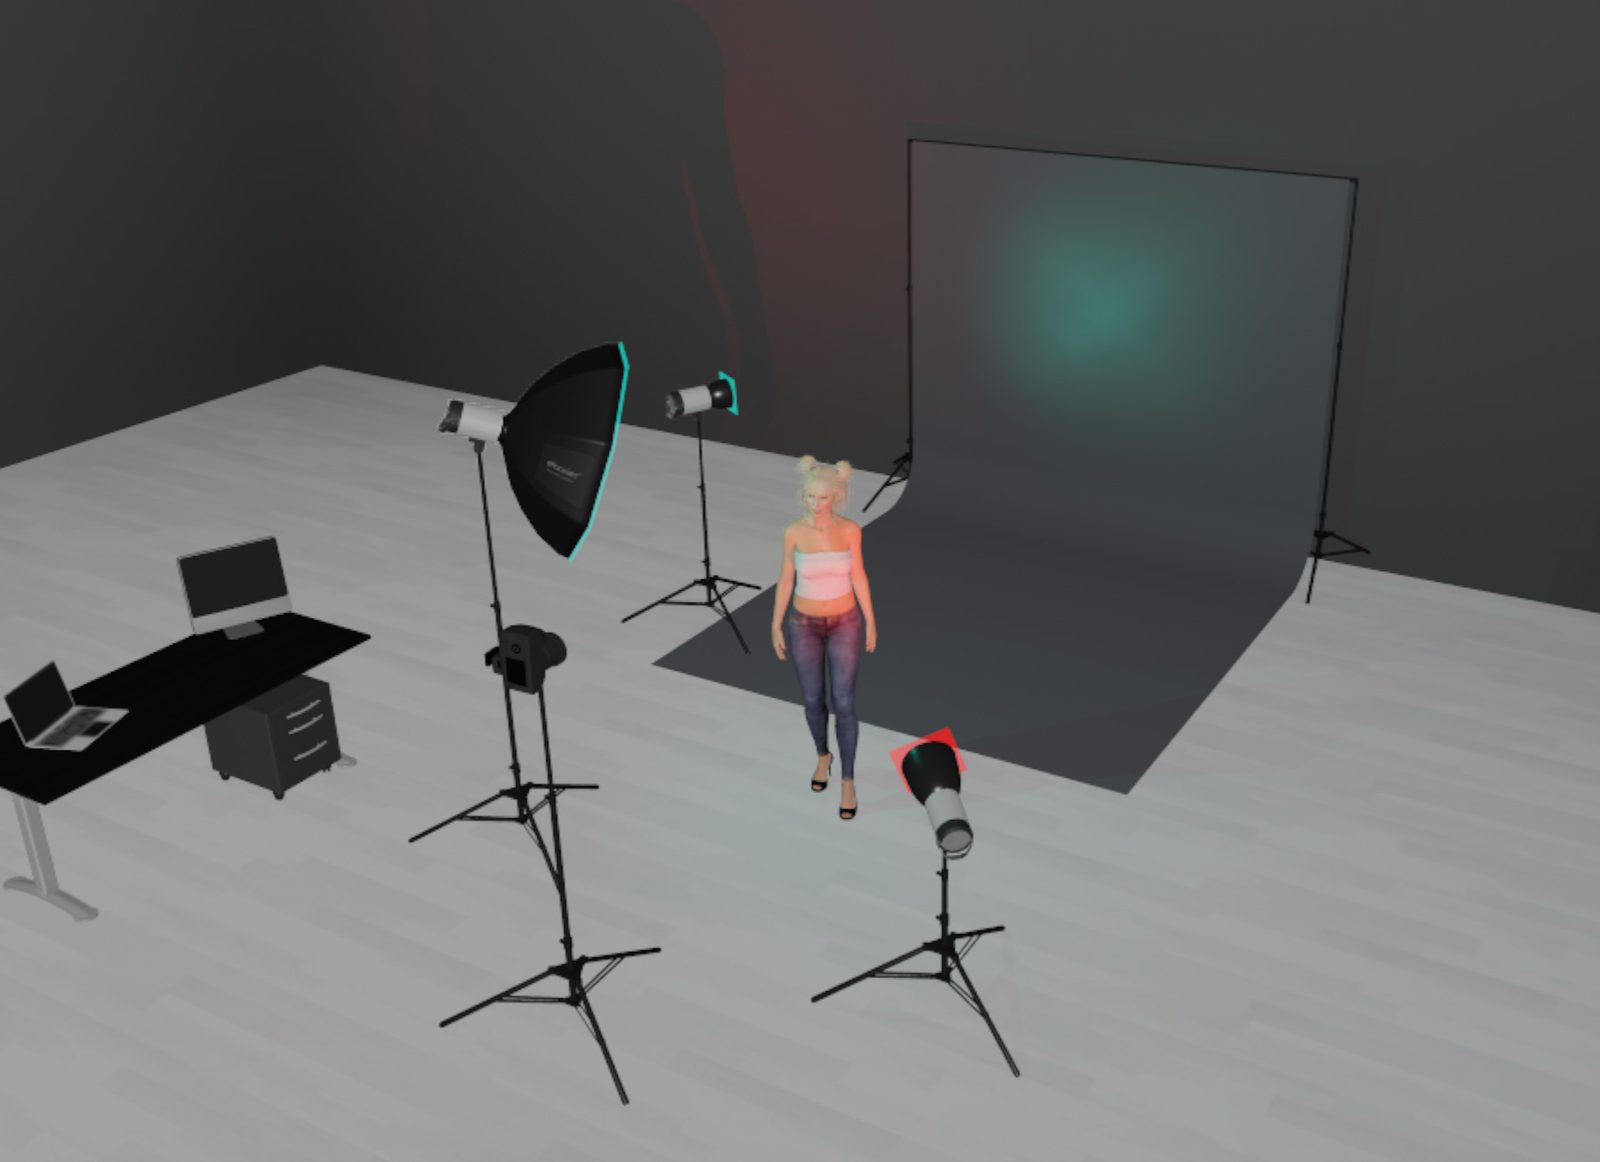
Typically, when I shoot with gelled lights, I go into my studio an hour before the session and do a bunch of light tests to ensure that my light output is balanced and accurate for when my subject arrives. This shoot was a bit different, though, because instead of opting for studio strobes like I normally use, I decided to use consistent LED lighting.
There are a lot of benefits to using constant lights over strobes, especially when using gels. The ability to balance your light output visually is a huge benefit over strobes. However, as I previously looked at in this blog, I do think single point LED lights that are at least 300W is really needed to be able to use in a studio setting without pushing your ISO too far. I used the Nanlite FS-300B and a Zhiyun Molus B500 as my key light for this particular shoot. If you’re looking for something comparable in our inventory, I would recommend the Amaran 300c and Aputure LS 600x. For gels, I used both teal and red gels purchased from a local camera store – if you were using RGB lights, you’d be able to use that feature instead.
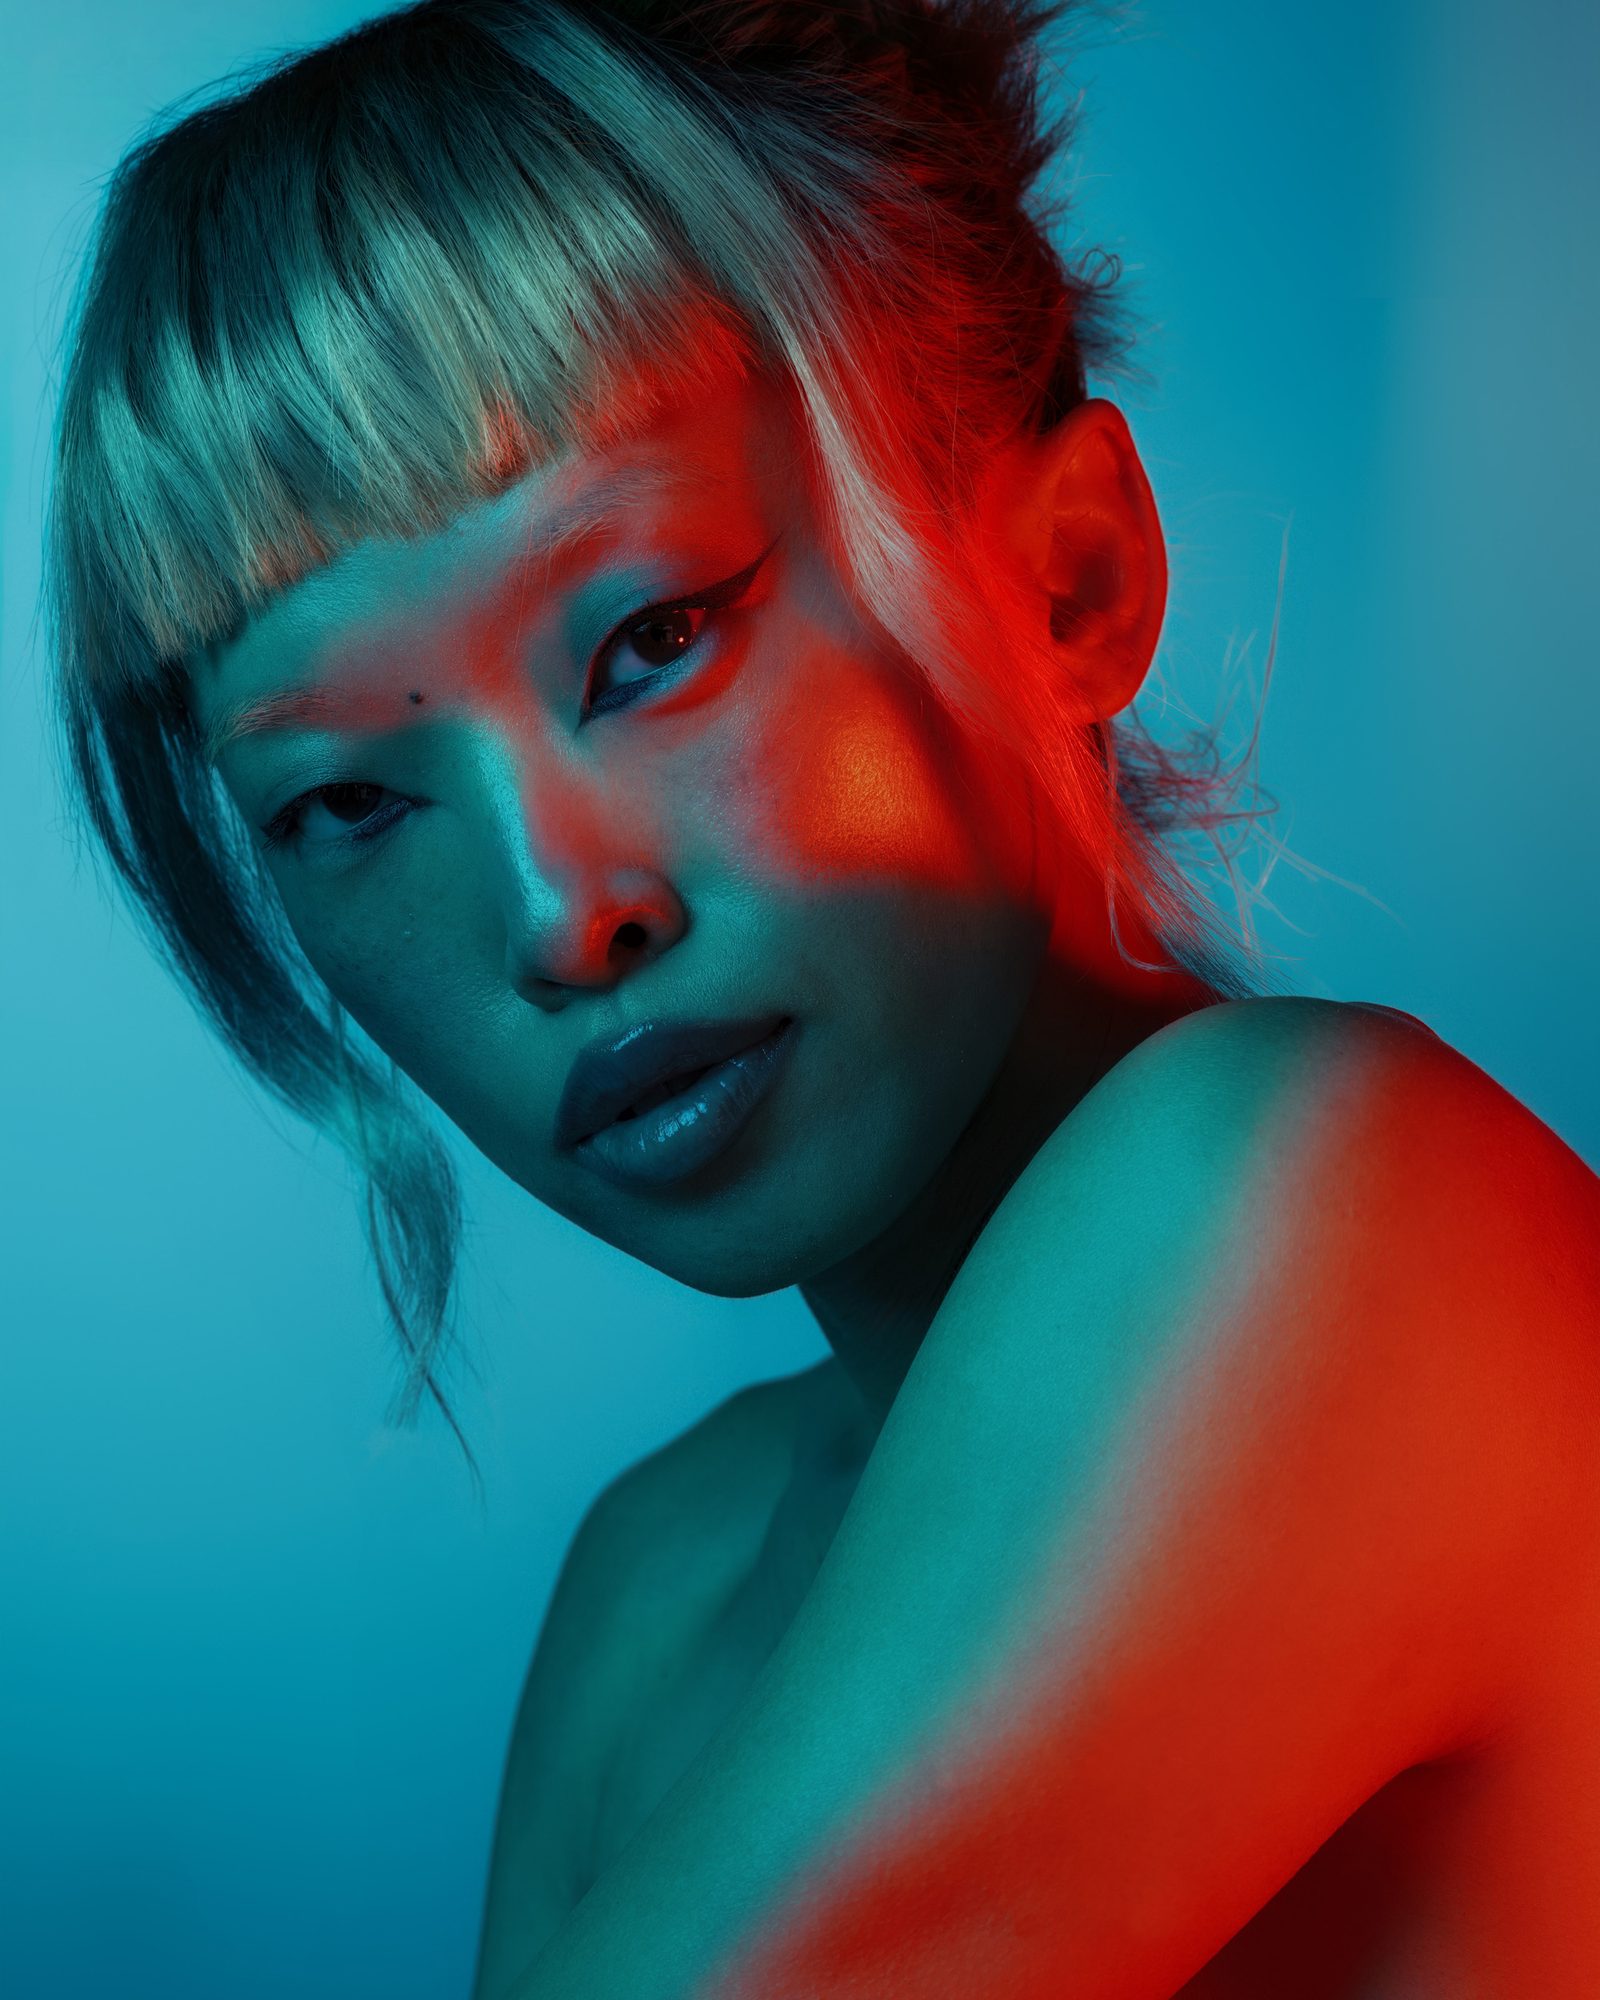
The Photos
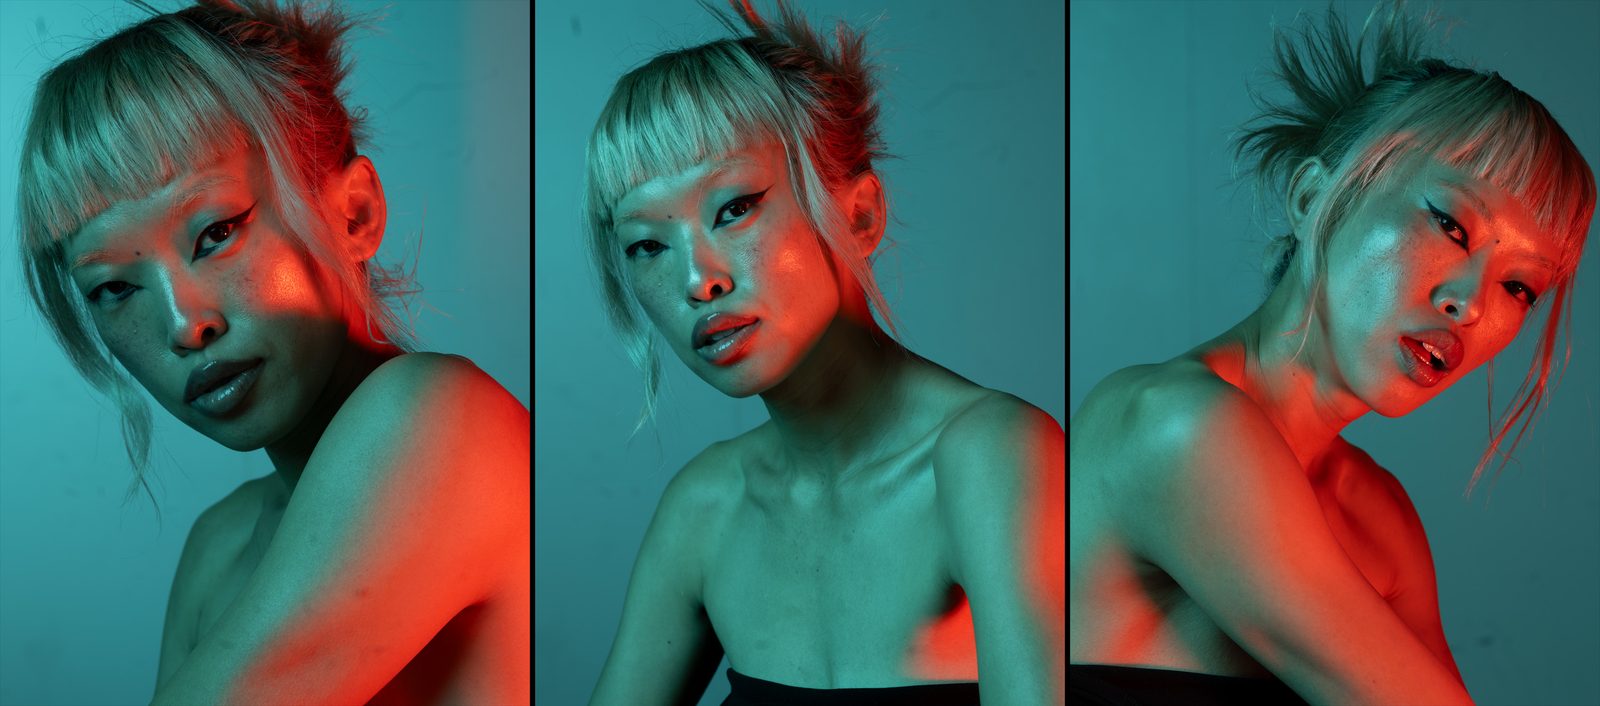
I won’t touch too much on this topic and instead opt for a deeper explanation in the post-production section below. These photos were generally taken with a Fujifilm GFX 100S and the Fujifilm GF 120mm f/4 Macro. The images’ settings were ISO 200, f/11, and 1/125/sec, and some images that were straight out of the camera are below. Yes, I know, I desperately need to clean my sensor and lens.
The Post Production
Now that I had a basic look down, I went into Adobe Photoshop to do my editing process. For these images, a lot of the work is to do subtle color work to help bring out the vibrancy of the teal gel and pull back some of the red. Additionally, now is the time to remove distractions, from weird shadows to sensor dust to any blemishes the model may have. After spending some time in Photoshop, I was left with these images.
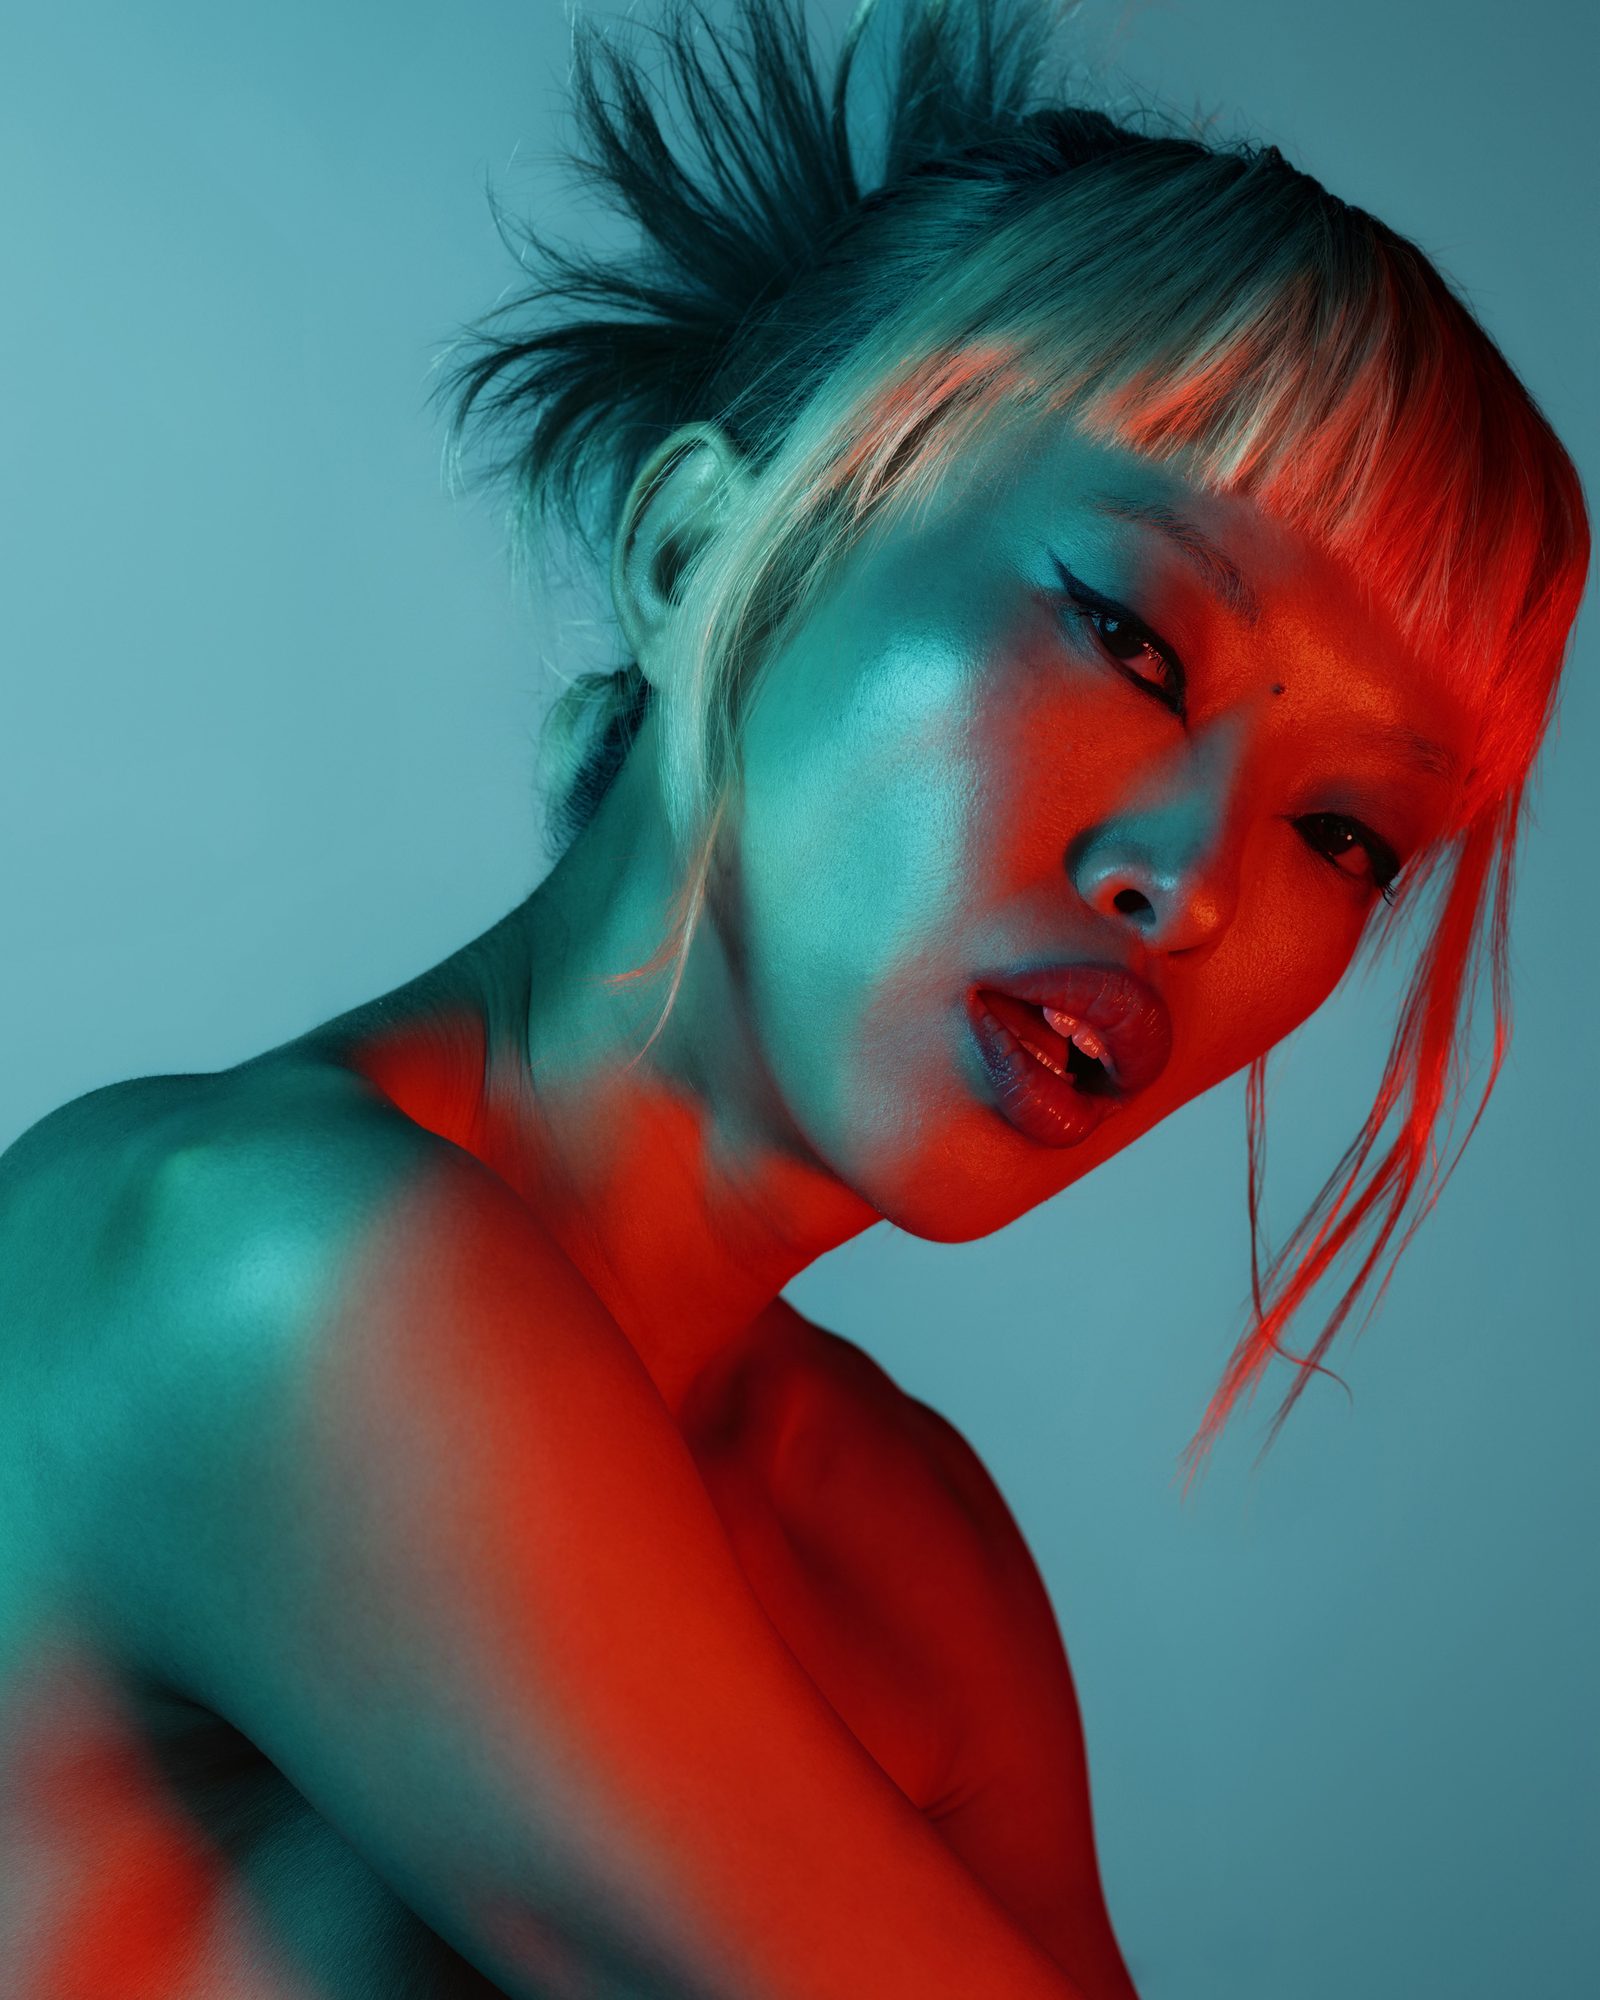

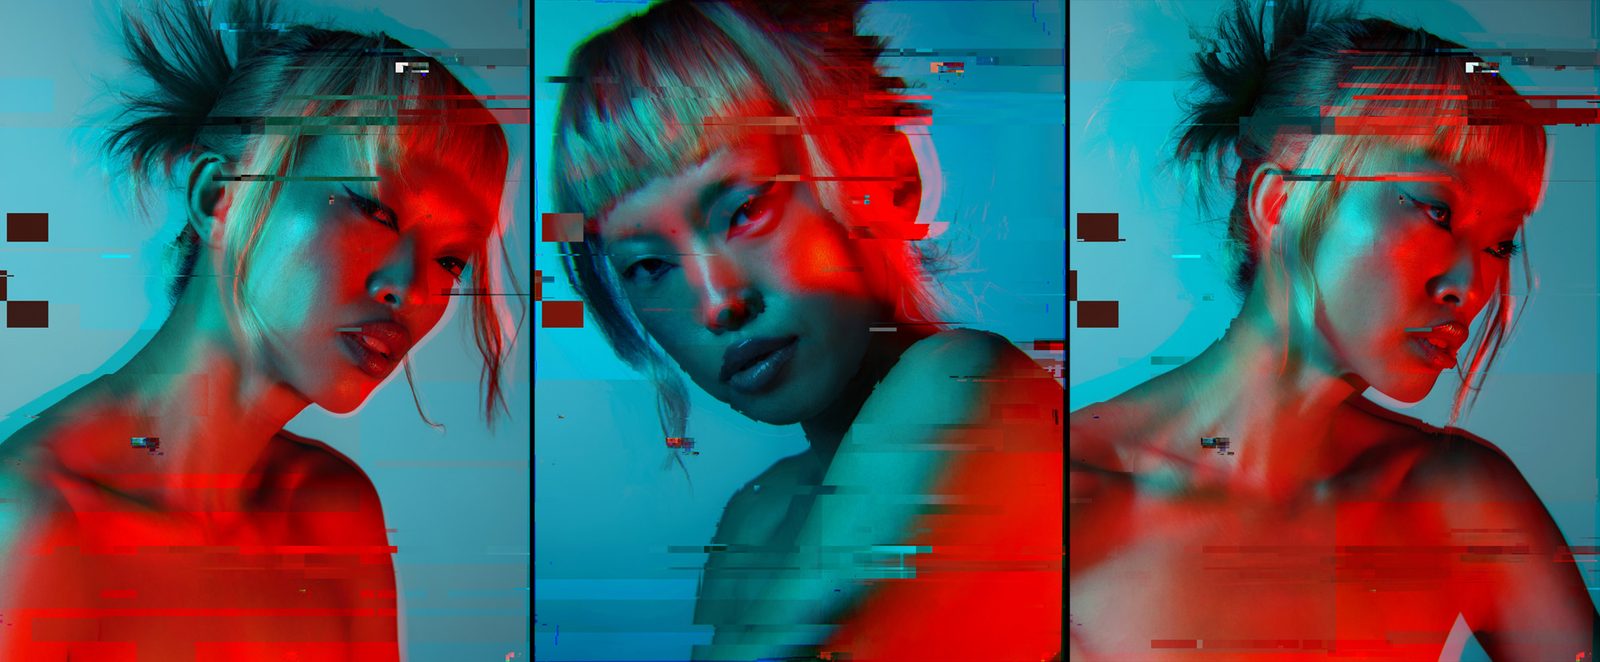
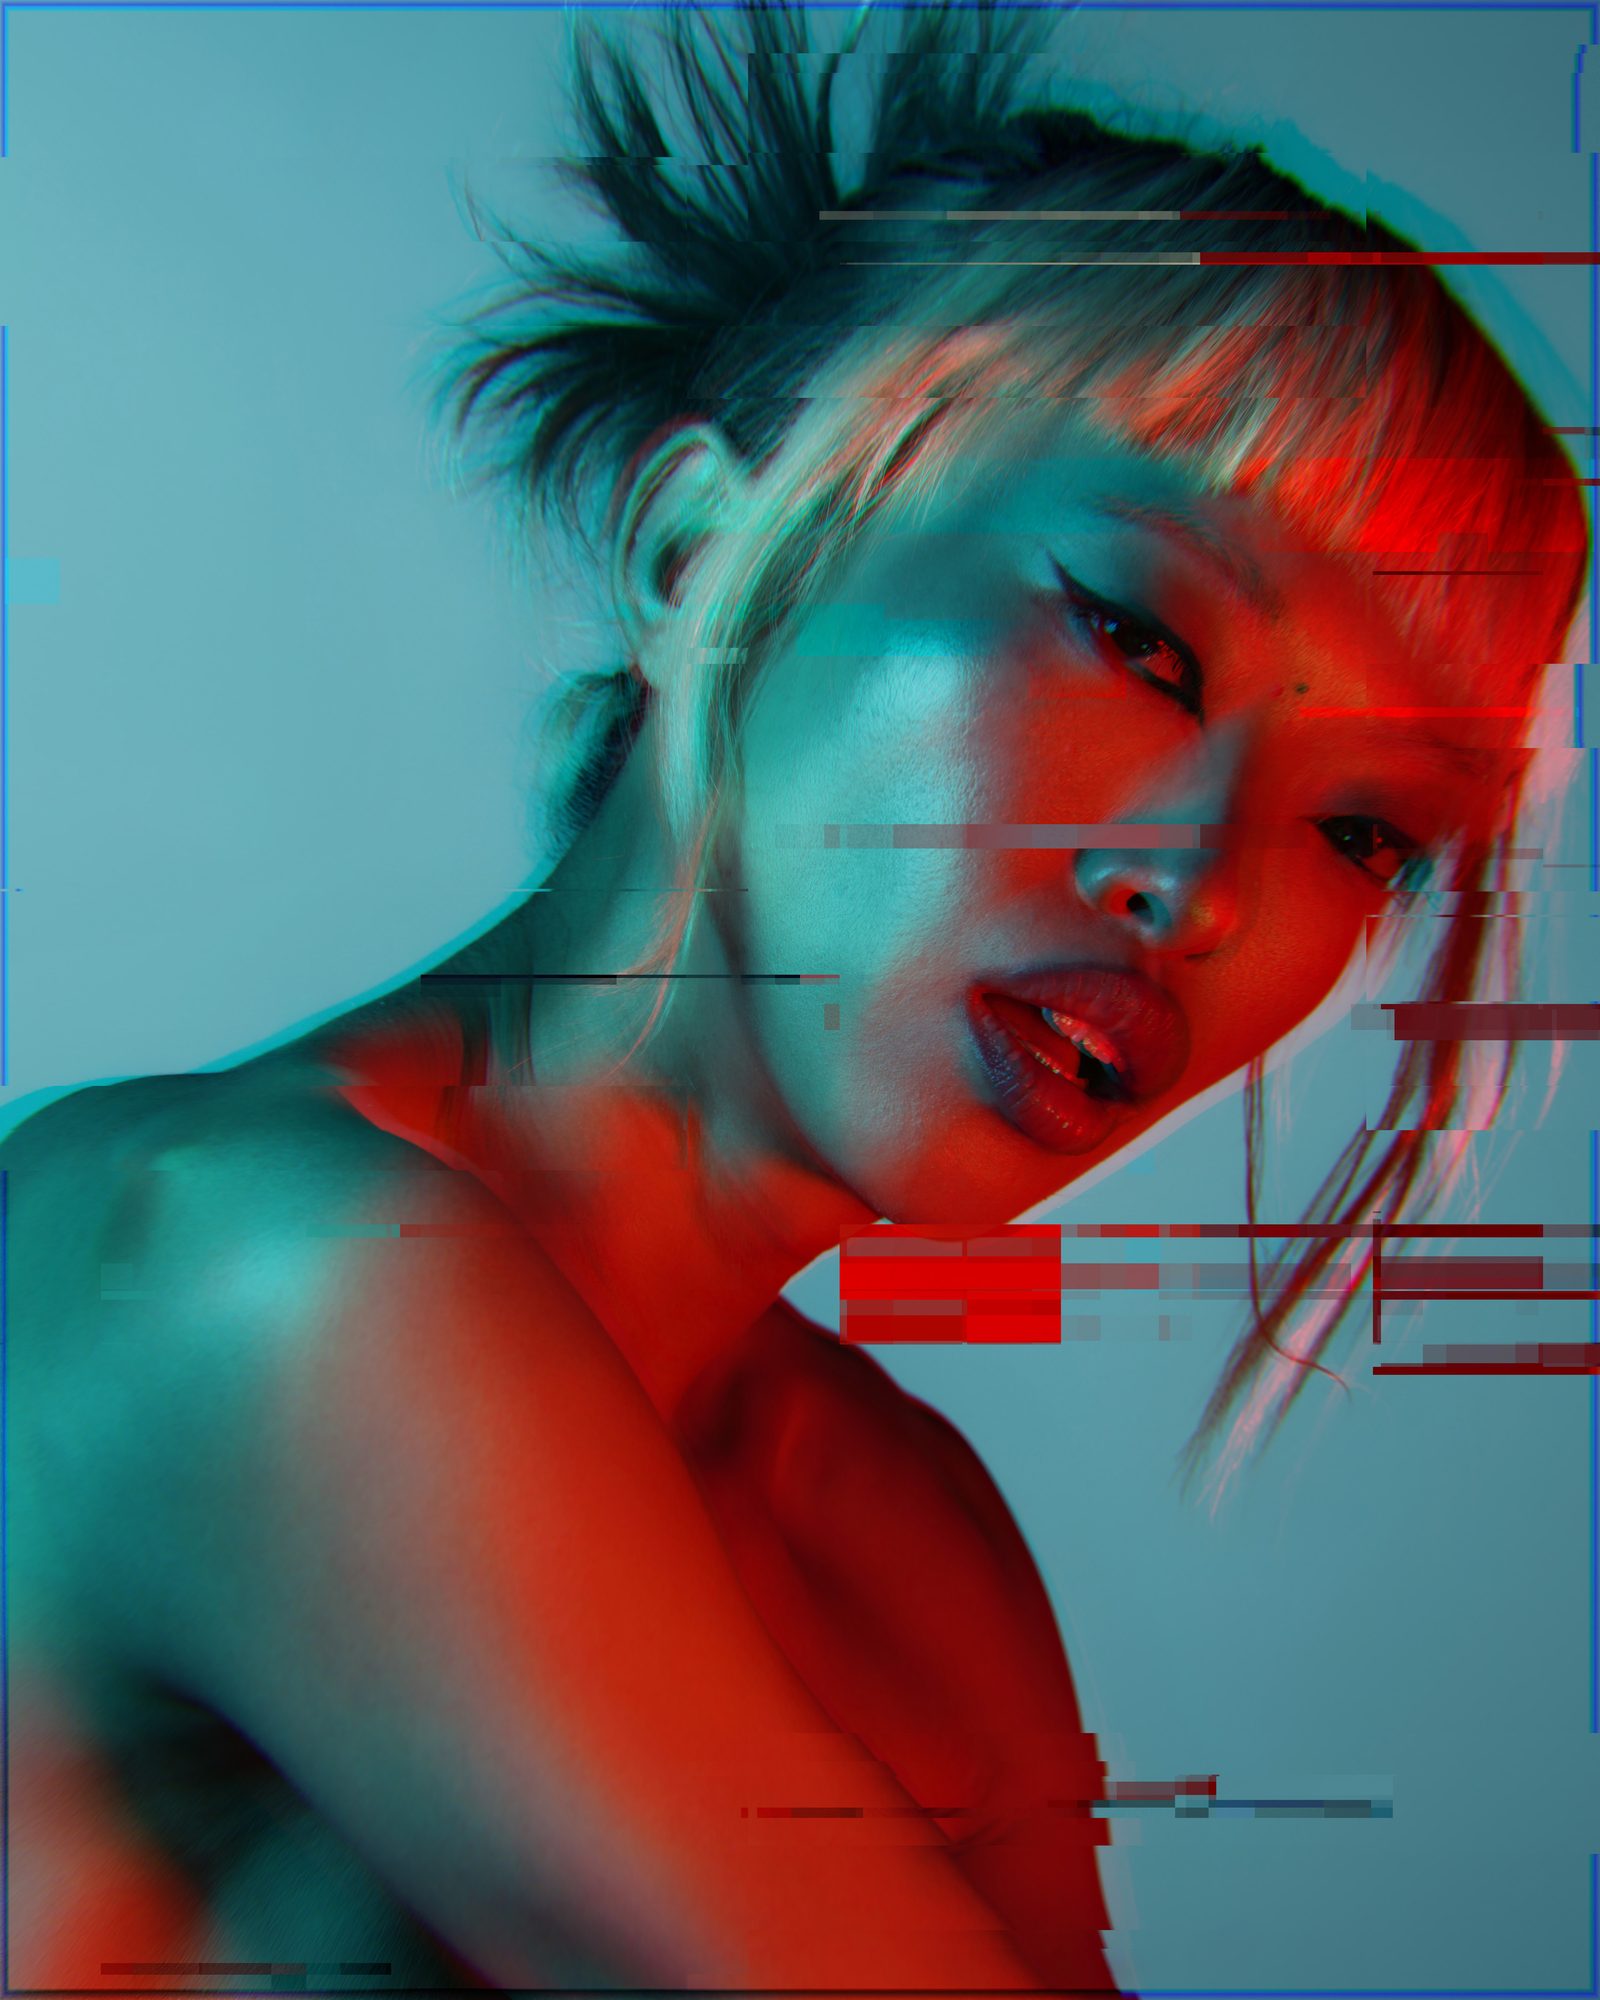
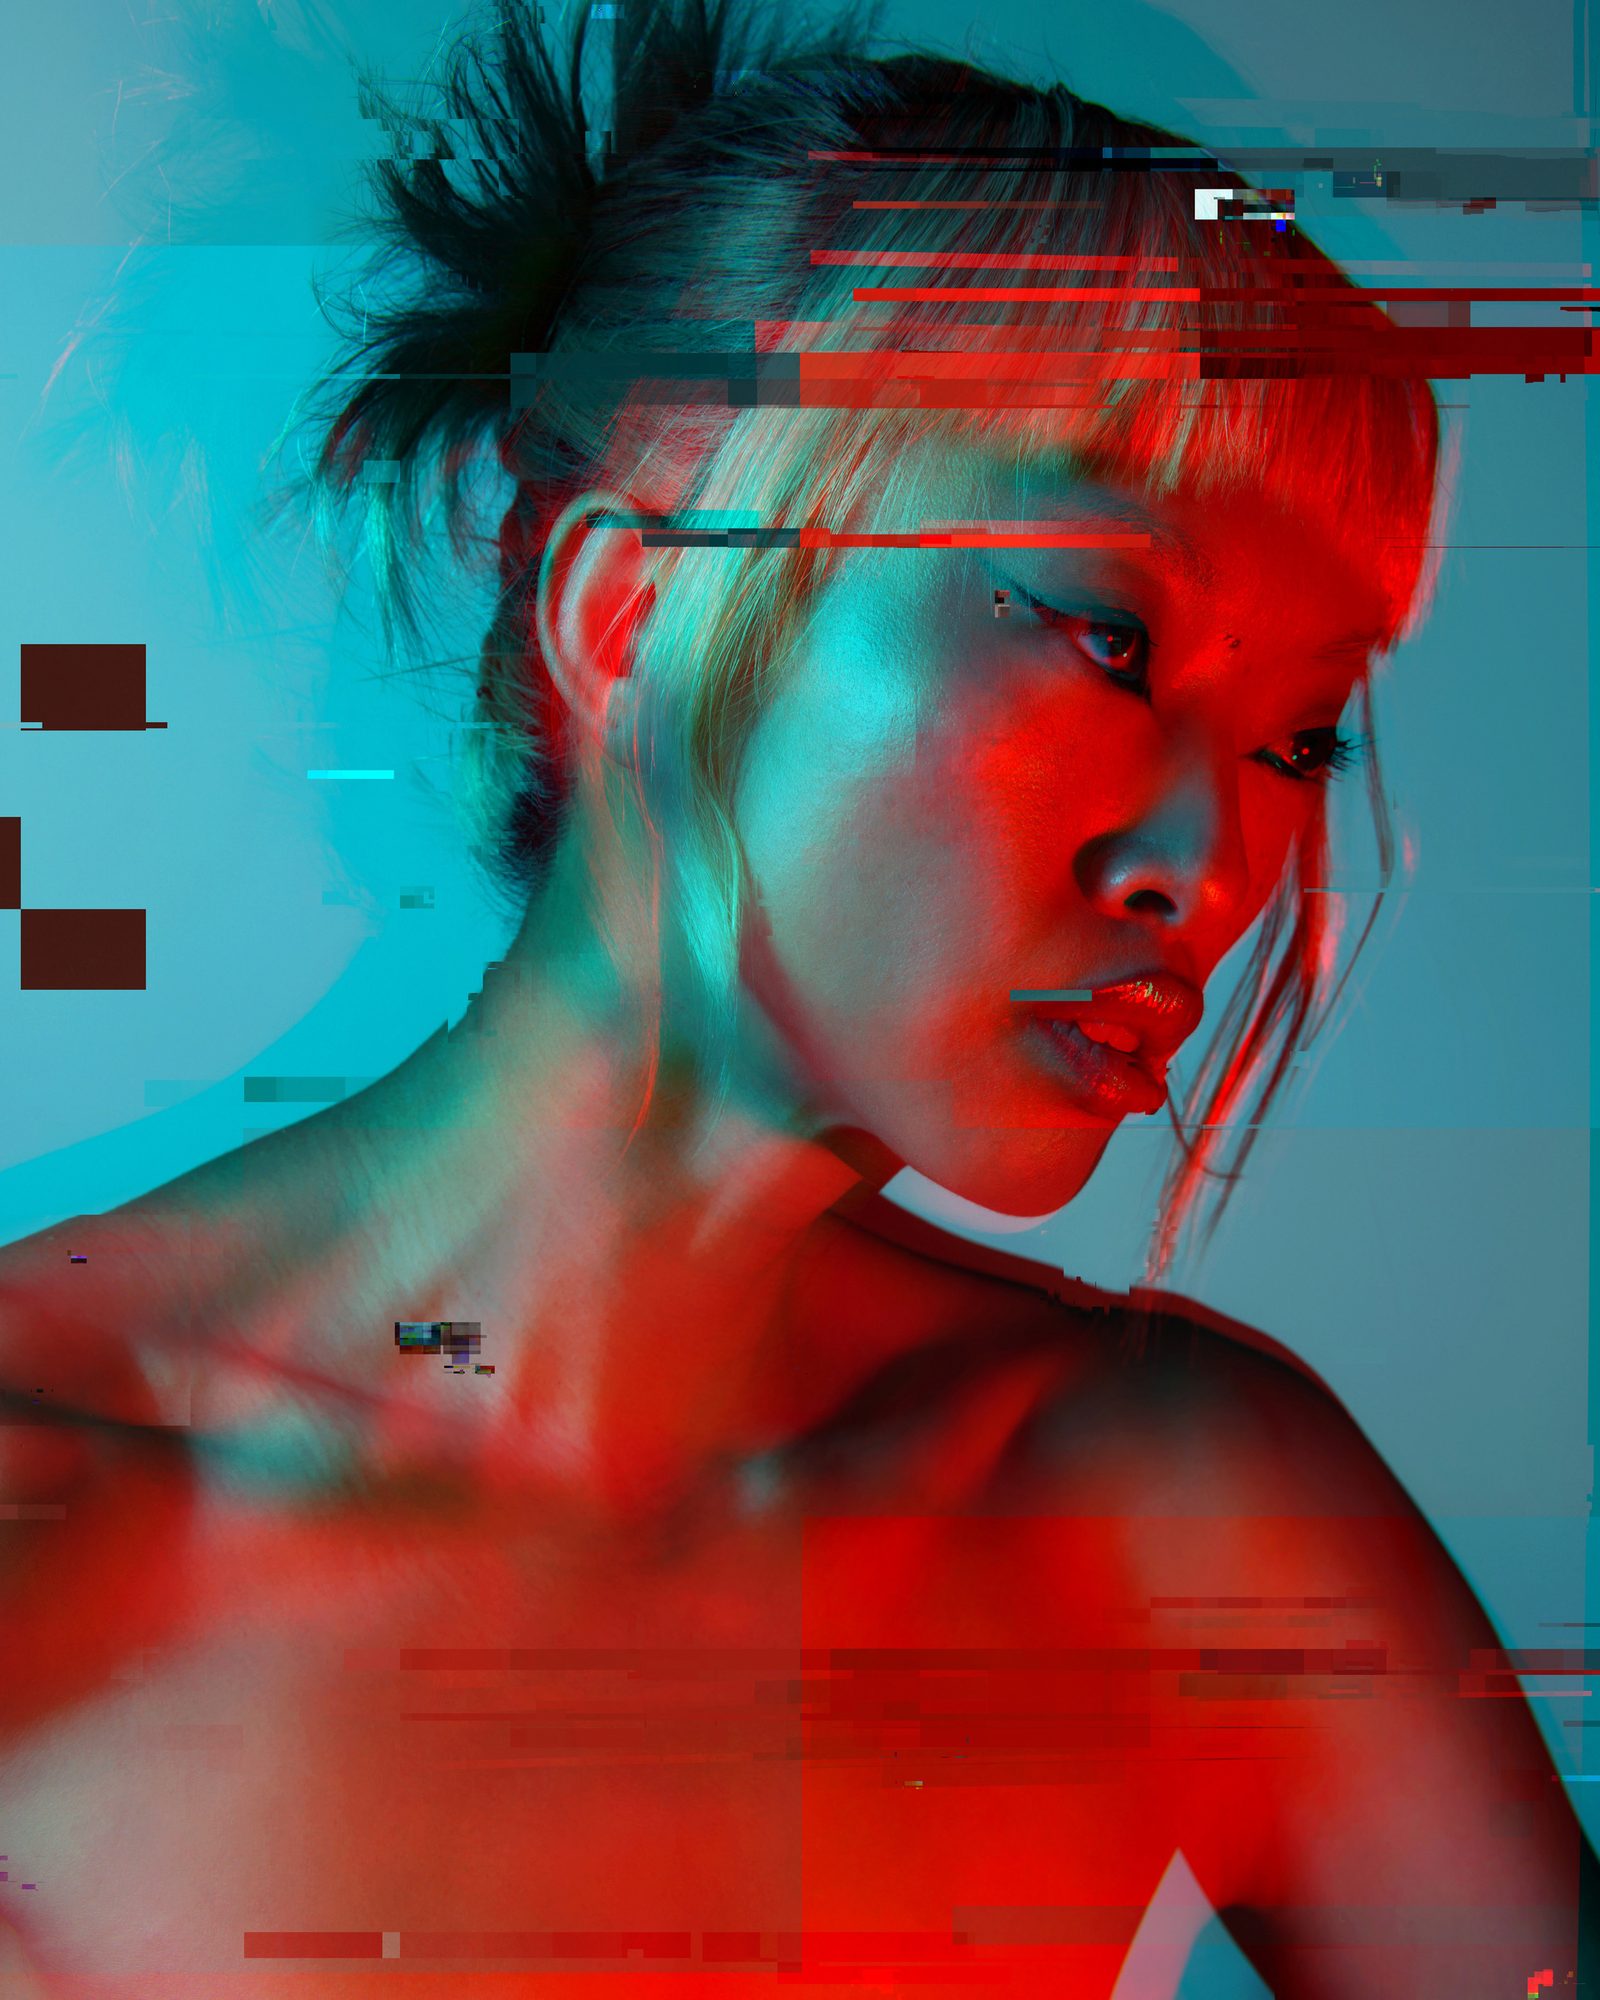
While I like these images, I felt like they really needed more to bring in the ‘Neo-Noir’ styling we were originally planning. Since this is more of a portrait session than a beauty session, I felt it was worthwhile to do some pretty drastic edits to the images to bring a futuristic look. This is where the Photoshop plugin Boris FX Optics comes in.
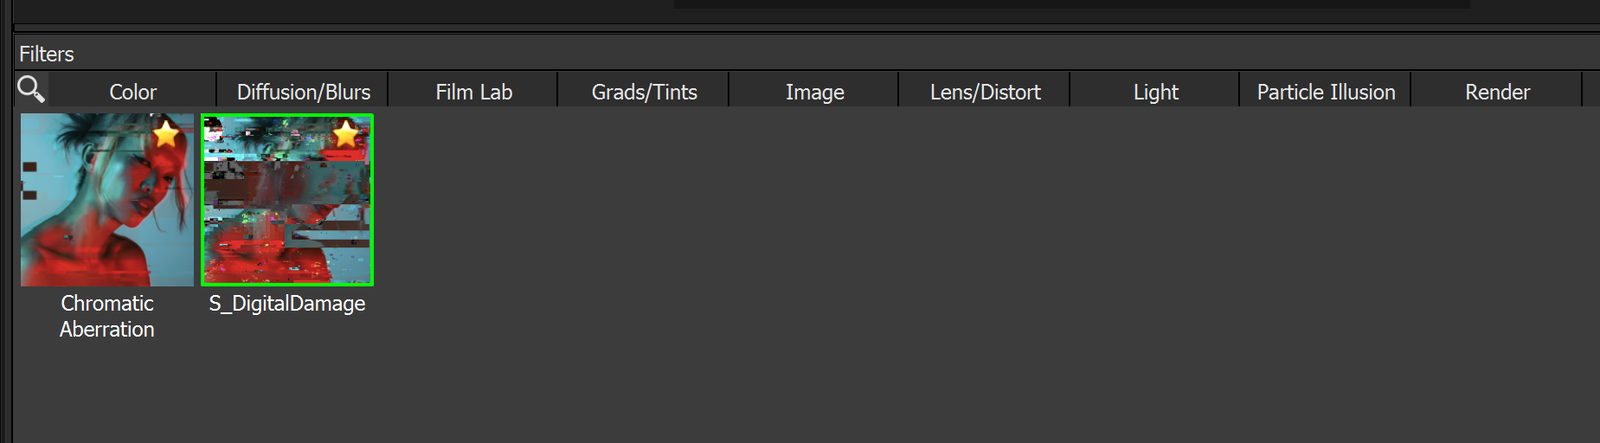
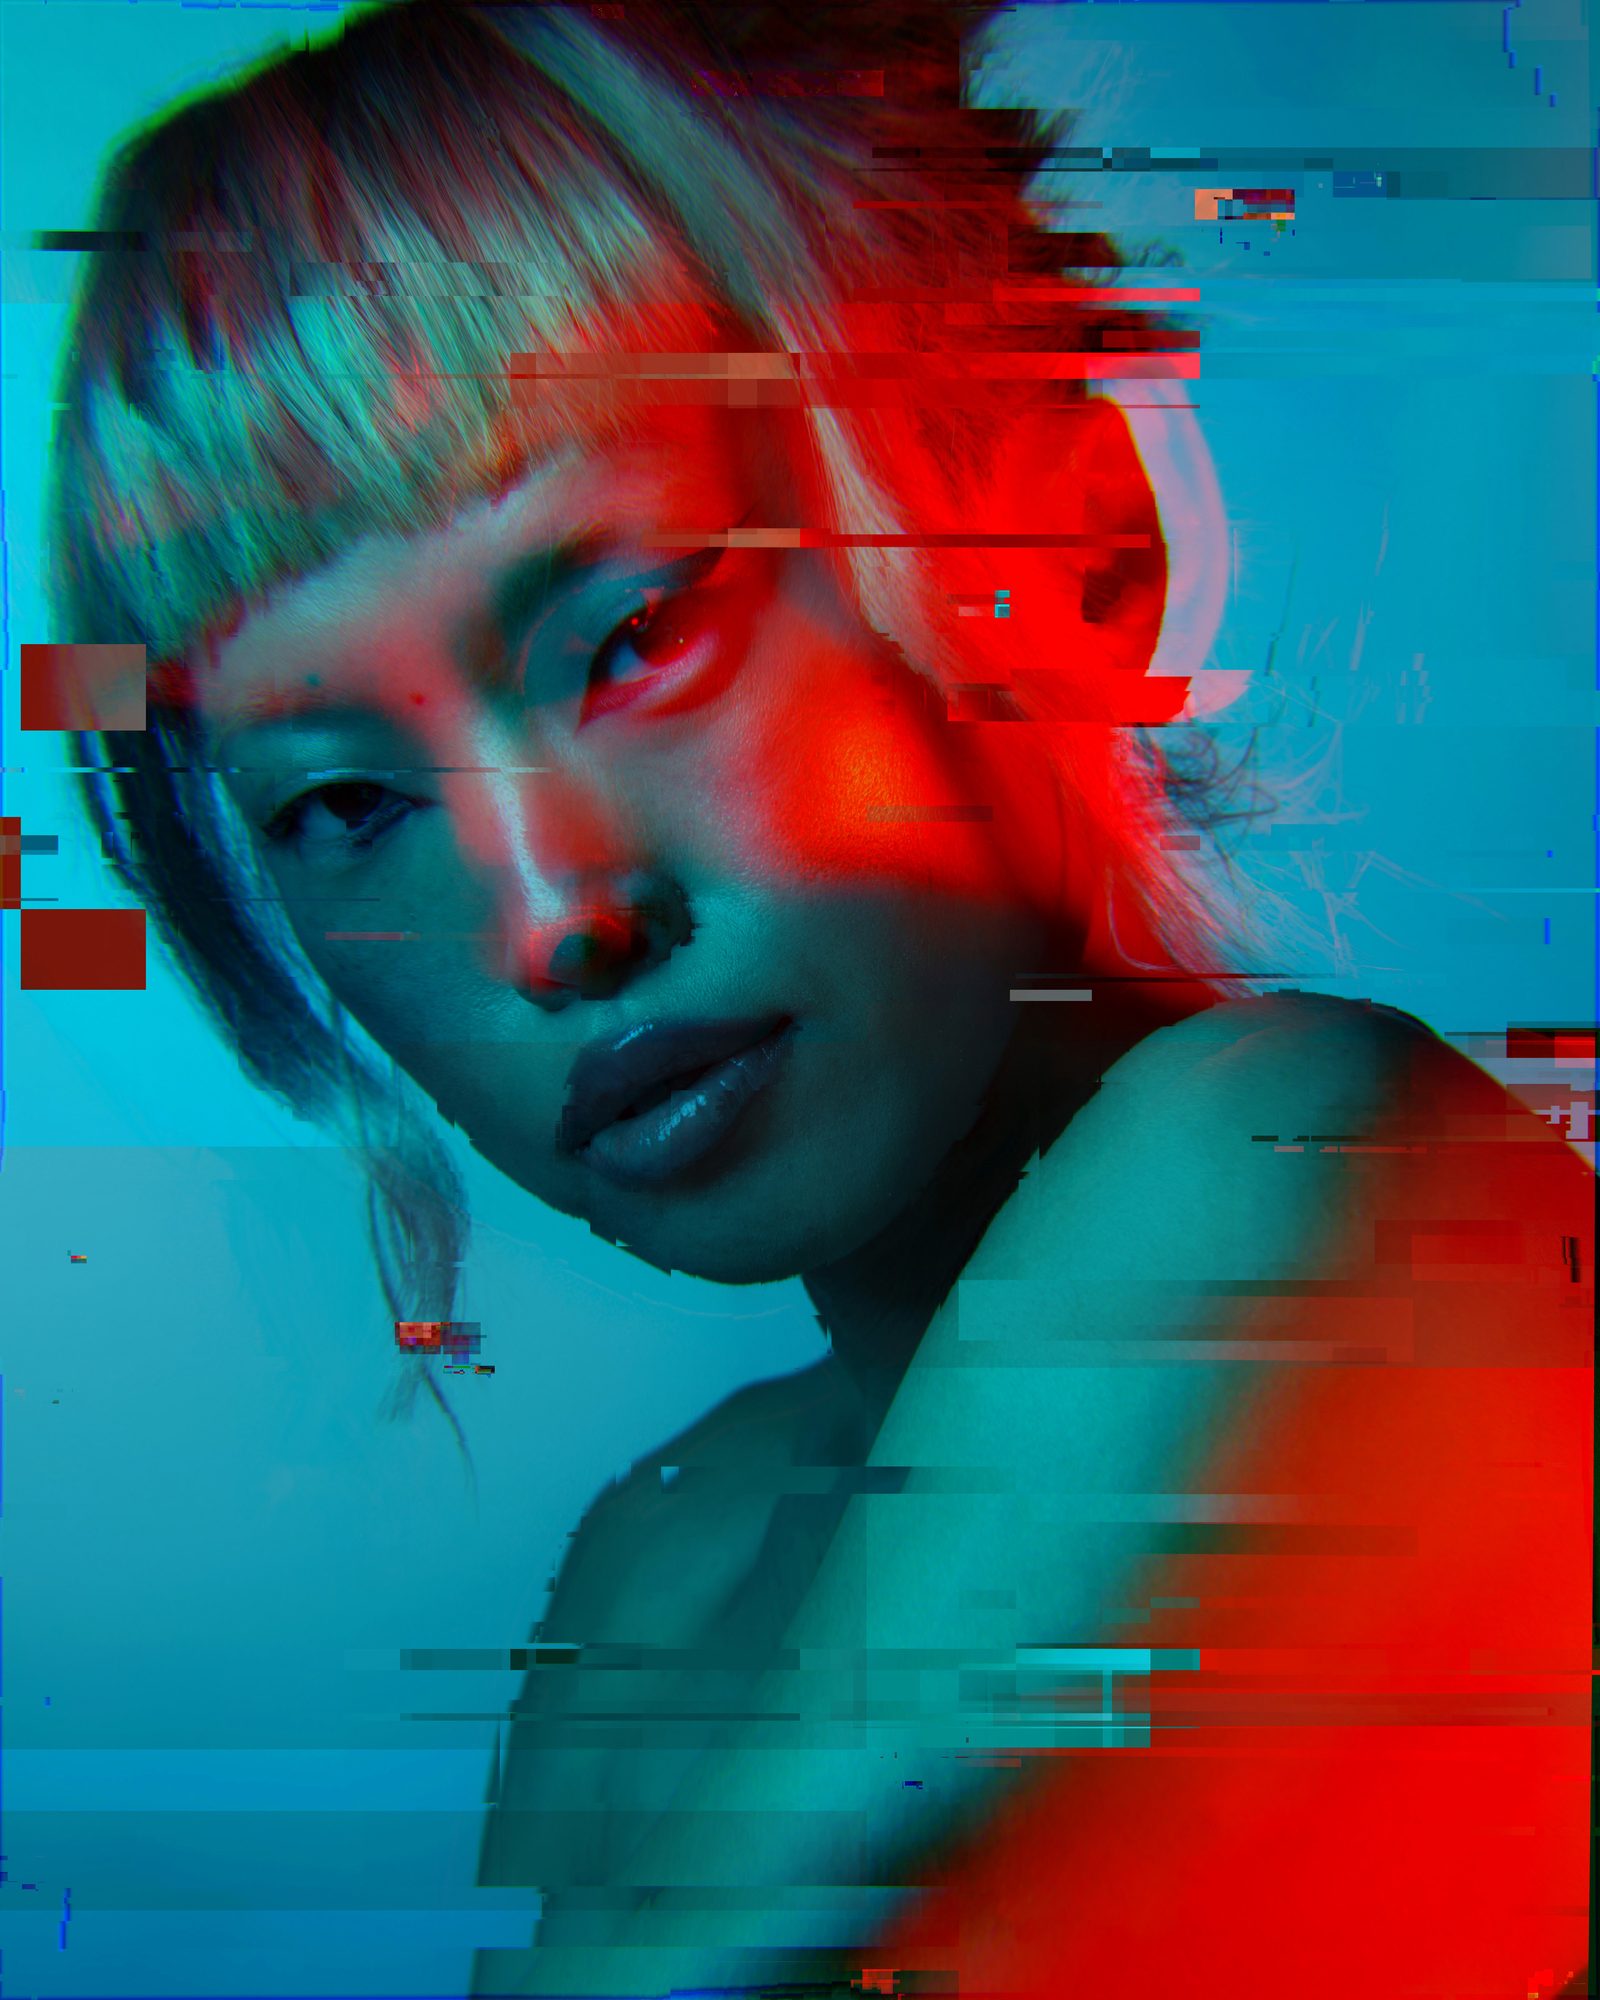
Using this tool, I am able to do some pretty dramatic edits to the images that will bring the concept together. I started with some strong Chromatic Aberration edits, to push the specific color channels off from each other. This technique involves some trial and error, as you want to add visual effects to the image without losing a lot of sharpness. Once I got the desired effect on that front, I then decided that the images needed some digital damage done to them – almost like they were stored on a corrupt hard drive. One technique for this could be to bang your hard drive on the counter a few times, but I instead chose to use the Digital Damage effect on the images. After a few passes with this, I felt the images were complete. Below are the final images with all the effects added. Let me know what you think!

That is the basic start-to-finish of this shoot, which I ended up being really happy with. Thank you to the model, Angel, and the makeup artist, Vlada, for being patient during this concept development. Do you have a shoot that you’ve recently done that you’re proud of? Feel free to share the images in the comments below.

1 Comment
Jarno.S Kuvaajankulma ·
Zach, this blog post is a masterclass in creativity and lighting technique! As a professional photographer myself, I greatly admire the way you’ve broken down the complexities of working with gels into an approachable and inspiring guide. The attention to detail in your pre-production process, from selecting the perfect color palette to lighting tests, demonstrates a true commitment to the craft.
Your use of consistent LED lighting is a fantastic choice, and I love how you shared the specific equipment you used—it’s incredibly helpful for readers looking to replicate your results. The transformation of your images through Photoshop and the addition of those futuristic effects showcase not only your technical skill but also your artistic vision. The final images are breathtakingly unique, capturing the neo-noir vibe perfectly!
This write-up is not just educational but also a source of motivation for photographers exploring the creative potential of gels and lighting. Thank you for sharing your expertise and inspiring us to push the boundaries of our work! Keep creating and teaching—your passion is contagious.
https://www.kuvaajankulma.com/