Geek Articles
Assembling the C-4 Optics 4.9mm f3.5 Hyperfisheye Prototype
You guys have watched us gut a lot of lenses and cameras over the years. So I thought it would be fun for you to see us put one together from scratch. Compared to many of the lenses we’ve taken apart, this is all mechanical lens is rather simple: no focus motors, image stabilizers, etc. But even a simple lens is a very complex structure. This post will probably give you a good idea of how much mechanical design is required to make even a very basic lens.
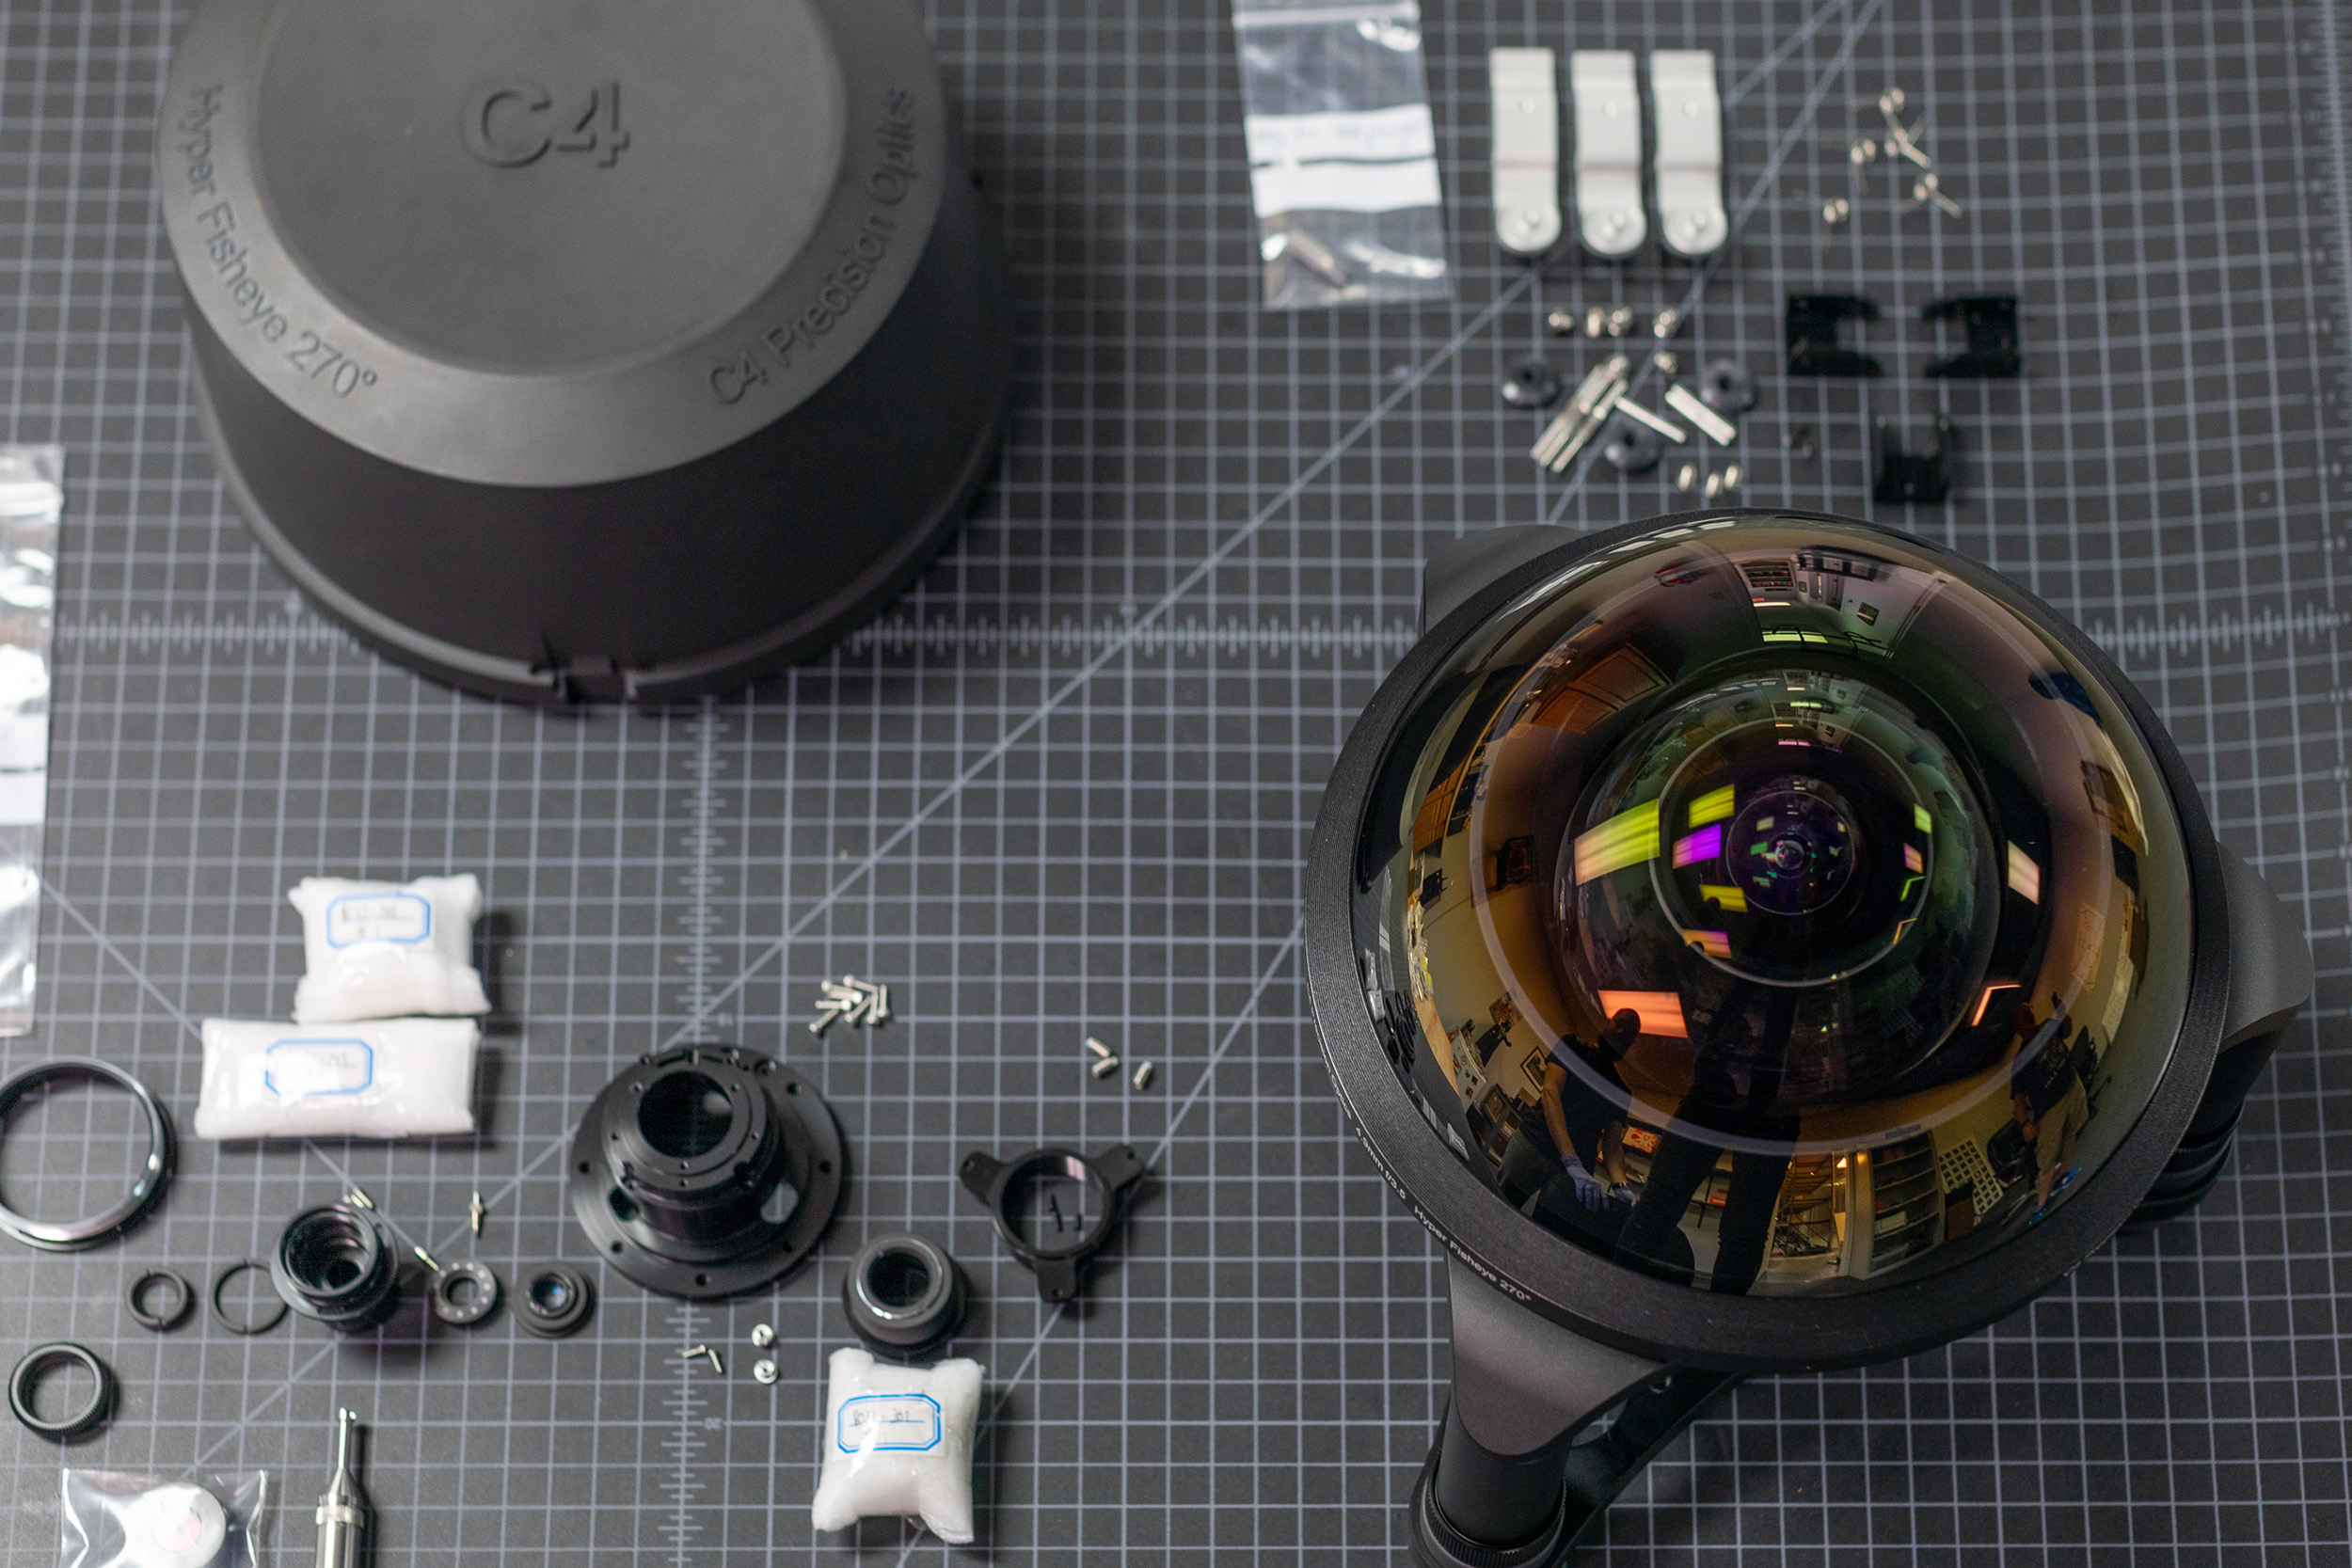
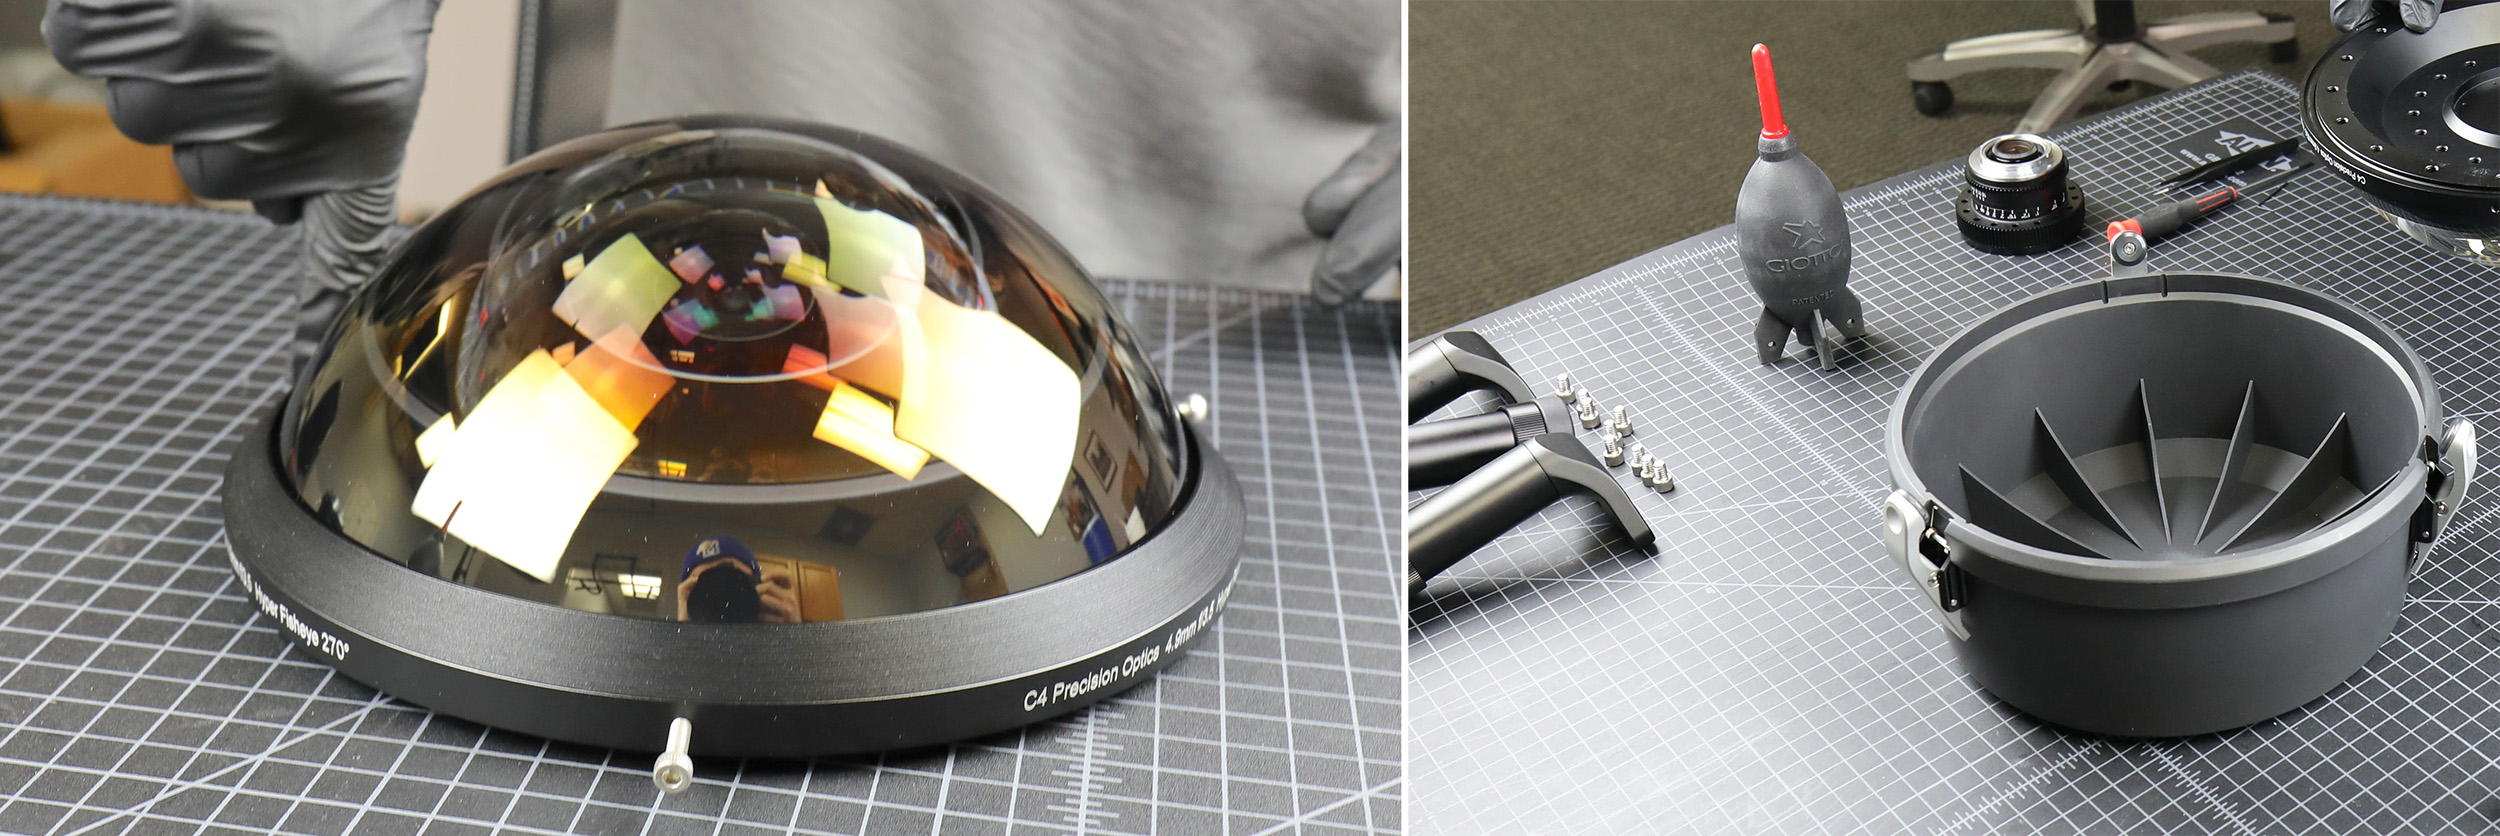
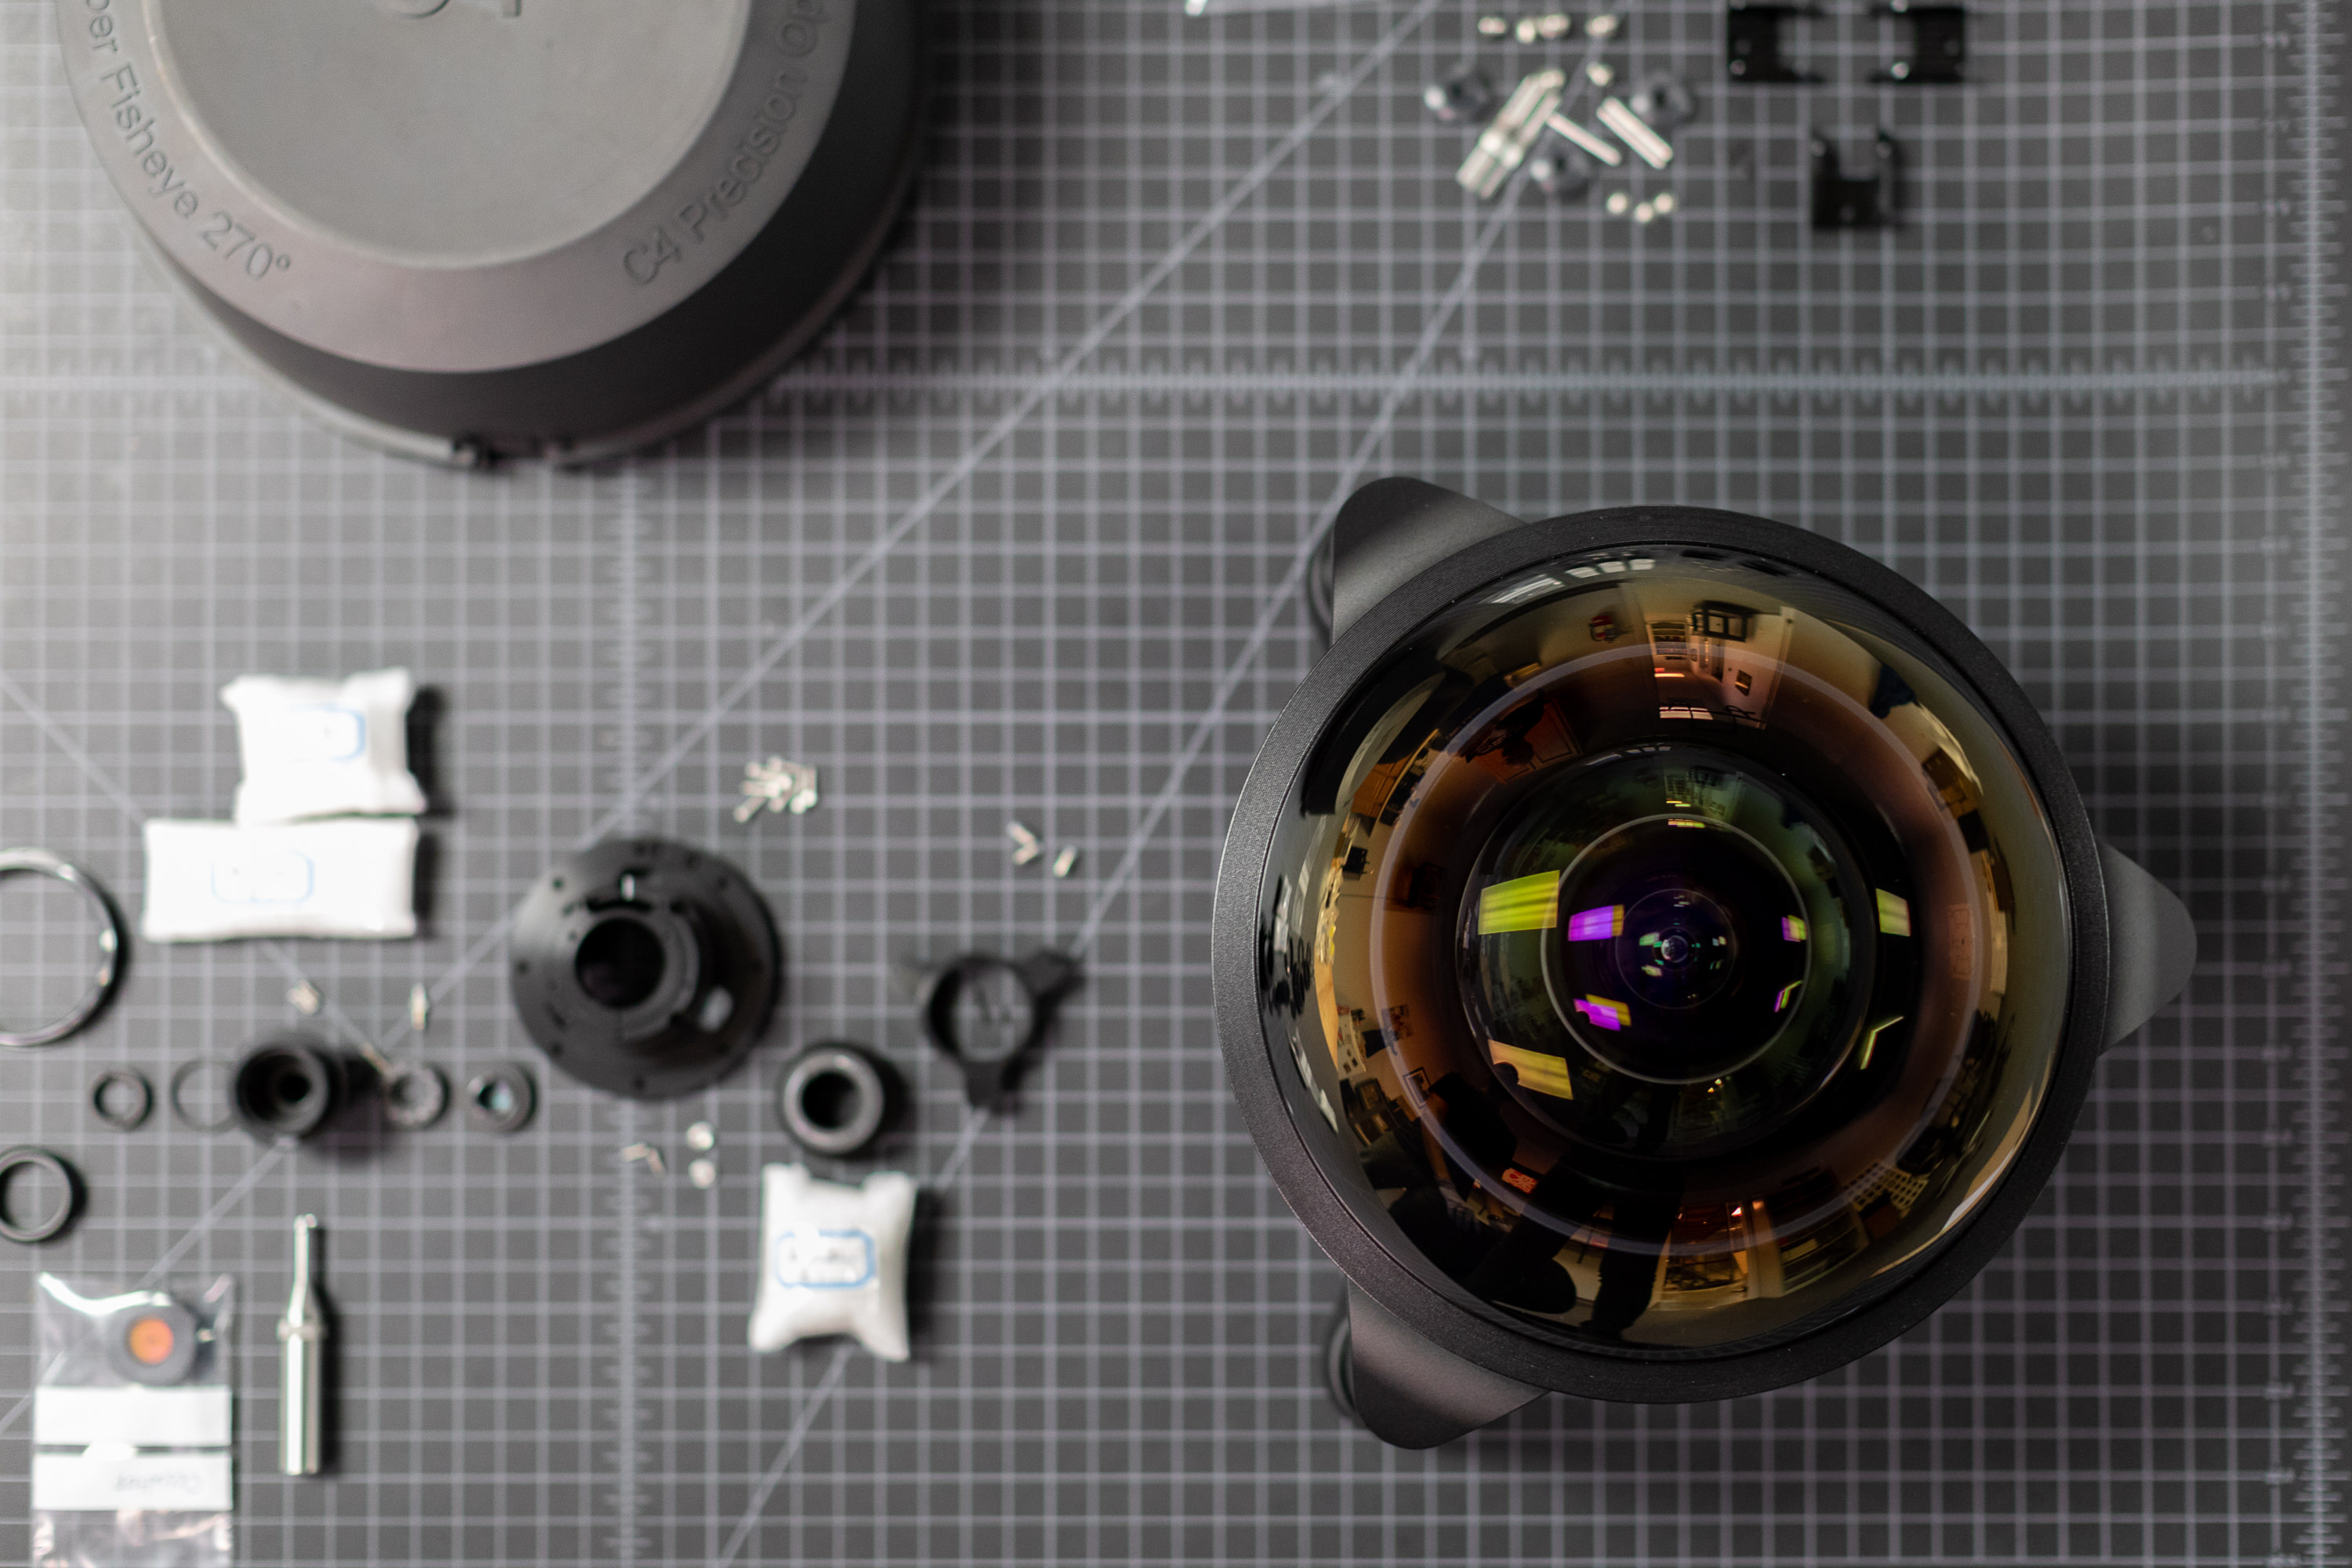
The lens is also unique; it’s a prototype C-4 Optics 4.9mm f/3.5 circular fisheye. It’s a massive lens giving a 270-degree field of view, meant for immersive video and specialty shots. To give you an idea of what 270 degrees means, the lens sees behind itself. An ultra-wide 15mm fisheye lens gives a 180-degree field of view while an 11mm rectilinear lens is less than 120 degrees.
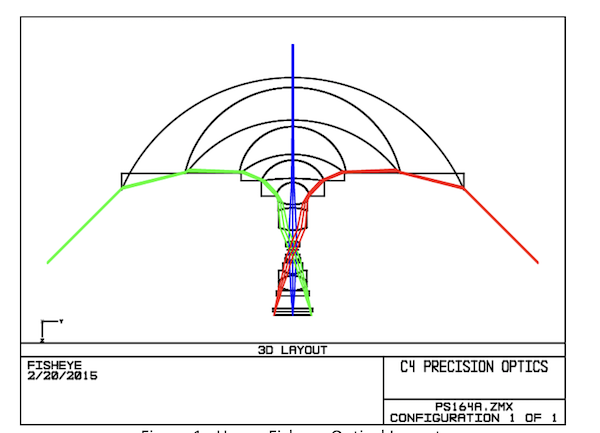
Image Courtesy C-4 Precision Optics, 2019
The closest thing that’s existed to this is the 1970s classic Nikkor 6mm f/2.8 fisheye, which gave a 220-degree field of view, weighed 5 kg, and can be rarely found for $100,000 and up these days. The C-4 optics lens weighs every bit as much as the Nikkor, but should be far sharper, have less distortion and vignetting, and cost somewhat less than those do today. (‘Somewhat’ being defined as ‘less than half’.)
So let’s put stuff together!
Potting Elements
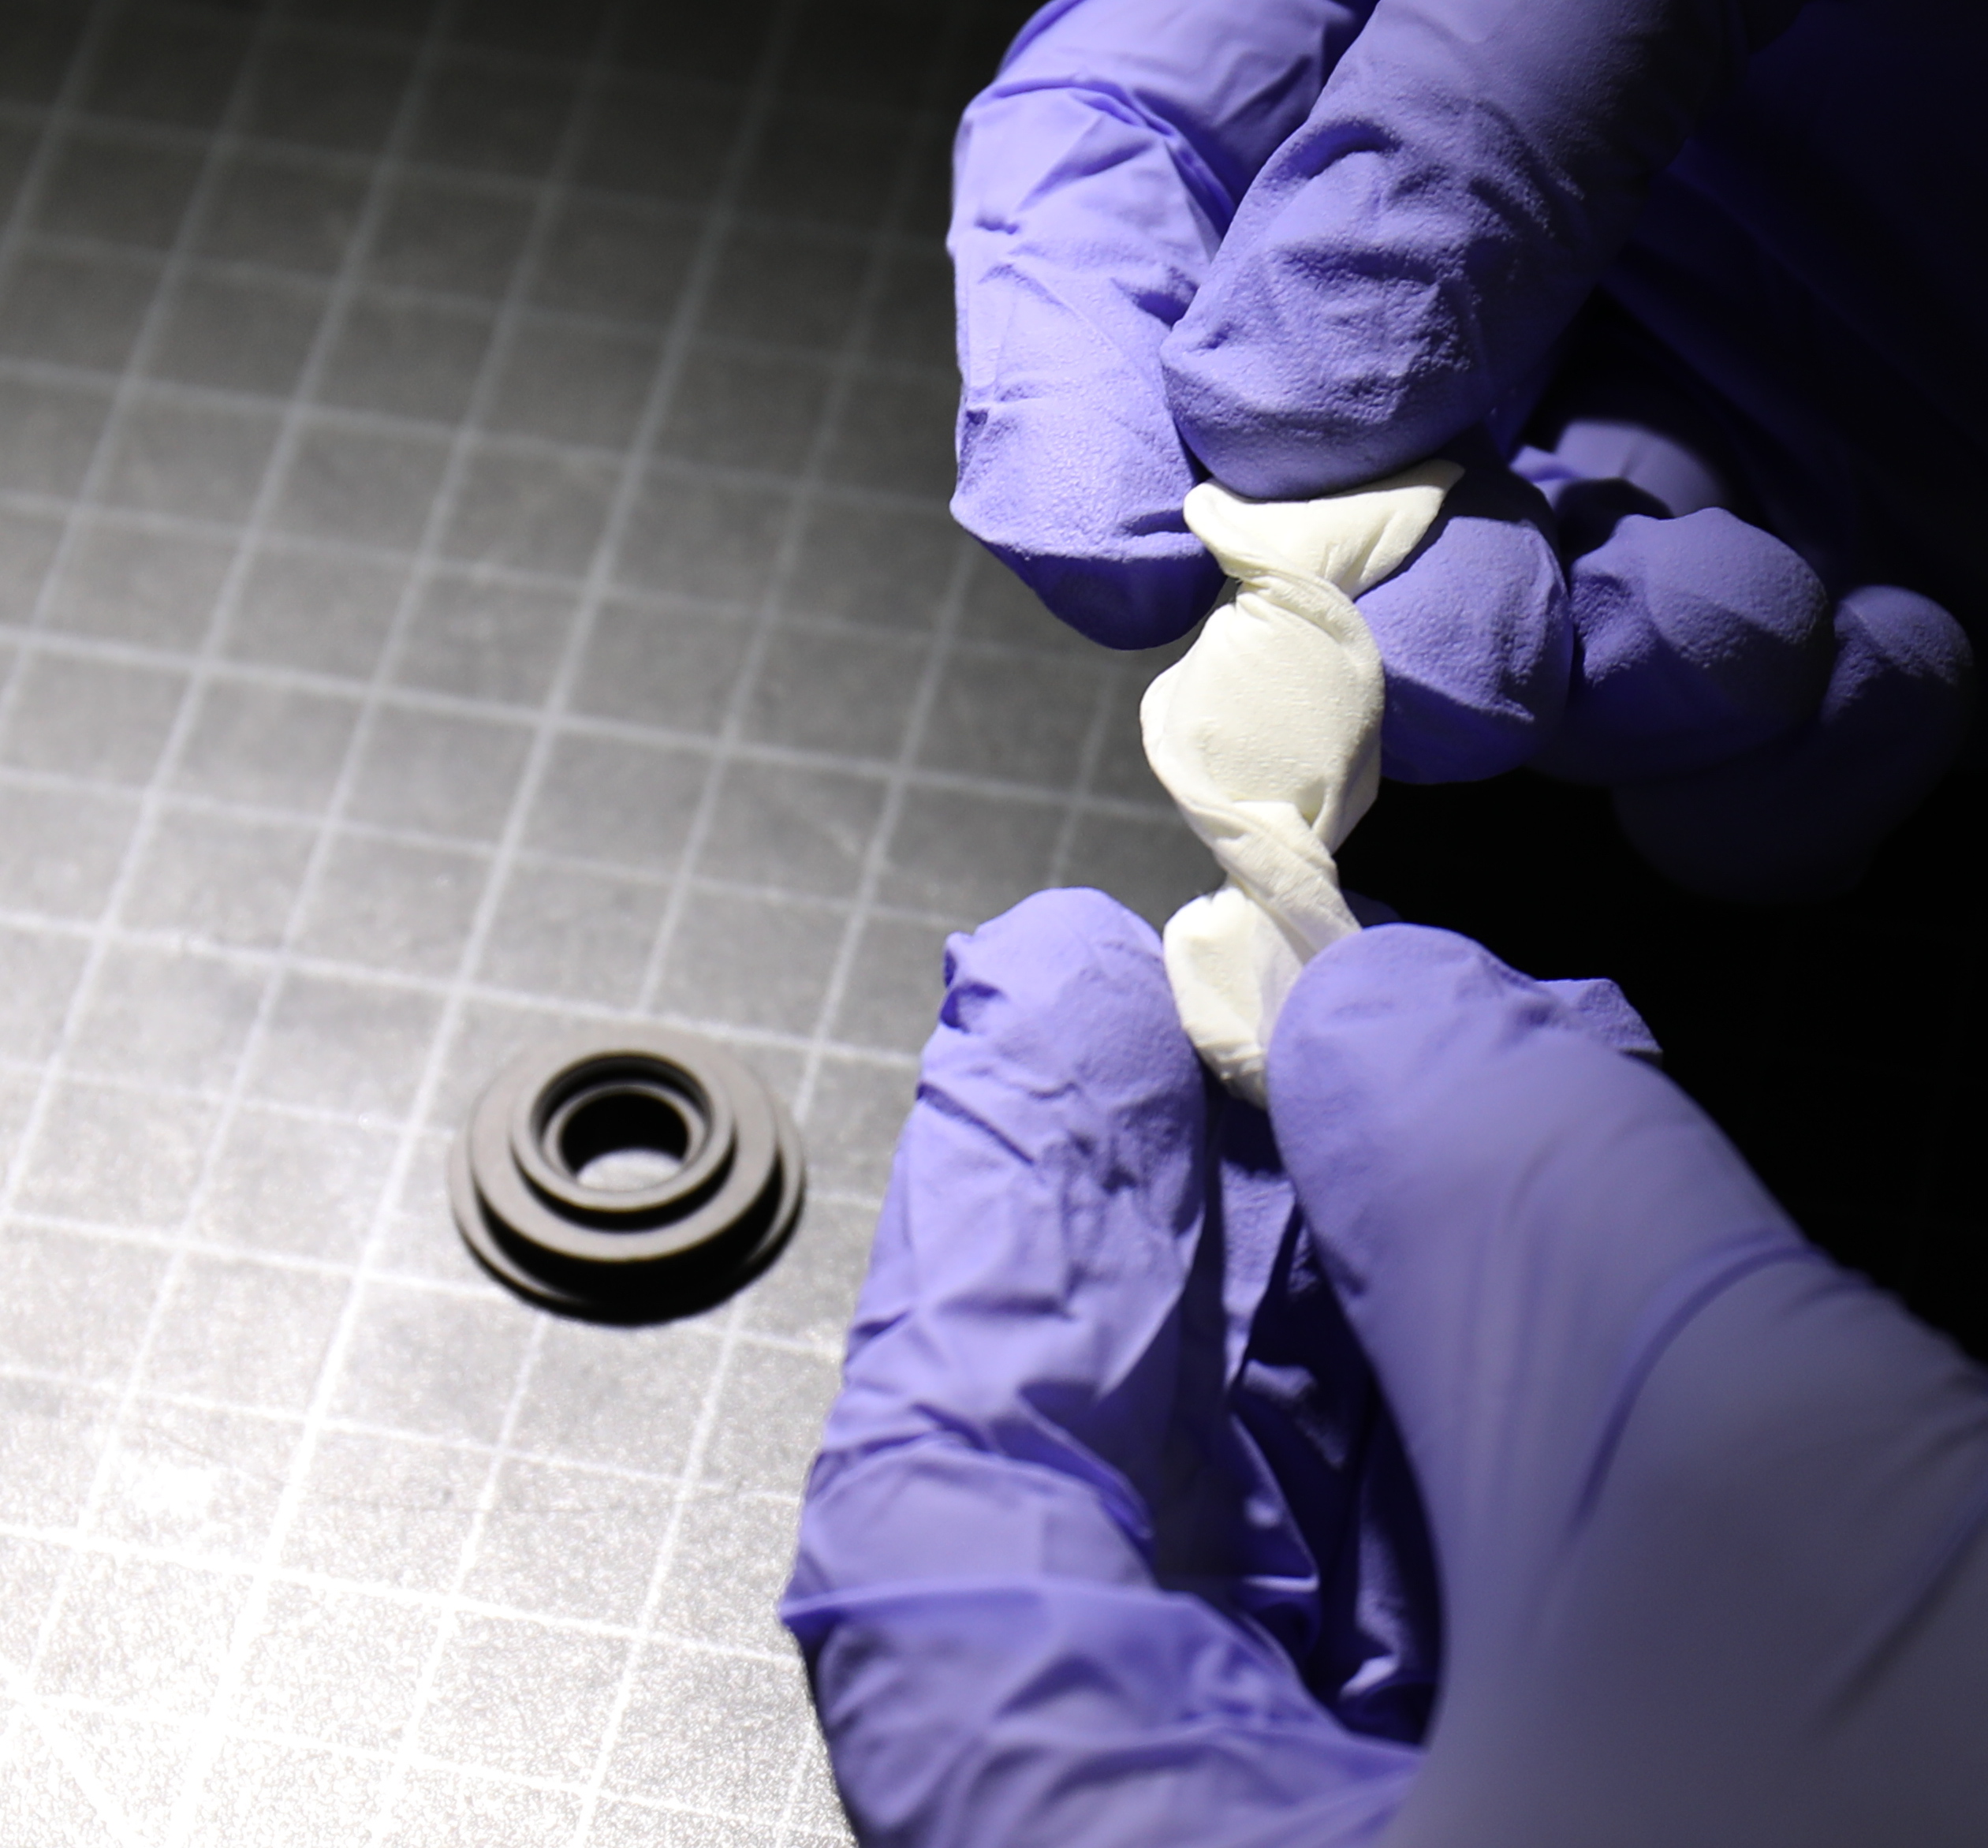
Several of the elements need to be potted (glued) into their metal holders before we begin assembly, then let dry for 24 hours before we really get started. This requires a steady hand, which is why I write the posts and take the pictures while Aaron does all the work.
We start with the smallest element in the lens, a tiny one that sits right by the aperture when assembled.
C-4 Optics, 2019

C-4 Optics, 2019
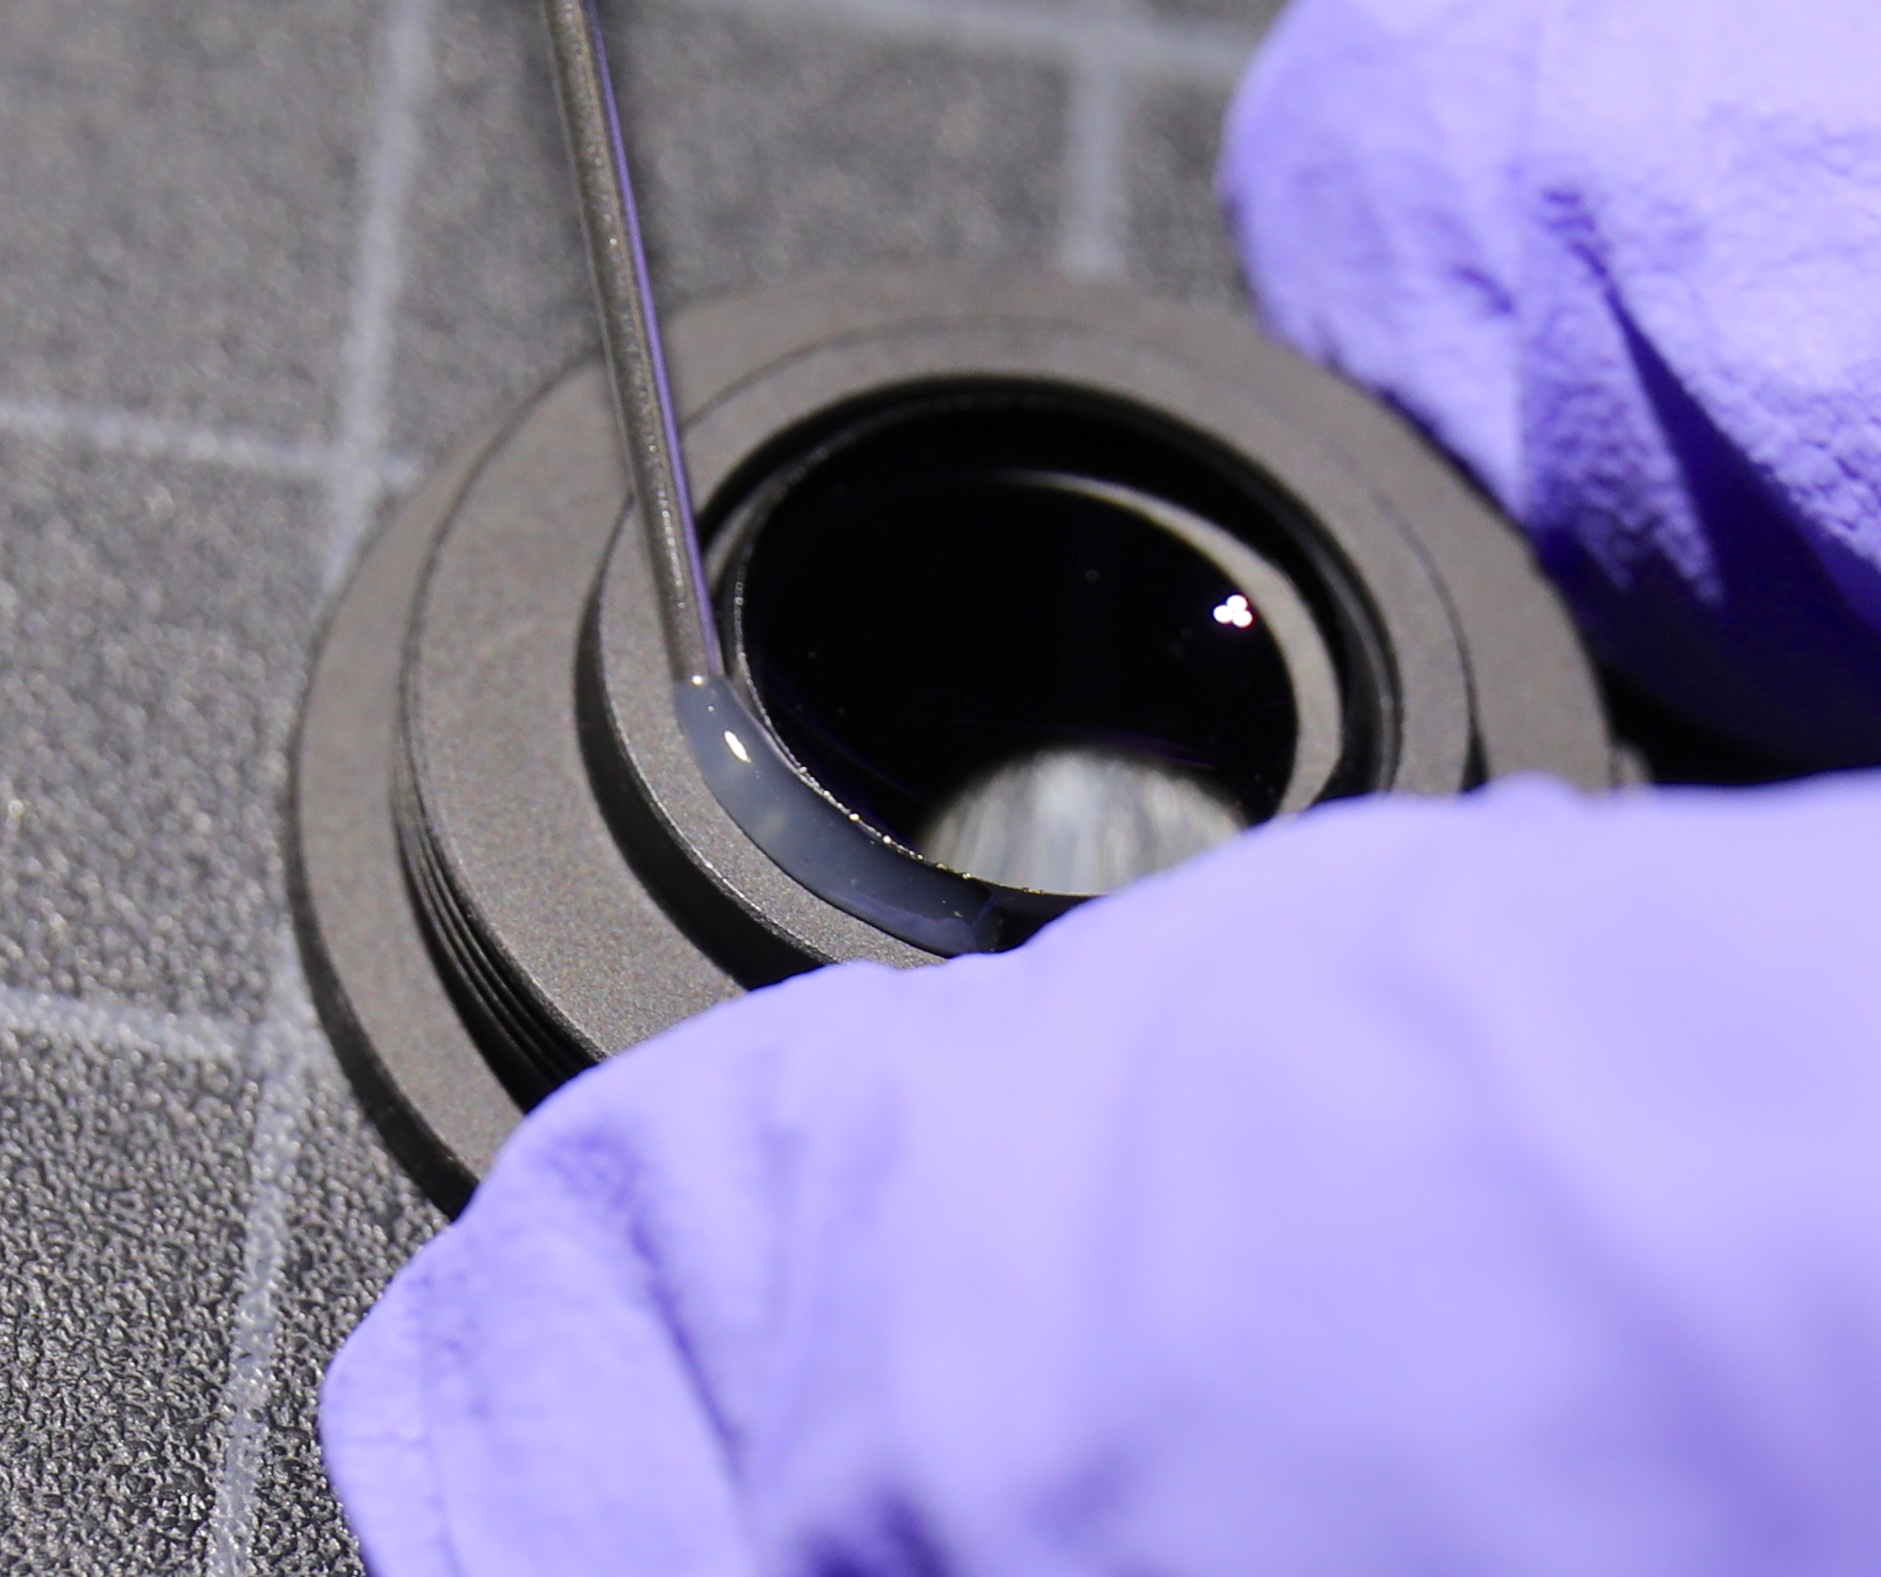
Once the lens is placed in position, a syringe full of potting cement . . . .
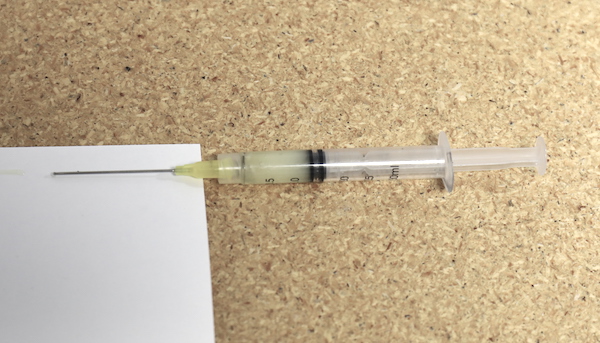
is used to lay a bead around the edge of the glass, cementing it in place.
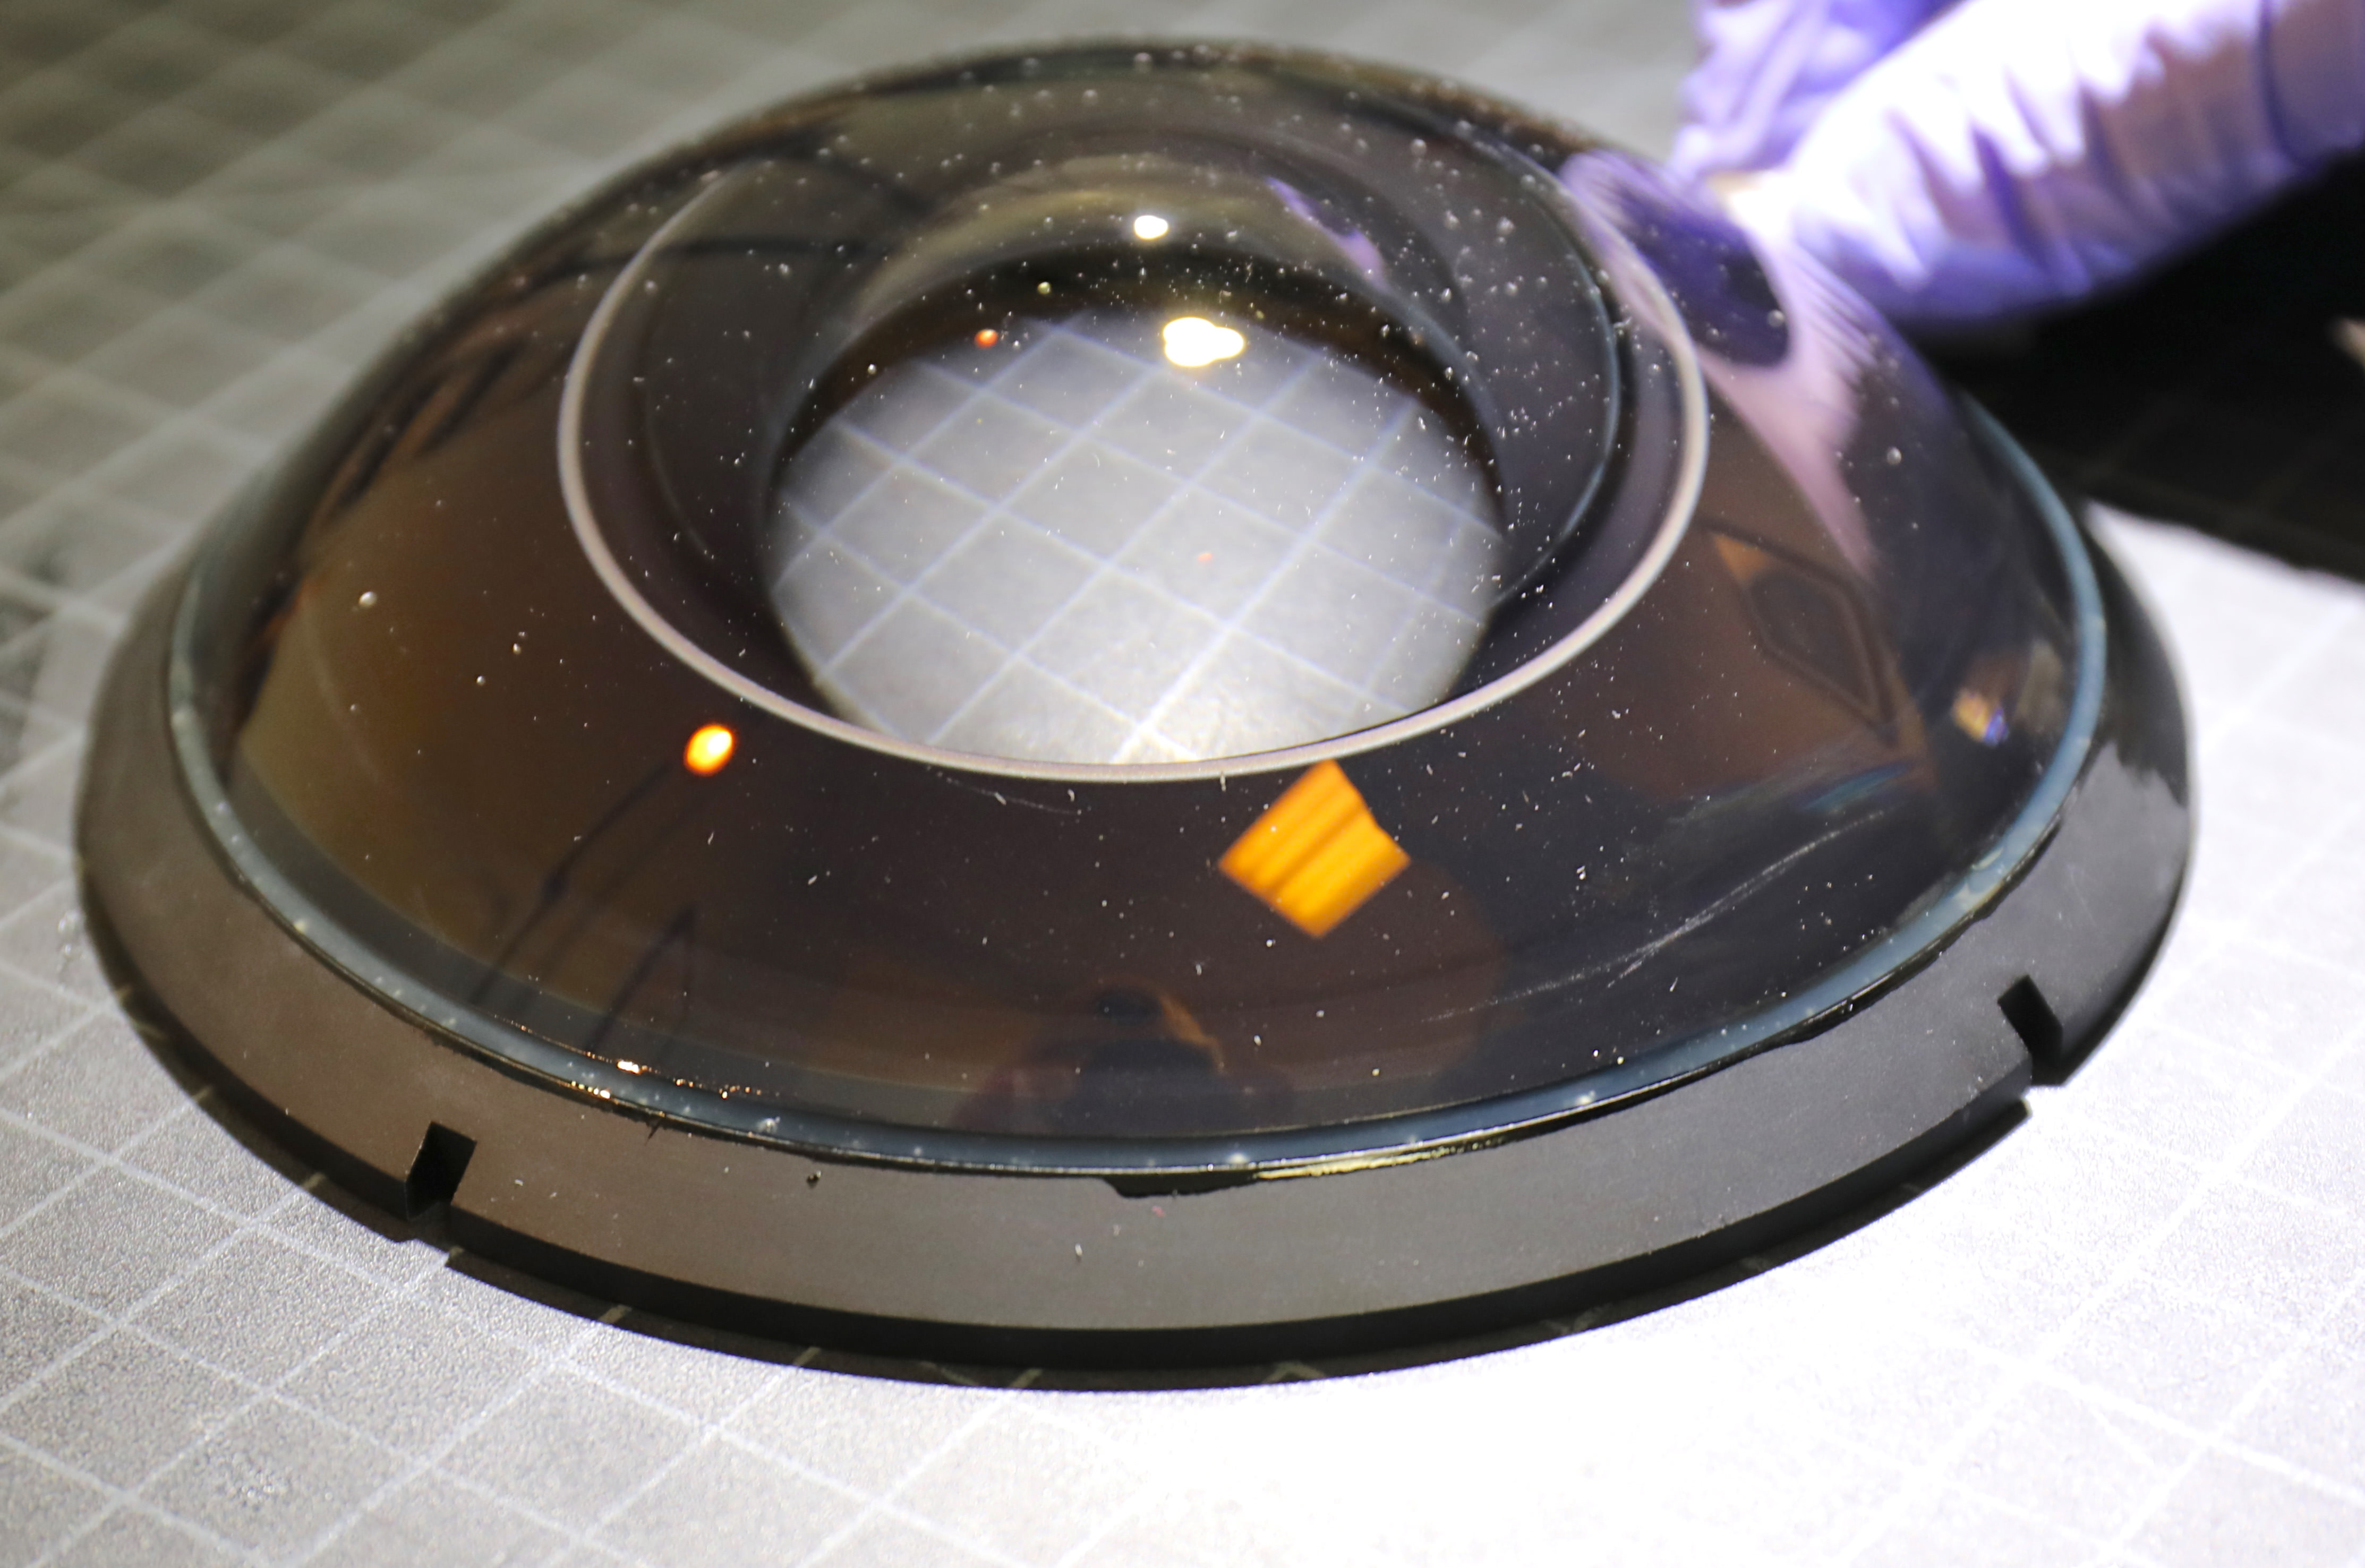
The much larger second element also gets potted. This is a two-syringe-worth-of-cement job. (Yes, everyone, we know it’s dusty. Cleaning comes during assembly.)
C-4 Optics, 2019
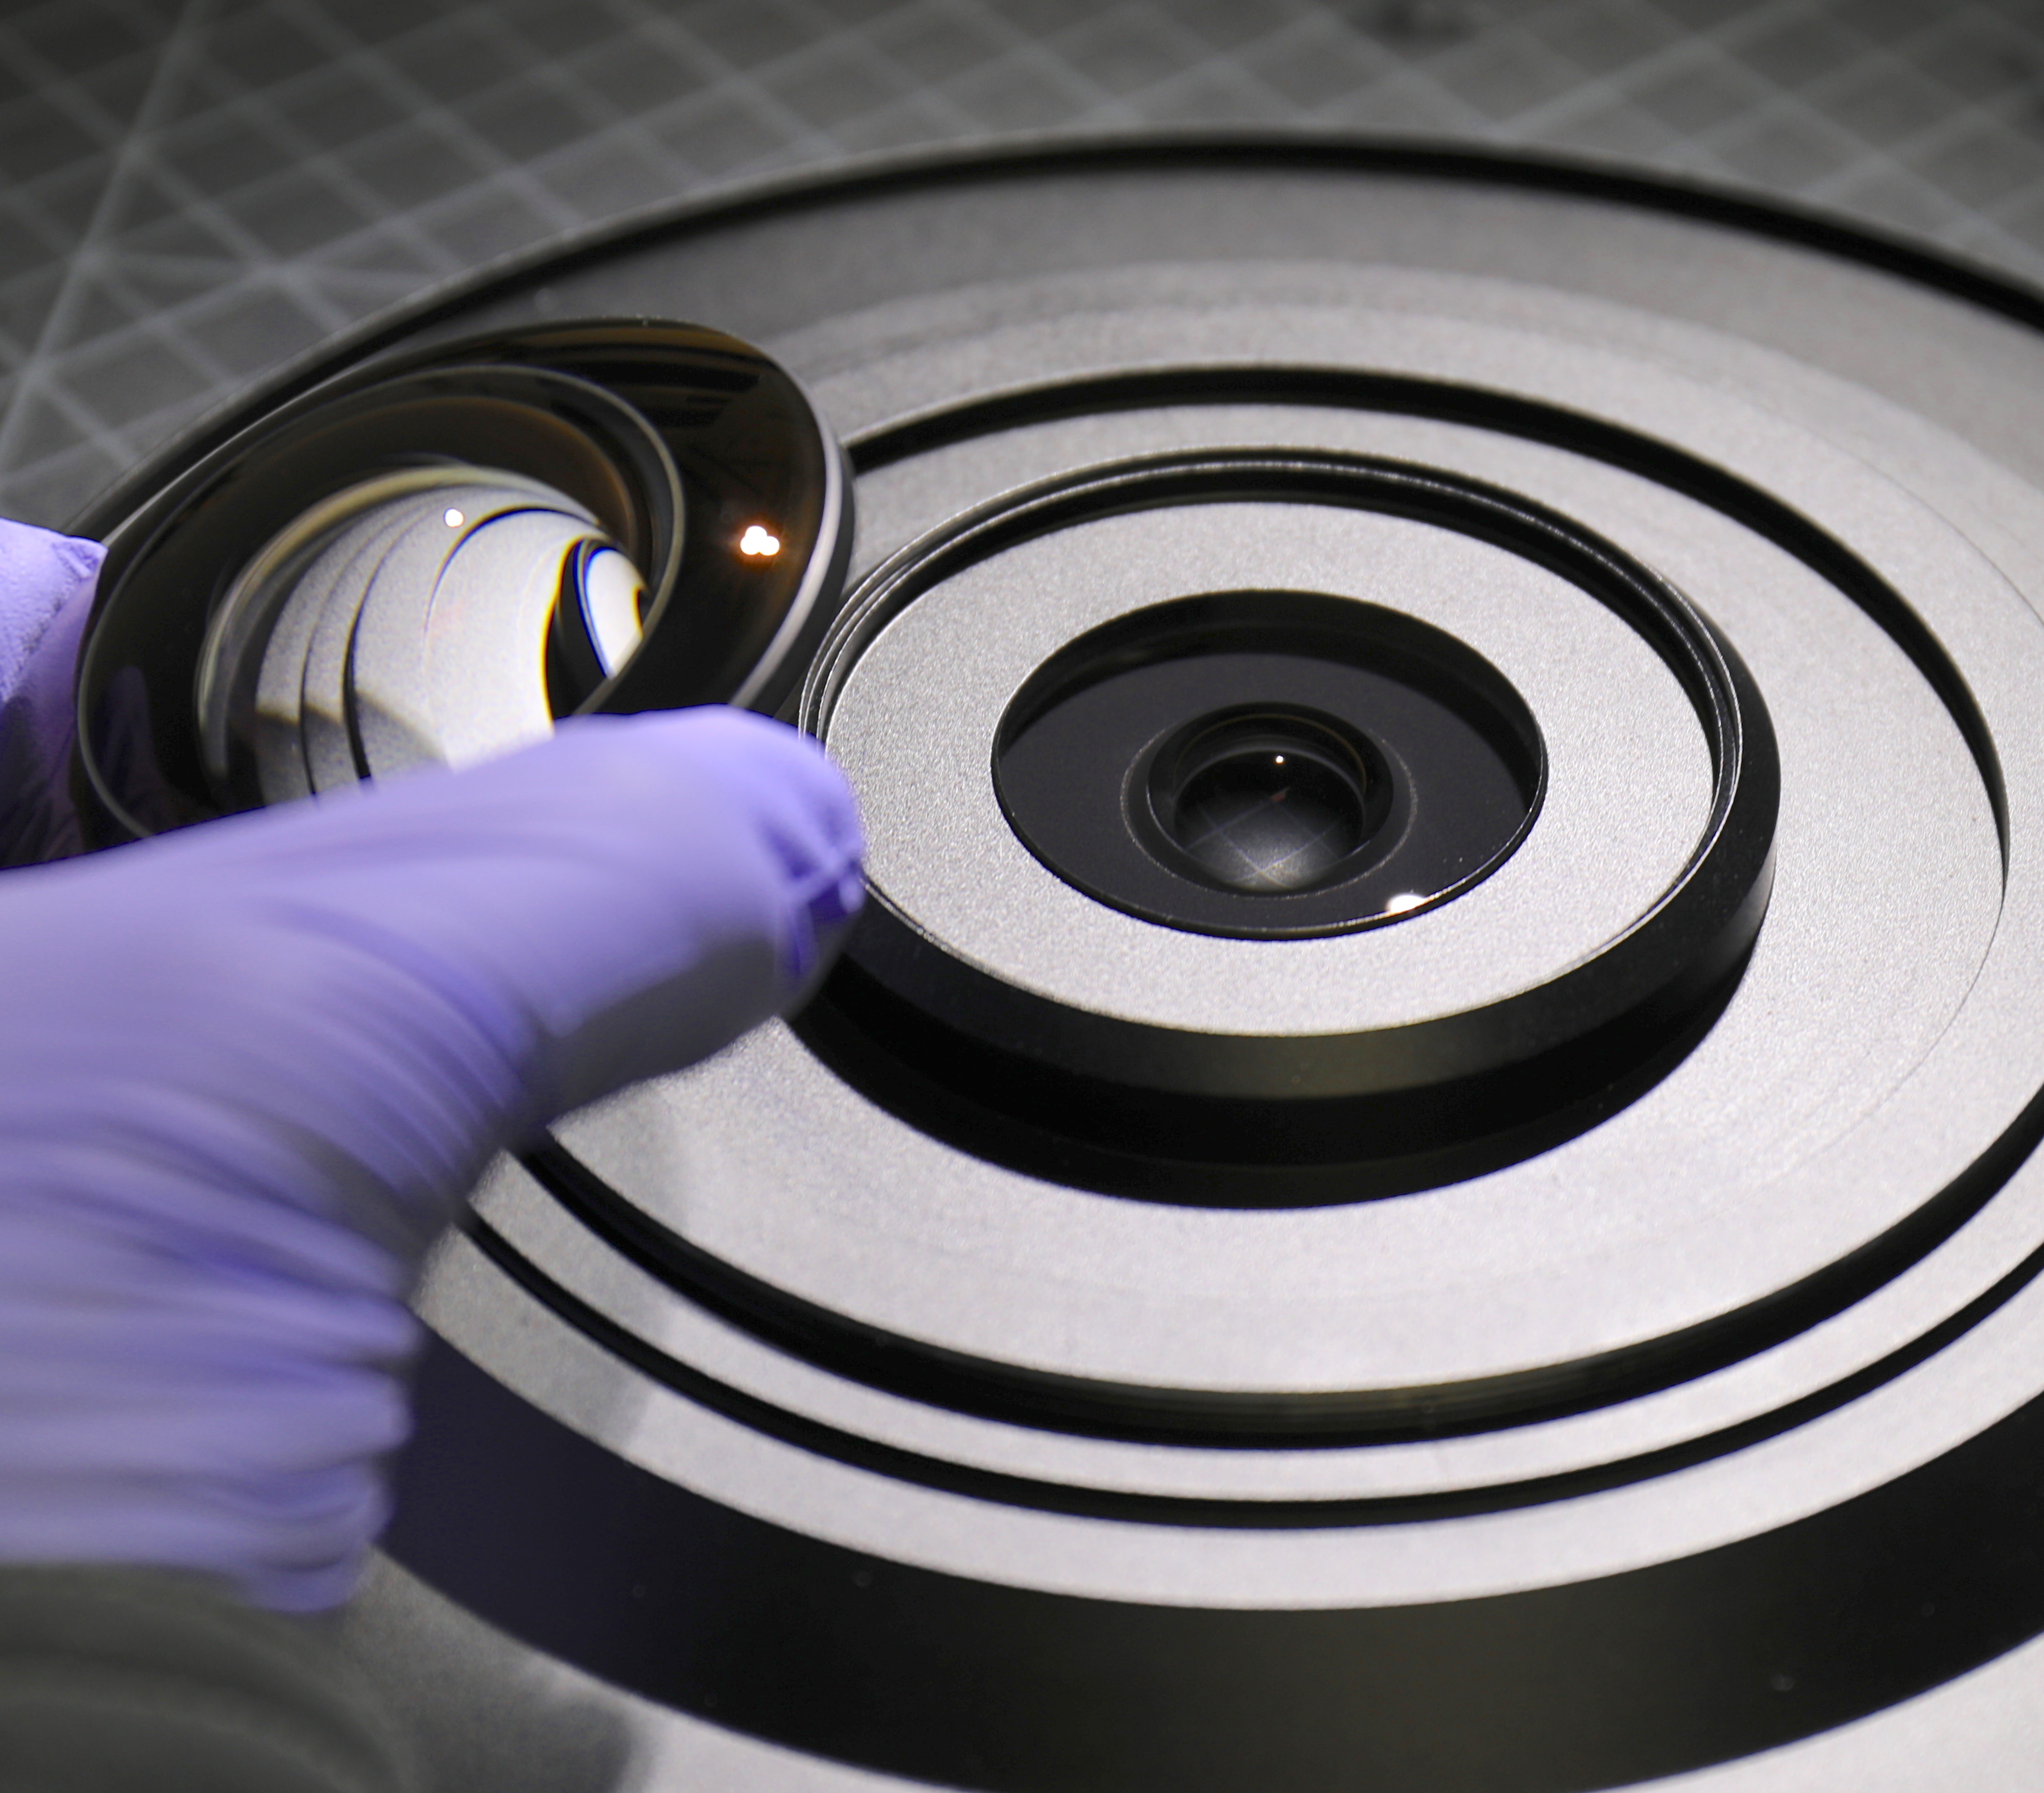
The third and fourth (already in place) elements both get potted into the main support plate.
C-4 Optics, 2019

C-4 Optics, 2019
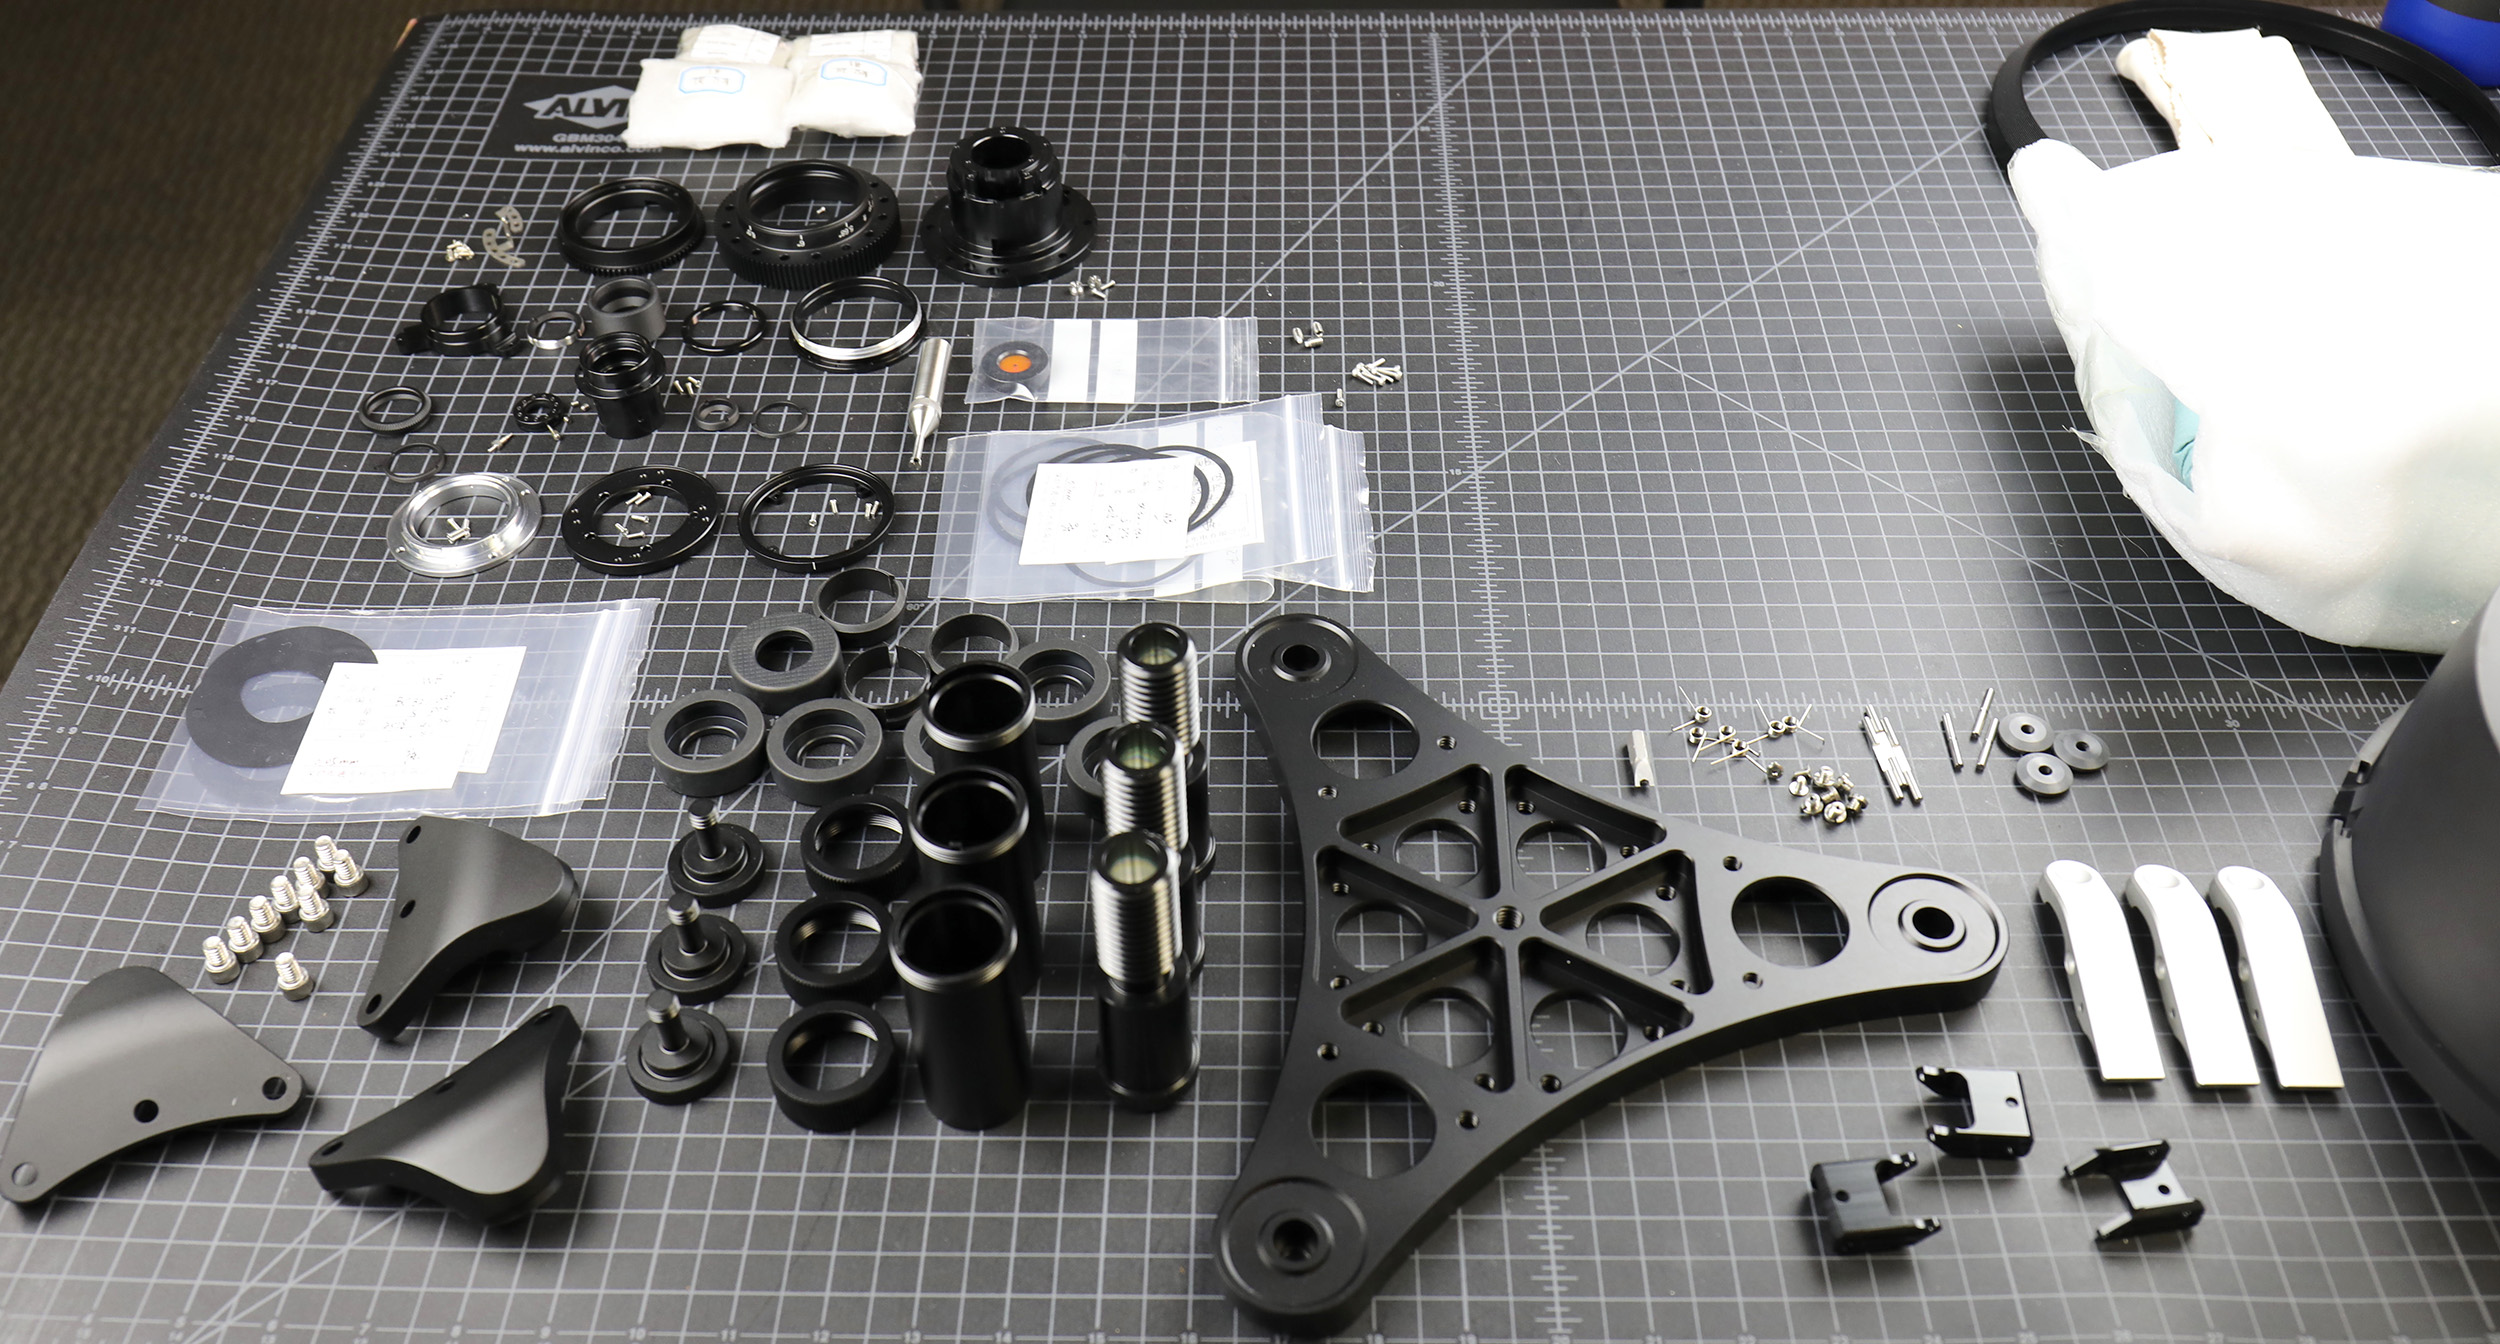
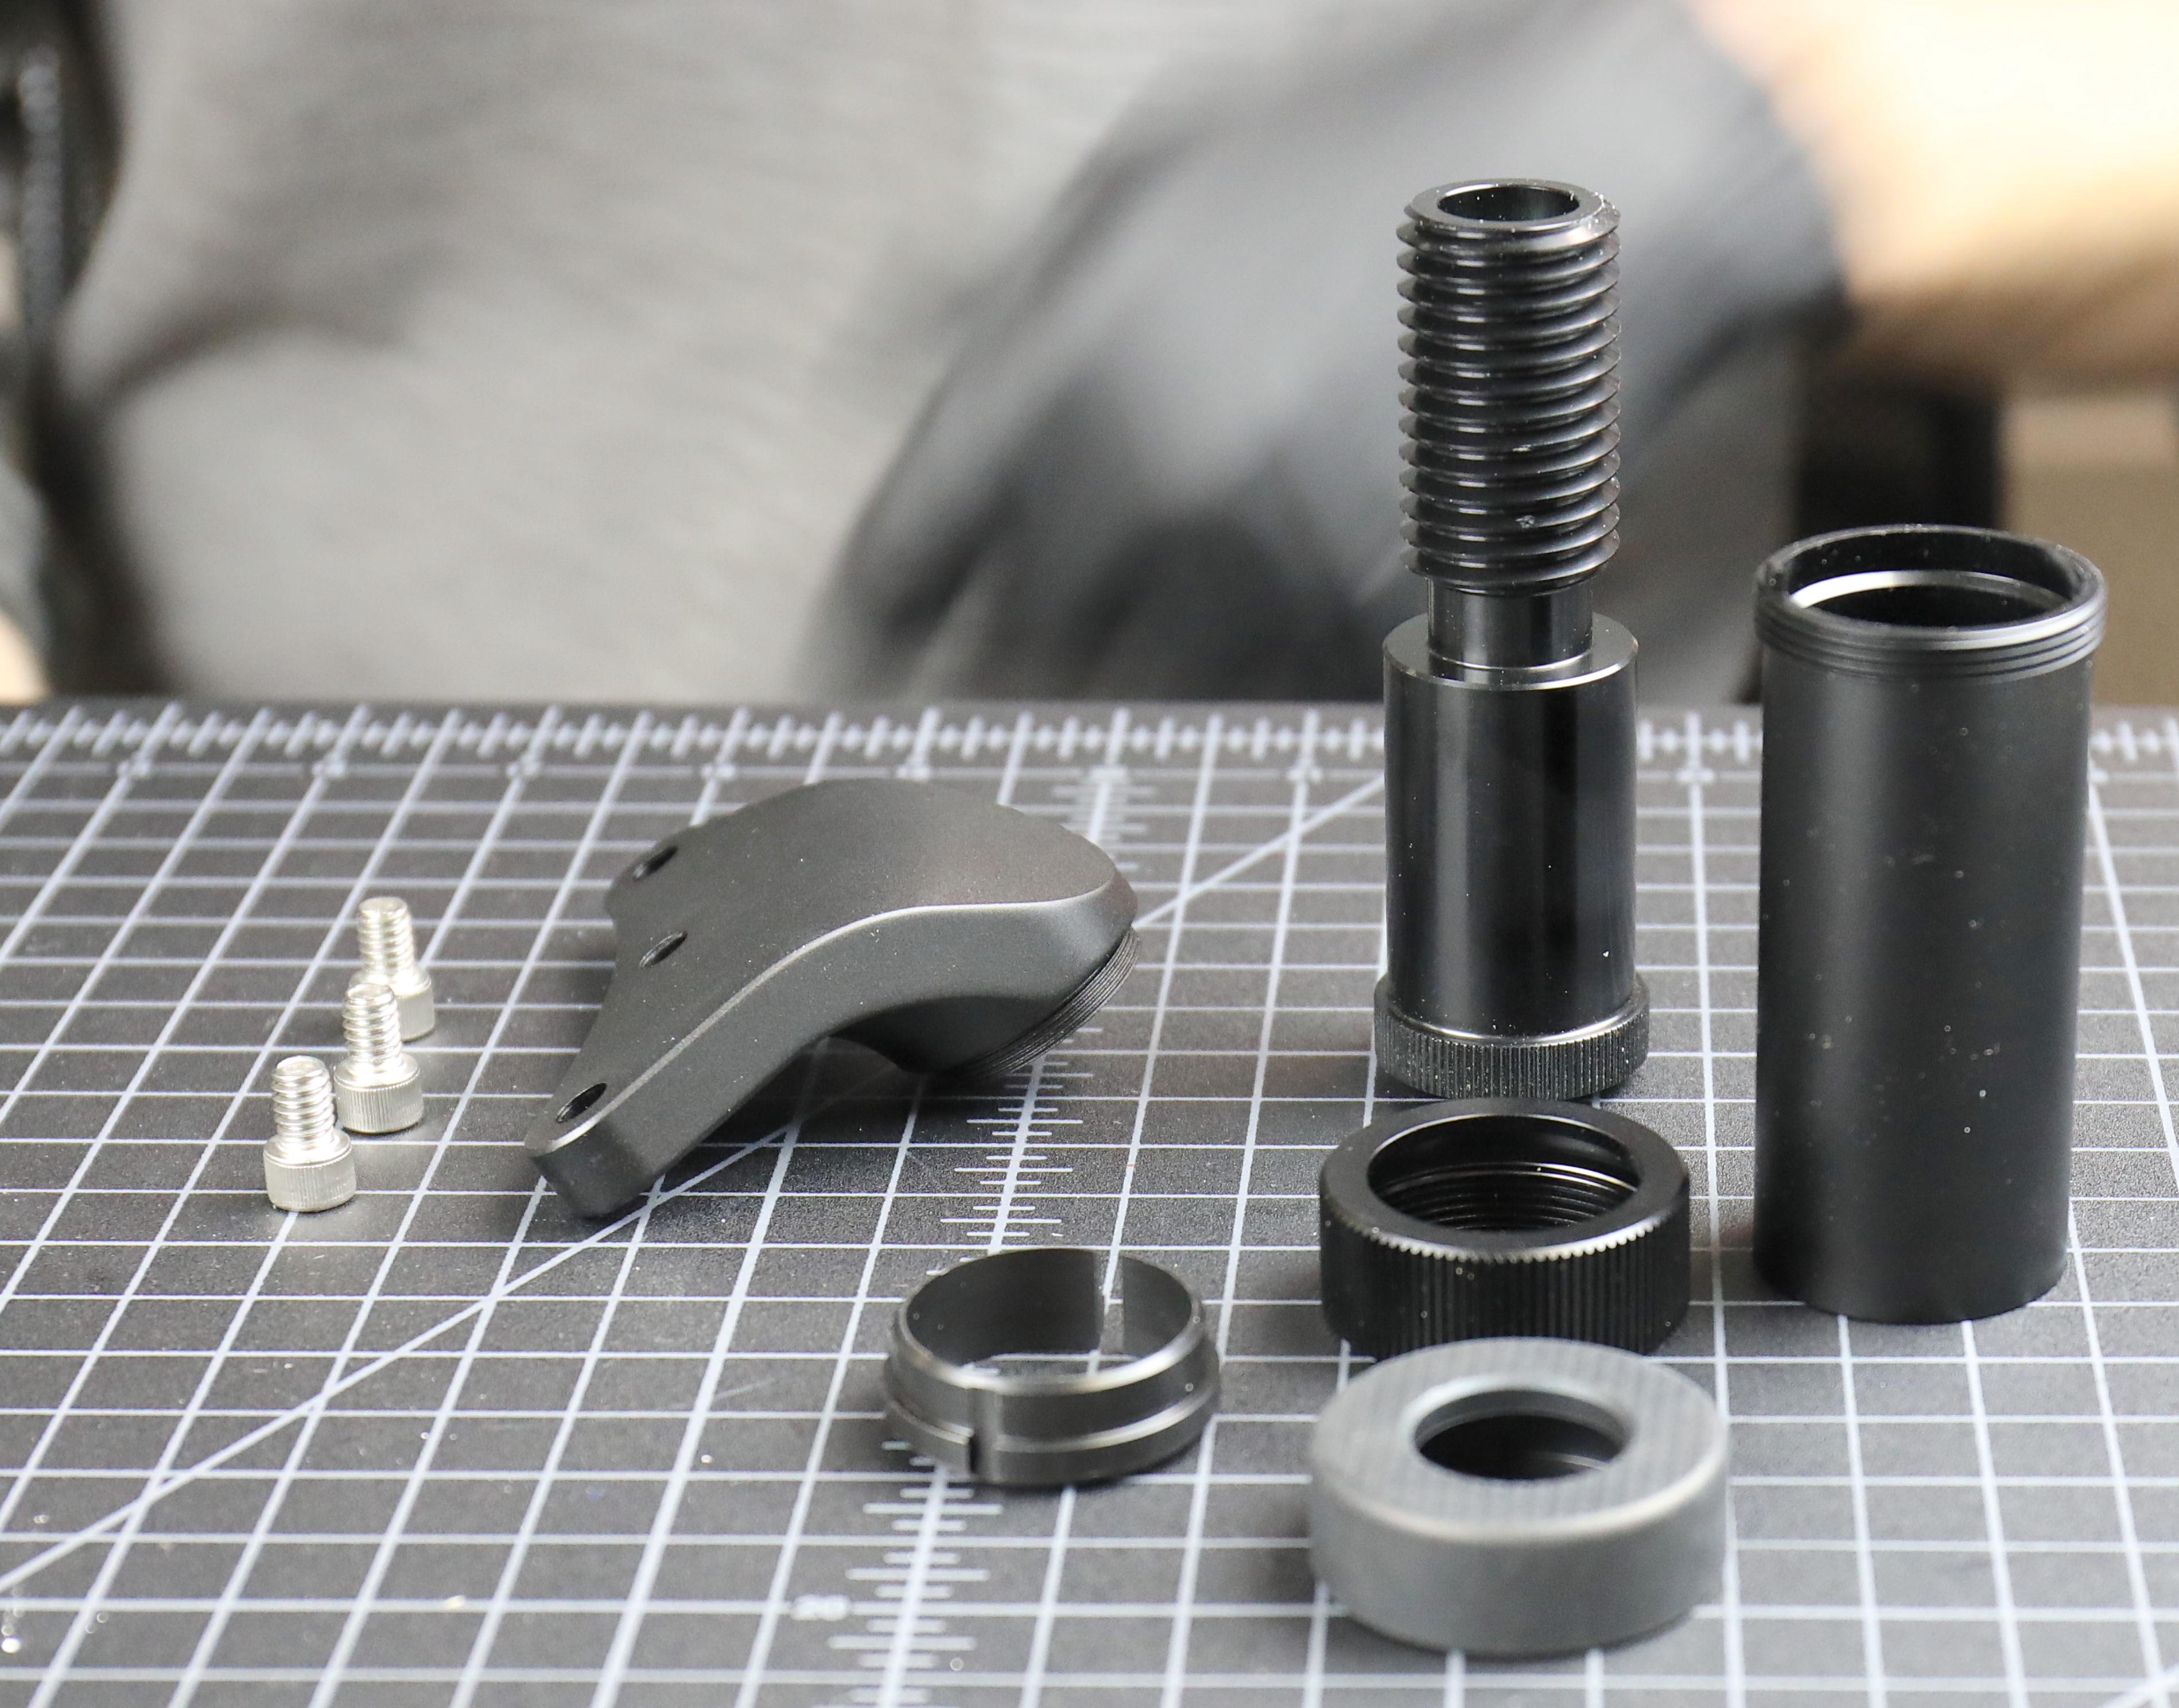
This all dries overnight and then we get on to the actual assembly. Aaron laid out the parts for the assembly before we quit for the day.
C-4 Optics, 2019
Base and Cap Assembly
You probably just think of these as accessories, but on a lens of this size, they are critical pieces that took up as much design effort as the lens itself. Actually, most of the parts you saw in the image above are for them.
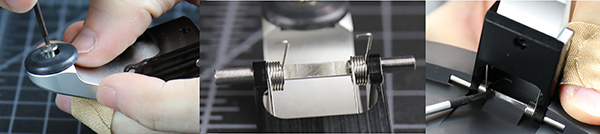
Each extending leg/handle is six pieces.
C-4 Optics, 2019
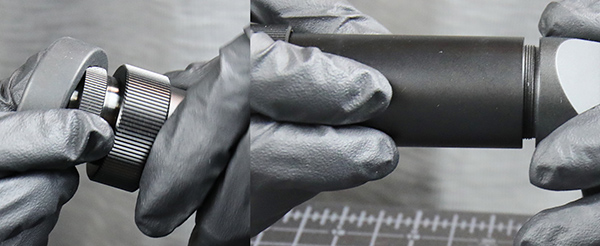
They go together like this: The inner leg threads get lubed, the lock ring inserted, and then the inner leg inserted into the barrel.

After handle’s locking ring is tightened down, the rubber foot gets put on and the leg screwed onto its mount.
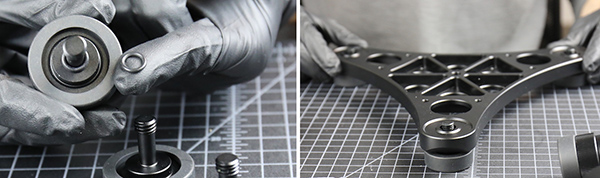
The bottom platform just needs its three adjustable feet covered, their rubber bumper added, and then screwed in.
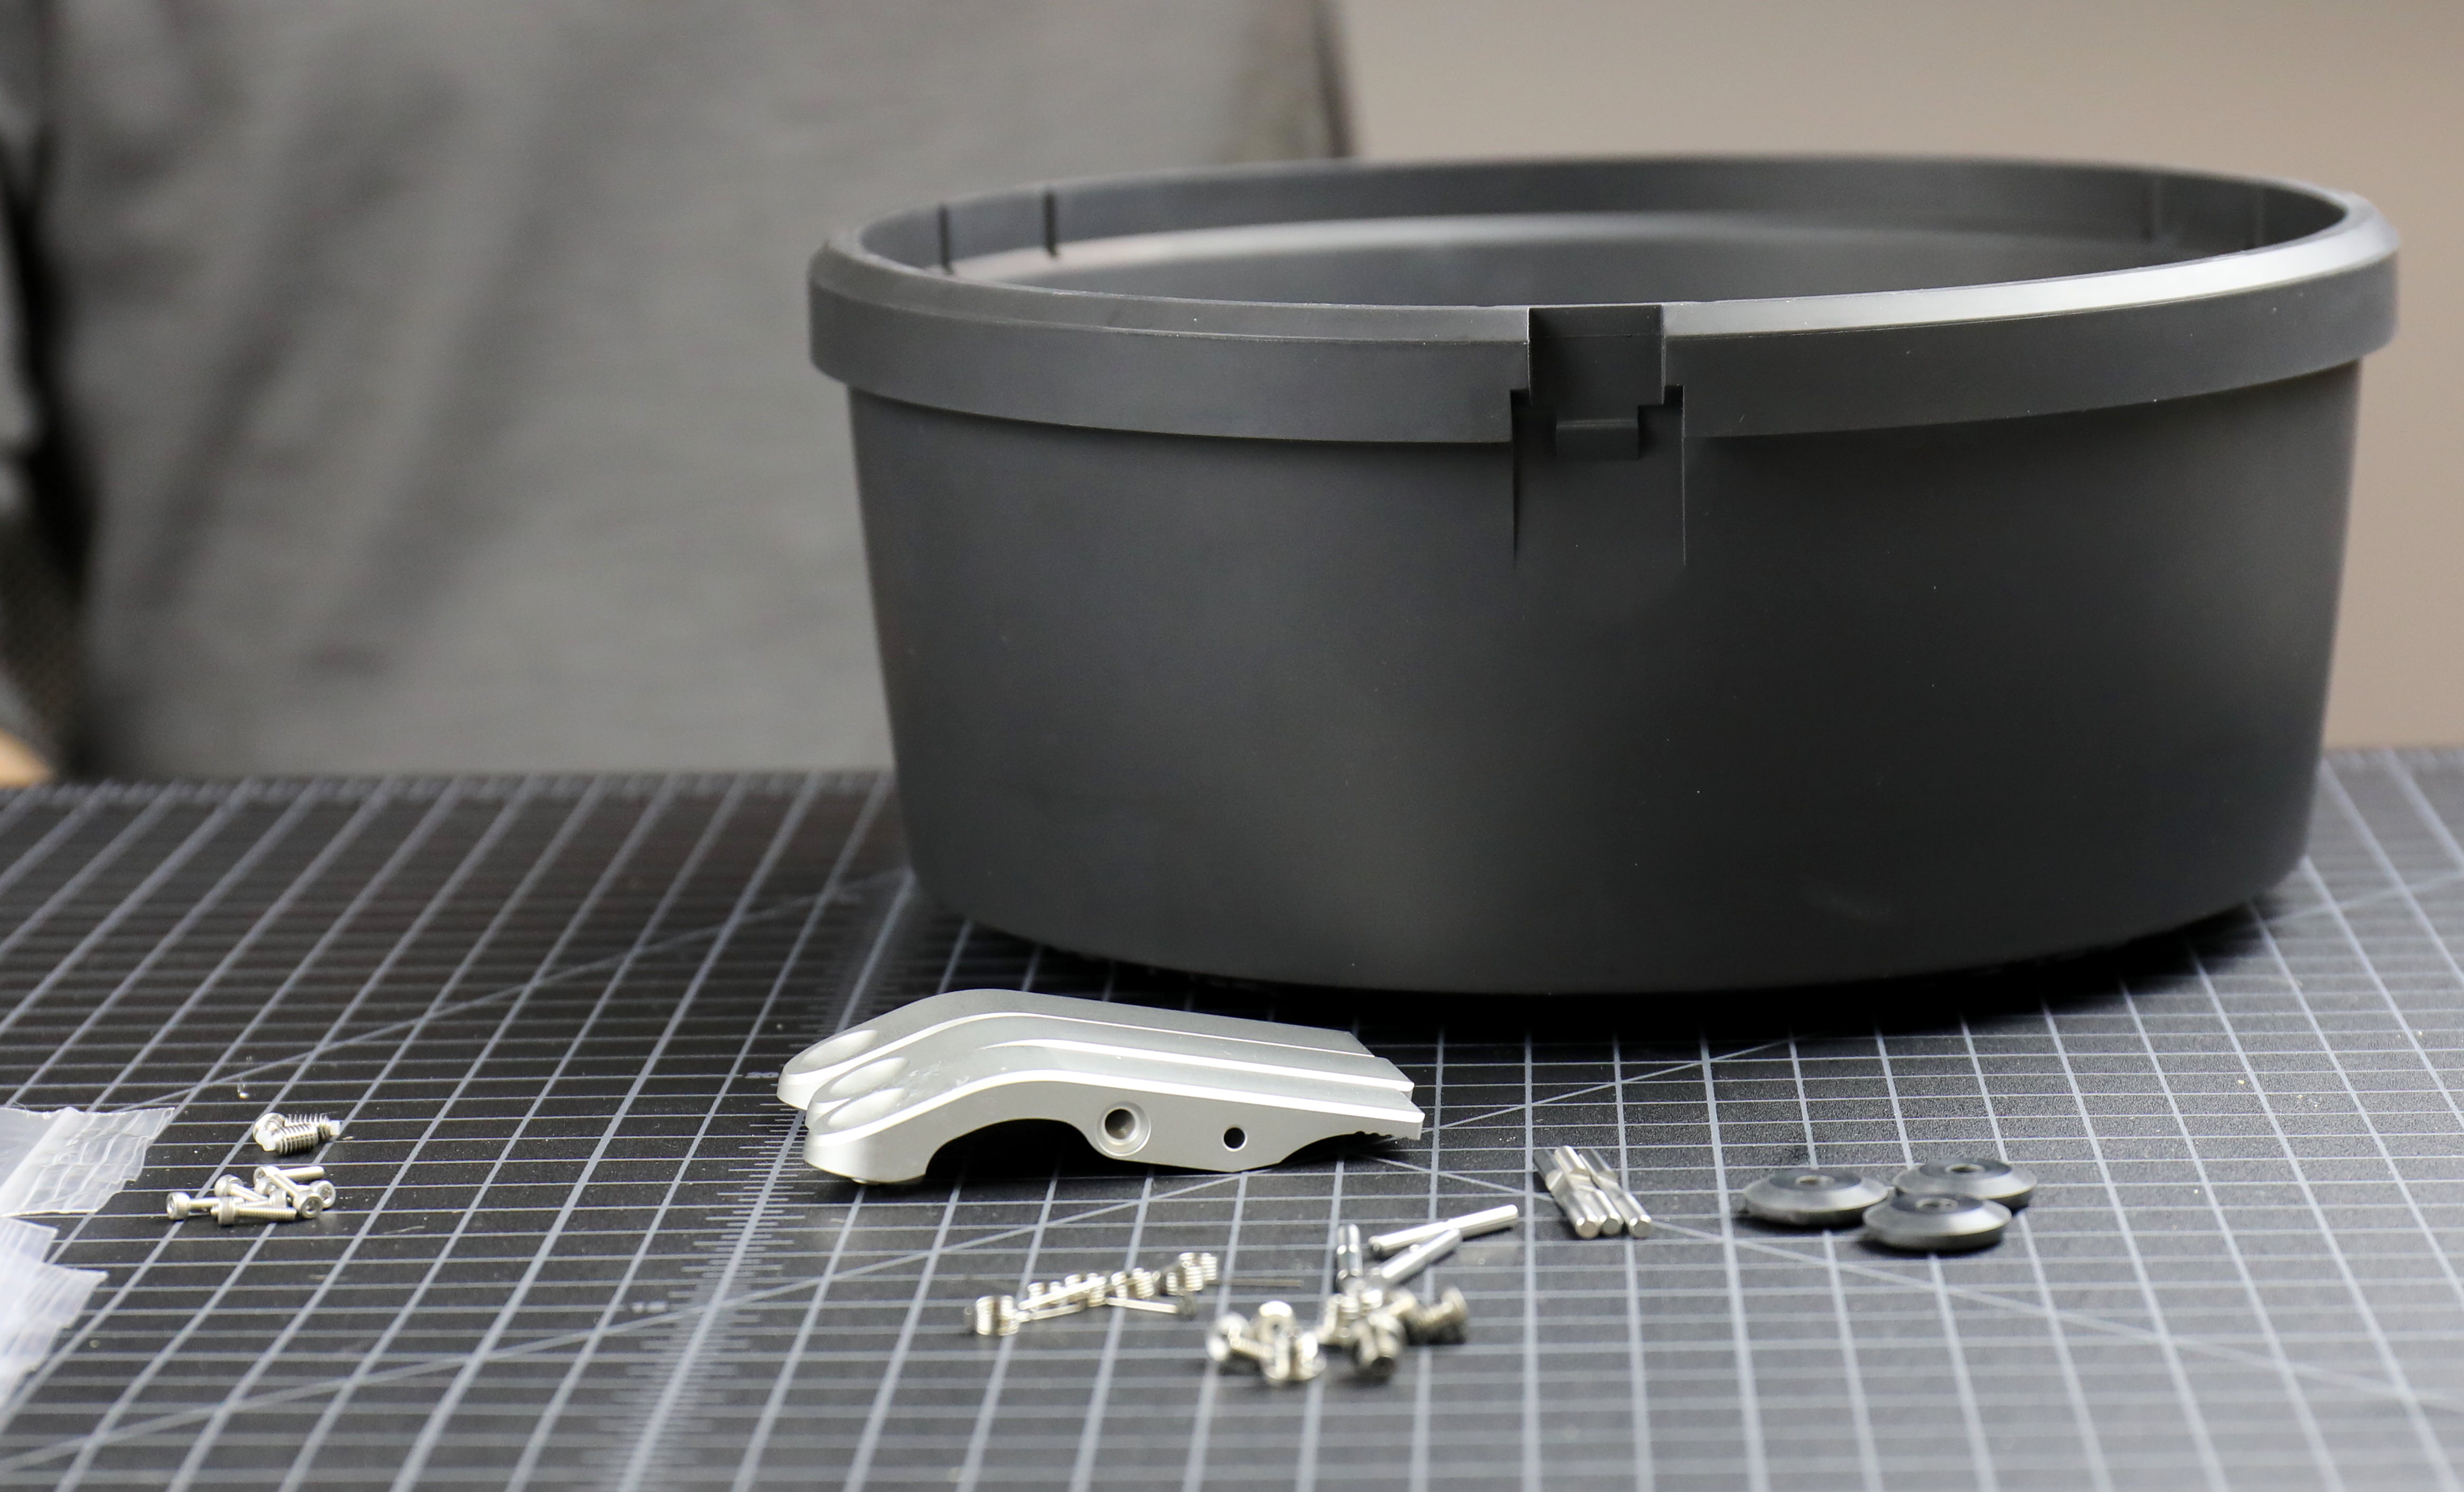
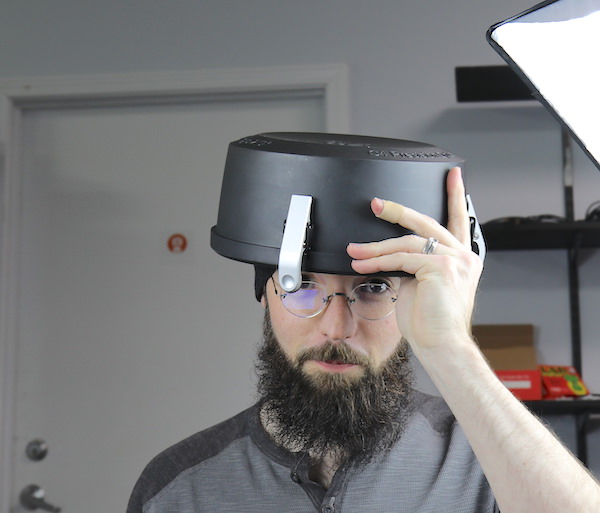
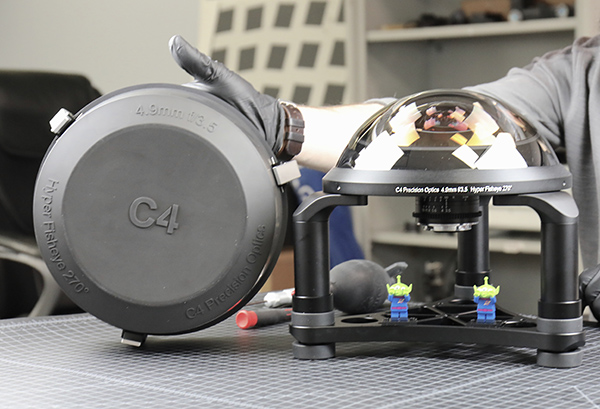
Finally, the lens cap (it really should be called the lens helmet) needs to be assembled. This isn’t just a cover; it has to be capable of supporting the entire lens since that’s the only way to place it face-down to attach cameras, follow-focus, and other assorted gear to it. The cap itself weighs almost a kilogram and has to have air-release vents; otherwise, it can become immovable if it suctions down around the lens. (Yes, there is a story about how we figured out the vents were necessary.)
C-4 Optics, 2019
The latches have a ‘ball-bearing screw’ inserted on each side as a latch-lock, then the latch itself goes on over an inserted rod which is then locked in place with a set screw.

After that, we screw on the rubber stopper, add another rod containing the tension springs, and then mount the latch assembly to the hood. The plastic of the hood is plenty thick enough that it has nice 5mm molded latches to attach the latch rods with.
C-4 Optics, 2019
Now to the Lens
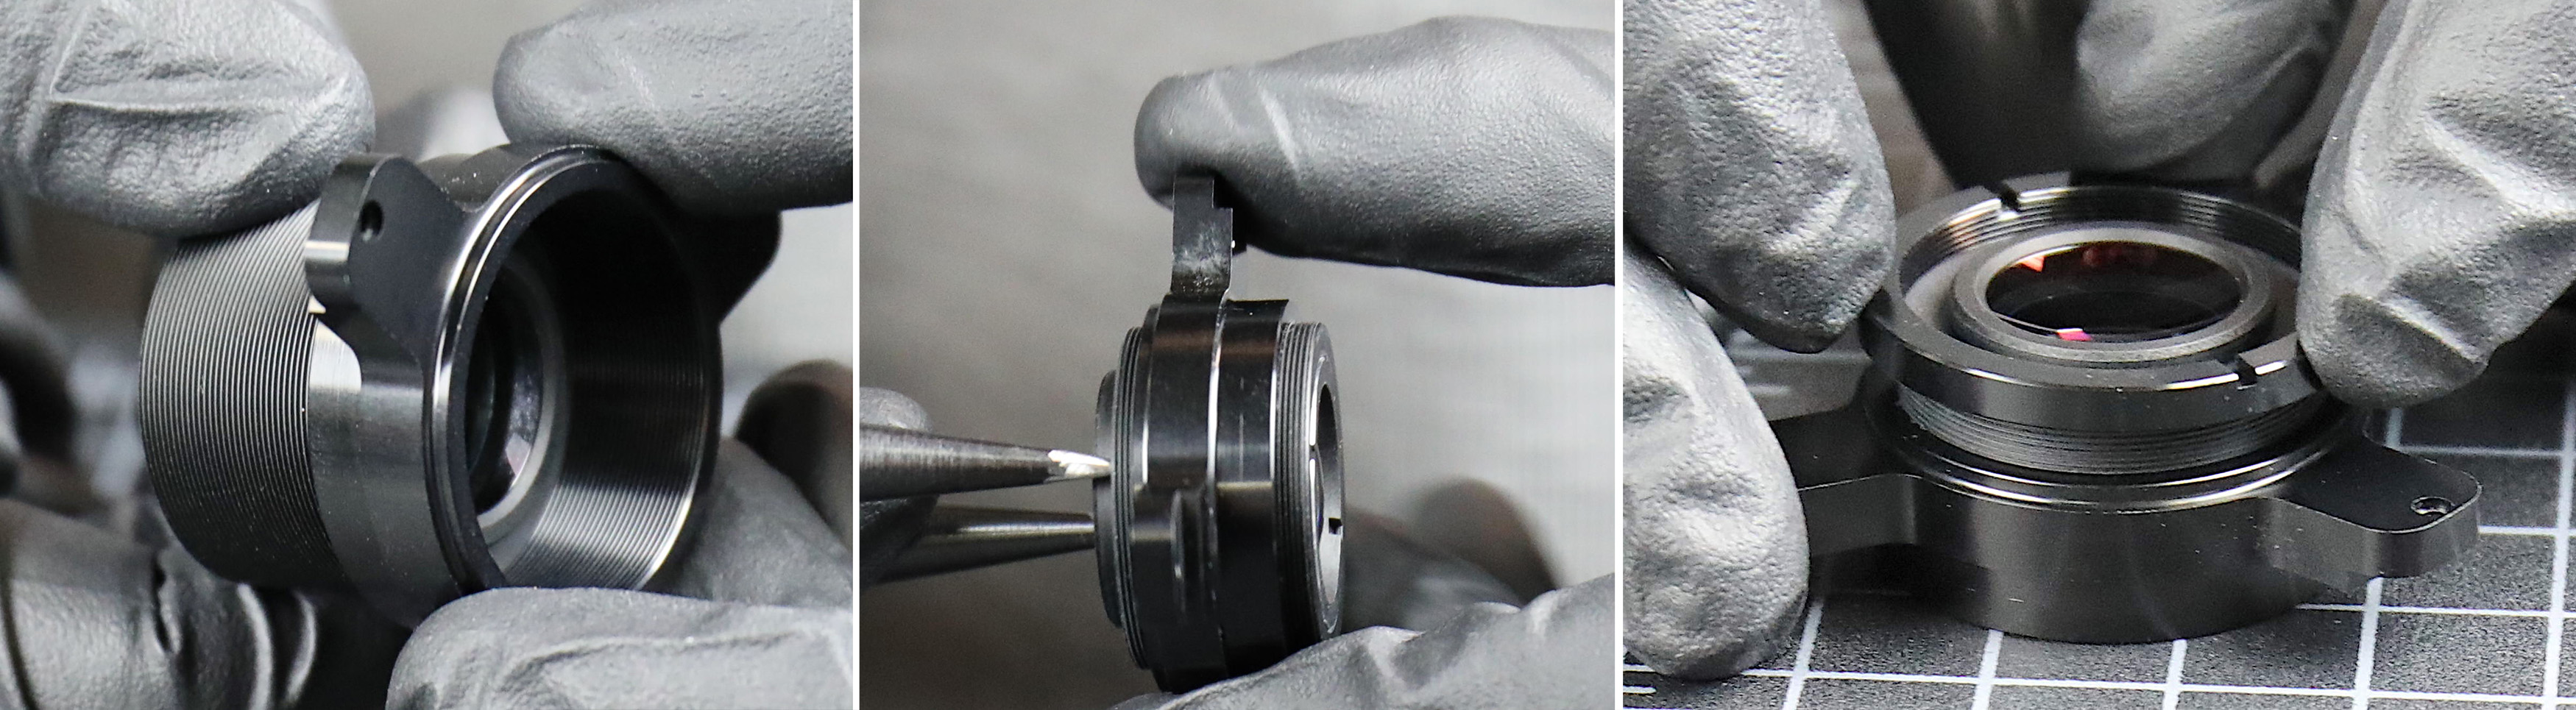
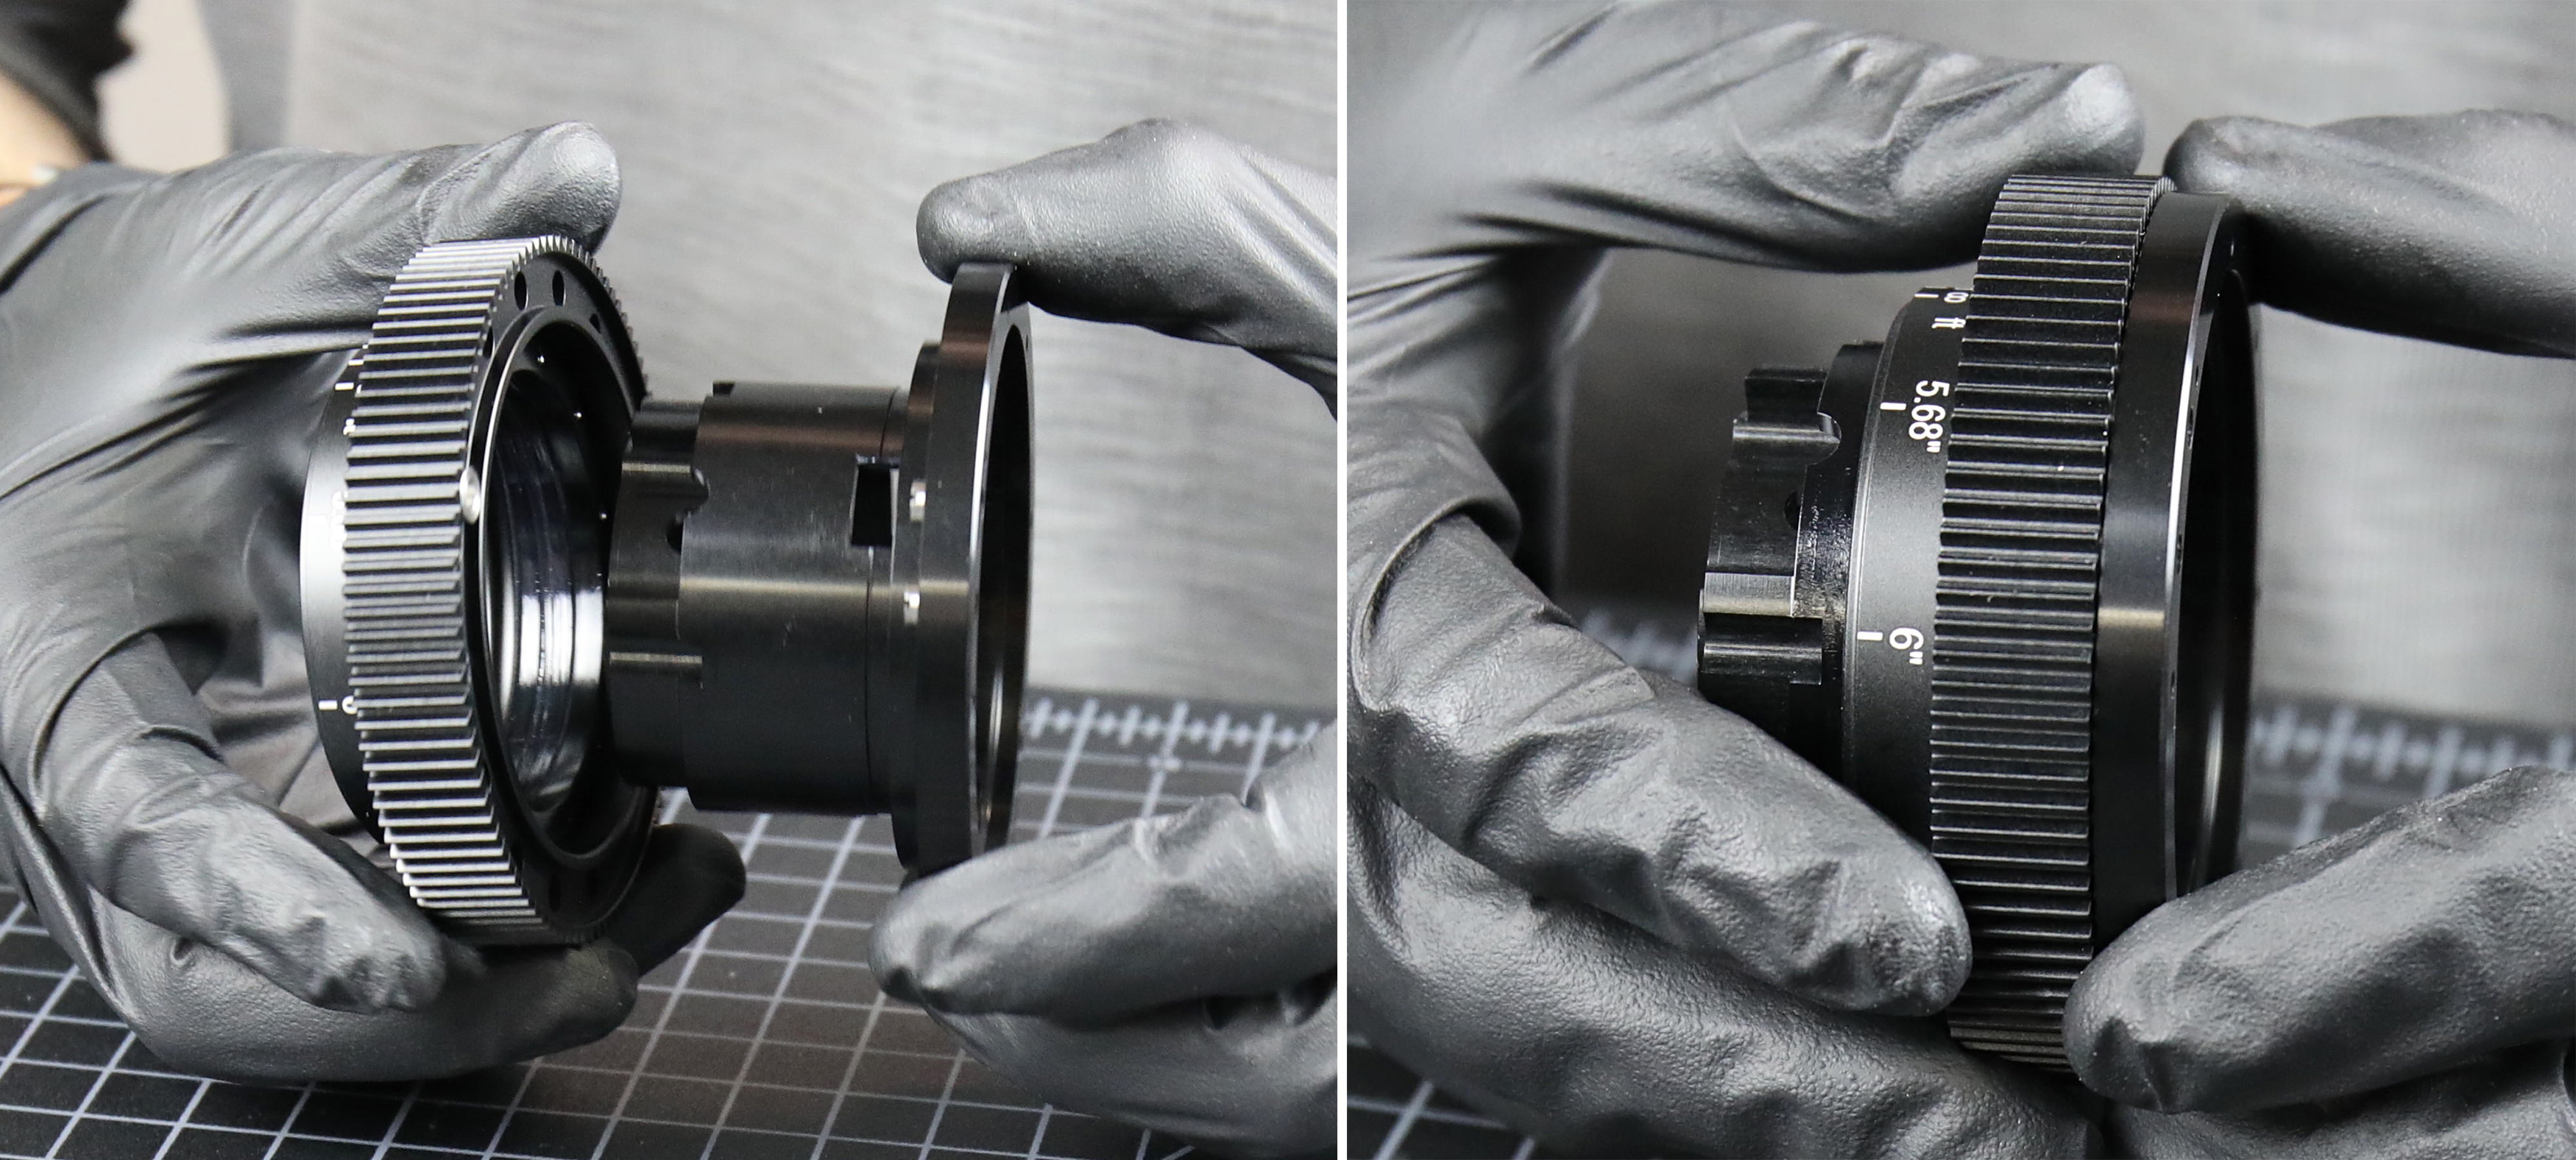
Focusing Barrel
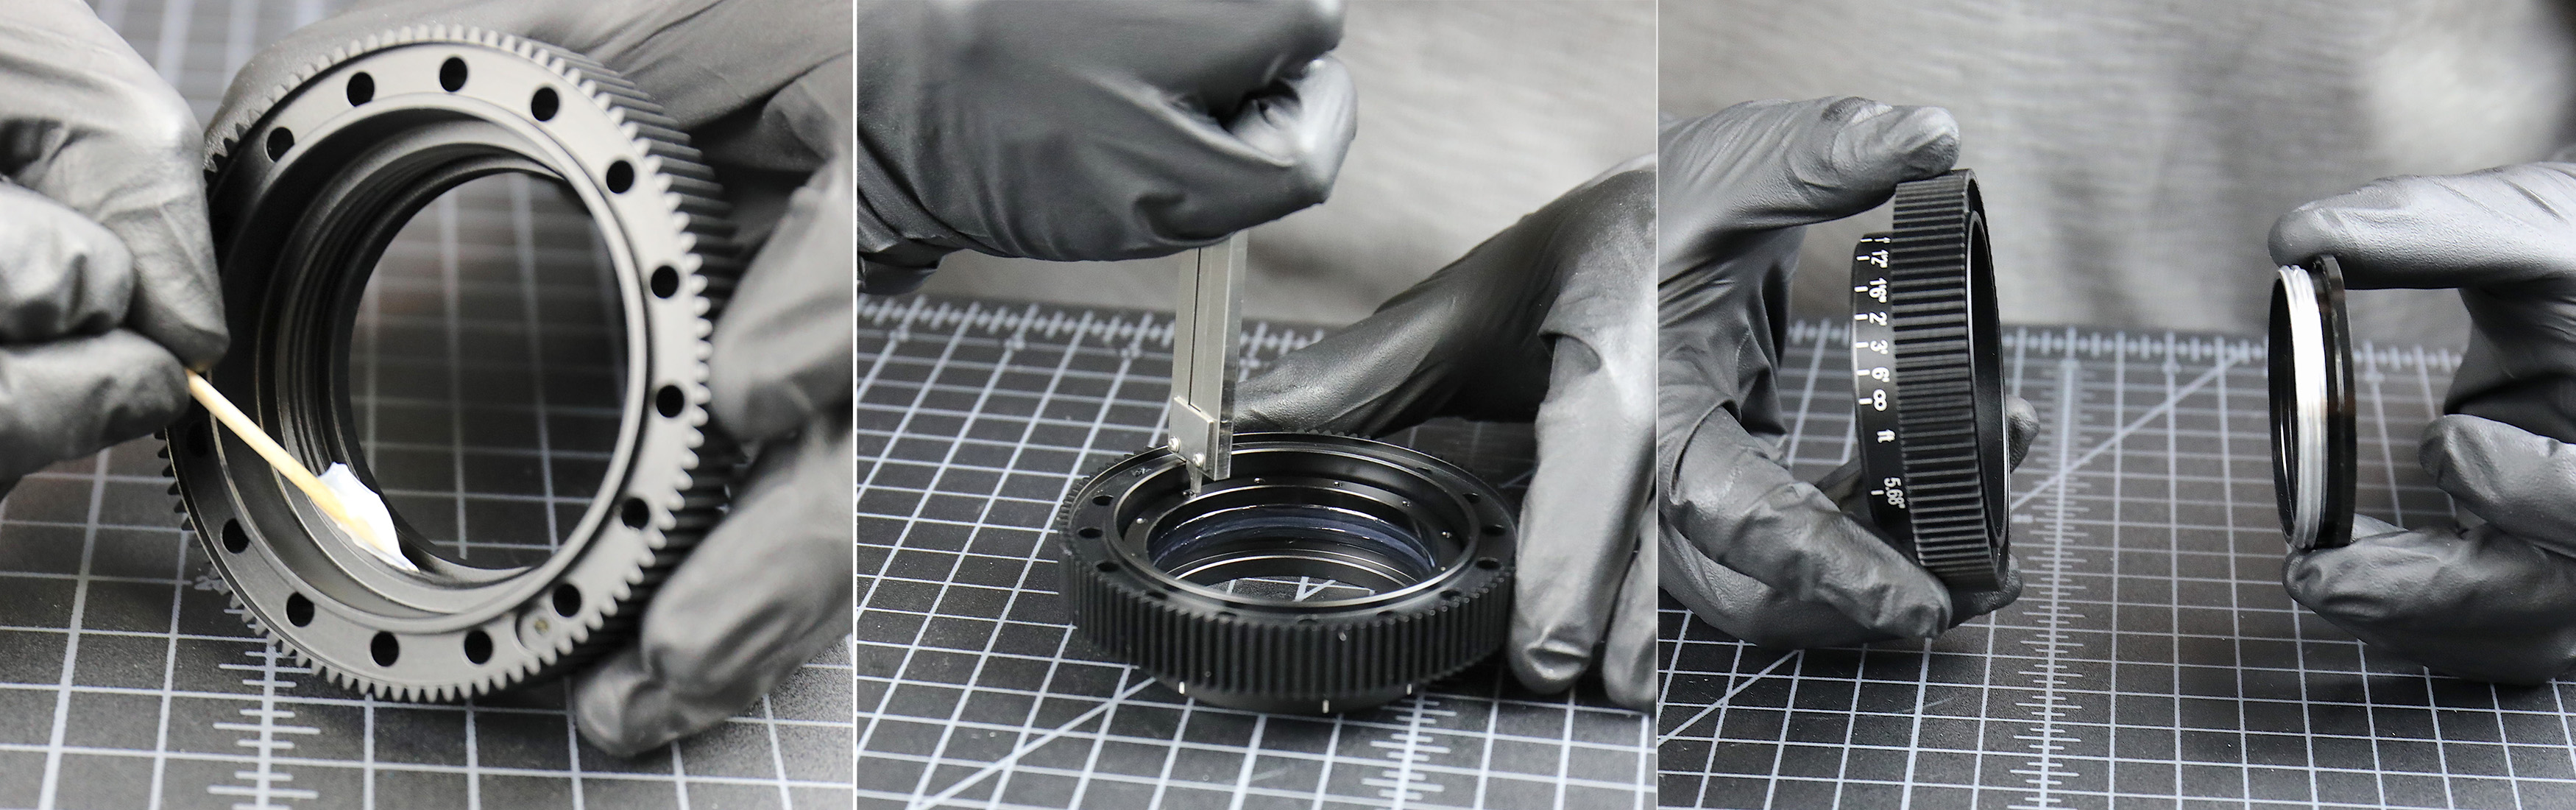
We start with the focusing group, a doublet that comes to us cemented with black lacquered edges.
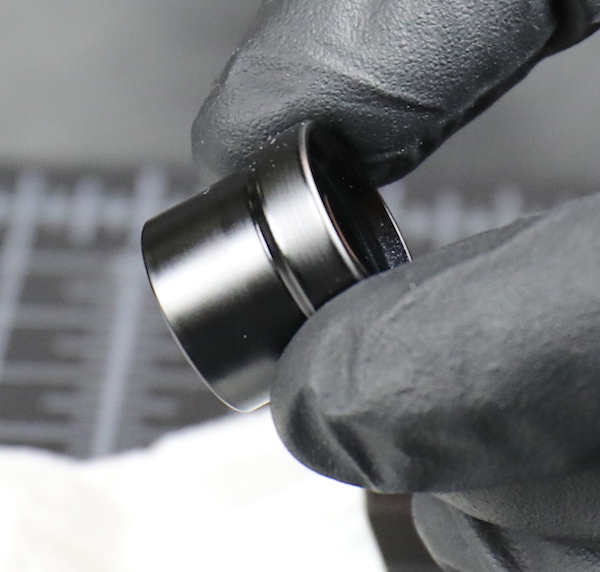
This gets placed into the larger focusing barrel and an internal retaining ring used to fix it in place.
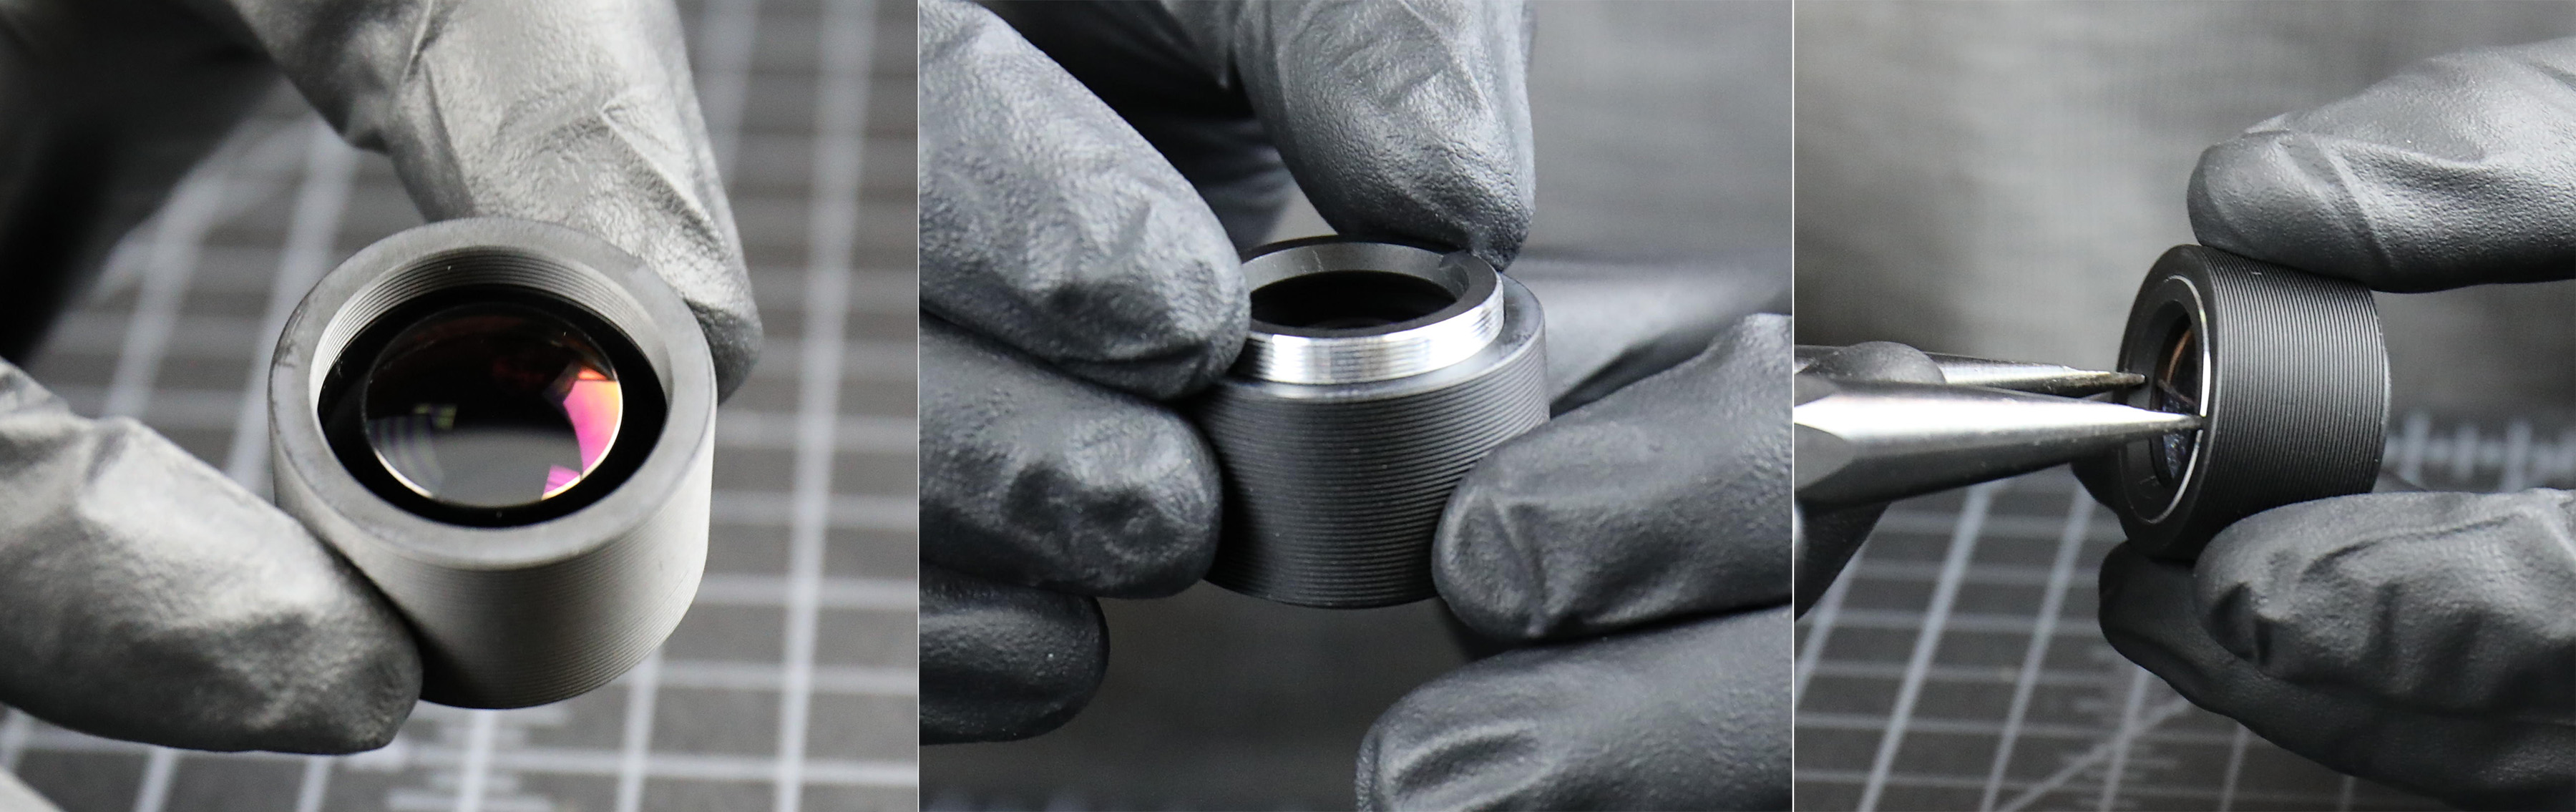
It doesn’t show well in the above pictures, but the outer barrel is threaded to receive the focusing link; the metal arms that will mount it to the mechanical focusing apparatus. Once this is started by hand, a spanner is used to thread the barrel to a measured position. Then the focus lock ring is placed to keep everything there.
Main Barrel
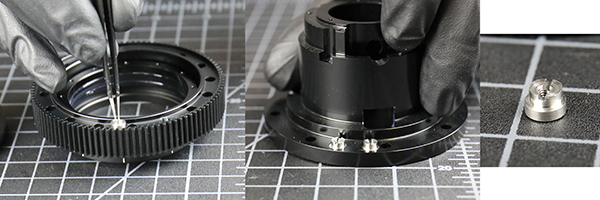
The main barrel, which contains the aperture and several optical elements, is the most complex part of the lens. The first piece in is a tiny doublet that goes right behind the aperture.
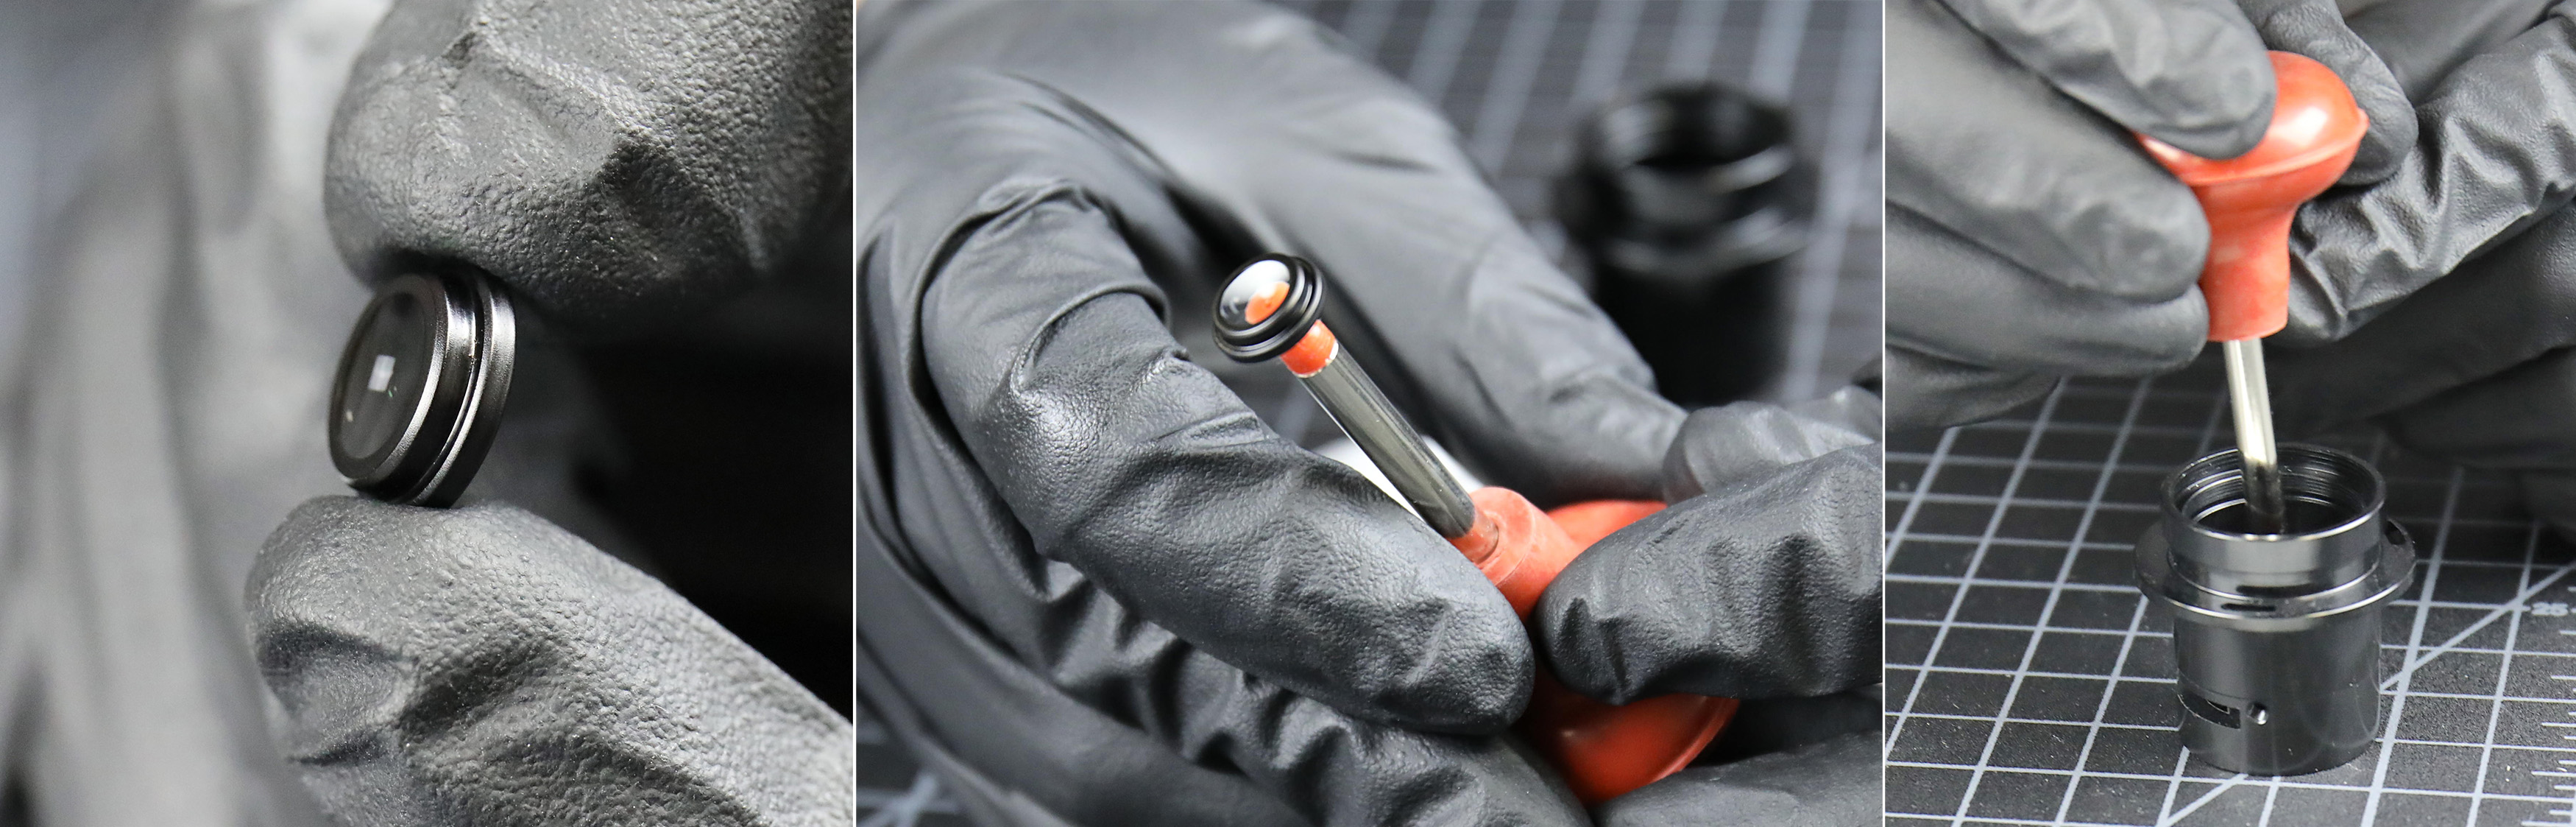
And then gets locked in place with a retaining ring.
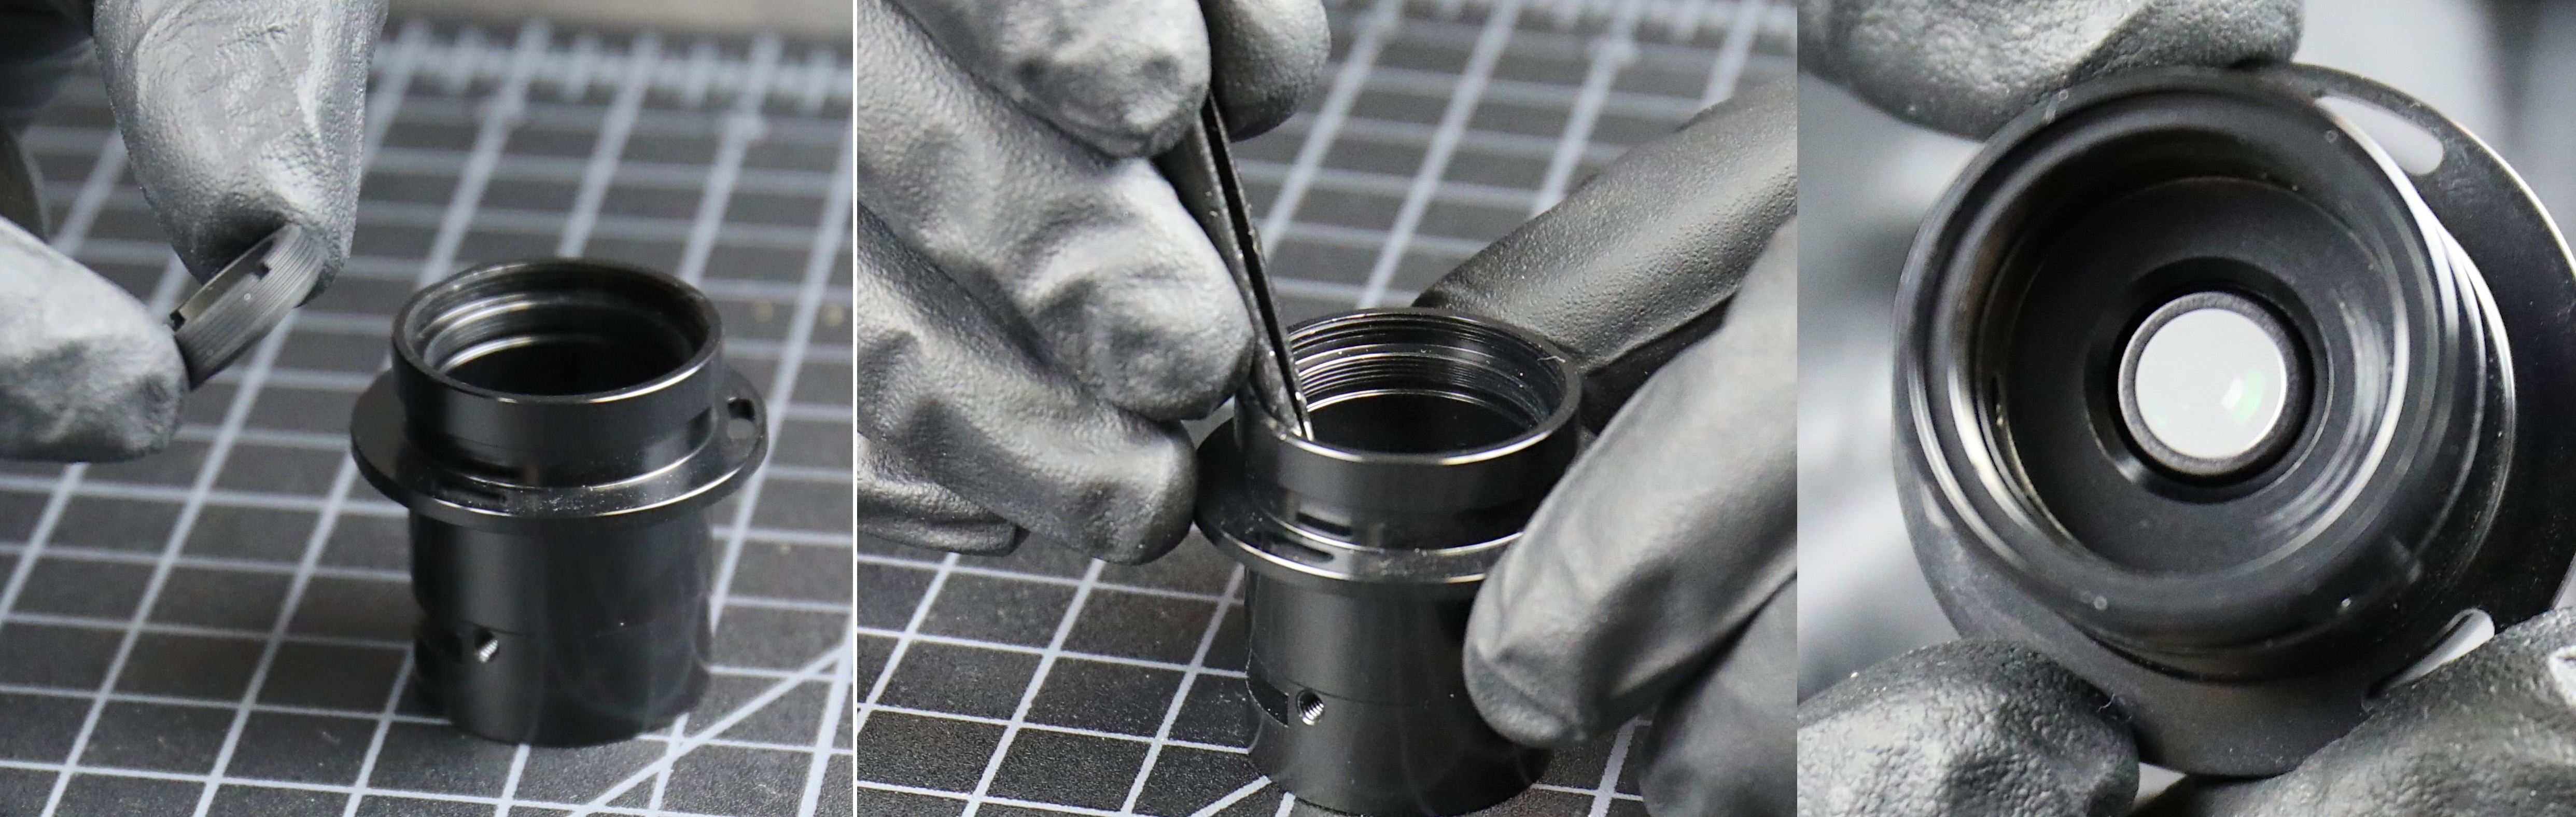
Behind that goes a cemented triplet that is slightly larger.
A flat element gets mounted in its holder and then placed at the very rear of the lens. You can see by the knurled finish that this can be removed and replaced with various filters if needed.

Turning the barrel over, the aperture assembly gets placed in the other end, right in front of the doublet we inserted first. It has to be rotated to the proper orientation, then it’s locked down with a hex screw.
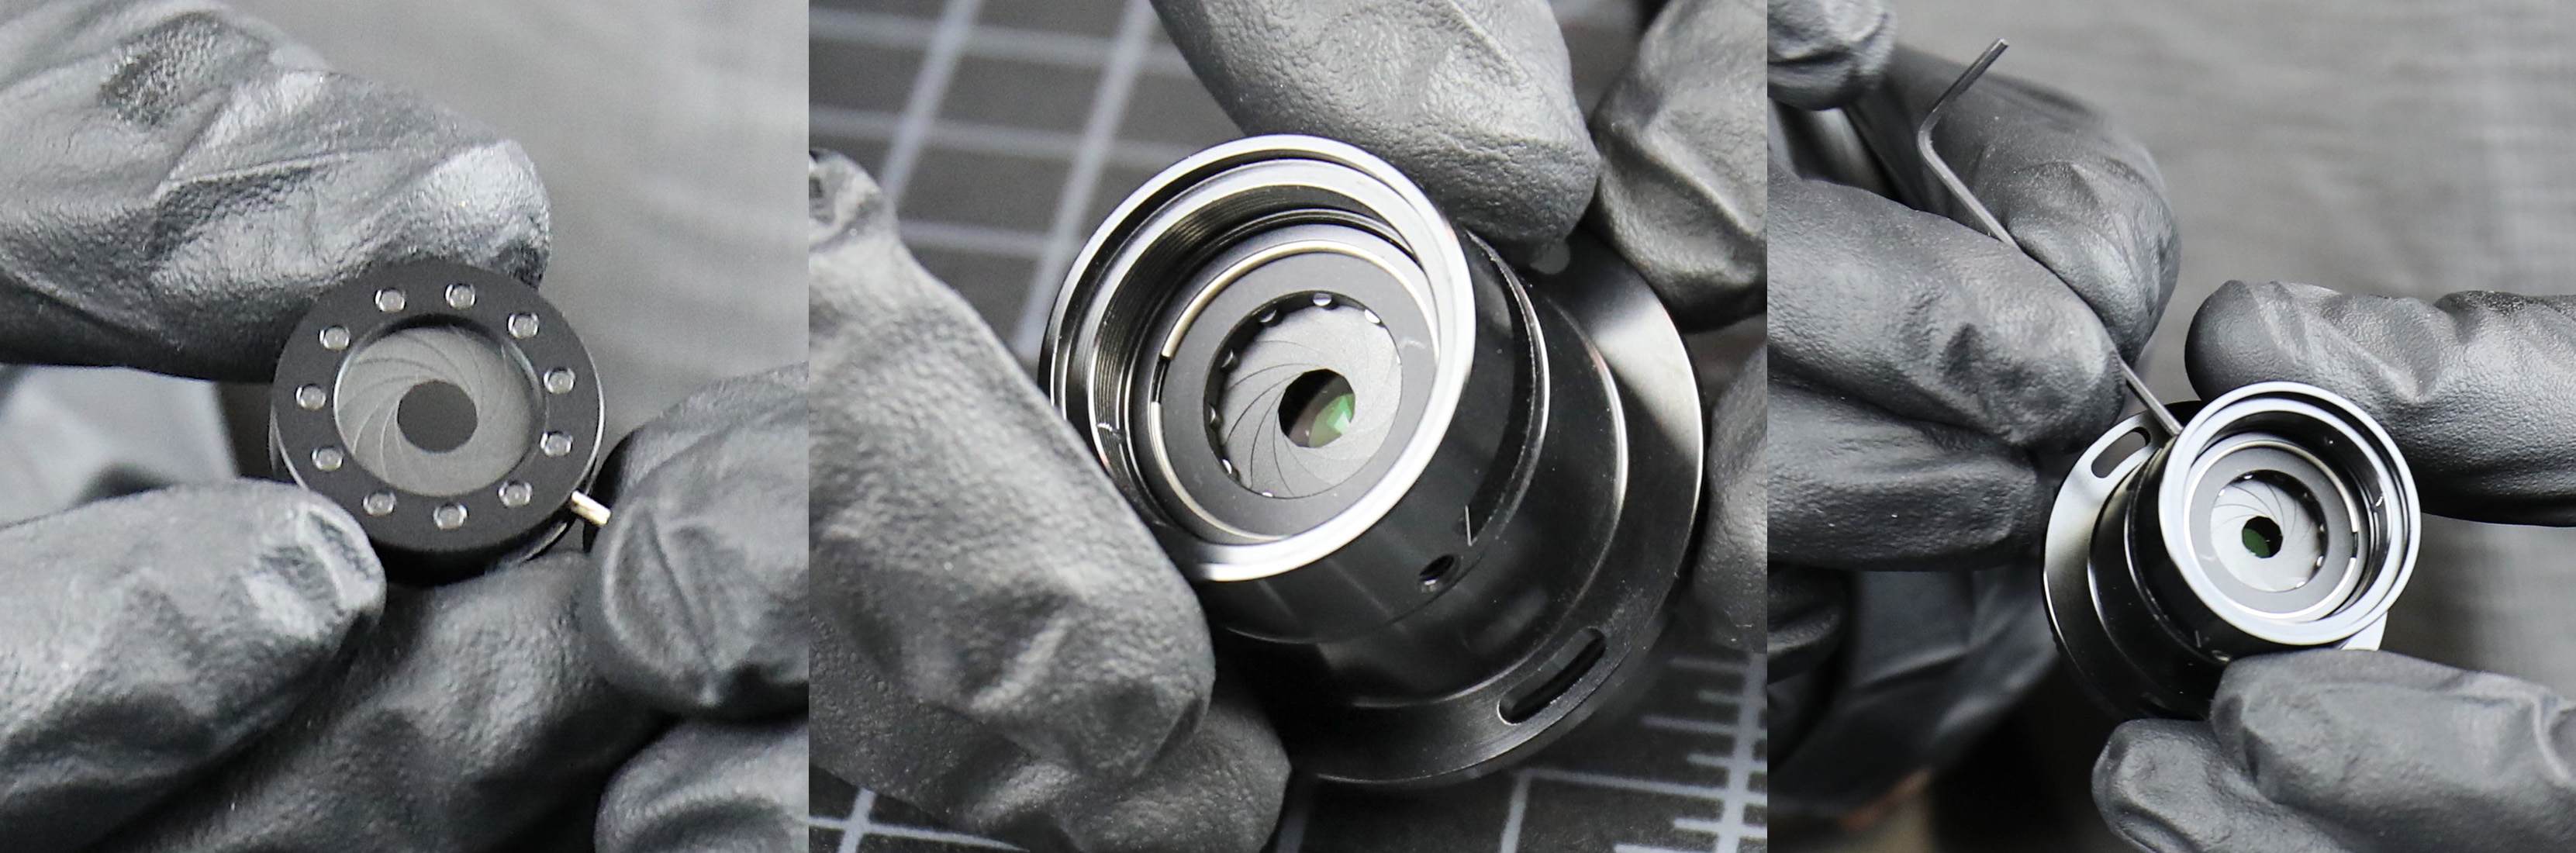
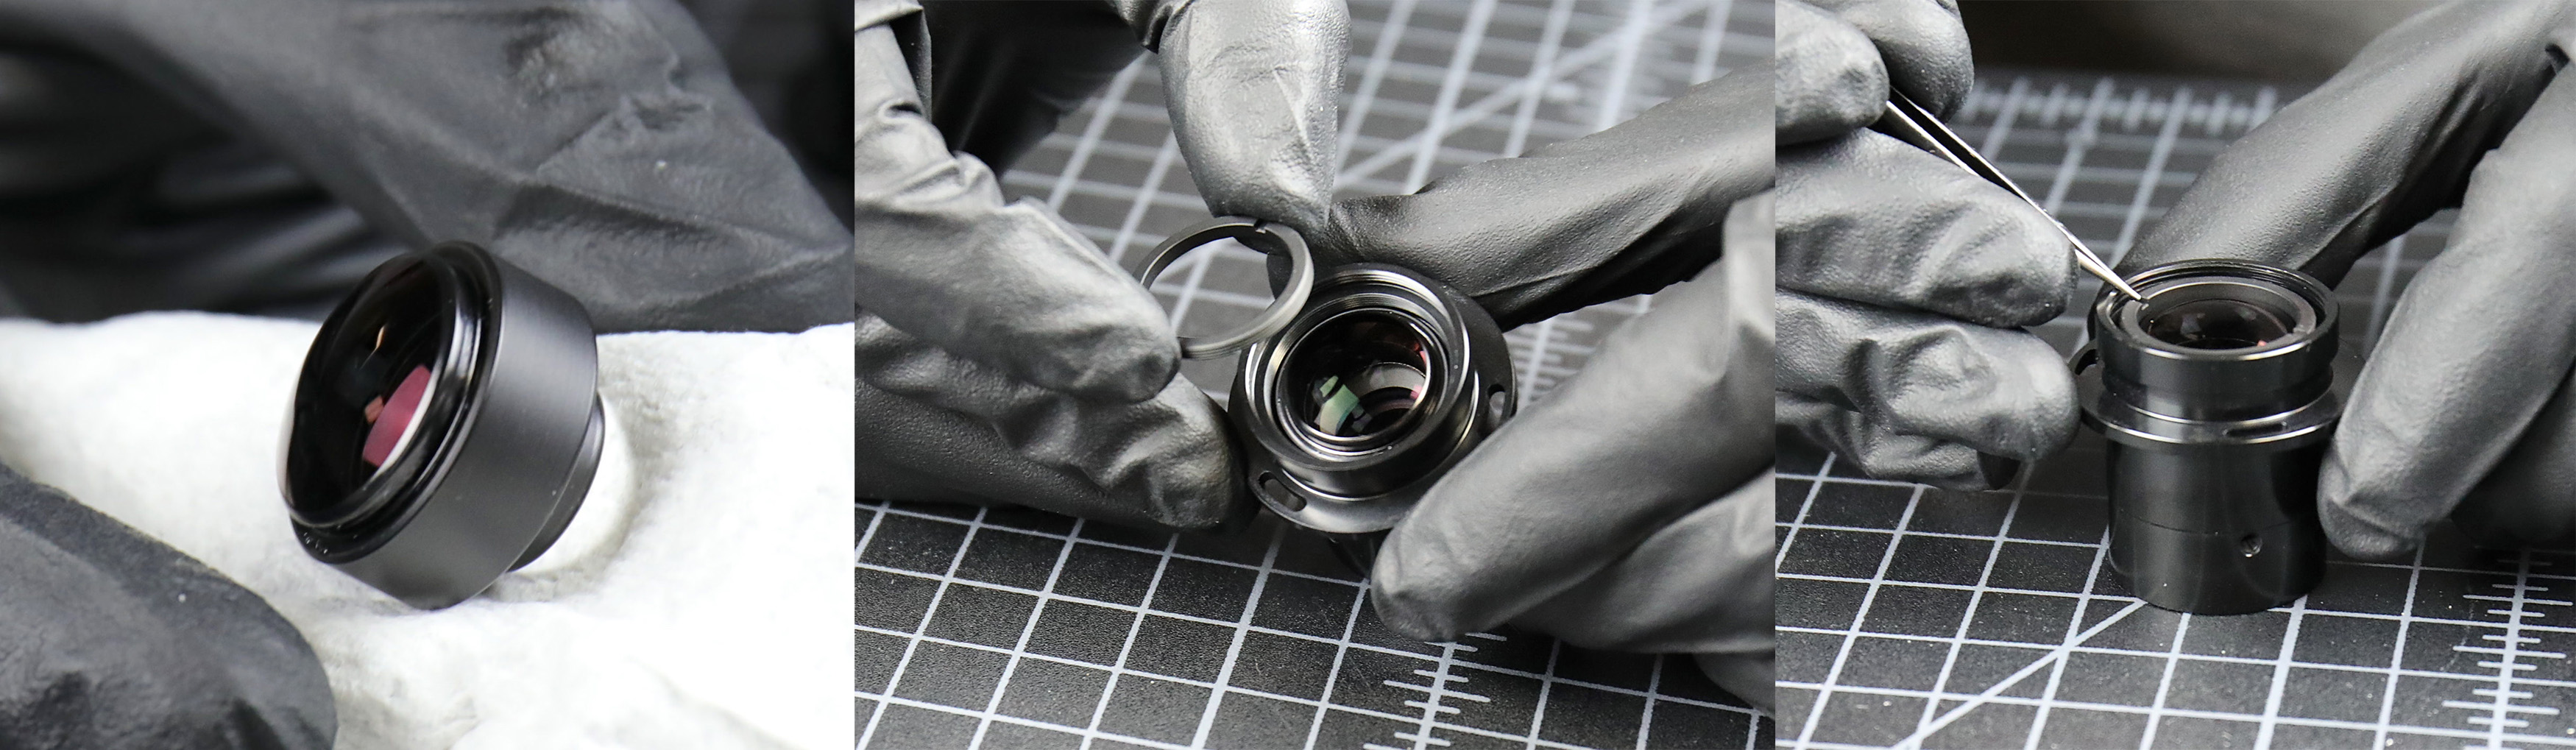
We finish up the barrel with an old friend. The small element we potted yesterday mounts to the front of the barrel. It’s hard to see in the pictures, but its mount is threaded and screws into the barrel.

C-4 Optics, 2019
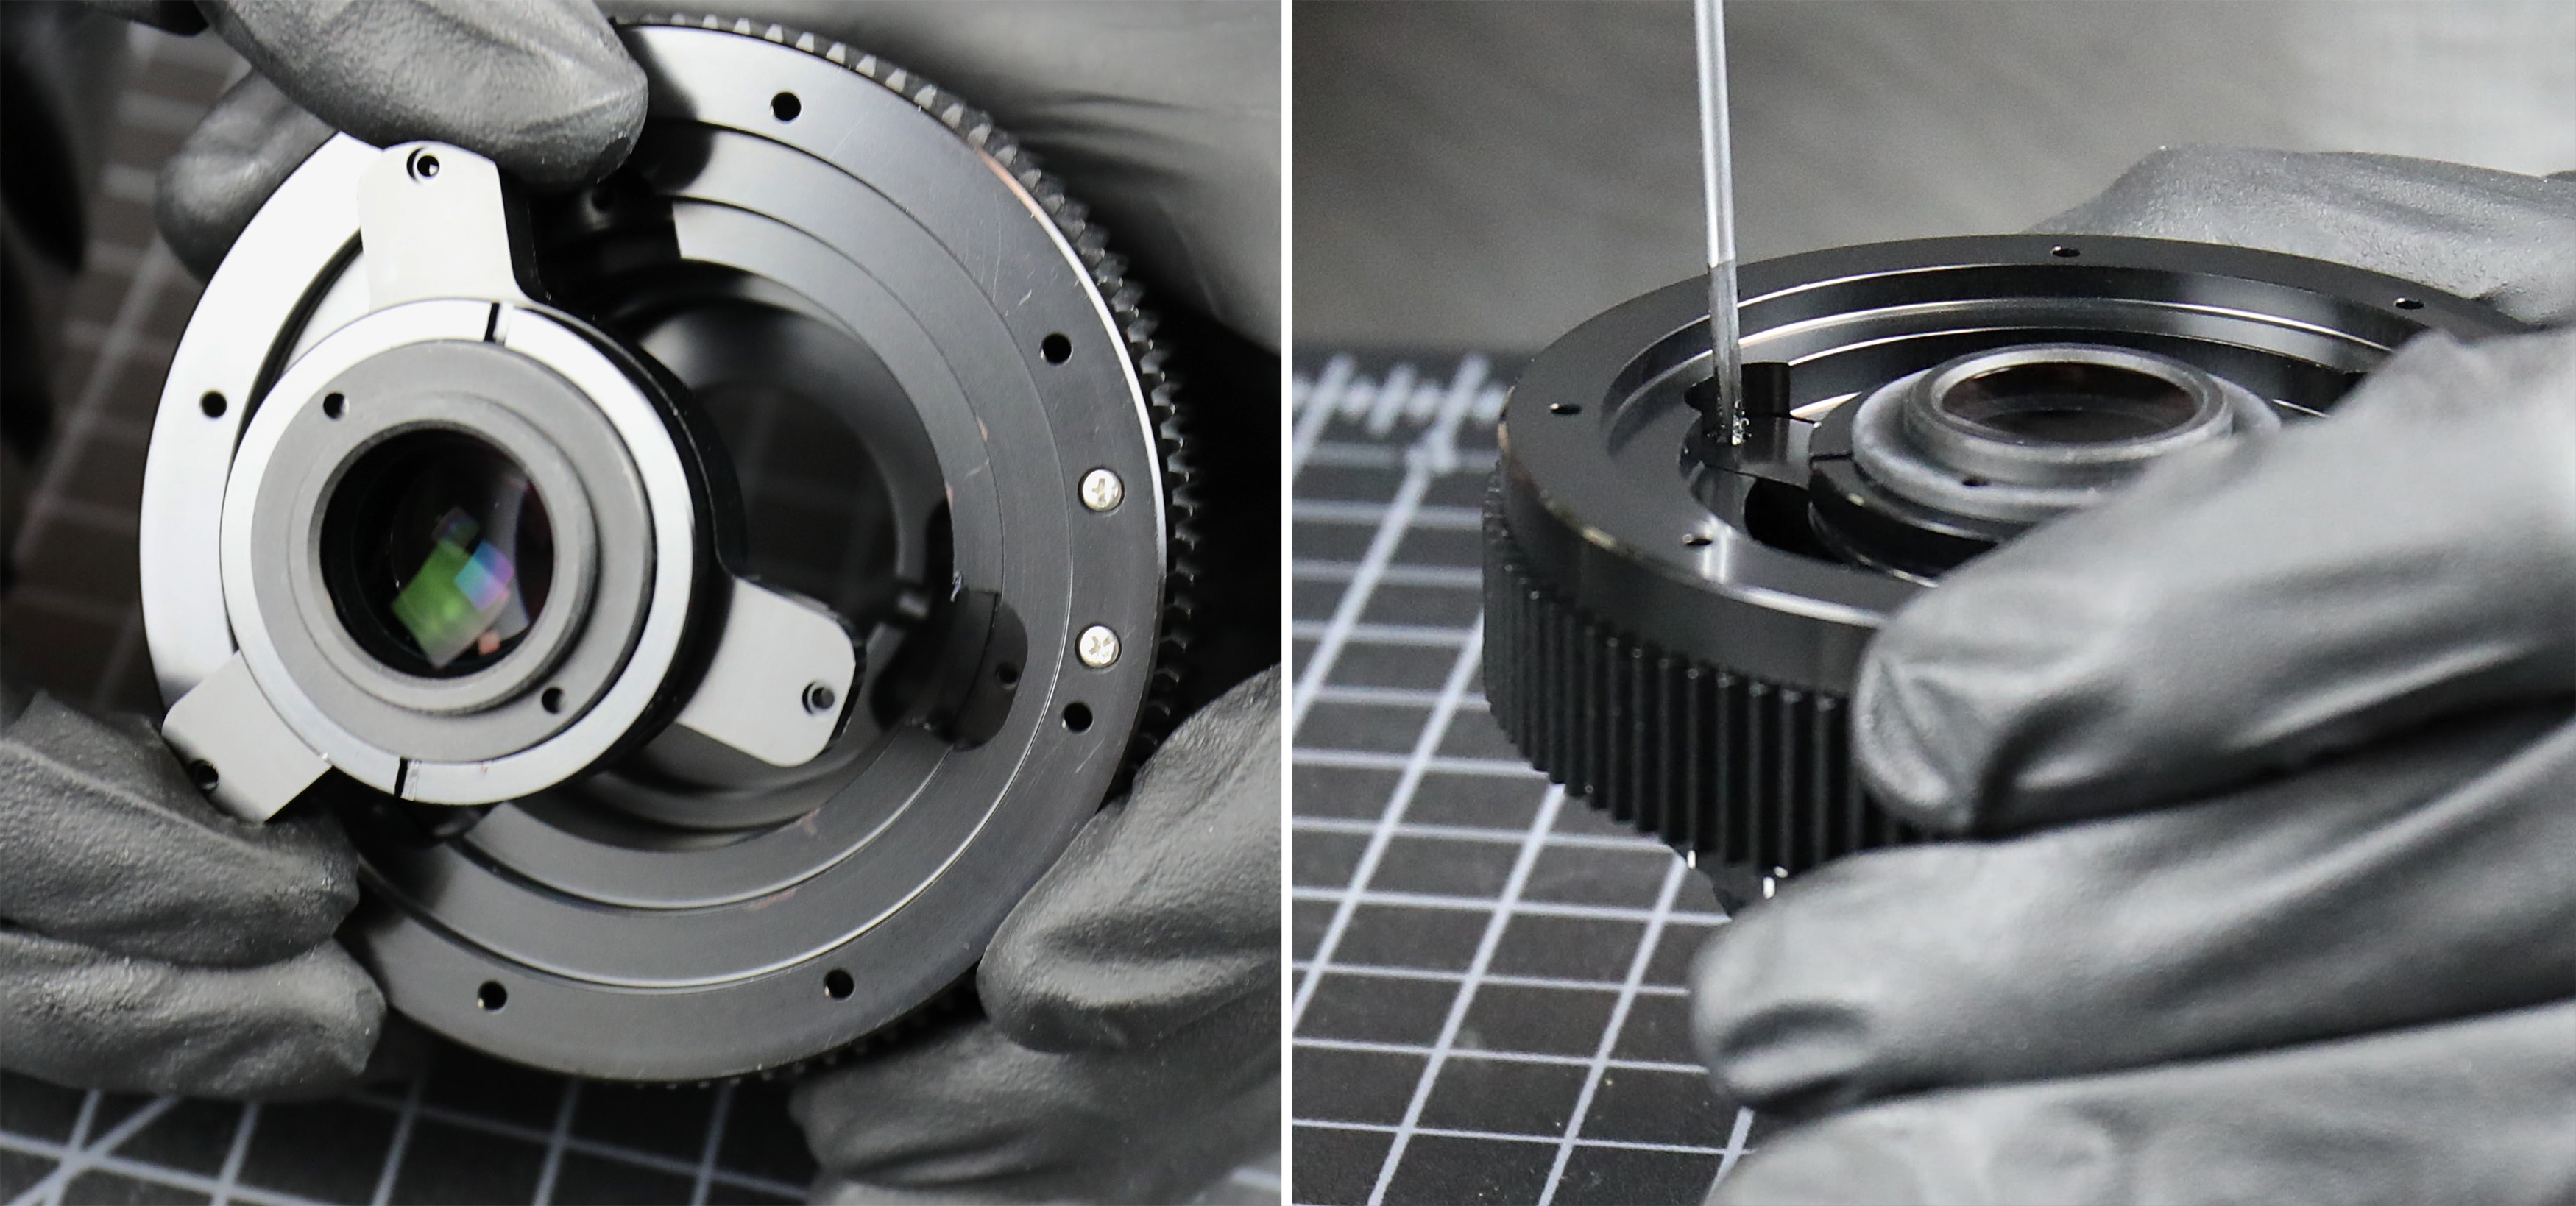
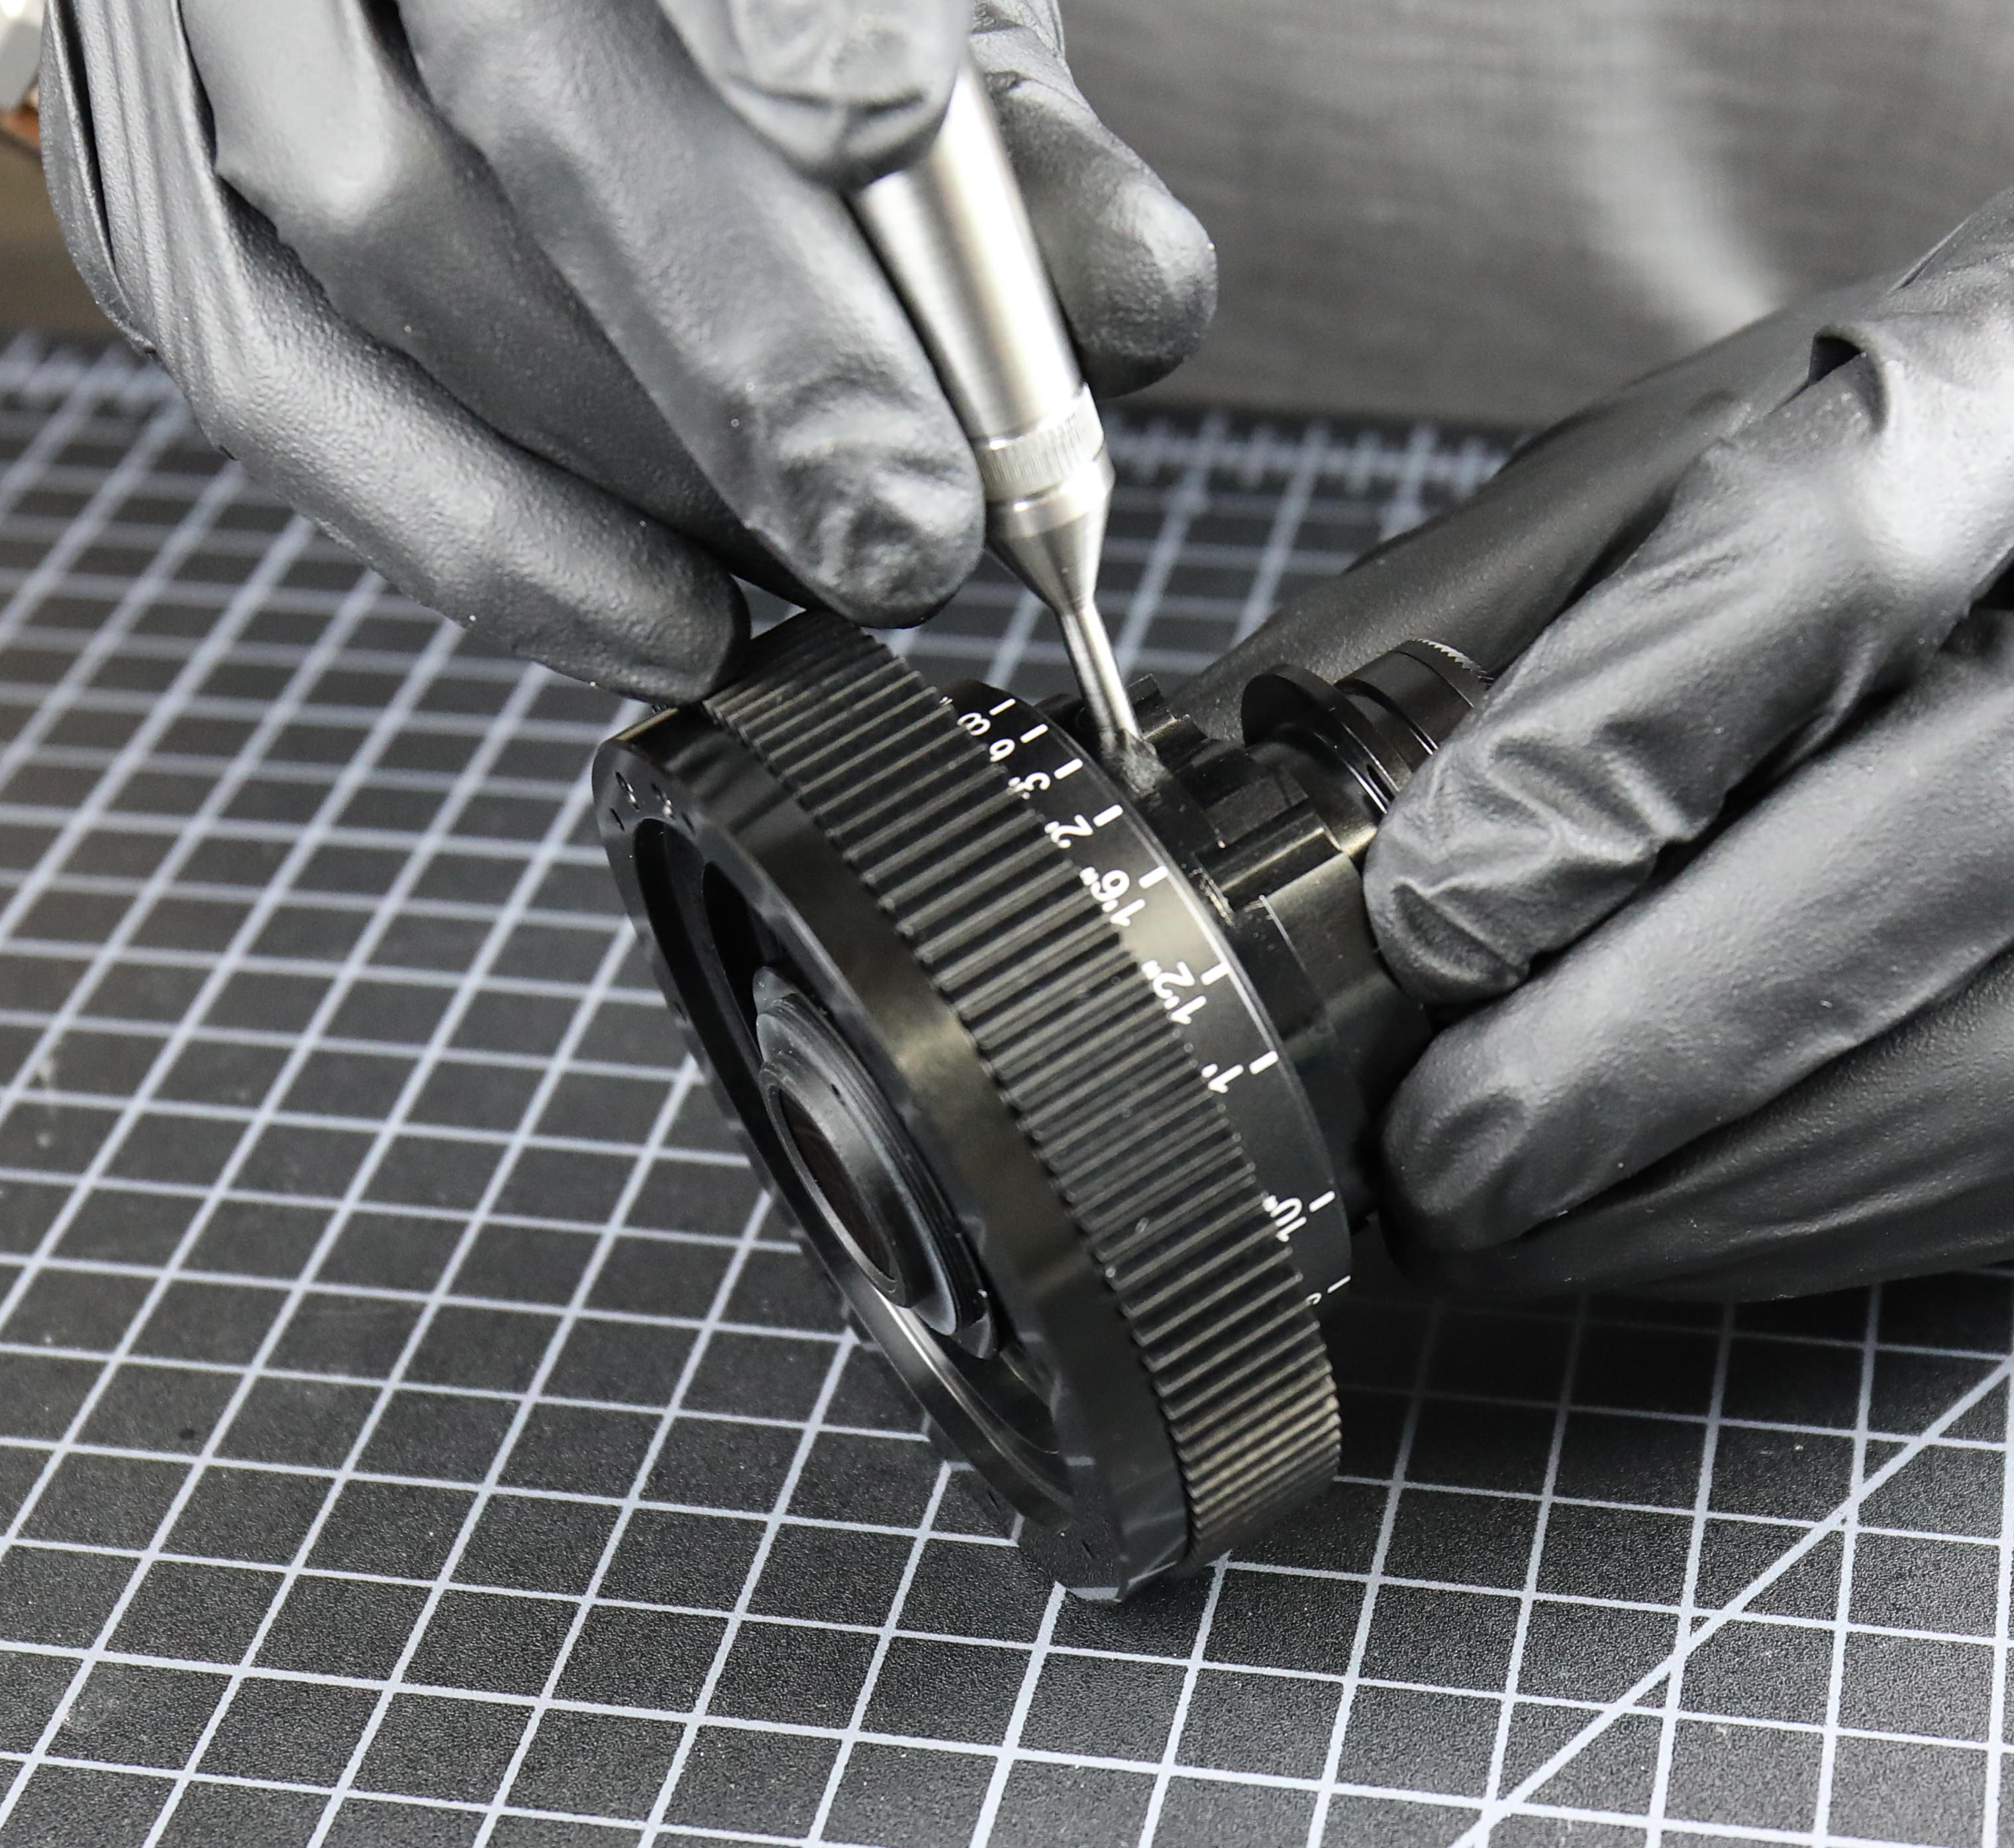
Main Barrel and Gear Assembly
We start by lubing the focus gear and inserting the focusing helicoid, which is then adjusted to a measured depth.
The aperture fork is mounted to the aperture ring. The fork comes in two pieces that overlap. The reason for the two pieces is that these are adjusted to be the aperture stops on either side.
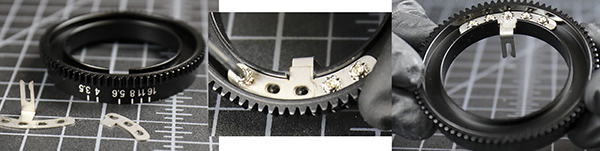
A hard stop is screwed in place in the focusing barrel and two more into the main barrel. The ones in the main barrel are eccentric; adjusting them sets the focus stops accurately.
Now the focus gear is slipped over the main barrel and the stops all aligned.
Then the focusing group that we assembled earlier is placed into the focusing helicoid and screwed in place.
Following that, the aperture / rear optical assembly gets put in place.
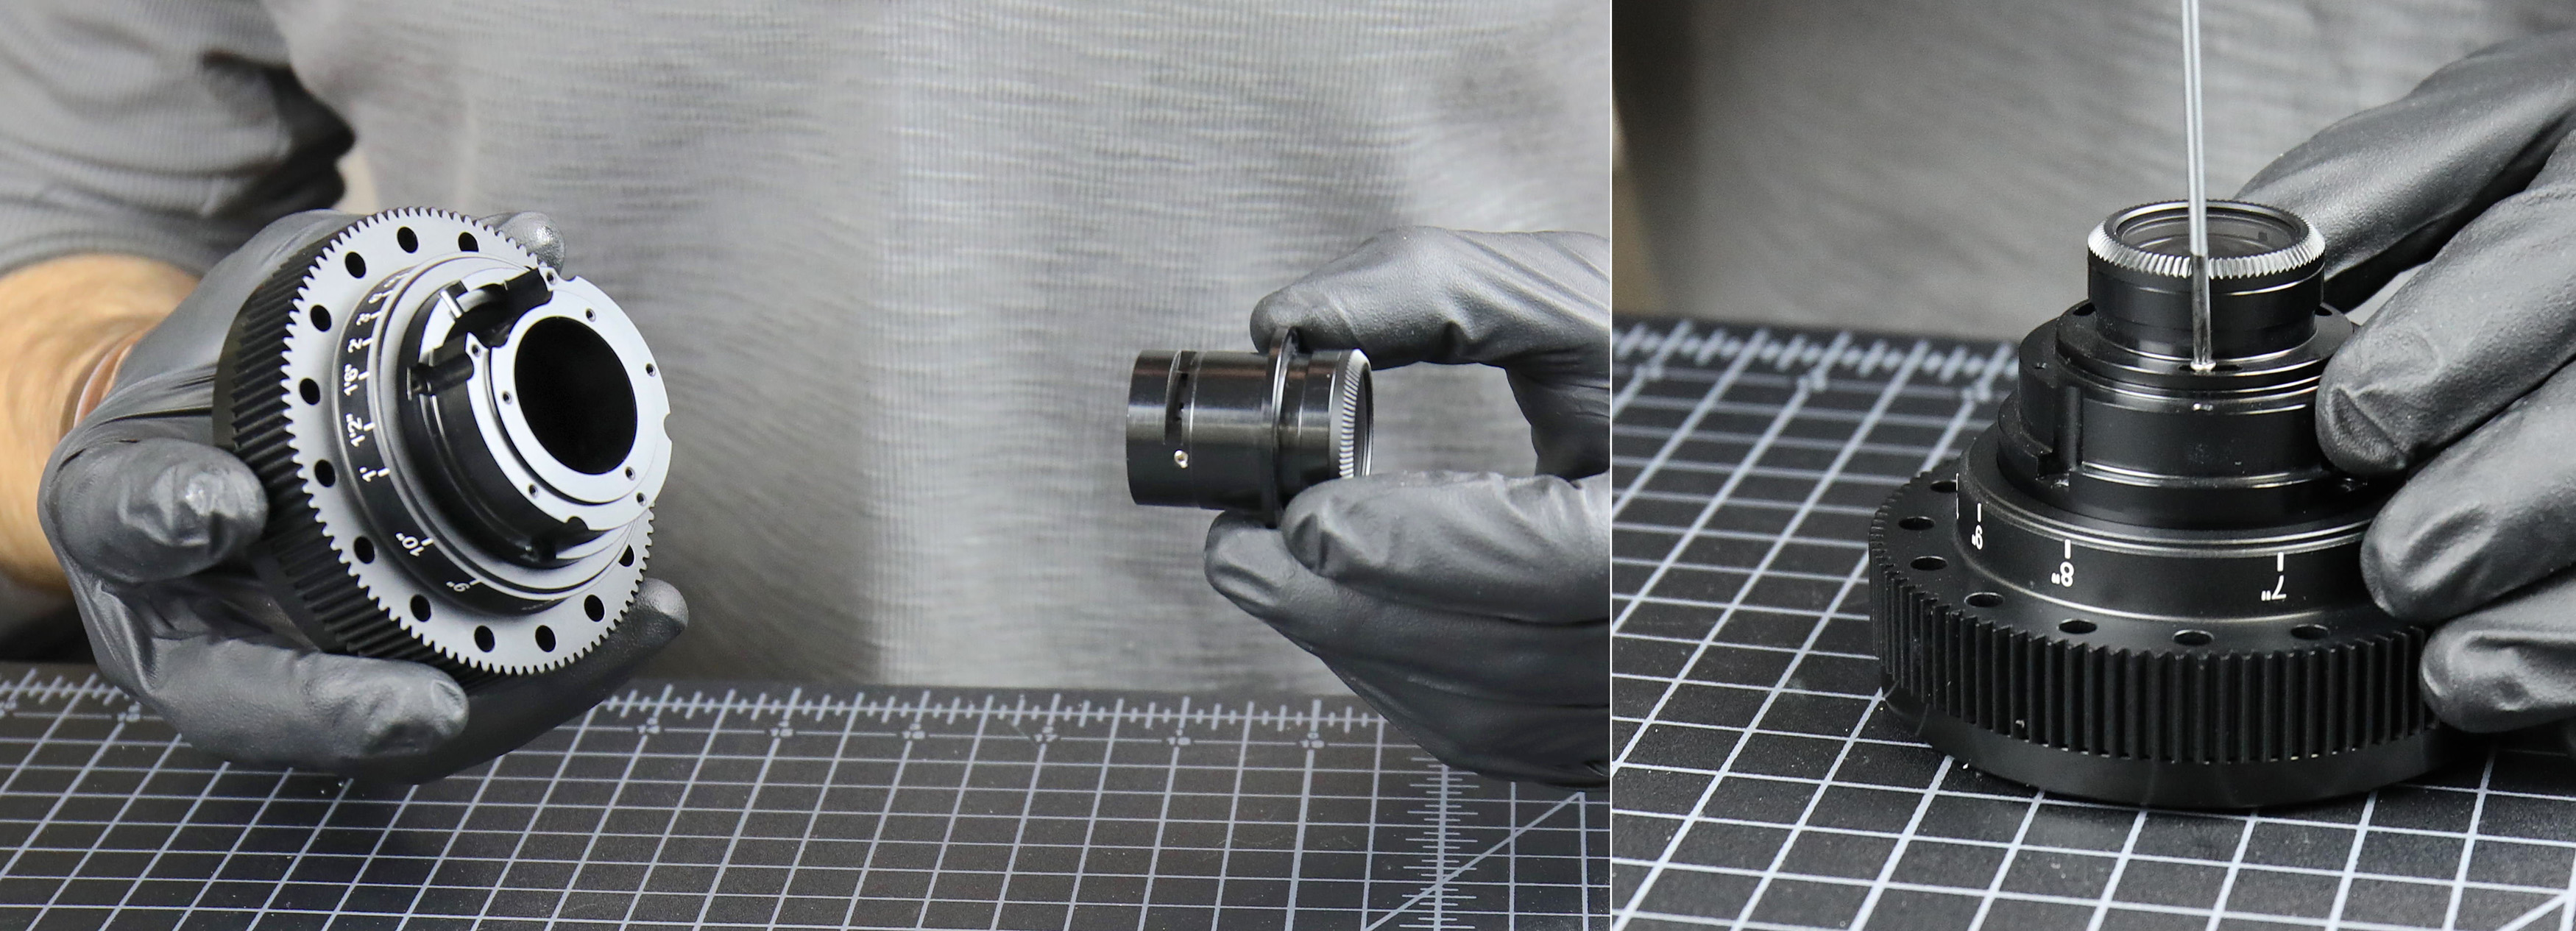
The aperture pin then gets screwed in place with a really nice, expensive tool that does nothing other than screw the aperture pin in place. That’s it.
C-4 Optics, 2019
Then a nylon spacer goes on (the green shim), which keeps the focus smooth and with just a bit of resistance. After that, the index barrel is placed and screwed down, and then the aperture gear can be slid on.
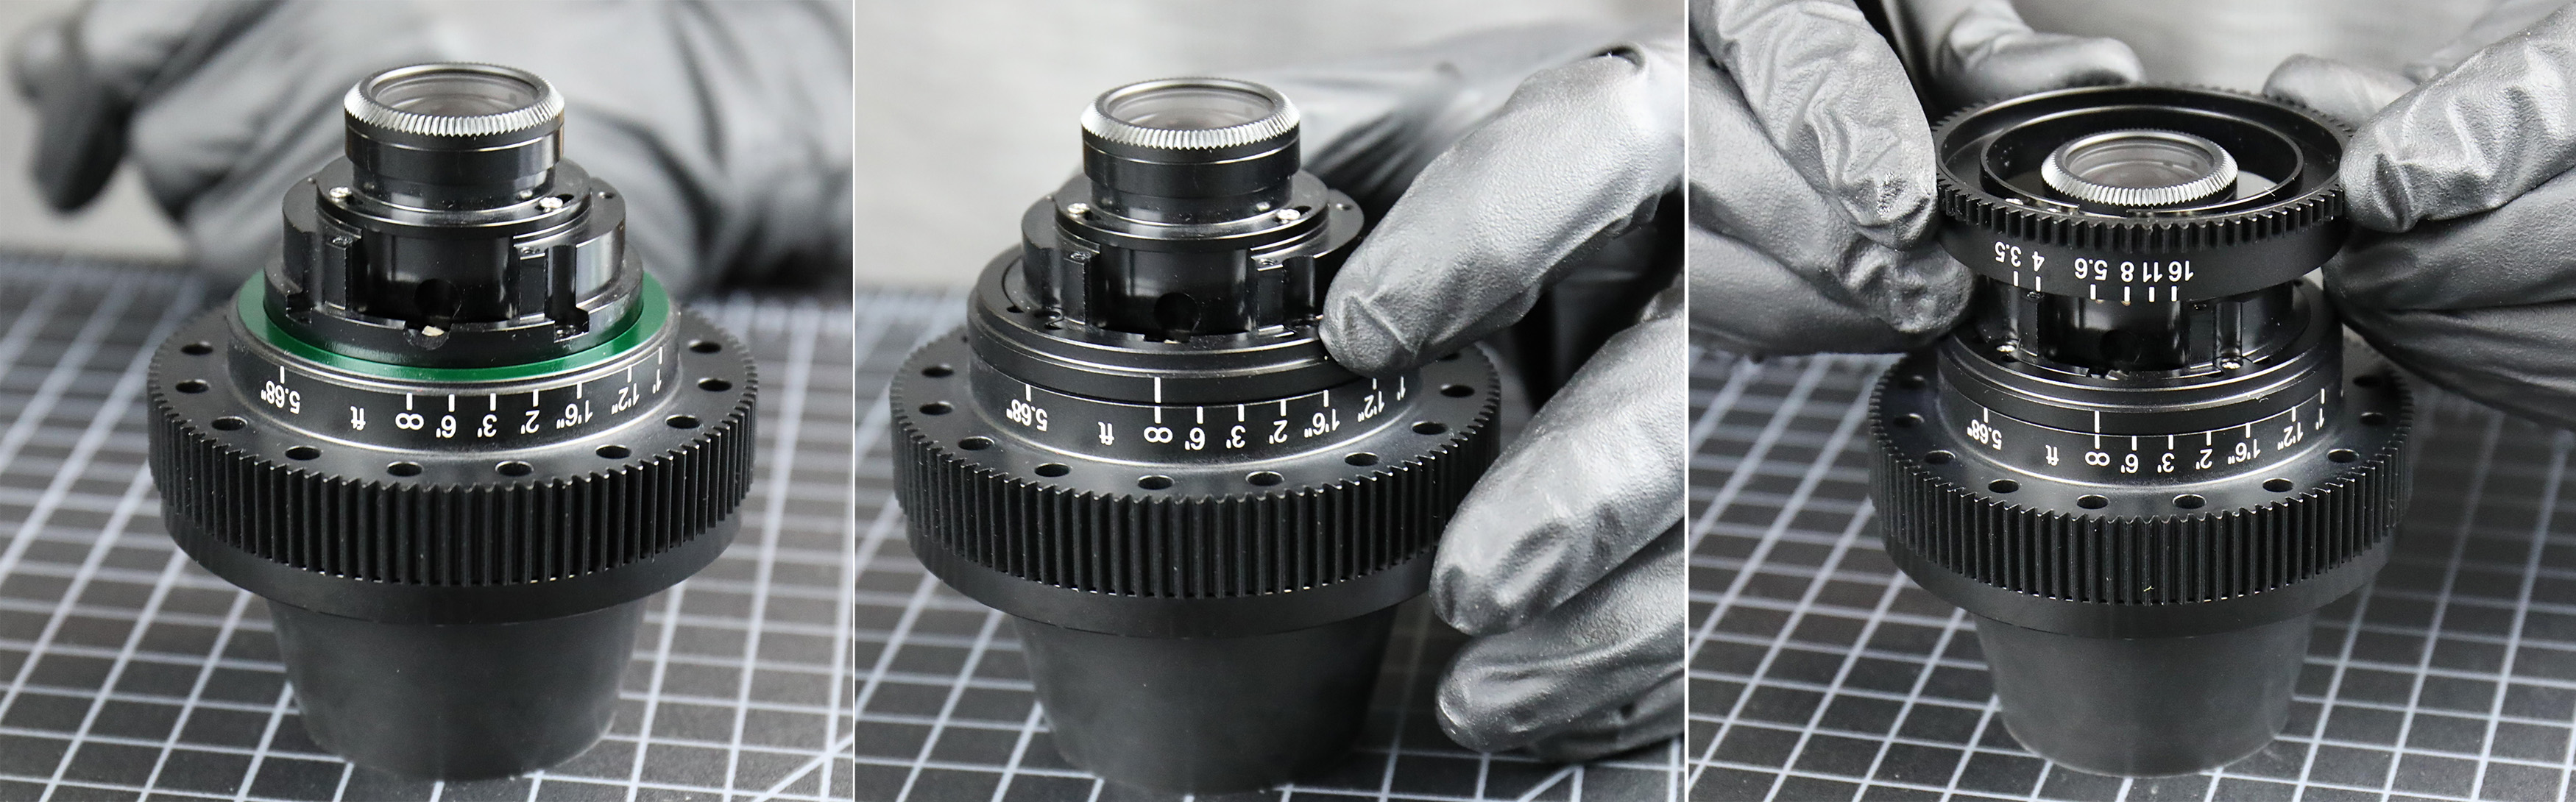
We’re getting close to being done with the rear part of the lens. The mounting ring goes on, then an infinity spacing shim (we just guess the thickness at this point, it gets reshimmed later), and finally the bayonet mount.
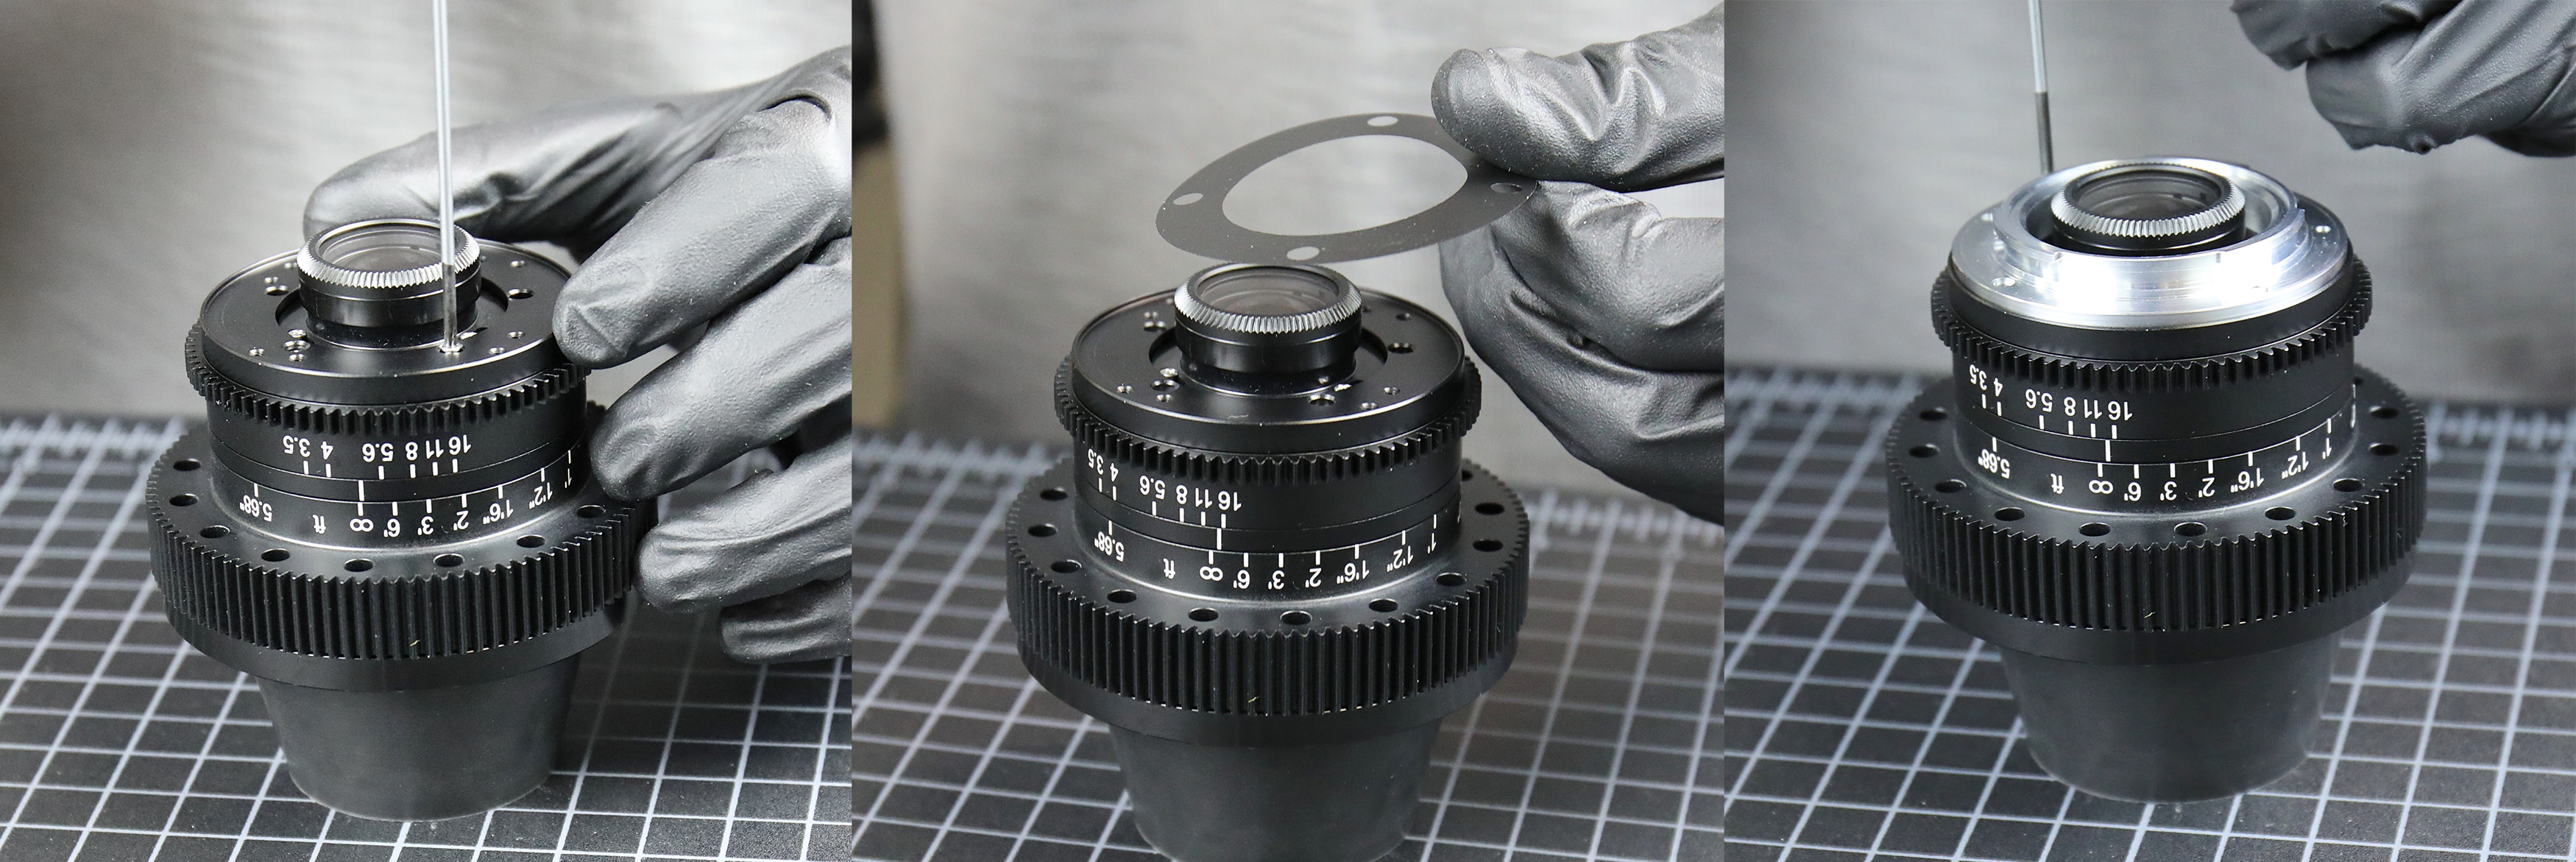
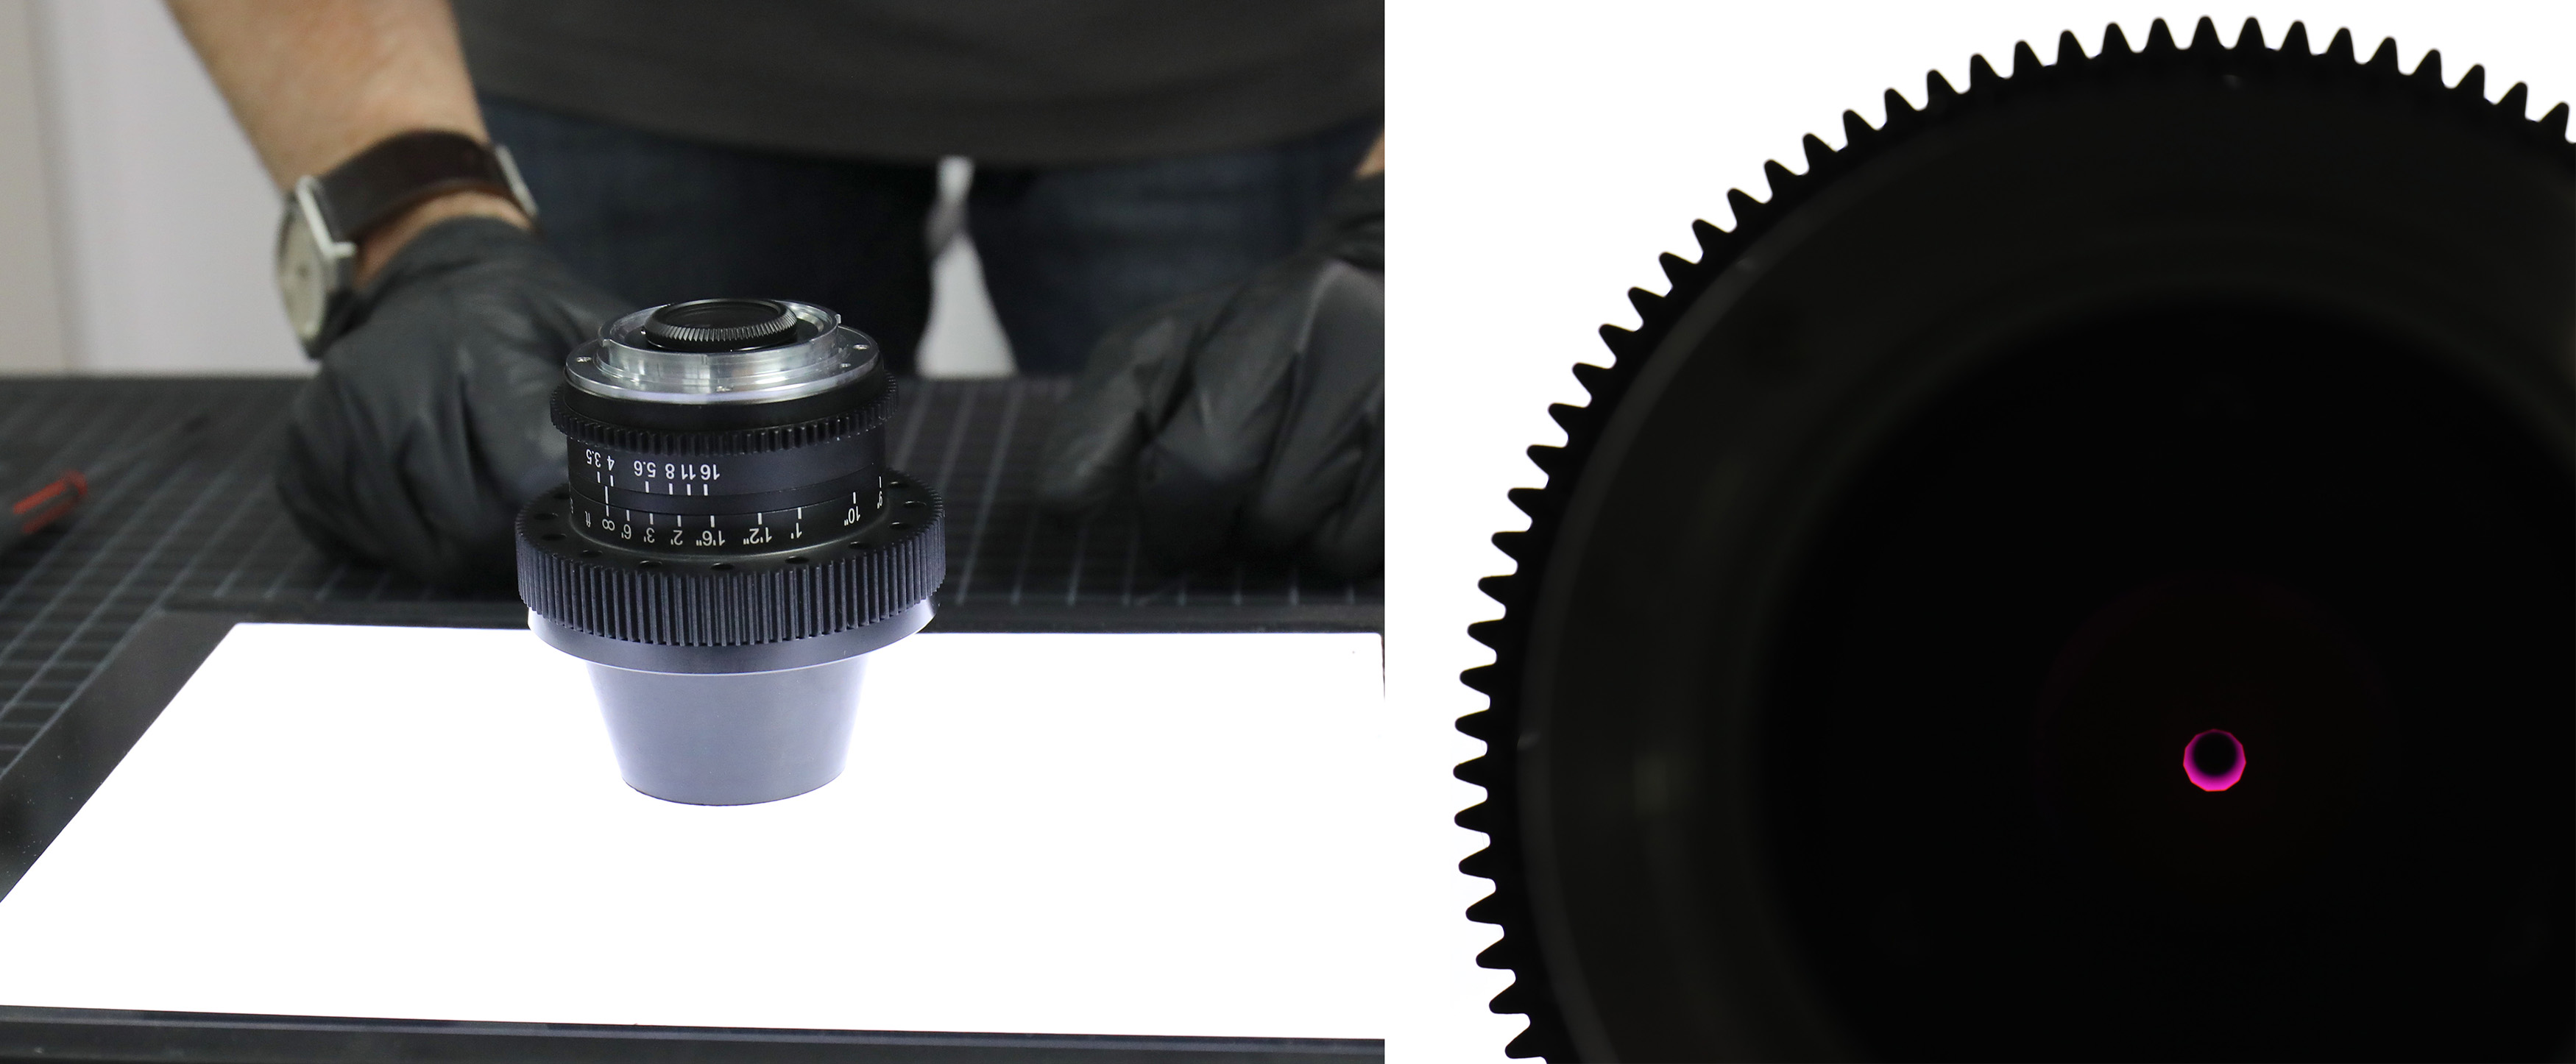
There’s only one more step to completing the assembly of the rear part of the lens; calibrating the aperture. We use an occulter, basically a semitransparent disk with a blackout that will be the size of the aperture at f/16.
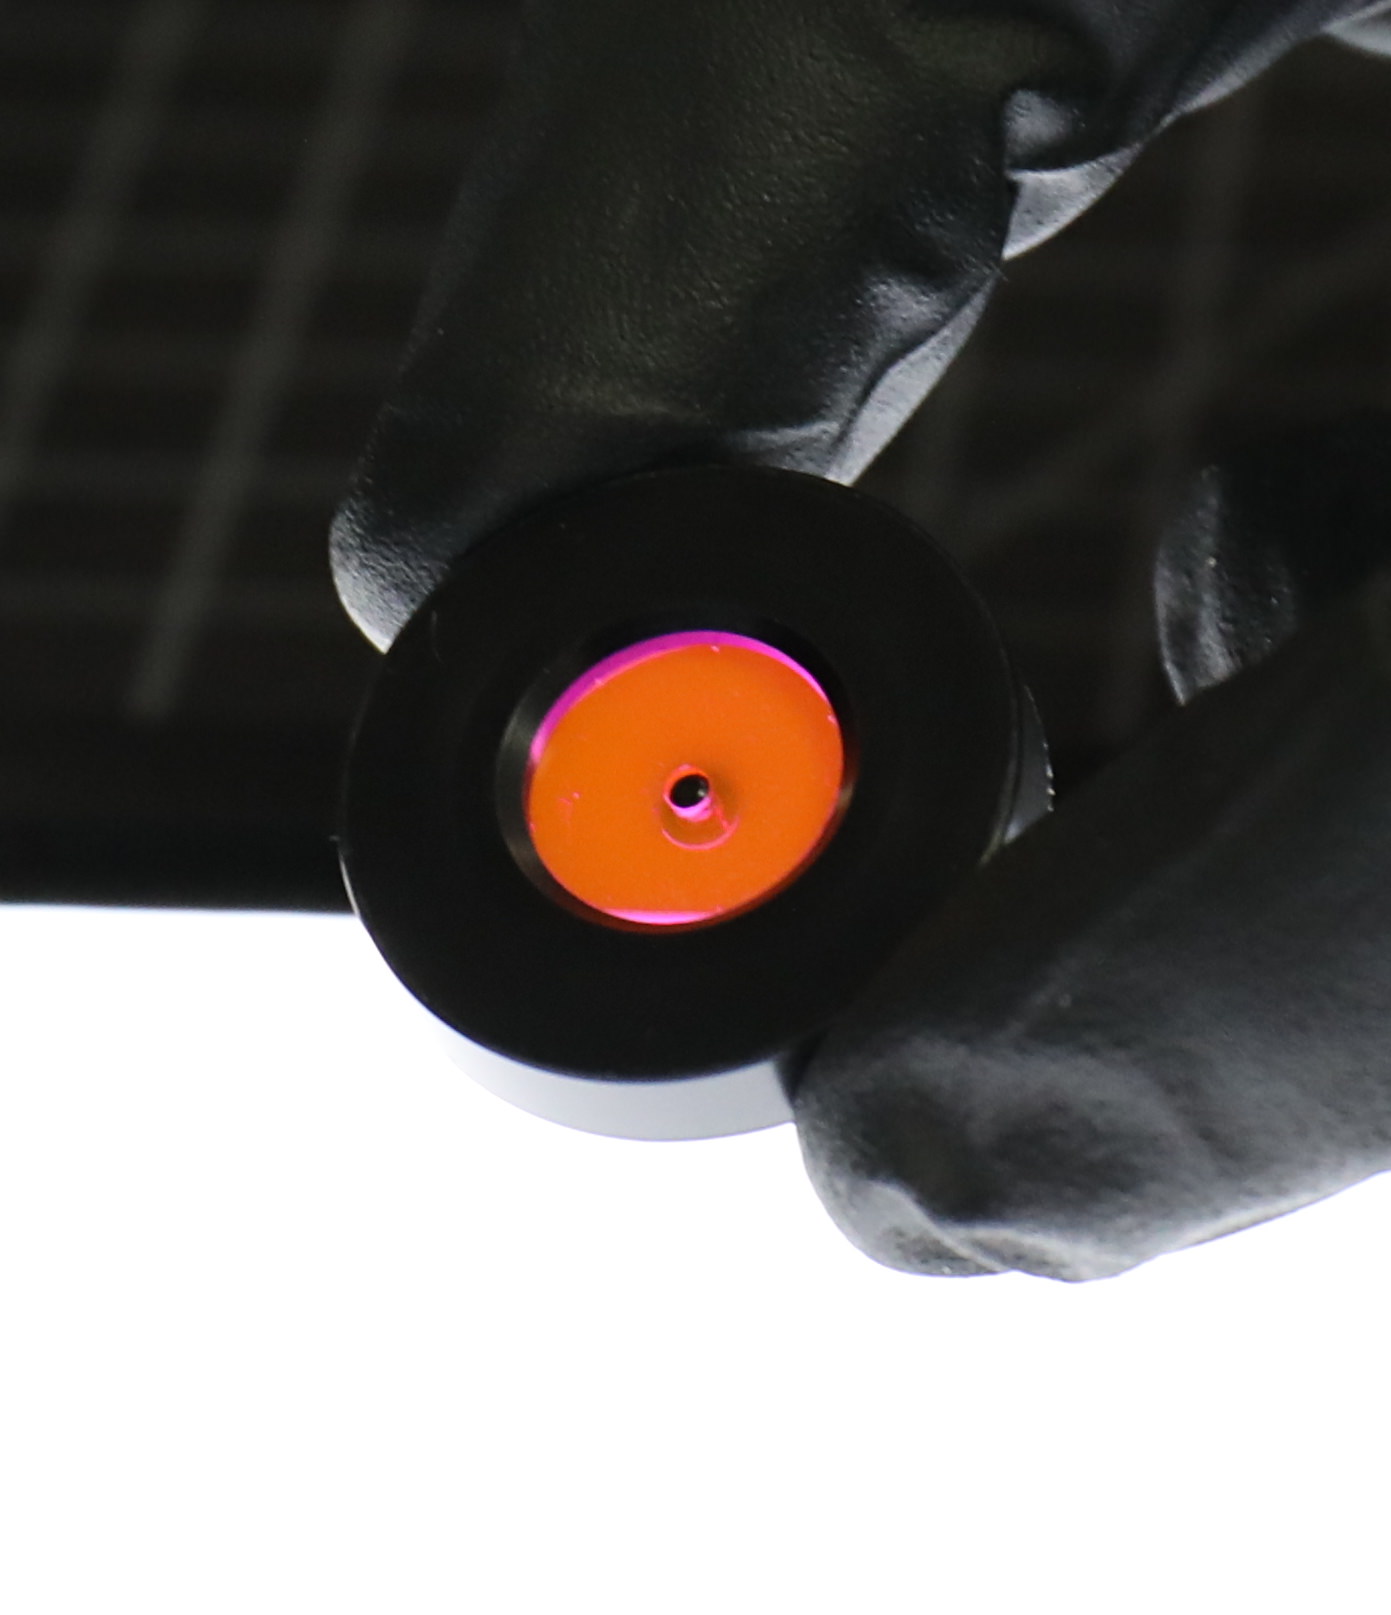
The lens is placed on a light table, the occulter placed over the rear element, and the iris adjusted until the f/16 setting just occludes the occulter’s central black disk (it’s not quite there in the image).
Putting It All Together
All of the complicated parts of the lens are in the rear we’ve just assembled, but that’s not really the part you notice when you look at the lens. It’s time to put those together now.
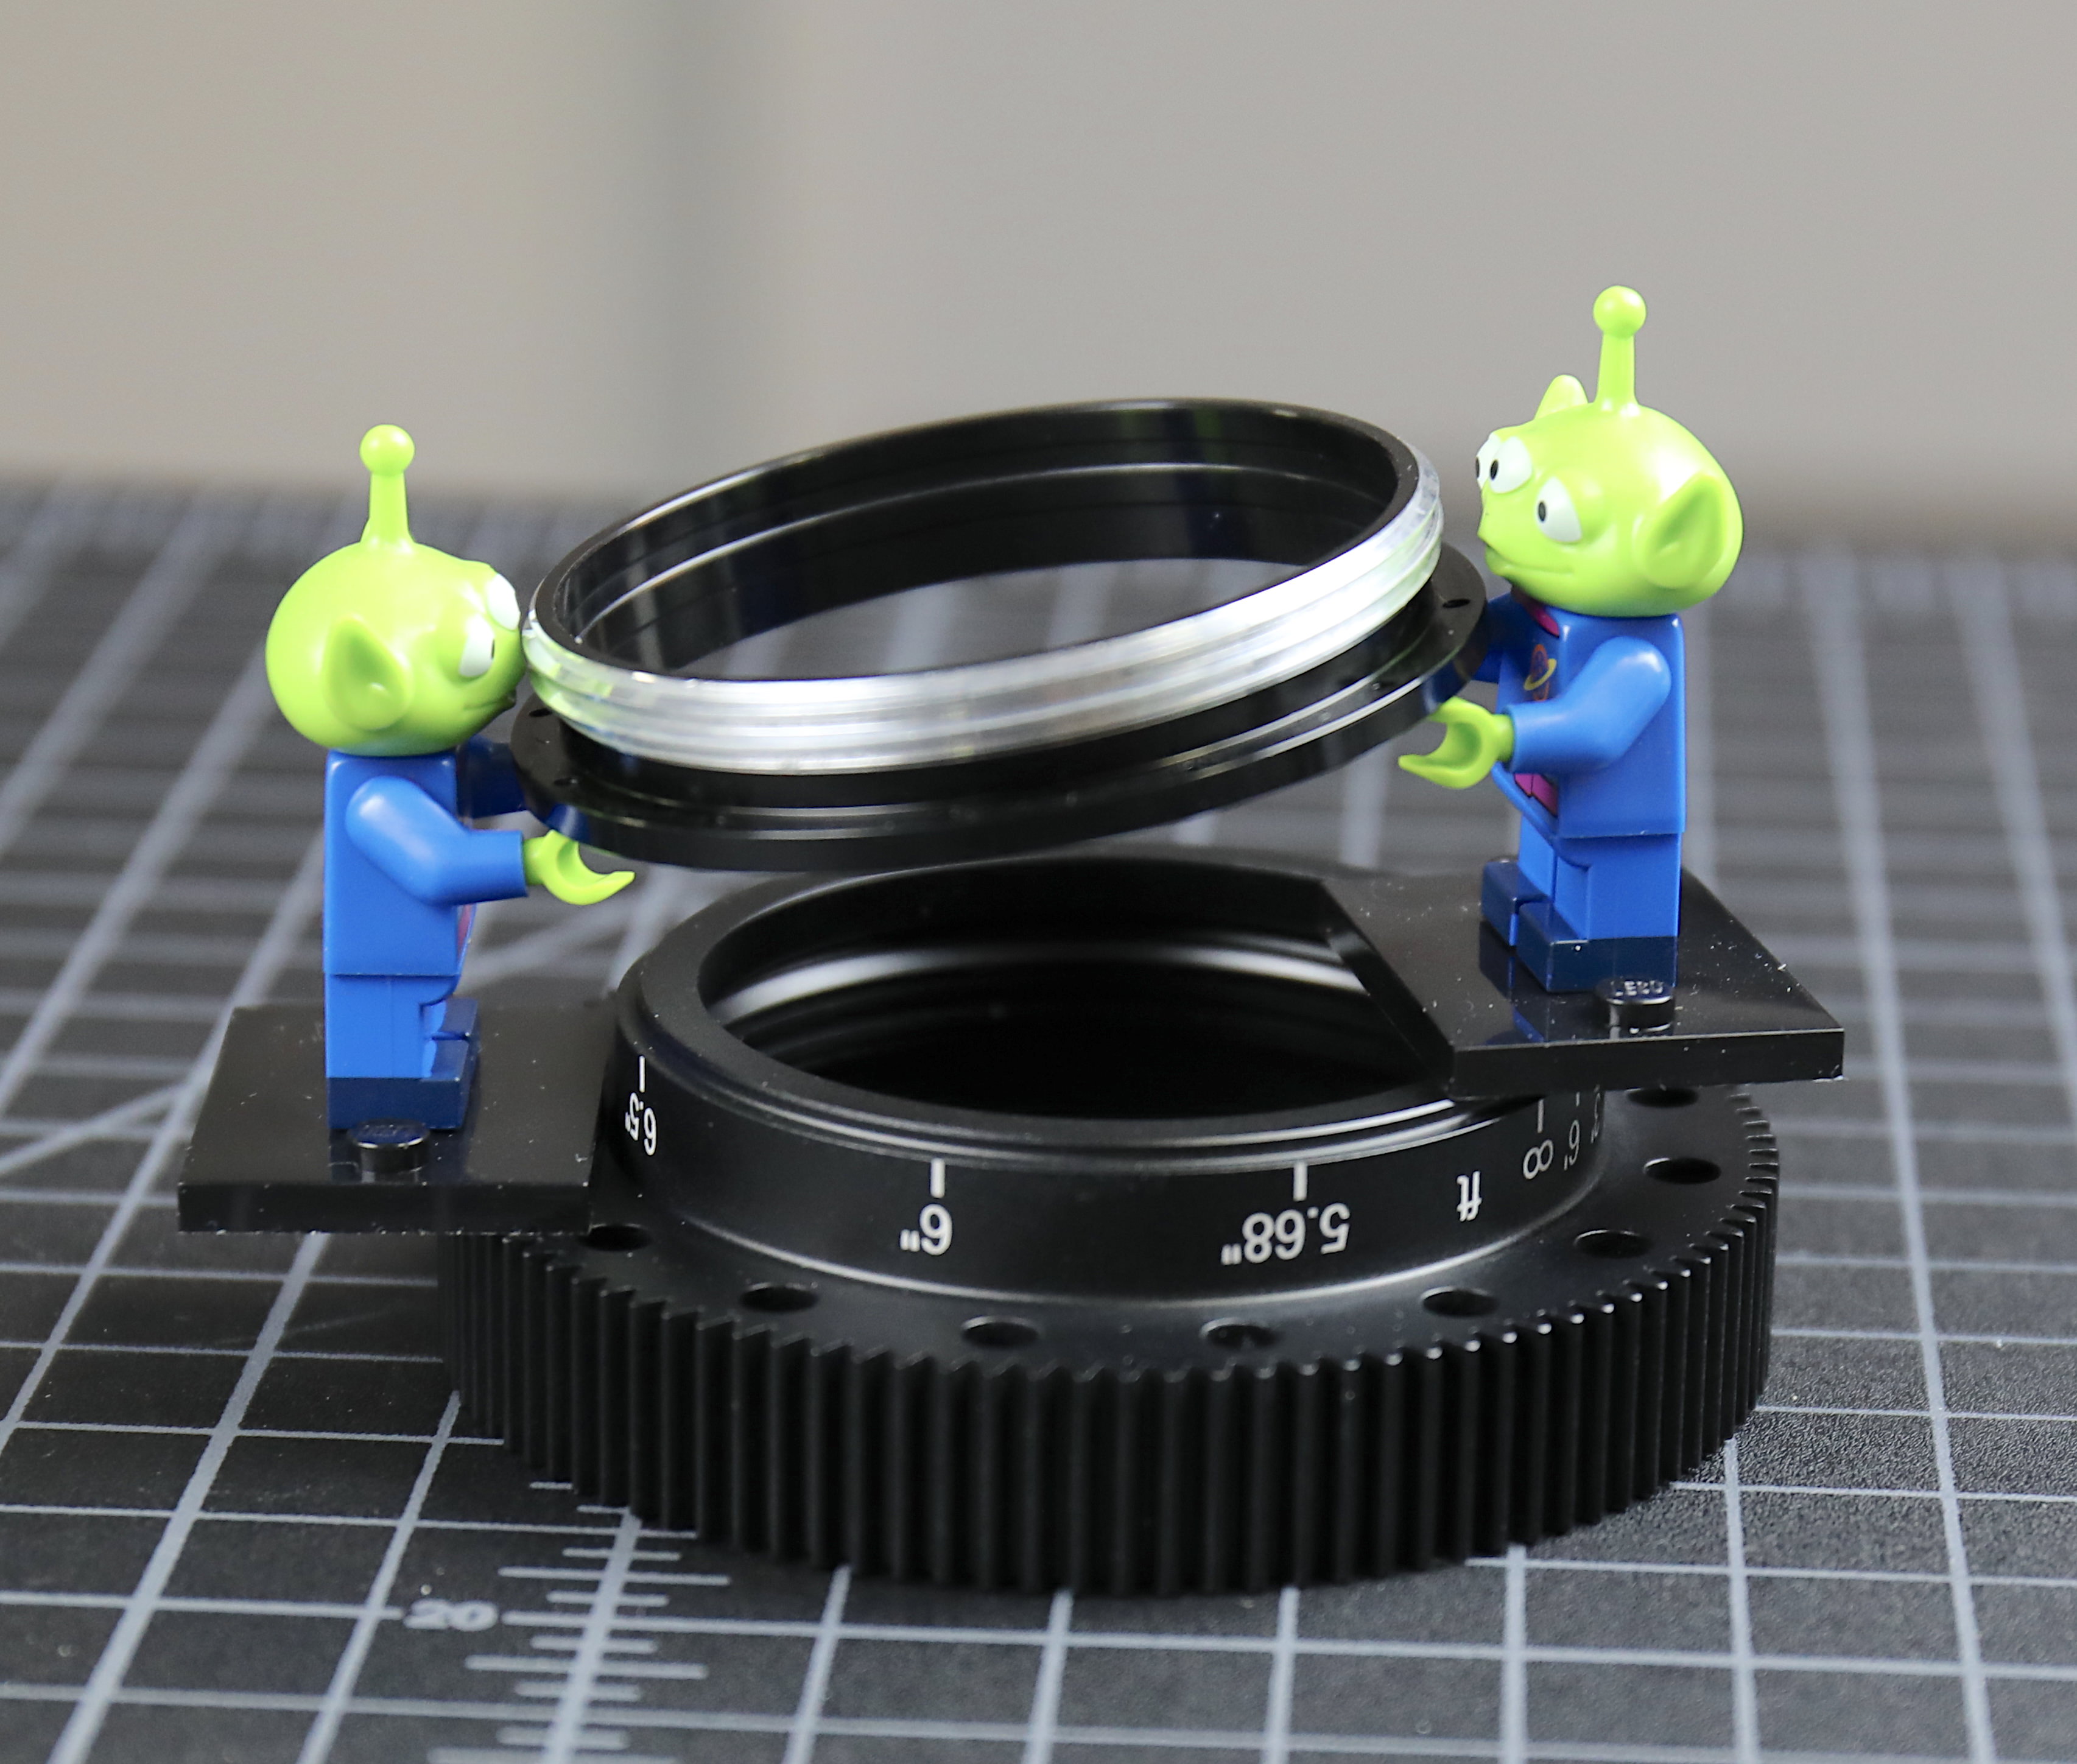
First, we get the base plate (AKA cheese plate) that we had potted the third and fourth elements to. The top side of the plate is the base of the large front elements, the back side functions as a cheese plate for inserting rods and other support items. The second element, which we also potted yesterday, then threads on.
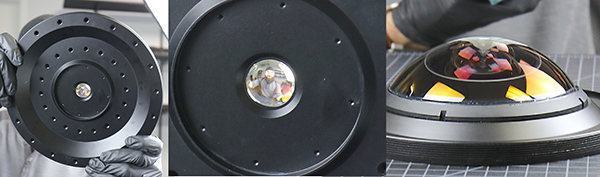
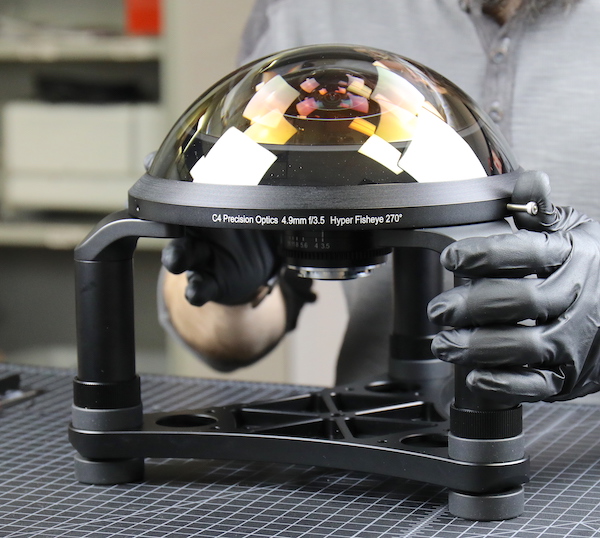
Finally, we unwrap the first element. These cost about $5,000 each so we tend to be a little paranoid about them.
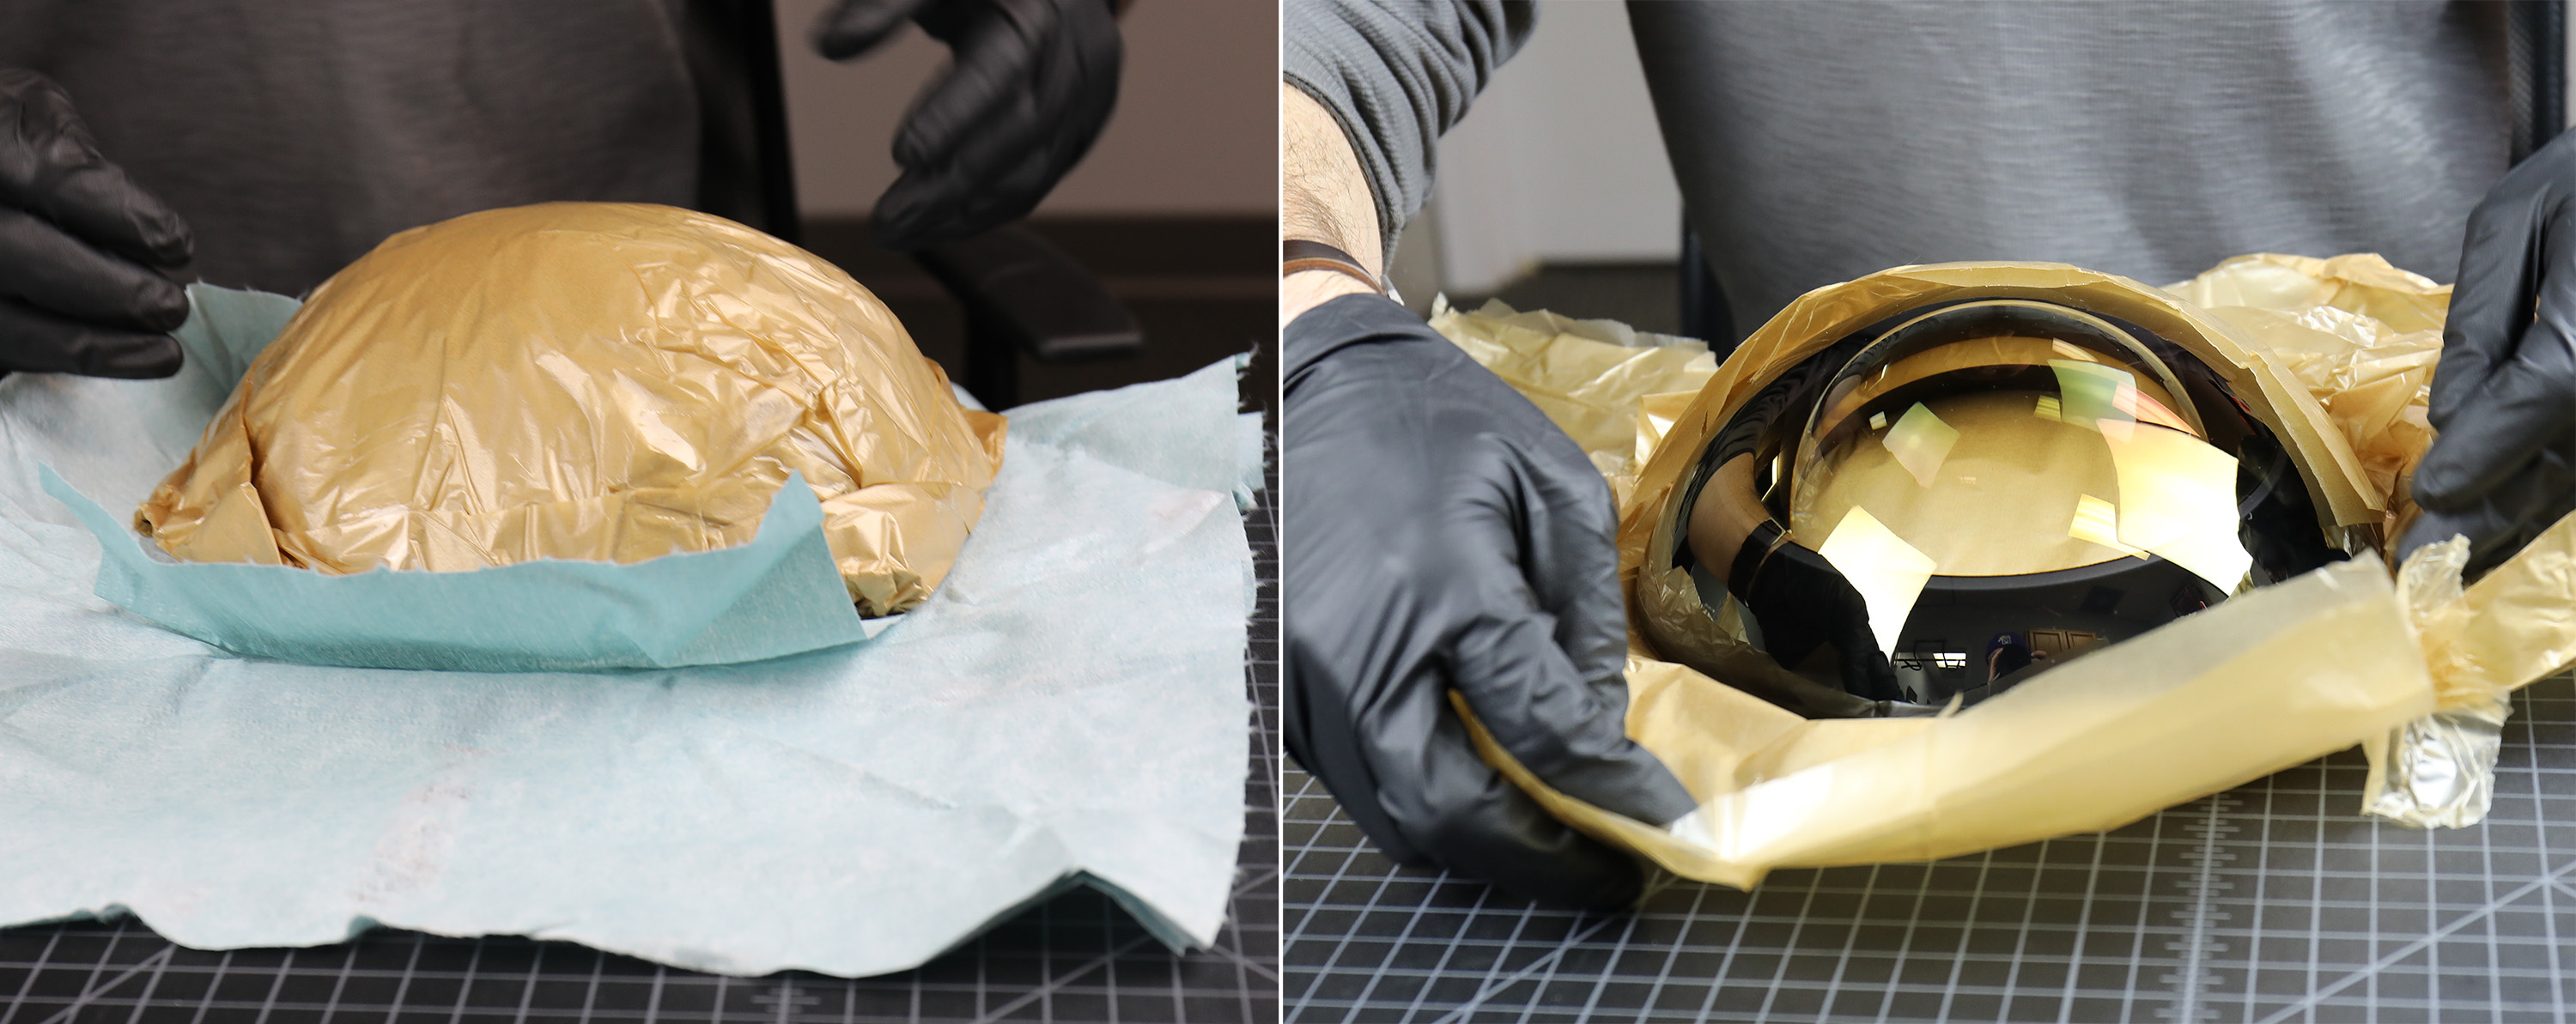
Once it’s set in place, it will be held by what we think is the world’s largest retaining ring.
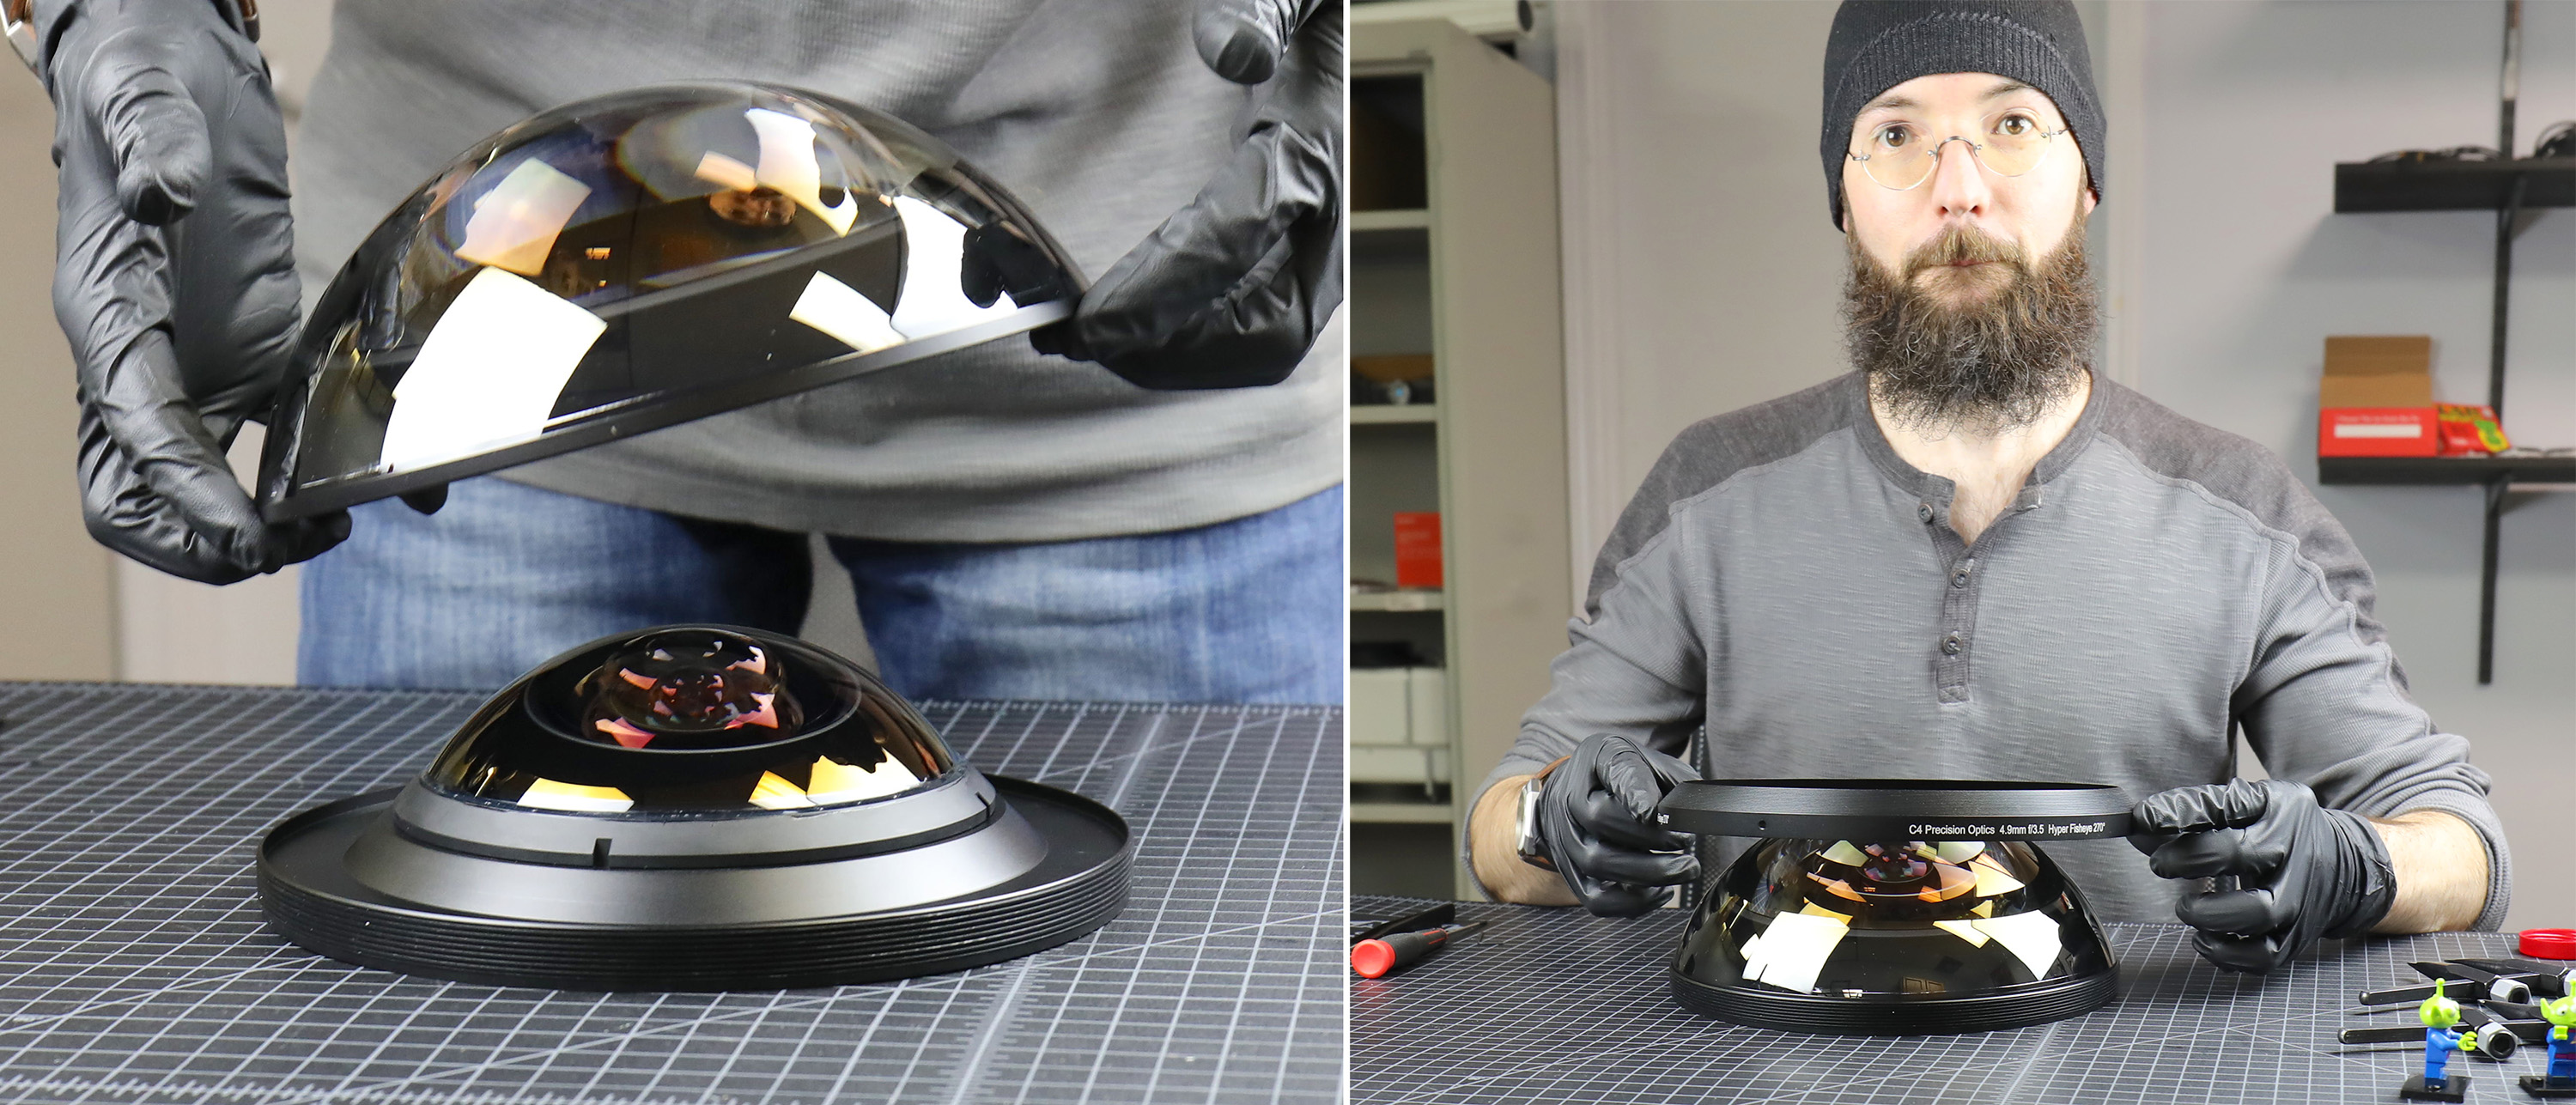
How do you tighten such a big ring? You temporarily put some big-ass screws in the locking slots to serve as handles. Once the ring is mounted, the front assembly gets put into its cap, which is the only reasonable way to hold it while we work on the back.
Now we can align and mount the rear assembly, the tripod legs, and finally the bottom platform.
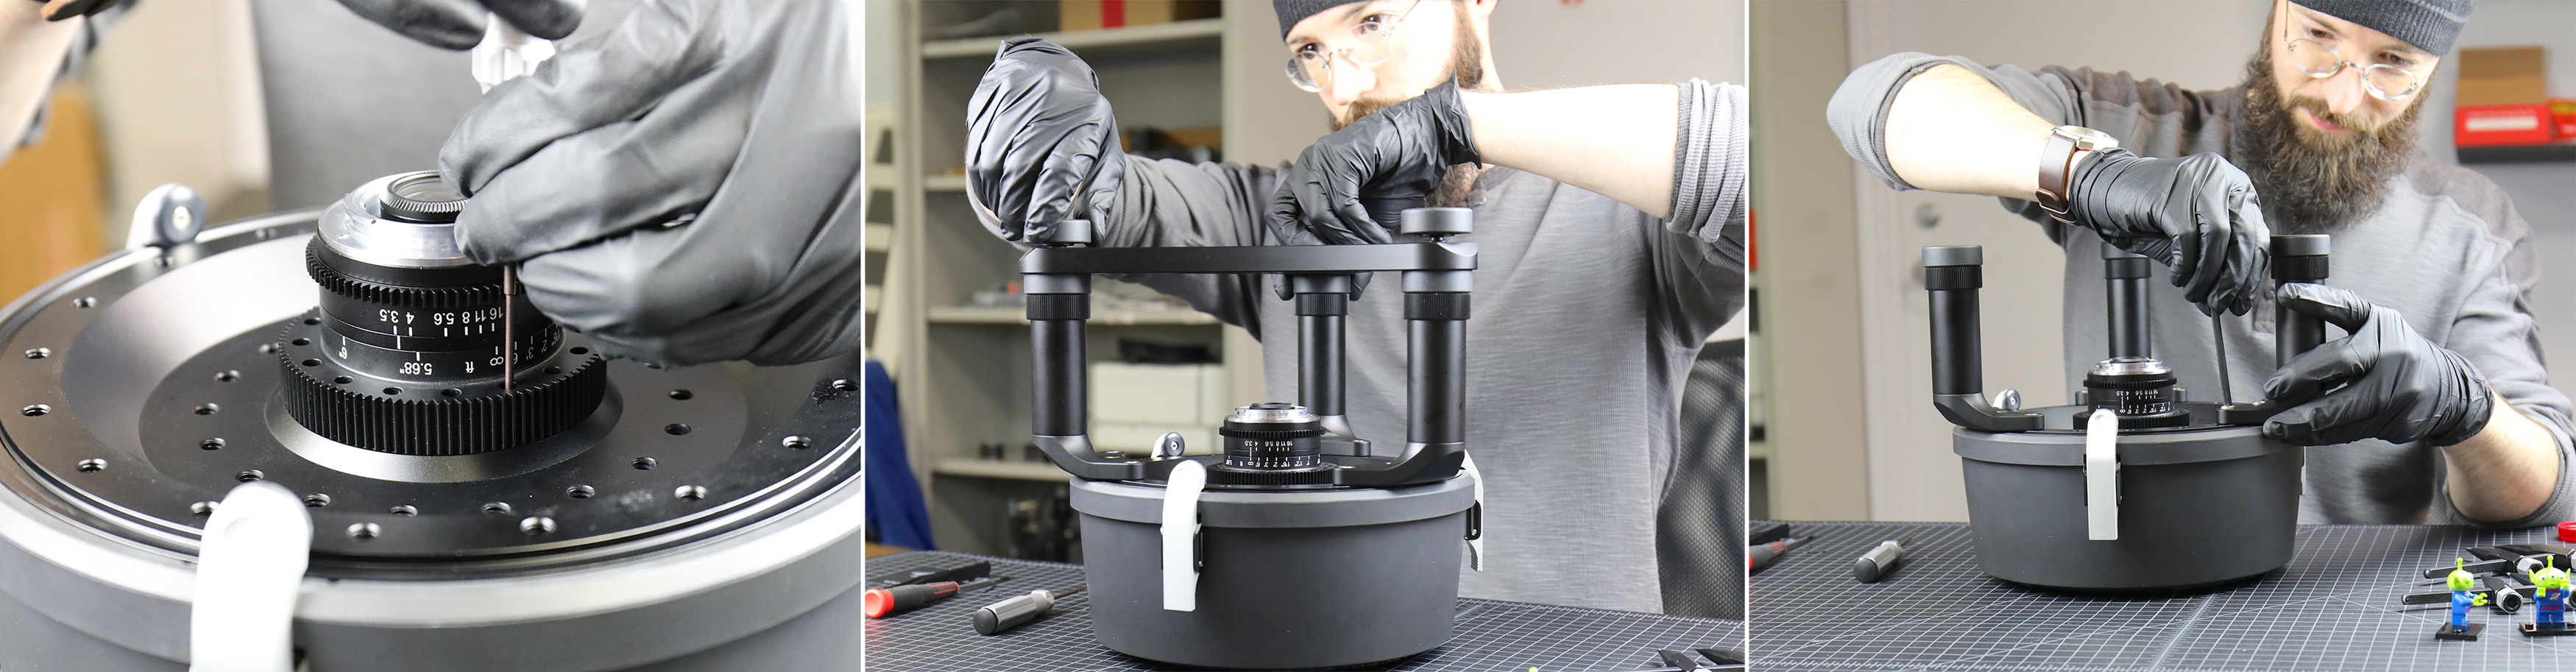
With the legs in place, we turn it back over and put in a leverage screw for one last torque of the retaining ring. Then the ‘handle’ screw is removed and set screws placed in those three holes to keep the ring in place.
And assembly is done.
We’ll have to take the bottom platform off and fine tune the shims under the bayonet mount for infinity focus before we start taking pictures, but that’s about it.
For those of you who are curious, a smaller Sony camera (A7xxx) fits nicely protected within the legs. For larger cameras the bottom platform can be removed, the legs extended or removed, and various apparatus (rods, follow focus, aperture control, etc. ) mounted directly to the cheese plate.
This lens is one of two developed for C-4 Optics, so it likely won’t ever show up on our rental list. But it is a passion project of mine, so I wanted to show off some of the things I’m working on on the side. If you are looking for an ultra-wide, I’ve gone ahead and listed the widest lenses we have available for rental below.
| Lens | Angle of View |
| Canon 8-15mm f/4L Fisheye | 180 degrees |
| Sigma 8mm f/3.5 EX DG Fisheye | 180 degrees |
| Sigma 4.5mm f/2.8 EX DC HSM Fisheye (crop sensor) | 180 degrees |
| Nikon 10.5mm f/2.8G AF DX Fisheye | 180 degrees |
| Panasonic 8mm f/3.5 Fisheye | 180 degrees |
| Rokinon 8mm T3.8 Cine Fisheye (crop sensor) | 167 degrees |
| Canon 11-24mm f/4L | 126 degrees |
| Sigma 12-24mm f/4 DG HSM Art | 122 degrees |
| Sigma 8-16mm f/4.5-5.6 DC HSM (crop sensor) | 114 degrees |
| Olympus 7-14mm f/2.8 ED PRO | 114 degrees |
| Fuji XF 10-24mm f/4 R OIS | 110 degrees |
| Sony E 10-18mm f/4 OSS | 109 degrees |
| Panasonic/Leica 8-18mm f/2.8-4 ASPH | 107 degrees |
| Rokinon 10mm f/2.8 ED AS NCS CS (crop sensor) | 105 degrees |
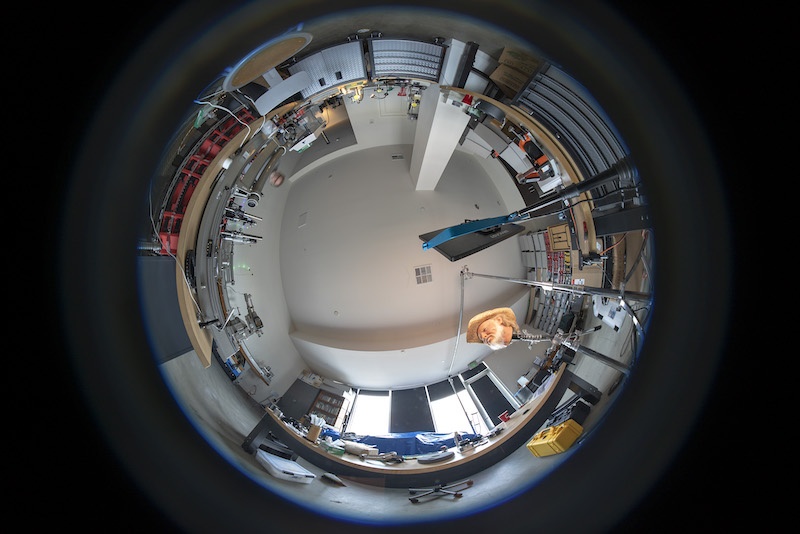
We’ve got some urgent things that are going to take up the next week, but we should have another post with images from the lens in 10 days or so. In the meantime, here is a quick teaser to give you an idea of how wide 270 degrees really is.

Roger Cicala, Aaron Closz, Brian Caldwell, and Wilfried Bittner
February, 2019
Author: Roger Cicala
I’m Roger and I am the founder of Lensrentals.com. Hailed as one of the optic nerds here, I enjoy shooting collimated light through 30X microscope objectives in my spare time. When I do take real pictures I like using something different: a Medium format, or Pentax K1, or a Sony RX1R.
-
Alan B
-
geekyrocketguy
-
Roger Cicala
-
Someone
-
Matt Grum
-
Matt Grum
-
Someone
-
Matt Grum
-
Remigiusz Modrzejewski
-
Julian
-
Alan B
-
donpedro
-
Brian Caldwell
-
Roger Cicala
-
Ed Hassell
-
Zach Sutton Photography
-
Zach Sutton Photography
-
Michael – Visual Pursuit
-
entoman
-
Razor512
-
MassimoTava
-
MassimoTava
-
Alan B
-
Roger Cicala
-
Not THAT Ross Cameron
-
Alan B
-
Ed Magowan
-
Astro Landscapes
-
geekyrocketguy
-
Andreas Werle
