Geek Articles
Removing a Fly from ‘Weather Sealed’ Canon 70-200mm f/2.8L IS II
I’ve been doing lens stuff for a long time now. Long time. Trust me; it’s hard to remain polite the 843,911th time some newbie goes into hysterics because there’s dust in their lens. Telling them it doesn’t matter a bit, and that all their other lenses have dust they just can’t see ( because different optics magnify dust more than others, or because they’re using some puny little baby light to look into their lenses) won’t stop the hysterics, I know. But I’ve reached a Zen place of peace and contentment and can generally ignore them and not respond.
I get a bit less Zen when they come back a day or two later and scream in all caps, “THEY WANTED $350 JUST TO GET THE DUST OUT”. I can ignore that when it’s some online forum, although I will admit ‘ignore’ in this case generally means not hitting send after I spend 20 minutes writing a two-page response in quatrains with multiple references.
Every so often, though, someone emails me and offers me a ‘reasonable’ price (usually about $50) to clean out their lens. At this point, everything is not Zen, and a day or two later I typically regret the snarky response I made telling them why my charge would be twice the original sales price of the lens in question.
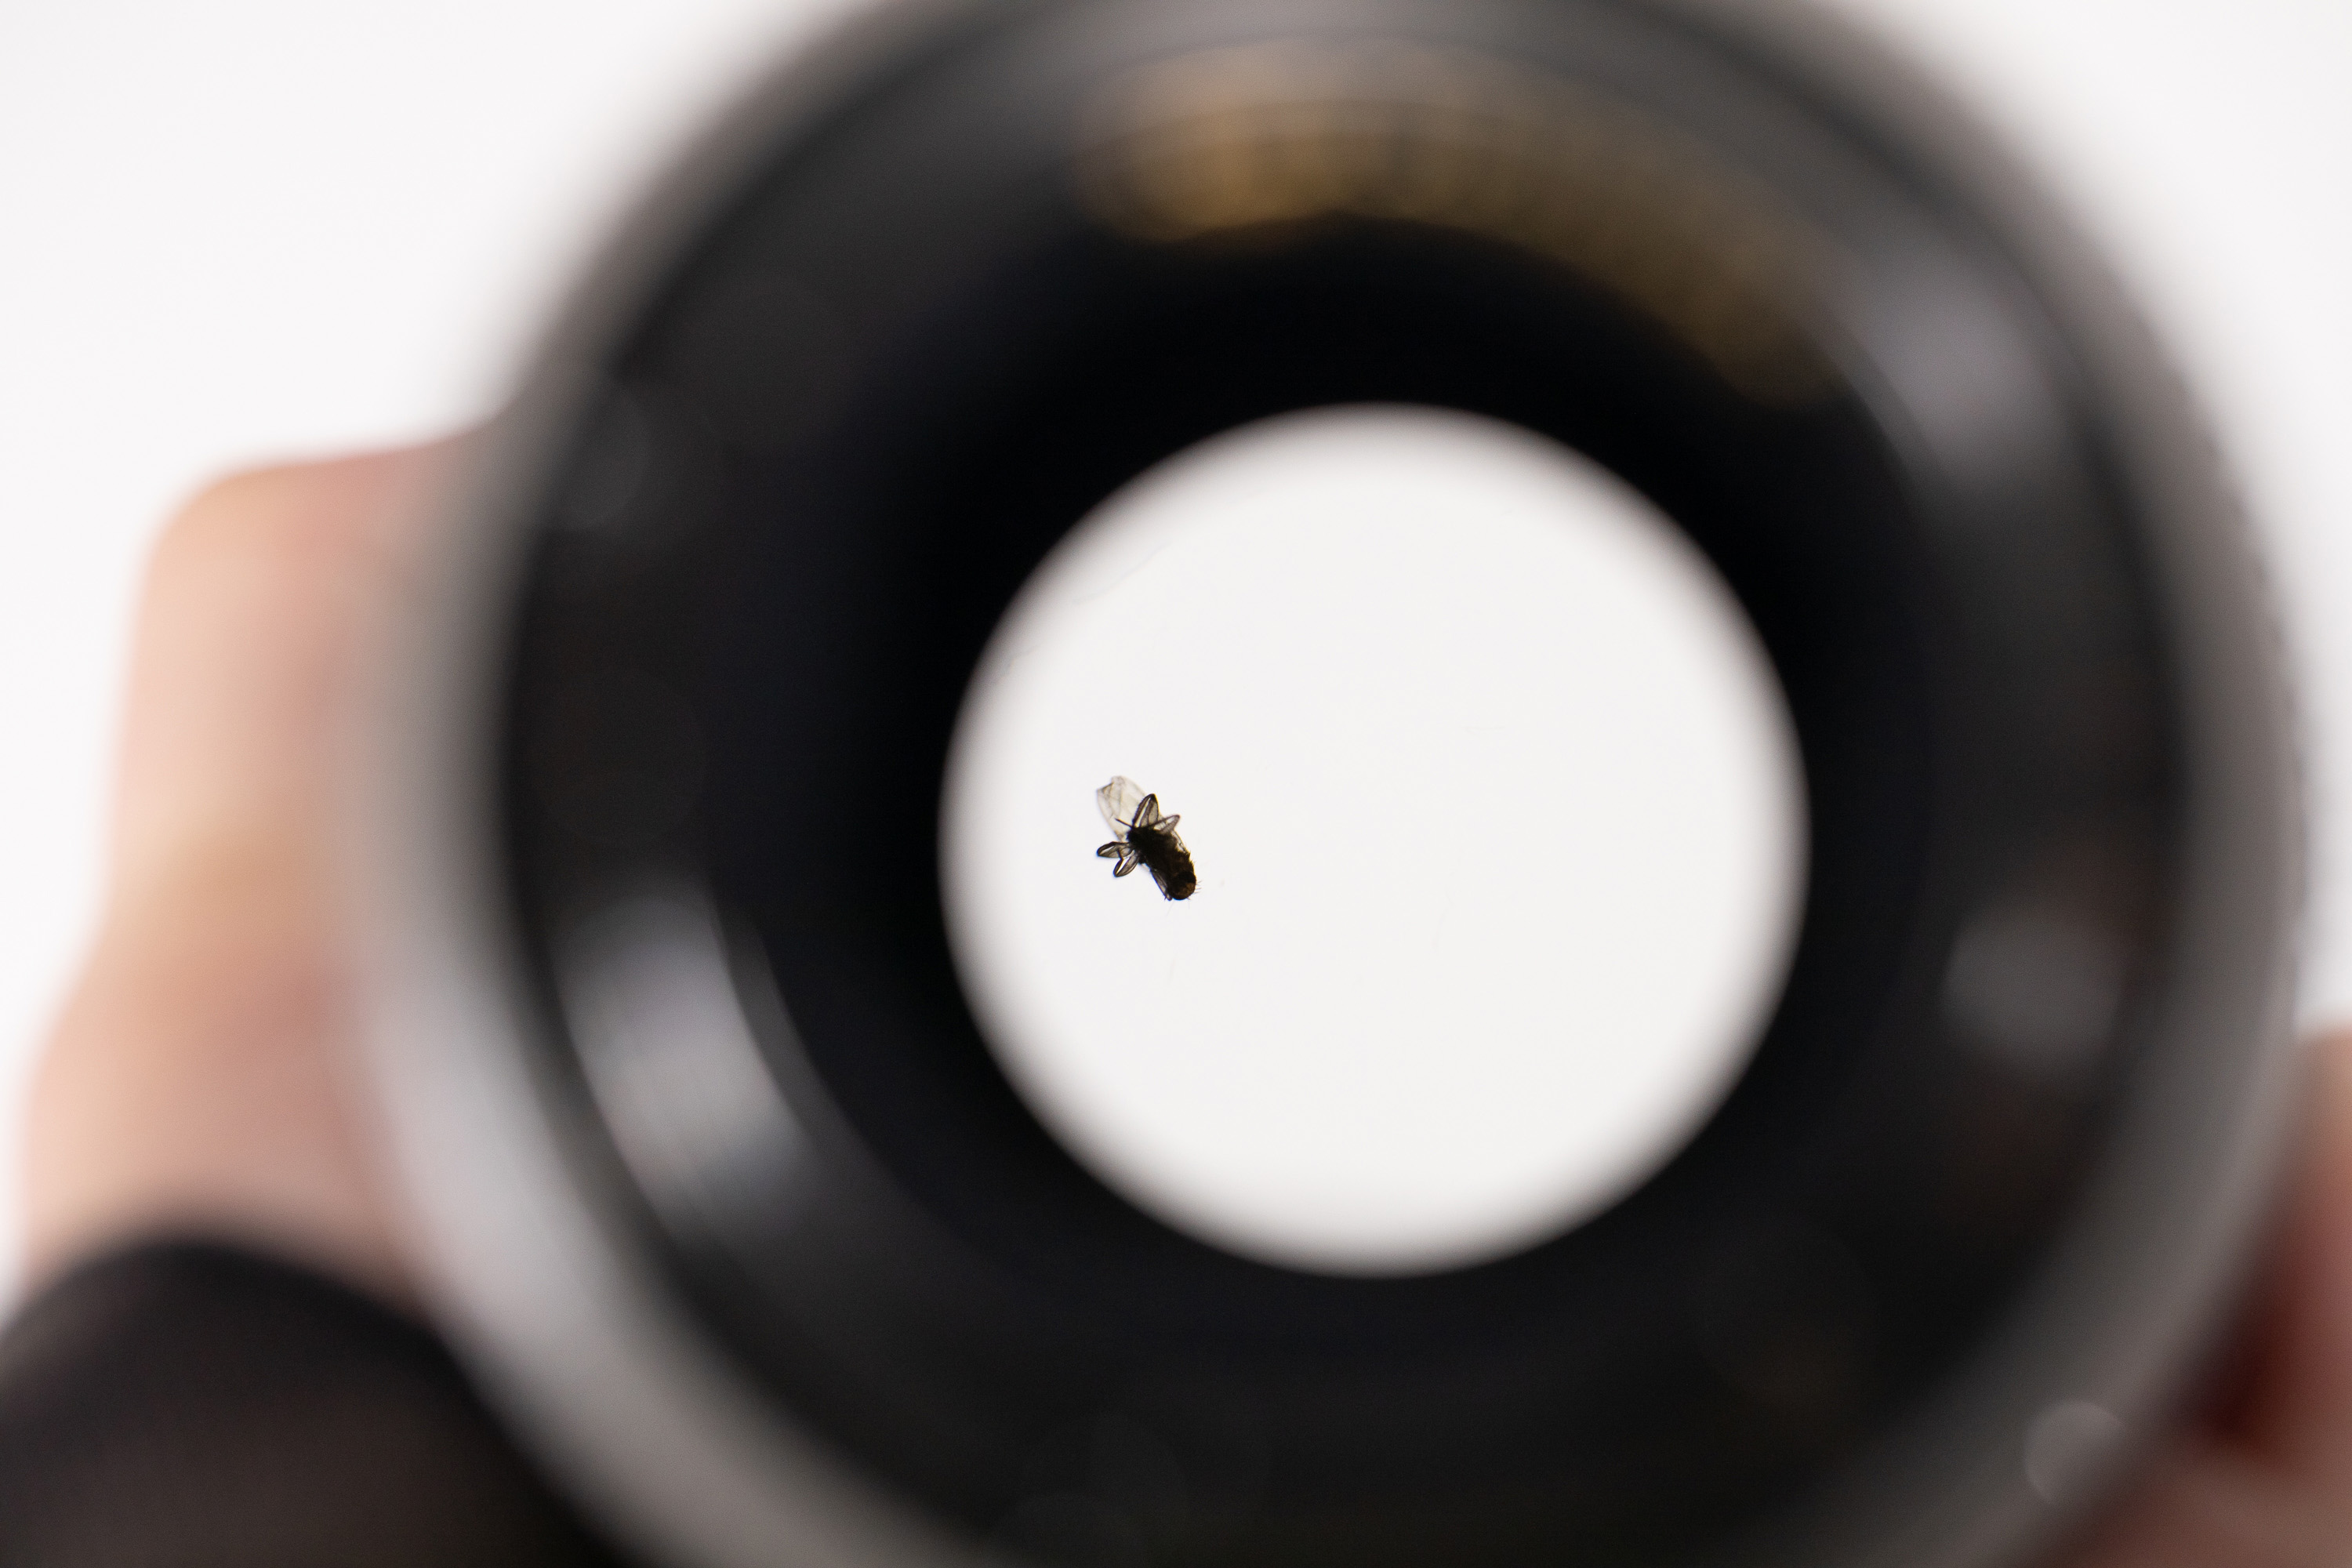
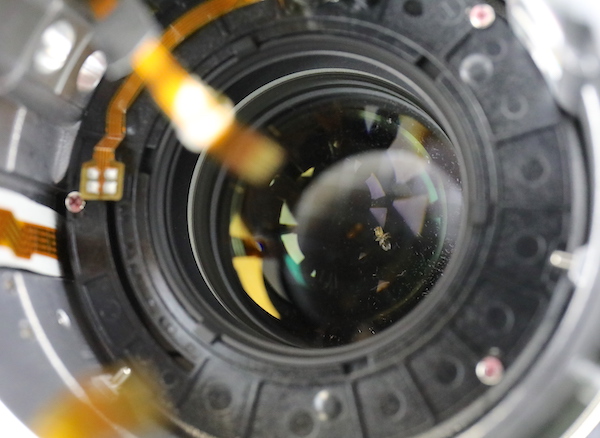
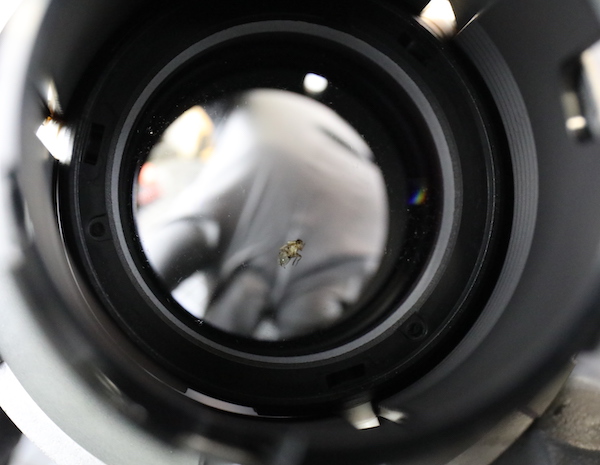
Anyway, we had a Canon 70-200mm f2.8 IS II lens come back from rental with a fairly large sized fly inside. It’s hard to take pictures of a fly deep inside a lens, so we put the lens on a white box to do it; that’s why it appears rather backlit. Here’s the fly as viewed from the rear element.
Lensrentals.com, 2019
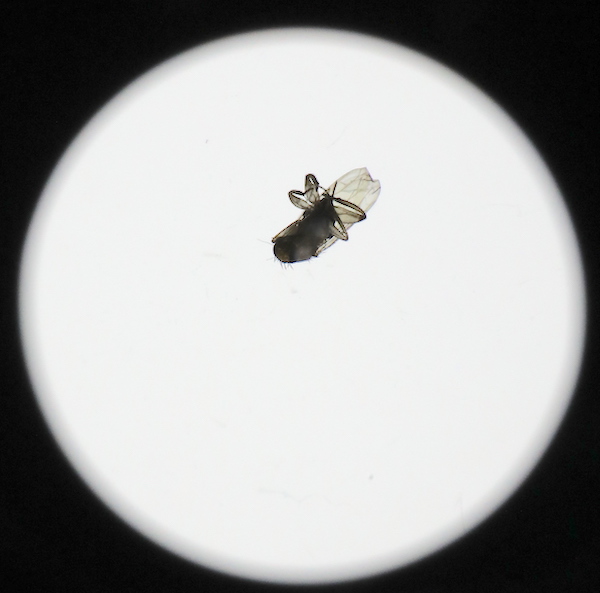
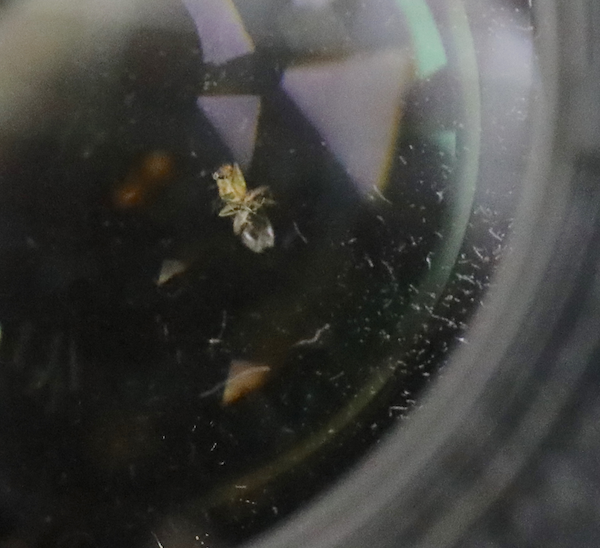
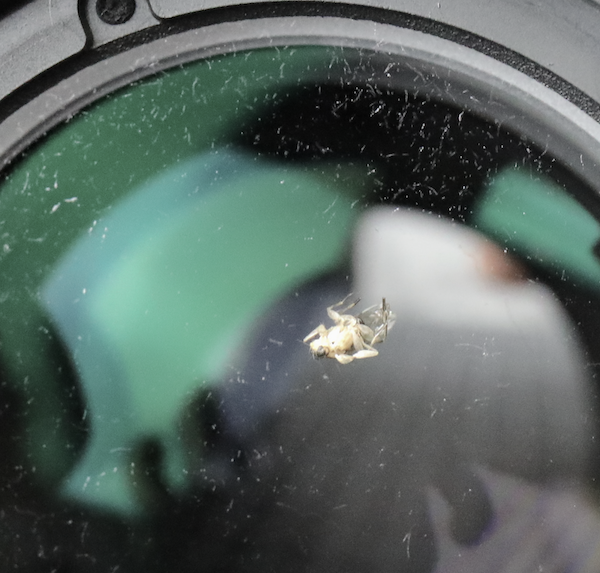
In case any of you entomologists want to take a shot at telling us what kind of insect this was, here’s a close-up.
Lensrentals.com, 2019
Of course, if there’s going to be a fly in the lens, it’s going to be way deep inside where it’s really hard to get to. I don’t know why flies do that, but I promise you they do. You never see a fly just under the front or rear element. They get into the deepest groups, leaving little fly parts all over, and usually, get smushed by the zoom or focus element.
So, this seems like a good time to do a blog post showing that 1) this big-ass fly had almost no effect on image quality, so that little dust speck you’re frantic about sure doesn’t, and 2) getting flies (or dust) out of a lens is a lengthy and difficult process that takes a long time.
Now I think we all agree that the fly really did need to be removed, but by the time you finish this post, hopefully, you’re going to agree with me that that dust speck in your lens probably is just fine right where it is. Not to mention, I bet there’s a really good chance that if we remove this fly, the lens will never have another fly episode. If we remove some dust, though, there’s a 100% chance there will be more dust in the lens in a few weeks.
How Does a Lens Perform with a Fly in It?
Pretty well, actually. We took pictures of test charts, even ran a complete set of MTF tests. We took images stopped down, and at all focal lengths.

Lensrentals.com, 2019
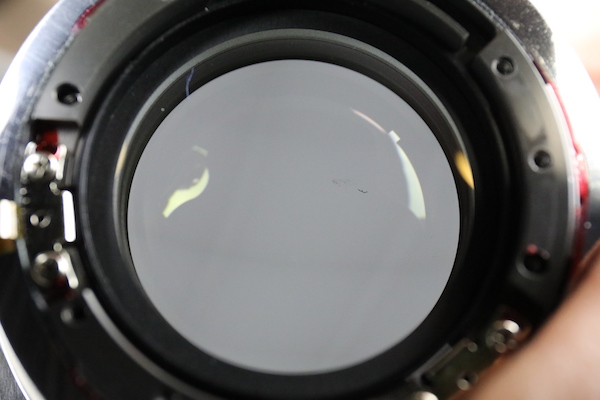
There was no sign there was a fly inside the lens until you stopped it down to f/13. Then we started to see a shadow.

Lensrentals.com, 2019
Stopped down to f/22, zoomed back to 70mm, and focused at minimum focusing distance, we could get a pretty sharp, black blob. Just so nobody claims ‘see, that’s why you don’t want dust in your lens’, I’ll add there’s lots of dust and a couple of detached fly legs lying around and you don’t see any sign of them. Takeaway message: if your dust spec is smaller than a fly (about 4mm by 1.5mm) it’s not showing up in your images.

Lensrentals.com, 2019
So Let’s Go Fly Hunting
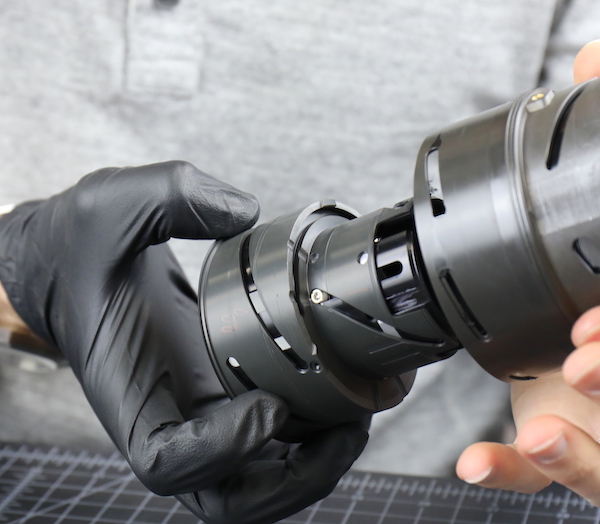
We’ve already done a complete tear-down of this lens, so I’m just going with an overview of the disassembly for this post. We start by getting the rear barrel off. The rear baffle pops out.

Lensrentals.com, 2019
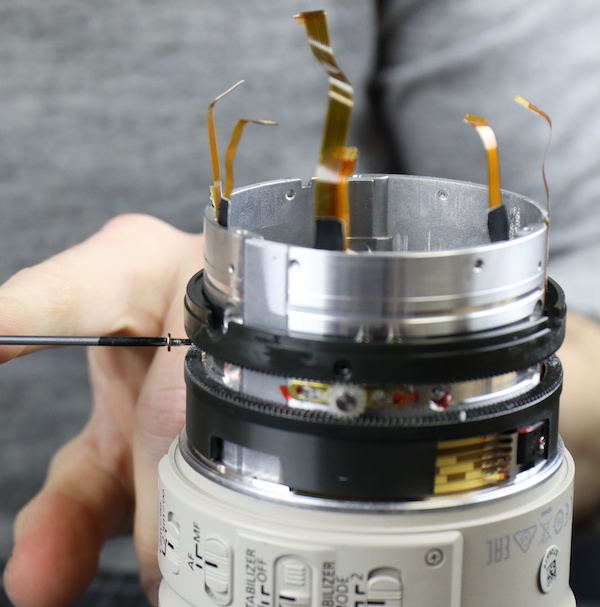
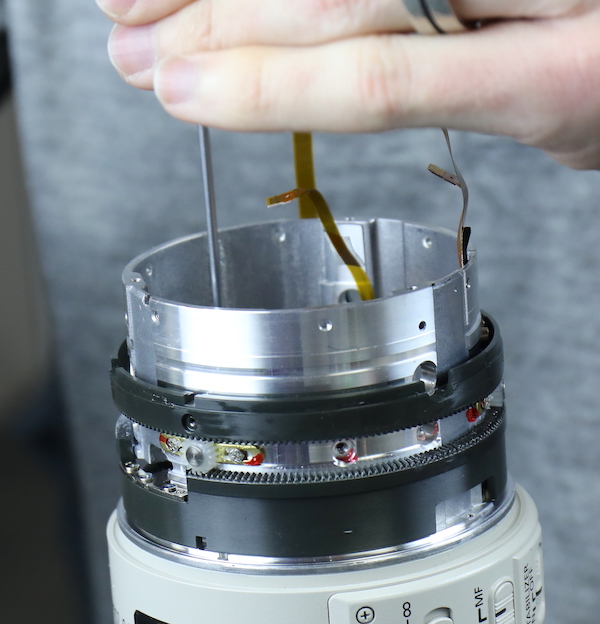
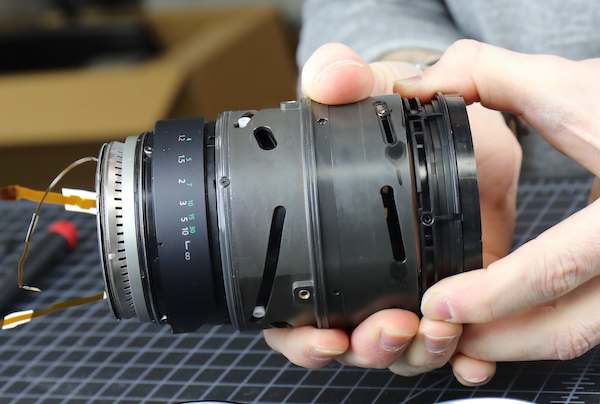
Then we take the screws out that hold the electrical connections to the bayonet (already done in the photo) and remove the 8 screws under the tripod ring that hold the outer barrel on (being done in the photo).
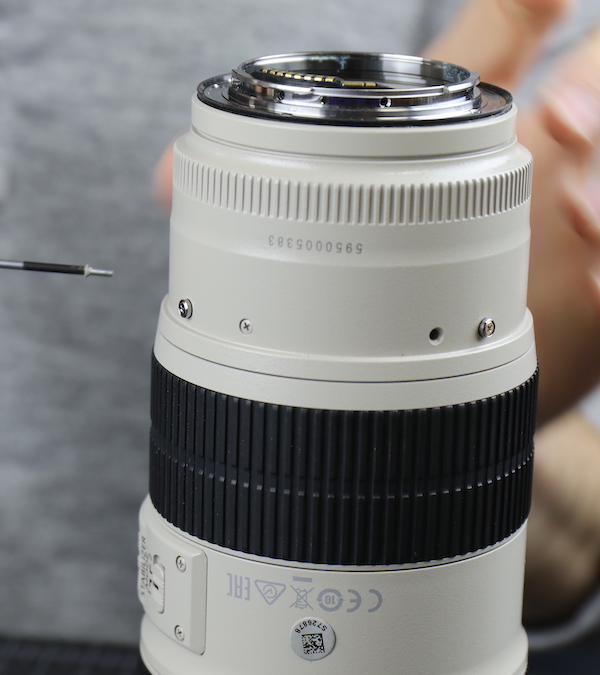
Lensrentals.com, 2019
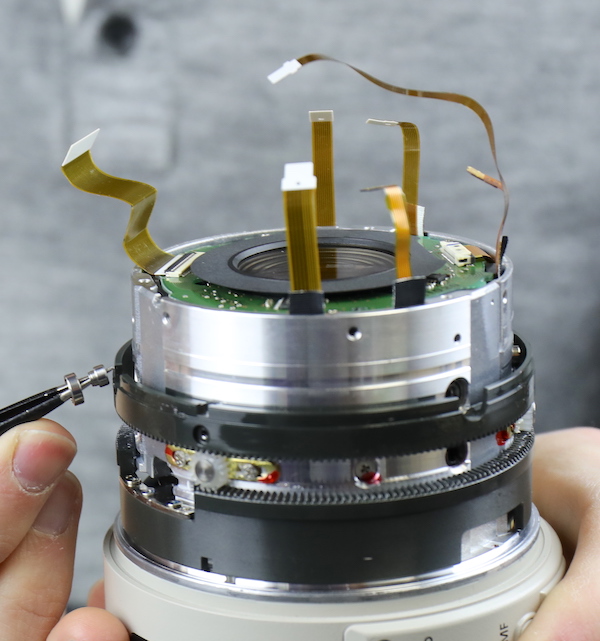
After the screws are out the rear barrel slides off, showing the electrical chaos that is the back of the Canon 70-200 f/2.8 Mk II/III.
Lensrentals.com, 2019
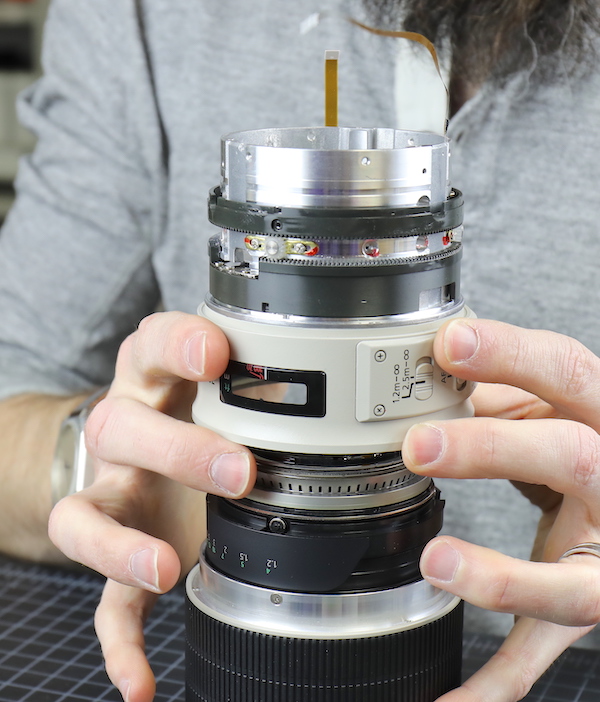
Next the zoom rubber is peeled down, the screws holding the zoom barrel removed, and the zoom barrel comes off.
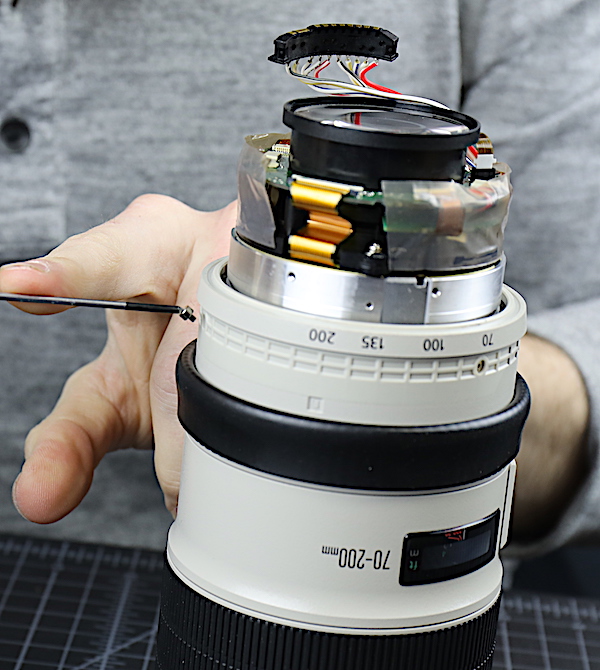
Lensrentals.com, 2019
This exposes the reverse gear mechanism. It’s there so when you turn the zoom ring one way, the internal zoom barrel turns the other way. Because, why not make something simple as complex as you can? (There actually are good reasons for this; I’m just tired of 70-200mm zooms in general so I feel like mocking them. No lens is more tightly packed full of complex stuff than the 70-200 f2.8 of whatever brand. More stuff, if you work at Lensrentals repair department, means more stuff that breaks and more stuff to take apart to get to the stuff that’s broke.)
Lensrentals.com, 2019
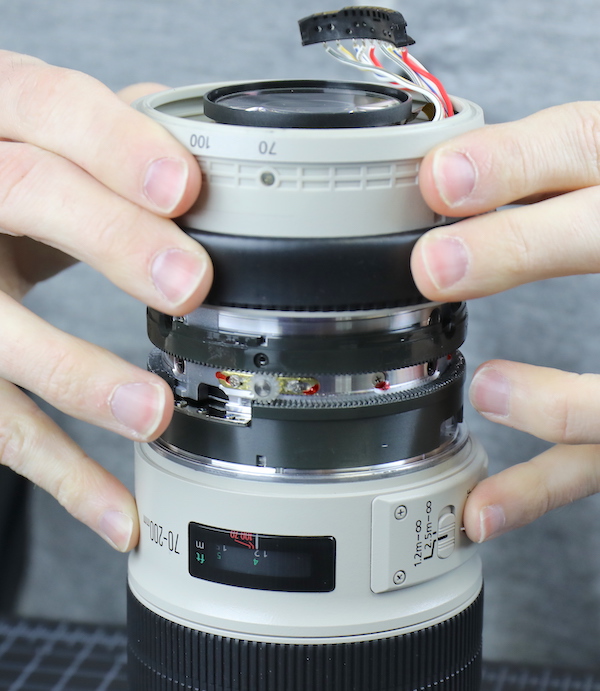
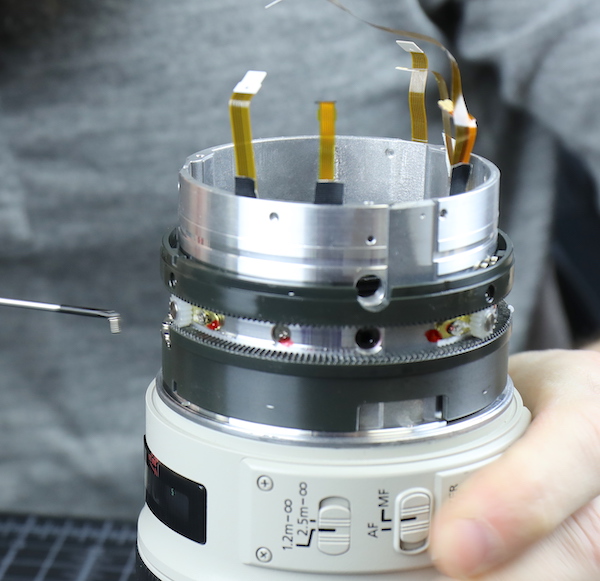
Speaking of electric chaos, the rear element needs to come off next, which means undoing the tape that keeps everything stuffed into a barrel shape, undoing 613 flexes from two (yes two) PCB boards, and then removing the screws holding the rear element in place. If you’re doing this at home and you’ve gotten to this part, well, you screwed up. The rear group is a centering group so you’ll need some high-power optical equipment to recenter it when you put things back together.
Lensrentals.com, 2019
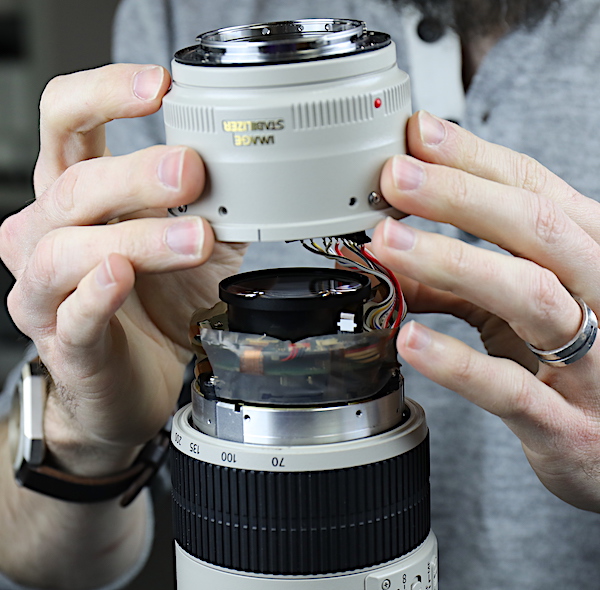
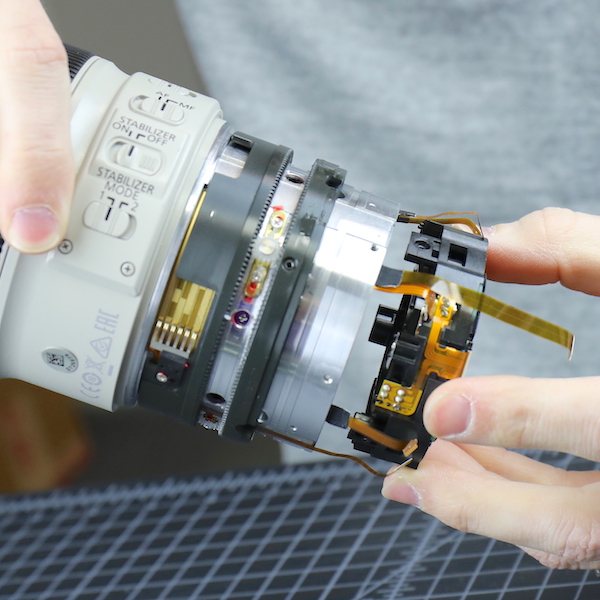
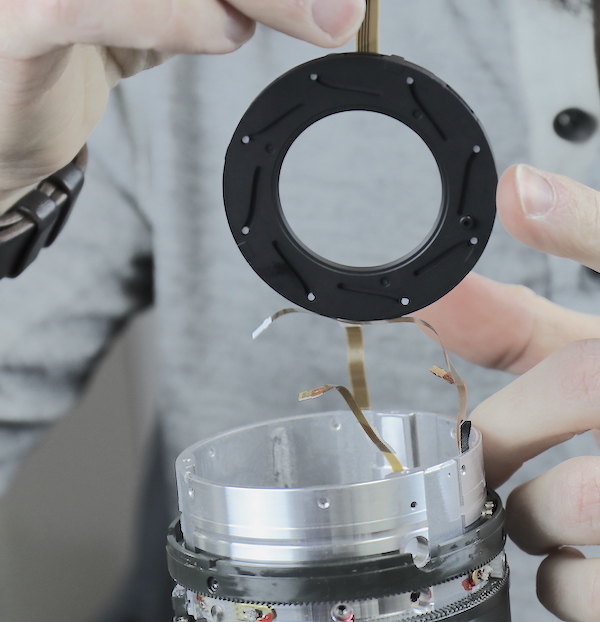
With the rear group and all those nasty soldered wires removed, we can remove the screws and bearings that keep the Image Stabilizer in the proper image stabilizing position.
Lensrentals.com, 2019
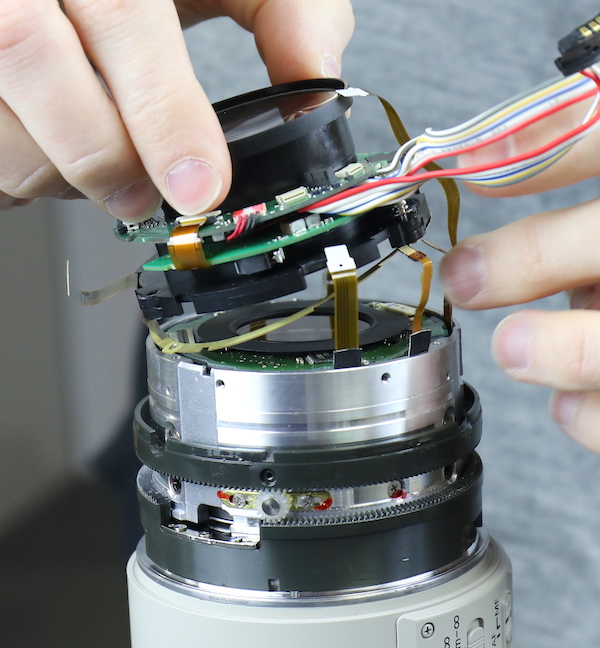
And get that thing up out of there.
Lensrentals.com, 2019
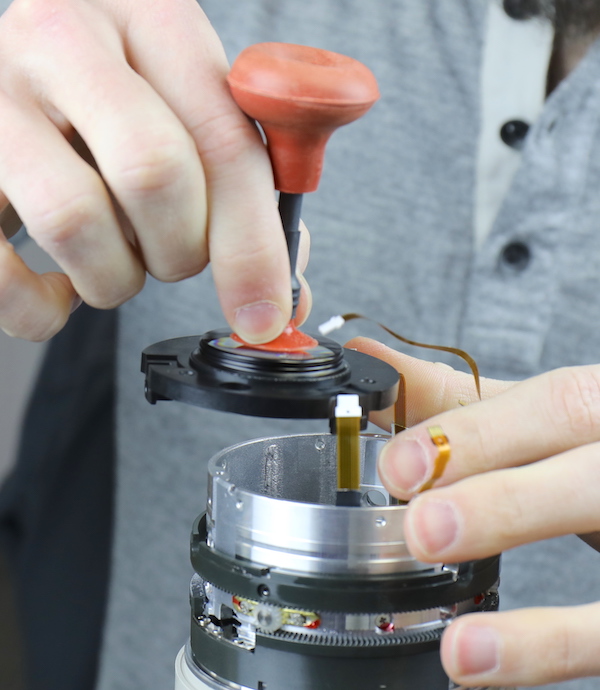
There’s a solo element that has to come out next. This element is held by eccentric collars over screws and optically adjusts for tilt. Again, unless you’ve got some optical equipment, don’t take this out at home. It has to be readjusted during assembly.
Lensrentals.com, 2019
Once the stuff that holds the element in place is removed, the element can be removed. This, my friends, is the basic rule of all disassembly; it isn’t complicated (although it gets complex). “Take out the stuff that’s holding stuff, then take out the stuff it was holding.”
Lensrentals.com, 2019
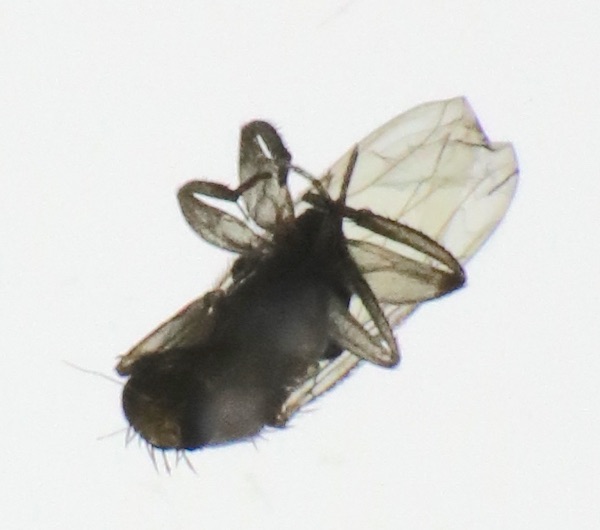
I know it seems like we’ve removed a lot of optics, but we’re nowhere close to Mr. Fly’s level yet. We can, however, finally get a decent picture without backlighting.
Lensrentals.com, 2019
Close up you can see the other problem that happens when an insect lives in a lens for a while. They leave insect hair, parts, and unmentionable stuff scattered throughout the lens. Spiders are worse; they’ll spin a web in there. Every time. Have you ever tried to clean spider webs off of glass?
Lensrentals.com, 2019
We continue to follow the rule of ‘take out the stuff that’s holding it . . . .
Lensrentals.com, 2019
then take out the stuff that was held’. This time our efforts are rewarded with a nice aperture assembly. It’s kind of like archeology; carefully digging down one level at a time.
Lensrentals.com, 2019
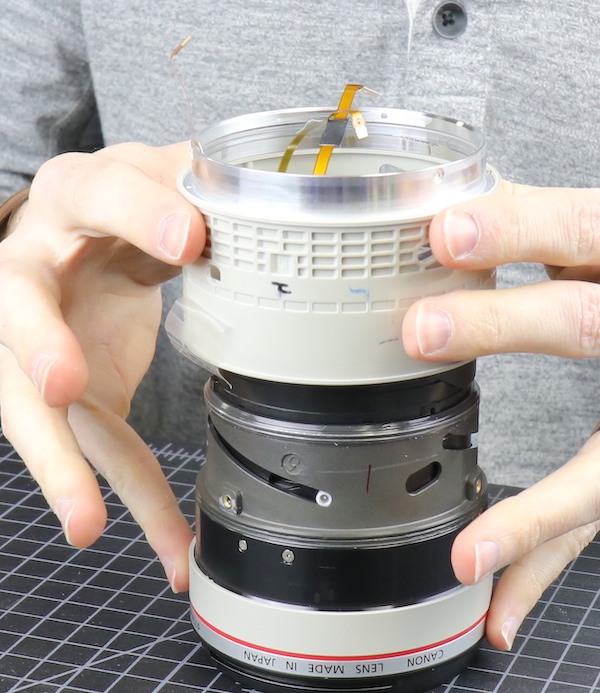
That lets us get to the screws holding the reverse-gear barrel onto the front part of the lens.
Lensrentals.com, 2019
After which we can remove that barrel. There’s no more optics in this barrel, BTW.
Lensrentals.com, 2019
I’ll try to speed things up a bit by not showing you all the screw removals. At this point, a lot of sealing tape was removed. (We wanted to inspect each seal. This is a weather sealed lens so we considered that there might be a defective or missing seal that gave fly access. That was not the case, every seal was in place and effective.) After a half-dozen screws and posts are taken out, the focusing ring is removed.
Lensrentals.com, 2019
A quick intermission photo, just to emphasize how much we’ve taken apart without getting to the fly. Aaron’s removing a bunch of screws holding the filter barrel in place while I’m practicing my photographic art. (Yes, I know. It needs more practice.)
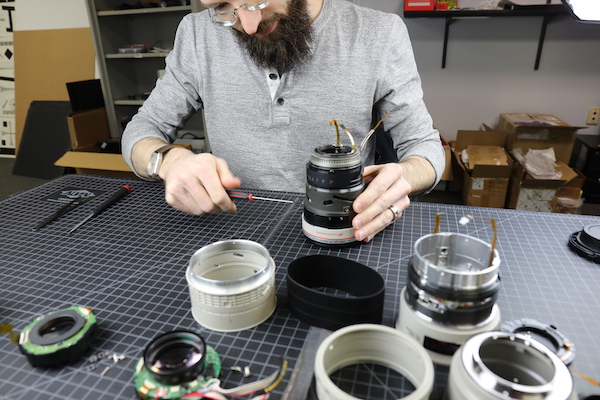
Lensrentals.com, 2019
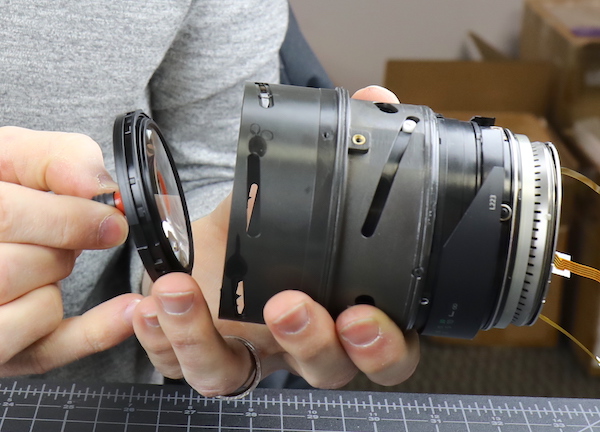
With the filter barrel off we can remove the front group. This is a pretty time-consuming thing; the front group has eccentric collars to adjust tilt and also rotates to adjust spacing, so there’s a lot of stuff holding the front group stuff in place. All of which has to be readjusted during reassembly.
Lensrentals.com, 2019
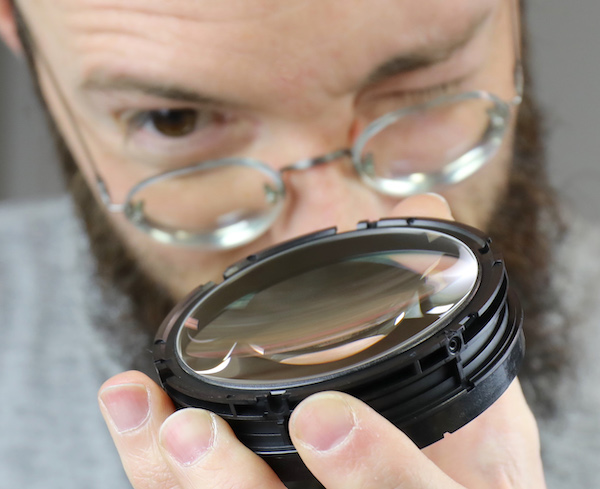
The front group is a pretty big (and expensive) bit of glass. Because we’re close to fly level, Aaron was looking to see if our little buddy had been up here and left some hair or things behind. We saw no evidence of it.
Lensrentals.com, 2019
Just in case you’re wondering about lining everything up during reassembly, here’s the third rule of disassembly (the second is keep your parts organized and in order): mark where the cam barrels should line up.
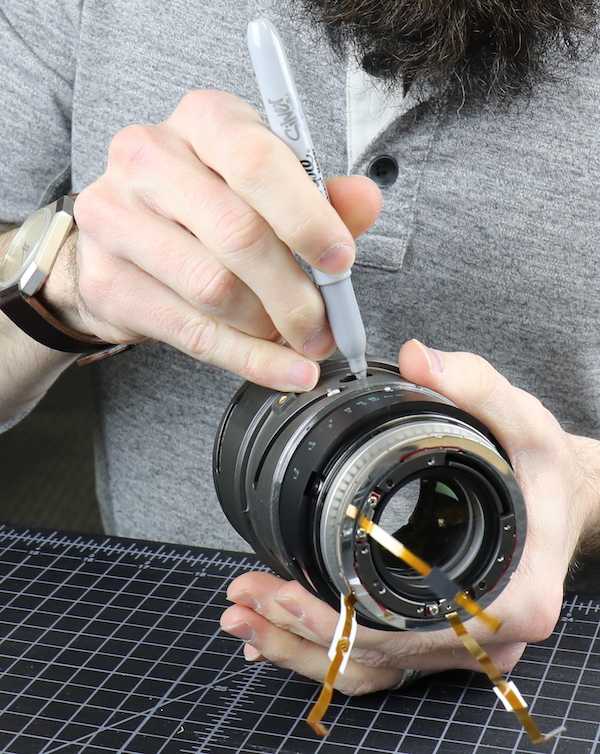
Lensrentals.com, 2019
There’s another adjustable element that got removed, this is the second group and is the focusing element.
Lensrentals.com, 2019
Removing some more screws and cams lets us slide out the inner optical assembly. You can tell stuff is getting real now, cause Aaron put a glove on to remove the inner cam barrels. Here’s a secret: sometimes in blog posts, I’ll substitute a reassembly photo for a disassembly photo that didn’t turn out well. You can usually tell because ‘no gloves on’ is disassembly, ‘gloves on’ is reassembly. This one is an exception because inner cam barrels often have lube on them. It’s quicker to take a glove off than to clean the lube off your hands so you don’t smear it on other parts.
Lensrentals.com, 2019
Now we’re down to fly territory and we can call in the forensic team to remove the body.
Lensrentals.com, 2019
I really wanted to draw a little chalk outline around the body. Aaron really didn’t want to clean that off the glass later so I didn’t get to. But it would have been a great photo.

Lensrentals.com, 2019
A closeup shows how much gunk our little friend left behind. This stuff, even without the fly, would make this a very dusty lens, but remember we saw absolutely no effect on the images.
Lensrentals.com, 2019
And there are fly parts and more gunk on other lenses in this area; although we didn’t notice them anywhere else.
Lensrentals.com, 2019
There’s actually a little smear of fly innards on this element. Remember, in this area, the elements are moving and move very close to each other. So the forensic team has determined the cause of death to be squishing. Yep, the lens swatted the fly.
Lensrentals.com, 2019
I won’t show you a dozen pictures of Aaron cleaning all the elements, and another 20 of the reassembly. But here’s a summary of the work done to put this lens back in service:
- Disassembly: 1.0 hours
- Cleaning elements: 0.75 hours
- Reassembly: 1.0 hours
- Initial optical readjustment: 0.5 hours
- MTF testing and final optical adjustment: 0.5 hours
- The use of a lot of expensive equipment
If you assume a repair tech makes $30 an hour, that costs the company $45 with all taxes, expenses, and benefits. Plus money for space, tools, and overhead. And optical adjusting equipment charges range from $50 to $250 per hour depending on which machine. So the repair cost to do this fly removal was $169 in labor charges and $200 in equipment use and overhead; $369 total. Unless you’ve found a nonprofit repair shop they’re probably going to charge more than that.
You can probably get it done for less. Volume does discount things. I doubt most repair shops will spend an hour optically adjusting the lens or use anything close to our equipment (most still do optical adjustments using a chart or projector). But still, $350 seems like a pretty fair price to me. Of course, a less complicated lens or a better fly location would have made it less expensive.
Final Thoughts
Our first question was, well, how did he get here? This lens had been in service with us for 15 months so it didn’t get put in at the manufacturing plant during assembly. We only found fly evidence in the moving inner elements; there was no clear trail from an entry point. All of the lens seals were intact and the lens had a filter on from day 1. We couldn’t find the tiniest possible entry point around the barrel or front element.
We think getting in from the rear is most likely. There is a small crack where the rear baffle (the very first photo) seats around the rear element. With the cap on or mounted to the camera, this area wouldn’t be accessible, but caps aren’t always on or perhaps get put on with something inside them. My own thought is perhaps our fly got in at the maggot stage and hatched inside. The gaps we saw around the rear baffle look too small for a full-grown fly to get in. But that’s just a guess. I am not knowledgeable in the ways of flies.
I think this does serve as a good demonstration of how little effect even a very large object inside the lens has. It would have a more dramatic effect, probably, if it had been located closer to the rear element. It’s also a really good demonstration on why we (nor anyone else who’s qualified) won’t clean the dust out of your lens for $50. Sure, a lot of lenses are easier to do than this one, but it’s still time-consuming and often technically difficult.
Roger Cicala and Aaron Closz
Lensrentals.com
April, 2019
Author: Roger Cicala
I’m Roger and I am the founder of Lensrentals.com. Hailed as one of the optic nerds here, I enjoy shooting collimated light through 30X microscope objectives in my spare time. When I do take real pictures I like using something different: a Medium format, or Pentax K1, or a Sony RX1R.
