Equipment
The Not Very Long Awaited Teardown of the Canon RF 70-200mm f/2.8 IS
Lensrentals.com, 2019
Long ago, a visiting Canon engineer put a box on my workbench, grinned, and said: “You’re going to like this.” Then he pulled out a mock-up of the RF 70-200mm f/2.8 IS lens, and my jaw dropped. I’ve been doing this stuff for a long time. My jaw drops very infrequently. My only comment was, “That’s going to sell you a lot of cameras.”
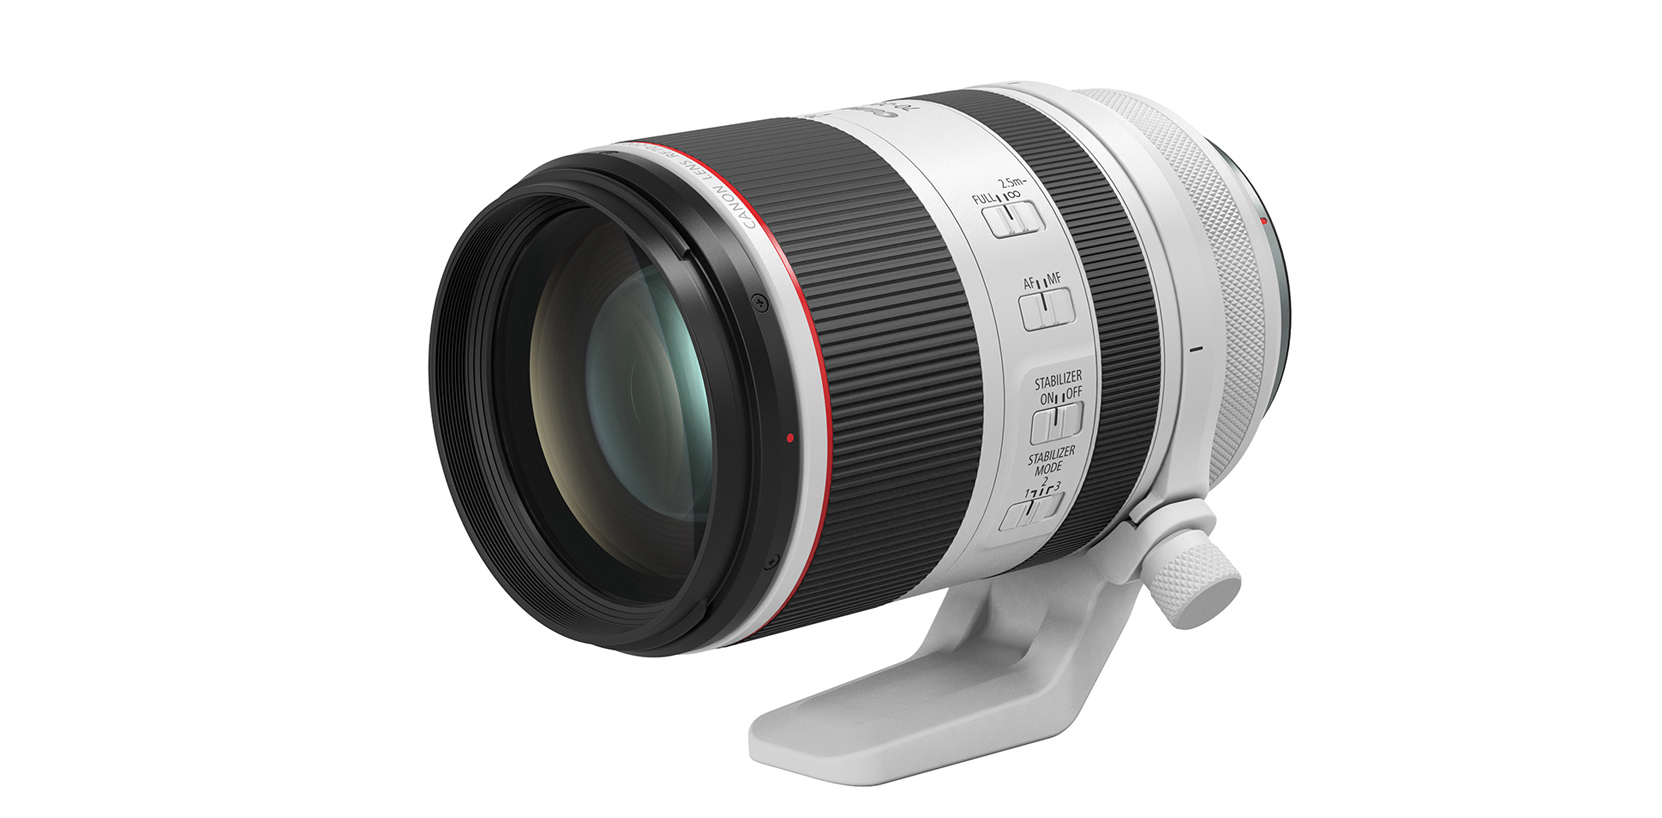
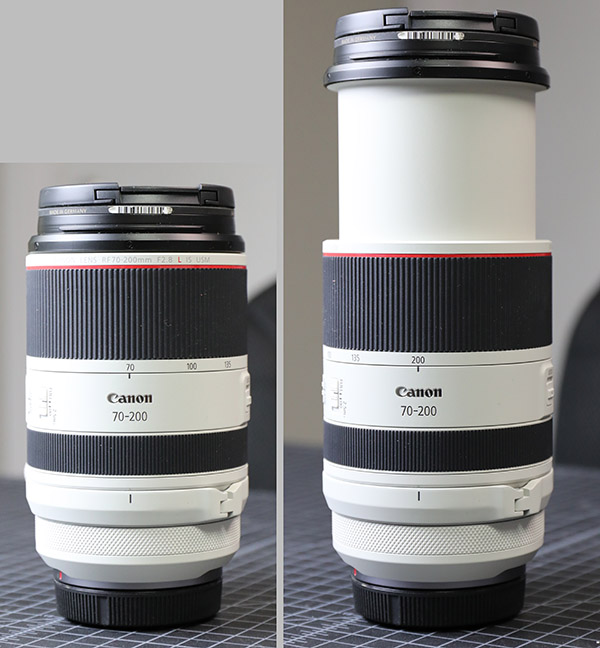
Now the lens is here and available. The jaw-dropping part is that (when not extended) it’s only 5.75 inches long and weighs only 2.35 pounds. Extended, of course, it’s nearly as long as a more normal 70-200 f2.8 lens, although it’s still a pound lighter than the EF (or Sony or Nikon) versions.
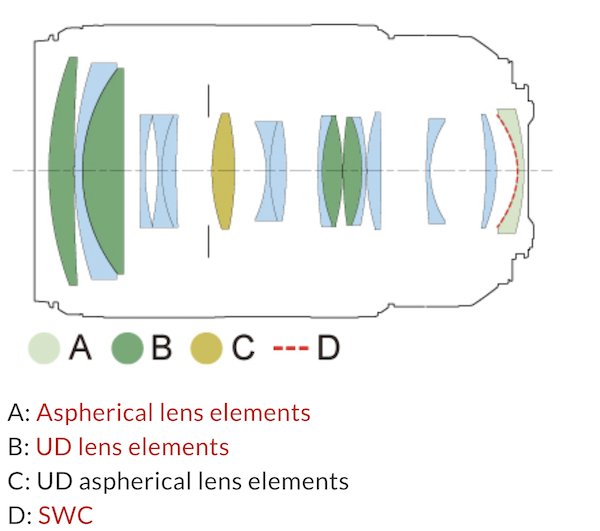
There’s a lot of ‘how did they do that’ in this lens. Obviously, some of how they did that was going to an extending barrel design, but that doesn’t explain the weight difference. Another is that they were able to reduce the amount of glass; the RF has 17 elements in 13 groups, compared to 23 elements in 19 groups for the EF version. Canon claims that the shorter back focus distance with a wider opening allows them to place larger elements closer to the sensor to achieve this. The fact that the rear element is a large aspheric with subwavelength coating, and that the other rear elements are large, supports this.
https://snapshot.canon-asia.com/taiwan/article/en/rf70-200mm-f28l-is-usm-6-things-you-need-to-know
There are also some interesting tidbits we know about this lens, like the fact that it has two separate focusing groups, each with its own motor. The bottom line is we couldn’t wait to open one up and see what was inside.
https://snapshot.canon-asia.com/taiwan/article/en/rf70-200mm-f28l-is-usm-6-things-you-need-to-know
Before we start, though, let’s get the extending barrel discussion out of the way. Some of you HATE extending barrel lenses. That’s cool; don’t get one. Some of you like to call them dust pumps. That’s cool, too, although it’s incorrect. (We take care of over 20,000 lenses. The most common ‘dusters’ among current lenses all happen to be primes that don’t zoom at all.)
Let’s Take Things Apart
Aaron wants me to start by saying he did this tear-down under duress. We didn’t have any of the cheap Dynamite #00 screwdrivers he loves, so he had to work using a more expensive, but apparently completely unacceptable, Huijadi #00. You can’t tell from the pictures, but he bitched during nearly every screw removal.
Opening the Front
The tripod ring is a pretty standard design, unscrew the knob a turn and pull out to unlatch it. The latch is Canon’s standard e-clip-holds-in-place design.
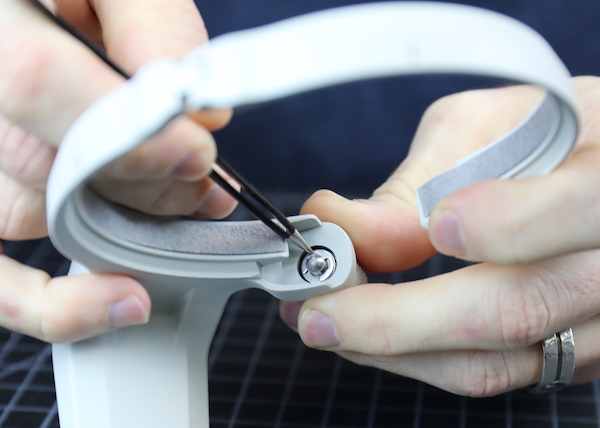
Lensrentals.com, 2019
The hinge is just a press-in expansion rod. This is not the most robust of tripod rings we’ve encountered when it’s off the lens. If you remove it a lot, I’d suggest closing it back up before dropping it in your camera bag; with some leverage, the hinge could bend. Mounted on the lens, though, it’s quite sturdy.
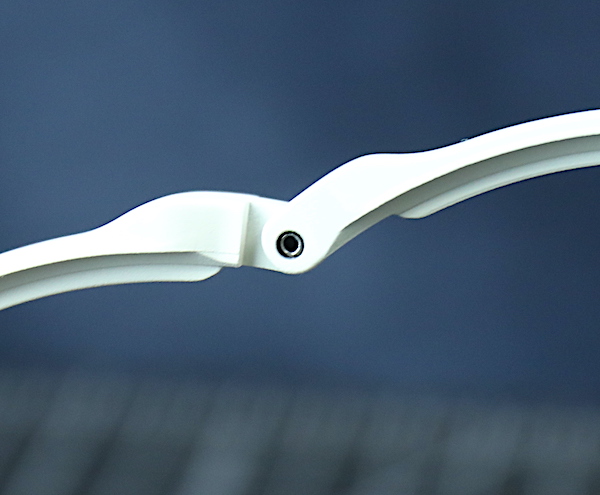
Lensrentals.com, 2019
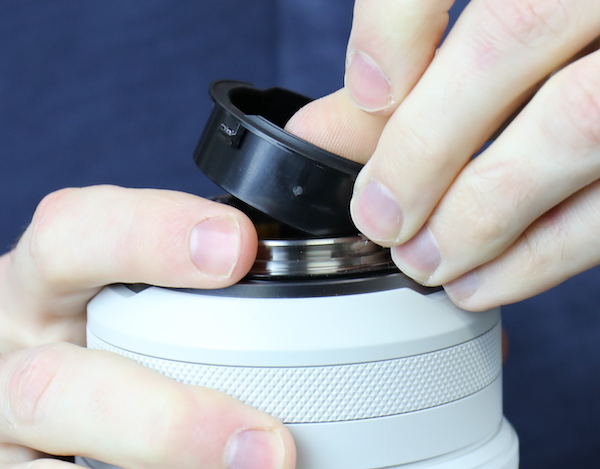
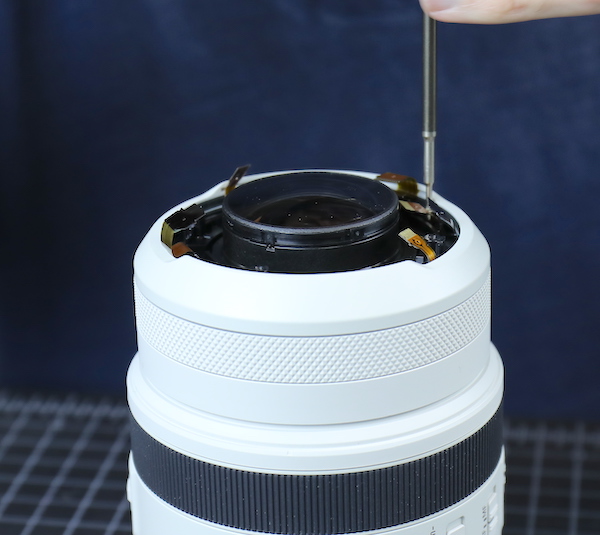
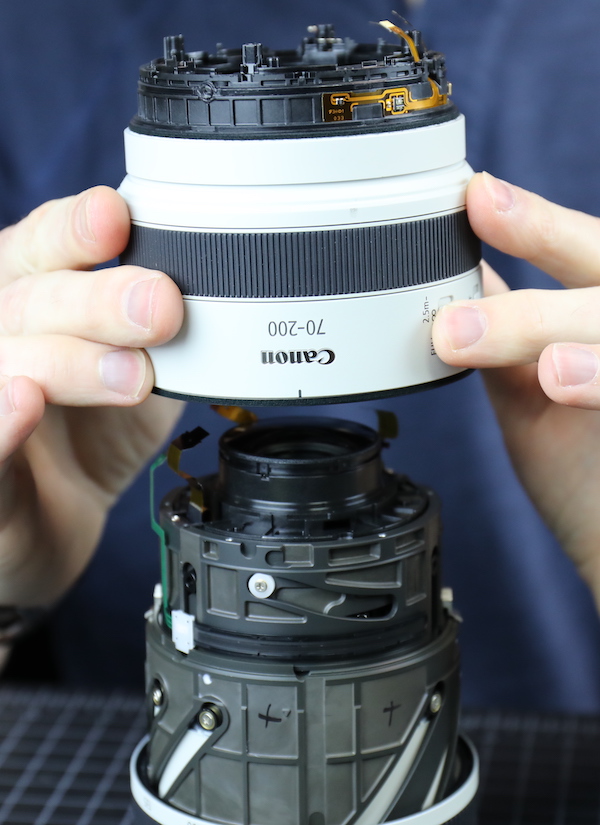
Looking at the front of the barrel, it seems the filter ring should be easy to remove. This is a good thing, filter ring replacement is a reasonably frequent repair, and on some lenses, it’s overly complicated and expensive.
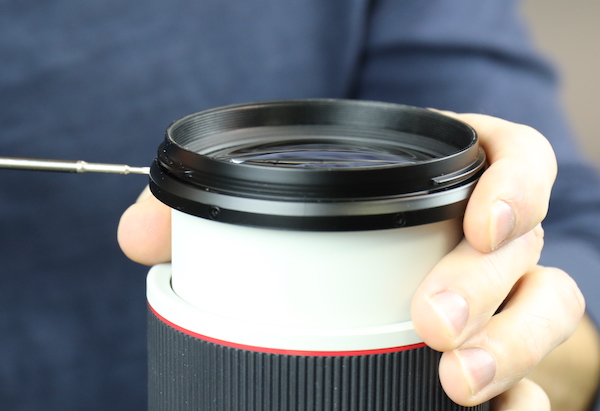
Lensrentals.com, 2019
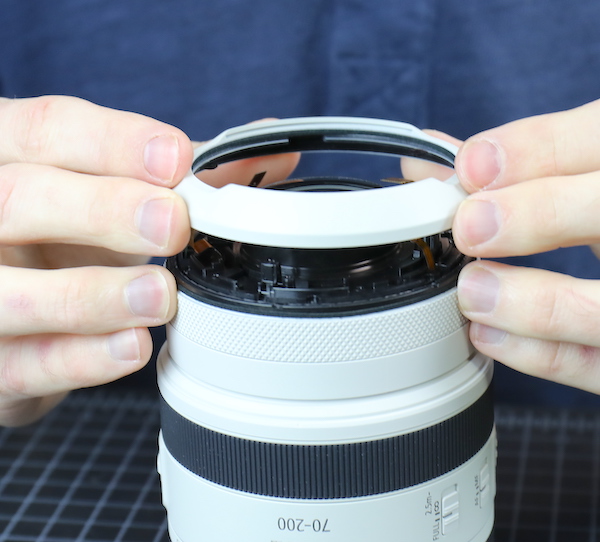
The ring does come off with just the removal of the external screws. It seems silly, but it’s a big deal if you ever repair lenses. With some lenses, a filter ring replacement requires a nearly complete tear-down.
Lensrentals.com, 2019
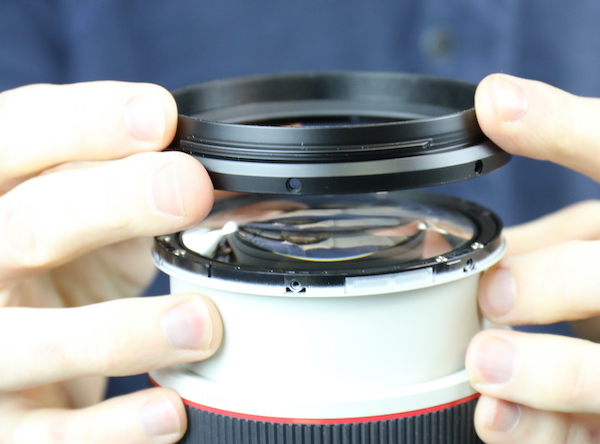
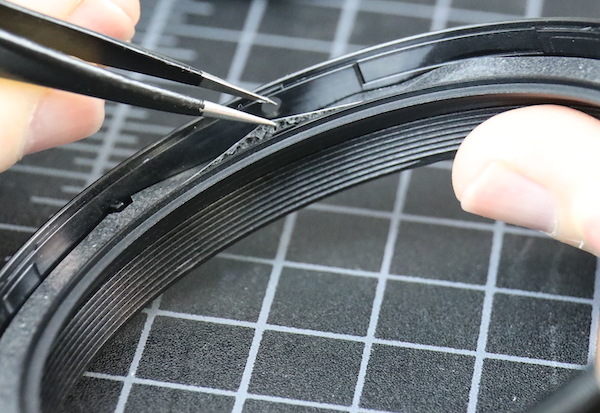
As expected, there is a foamed sealing ring between the filter barrel and the front element.
Lensrentals.com, 2019
And a new thing we hadn’t seen before. The ports under the filter ring are covered with a breathable filter. This would let air pass through as needed but would filter out dust particles. Nicely done.
Lensrentals.com, 2019
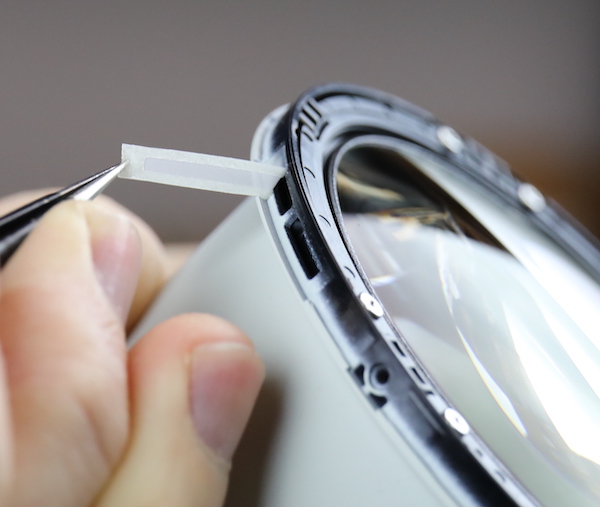
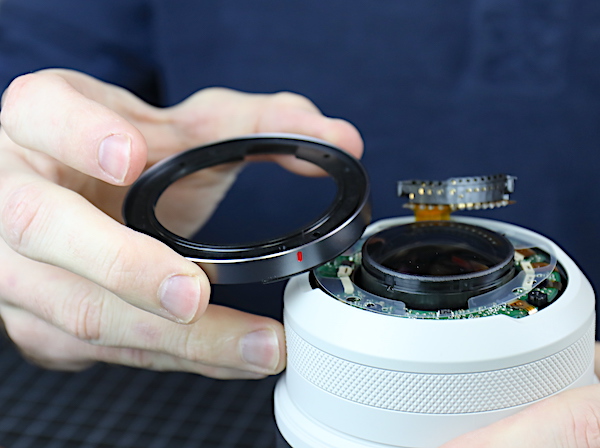
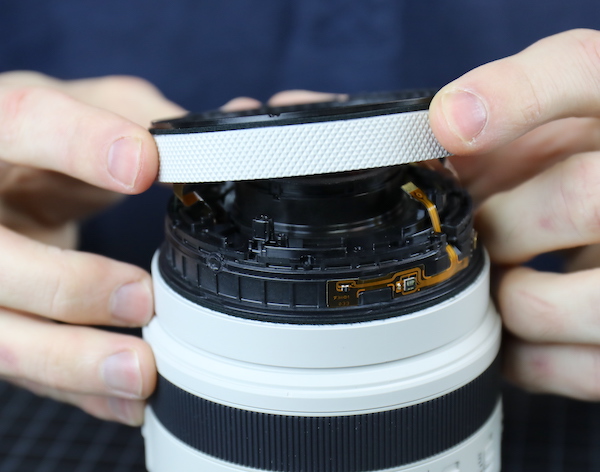
It seemed the front group was held in place by six screws, and we didn’t see anything to suggest shimming or centering adjustment, so we removed those.
Lensrentals.com, 2019
After which the front element came right out. I need to emphasize the lack of shims or adjustment on the front group of an extending barrel lens is unusual; it means the barrel has to be kept to very close tolerances as it extends. It also means the front element has been designed to not be one of the more critical elements in the lens.
Lensrentals.com, 2019
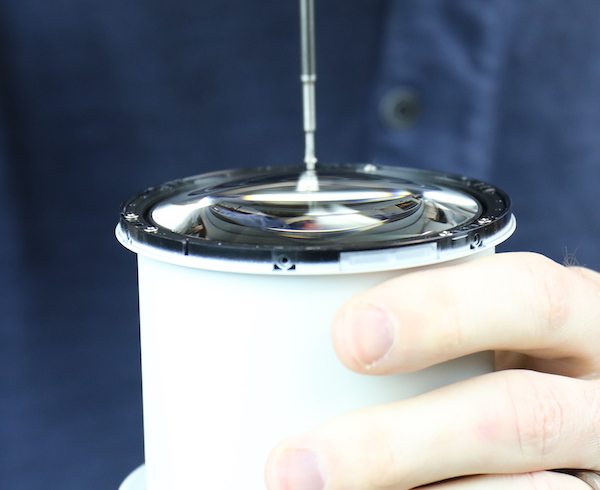
Looking down into the now empty barrel, we see a light shield and a reasonably large IS unit. There’s no further disassembly we can see here, so we’ll turn things over and open up the back next.

Lensrenals.com, 2019
Removing the Rear Barrel
Lens mounts are lens mounts, and this one isn’t really different. The visible screws were removed, and the rear light baffle popped out.
Lensrenals.com, 2019
The metal bayonet mount comes off next. It has the usual Canon rubber weather sealing around the base.

Lensrenals.com, 2019
There is a polycarbonate spacing ring that comes off next. Sometimes these are sized in place of rear shimming, but we didn’t see any markings indicating either this or the bayonet thickness, came in different sizes. Note also there is a plastic insulator over the top of the PCB (still in the lens).
Lensrentals.com, 2019
The PCB is held down by a couple of screws. Under one of these is what looks like a spring clip. This is actually a ground; the spring action keeps it held in place to do its grounding job.
Lensrentals.com, 2019
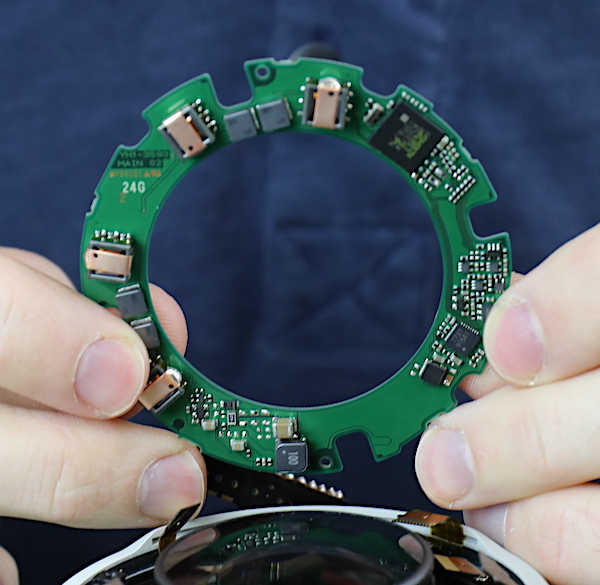
As with all RF lenses, the PCB has more flex connections coming and going than the EF lenses do. There are two groups of copper-covered induction coils sandwiching chips. From the positions of flexes, we assume each of these sets is the current source for one of the two focusing motors. There’s also what is probably a processor chip and an EPROM back here.
Lensrentals.com, 2019
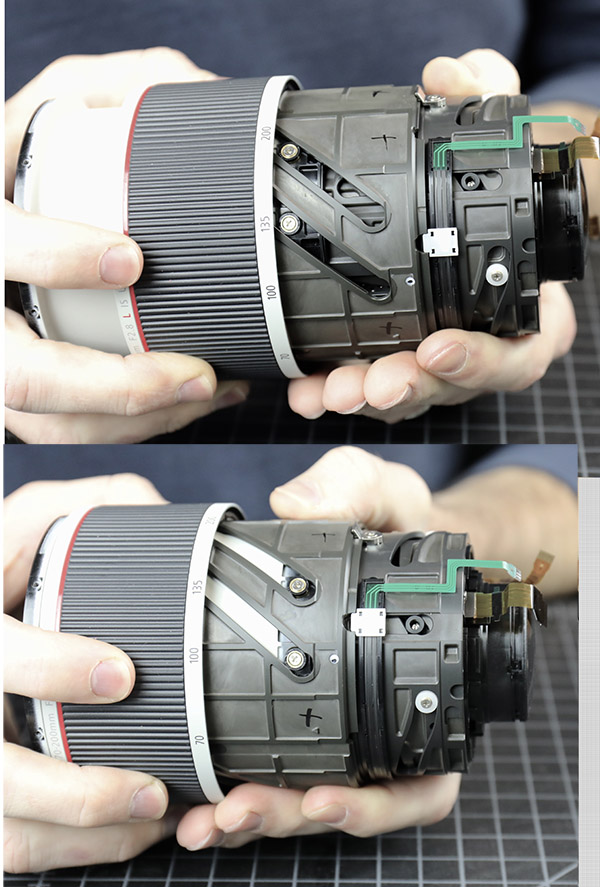
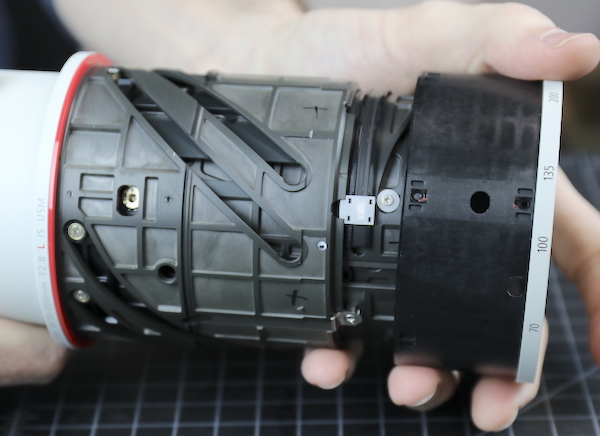
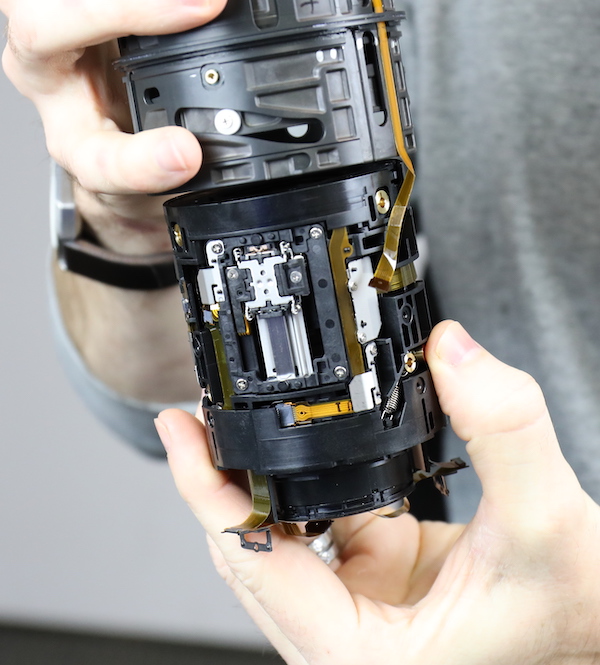
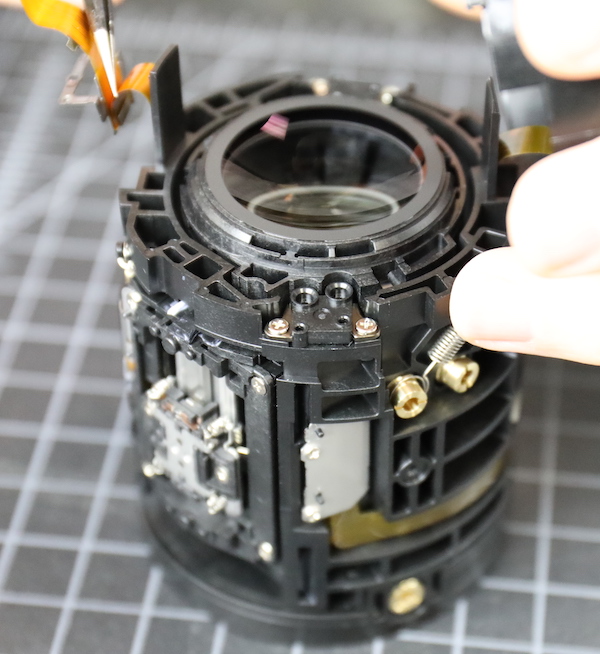
Now we’re starting to boldly go where we’ve never been before. RF lenses tend to be more involved in the rear barrel because of the increased electronics. If you’ve noticed, in this lens, there’s no switch plate, the switches are all mounted directly into the barrel, so things are a little bit scarier. A switch plate can be removed and show the other end of flexes; in this case, we’re not sure what’s going where.
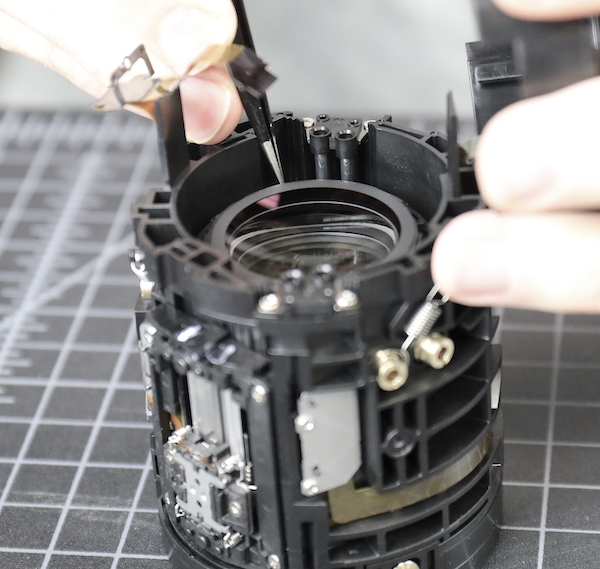
There are three screws begging to be removed now.
Lensrentals.com, 2019
That let us take off the rearmost fixed barrel.
Lensrentals.com, 2019
And then the grounding spring we noticed earlier.

Lensrentals.com, 2019
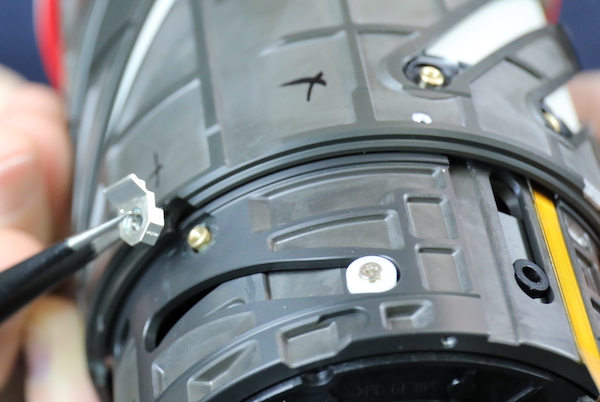
The programming ring slides off next.
Lensrentals.com, 2019
There’s a small, spring-loaded rod that gives the slight clicks you feel when rotating this ring. Usually, a spring-loaded ball bearing is used for this, but the rod-and-ball seems to give tactile ‘click’ feels without any sound being made; maybe that’s better for video use. From our long experience, things with springs like to spring out onto the floor, and this rod will be a lot easier to find than a ball bearing.
Lensrentals.com, 2019
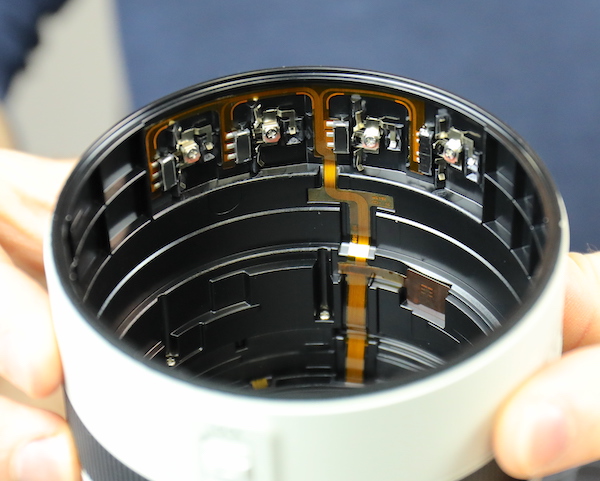
Inside the ring are the optical markings that the camera reads when you rotate it.
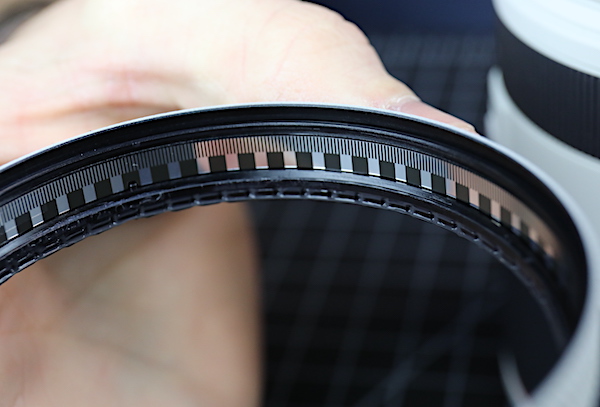
Lensrentals.com, 2019
On the inner barrel underneath the ring, you can see the optical sensor that does the reading.
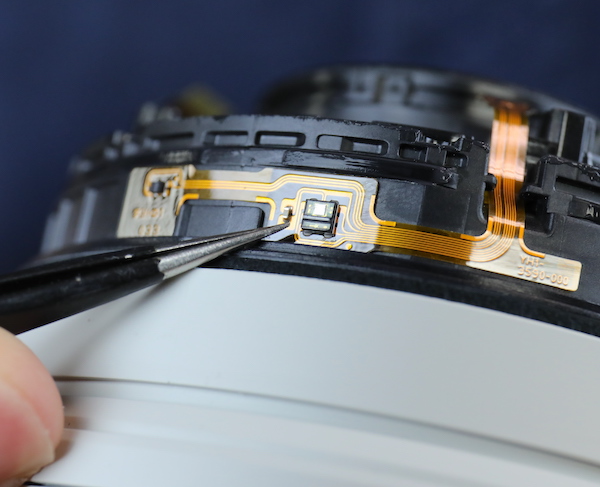
Lensrentals.com, 2019
On the same barrel, located 90 degrees apart, are the two movement sensors for the image stabilizer. The flex from these goes back to the PCB, not directly to the IS unit. Perhaps there’s an analog-to-digital conversion or some other reprocessing going on in one of the PCB chips.

Lensrentals.com, 2019
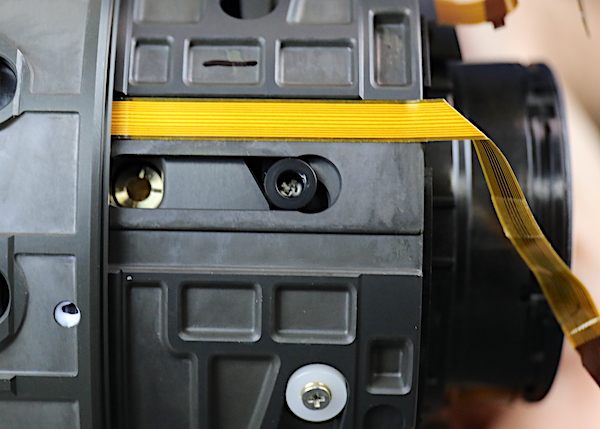
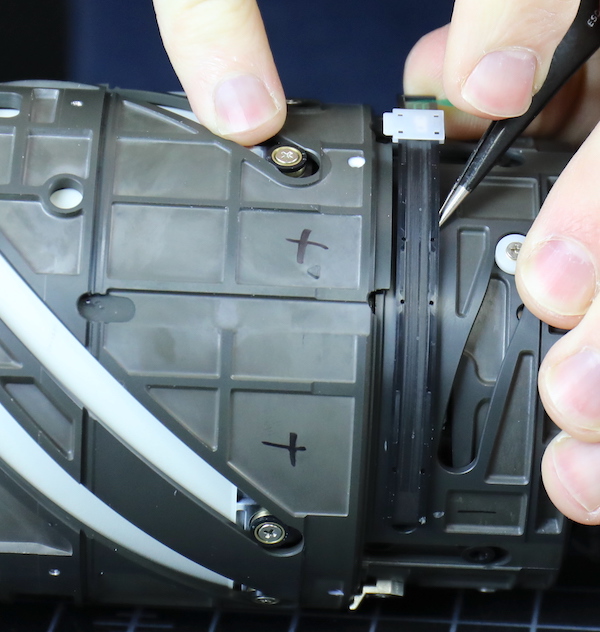
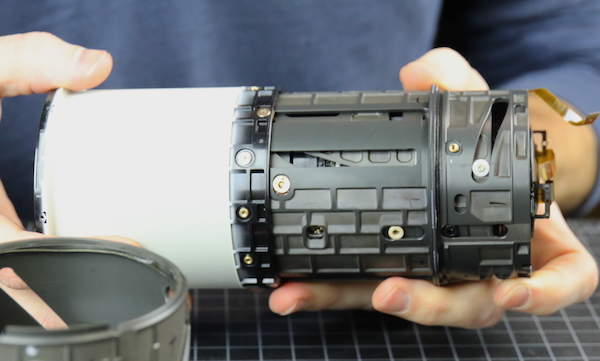
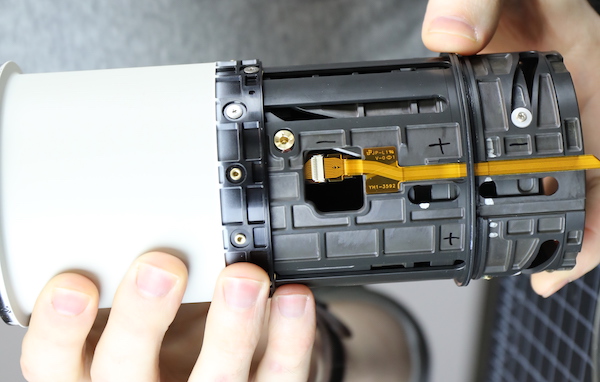
Looking down onto the rear barrel, you can see 6 (actually you only see 5 in the picture) screws that are screaming, “take me, take me.” You can also see several flexes, some with metal attachment plates that are strongly suggesting they’d like to tear if we try to force them through the too-small slots the seem to have been threaded through.
Lensrentals.com, 2019
As we do in such risky situations, we looked at our other options for proceeding with our disassembly. Since the only ones we could think of involved table saws, Aaron continued to remove the screws (complaining about his screwdriver the entire time), then spent literally 20 minutes slowly backing the barrel up while threading flexes through their slots. You can see in the image below he’s made like 2mm worth of progress.
Lensrentals.com, 2019
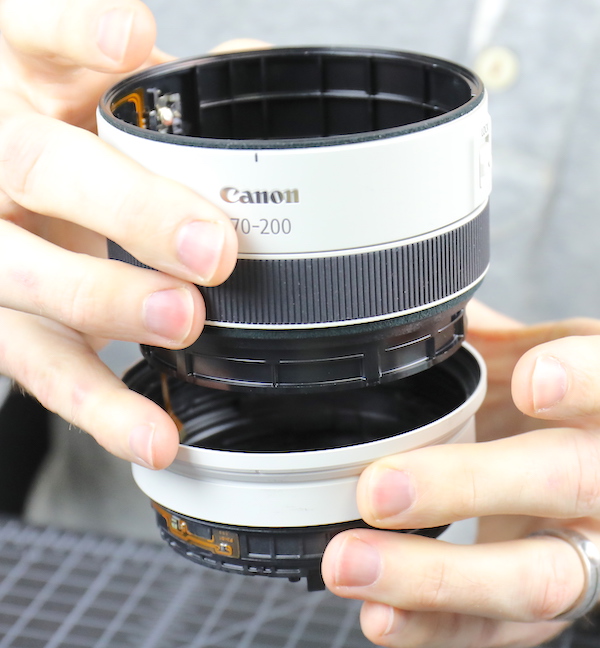
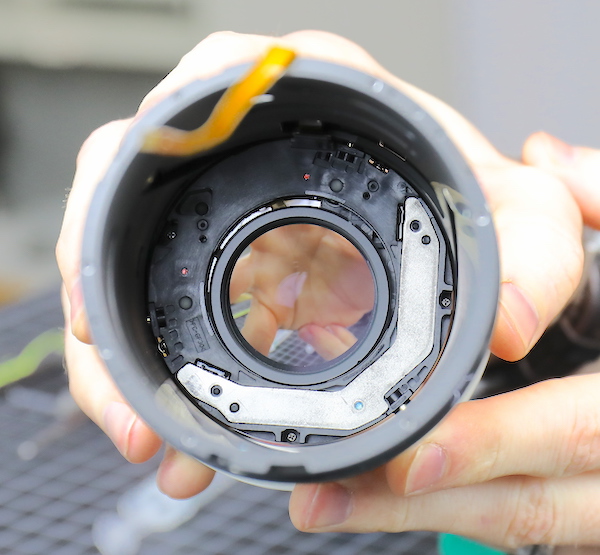
But eventually, and with no loss of electrical conductivity, the outer rear barrel came off. As you’d expect, there’s a foamed seal along the forward edge.
Lensrentals.com, 2019
Looking inside the barrel gives us one of those moments where we salute Canon’s engineers, the flexes are all beautifully laid out and organized, going directly to their appointed place with no wandering about allowed. Notice how all the switches just take up one small flex; there’s not a lot of electron transfer needed to signal ‘on’ or ‘off’ compared to the amount of information that IS or focusing requires.
Lensrentals.com, 2019
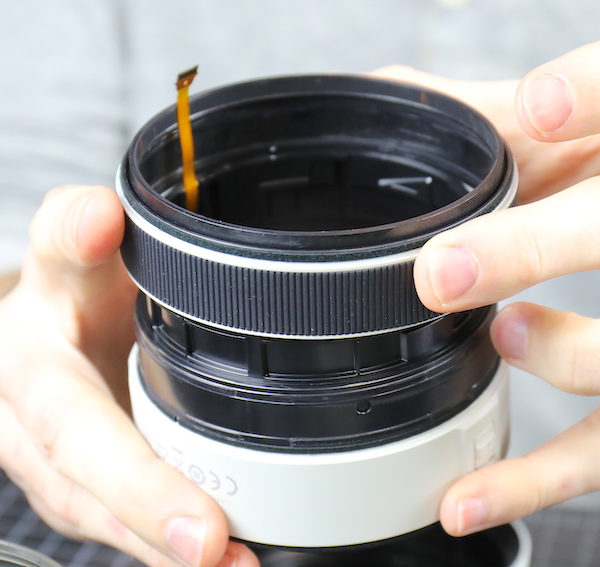
Disconnecting the flexes and removing a couple of pins lets us separate the barrels (again, note the foam sealing ring between every barrel piece).
Lensrentals.com, 2019
The focusing ring slides off the barrel. I don’t show it, but there is a spring washer underneath it, giving that smooth resistance you feel when turning it.
Lensrentals.com, 2019
Under the ring, of course, is an optical position sensor.

Lensrentals.com, 2019
The Inner Workings
With the rear barrel off, we start finding out some interesting things. First, I had mentioned earlier that the extending barrel would have to be held to close tolerances. If you’ve had a consumer-grade zoom with extending barrel, you may be aware that the barrels can have some play in them, allowing them to droop a bit when fully extended. This adversely affects optics.
The Canon RF 70-200mm has about the most robust extending barrel mechanism I’ve ever seen. There aren’t the usual three cams sliding about to move this barrel, there are three pairs of them, and each is very large and robust.
Lensrentals.com, 2019
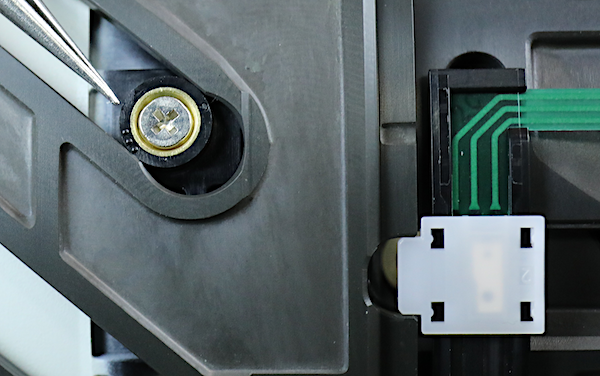
Close-up, you can see each of the six consists of a large screw, brass collar, and nylon (it’s probably not really nylon, but I have no clue what, so I’ll pretend it’s nylon) ring around the brass. Later in the disassembly, we found that each of them is sized, assuring a perfect fit in its slot with no looseness or binding. The plastic cover with green wires to the right is a magnetic position sensor; these are modern versions of the electronic brushes lenses have always had. I don’t know if they’re more accurate, but they are self-contained and less delicate for sure.
Lensrentals.com, 2019
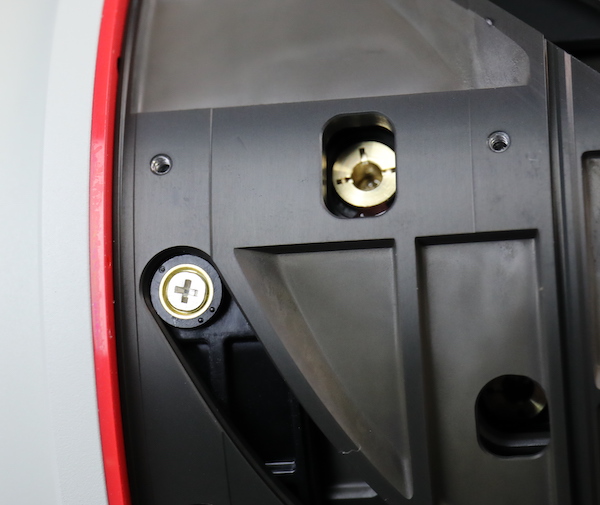
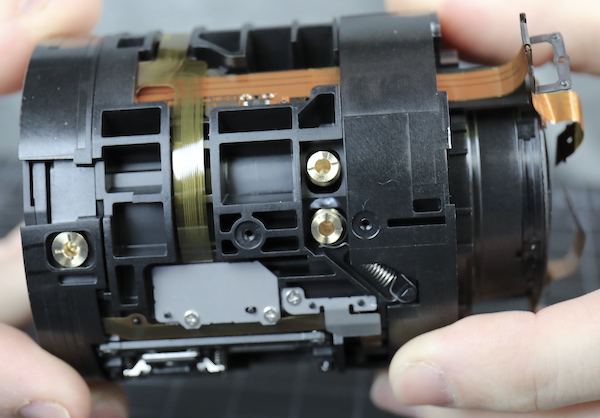
Rotating the barrels a bit, we can see another large sliding cam for the rear focusing group (black) with a large, brass eccentric collar for an optical adjustment just in front of it.
Lensrentals.com, 2019
Looking back towards the front, we can see the zoom ring is held on by three sets of two screws. At the bottom of the opening between them, we can see another eccentric collar. Notably, all of the eccentric collars we’re seeing are heavy brass, not plastic, and there are none of the glued-in-place silicone glops we’ve grown to hate so much. That means these are sturdy enough to stay where they are set (brass is better at that than plastic), and no need to pick out bits of glue if an adjustment is necessary.
Lensrentals.com, 2019
Back to disassembling, removing those six screws lets us slide the zoom ring off of the inner barrel.
Lensrentals.com, 2019
This gives us a better look at the set of eccentric adjustment collars you saw between the screws holding the zoom ring on.
Lensrentals.com, 2019
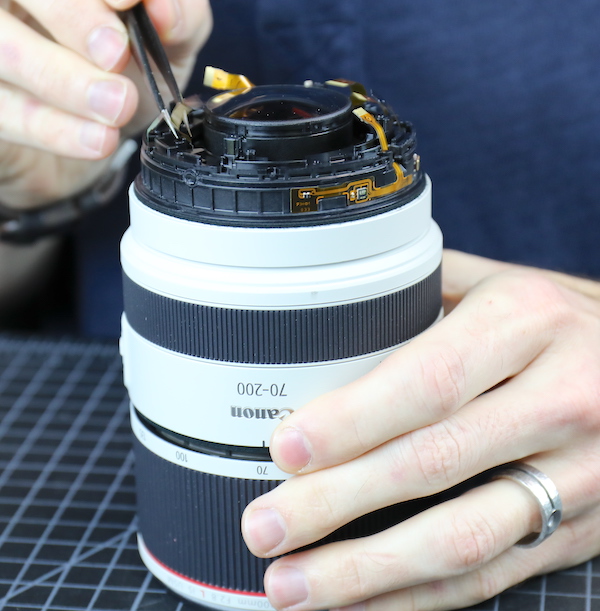
Now, if you want to reproduce what our teardowns are like in real-time, spend the next 20 minutes looking at something from 16 directions. It took us quite a while to decide what the safest next step was. Eventually, we took off the focus sensor, took out the front barrel cams and stop clips, and then spent about 15 minutes sliding the external zoom barrel off without tearing any flexes.
Lensrentals.com, 2019
Lensrentals.com, 2019
And finally, the outer cam barrel is off. To the right, you can see all of the roller hardware laid out in a grid; this is where we discovered they were specifically sized to keep the extending barrel smooth and without sag or play, so each had to go back to the correct position.

Lensrentals.com, 2019
Despite all the disassembly we’ve done, we’ve barely scratched the surface.
Lensrentals.com, 2019
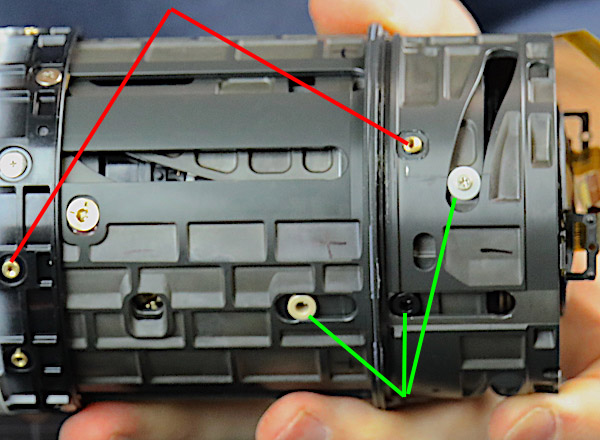
To kind of show you around, the red lines are pointing to the brass posts that held the bearings we just took out. Green lines are pointing to the focusing group collars that are still in place. The takeaway is the engineering, despite the lightweight of the lens is very robust. Every moving part is large and sturdy and held steady by more than one set of collars or bearings, so there’s no chance of unwanted movement.
Lensrentals.com, 2019
The focusing element bearings are removed next.
Lensrentals.com, 2019
Lensrentals.com, 2019
Once those are all out and the flexes cleared, we can slide the focusing assembly out of the inner cam barrel.
Lensrentals.com, 2019
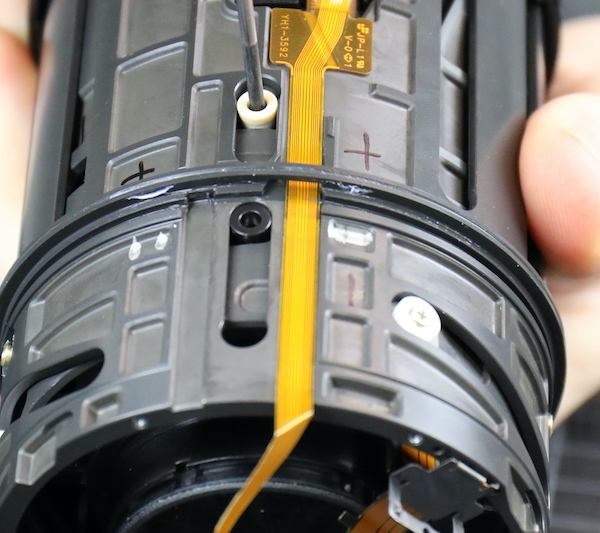
The outer barrel now contains just the IS unit (that’s the IS flex running along the barrel). You can also see one of the large, brass eccentric collars that adjust the IS unit optically.
Lensrentals.com, 2019
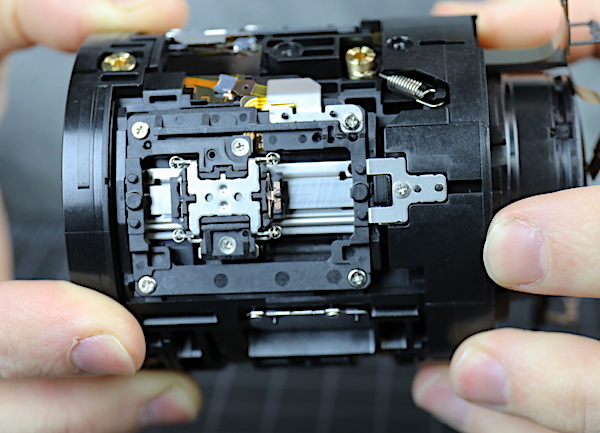
Looking inside shows the large IS unit. We’re not going to take this apart, it requires factory programming, and we don’t have that kind of equipment.
Lensrentals.com, 2019
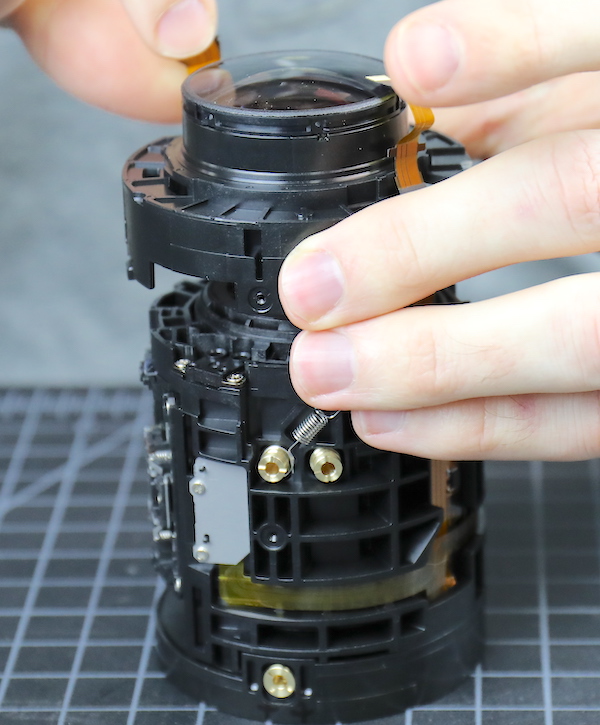
The Focusing Assembly
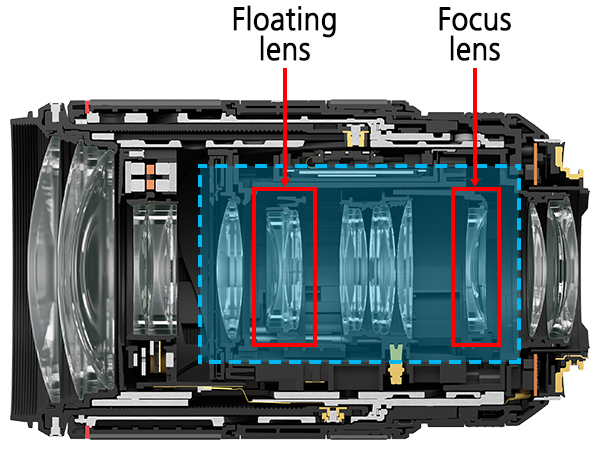
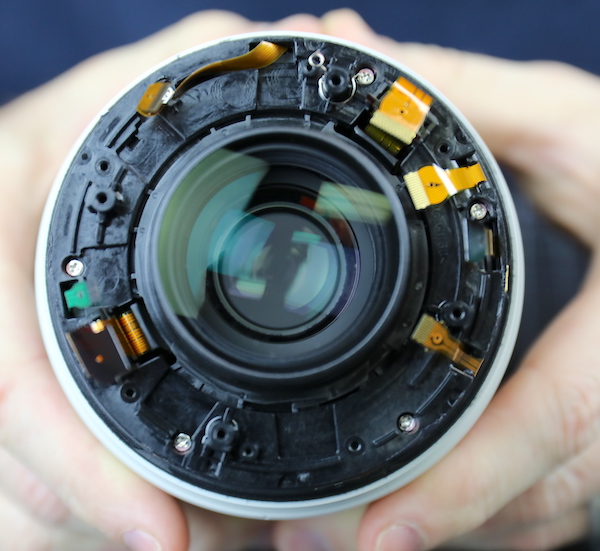
The interesting parts of the lens are mostly in the inner focusing assembly, not only electronically, but also optically. We took off the front group (3 elements) at the start, and the IS unit (3 more elements) is in the barrel we just showed you. The other 11 elements of the lens are all back here. This ‘glass at the rear’ design is what allows this lens to be both shorter and lighter than other 70-200mm lenses. The linear focusing motors are also smaller and lighter than ring USM type motors.
Looking at the assembly, the first thing we noticed is the doubled eccentric adjustment collars; these appear to adjust the fixed groups between the two focusing elements. There’s another single adjustment collar toward the front. This one adjusts the fixed element in front of the front focusing group.
Lensrentals.com, 2019
Rotating the assembly around a bit, we can see one of the linear focusing motors. In the early days of such motors (circa 2015, before Canon used them), they were often a bit fragile and in a couple of early lenses, sometimes broke. As you can see, these are not your grandfather’s linear motors; they’re heavily constructed things with multiple clamps and screws holding everything in place.
Lensrentals.com, 2019
The closeup below shows the travel of one of the focusing motors.
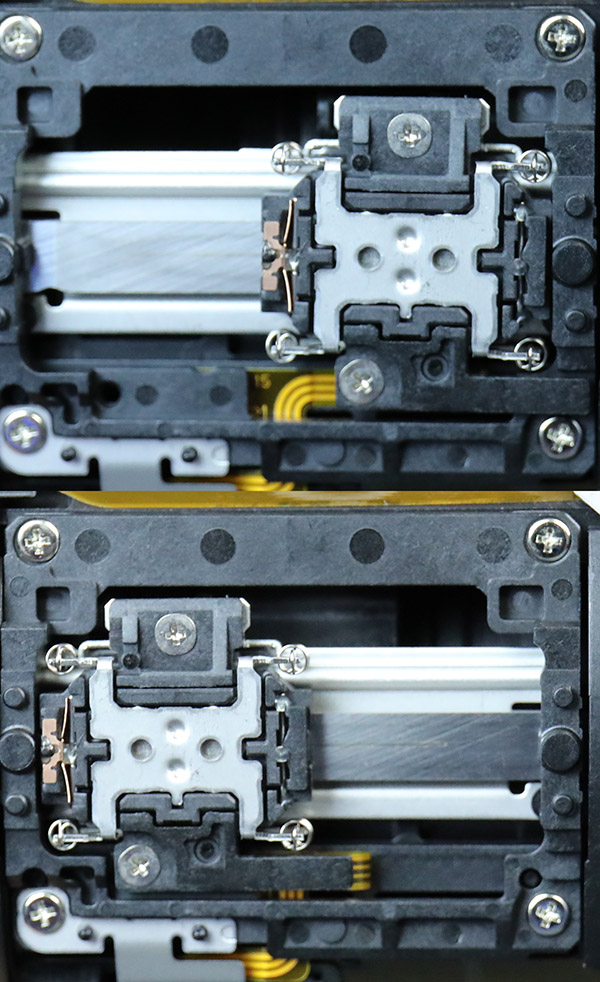
Lensrentals.com, 2019
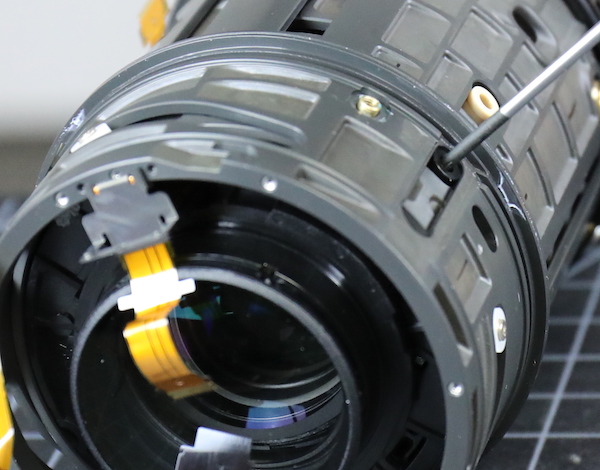
Looking at the front of the focus assembly, we see the aperture. Right behind the aperture is the front fixed element in this barrel. The aperture is very smoothly circular, as you would expect (but don’t always find) in a lens of this price.
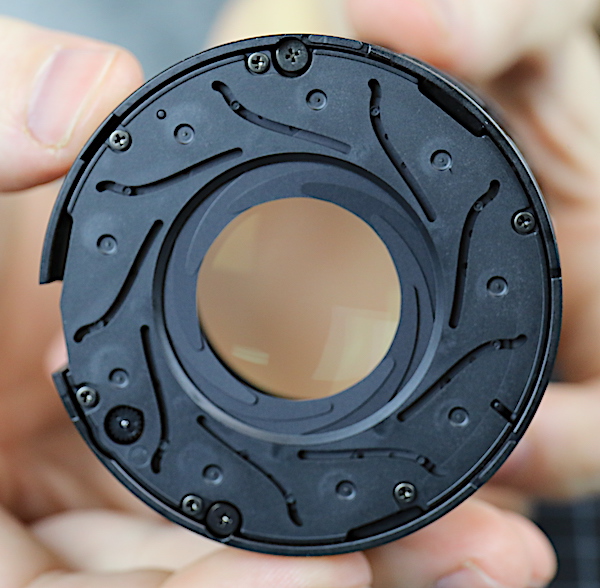
Lensrentals.com, 2019
The rear group moves during focusing but is attached to the motor from the outside by keys and clips. This same motor moves the internal rear focusing group simultaneously.

Lensrentals.com, 2019
Removing those keys and a few more screws lets us take off the rear group.
Lensrentals.com, 2019
Now looking down at the back of the focusing assembly, we see the rearmost focusing element. As you can see, looking at it (and from the lens diagrams above), it’s a strongly curved meniscus.
Lensrentals.com, 2019
Here’s a view of the rear focusing group’s travel range (compared to the fully back position above). Note how it slides on double posts, not the single posts we usually see in liner focusing assemblies. This provides more stability to prevent any tilt of the element as it moves during focusing.
Lensrentals.com, 2019
Taking apart the focusing motors and elements is doable, but our call is no good can come of it. There’s really nothing more we’d learn by doing it, and we’d have to readjust all those optical adjusting collars. What is apparent is that, in all likelihood, this entire focusing assembly is one part. If it breaks, the entire assembly (motors and optics) would be replaced as a unit. That’s going to be an expensive part. On the other hand, we doubt it’s a part that will really ever need replacing. This is SLB (Strong, Like Bull) engineering, and the area is well protected.
Conclusions and Impressions
I’d strongly encourage you to look at our teardowns of the Canon EF 70-200 f2.8 IS lenses and the two-part teardown of the Sony 70-200mm f2.8 GM lens for comparison to this. You’ll pretty quickly reach a couple of conclusions. The first conclusion is that this article should have been two parts, like the Sony one; it’s too long.
The second conclusion is in the years since those lenses were released, a LOT of engineering progress has been made. The Canon RF 70-200mm f/2.8 is a complex beast, but you get a quick feel for it being organized complexity, and it’s actually a much simpler layout than those other lenses. Some of that is from the improved optical design; there’s less glass floating around. Some of it is the use of linear focusing motors.
Most of it is superior electro-mechanical engineering and a brand-new, ground-up design. It’s clear those other lenses were improvements on existing designs. Over the years, as various versions of the lenses have been released, it’s apparent that they started with the previous design and modified it. Like a lens paleontologist, we could see the bones of the original beast with layers of new complexity and modifications added in the newer version. (Yes, I’m very aware it was Sony’s first FE 70-200mm lens, but, to be polite, it heavily borrowed from other 70-200mm lenses mechanically).
This lens was a new design from the ground up. There’s no ‘that’s the way we’ve always done it’ holdovers. That’s a lot more work for the designers, but the result is a beautifully engineered, fully modern lens. It’s clean, functional, and straightforward.
It’s obviously very robustly engineered from a mechanical standpoint. The internal composites are strong as hell. There are double cams, rods, and posts everywhere. There’s no play in any moving parts. We can’t imagine there will ever be play in the moving parts unless you run over it with a truck. You could describe it as ruggedized, but I’m going to stick with Strong, Like Bull, and suggest we refer to this as the RF-SLB 70-200mm f/2.8 from now on.
There are a lot of nice touches, like the air filter tape over the openings around the front group. Will it prevent the lens from getting dust inside? Of course not; every lens gets dust inside. But it’s helpful and shows they’re trying. It’s also the first lens in a decade that I can say was obviously designed with ease of repairability in mind, at least as far as they could. Replacing the filter ring or front or rear element is going to be quick and straightforward. The downside is, like many lenses with linear focusing systems, that focusing assembly is probably a ‘replace not repair’ part, and that will be an expensive, albeit rare, repair.
There are some of you who are going to scream about how you want metal lenses. OK, Boomer, go get you a metal lens and show us how strong you are. On every other 70-200mm lenses we’ve disassembled, there are multiple metal parts that we can bend with our fingers. There’s not a damn thing we can bend with our fingers in this bad boy. This is going to hold up better than a metal lens, it’s probably sturdier, and it weighs far less.
I haven’t tested it optically. I haven’t even shot with it. But after looking inside it, I want it. The engineering in here is pure art. And even I, the person who mocks construction at any chance I get, can’t find anything to complain about.
Like Montel (sort of) said: This is how you do it!
Roger Cicala and Aaron Closz
Lensrentals.com
December 2019
Author: Roger Cicala
I’m Roger and I am the founder of Lensrentals.com. Hailed as one of the optic nerds here, I enjoy shooting collimated light through 30X microscope objectives in my spare time. When I do take real pictures I like using something different: a Medium format, or Pentax K1, or a Sony RX1R.
-
T N Args
-
Roger Cicala
-
jon Gang
-
Nemo Niemann
-
Andreas Werle
-
Mel Gross
-
Roger Cicala
-
KeithB
-
Roger Cicala
-
pmmc
-
Roger Cicala
-
Roger Cicala
-
Franck Mée
-
Macman
-
Michael Khalsa
-
Jeffrey Yang
-
KeithB
-
Scott
-
Urbex Mark
-
Roger Cicala
-
Roger Cicala
-
JosephAndrews
-
Jim H
-
Urbex Mark
-
Baconator
-
Roger Cicala
-
Roger Cicala
-
Brandon Dube
-
Brandon Dube
-
Brandon Dube
