With the digital era of photography came a lot of comforts that made photography only more accessible and affordable – from shooting hundreds, and at times, thousands of photos to a memory card, to instant development of your images to the back of your camera and computer screen. But despite these significant advantages, film still has a place in plenty of people’s workflow. And while we’d love to rent film cameras too (Trust me, we’ve looked into it dozens of times), it’s not a viable model for our business.
But film photographers have a much more laborious workflow – from developing the film to scanning the film, and then doing post-production if desired – and we’d like to at least help with those film photographers who are doing it for the film aesthetic and tones. And so, we offer a couple of different tools to digitize your film. Today, we’re going to take a look at two of our most popular film conversion systems, discuss how to use them, and which one might bring the best results.
Epson Perfection V850 Pro
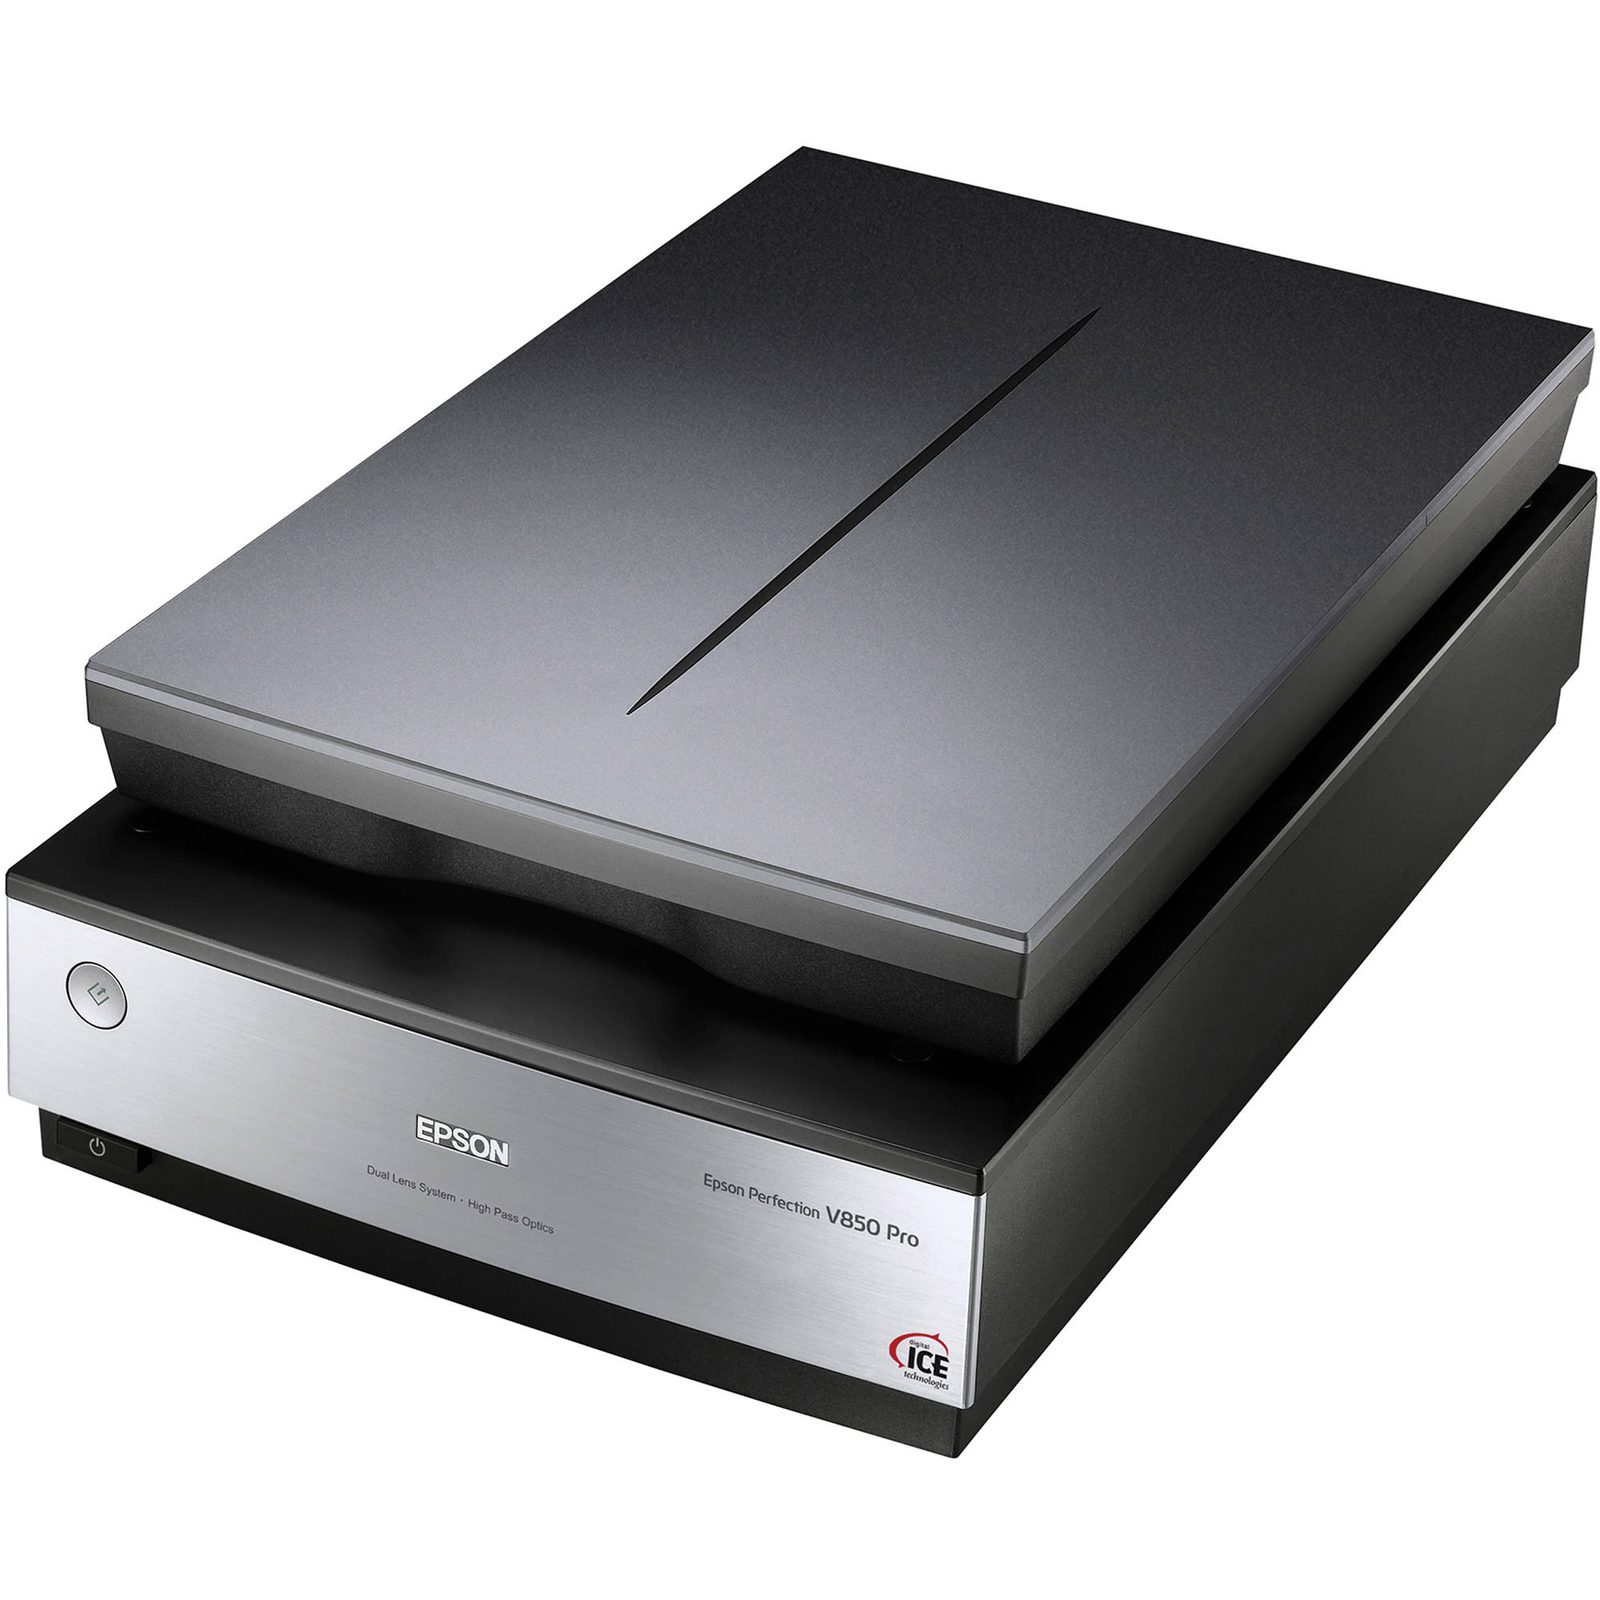
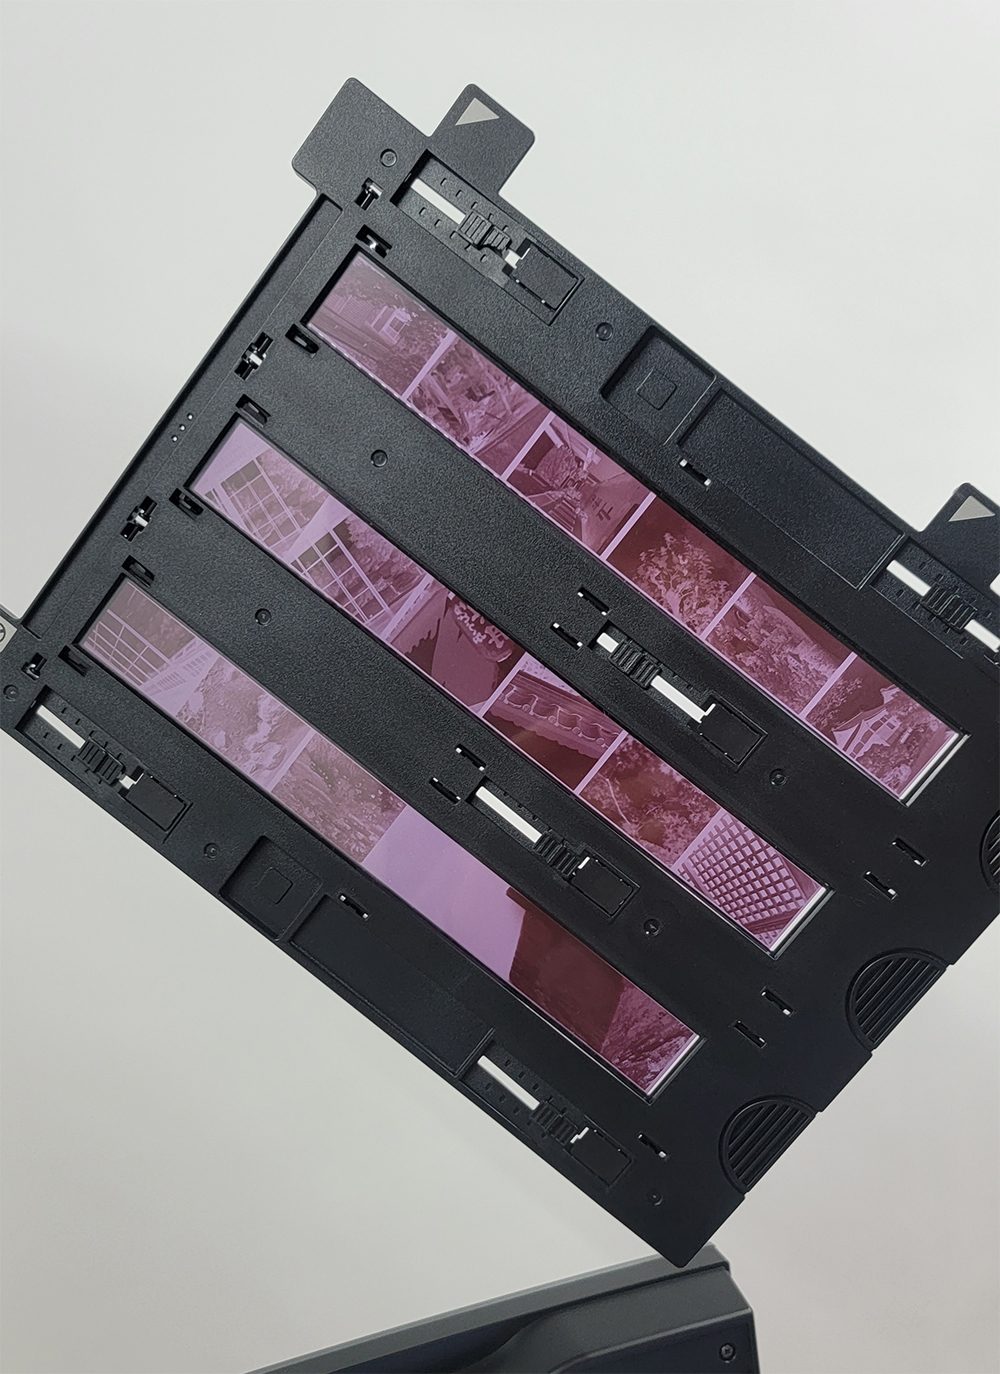
The first of the two tools we’ll be looking at today is the Epson V850 Pro Scanner. As a scanner, the Epson V850 Pro is a flatbed that offers film scans of a large array of different film sizes – from 35mm film strips to medium format, 4×5 film slides, and even as high as 8×10 large format film. Including the film holders and slides with the scanner, the Epson V850 looks easy to use, in a robust and professional-grade package. At 6400 dpi available for film scans, I suspect this scanner to offer really high-grade scans – something that isn’t always available at film development and scan services.
Nikon ES-2 Digitizer
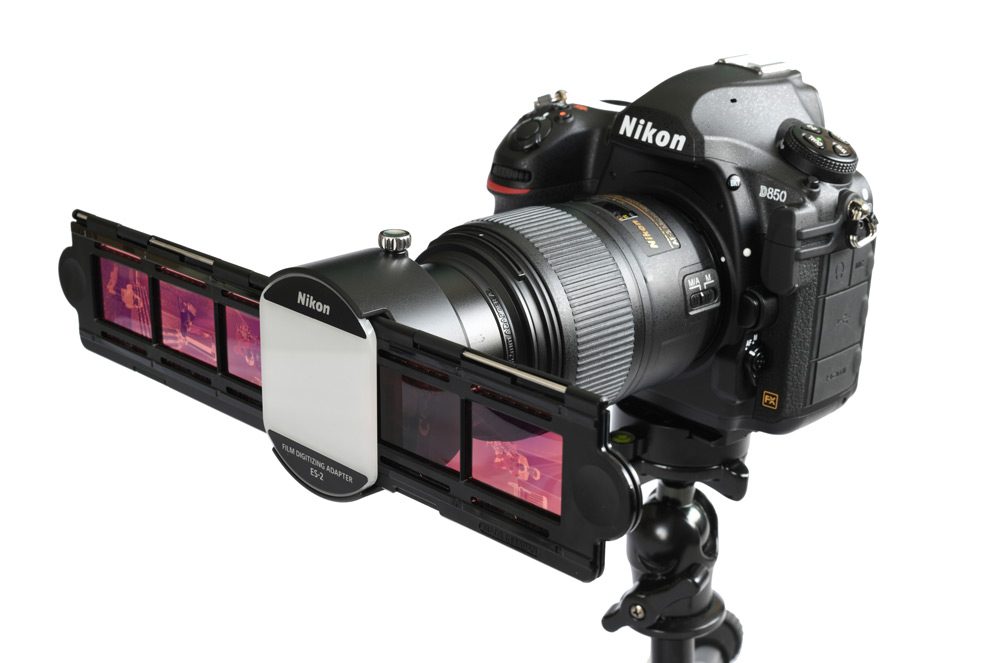
Perhaps one of the coolest products I never knew existed is the Nikon ES-2 Digitizer. Introduced in 2017, the Digitizer was met with skeptics but largely went unnoticed by the general photography community. With the use of a Nikon D850, and a Nikon micro lens (for my test, I used the Nikon 60mm f/2.8G ED AF-S Micro), the Digitizer puts a cap-end onto the lens, with a film tray, allowing you to scan your images with the help of the digital sensor. The process looks incredibly intuitive, though results depend on your light source and workflow.
Scanning with the Epson V850
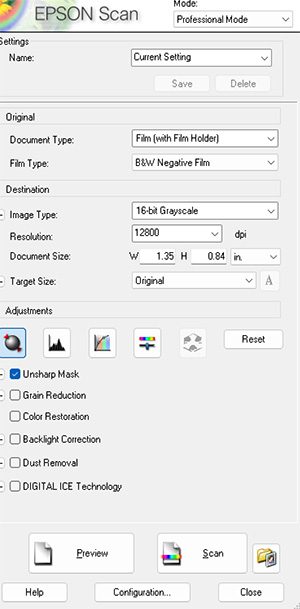
Going into the Epson V850, I was initially pretty intimidated. The system itself is large and looks incredibly complicated by comparison. However, the software included was incredibly easy to use, and explained the process pretty well. The resolution I was able to get from the Epson V850 was very impressive, giving me images that exceed a 50-megapixel equivalent. However, when scanning the images at the highest resolution, I found the process took about 15 minutes per image, which makes scanning a couple of rolls of film an all-day process. Fortunately, the machine runs quietly, with little to no light leak, and with the help of the included film slides, you’re able to scan in 18 images at a time, so you can start the process and come back a couple of hours later to see how it went.
I suspected the machine would require some calibration and retesting to get it running correctly, but to my surprise, my first attempt at scanning went well. In particular, I was really impressed with the scanner’s ability to reproduce color film – giving rich film tones that digital photography sometimes still struggles to achieve. Given my timeframe with the system, I couldn’t go through and see all the settings (I’m happy to do that later if there is interest), but I got the system running in about 20 minutes ofset-upp time.
Scanning with the Nikon D850 & Digitizer
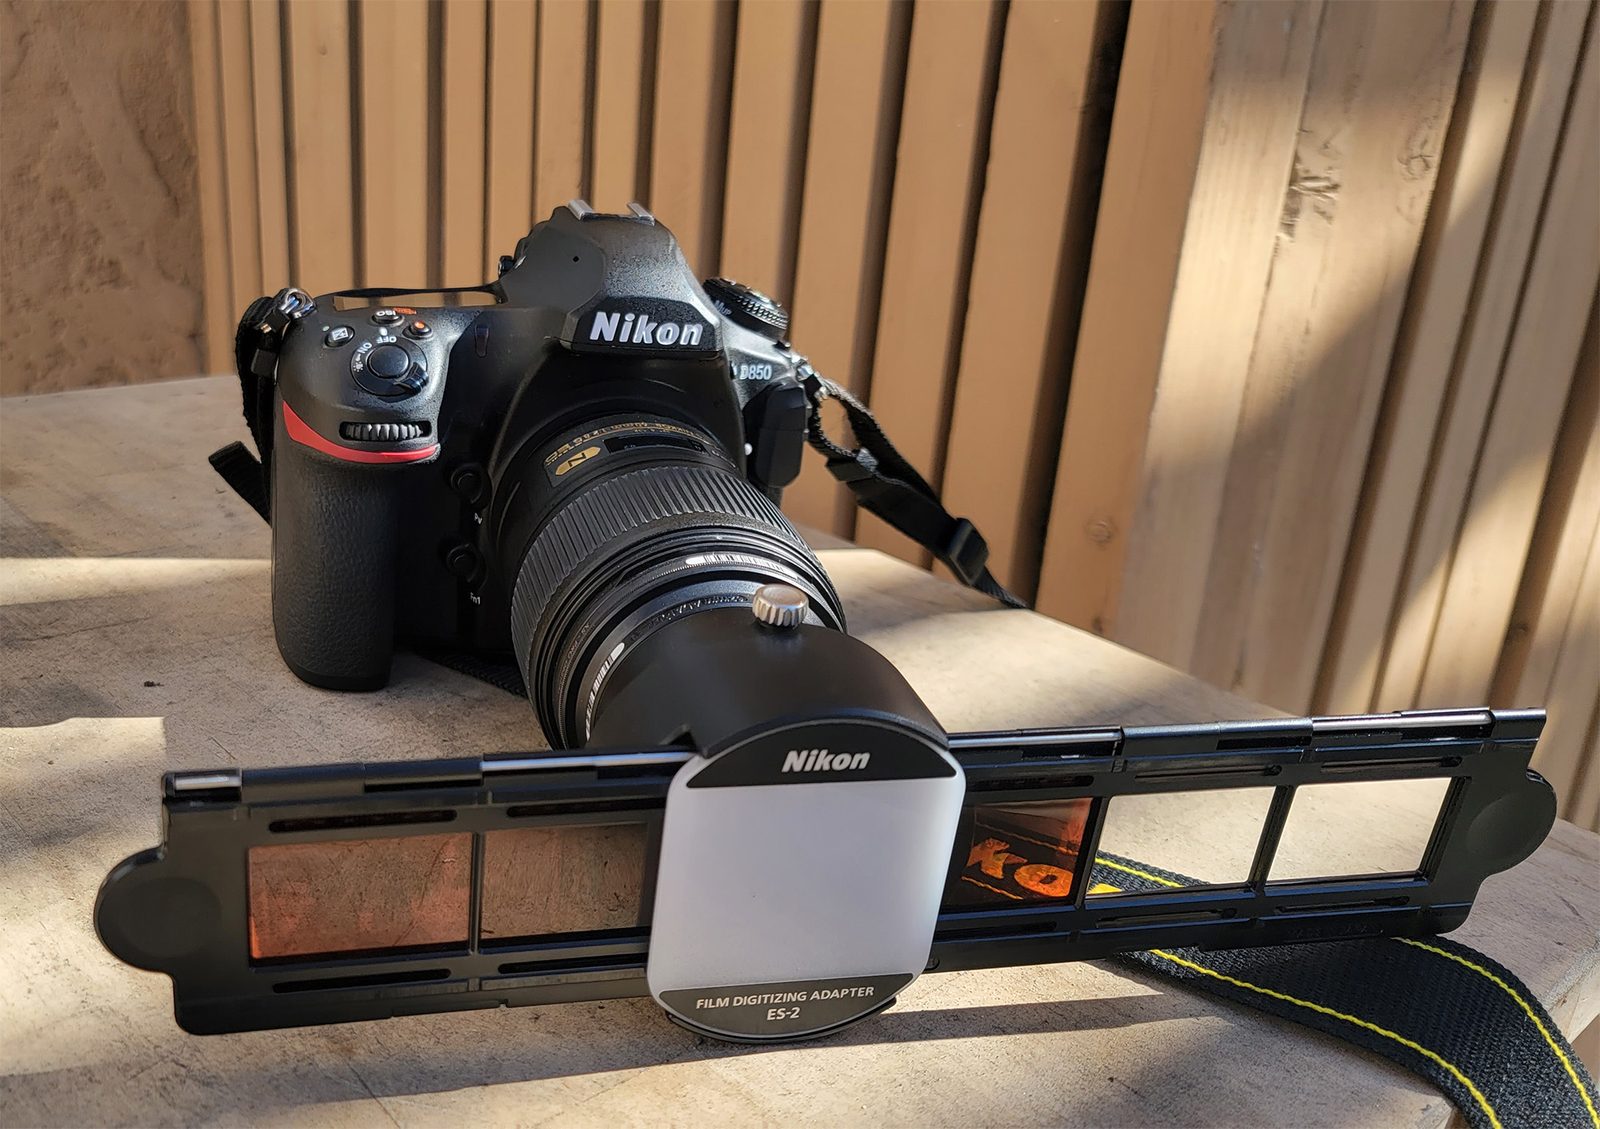
While the setup process of the Epson V850 wasn’t particularly difficult, it really pales in comparison to setting up the Nikon D850 and ES-2 Digitizer. This innovative system works in an incredibly intuitive way – by attaching a film strip to your lens, allowing you to use the digital sensor of the camera as a scanner. The idea is brilliant, and I initially thought that it could be made for several different cameras, but Nikon has restricted the system to just the Nikon D850 and a Micro lens through the camera’s built-in software. But the setup process is simple, you attach the Micro lens (I went with the Nikon 60mm Micro lens) to the camera body, and the film scanner system screws onto the end of the lens much like a UV filter would. From there, you just load your film strip into the system, and set the camera to film scanning mode in the live view settings. From there, you simply point the camera to an even light source (I chose a video light with a 3×4 softbox attached), and take your photos with the camera.
The entire process of the Nikon D850 and ES-2 Digitizer took all of 5-10 minutes to set up, and because we were using a digital sensor, the process of “scanning” the film took all of a few seconds per film strip.
Comparing the Scans
Using both the Nikon Digitizer and the Epson V850 on the same film, I figured it was worth comparing the two scans to see which one performed better. Below are a couple of comparisons of both color and black-and-white film, and I’ll share my thoughts after the break of images. Special thanks to my friend Nette for supplying the 35mm film to scan – be sure to check out her excellent travel guides here.
-
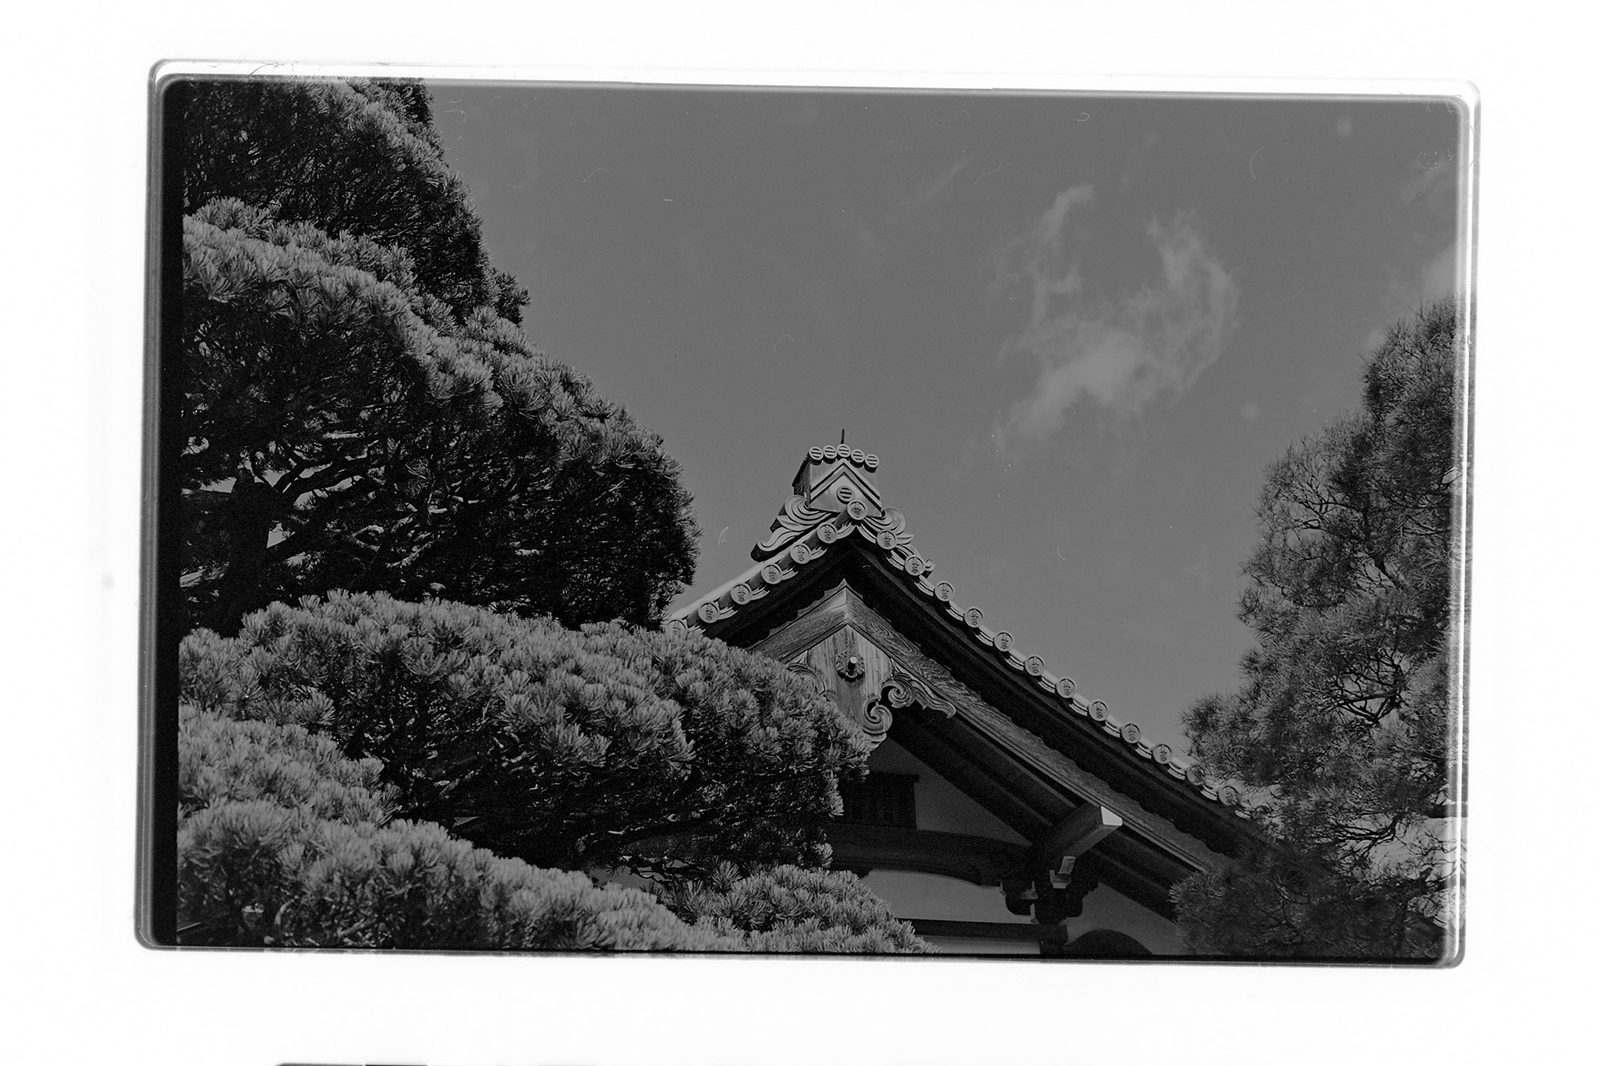
Epson V850 Scan of Kyoto -
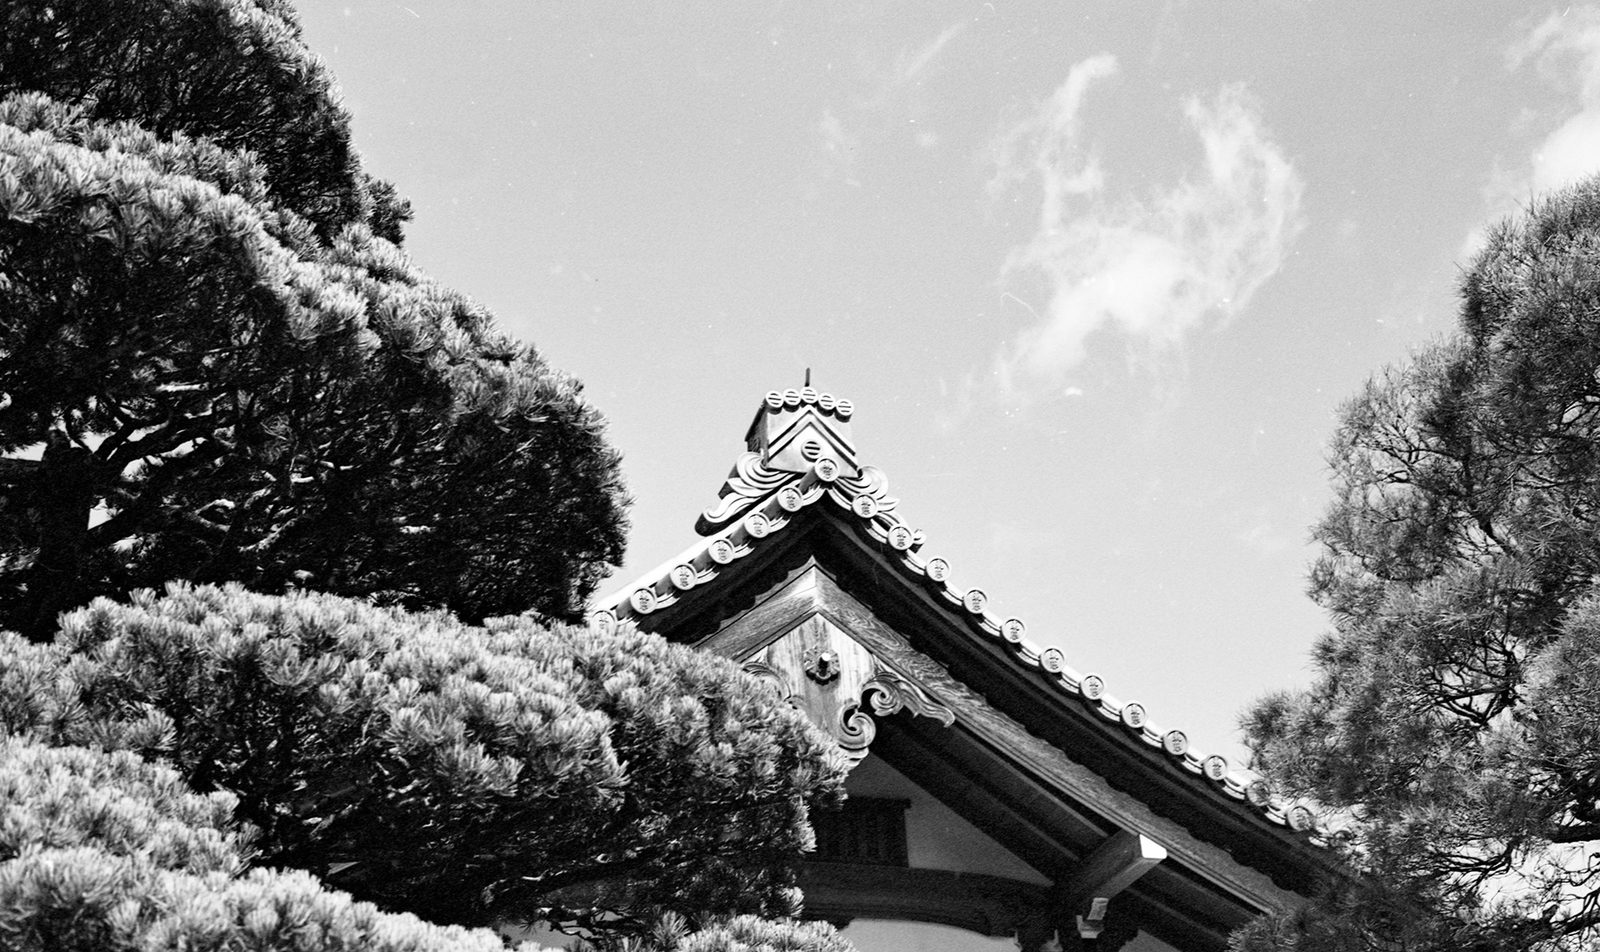
Nikon ES-2 Scan of Kyoto -
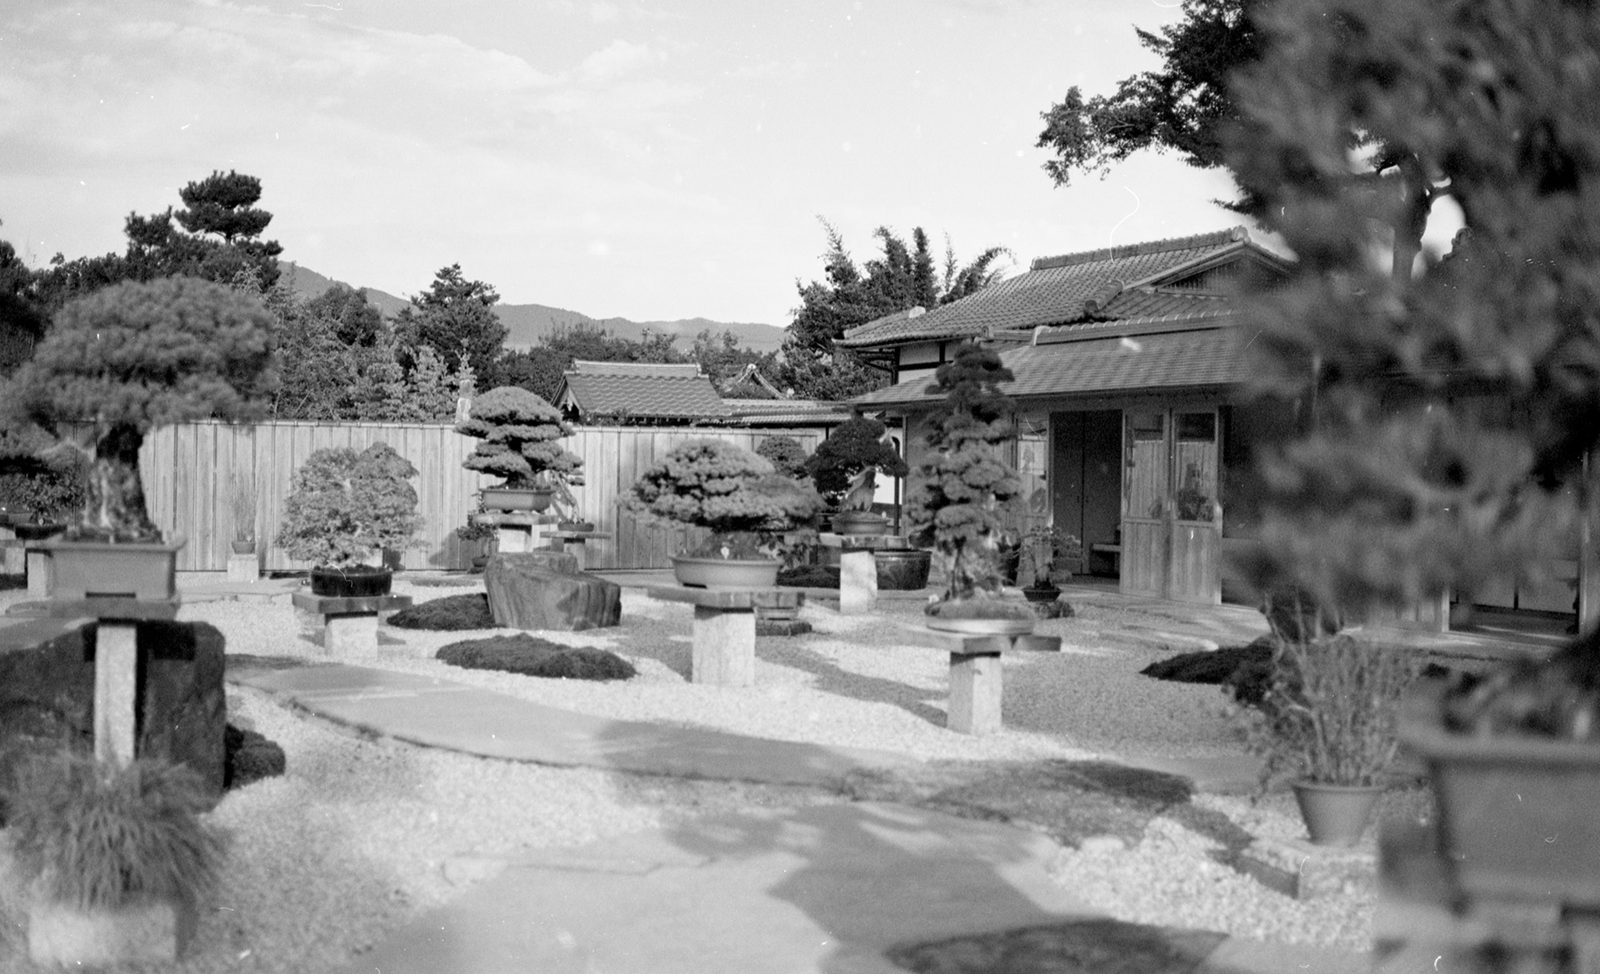
Epson V850 Scan of Kyoto -
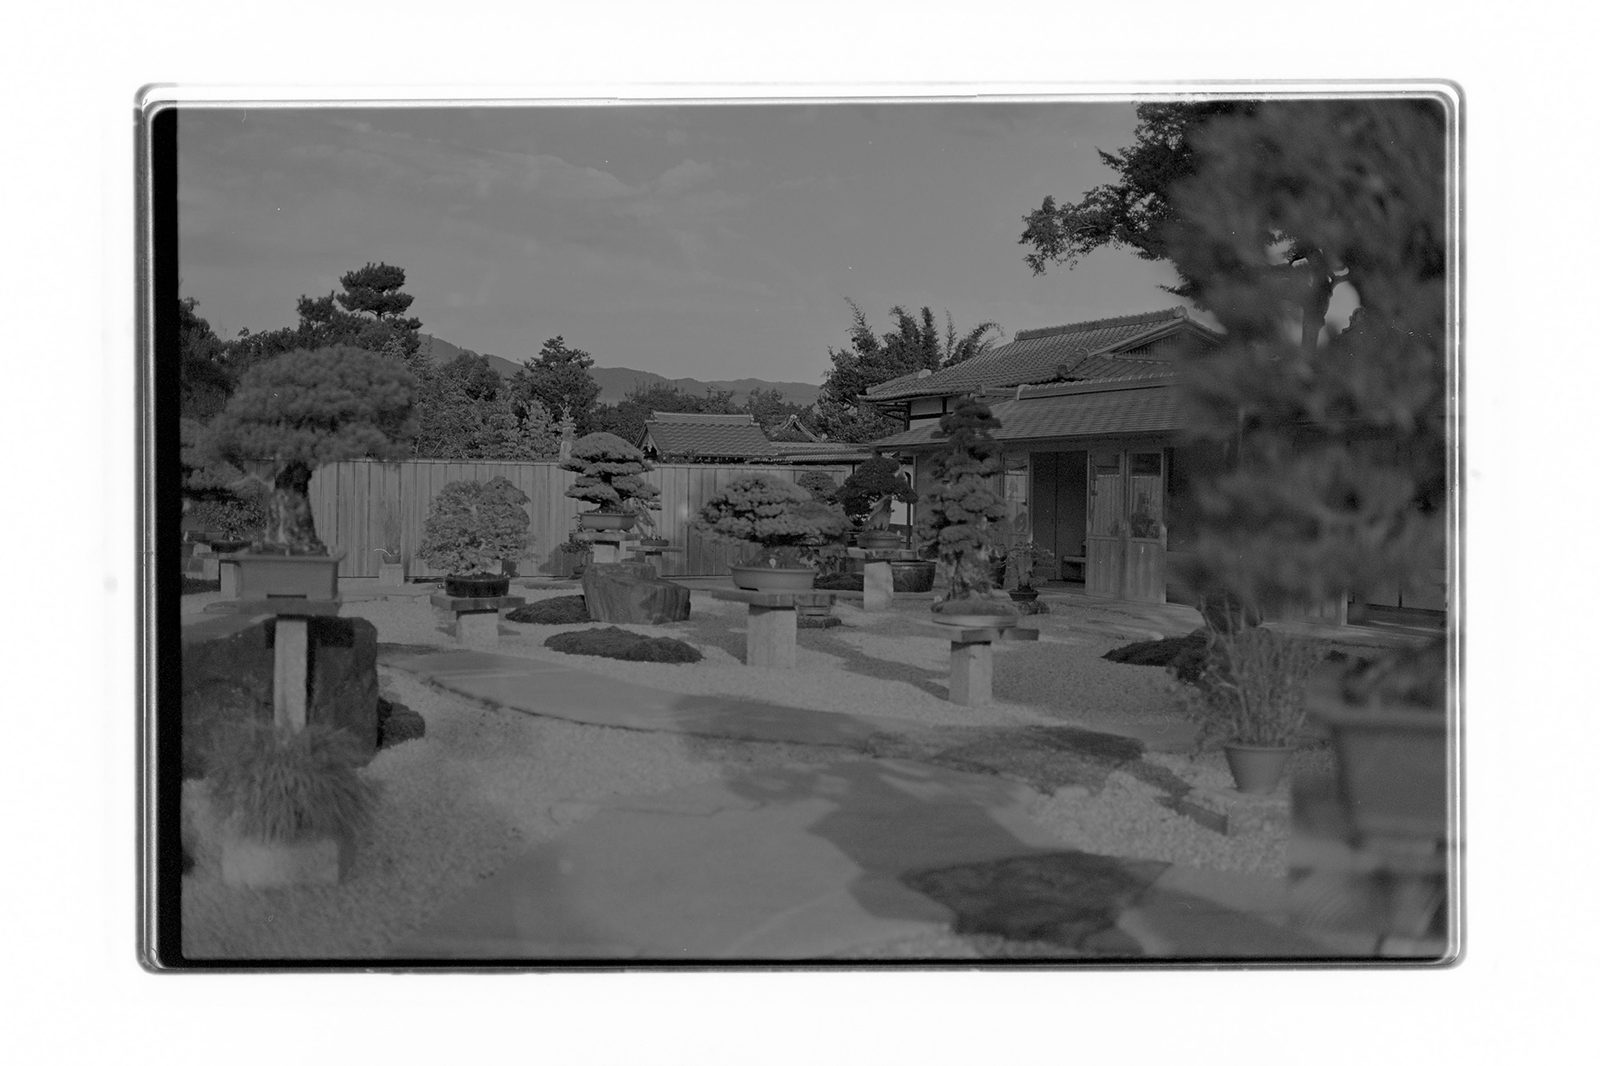
Nikon ES-2 Scan of Kyoto -

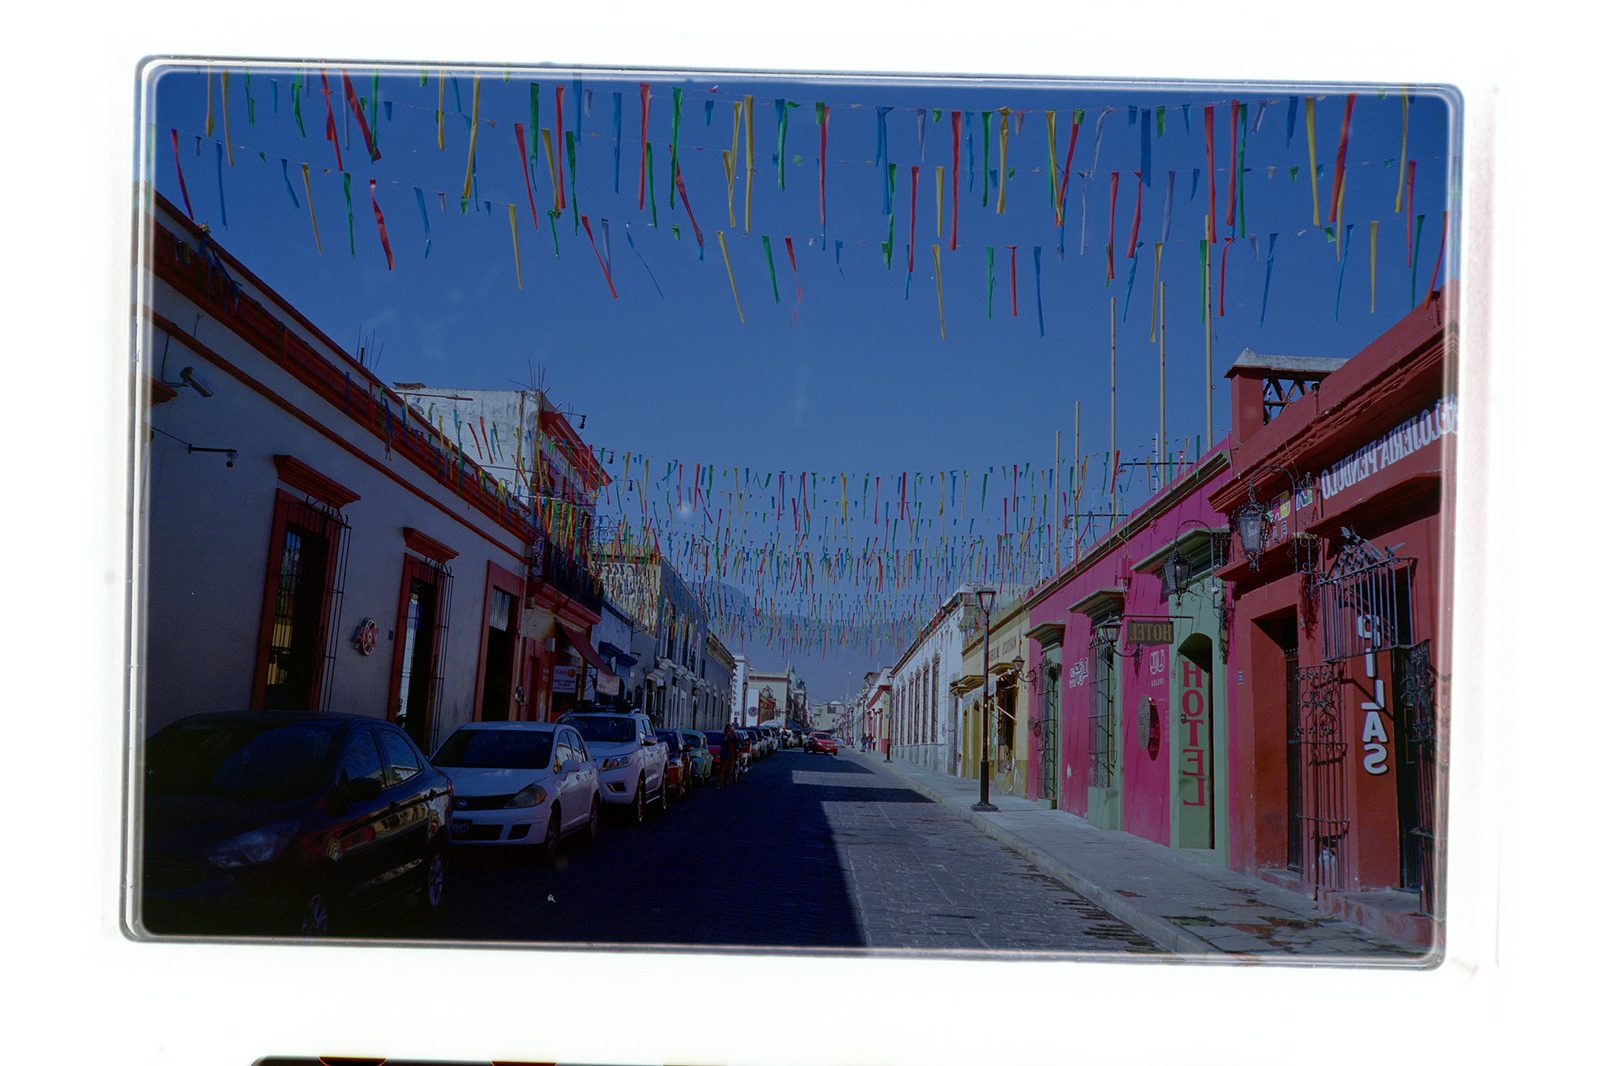
Epson V850 Scan of Oaxaca -
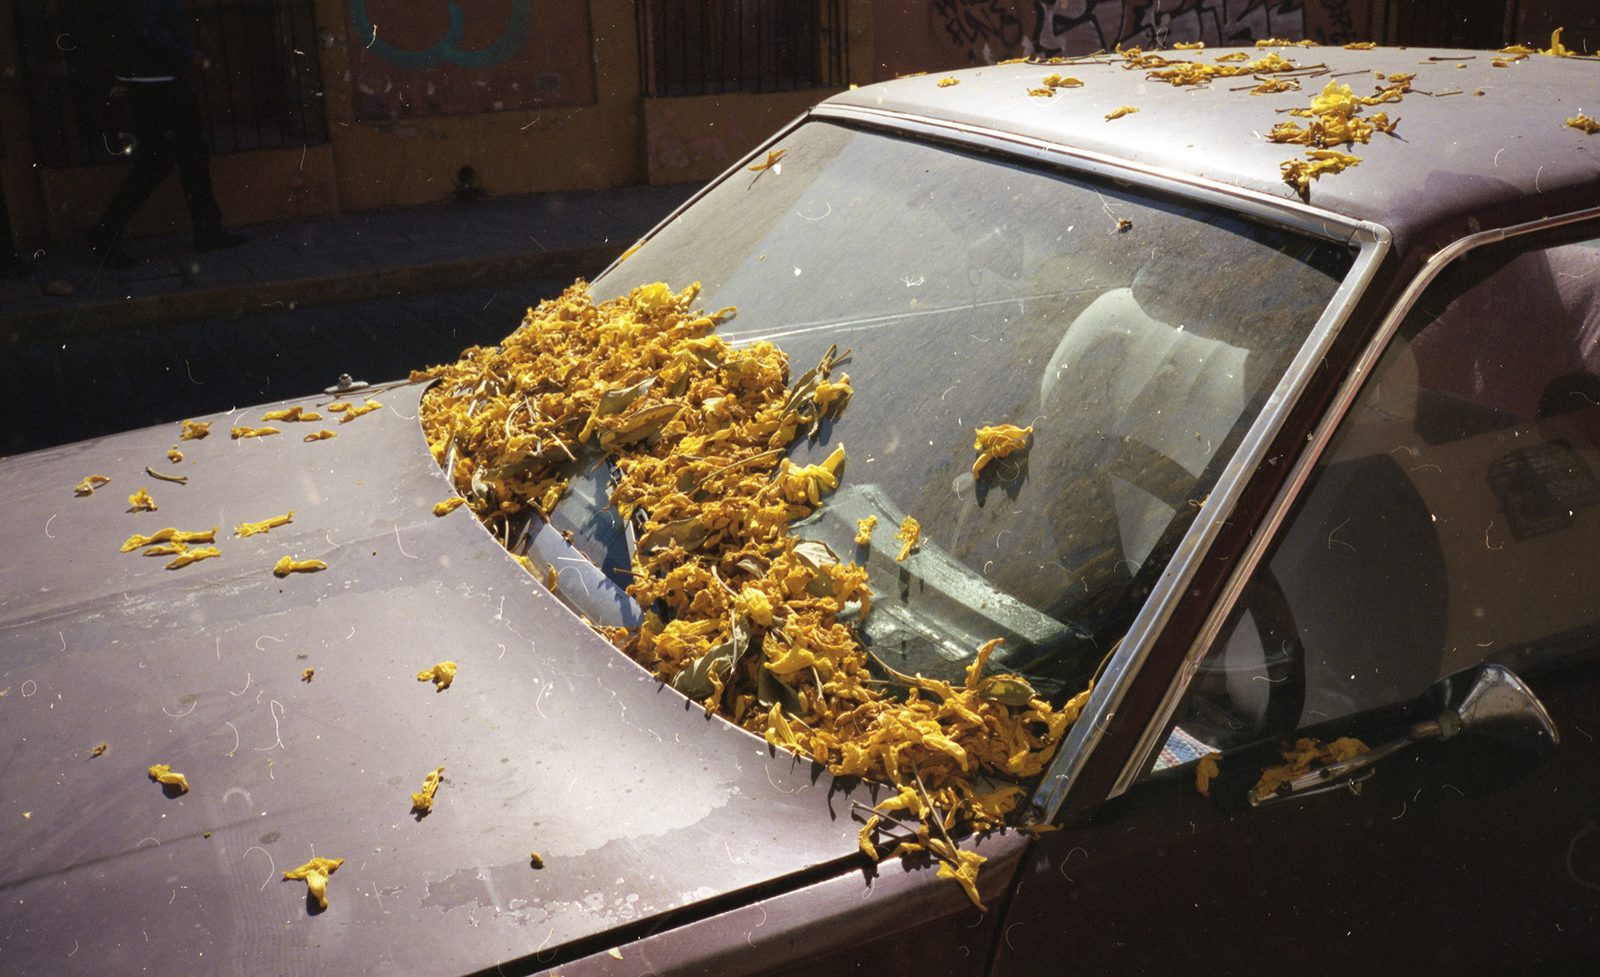
Nikon ES-2 Scan of Oaxaca -
Epson V850 Scan of Oaxaca -
Nikon ES-2 Scan of Oaxaca
Of the two scans, I had the Epson V850 set to its highest resolution and assured that the scan bed was clean and free of debris (though despite that, there is quite a bit of dust and debris in the photos). For the Nikon, I shot everything in JPG (the default when shooting in scan mode) at its highest resolution to make for a fair comparison. Of the two, I thought both of them did a fair job at scanning the 35mm film into digital – though the Epson V850 was better, especially when handling color film. Of the two, I found that the Nikon often lacked dynamic range and contrast in the images, giving them a more flat appearance. While neither of them could really compete with professional grade scans, both of them offered scans that would be more than what the average person would need for social media or sharing online.
Conclusion
To sum it up, I found both scanners pretty good at doing what they are designed to do, but still falling short (as suspected) by some of the uber-expensive scanning systems developed by Hasselblad or PhaseOne. Of the two, I found the Epson V850 to offer significantly better results. Either way, both are great options for digitizing your work – particularly if you have a large batch of film sitting idle in a box somewhere. But what do you think? Are you a film photographer and have your solution for scanning film? Chime in in the comments below.
And again, thank you to my dear friend Jeanette for loaning me some of her 35mm film to scan into these systems. Be sure to check out some of her work and incredible travel guides by clicking here.

9 Comments
Gordon Lewis ·
The flatness of your JPEGs with the Nikon ES-2 setup was because the average digital sensor has much more dynamic range than the film image you’re copying. You would have gotten much better results if you had shot RAW, brought the files into a raw converter, set the white point, black point, and then adjusted the curves appropriately. Here’s an example shot on 35mm Tri-X. https://uploads.disquscdn.com/images/6121311250c48463c96135c5c0c1abedd77c4dd4f24f03c32eedf9f4d665ee5d.jpg
Zach Sutton Photography ·
When using the Nikon ES-2, it only allows you to shoot in jpeg. When going into the film scanning mode, you’re really limited by the settings you can adjust on the d850
Athanasius Kirchner ·
That sucks ??
But I guess nothing stops you from just shooting regularly in RAW without the dedicated mode, right?
Mike Peters ·
I shoot in RAW and use Negative Lab Pro for both b&W and color negs. I use the high res mode on my Lumix G9 and get an 80 mp raw file from either positives or negatives. The results are stunning and are easily better than what I got out of an Imacon X1.
Daniel Daugherty ·
I assume you mean the D850 feature that converts from a negative is the limiting factor here, not the ES-2 itself. You might want to adjust the internal jpg settings a little and use a proper backlight… but more importantly, you might want to use that ES2 and shoot raw for a proper comparison. There has been a number of 'tests' out there that favors high-res camera sensors over flatbed scans of late… it really seems the ES-2 was not evaluated to its proper ability here.
Peter J. DeCrescenzo ·
Attached is a favorite family photo taken in the early 1940s by Arthur Heitzman (on the left). After his WWII service, Arthur became a very successful studio photographer, manager, and member of Cameracraftsmen of America.
At the far right is my father in his Army uniform. My dad was trained as a medic, and soon after this photo was taken, he shipped-out to serve in the war in Europe. 2nd from the right is his childhood sweetheart, my mother. My parents married after the war ended. My mother’s mother is 2nd from the left. The location is my grandmother’s apartment in Cliffside Park, NJ. All are since deceased.
I “scanned” this photo from Arthur’s original 2″x3″ black & white negative using an Olympus E-M10 Mark III (MFT) camera, RAW, ISO 200, Panasonic 45-175mm f5.6 lens, and two macro tubes. Shot against a piece of white diffusion backlit by a desk lamp. Processed in Pixelmator Pro on my MacBook Pro 13″ (M1). Especially thanks to the relatively large, properly-shot original negative, I think the result is quite good. Cheers.
https://uploads.disquscdn.com/images/8715875f00b914c17a56dba09ad8edf271e705065f457c3bb3e387da8e000218.jpg
Dave Oddie ·
I have an Epson V750 pro, the predecessor to the V850 the main difference being the light source on the v850 is LED (I think).
I have had some successful scans and some not so great with it but while easy to use the Epson software imposed quite a severe crop on 35mm film. My scanner came with Silvefast scanning software bundled and that doesn’t suffer the same problem allowing you to crop each frame precisely but it is much more complicated to use with plenty of scope to go wrong. It is even buggy such that it can for no apparent reason keep doubling up the sharpening which if you miss the fact it did this results in very grainy and high contrast scans.
The Epson software also wouldn’t allow the setting of exif data. I know the dates when photos were taken and wanted to include it in the exif. Silverfast allows this, the Epson software I have does not.
Overall the complexity and scope for error has led me to look for alternatives and I am about to try a similar system to the Nikon from here: https://www.valoi.co/ and they do the “easy35 which is most like the Nikon offering.
The big difference between the above and the Nikon is when using the Valoi system you shoot raw and use software like Negative Lab Pro: https://www.negativelabpro.... to convert the raws. The results shown look better than those you obtained from the Nikon setup which looks very restrictive given you are stuck with jpeg’s.
cthulhu fhtagn ·
I have a Epson 3170 which, while not as sophisticated as the V850, does a commendable job of scanning 35mm negatives and (mounted) slides, but it’s sloooooooooow. It works well if you’d want to digitize the occasional roll of film, but digitizing a sizeable archive takes forever.
Being an inveterate tinkerer, my solution consists of a copystand, an old enlarger head as a collimated light source, the film carrier from the 3170, a 7Dmk2 and a Sigma 105/2.8 macro lens.
The camera is tethered to a computer and can be remotely controlled through the Canon software that comes with the camera.
Frames are shot in Raw with reduced resolution (11Mp) since the average color negative doesn’t afford more than 6Mp anyway. For processing I use RawTherapee, which has a tool for processing scans of (color) negatives. With some experience, one can figure out (and save) the parameters for each type of film for optimal results. RawTherapee also automagically compensates for lens vignetting and geometric distortion (if any). Of course, beyond the basic conversion, individual frames can be tweaked however one wishes.
Vignetting compensation is essential since the image will be inverted and any vignetting will then present itself as the corners being brighter than the center of the image, which is weird. Now the Sigma (being a FF lens) on the 7DmkII (being a crop body) has no vignetting to speak of at sensible apertures, but of course this depends on the lens/body combination at hand.
Speaking of lenses, if one doesn’t have a true macro lens, one might use any suitable prime or zoom with an extension tube to achieve the proper magnification – but note that not all lenses work well with extension tubes. I figured that my 50/1.8 might do pretty well, since at f/5.6 it’s very sharp. But in reality, at the close focusing distance required the image quality falls apart. The humble 18-55 IS STM on the other hand, was capable of producing very good results.
disqus_XN9vf0ShQK ·
Why would you ever scan with the Epson at its maximum resolution? You are not getting any more detail, you are just increasing the scan time.
It’s real optical resolution is limited by the optical path to a much lower figure, something like 2500 DPI IIRC…