Geek Articles
Completing the Teardown of the Sony FE 70-200 f/2.8 GM OSS: Part II
Lensrentals.com, 2017
You probably shouldn’t read this article unless you’ve at least skimmed through Part 1. To summarize, we had a Sony FE 70-200mm f/2.8 GM OSS lens that had been dropped and no longer would focus. We tore it down both to see if we could repair it and to see what-all was up inside there. In the first part, we did the initial disassembly of the major components and a complete disassembly of the back (mount) half of the lens. We found a few surprises and some different ways of doing things. But we didn’t find the problem with the lens.
The Rest of the Teardown
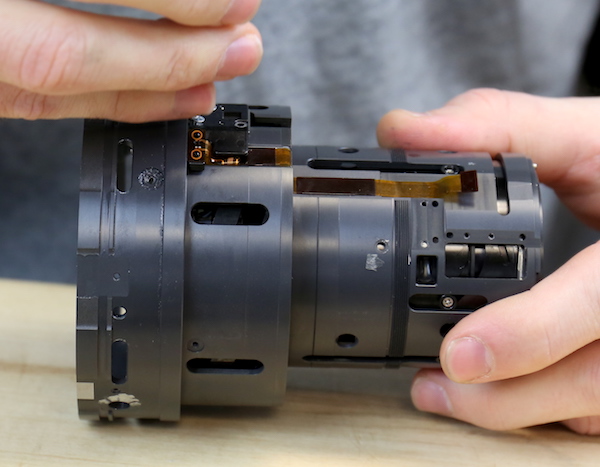
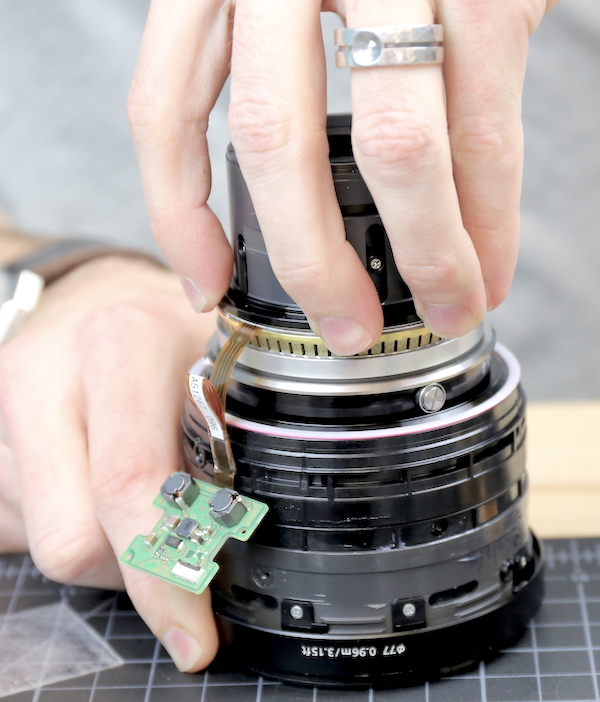
So after a snack break and some more caffeine, we tackled dissecting the front half of the lens. You can see the Southern Fairy Tale ring on top, with the black plastic zoom-link ring right underneath it (you can see a metal zoom key peaking out above it on the side away from Aaron’s hand).
Lensrentals.com, 2017
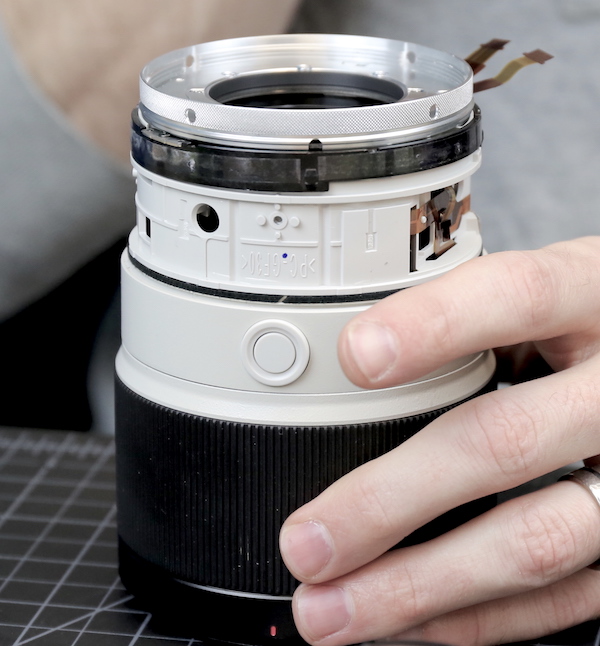
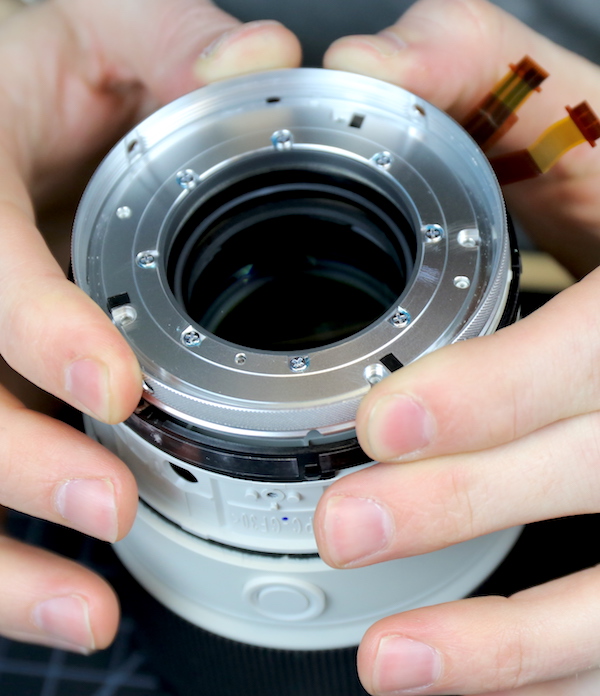
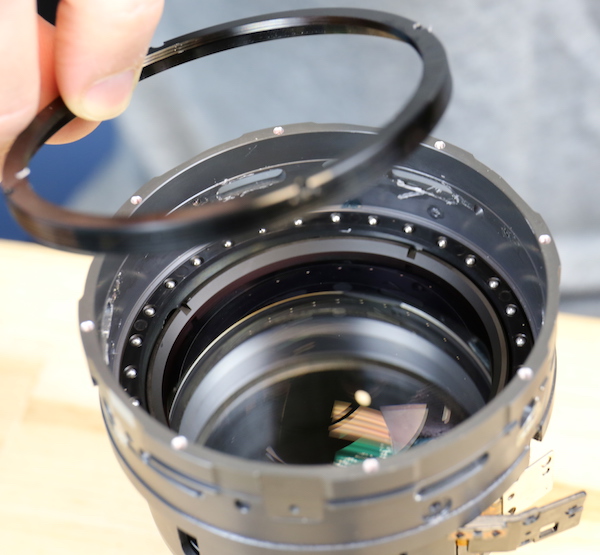
We start by removing the lock-on ring that connects the front half to the back half of the lens. You can see the ring of 8 screws holding the ring assembly to the front of the lens. There are 4 additional screws in the little notches, two of which are by Aaron’s forefingers.
Lensrentals.com, 2017
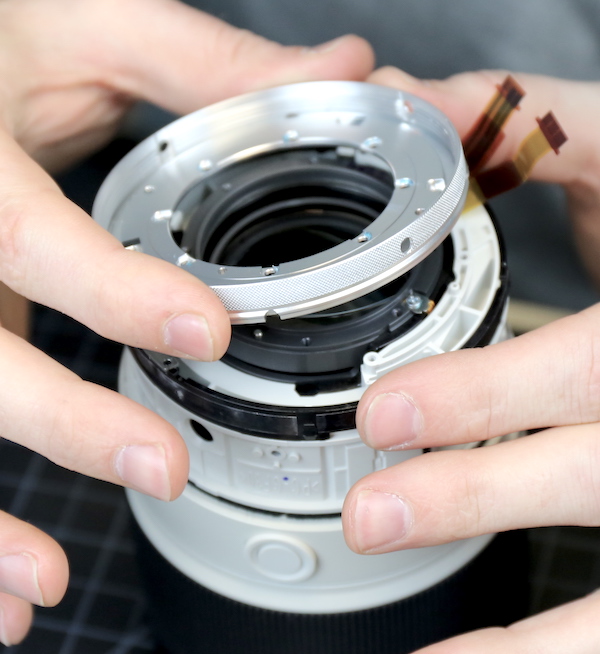
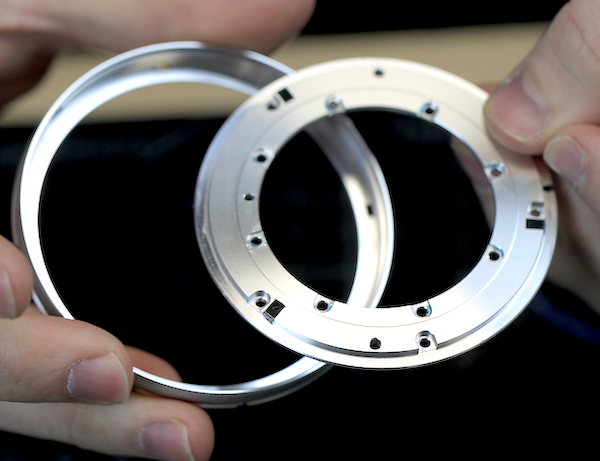
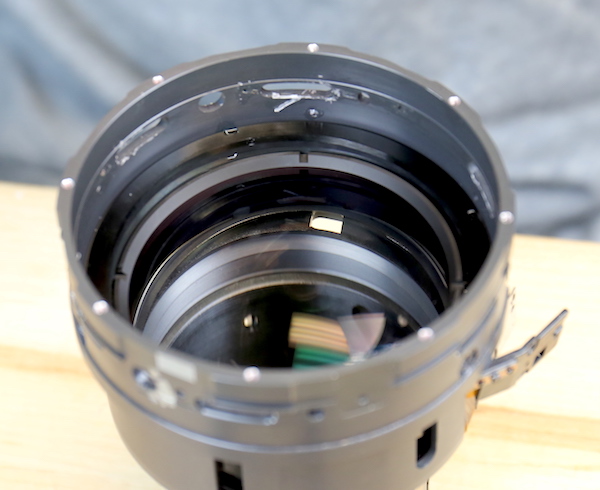
Taking all of those out let us remove the lock ring from the front half of the lens.
Lensrentals.com, 2017
As you might expect, only the plate is fixed to the front of the lens, the locking ring spins freely behind the plate, threading onto the rear half of the lens to attach it.
Lensrentals.com, 2017
There’s also a shim under the plate. This would be a spacing shim either for backfocus adjustment or for optical spacing (probably the latter).
Lensrentals.com, 2017
Here’s where we found our first problem with the lens. It didn’t prevent focusing; but it may well have caused an optical issue. Remember, this lens had been dropped. We were told the drop was only about 2 feet, and there was no external evidence of damage (no scuffs, dents, etc.)
When we looked at the attachment plate above more carefully, it became apparent that two of the screw holes on one side of the lens were bent downward slightly.
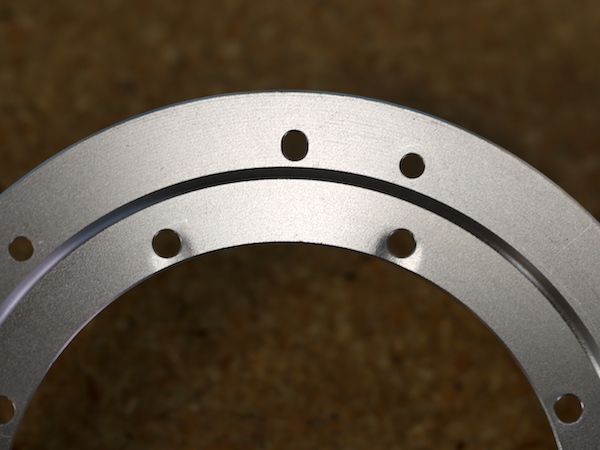
Lensrentals.com, 2017
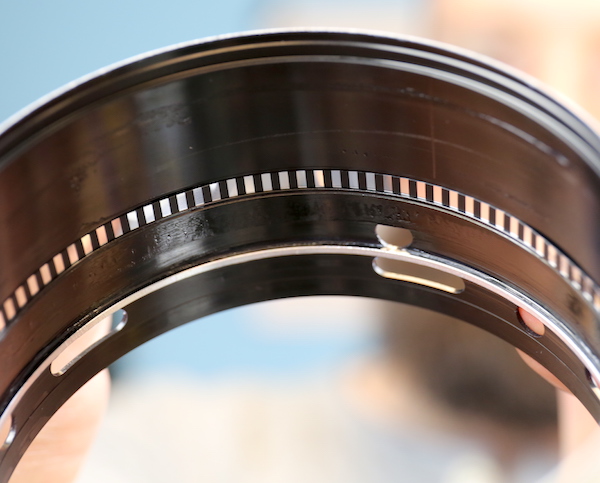
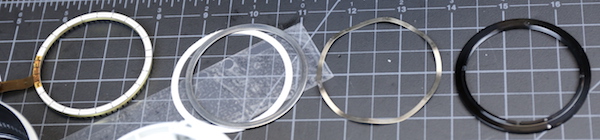
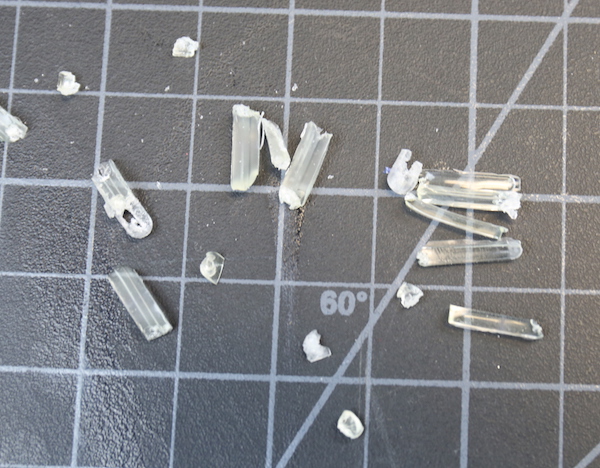
Two holes on the opposite side were bent upward slightly. This plate is attaching two heavy lens-halves, and it’s fairly thin aluminum (or aluminium, if you have a non-U. S. plate). The picture below shows the thickness of the plate through one of the screw holes; we measured it as 1.2mm. That might be thick enough if it was stainless steel or titanium (I’m no materials engineer) but this is aluminum; we could bend it with our hands. If the screw holes were bent, we had to assume the rim of the plate was also.
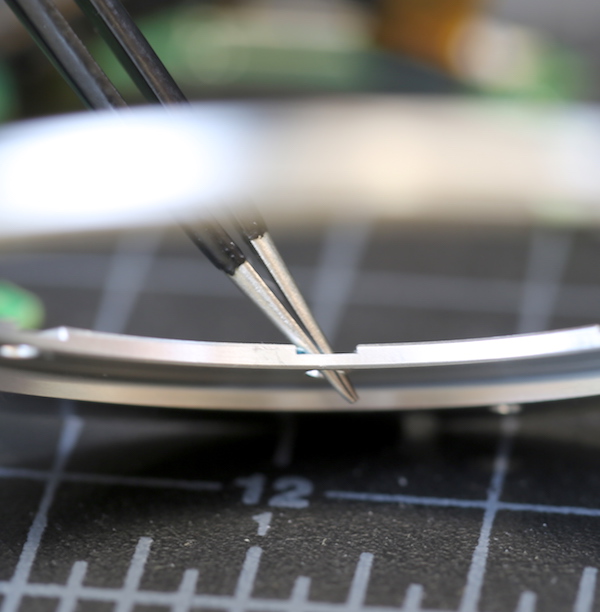
Lensrentals.com, 2016
Some engineer with way more math than me obviously calculated that this plate was thick enough to hold the mass of the two lens-halves together. But I’m damn sure he didn’t consider the part about force and velocity squared and all, because this plate, the one I can bend in my hands, is not going to resist much force. At all.
While the plate did hold the lens together just fine despite these bends, we’re obviously concerned that the bent plate could affect the lens optically. There are strong elements on either side of that connection and a tilt of a few microns could cause some significant optical disturbance.
Anyway, while we aren’t happy about the plate, it certainly wasn’t preventing the lens from focusing, so we continued on with our disassembly after getting the parts department to order a replacement plate.
With the connecting ring out of the way, we can access the keys to remove the inner ring linking the zoom barrel you turn to the zoom mechanism inside the lens.
Lensrentals.com, 2017
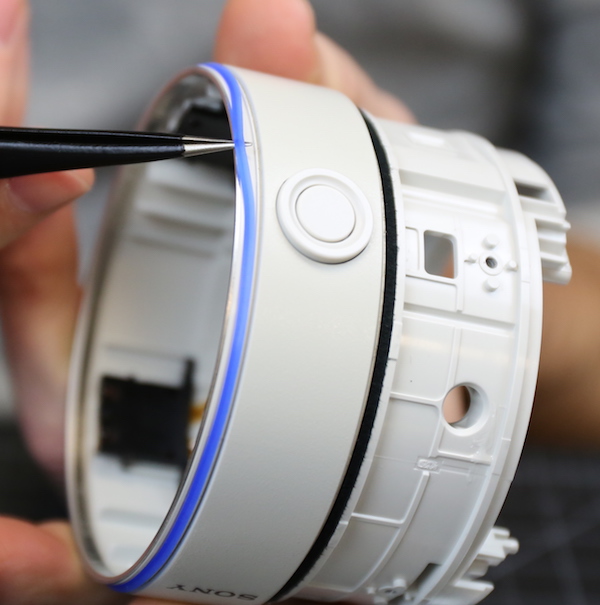
Removing those keys lets us take off the connecting ring and then remove the front outer fixed barrel. Like the other outer barrels, it has weather resistant rubber strips; the blue one is a seal, the black fuzzy felt one further back goes under the rotating barrel.
Lensrentals.com, 2017
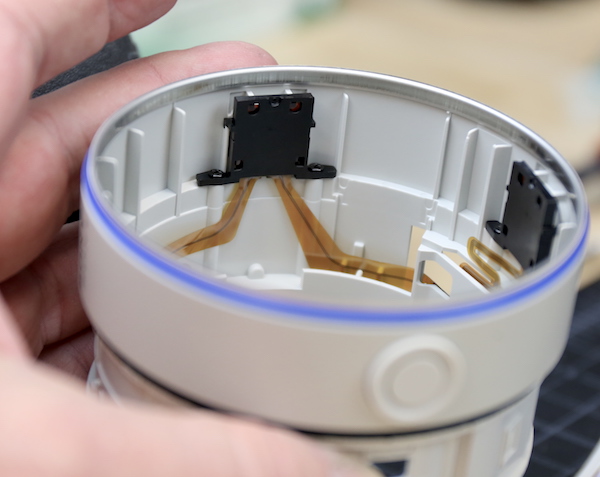
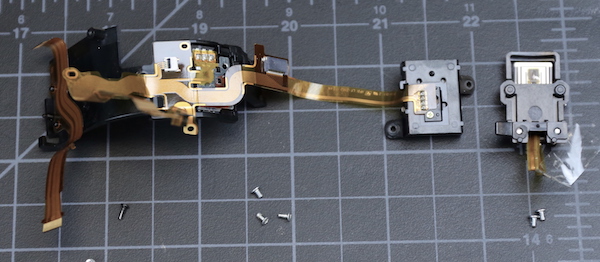
Looking inside the outer barrel, you can see the focus-hold button mechanisms and the flexes that connect them.
Lensrentals.com, 2017
Underneath we start to see the inner workings of the zooming groups and front focus motor. You might think ‘look at all the cool stuff in there’. We thought, ‘oh, crap, this is going to take forever’. If you look you can see a position sensor over on the left side, the big GMR unit hanging over the ring USM motor on the right side, and flexes criss-crossing every damn where. More and more, this lens looks like it’s got a lot of Nikon heritage.

Lensrentals.com, 2017
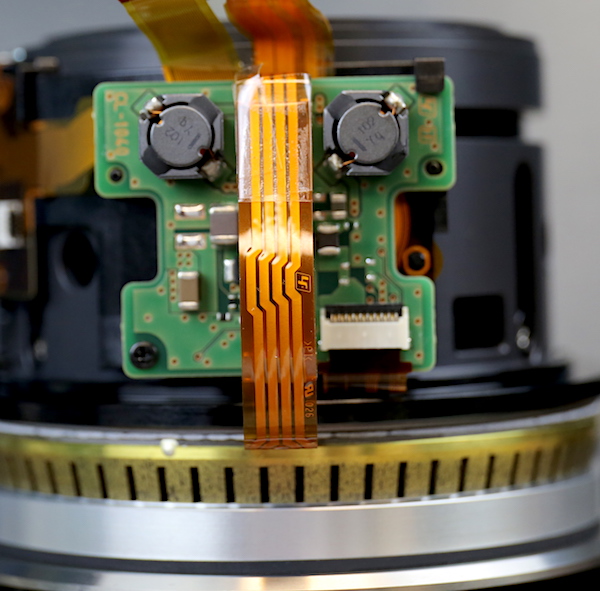
Rotating around to the other side, there’s another PCB, presumably doing some position processing since it’s connected to all those position sensors.
Lensrentals.com, 2017
The focusing ring was the next obvious removal and with the rubber taken off there was easy access to the screws and collars holding it in place, after which it slips off of the lens.
Lensrentals.com, 2017
This is at least partially a fly-by-wire-focusing lens so inside the focus ring is a magnetic strip. When you turn the ring a sensor reads the strip and sends a signal to move the rear focusing elements accordingly. The front focusing elements can be controlled mechanically by the ring or through the ring USM.
Lensrentals.com, 2017
And now we’re getting down to the inner workings of the front half of the lens. We were pleased to see an optical adjustment collar up here, too.
Lensrentals.com, 2017
I’m going to compress about an hours worth of work now, trying to keep this post a reasonable length. But that set of flexes and sensors you saw 5 pictures ago was removed.
Lensrentals.com, 2017
After that we spent 4 or 5 minutes colorfully discussing the parentage of the lens’ mechanical designer who saw fit to make the stacking of the ring USM an integral part of the disassembly. In a nice lens, designed with the thought that someone might actually repair it some day, you take out a couple of screws and take off the ring motor assembly. In this lens we (I’m using the Royal “We” here; Aaron does all the hard stuff) have to take the USM apart piece by piece to get further into the lens.
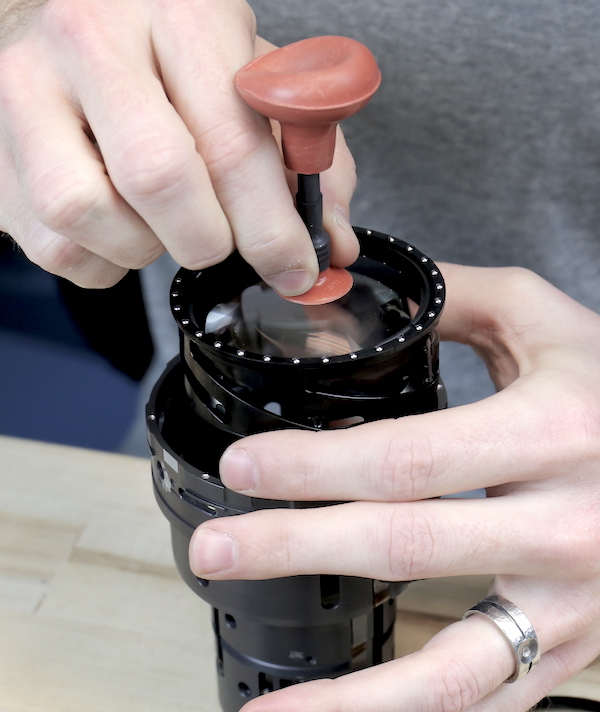
So after carefully marking the alignment, Aaron started counting turns to remove the pressure plate (because it has to go back to exactly the same point).
Lensrentals.com, 2017
After which we unstacked all of the rings and the USM motor was off.
Lensrentals.com, 2017
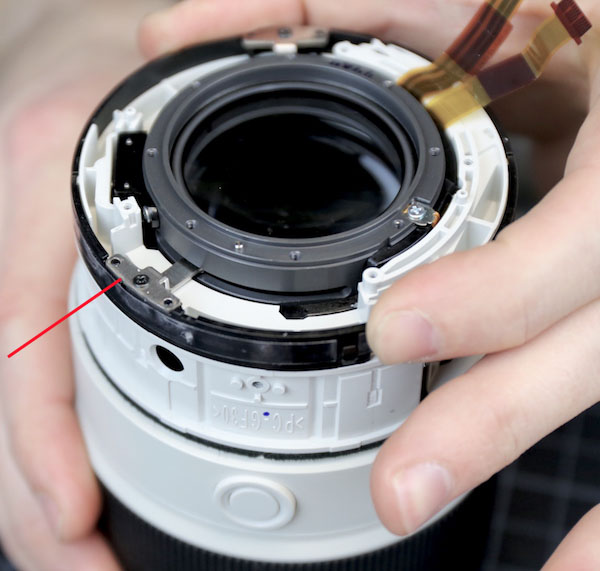
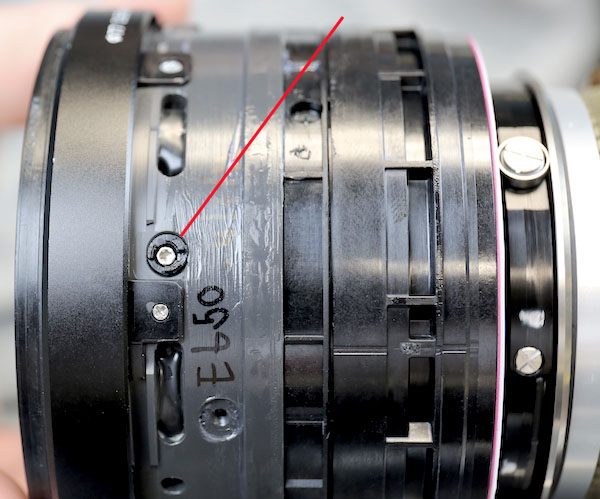
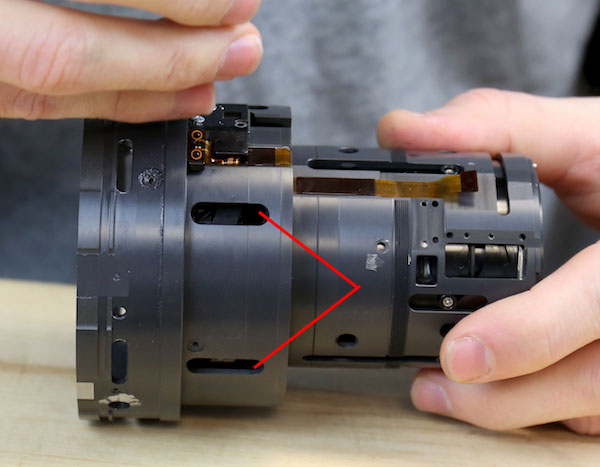
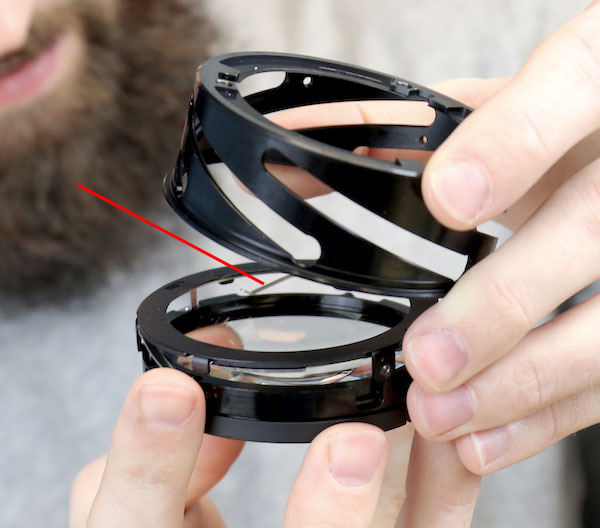
With the motor off, the next ring is a clutch or transfer ring that translates focusing movement to the focusing elements. Well they would, if they worked. We were now able to see the front focusing group didn’t want to move very well since we could turn this ring by hand now. You can see the ring rolls on very robust bearings (red line) and moves the focusing keys connected to the internal group (green line).
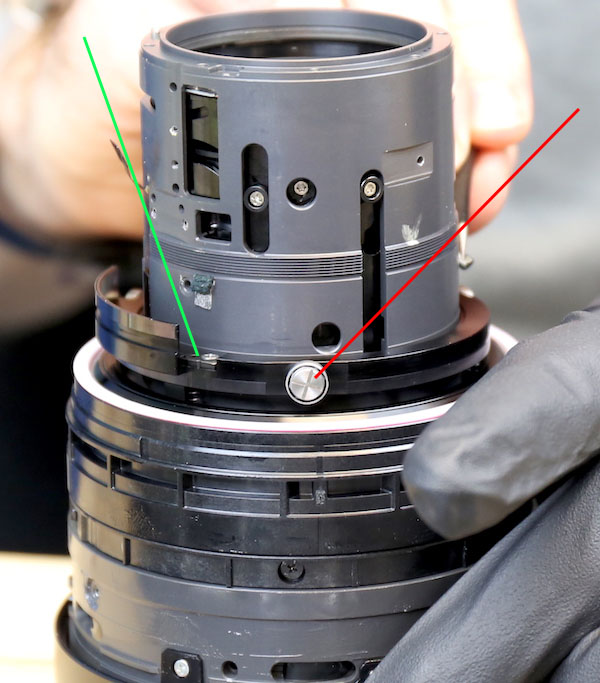
Lensrentals.com, 2017
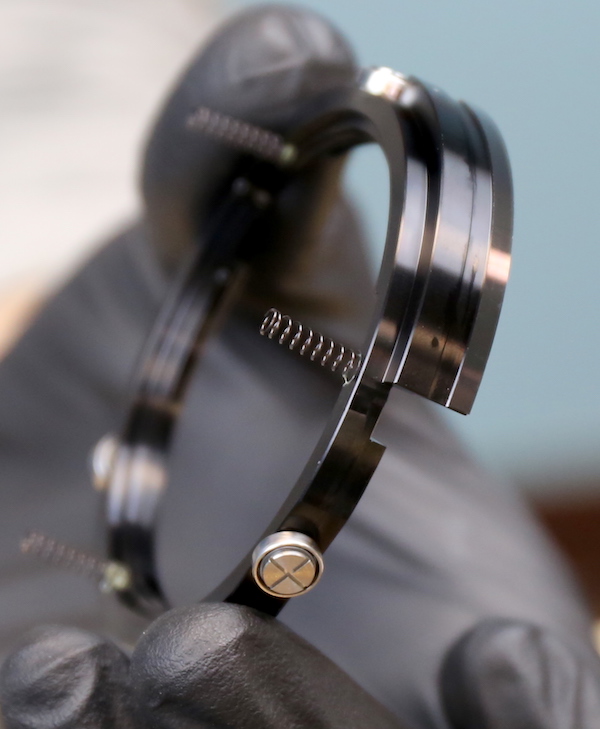
Once we took the keys and one locking pin out, this ring came right off. We were grateful the tensioning springs underneath it came right off with it. Sometimes those spring out like a jack-in-the-box and we have to spend 15 minutes on hands and knees searching for them.
Lensrentals.com, 2017
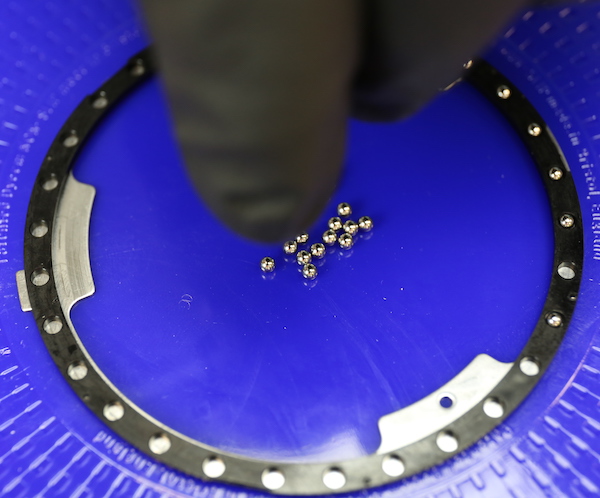
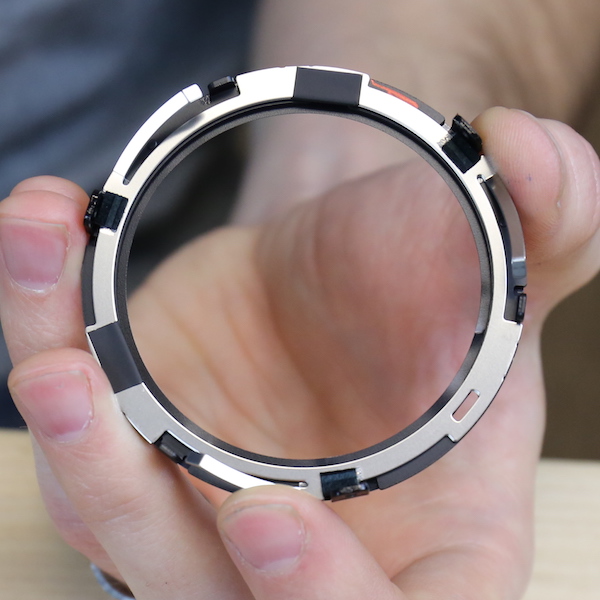
The next ring down comes right off, too. It rotates on a beautifully made bed of 30 ball bearings, which is one of the reasons this focus ring is so nice and smooth. We both did another prayer of thanks, because none of the ball bearings escaped the disassembly table and made a mad dash for freedom. Ball bearings are the escape artists of the lens prison system.
Lensrentals.com, 2017
Just in case any of you want to know how we keep the ball bearings from running away during disassembly, they are corralled on a Dycem non-slip pad. Dycem is one of the great accomplishments of humanity, ranking slightly below the invention of fire and the wheel, but well above the printing press in my pantheon of most important advancements.
Lensrentals.com, 2017
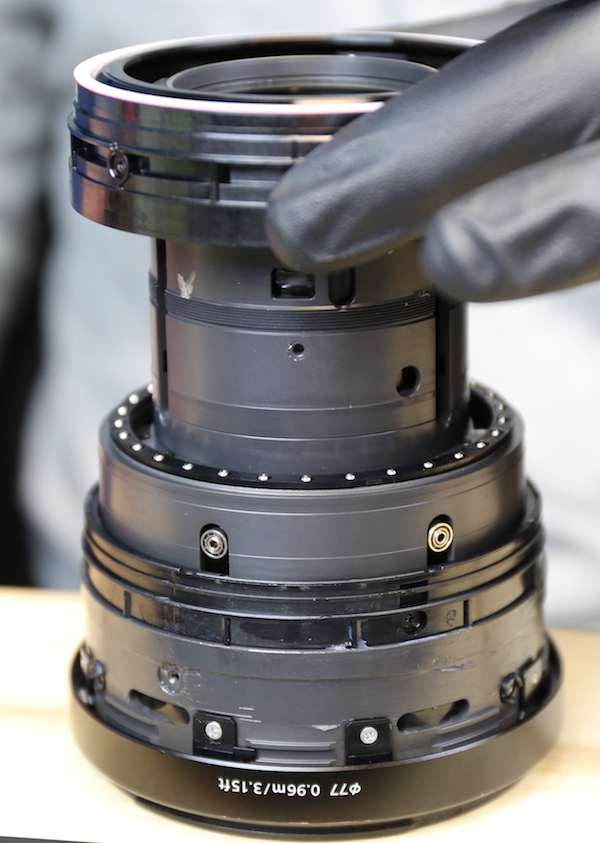
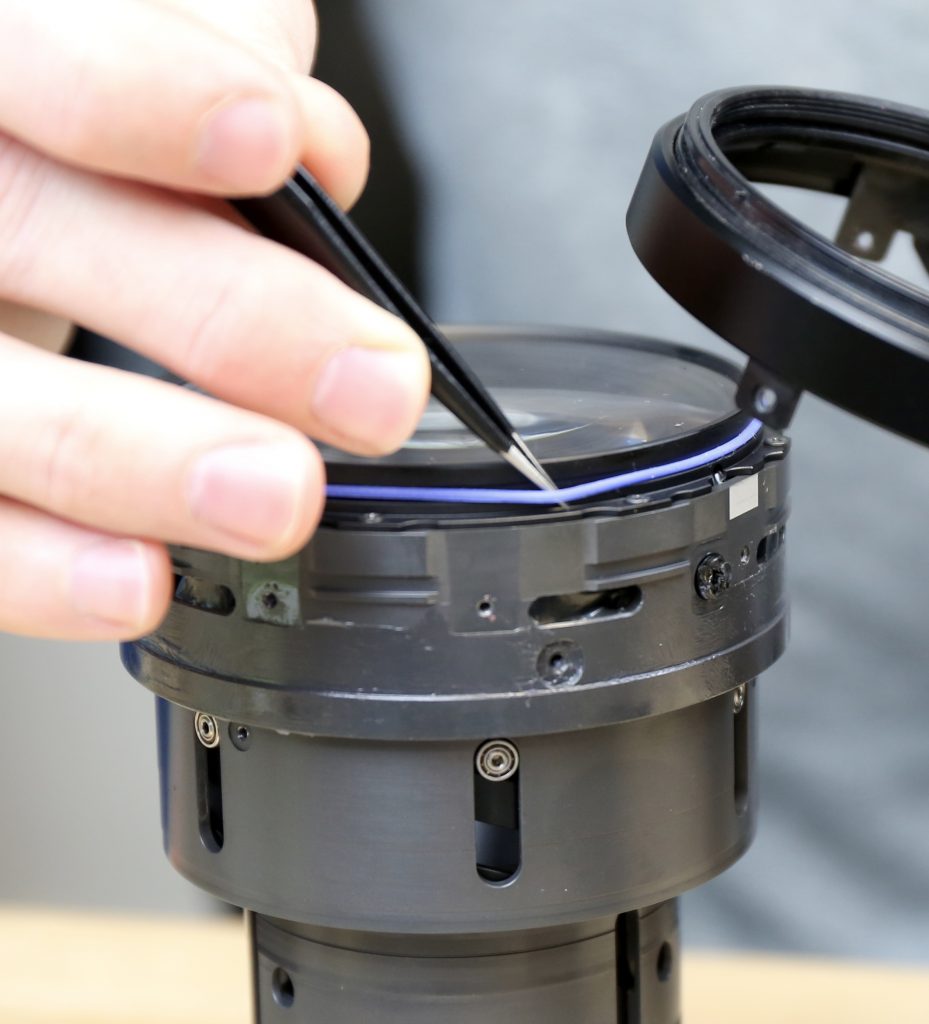
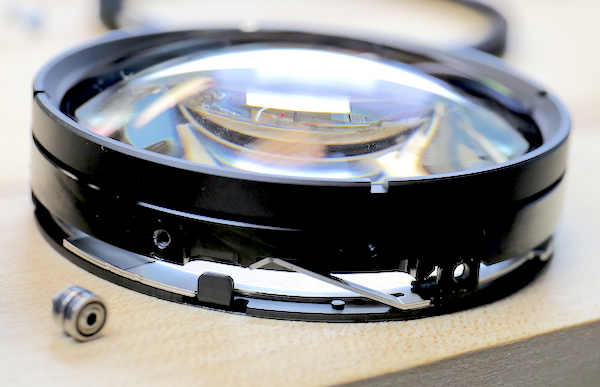
Next, we took off the front (filter) ring, which like all other joints in this lens has a nice rubber seal. Right below the top ring you can see 3 of the 6 heavy rollers that the front focusing element slides up and down on.
Lensrentals.com, 2017
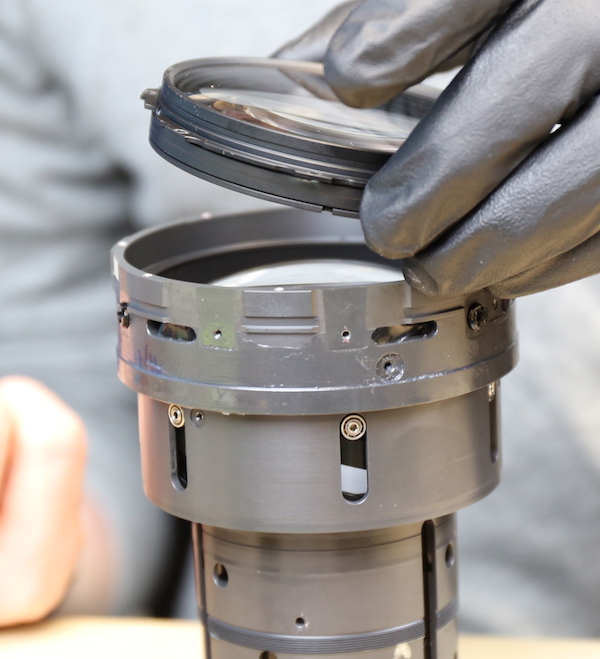
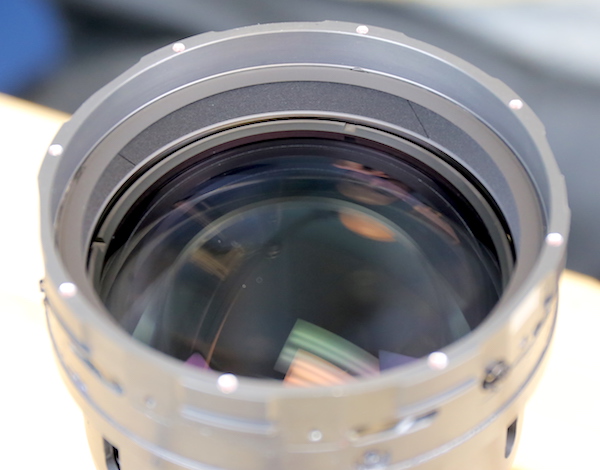
Then we removed the front group, which is two cemented elements. This, of course, could have been done at any time during the teardown, but we were doing most of our work with the lens face down, so it seemed best to leave it until near the end.
Lensrentals.com, 2017
Oh, Yeah. About that Focusing Problem
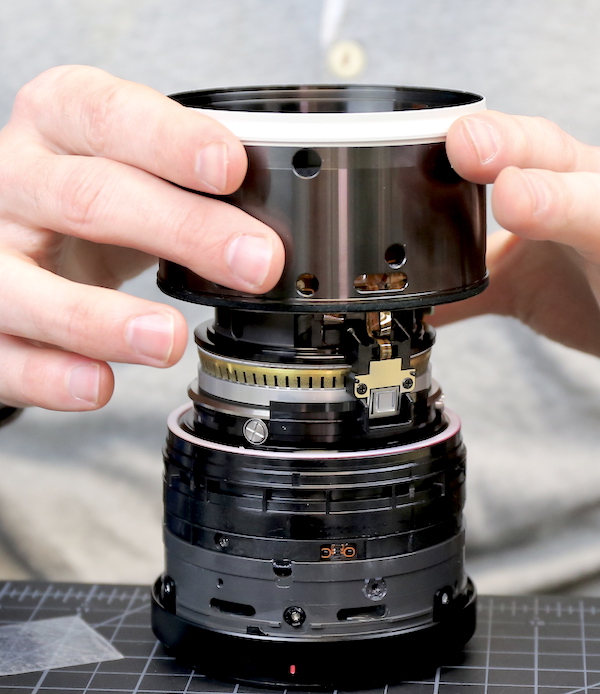
At this point we we had one piece left – the front group barrel assembly you can see in the picture above. This contained some zoom elements in the smaller part of the barrel, and the front focusing group in the larger part. Reaching through the slots with forceps we could tell that the focusing group was still grinding when we moved it up and down, with a lot of resistance. We could also see it was slightly tilted. This usually means a roller or cam was broken or bent.
We removed all 6 rollers, which by the way are some really robust, ball bearing containing, pieces of engineering. They were all working fine and even with them out of place the focusing groups was still scraping when we tried to move it.

Lensrentals.com, 2017
Looking through the slots where the rollers had been, we could tell there was some form of spring loaded plate system with the focusing element; three of the rollers above went into the actual focusing element, three into the plate below the spring. But we couldn’t find a way to open things up further.
Lensrentals.com, 2017
We decided to put the lens back together, bite the bullet and see if the service center could repair it. But being a suspicious person by nature I did some checking first and found out, in typical Sony fashion, this entire assembly was considered a single part. So if we sent it in they would replace this entire assembly at a repair cost of slightly more than half the price of a new lens. Needless to say, we switched into nothing-to-lose mode and went back to looking for a way into this assembly.
We could have removed the zoom groups from the small end, but that wasn’t going to give us access to the larger focusing area. The only way in appeared to be by removing the second group, which was held in place with both a spanner ring and also with adjustable collars through the side of the lens.
Lensrentals.com, 2017
Oh, and lots and lots of silicone glue. So we (royal “We” again – Aaron did this while I made more coffee) position-marked and removed the collars and chipped out lots and lots of glue.
Lensrentals.com, 2017
Finally we got the element out and could actually look down onto the top of the focusing element. (And yes, we realize there’s more glue to clean up before reassembly. Don’t be snarky. You’re tired just from reading about it, so you can understand we were really sick of doing it.)
Lensrentals.com, 2017
There’s another spanner ring down over the focusing element, so we took that out and then just about lost our minds. Because there’s another ring of beautiful ball bearings under it. We’ve never seen anything like this before and at this point really had no idea what we were seeing.
Lensrentals.com, 2017
Despite multiple cups of coffee and the resultant tremor, Aaron managed to get the focusing assembly out without spilling any ball bearings. (Notice how I use ‘we’ when I know everything’s going fine, and switch to ‘Aaron’ when there are 30 ball bearings that might spill onto the floor.)
Lensrentals.com, 2017
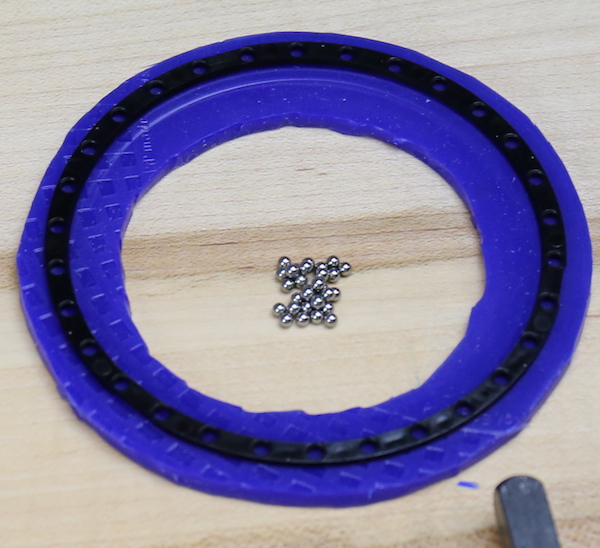
So we made our second ball-bearing corral. We kept them separate on principle, but they’re the same ball bearings as the other set. What size you ask? Oh, 2mm, which is just a bit thicker than that connecting plate I’m obviously not happy about.
Lensrentals.com, 2017
We looked at the internal focusing assembly and saw there was a pressure spring at the bottom (red arrow), pressing up against the focusing element in a cage-like arrangement. It appeared to be out of position, creating a bit of a tilt of the element that was scraping the inner barrel when the focusing group moved.
Lensrentals.com, 2017
Lensrentals.com, 2017
We (yeah, I’m back to taking credit now) reassembled it with the spring properly positioned back under it’s little latches like it should be.
Lensrentals.com, 2017
I won’t bore you with reassembly, except to add that we discovered that the spanner ring over the ball-bearings is like that for a good reason. Tightening the spanner compresses this bottom spring and you can ‘dial in’ the proper amount of tension for the focusing element. Too loose and it rattles around a bit. Too tight and it gets a little resistance to sliding up and down. It’s an interesting arrangement.
But if this spring comes out of position with any regularity the repair is going to be a royal PIA. This is just one dropped lens so let’s not run screaming about what may or may not happen again. We may never see this again. Or we might. Only time, and a few more dropped lenses, will tell.
Usually I end these posts by saying we’ve got the lens reassembled and it’s back in stock now. In this case we’ll wait for a new connecting plate, and then optically test and adjust the lens after final assembly, and really, really carefully check it before putting it back in stock. But we did reassemble it with the old connection plate to make sure the autofocus system worked properly.
So What Did We Learn Today?
Well, first and foremost, that lens repair is a miserable way to make a living. And lens repair on this lens will be miserabler than most.
Second, we learned that dropping your lens is bad, so don’t do that.
Third, 1mm thick aluminum plates maybe shouldn’t be used to hold two halves of a heavy lens together. And yes, Fanboy, I know the Sony engineers are smarter than I am. They designed 962 really great parts that I couldn’t have designed. But it doesn’t take massive engineering knowledge to figure out that the thinnest piece of soft metal shouldn’t hold the two biggest pieces together.
And finally, we learned there’s some really elegant and complex engineering in the Sony FE 70-200 f/2.8 GM OSS lens. There’s also some engineering that just seems complex. It may be far more awesome than I realize and I’m just missing the point. Or not.
I’ll repeat what I say all the time: Sony is trying a lot of new things; that’s how you advance. I completely admire the risk taking and efforts to try new things when most manufacturers are just fine-tuning what already is. Some of these new things turn out to be awesome, some don’t. It’s just as important to identify which new things are not better, or not even adequate, as it is to identify when the new thing is a dramatic improvement.
Roger Cicala and Aaron Closz
Lensrentals.com
March, 2017
Author: Roger Cicala
I’m Roger and I am the founder of Lensrentals.com. Hailed as one of the optic nerds here, I enjoy shooting collimated light through 30X microscope objectives in my spare time. When I do take real pictures I like using something different: a Medium format, or Pentax K1, or a Sony RX1R.
-
Rainbow Dash
-
EvilTed
-
Dragon
-
hugh crawford
-
hugh crawford
-
Ayoh
-
VTC Media
-
Matthias Welwarsky
-
Jase1125
-
disqust101
-
Prefer Anonymous
-
Roger Cicala
-
Terry
-
Pete No Surname
-
Pete No Surname
-
Konstantinos
-
Munchma Quchi
-
Roger Cicala
-
LAB 2.35:1
-
Tord55
-
Roger Cicala
-
Mansoor Guuwa
-
Roger Cicala
-
Laurent Fournier
-
Marc P.
-
JJ
-
AStarbucks
-
Astro Landscapes
-
Ralph Hightower
