A short time ago, I shared a piece breaking down the lighting styles and diagrams of different lighting setups for portrait photography. Beyond anything else, lighting is what got me passionate about photography, so I decided I’d continue the trend, and show you a few diagrams of lighting while on location to hopefully inspire you for the next time you’re shooting on location.
Lighting on location has been more viable now than it has ever been. With the implementation of Lithium-Ion batteries, high powered battery packs have gotten smaller and smaller, while also shedding the weight. I recall just a few years ago, bringing an AlienBee B800 with me on location, and using an 18lb Vagabond battery system, which was little more than a lawnmower battery with an inverter wired to the top. Since then, battery systems like those found on the Profoto B1X have become hot swappable, offering solutions well under 5 pounds, and provide hundreds of full powered shots. This bit of nostalgia got me thinking; it was probably time to share some photos and lighting diagrams of how I’ve taken advantage of these new technologies, to light some advertising styled photographs while on location, and not breaking my back in the process.
This isn’t the first article I’ve put together about lighting while on location, so if you have any questions regarding opening your F-stop, be sure to read up on my explanation of High-Speed Sync and ND filters. And of course, if you have examples to include, please add them in the comments. Together we can create a great resource for other photographers.
While a few years old at this point, this photo is still a staple within my portfolio and shows an excellent example of how bringing off-camera lighting can provide more dynamic light to your work, and create something that would be impossible using just natural light and reflectors.
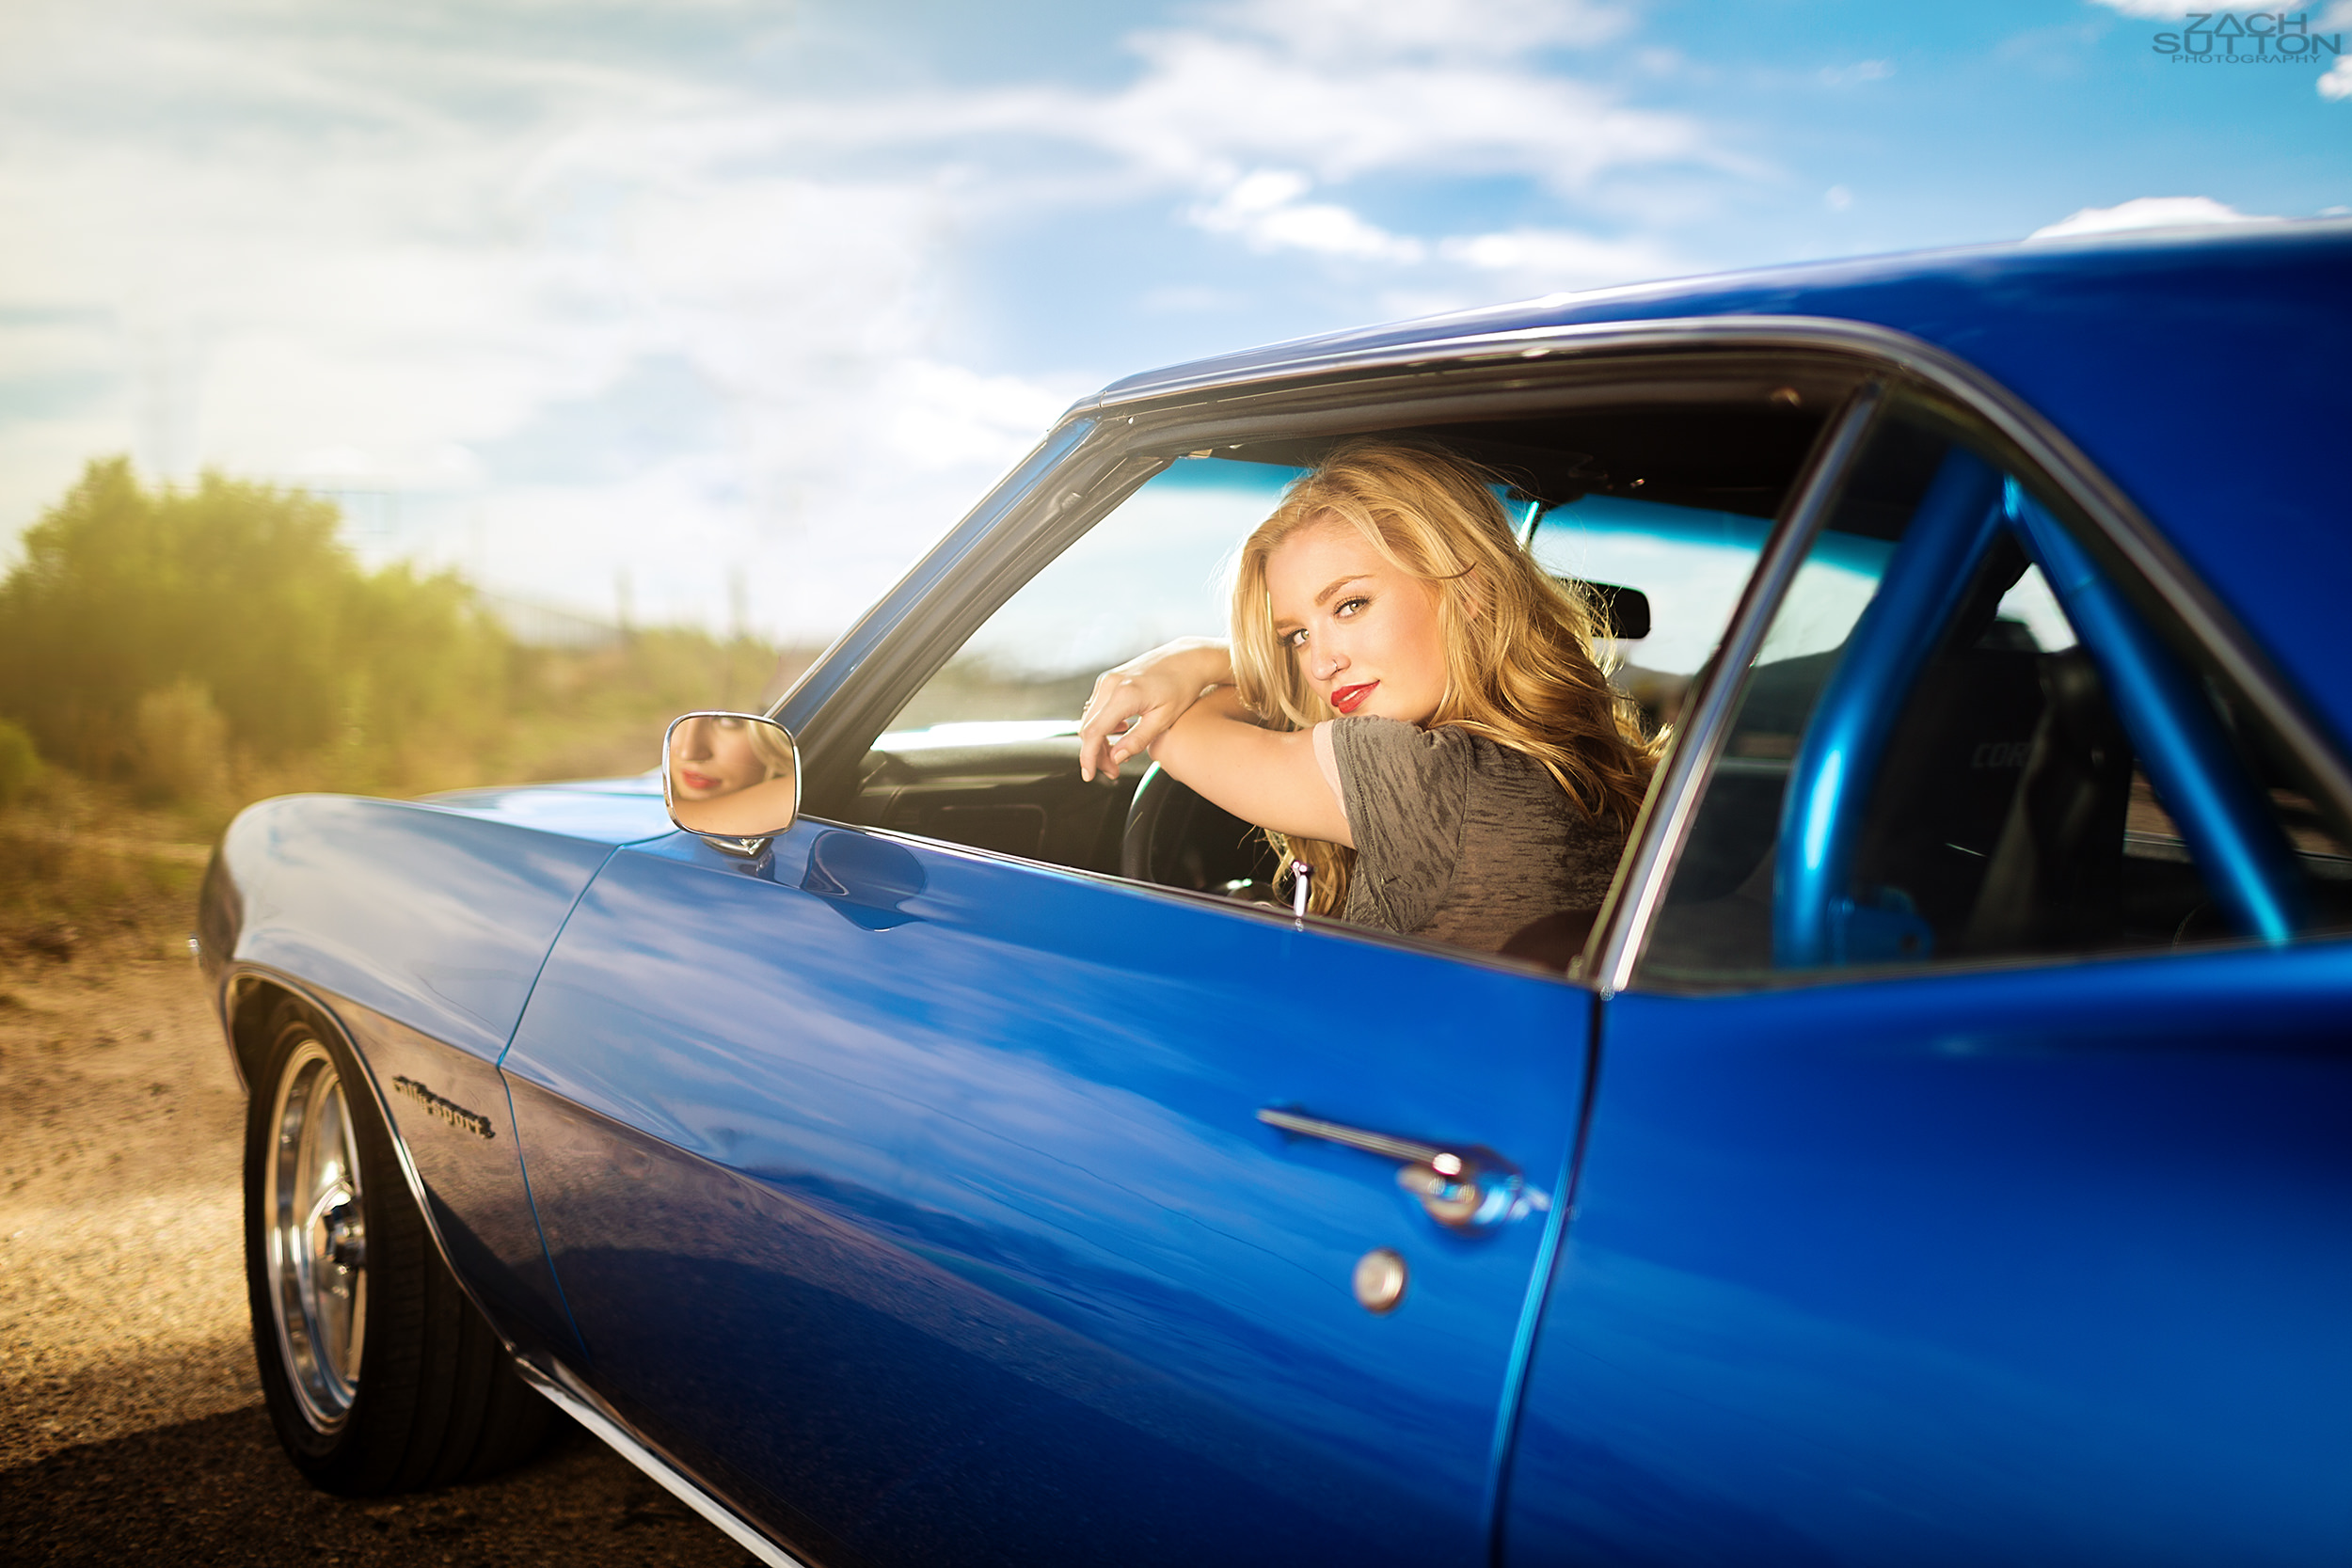
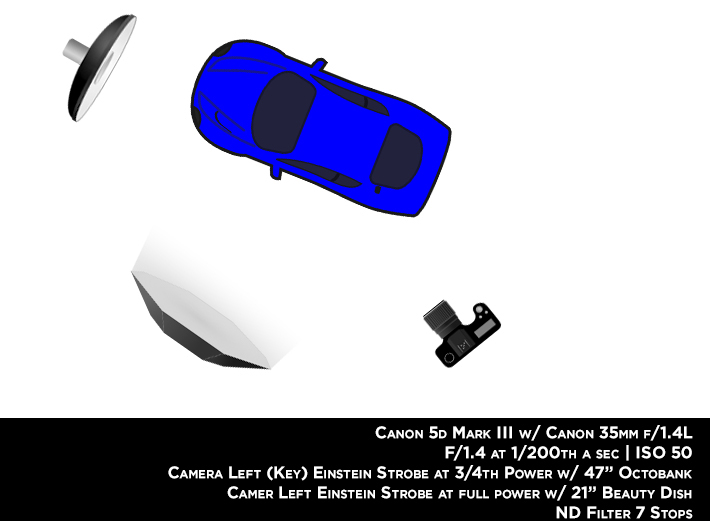
This was shot a few years ago, using 2 AlienBee Einstein Strobes, and a 47″ Octobox as well as a White Beauty Dish, while also using the Vagabond Mini battery pack. After moving the car multiple times, we were running out of lighting, so we improvised, and brought in a beauty dish to help mimic and soften the lighting from the sun, and then using the 47″ Octobox for fill and to bring light into the eyes of my subject. The goal of the shoot was blending natural light along with off-camera lighting to get a cinematic feel within the image, and still feel like it could potentially be lit using natural light and bounce cards.


This particular shot was taken while in Marfa, TX with friends. I was there to have a vacation and thought it would be an excellent opportunity to shoot some portraits while I had a Phase One Medium Format system in my hands. It was a couple of years ago, when the Profoto B1 was still new, so it was also an opportunity to give the Profoto B1 a test while on location with little to no access to power. The lighting diagram is above and shows the Profoto B1 camera left and in a 2ft x 3ft softbox. And as mentioned above, this was shot using the Phase One IQ 250 with an 80mm Schneider lens.

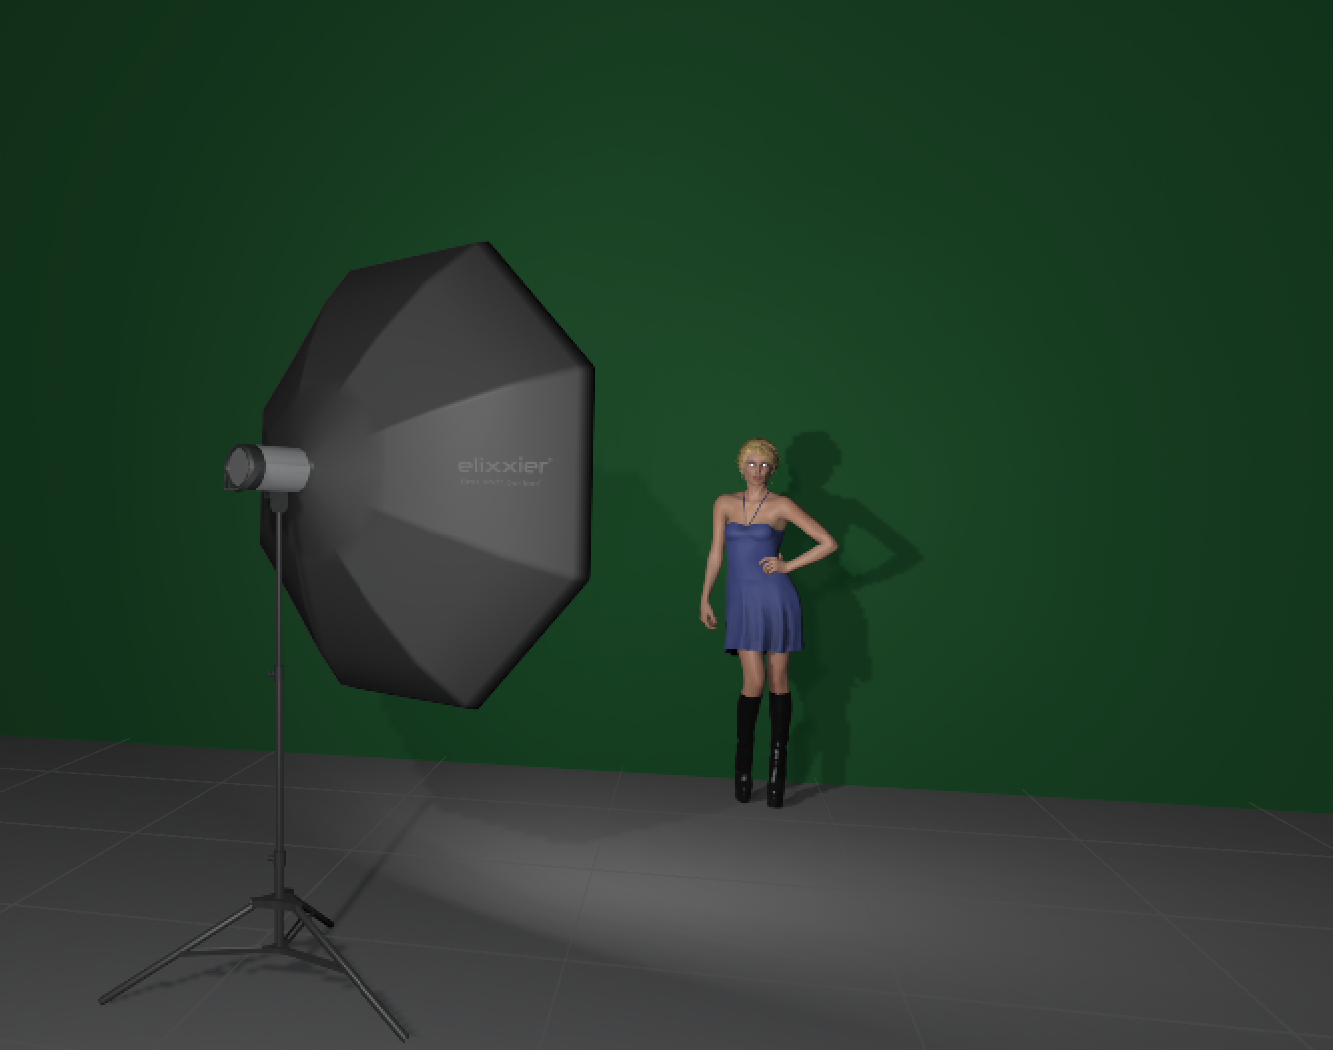
Like the photos before this, this photo was taken a couple of years ago, before I found myself spending most of my time in the studio shaping light in a controlled environment. Taken on a bright and sunny midday, we weren’t left with much options for lighting, so I thought it’d be in my best interest to bring a light with me on location. I chose an Alienbee B800 and 47″ Octobox, along with a Lithium-Ion Vagabond Mini battery pack. We walked through a small arched walkway and found a wall covered in vines. With it being in the shade, I knew I could completely control the light, so I set up my 47″ Octobox and shot. This was one of the results.
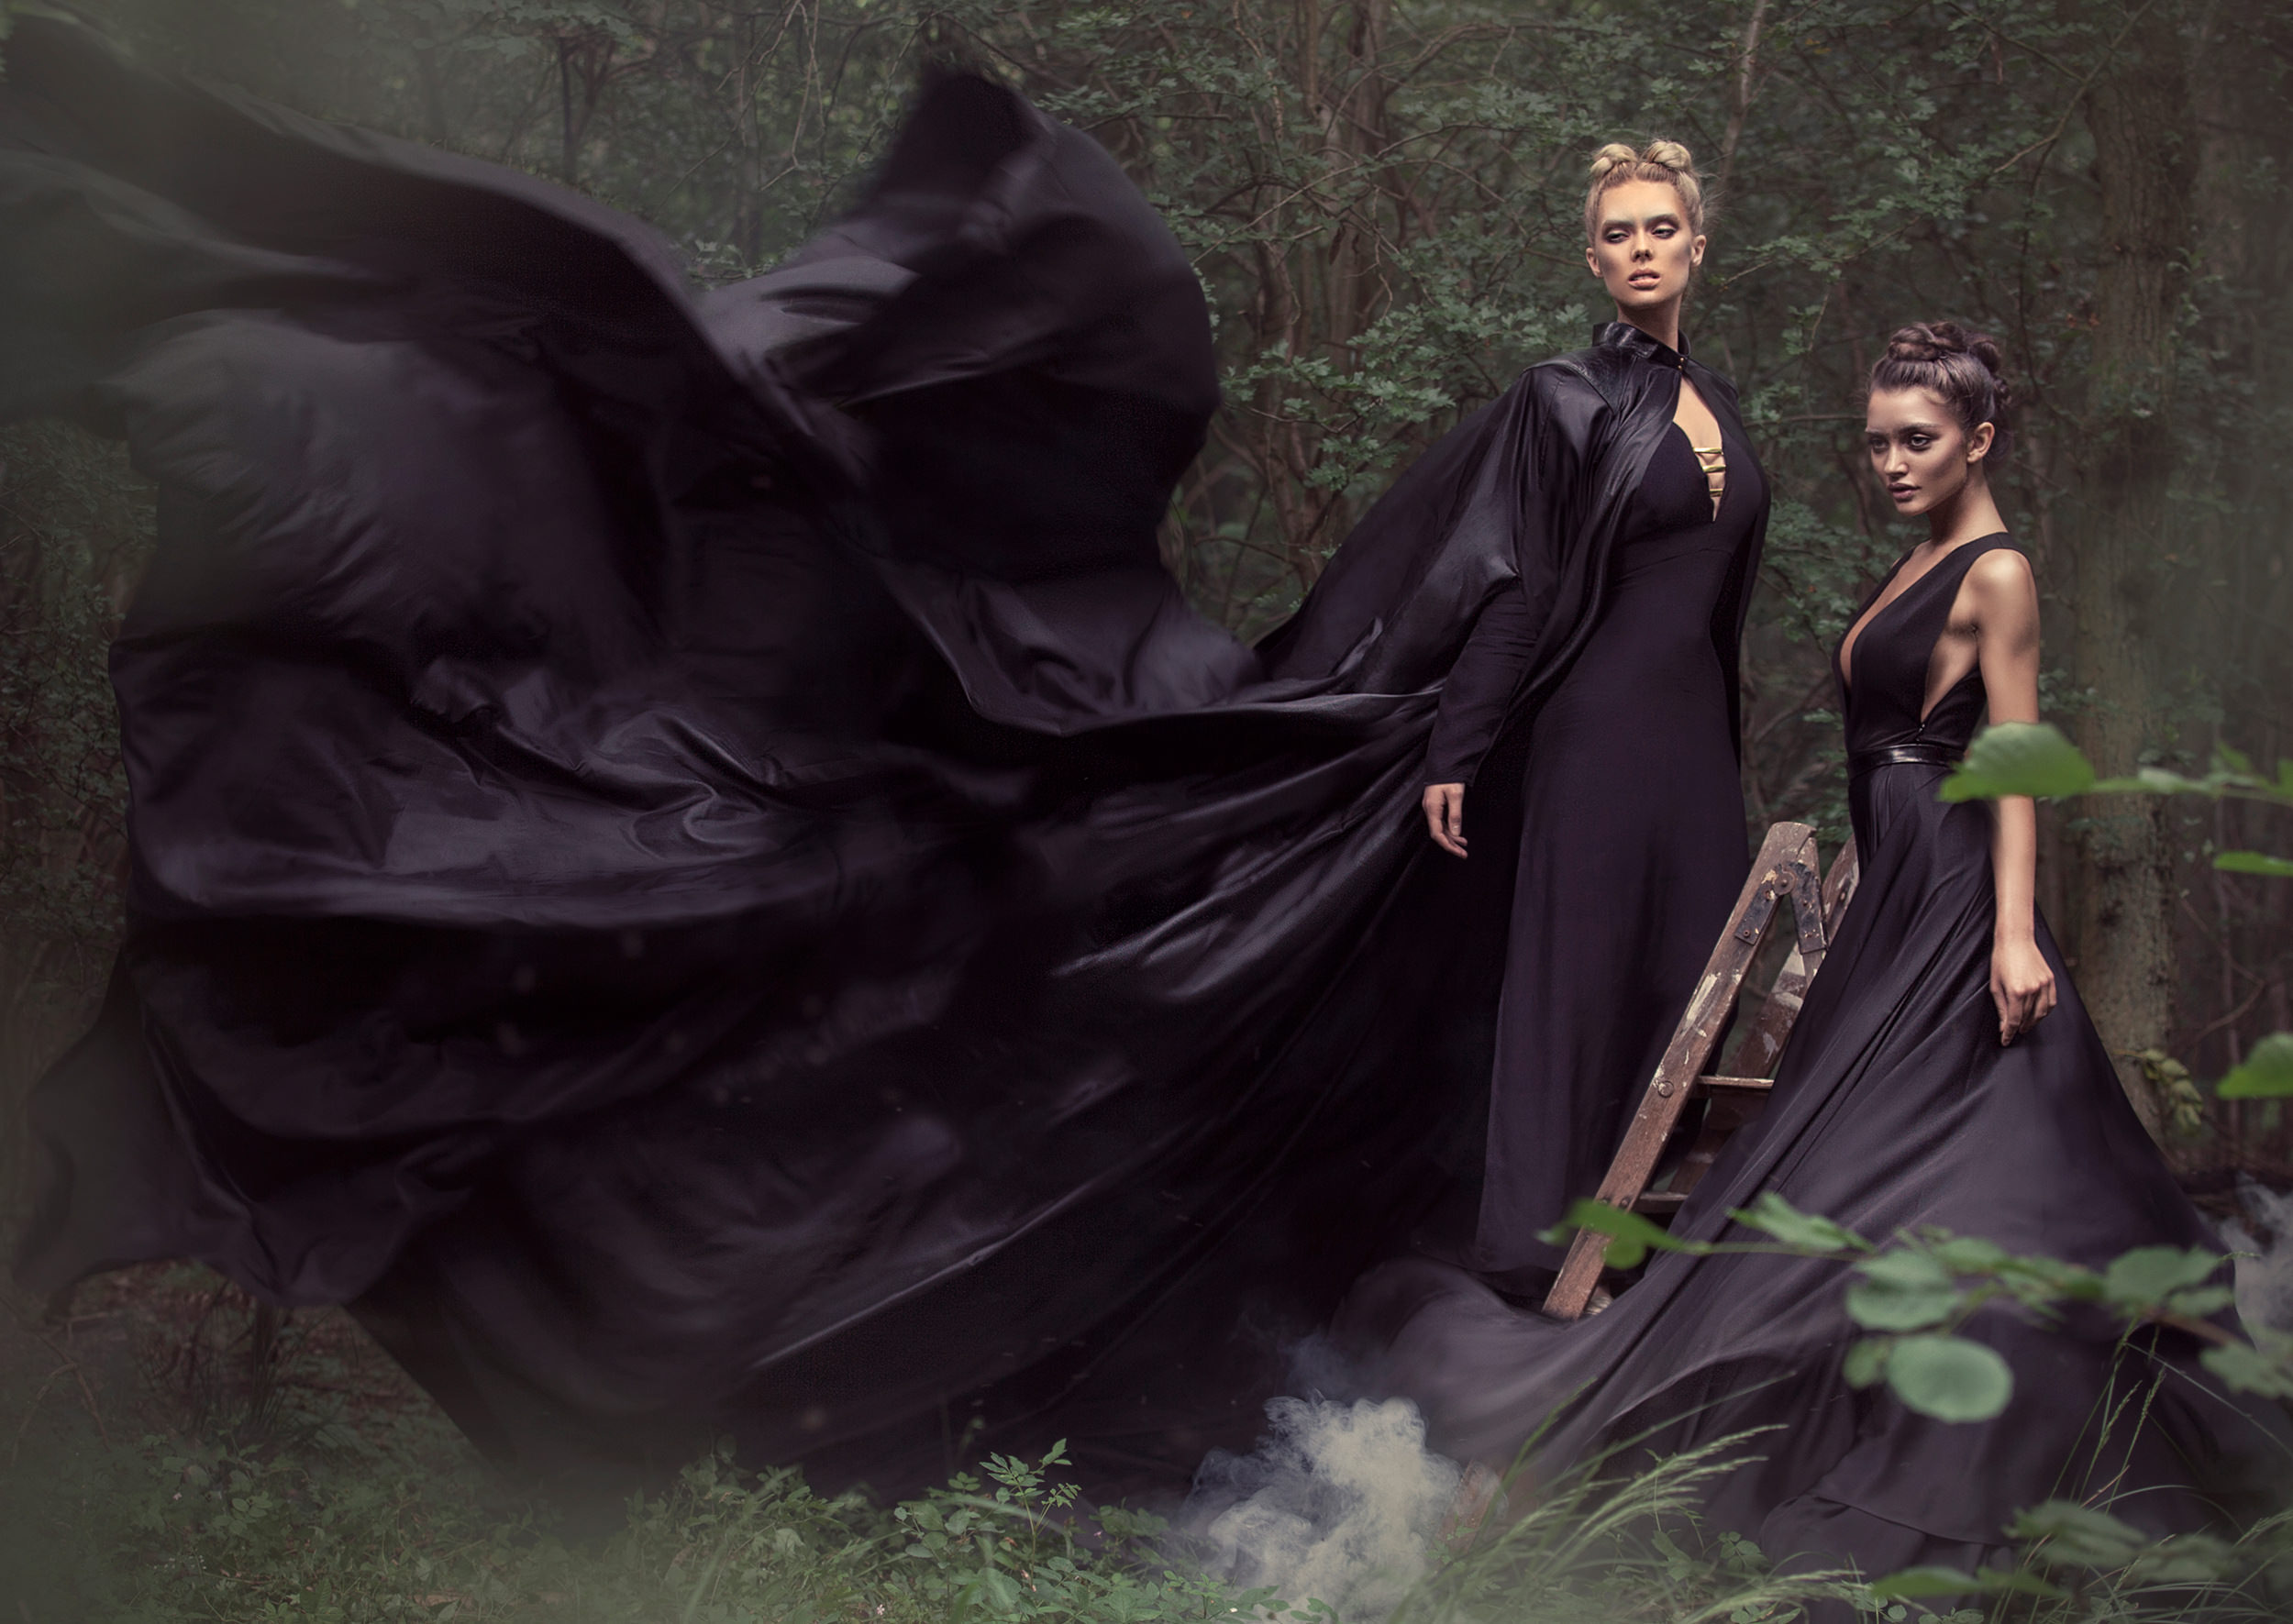
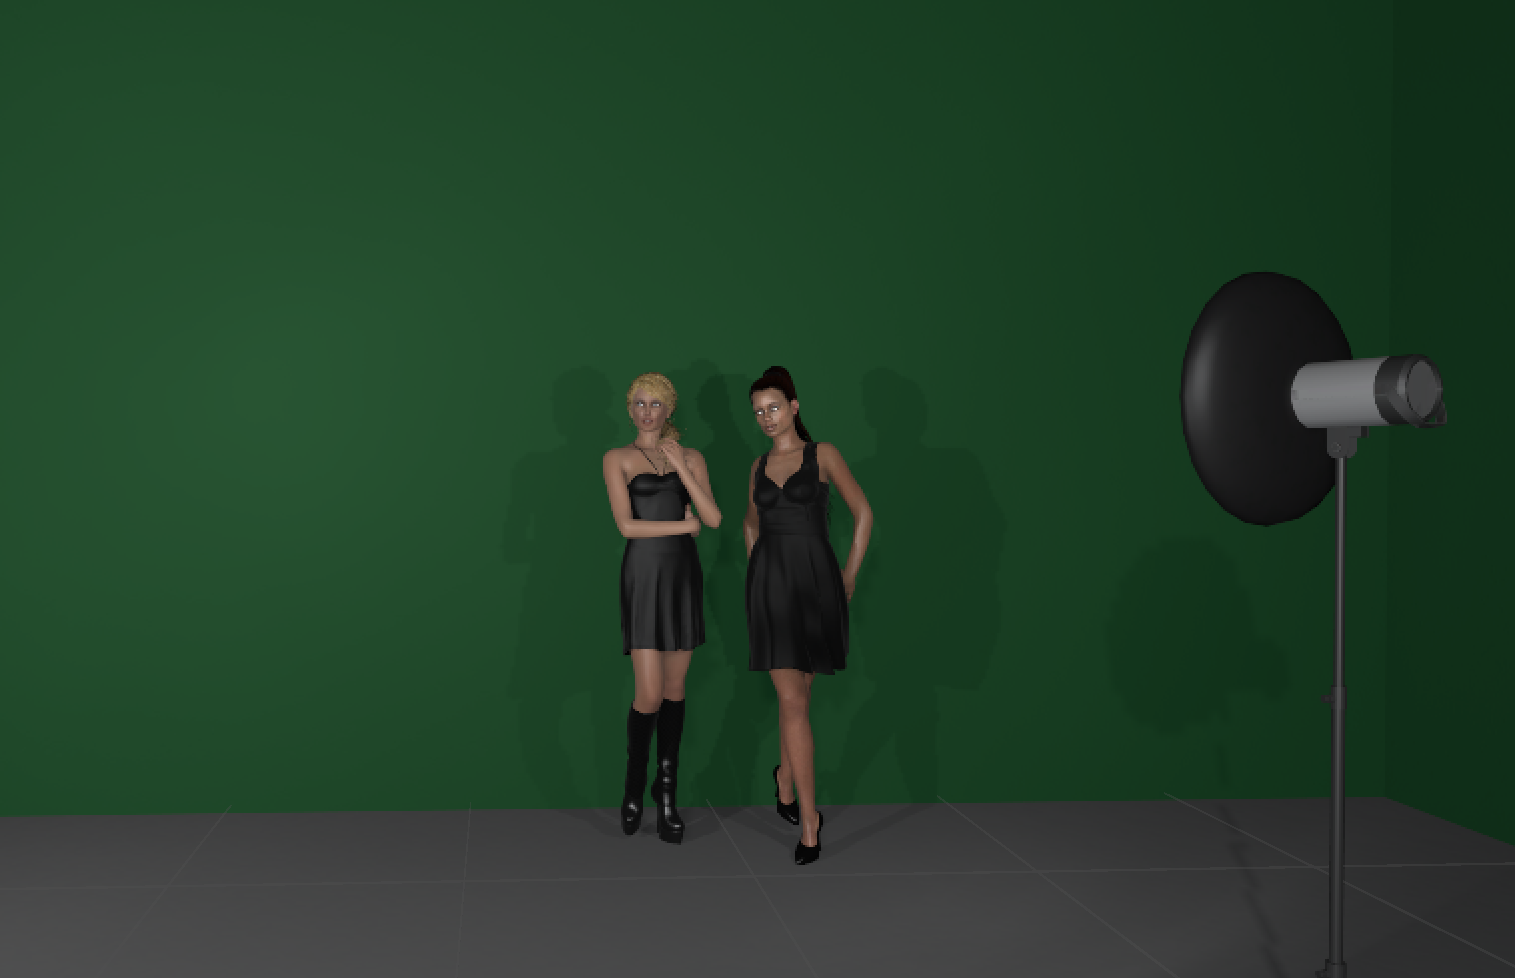
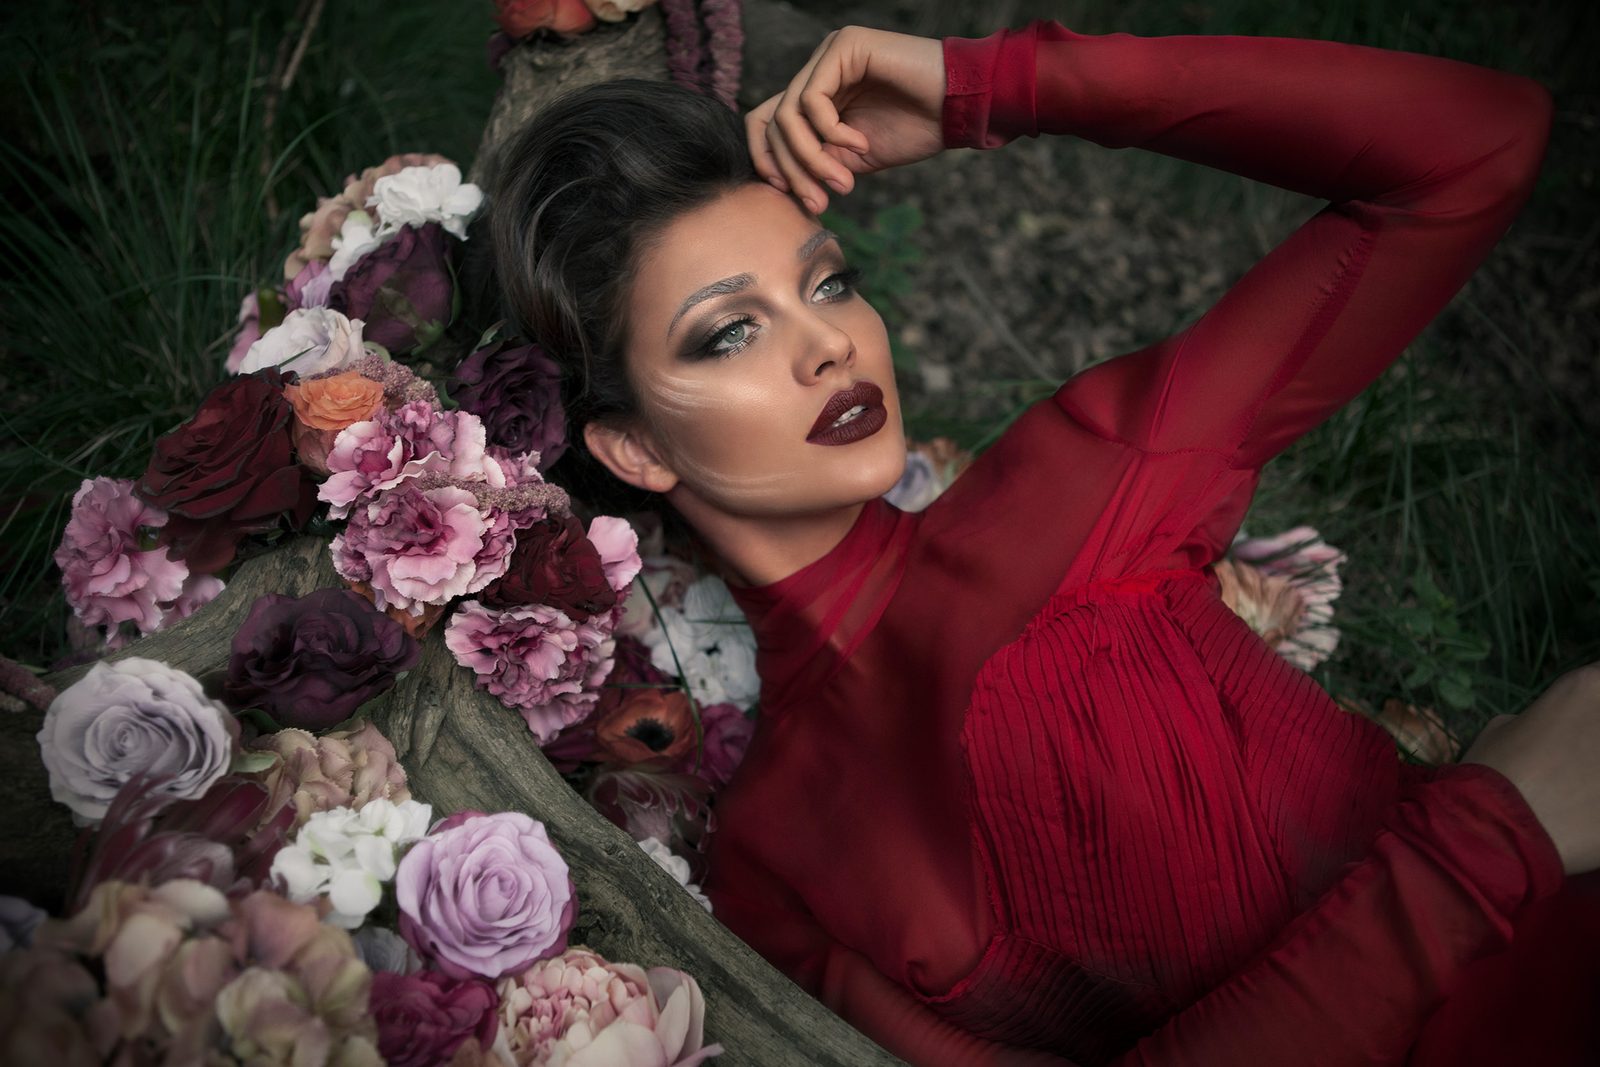
This next image comes from friend and incredible beauty photographer, Tina Eisen. In an effort to show how others also are able to shape and use off camera lighting while on location, I reached out to Tina, and she was able to help by contributing two images of her own and provide a detailed explanation on how it was done. The image above was shot using a single Profoto D1, attached to a generator for power (to give you an idea of how much easier it is now than it was a couple years ago). There was a beauty dish attached to the light, and it was about 6 feet from the models, camera right and above.

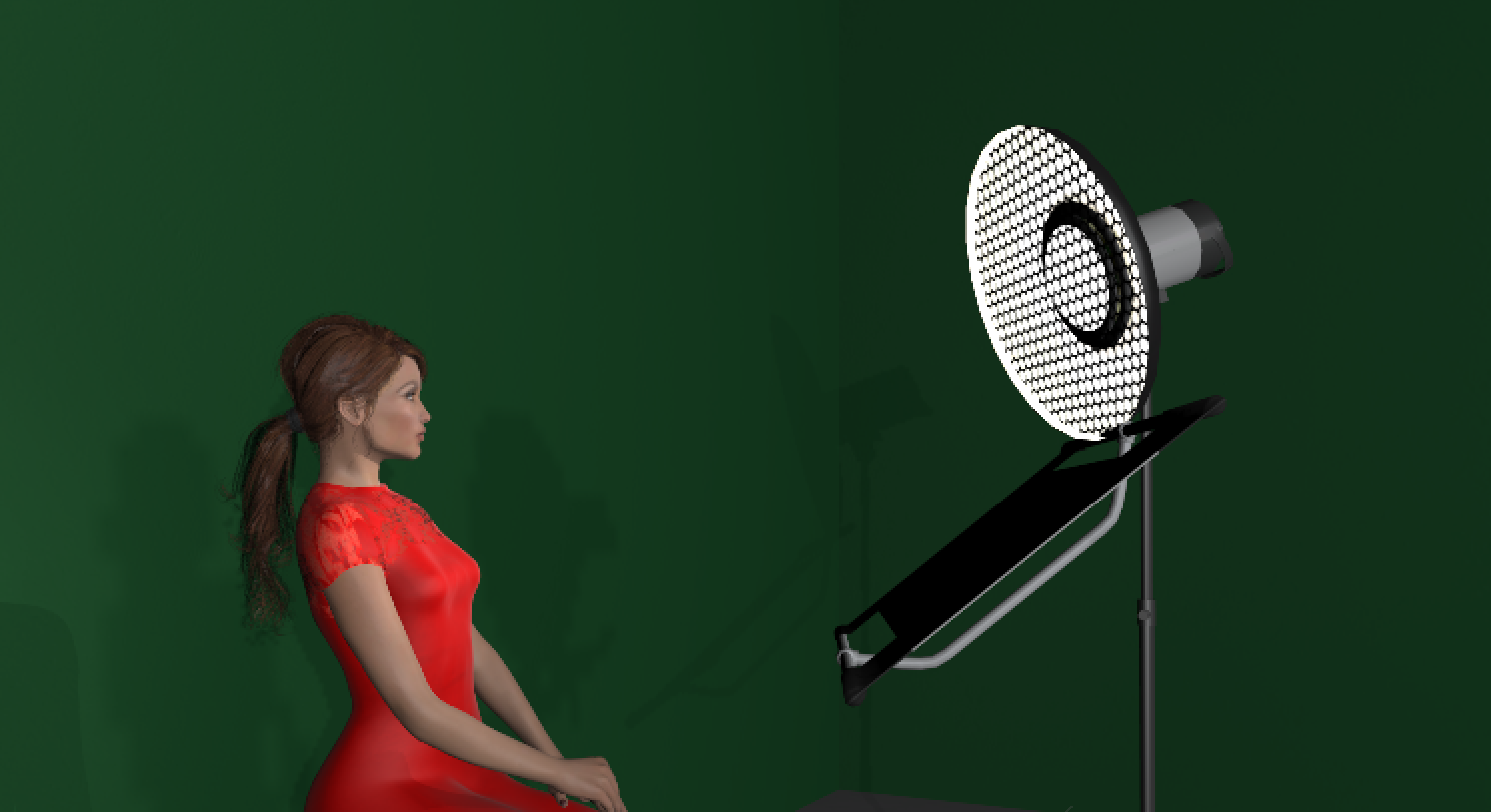
This image was captured during the same shoot which was published for a campaign displayed in a magazine. With limited gear at the time, and being tethered to a generator, Tina was really limited in mobility and accessibility. This was shot using the same Profoto D1 with a White Beauty Dish attached (and 25-degree grid) overhead and slightly camera right. There was also a silver reflector used camera right to help fill in the shadows.
Hopefully, these detailed diagrams and explanations have encouraged you to try shooting with off-camera flash for your next outdoor session. The process can be straightforward, and allow you to get images that would otherwise be impossible using natural lighting. Again, as always, if you have some detailed examples of your own, feel free to share them in the comments below.

16 Comments
SpecialMan ·
Another great article from Mr. Sutton!! I will add a warning from my own experience: think twice about renting the 60-inch Paul Buff octobox for indoor location work, it’s great for a studio or outdoors, but that thing is HUGE and hard to maneuver in a normal house or business. Rent the 47-inch instead.
Stereo Reverb ·
Even the 47 is huge (i own one), and you’ll need a good heavy C-stand, boom, weight for boom, sandbags, and if on location, an assistant to make sure it doesnt tip over if the wind hits it wrong. I just take a beauty dish, and i’m happy.
Jason Bodden ·
There are LOADS of manufacturers who make extremely lightweight, portable Octas in large sizes from 47″ to 60″ that are super easy to set up and break down. And they collapse into easily manageable sizes in their cases. This complaint is really a thing of the past. Now OTHER manufacturers like Fotodiox whose softboxes weigh a ton – I have their 48″ Octa rod assembly (*vomit*) and the thing is heavy – are just ridiculous. I still love the damn thing but I never take it anywhere as I leave it assembled lol. I take my Godox 47″ softbox instead. I’ll never buy another rod assembly modifier again. I can tell you that.
Stereo Reverb ·
Always love seeing examples of different lighting, complete with diagram setup, thank you!
Zach Sutton Photography ·
Thanks for checking it out! Hope it was able to help you!
Sean Tubridy ·
In the first shot, why don’t we see the light in front of the car, and why don’t we see the side light in the reflection on the door?
Dietr Storrer ·
The light in front of the car is above the car. The reflection on the door can be removed with a polarizing filter.
Zach Sutton Photography ·
You could play with angles and polarizing filters to remove some of the glare, but I actually removed it in post using frequency separation. Normally, I try to fix it in camera, but we were running out of light, so I shot knowing I could edit it out later.
Michael ·
I like the reflection on the door, helps the brain to make sence of where the light is coming from. If you remove all the reflections it can start to look fake.
Marcus Tucker ·
Could you explain what you mean by “frequency separation” please?
nicholai ·
you can google it, its a photoshop mostly method of using two layers of frequency that mostly used to edit people skin blemishes etc. Lots of tutorials on the net, I’ve used it on none people, like suits or fences.
silmasan ·
Hi Mr. Sutton, I’m just wondering.. what did you use for the 3D models/diagrams? Something like Daz or Poser? Thanks!
Zach Sutton Photography ·
It’s software called set.a.light 3D
silmasan ·
Thanks!
jncc ·
Very helpful write up. Thanks.
nicholai ·
Diagrams are helpful to noobs like myself. Thank you