When we optically tested the Sony FE 135mm f/1.8 GM we were mighty impressed. Then I threw up in my mouth a little when I read a couple of reviewers comment on the build quality. Because holding a lens gives you not the slightest idea about the build quality. So I was excited when a 135mm went out and failed on rental. Sorry for the customer, of course, but since parts aren’t readily available yet, it allowed us to look inside and see if we could figure out the problem. And did I mention, look inside?
We suspected we knew what the problem was, at least generally. This lens had performed flawlessly, then suddenly gotten horribly soft in the middle of the shoot; so soft that the camera struggled to autofocus. A quick optical test when it got back showed resolution was almost nil. In our experience, this means one of the elements is out of place.
So Get Out Your Screwdrivers and Follow Along at Home!
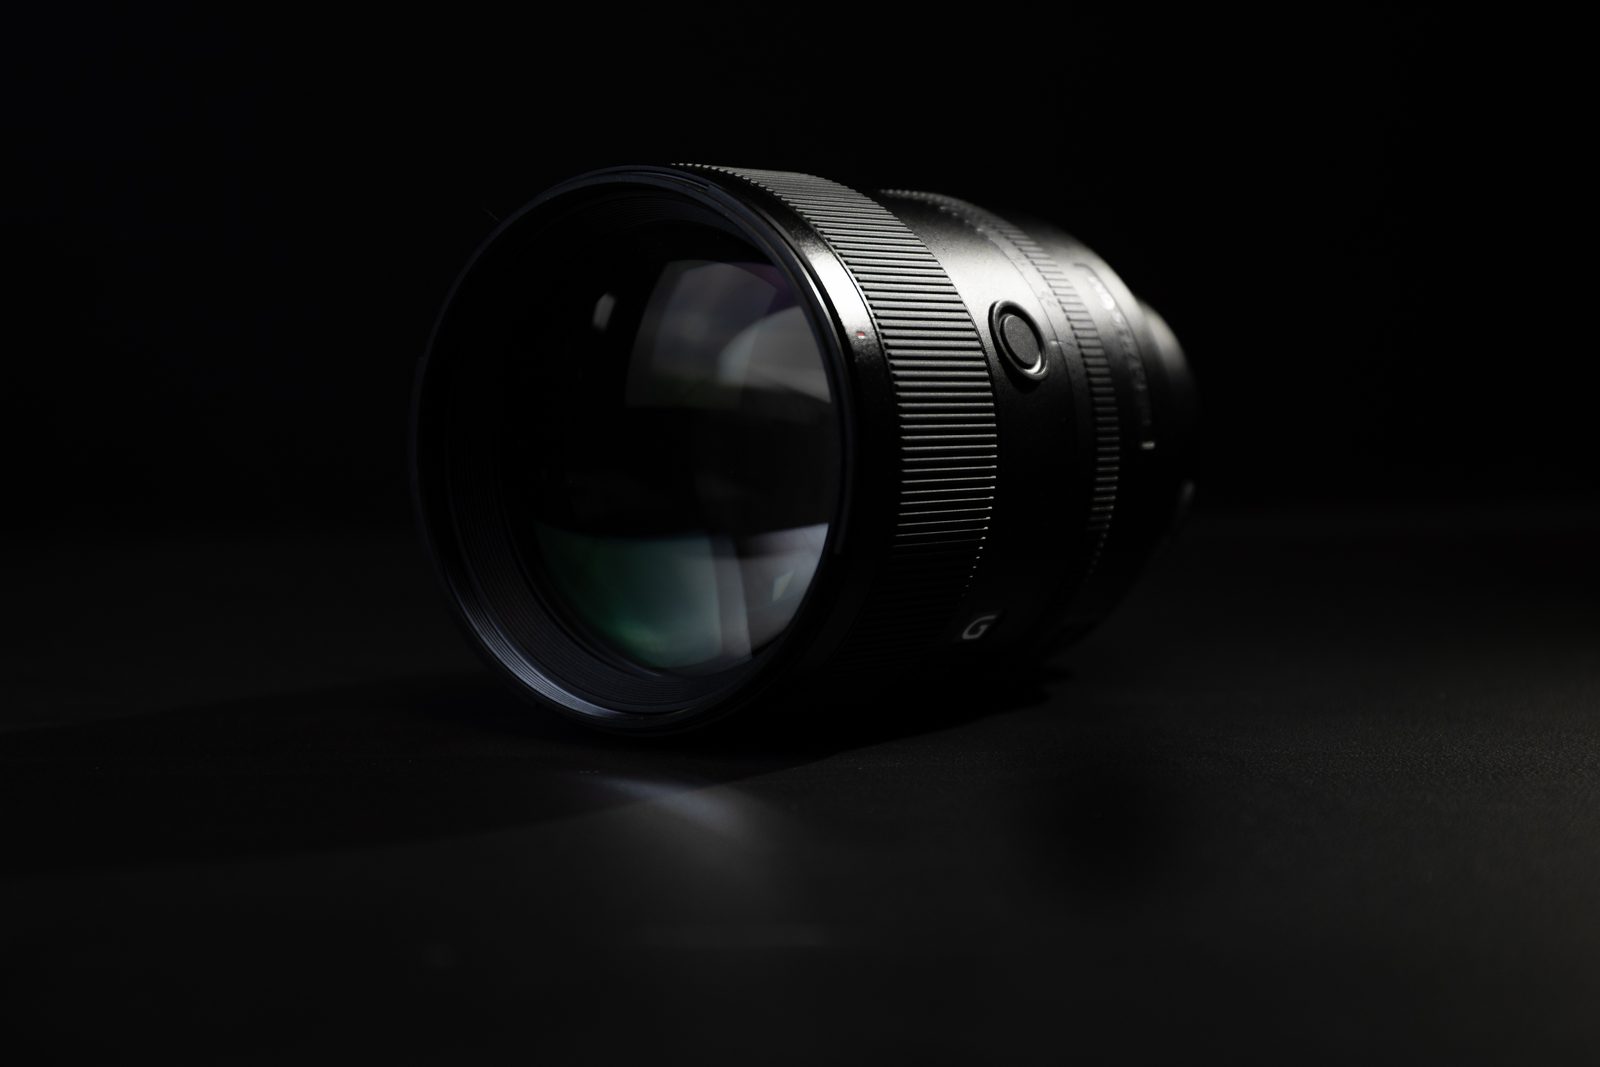
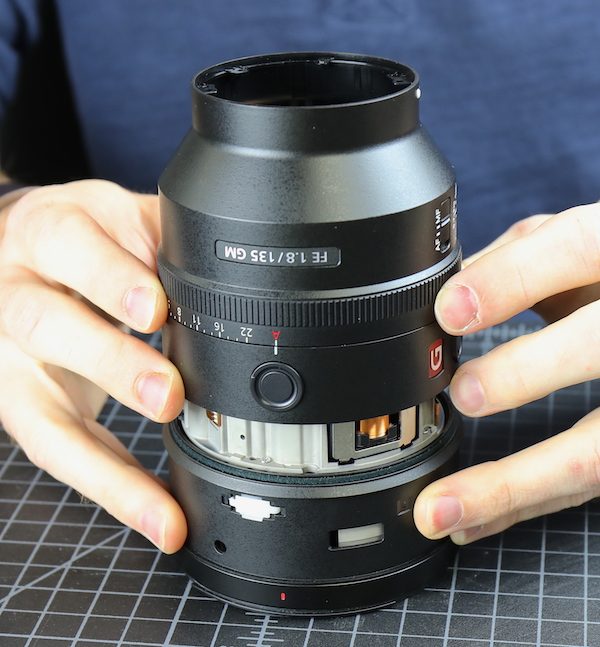
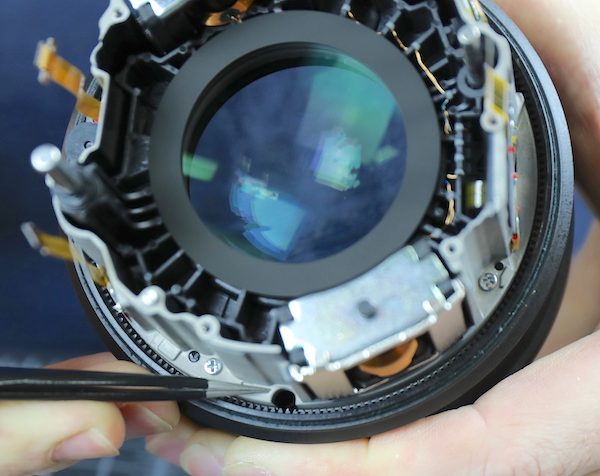
We looked at things for a while, deciding whether to go in from the front or the back; we don’t have any repair manuals for this new lens. It is pretty, though, isn’t it?

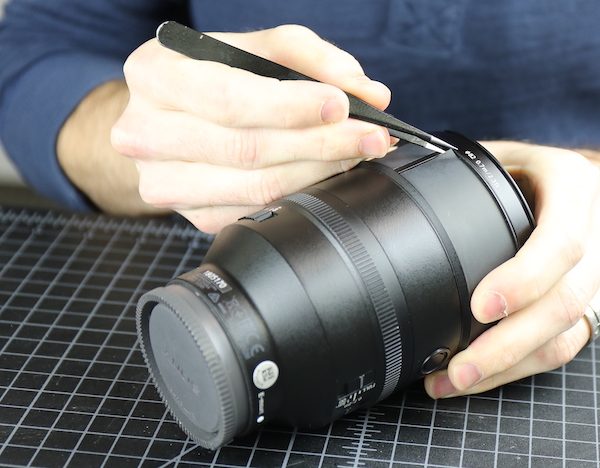
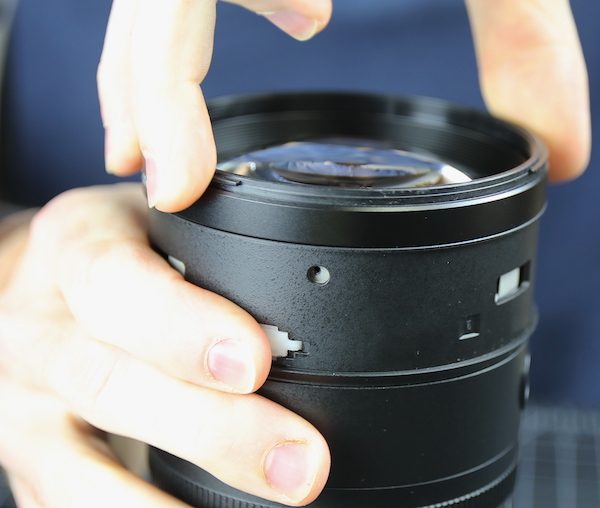
After a coin toss, we decided on front. So the focus ring rubber was removed, and we started peeling back the sealing tape underneath it.
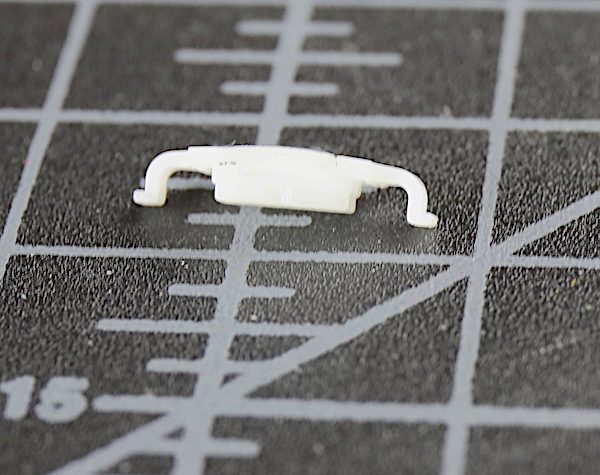
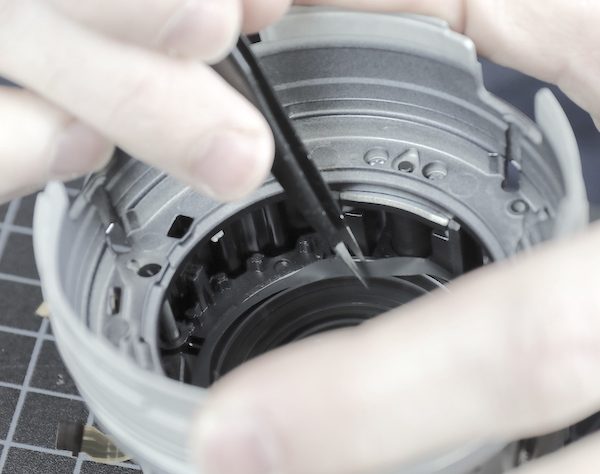
With the tape off we can see three white plastic inserts in the barrel. These are probably sliders or tensioners to give the focusing ring that ‘manual focus’ feel.
There are also some windows and in the windows are some shims. So the front group is shimmed for spacing and possibly tilt, but that’s not accessible yet.
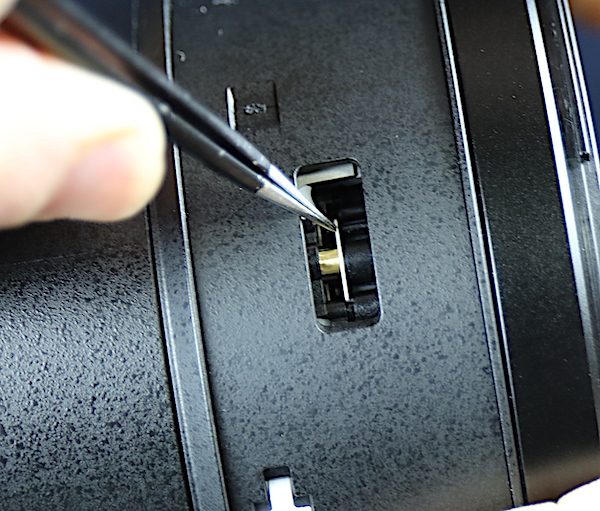
There are also (when the ring is rotated to the right position) some holes. At the bottom of the holes are some screws. Probably screws holding on the filter ring.

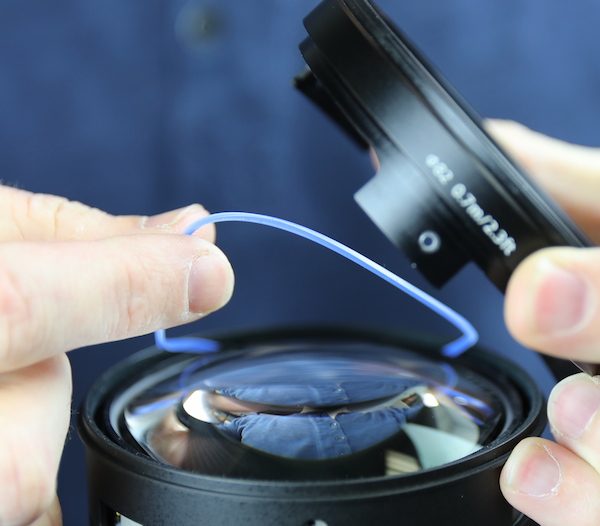
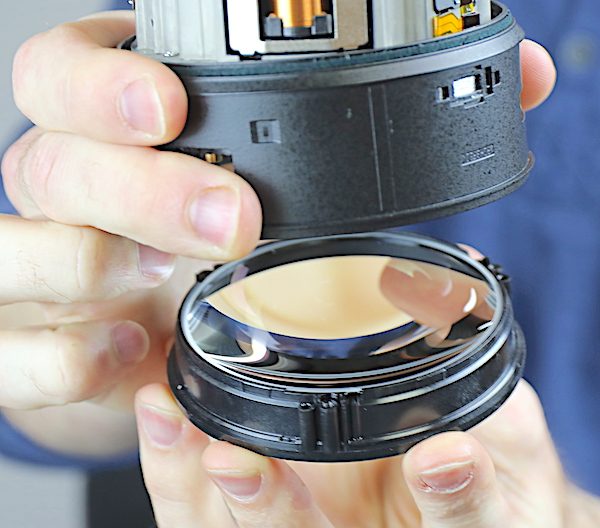
With the screws removed, a 1/8 turn of the filter ring lets it slide off. This is good engineering in two ways. First, a dented filter ring should be an easy and cheap replacement. Second, the 1/8 turn means it’s held on not just by screws, but also by slots within the ring.
So good news and bad news. The good news is there’s a nice, thick weather sealing gasket under the filter ring. The bad news is there’s nothing else accessible there, so ‘open the front’ was a bad choice.
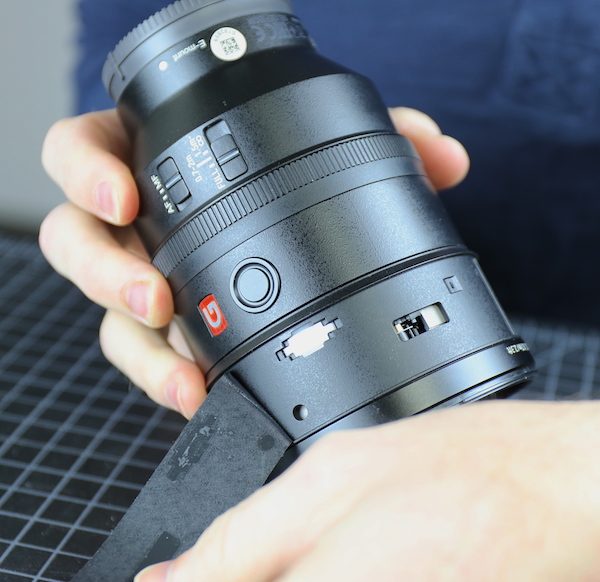
So the filter ring goes back on, the lens gets flipped over, and we start going in from the back. Hopefully, we can get in from the back because going in from the side never has never worked well.
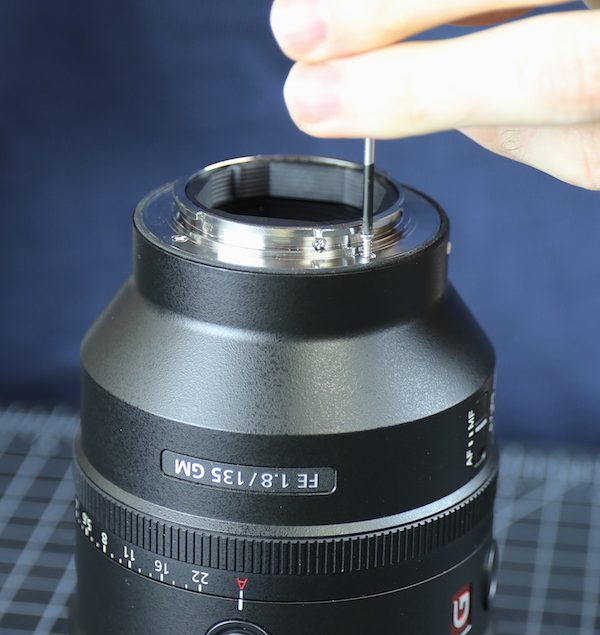
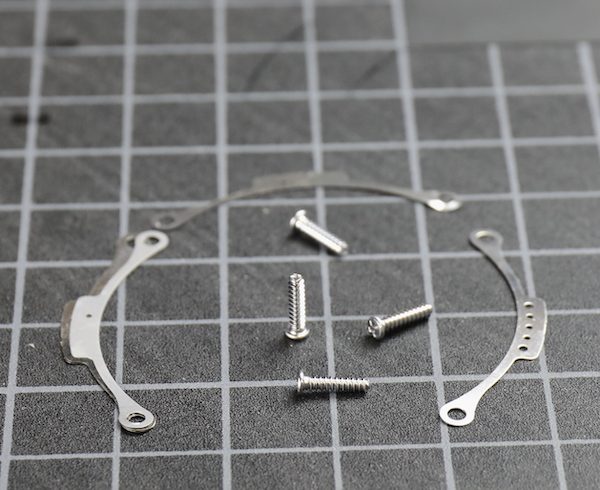
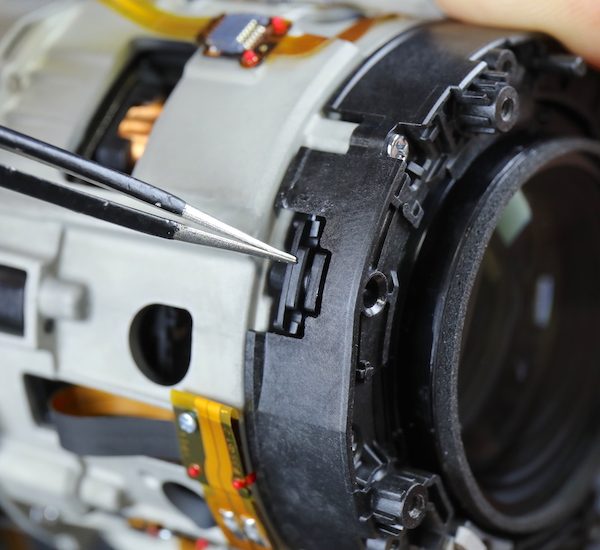
As the bayonet mount comes off, we see the usual weather sealing around the edges and some shims underneath. You can also see a second area of foam on the rear barrel where it would seal against the inside of the bayonet. This is good weather sealing, but before you get all excited, Sony fans, I’ll go on record as saying early returns on multiple copies indicate this lens gets dusty inside pretty quick. We’ve already had to dust several, and they haven’t been in stock that long.
The shims are of different thicknesses, and it’s obvious they can be placed at any quadrant, so these are for tilt as well as possibly spacing.
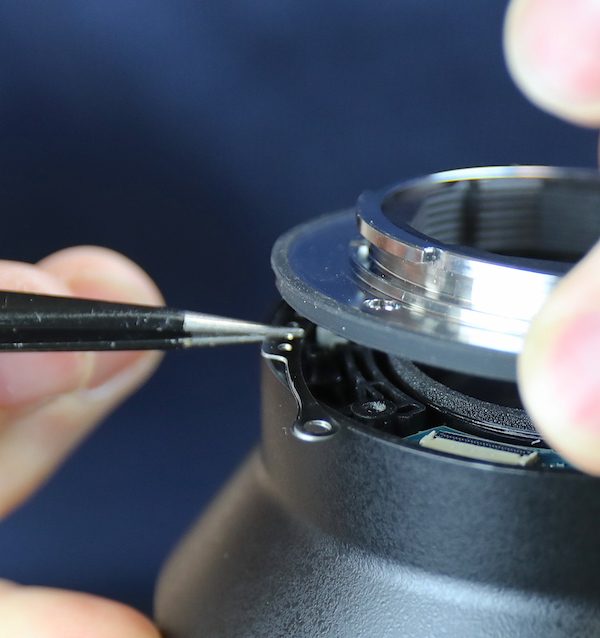
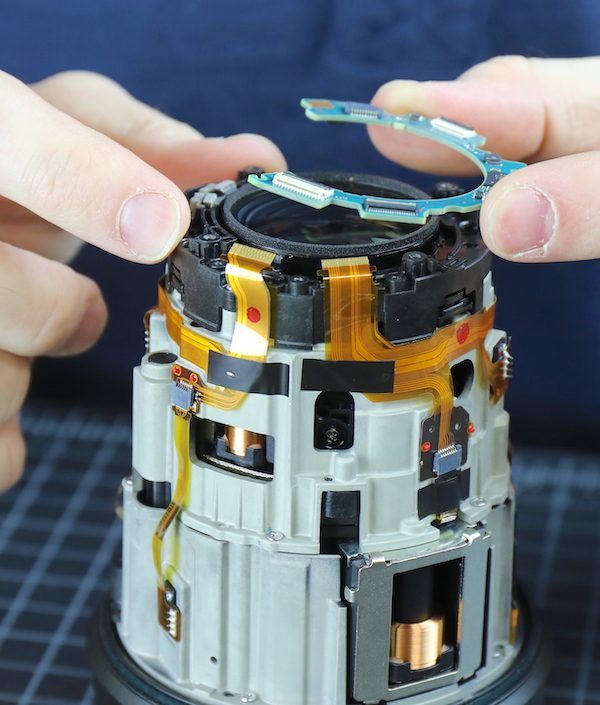
The PCB in this lens is held under the rear barrel, so the barrel has to come off before the PCB does.
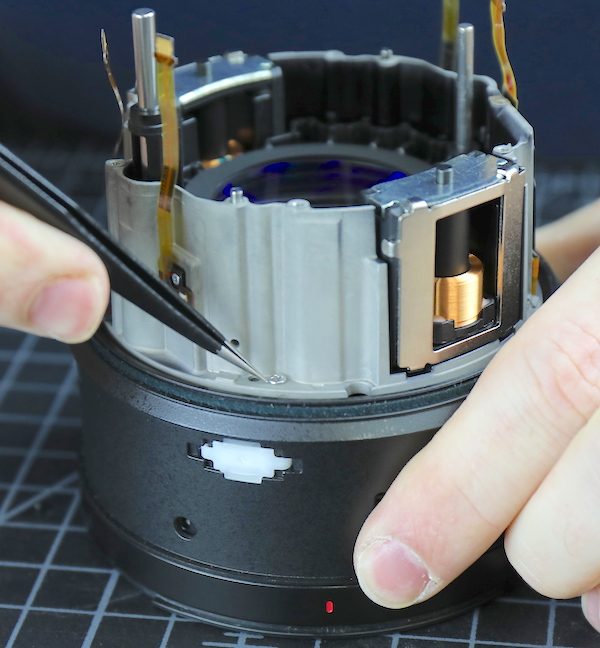
Removing five screws and disconnecting the switch flex lets us slide the outer barrel off.
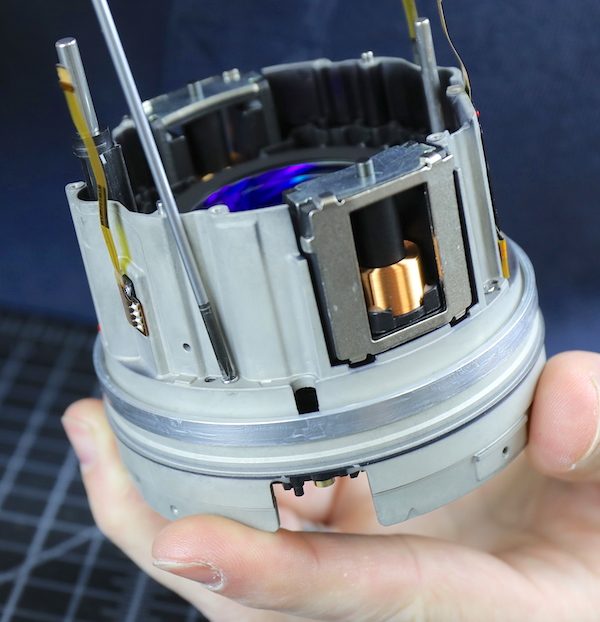
Exposing the inner barrel in all its magnesium-alloy glory. Note to shade-tree reviewers out there: if you haven’t seen the inner barrel then don’t comment on build quality. It shows that you’re guessing and makes people wonder what else you’re speculating about.
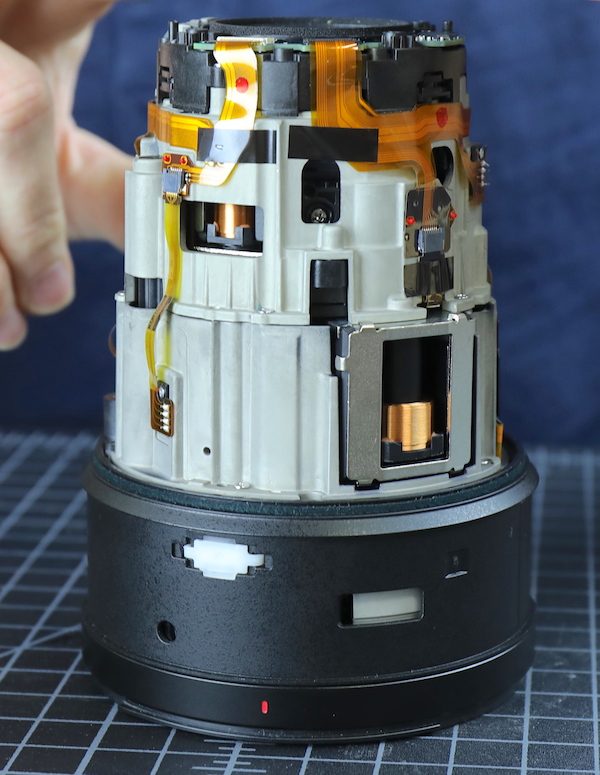
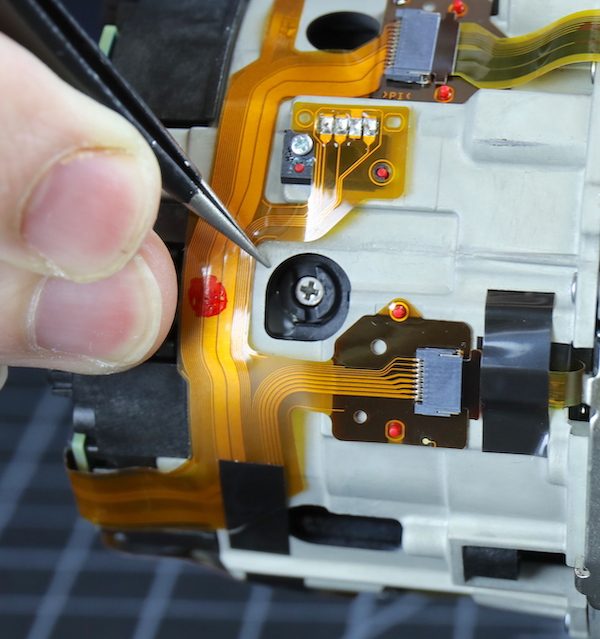
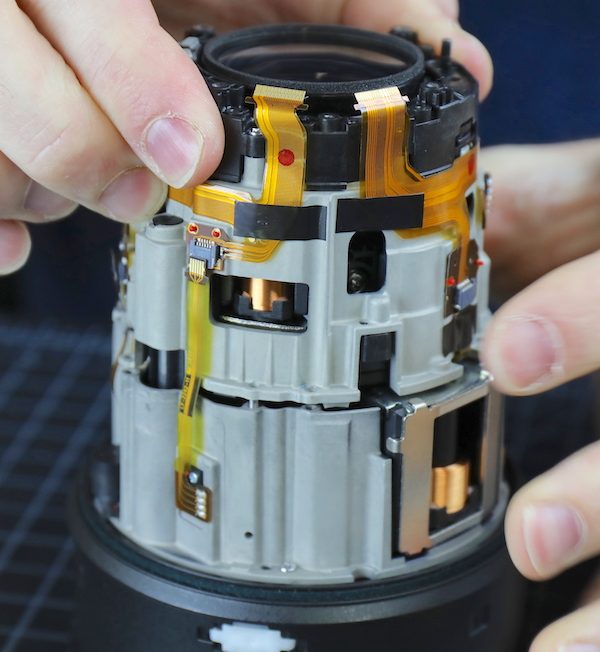
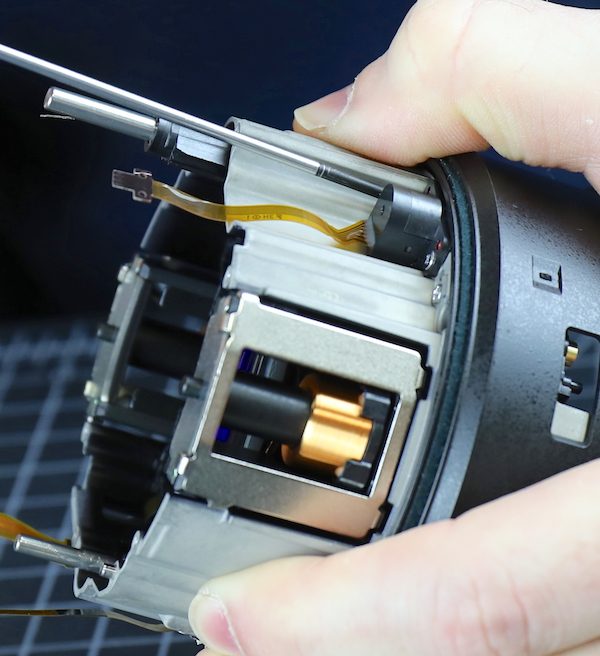
This gives a nice view of the coils for the two focusing motors; smaller rear and larger front. As always, we appreciate designers who take the time to lay out nice, neat flex runs. It makes things look like there was great attention given to detail. Things are laid out logically and modularly, and the build quality is robust. It looks like a small super-telephoto inside.
It’s really impressive that both focusing groups have a really long travel distance. While I can’t say for sure, logically this should allow very accurate focus with optical groups that aren’t too strong, meaning optical groups with fewer aberrations.
We also see some eccentric collars on the rear focusing group for adjusting the tilt.
One other (sort of) interesting note, under the rear mount is the standard Sony shim insertion plate at three locations, but with no shims. We don’t know if some copies need shims, although that seems redundant given the shimming under the mount. It could simply be this is a standard part used on several lenses.
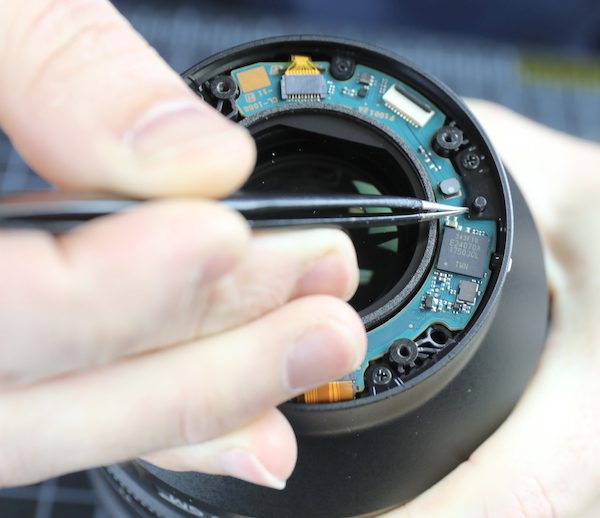
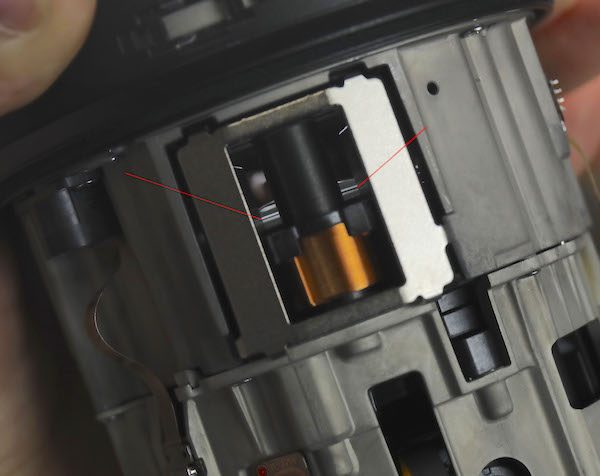
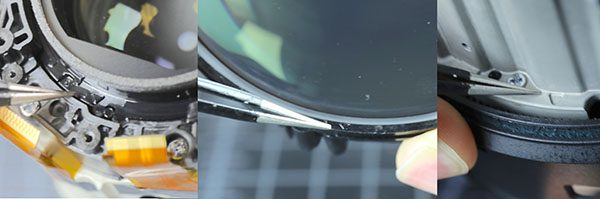
While we were peaking through slots, Aaron spotted what he thought might be the problem: the front element of the front focusing group seemed to be poking up a little bit on one side. It was hard to see and even harder to try getting a picture of, but at the red lines, you can sort of see the edge of the glass element, which you shouldn’t be able to do. More importantly, looking through the slots on the other side looks different, and that shouldn’t be.
We’ll need to get deeper in the lens to find out if Aaron was right. (Since the editor is always yelling at me for not caring about clicks and comments, I’ll reword this. “Should we go deeper in the lens? What do you think? Comment below!!) OK, you all voted yes, so off comes the PCB.
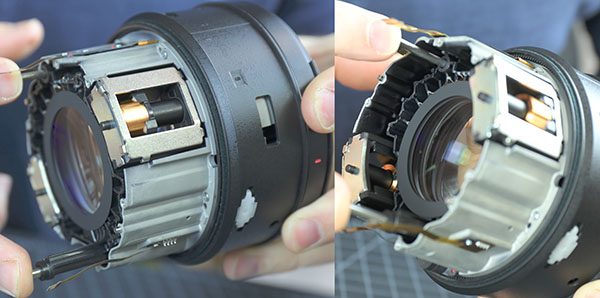
In case you couldn’t tell from the image above, the inner barrel has front and rear halves screwed directly together, which seems like the logical next disassembly step.

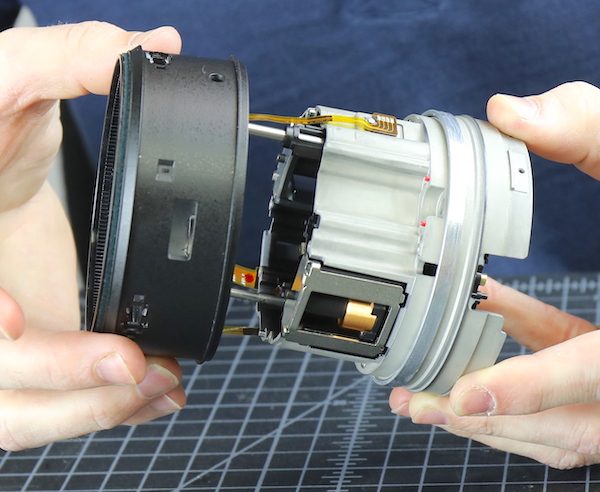
With the screws removed and the flexes disconnected, the two barrel halves separate nicely.
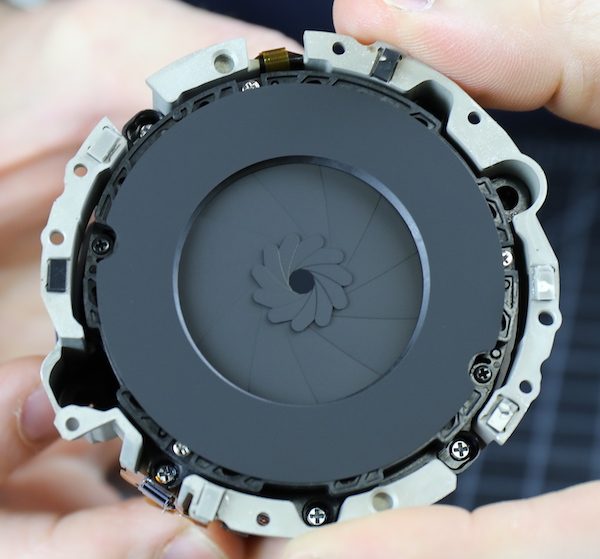
The rear half contains the rear element, rear focusing group, and aperture assembly.
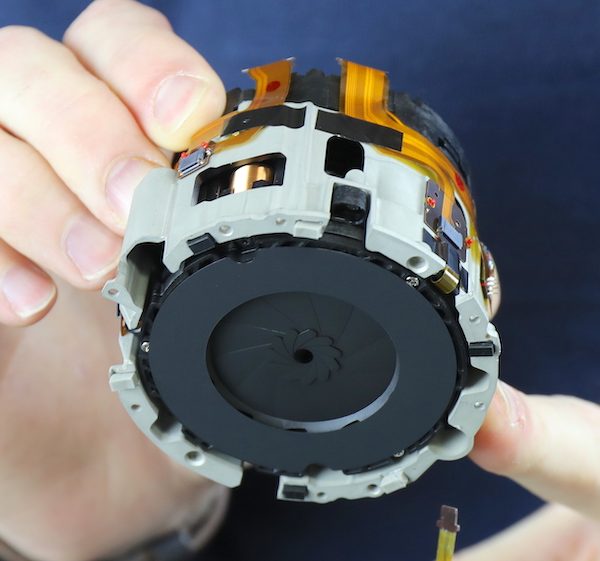
Here’s a straight-on view of the aperture; really nice and smoothly circular.
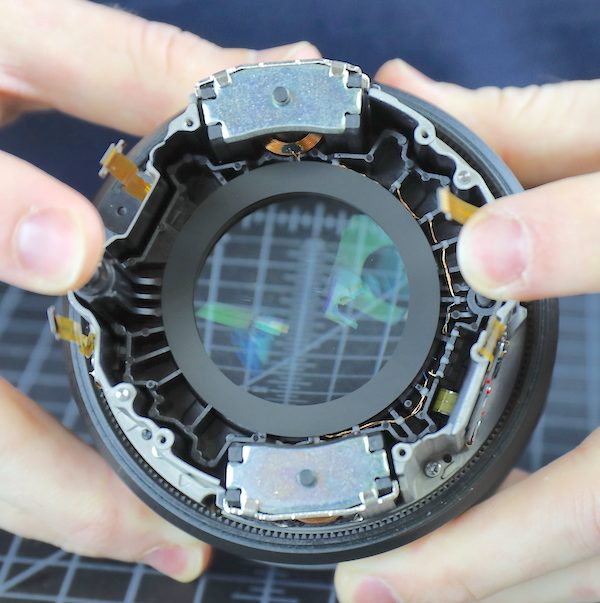
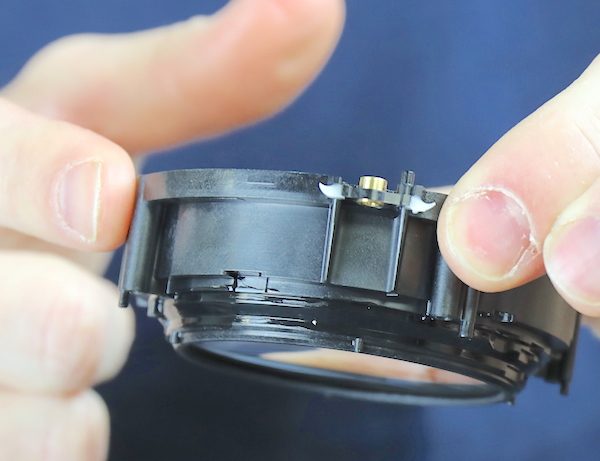
The front half still has the focusing and filter barrels attached. There’s some more weather sealing under the barrel.

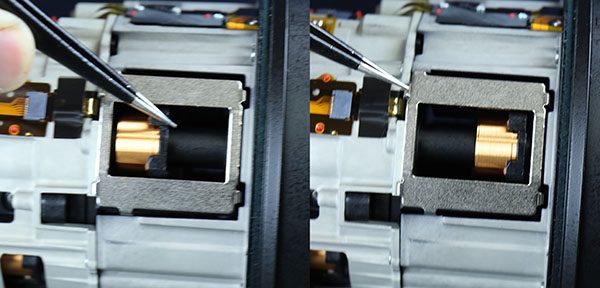
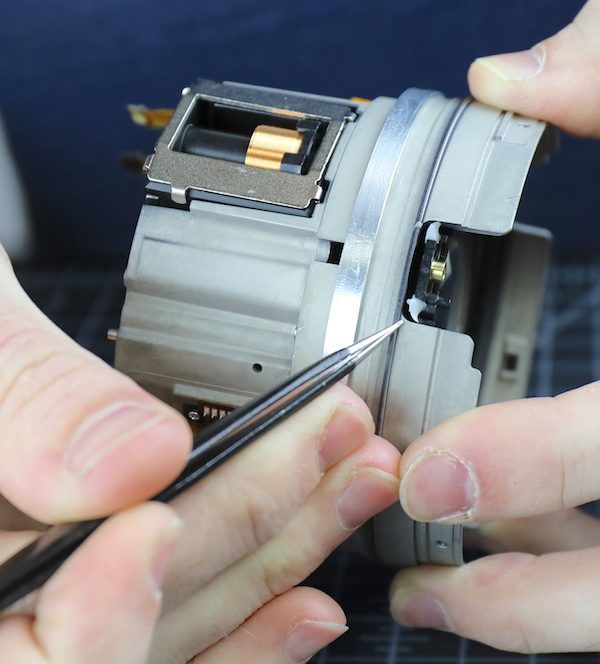
Looking down into this section from the rear, you get a good look at how big the electromagnetic motors are for this focusing group. Notice the wiring connecting the two motors running along the right side, and the geared teeth in the focusing ring.
We showed you the travel of the focusing motor earlier, but I find it even more impressive when you see how far the focusing group is moving.
OK, back to work, we still need to get inside here and access the front of the focusing group. We had already detached the filter ring and just put it back in place for the disassembly. There are some obvious screws that could be holding the inner barrel onto the front of the lens.
But we can’t see what’s under the focusing barrel, which makes us nervous. There are some other holes that have screws at the bottom that pass through those front element shims we showed you earlier, so we decided to take the front element before doing anything we might regret later.
Aaron loosened the screws a bit so he could remove the shims and keep them in proper order. These three ranged in thickness from 0.48mm to 0.27mm, so there was some significant tilt being applied to the front group in this copy.

With the shims marked and placed, the screws were removed, and the front group comes out.
A quick aside for those who have thought, “but doesn’t each piece of glass have to go back in the way it came out, so the shims are right”? Yes, it does, and usually, we mark each part as we remove it so we can line them back up correctly. Sony has made this lens foolproof, though, and again we appreciate helpful engineering. The lens elements, barrels, almost every bit of the lens is marked on one side with small triangles. When you reassemble, just line up the triangles, and you’re good to go!
To get the focus ring off, we have to remove the white plastic sliders. These are glued so we’ll wait here for 20 minutes while the alcohol soaks in…… then pull them off.
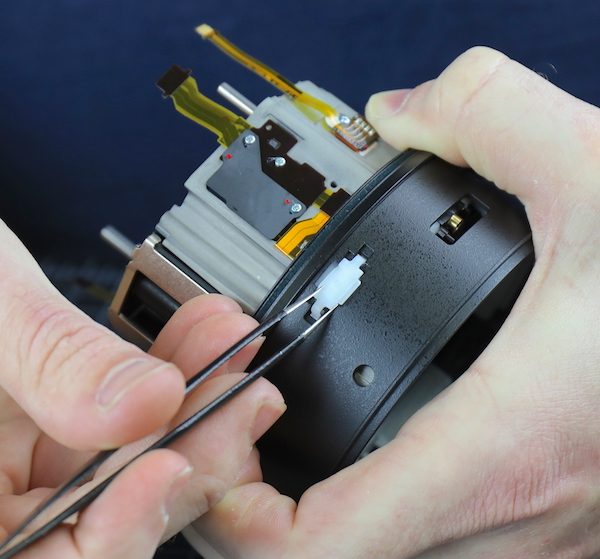
These seem to serve two purposes, they slide in grooves to keep the focusing ring in place but also are kind of springy, so they probably provide a little smooth resistance when turning the ring.
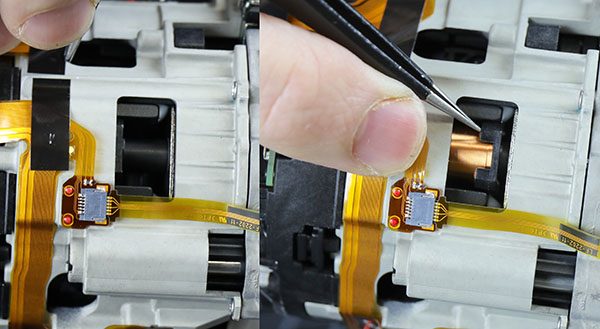
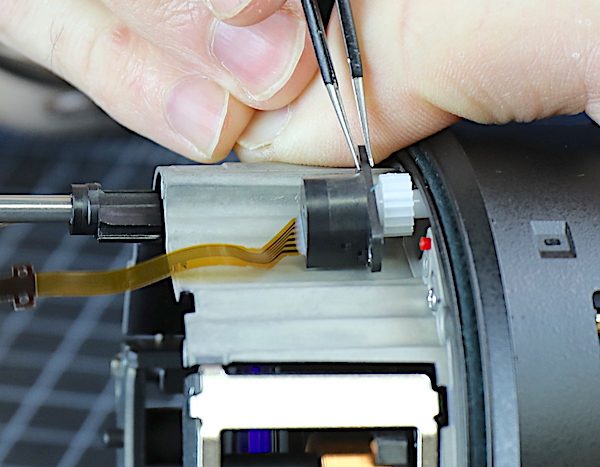
One last bit of disassembly; there is a focus position gear sensor that has to come off so the barrel can slide back. When you turn the focus ring, you’re actually turning this sensor which sends signals to the focus motors.
It turns out those screws that were so obvious earlier actually hold the second group in place.
There’s also a bit of glue, or possibly just sealant, around the second group, too. Since the element fell right out once the screws were removed we’ll go with sealant, since that sounds better than ineffective glue.
The second group is a hefty bit of glass; I’m assuming three elements.
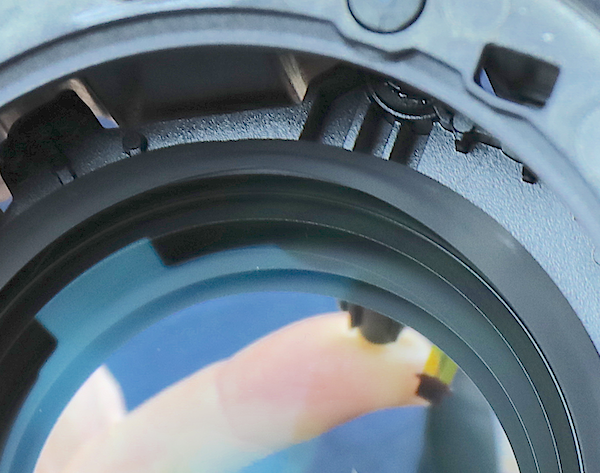
Now everything is out of the way, and we can look down at the front of the focusing group. It’s pretty obvious the first element of the focusing group (at least) is out of place; the light shield has been pushed up at the top of the picture.

Here’s a bit closer view in case you couldn’t see it above. You can see the light shield is flat along the right side of the picture but bulging up at the top where the element is shoving it up. This is probably a millimeter of tilt in a place where 0.1mm would be catastrophic optically.
We peeled back the light shield to look underneath.
And it’s obvious this is not just a ‘pop it back in place’ kind of issue like we’ve seen with some lenses. All the glue would need to be removed, and the element repotted. We thought it best to leave this job to the manufacturer, rather than potentially damage a part that’s we can’t purchase a replacement for.

Conclusions
First, let me be clear, this is an isolated incident; we haven’t seen this problem with any other copies of the Sony 135mm GM (and we have a lot of them). Elements come unglued sometimes. It’s rare, but we’ve seen it occasionally with lenses from every brand. Just to be proactive, we notified people we work with at Sony so they could be on the lookout for any pattern and they’re probably going to return this copy to Japan for a closer look.
Don’t get paranoid about your lens; this isn’t a subtle thing. One minute it was taking beautiful pictures; the next minute every picture looked like a fog bank. It would NOT be something where you think ‘I wonder if this corner is soft’. It would be a ‘WTF just happened to my lens’ moment.
Now let’s get to the fun part, the teardown. This is a very well made lens. It IS built like a tank with robust magnesium alloy barrels, lots of long thick screws holding things together and nothing flimsy to be seen. The electromagnetic focusing motors, which were a weakness a few years ago, are now built like you could pull trucks out of ditches with them.
The more subtle stuff, things like the neatly laid out flexes and reassembly markers, indicate to me that a lot of care was taken in designing this lens. Nothing has that ‘we can stuff that in this nook over here’ look.
It’s a great lens optically that is very well built.
Roger Cicala and Aaron Closz
Lensrentals.com
July, 2019

30 Comments
J.L. Williams ·
I always enjoy the teardowns! NB: The date at the end of your sig block says “July, 2016”.
Roger Cicala ·
It took a really long time.
Fixed that, thank you.
Vladimir Gorbunov ·
Thank you very much for this teardown! I love all of them.
An isolated question: are the fisheye zoom lenses more or less prone to decentering in comparison to average zoom? I wonder about one corner on my 8-15L being softer than others, and whether it can be fixed at all.
Roger Cicala ·
Not more that I can tell, but all zooms are decentered somewhere.
KeithB ·
“One other (sort of) interesting note, under the rear mount is the
standard Sony shim insertion plate at three locations, but with no
shims. We don’t know if some copies need shims, although that seems
redundant given the shimming under the mount. It could simply be this is
a standard part used on several lenses.”
Don’t you always have to have at least one shim so you can “un-shim” if required?
Roger Cicala ·
Perhaps it already was? As in 97% need a shim and this doesn’t? But I think the common part thing is more likely, it looks to me like a shim there would be redundant to the ones under the bayonet.
KeithB ·
Actually I also realized that this is to adjust tilt, not absolute distance. So no shims = no tilt.
Roger Cicala ·
There was tilt in the ‘under bayonet’ shims, so I assume that covered things.
Nick Podrebarac ·
It’s nice to see Sony (finally) making lenses which are properly stout.
Andreas Werle ·
Thanks for the teardown, Roger. Sony obviously took care to deliver a well designed lens and what a huge one!
I would be interested, if the Sony people will actually repair this and not simply send you another lens as replacement. My guess is, that a repair will be too intricate, if the focusing group must be disassembled completely.
As you mentioned the dust problem, any idea why it gets dusted so quickly?
Greetings Andy
Roger Cicala ·
They want a closer look at this one so we’re sending it directly to Japan and they’ll send us a new one. I think that’s mostly an engineering decision, they want a closer look at what happened, assess their mounts, etc.
Love Life ·
Did you see this could this revolutionize lenses?
https://petapixel.com/2019/...
Jonas ·
Couldn’t find a Feedback point directly on the page: At your 135 GM rental page, the last paragraph says “The FE 85 GM uses one”. Probably because the 85 is very similar 😉
MisterWU ·
Beautiful, incredible engineering work, and wonderful article.
People who complain about price lenses must read this article, this is a misterpiece.
Hunter45 ·
“misterpiece”?
Pox ·
Great article again, interesting and entertaining at the same time! Good to see that Sony is going to make your job more enjoyable 🙂
Keiki Alexandra Bailey ·
It’s like a transformer inside that lens. Wow, the engineering is insane for that lens
Lacknafta ·
Nice disassembly, it’s interesting to read about little design decisions and when you ponder of them. “Note to shade-tree reviewers out there: if you haven’t seen the inner barrel then don’t comment on build quality” is very true, I dare say a majority of reviewers throw “The build quality is great!” out because something feels solid in the hand.
I hope a Loxia develops a weird error soon.
Roger Cicala ·
No, no it can’t. It was really impressive mathematics (and according to several mathematicians, the formula was left more complex than necessary to make it look more impressive). In theory, it could improve ONE of the dozens of aberrations, but only in the center of the lens, not off-axis.
Not to take anything away from a very impressive intellectual effort, but basically it solved a problem nobody was particularly trying to solve (the stuff about ‘2,000 year old mystery’ was so over-the-top it makes me wonder if the authors were having a bit of fun).
Love Life ·
Oh darn.
Patrick Chase ·
Note also the words “the object-image distance… is provided by the user” in the paper’s formulation of the problem.
In other words, their analytical solution is only valid for a single conjugate. If you want to focus on subjects at varying distances then you’re out of luck.
Also, because the solution is explicitly for a singlet it leaves no way to correct for chromatic aberration. You need multiple elements with different refractive indices for that (and preferably at least one with abnormal dispersion).
HB Photo ·
I was quite interested to see this teardown and findings. My copy of the lens has been returned for a new copy as, you guessed it, there was substantial dust inside. Mine had dust inside before ever shooting it. I have almost every GM lens Sony makes, including the 400 2.8, and I have not experienced https://uploads.disquscdn.com/images/1b9e834b24ac176d0e68096580d9f05e122e12cbd87c5735593e3e63b7a8623f.jpg this with any other. I was shocked and attributed it to being a bad one. Even with the dust, I did a shoot with it (mostly wide open) and it produced beautiful results. I still returned it as I felt the dust was unacceptable.
Every Google search I did made me feel that this was only an isolated incident until I found this teardown. Thanks for the efforts and education. I am still waiting for a replacement, 3 months later. Patience is a verture.
HB Photo ·
https://uploads.disquscdn.com/images/1b9e834b24ac176d0e68096580d9f05e122e12cbd87c5735593e3e63b7a8623f.jpg
Roger Cicala ·
Your new one will have dust inside soon enough.
ntn_labs ·
Woow!
Bob Locher ·
Thanks very much for going to the trouble of writing this and sharing it. I found it fascinating. And now I better understand why Sony G-Master lenses are so expensive. The engineering and the tooling costs obviously represent a considerable investment by Sony. Sony replacing the lens to you so that they can examine the failure strongly suggests they will continue to tweak the design to improve it in any way they can.
I’d love to see how Sony makes aspheric lenses, but I strongly suspect that is a closely guarded company secret.
Again, thanks!
Don Lindell ·
Having worked for a Japanese company for 25 years, I am 100% sure they want this back for teardown and investigation. This will be a Juhin and requires detailed countermeasures
Thanh Tran ·
Am I understanding correctly that after all that disassembly you have to put them back and send back to Sony for fixing since it’s “And it’s obvious this is not just a ‘pop it back in place’ kind of issue”?
I’m really enjoying reading this great article. Thanks
Chris Albert ·
Love your work Roger.
Phillip Olson ·
Did you ever get a repair manual for this lens?