Recreating Iconic Lighting Techniques Used in Film
A few weeks ago, we looked at some of the Oscar nominations and the cameras that were used to bring these films to life. While that was an interesting look at some of the gear used to create these films, it’s still just a small fragment of what is needed to make them the best in their class. So I wanted to do an exercise, with the intent of encouraging others to do the same; to start looking at some of the lighting techniques and tools used to create the masterful scenes we’ve seen in the latest TV and film productions.
While it’s fairly easy with some research to find which cameras were used to film what movies, finding complicated lighting breakdowns of each and every scene is virtually impossible to find on the internet – this is why the great cinematographers who help make these films get paid the big bucks. But still, I wanted to look at a few still images from these popular movies and see if I can break down each scene with some accuracy, as a way to show how something like that can be done.
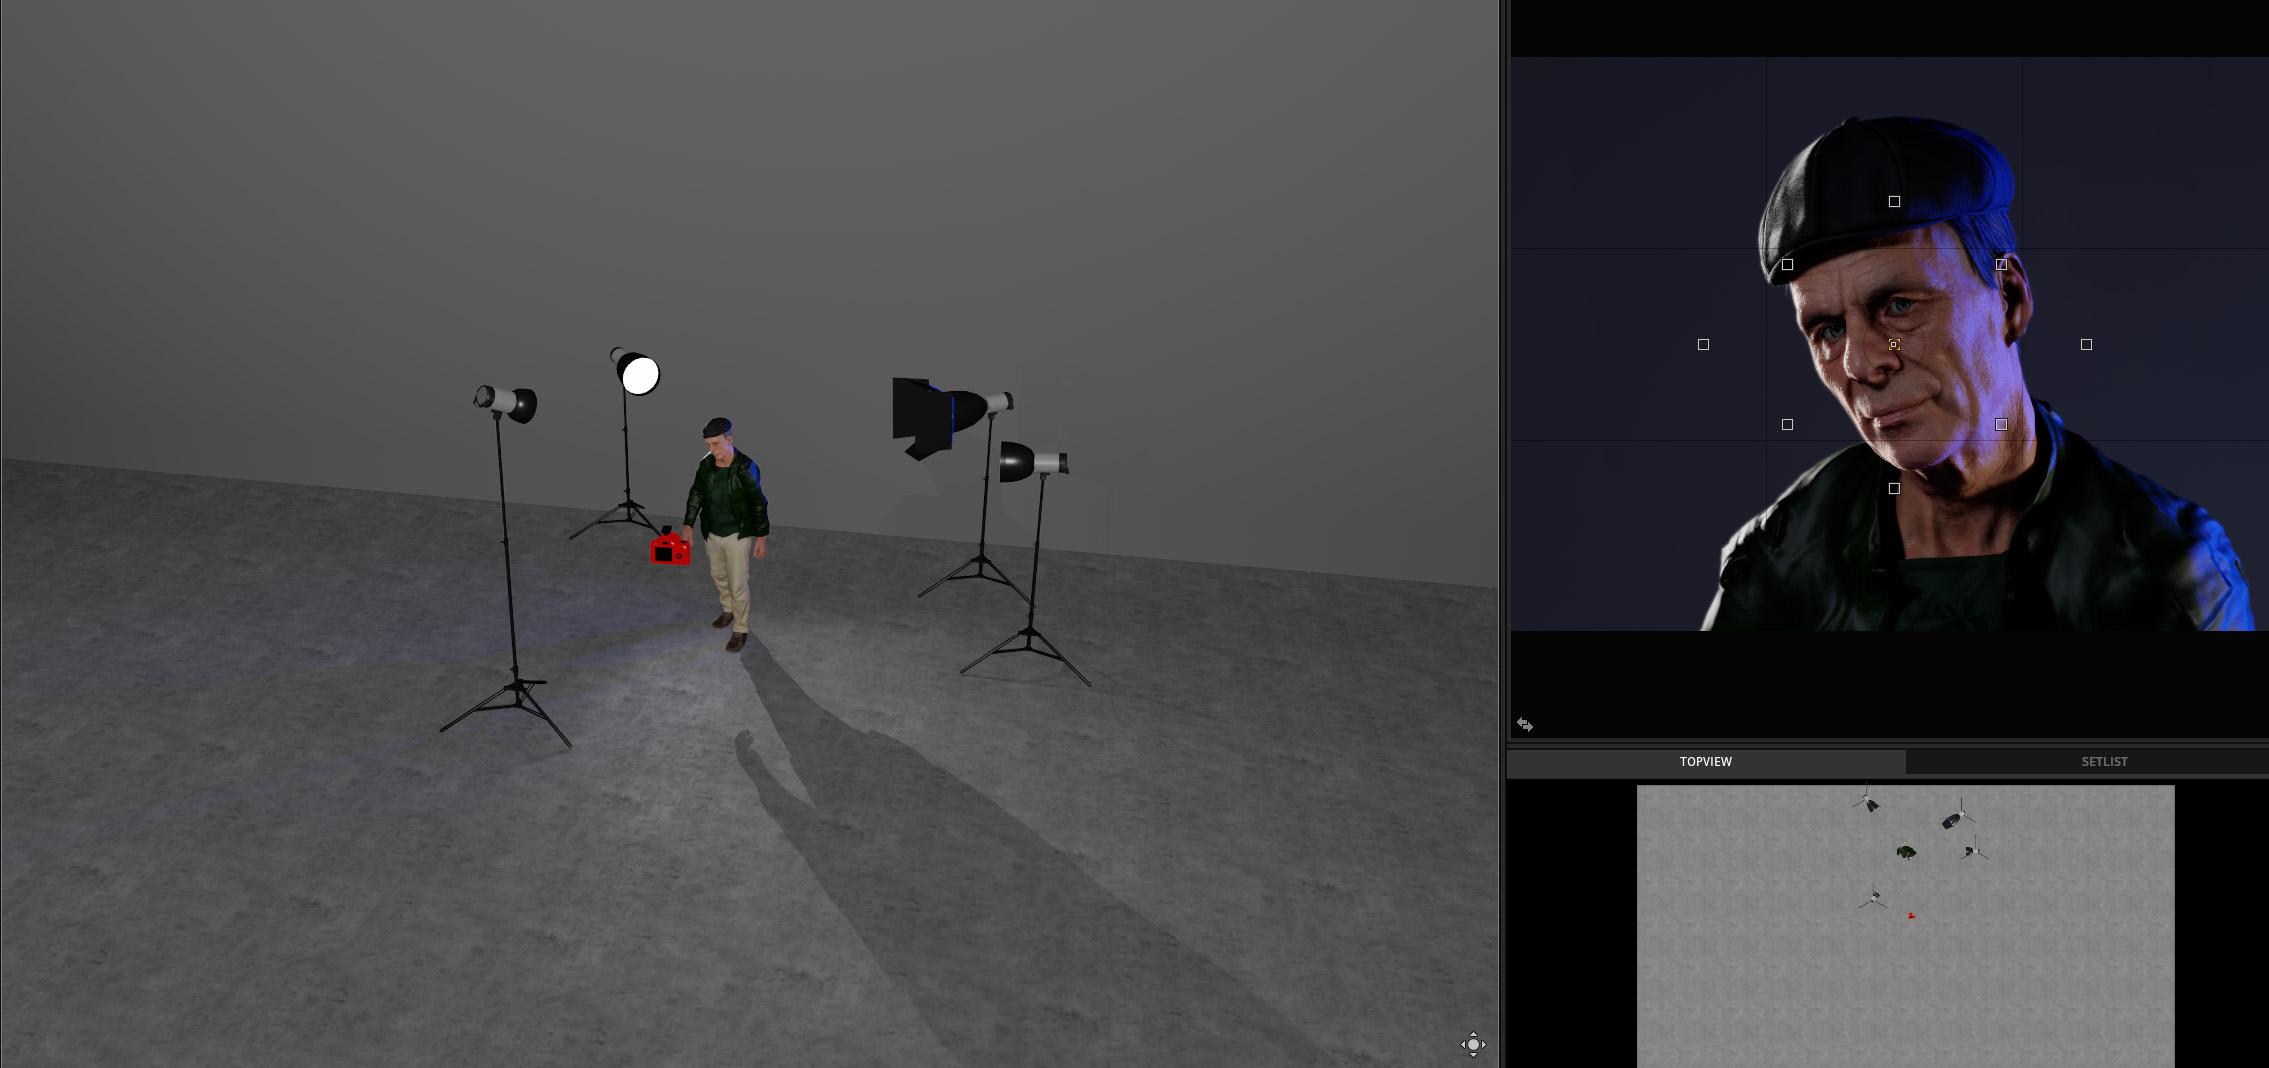
All of these lighting diagrams were made using software called set.a.light 3d – a relatively easy-to-use 3D modeling piece of software designed specifically for deducing lighting and building out complicated lighting diagrams for both stills and video. This isn’t a sponsored post or even a sales pitch; I just really like their software and have used it for years when creating breakdowns of some of my own work. So, anyway, here are a few images I took from popular films and TV shows, along with my attempts to break each one down for your own educational purposes. There are no claims to the accuracy of the specific gear used here, so please just treat this as an interesting exercise.
Marty Supreme – Key Advert Image
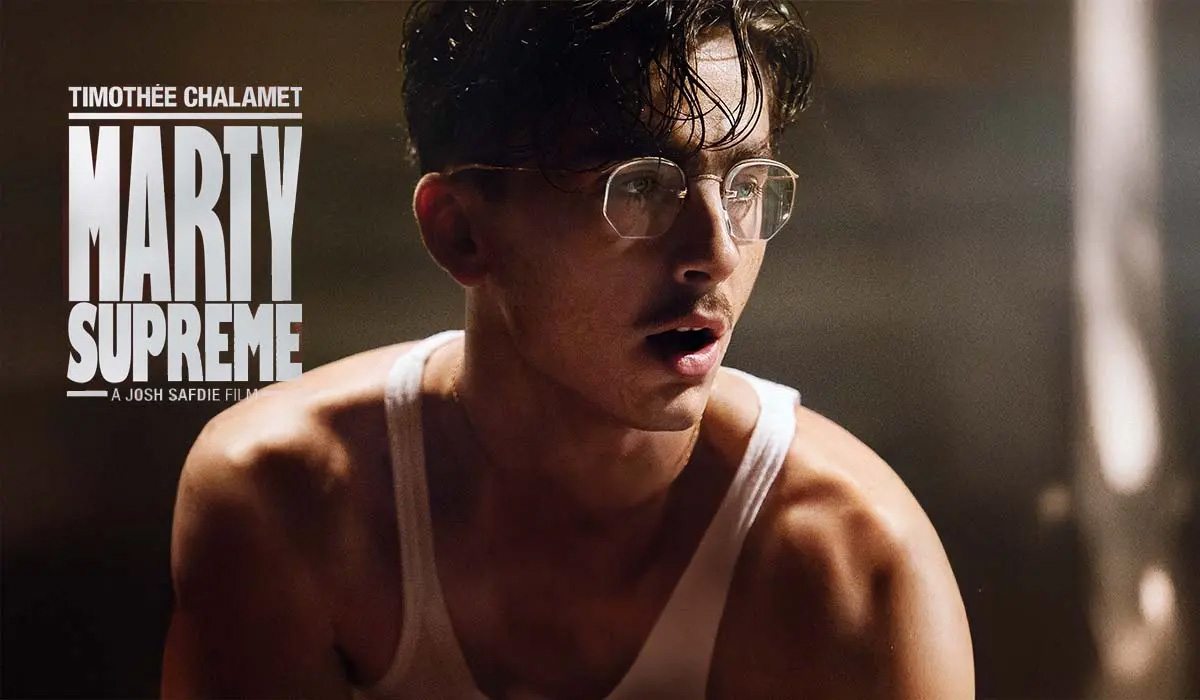
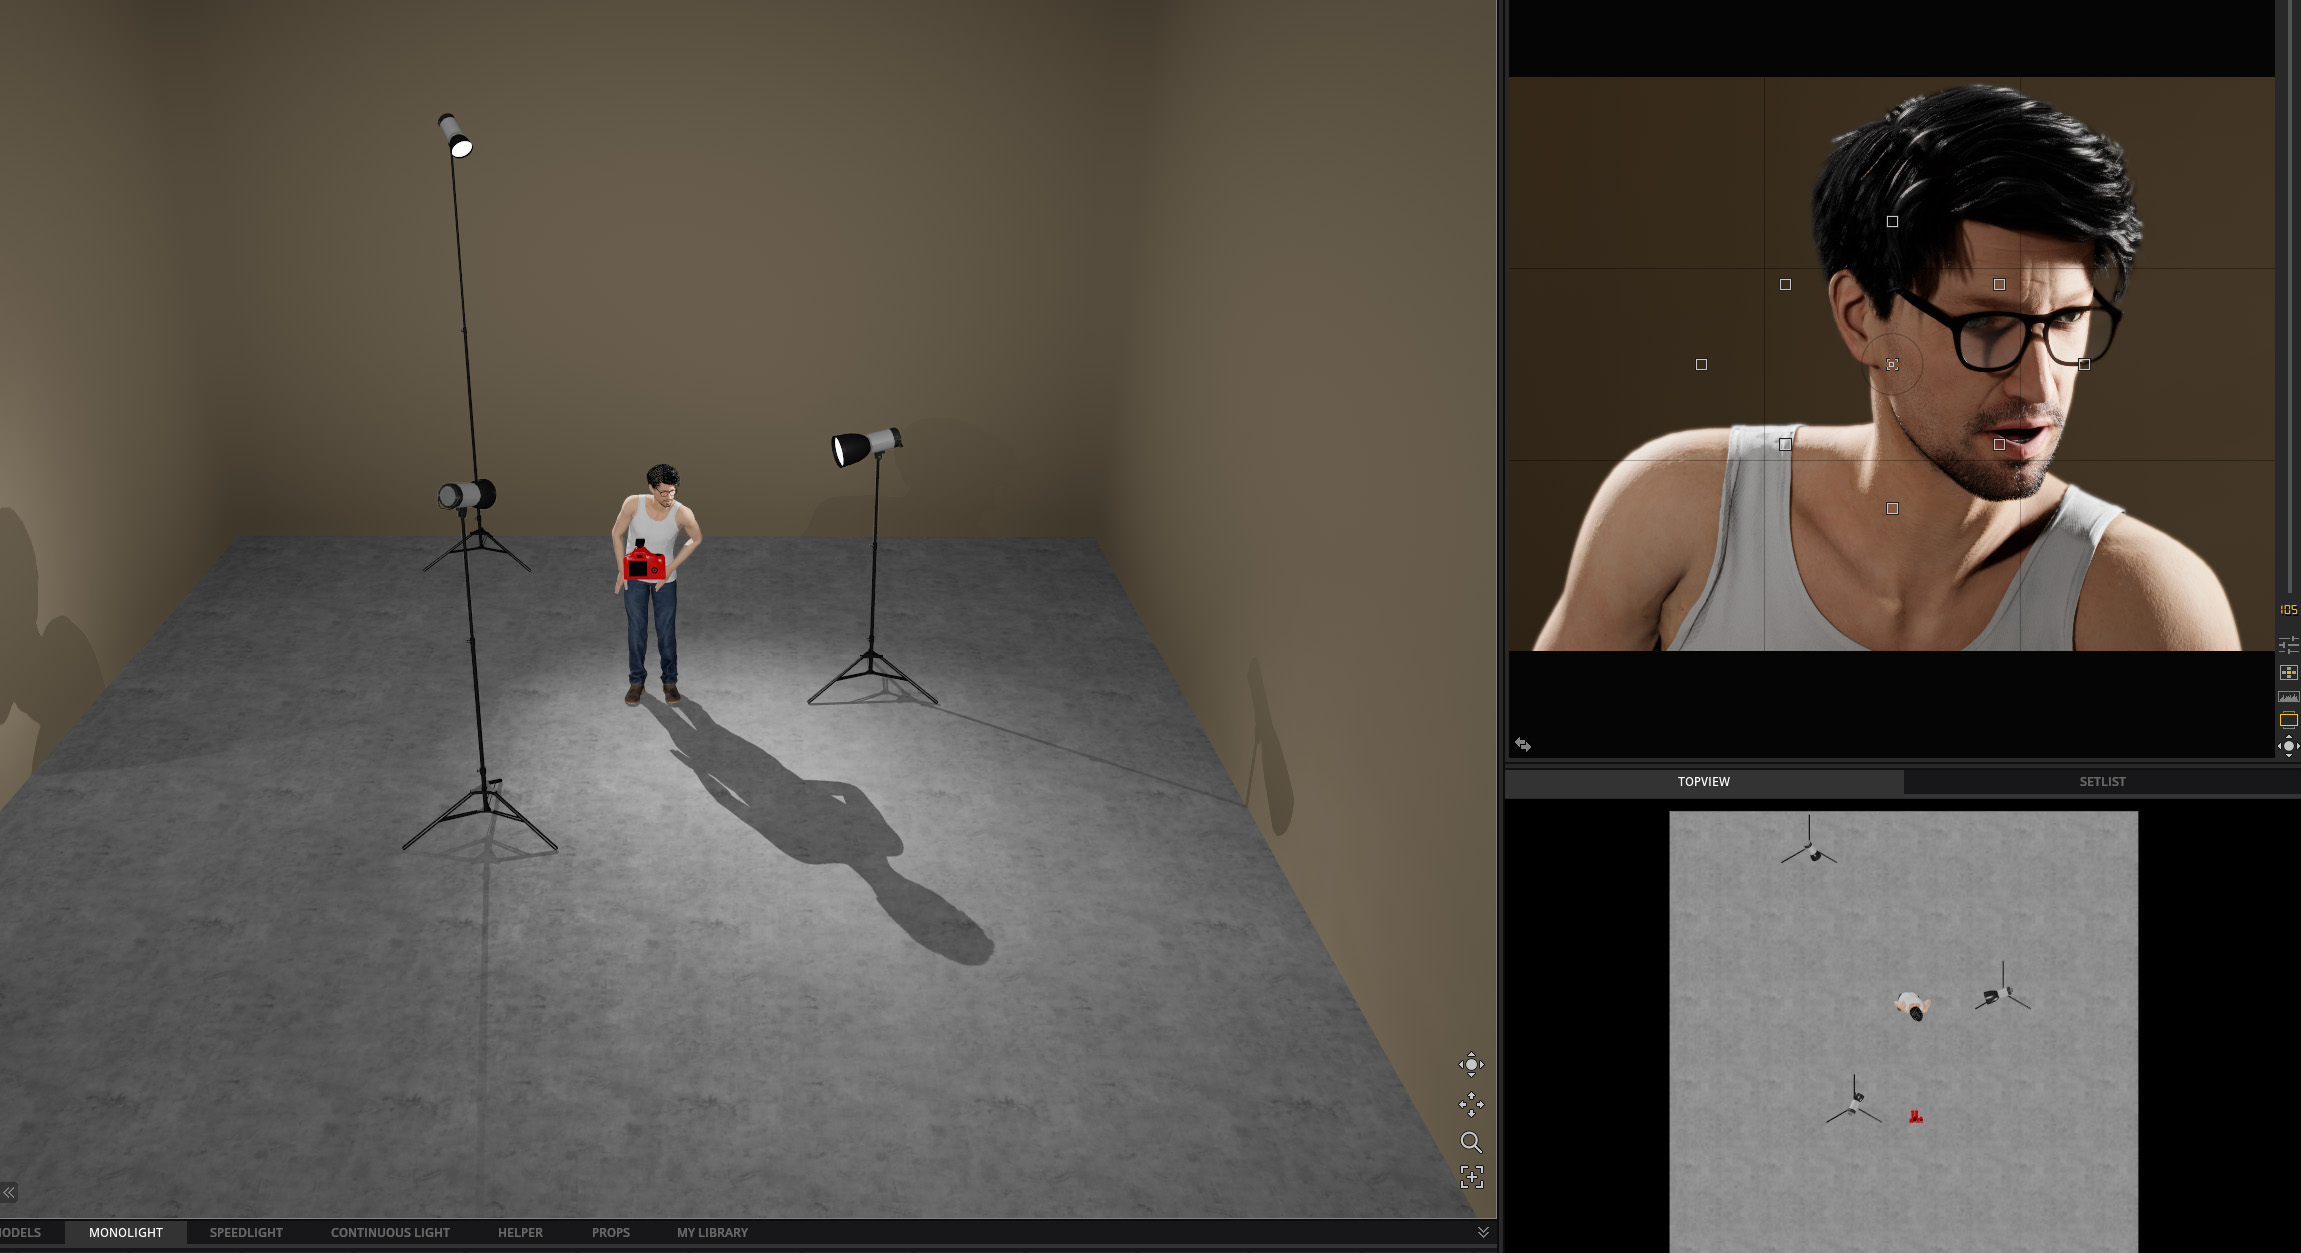
The specular highlights and shadows suggest that this image was largely created with harder light options. The stark shadows on the shadow side of his nose and those cast by his glasses further this proof, so I recreated this look with a three-light setup, using all lights without diffusion. For the rim light on the right of him, I chose a gridded light to focus the attention on both his shoulders as well as the rim light cast on his face. I added something similar to the other side, giving it the stark backlighting common throughout the movie. I then added a fill light camera left to help fill in some of those shadows and better expose the shadow side of his face.
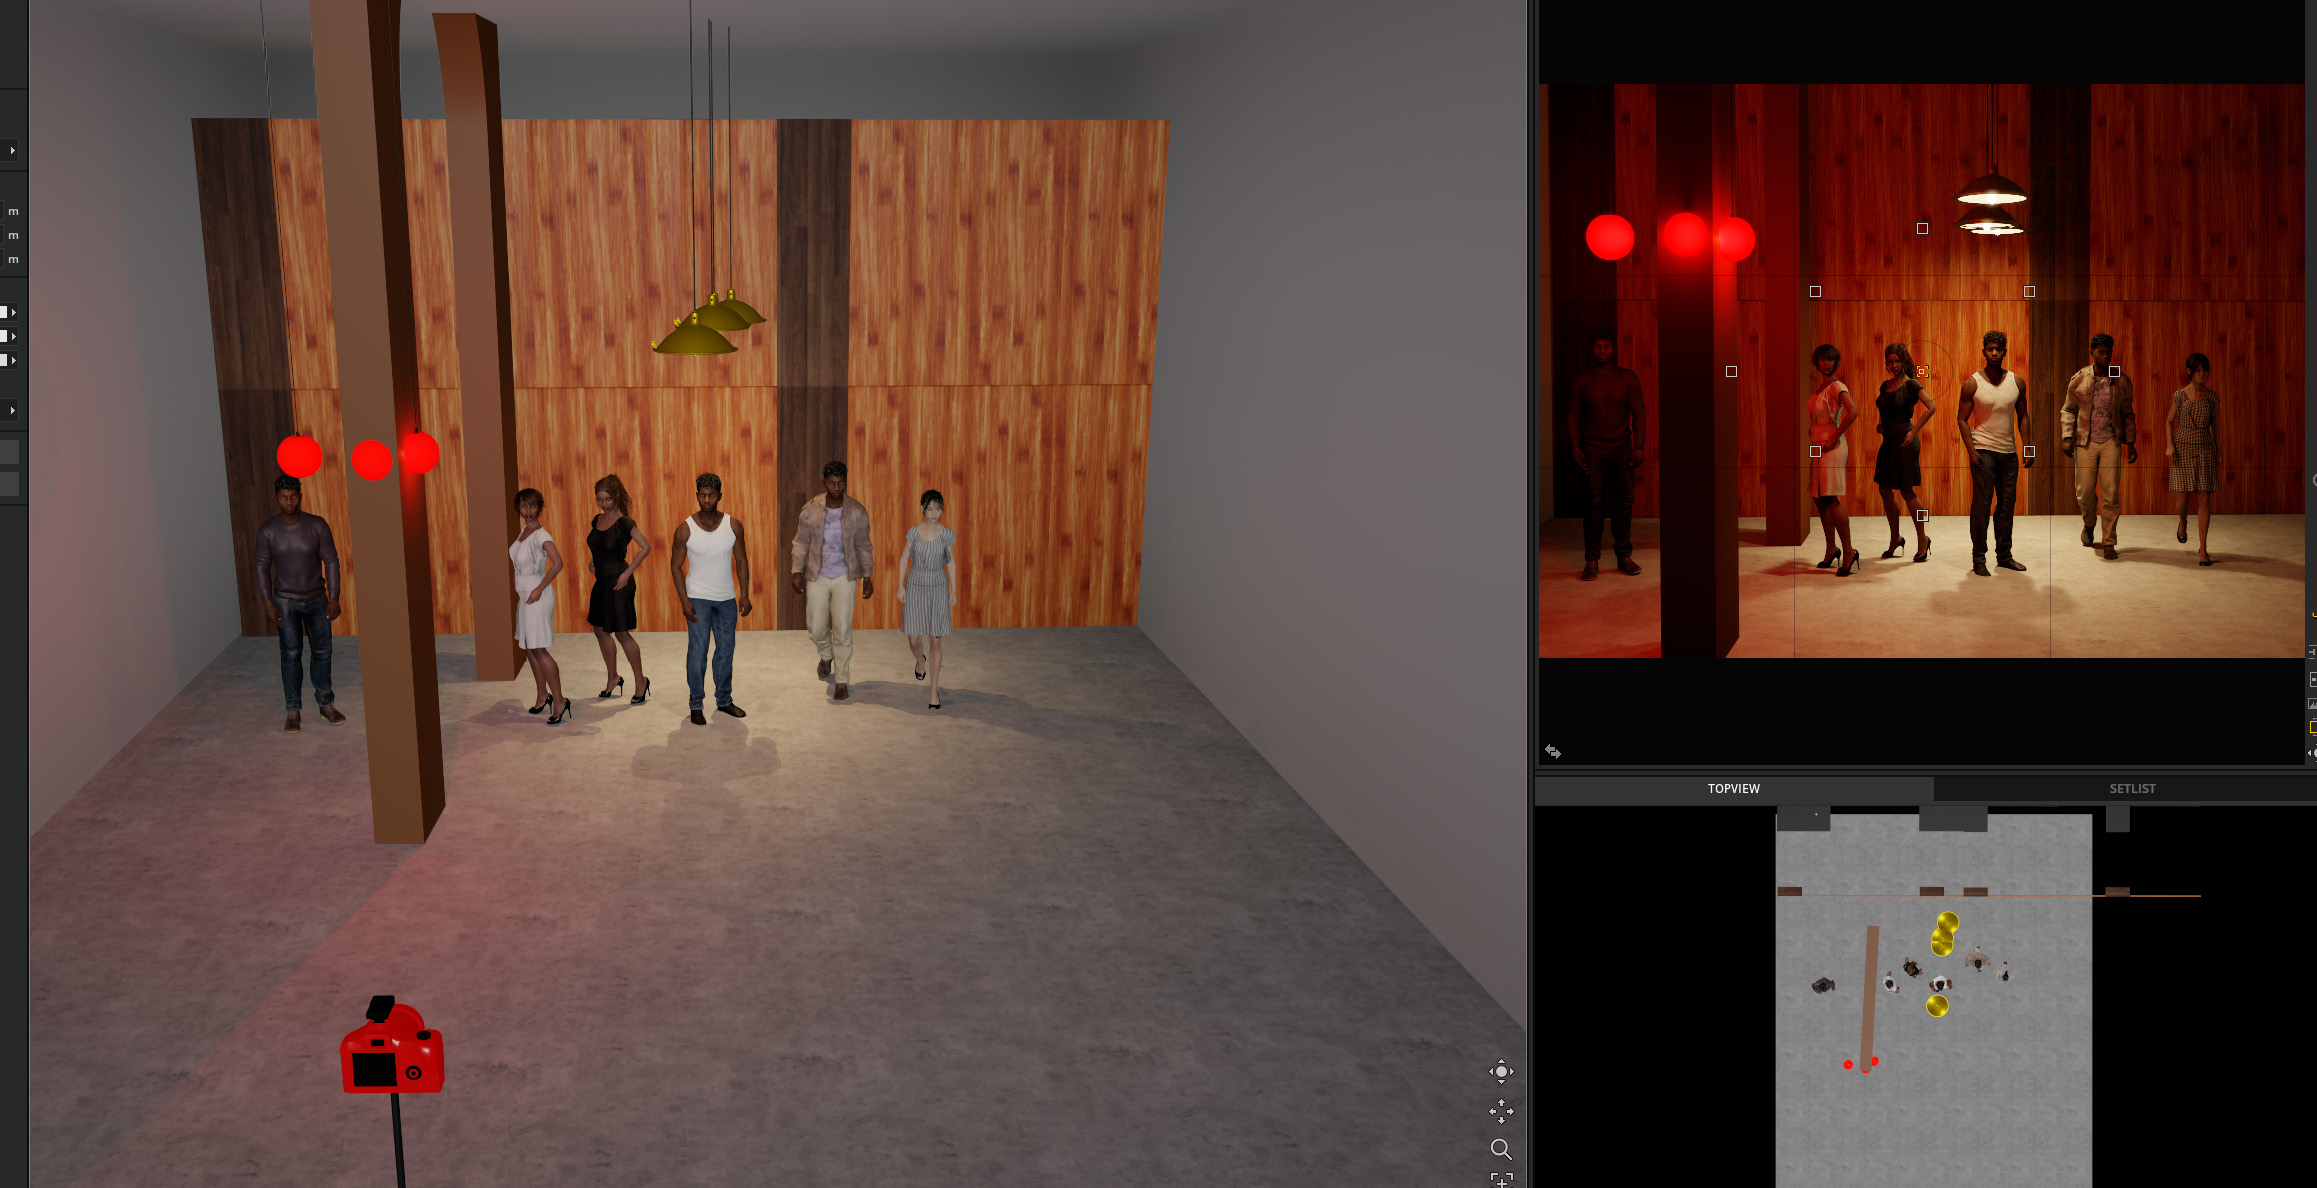
Sinners – Key Group Scene
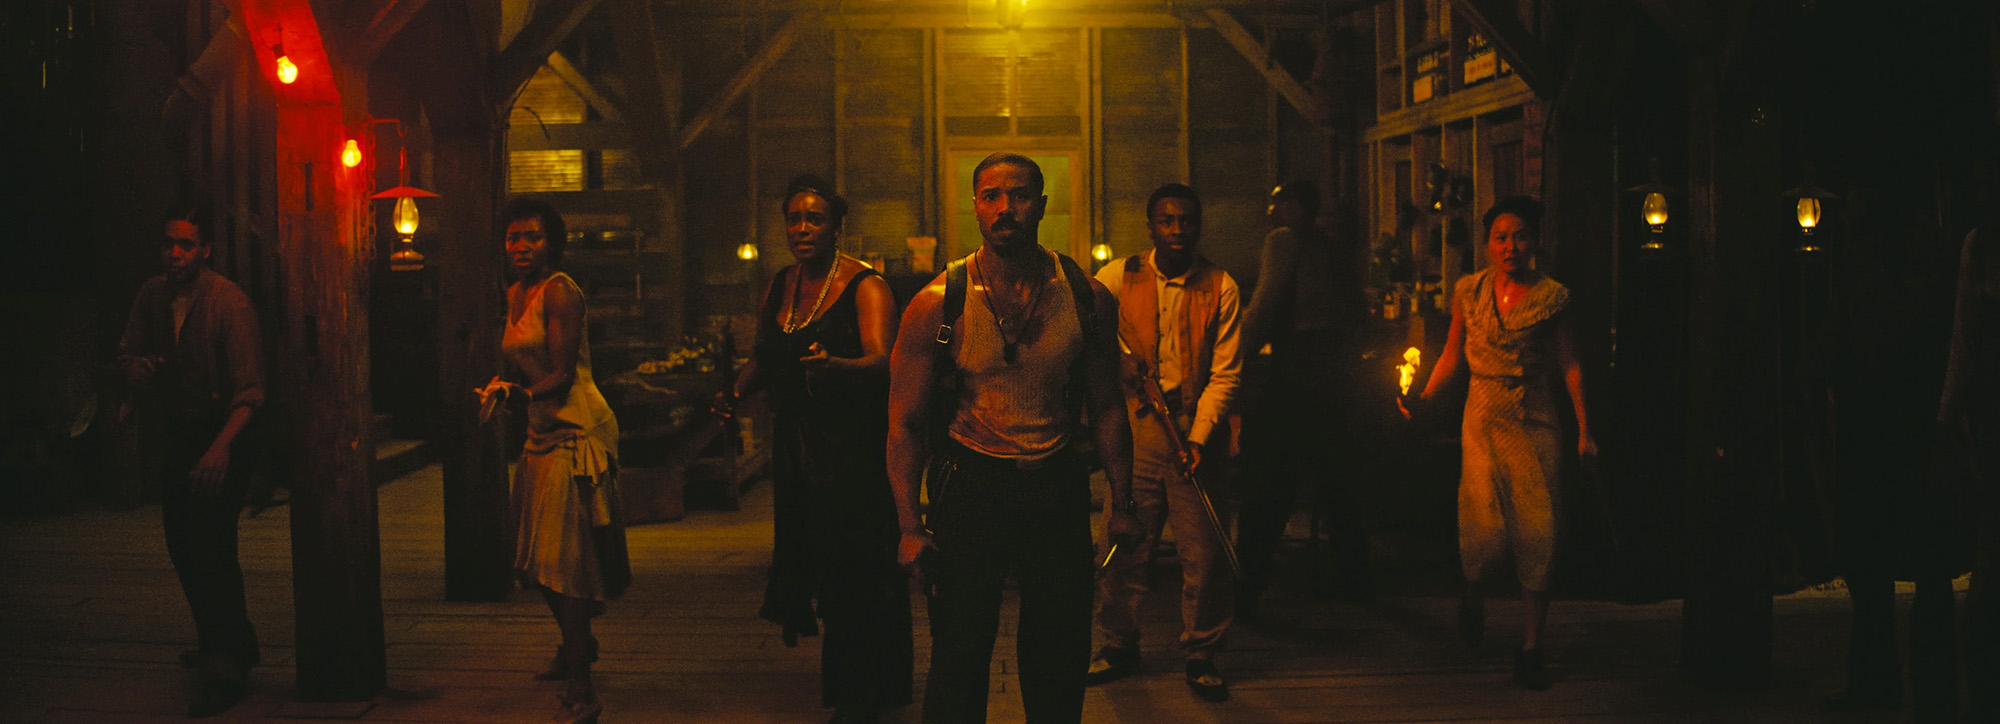
This is a pretty pivotal moment in the movie Sinners, and it’s without question that they wanted to make it as cinematic as possible. Lit largely by various fires along with red and orange bulbs, this scene is an expert class in using multicolored lights effectively to create a mood. Since this was an interior shot, I started by building a basic model of the building, as its architecture helps frame the shot and adds depth to the scene. I referenced the lighting in the scene to determine its placement relative to the subjects in frame, and started adding people in a staggered pattern to create contrast in their bodies and faces. From there, I added the lights seen in the frame, likely using Aputure B7c‘s or something similar to match the color spectra. Once basic placement was done, it was just a matter of adjusting power until we reached the final result.
Oppenheimer – Hero Shot
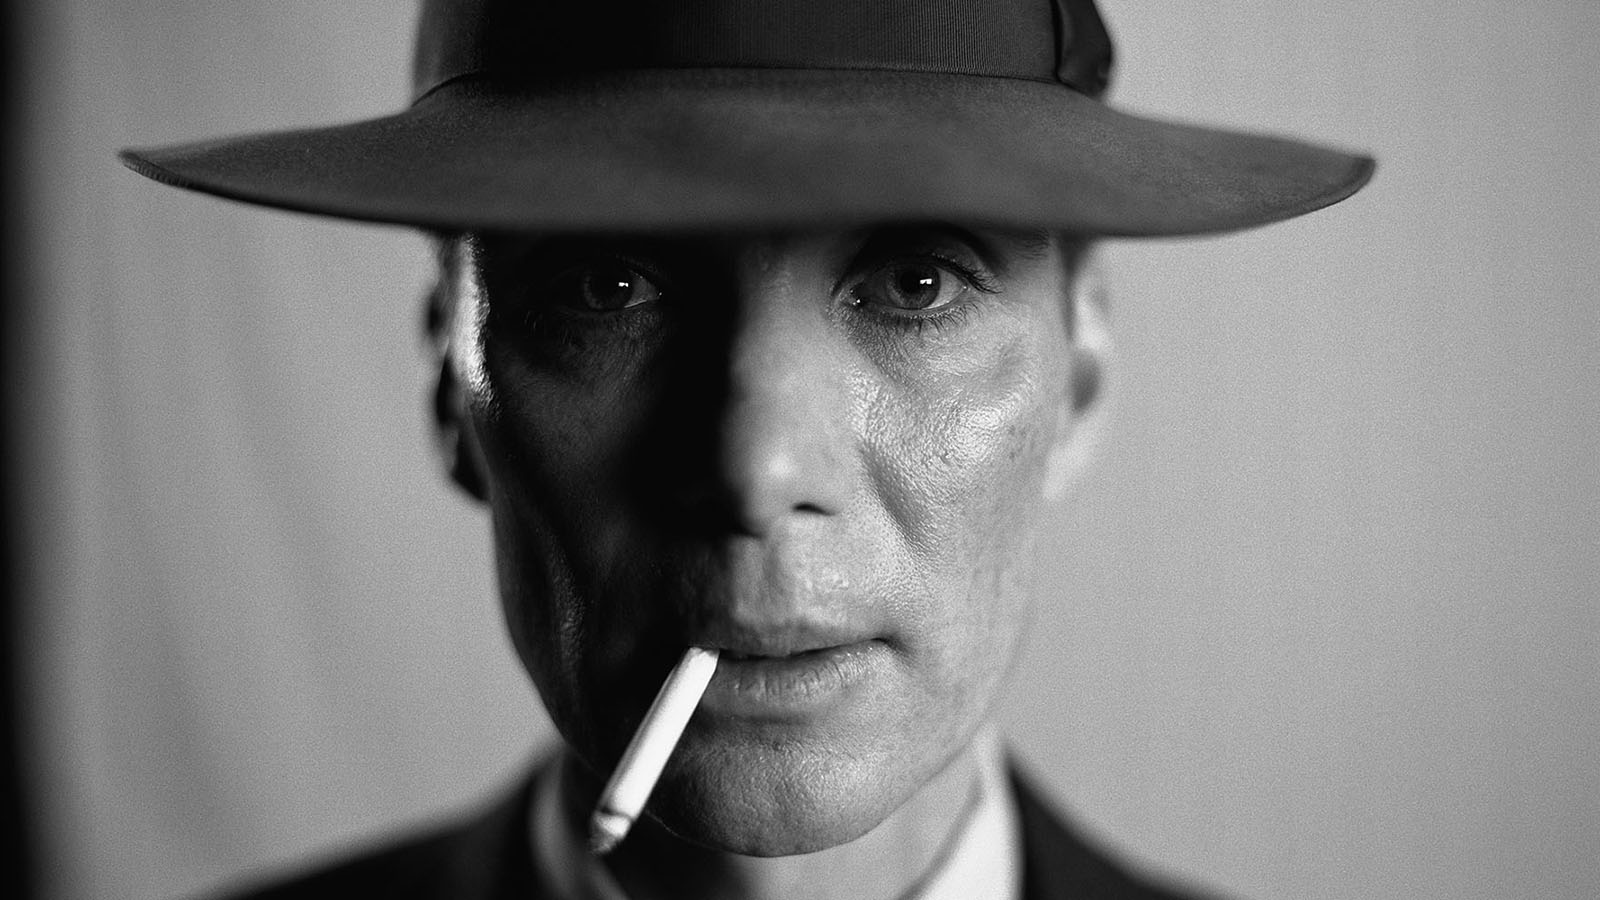
A pretty iconic shot of Cillian Murphy, this photo was used for much of the film’s promotion. The high contrast between rim and split lighting shadows adds a lot of drama to the image, while the catchlights in the eyes add emotion and character. I lit this with by using a relatively small gridded Octobox from camera right. The grid will help control light spread, and the octobox will help create a slightly larger catchlight, which helps convey emotion in the eyes. I then use a black blocking board close to the subject, camera left. This will help create contrast between the highlights and shadows. Finally, I added a bare light from behind and to the left to help bring some of that rim light into the frame.

One Battle After Another – Lockjaw Scene
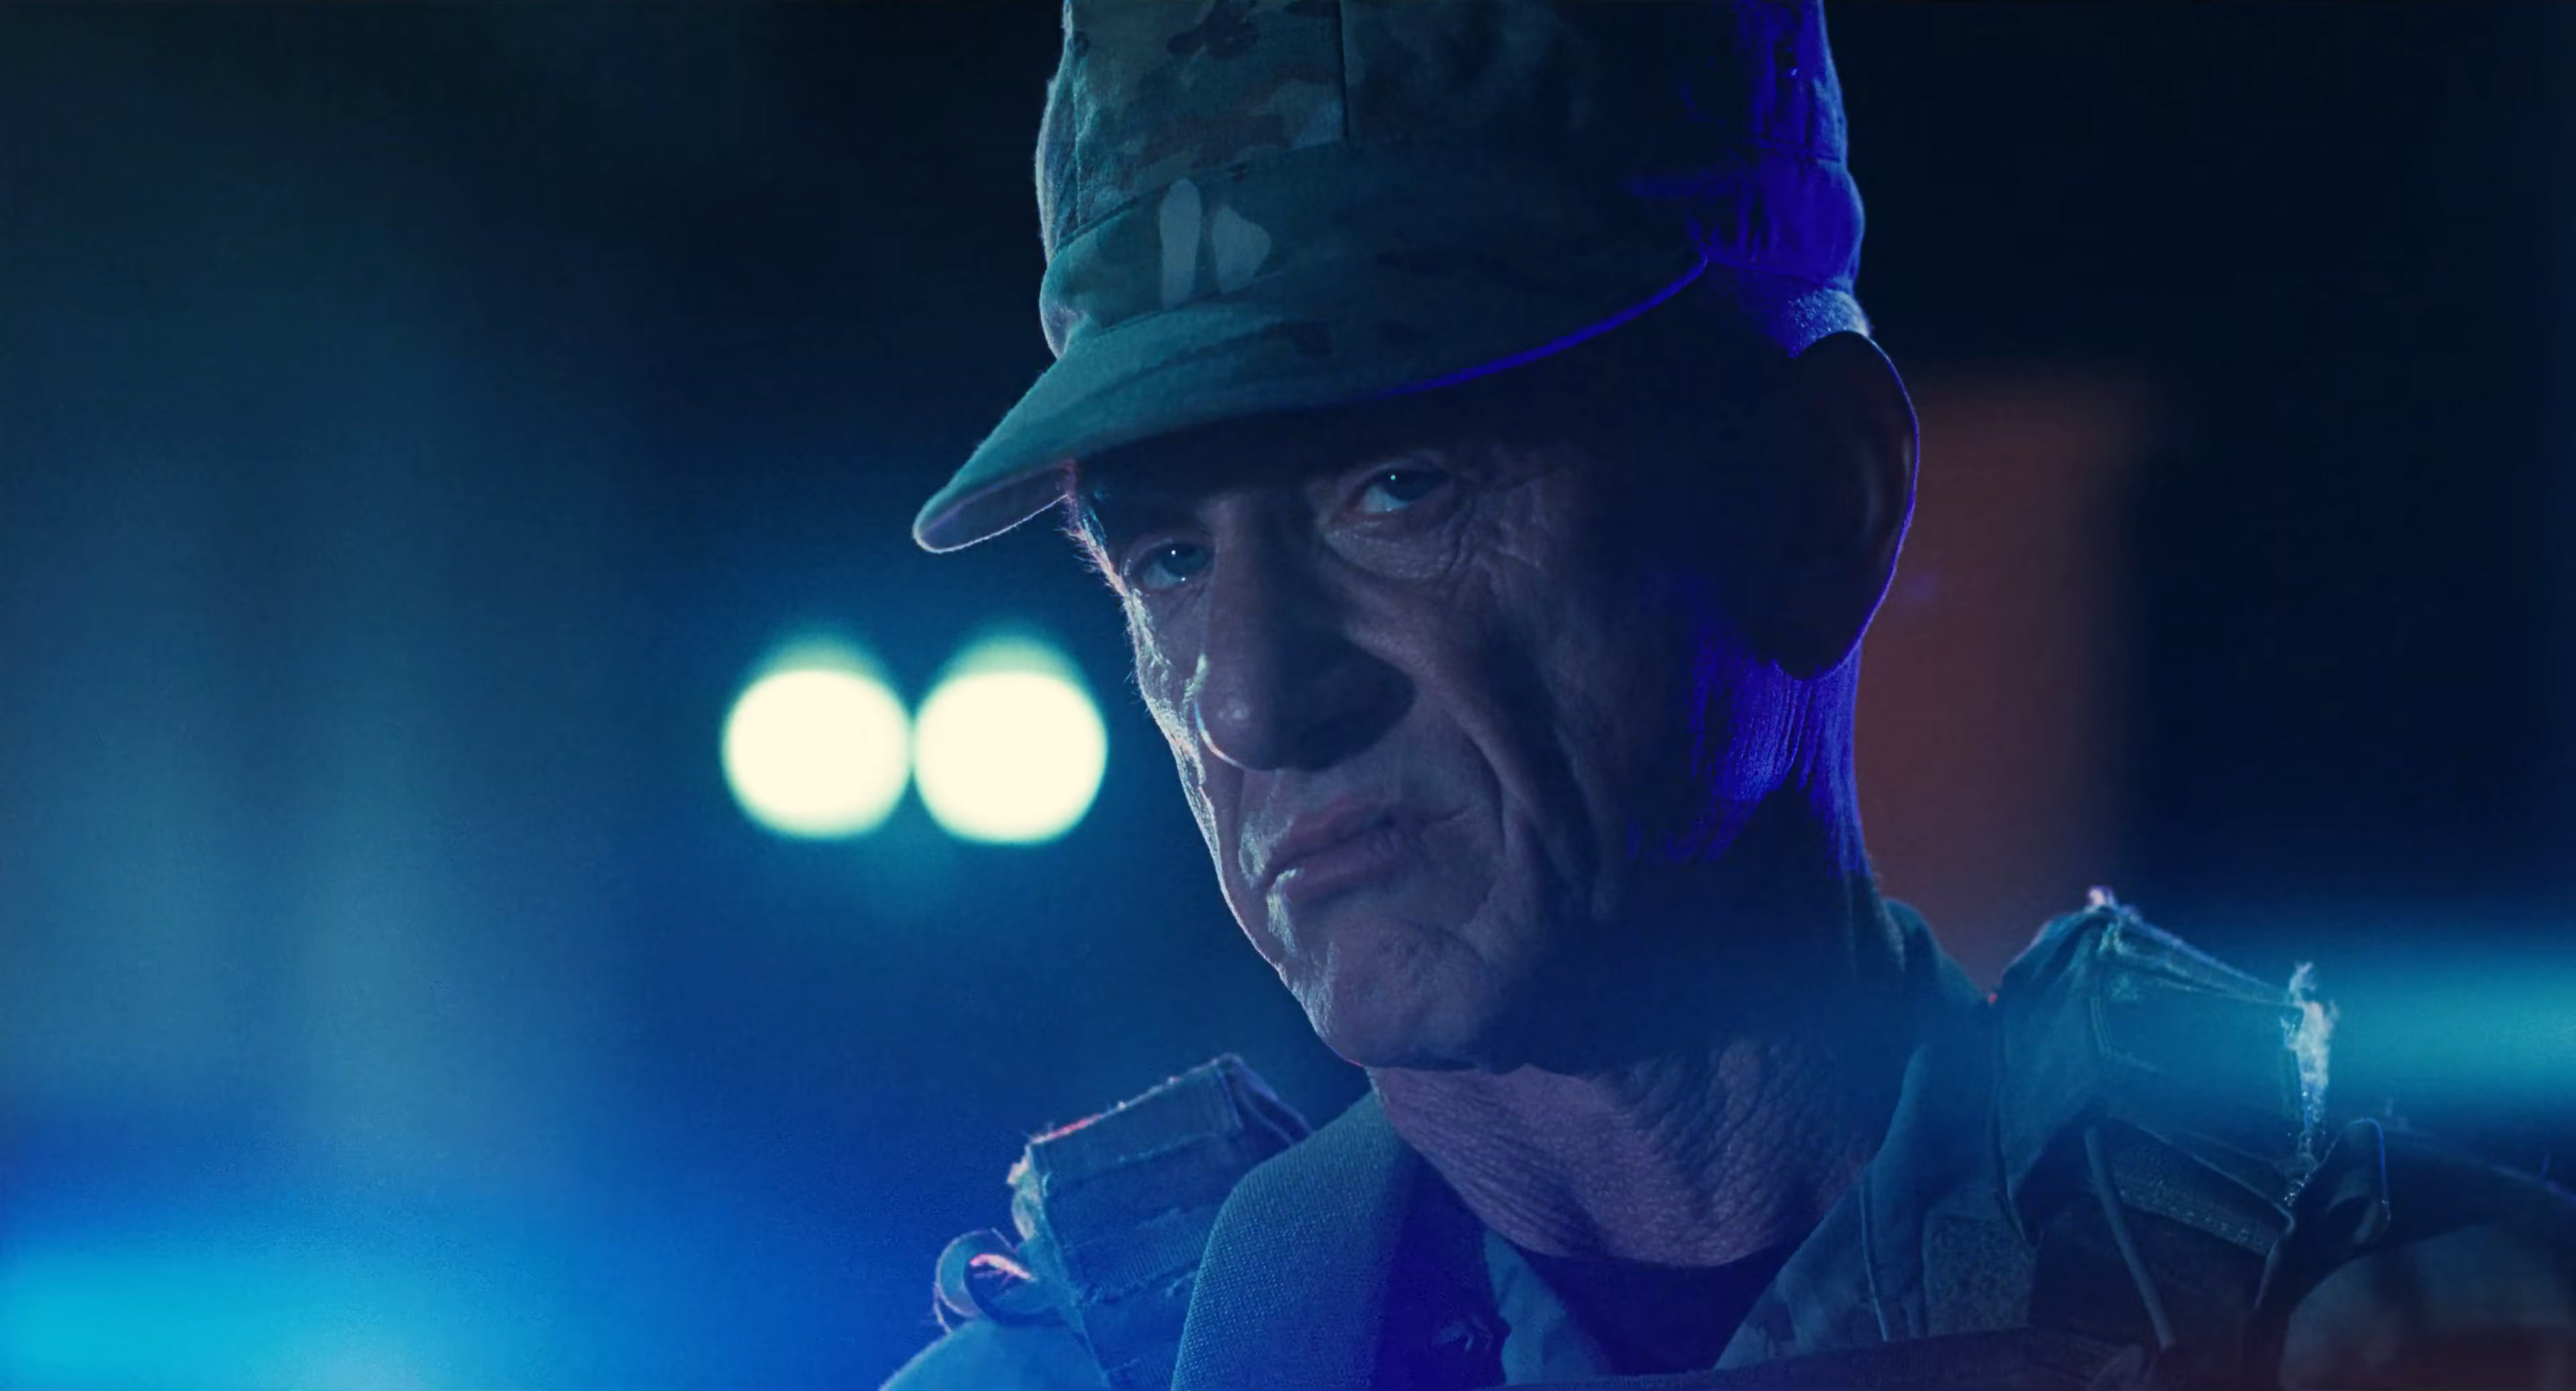
One Battle After Another was a masterclass in cinematography and storytelling, which is why it won Best Picture this past year and was many people’s favorite movie of the year. While much of the movie appeared to be filmed on location with plenty of natural light, there were several night scenes throughout the film, and some of the most iconic scenes were with the antagonist of the film, Sean Penn’s Lockjaw. So I took one of these scenes and decided to break it down. Based on the shadows cast on Sean Penn’s face, it’s pretty clear that they’re using a lot of harder lights throughout this shot. So I started with the harsh rim lights on each side, with one of them blue in color – signifying the police car lights from behind. After building out the rim lights, I added another bare light to the front, powered down, to help fill in some of the shadow cast on his face. Finally, the shot appears to have been shot with an anamorphic lens, giving us that horizontal flair on the right side of the frame.
So how do you think I did? Do you do this as well when watching a TV show or film? Any scenes over the last couple of years stand out to you? Feel free to chime in using the comments below, and if you’re looking to light your own scene, be sure to check out our extensive array of lighting equipment available for rental.