Geek Articles
Lens Teardown of the Complicated Sony FE 70-200mm f/2.8 GM OSS: Part I

Photoshop credit to Joey Miller.
A lot of you are aware that we’ve been rather puzzled by the Sony FE 70-200mm f/2.8 GM OSS lens. It didn’t test like we expected it to, which led us to reevaluate our testing methods with outside consultants (we’re now comfortable they are valid, BTW), question the accuracy of different types of autofocus, and search for the meaning of life.
The Sony FE 70-200mm f/2.8 GM is just a bit different. It has three aspheric elements, one of which is an extreme aspheric, and six extra-low dispersion elements. Ultra-low dispersion elements are pretty standard in telezooms, but aspheric elements not so much. It also has a unique autofocus system with linear motors moving a rear focusing element and a ring ultrasonic motor moving the larger front focusing group. So we were pretty interested in getting a better understanding of how this lens works.
As part of that Holy Quest, we wanted to take a look inside the FE 70-200 f/2.8, because, well, that’s what we do. They’ve been in such short supply, though, we just haven’t been able to take one apart. But a customer was kind enough to drop one of ours, jamming the focusing system. We decided the opportunity to do a repair/teardown was too good to pass up.
It’s not the first time we’ve made a bad decision, and it probably won’t be the last. It ended up being the longest and most complex (6 hours) teardown we’ve ever done. If you’re interested, read along and come feast your eyes on one of the oddest lenses we’ve ever looked into. But it’s going to be a fairly long read. (Poof! There went 90% of the blog viewers.)
I’ll warn you now, I’m going to use words like different, odd, and weird when describing the inside of this lens, especially in the second part of this two-part teardown. Don’t misread that to mean I’m saying ‘bad’ because I’m not. Sony is the one manufacturer these days that’s trying all kinds of new and different things. I love that. Sometimes new things are better, sometimes not. But it does make them different.
So Let’s Void Warranties!
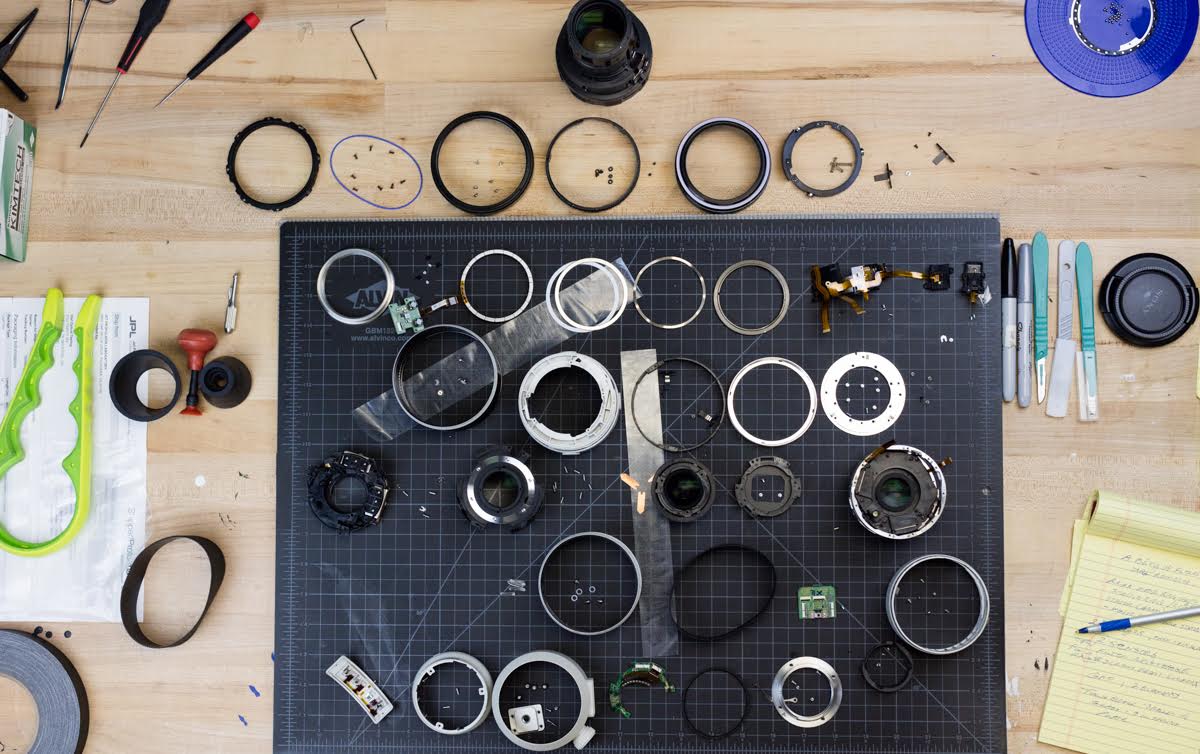
From the outside, the FE 70-200mm f/2.8 GM OSS looks pretty much like every other 70-200 f/2.8 zoom.

Lensrentals.com, 2017
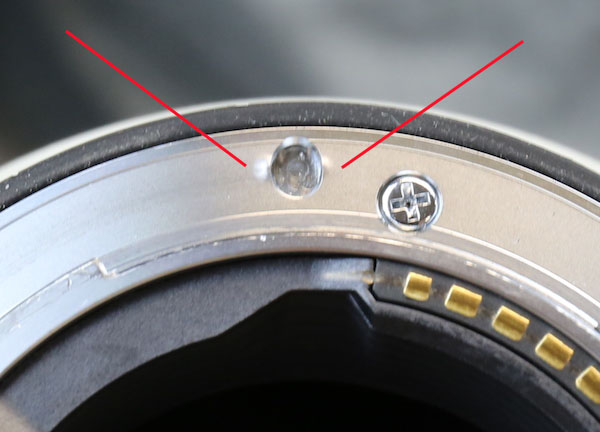
Before we start I’ll show you one close up of something we’re seeing fairly frequently with this lens: some wear around the locking pin. These are rental lenses, of course, but all fairly new to the fleet. Most of ours now have some raised metal (red lines) on either side of the lock-pin slot. This isn’t causing any problems yet, but if you have one, you may notice the same thing. If it worsens it may could cause some rotational looseness or a bit of mounting resistance, but we haven’t seen that yet.
Lensrentals.com, 2017
We started the teardown from the back. The rear baffle comes off after removing a couple of screws.
Lensrentals.com, 2017
The bayonet mount comes off after removing four screws. It has a relatively robust rubber weather seal between the bayonet and the lens.
Lensrentals.com, 2017
Under the bayonet, there’s a set of shims in two locations. This would correct lens tilt at the mount.
Lensrentals.com, 2016
One other thing we found a bit unusual: the PCB is small and only has one large flex connecting it to all the camera’s electronics. A typical 70-200 f/2.8 would have at least half-a-dozen connections. We speculated that the lens must do a lot of processing internally rather than using the camera’s electronics. Given that there weren’t a lot of chips on the PCB, we thought we might find another PCB down in the lens, like Nikon lenses have.
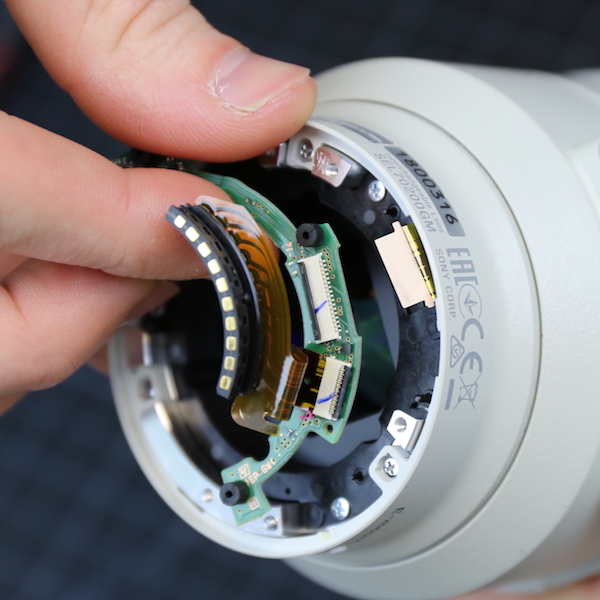
Lensrentals.com, 2016
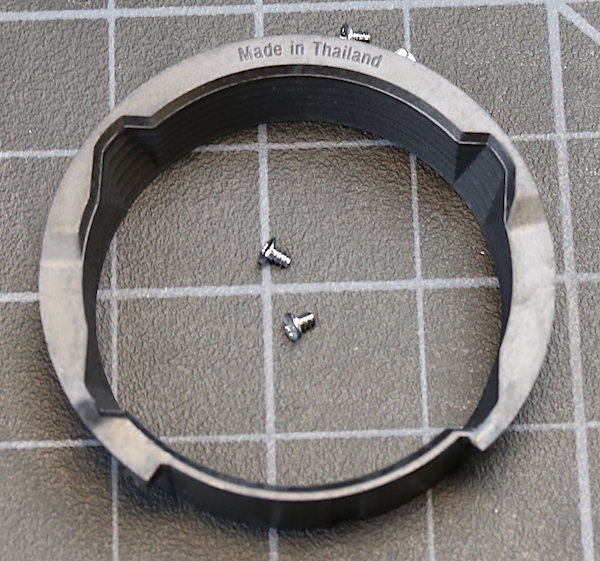
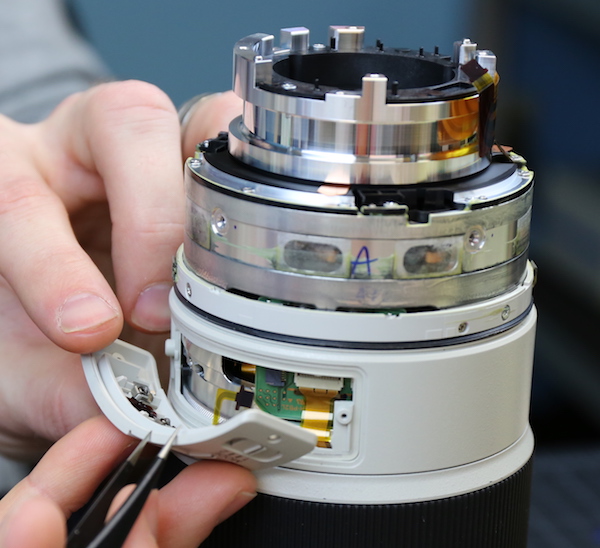
The next disassembly step is to remove the built-in tripod ring. This is actually one thing some of you might want to do someday if you get some sand or grit in it. We start by removing the mount foot plate, which as you can see is a (very slight) modification of the plate Nikon 70-200’s use. It does appear thicker and more robust than the Nikon version, though, which is a good thing.
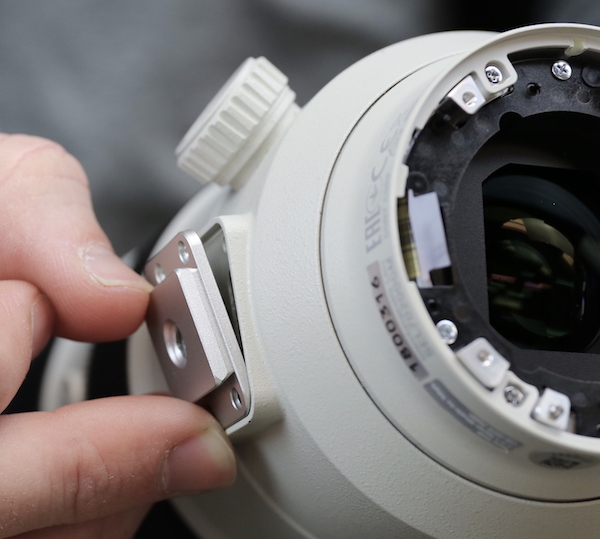
Lensrentals.com, 2016
Once the plate was off, we removed the four tripod collar rollers through the opening the plate was in.
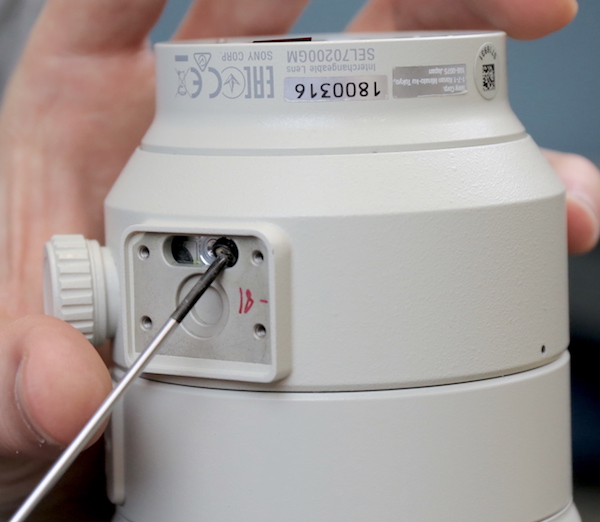
Lensrentals.com, 2016
These are nice, solid rollers with thick nylon collars, built as they should be.
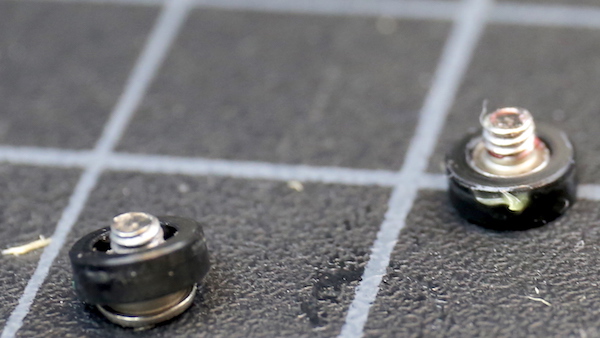
Lensrentals.com, 2016
Once those are removed, the tripod collar slides off of the back of the lens.
Lensrentals.com, 2016
You can see thick lube around the inner barrel above, and there’s a generous amount in the collar too.
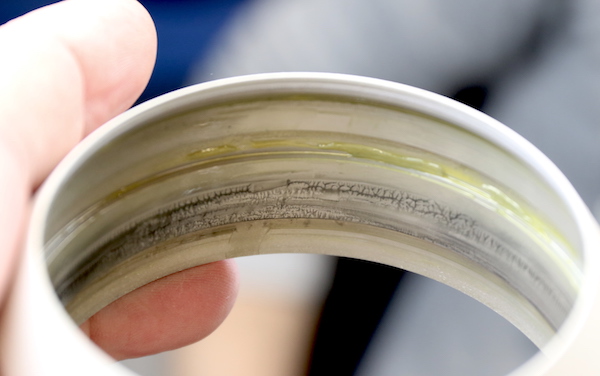
Lensrentals.com, 2016
With the tripod ring off we can see some of the inner barrel. There were some taped over windows we peeked under and you can see the coils of the image stabilization system in there. Also note that there are nice thick environment resistance seals at both the top (white) and bottom (black) of the tripod ring assembly mount. You’d think that would keep sand and stuff out of there. It certainly seems like it should. But no, it doesn’t; not all the time.
Lensrentals.com, 2017
Speaking of that top environmental resistance seal, it’s attached to the outer rear barrel which gets removed next.
Lensrentals.com, 2017
The rear inner rear barrel is exposed now, showing a good look at the single flex that carries all of the lens’s electrons. You heavy metal fans are pleased to see all this thick metal making up the inner barrel, I know.
Lensrentals.com, 2017
The switch panel comes off next, after removing screws and disconnecting a couple of flexes. As you’d expect, there’s a rubber gasket to seal this area too.
Lensrentals.com, 2017
With that removed the mid barrel slides right off. Notice another rubber seal on the forward end of the middle barrel where it tucks under the zoom ring.
Lensrentals.com, 2017
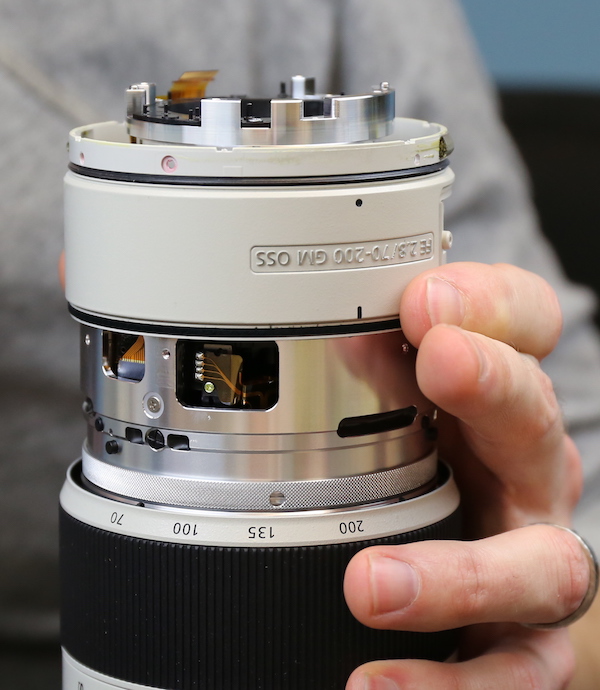
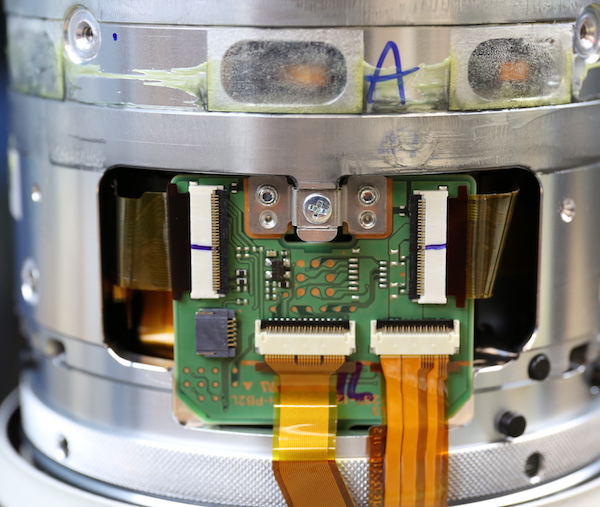
The inner barrel at this level has an interesting feature — windows that allow access to things like a zoom position sensor.
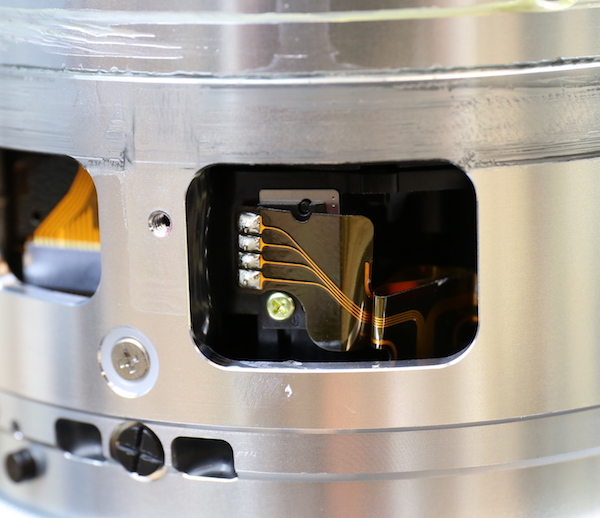
Lensrentals.com, 2017
On the other side is a window over the secondary PCB we thought would be in here somewhere. We thought this was a nice feature giving access to these areas without requiring further disassembly. We should have realized there was a good reason to provide access to areas without requiring further disassembly. But we didn’t.
Lensrentals.com, 2017
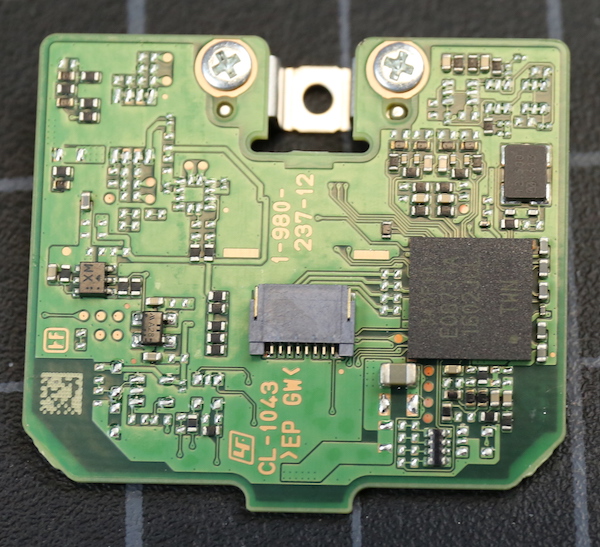
This PCB has to be removed, obviously. The underside view shows it apparently has more processing power than the main PCB we removed earlier.
Lensrentals.com, 2017
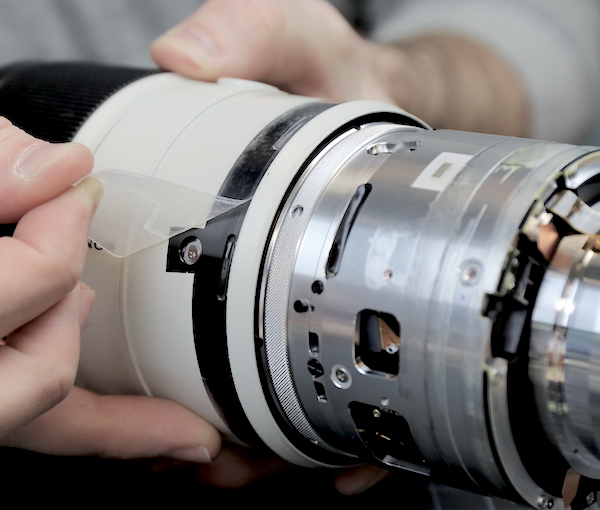
The next step was to take the rubber off of the zoom ring. Underneath the rubber, the various slots and holes in the ring are covered by a thick layer of tape, again to provide environmental resistance.
Lensrentals.com, 2017
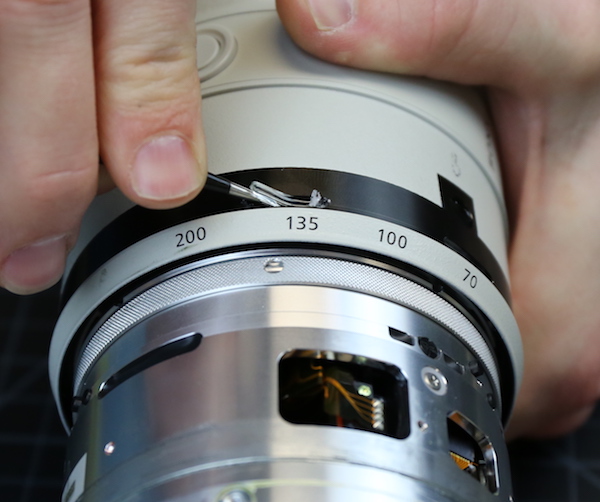
After removing the three ring attachment collars (you can see the screw for one under the removed tape above) we expected the zoom ring to slide right off. Not so much. We tried all the secret codes of rotation and nothing worked. Finally, Aaron noticed there was some silicone glue placed in the various slots around the lens, either as further sealing or to just irritate us, we’re not sure which. As you’ll see, about half of this lens by volume is silicone glue. (OK, I’m exaggerating a little, but you didn’t have to pick it all out.)
Lensrentals.com, 2017
Once we got this out we could slide the zoom barrel off the lens. As an aside, have you wondered what that small silver ring with the rough grippy surface near the zoom ring is yet? We sure did. We’d never actually seen one of those before and had no idea what it would be. Stick around and you’ll understand why we named it The Southern Fairy Tale Ring.
But back to where we are. With the glue removed the zoom ring came right off. Don’t worry, we have plenty of replacement glue. And we needed it because Sony just loves this stuff, it’s all through the lens. It probably does help with weather resistance, but it makes it a pain to work on.
Lensrentals.com, 2017
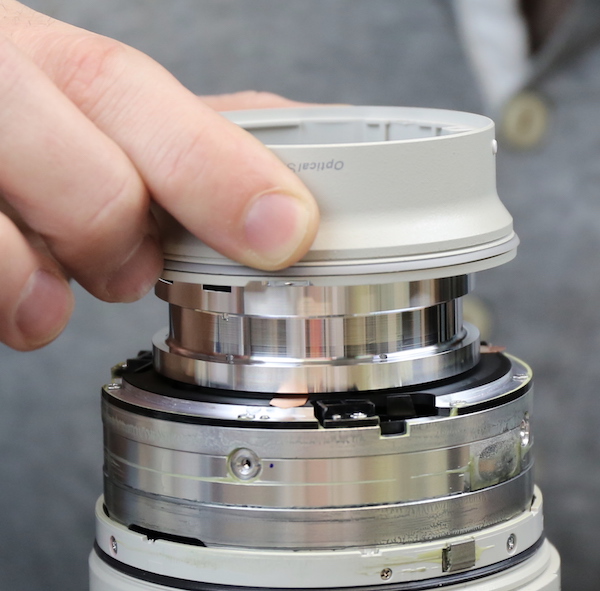
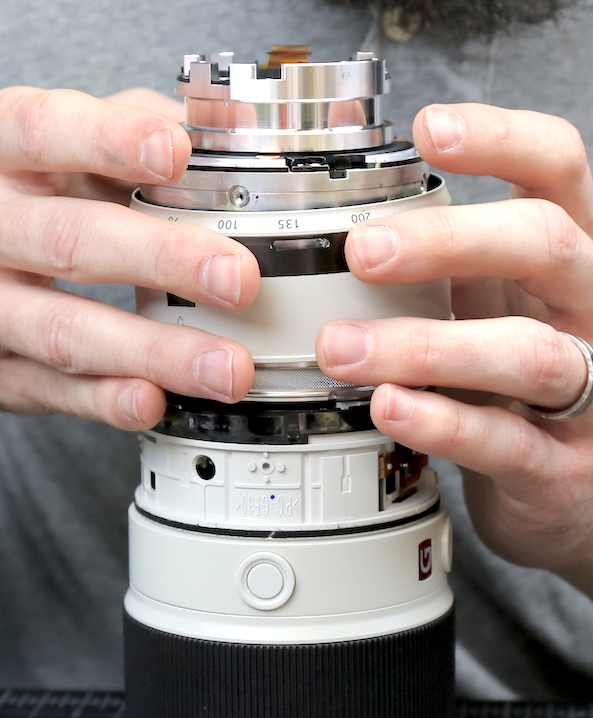
Looking at the lens at this point, it seemed pretty evident that silver ring with the grippy surface was supposed to come off next.
Lensrentals.com, 2017
But it didn’t want to. Finally a combination of picking out more glue from under the ring, adding some glue softener, and Aaron’s really strong grip and realizing it was a reverse-threaded ring got it moving. But we spent about 30 minutes looking at basically this picture and trying one thing after another.
Lensrentals.com, 2017
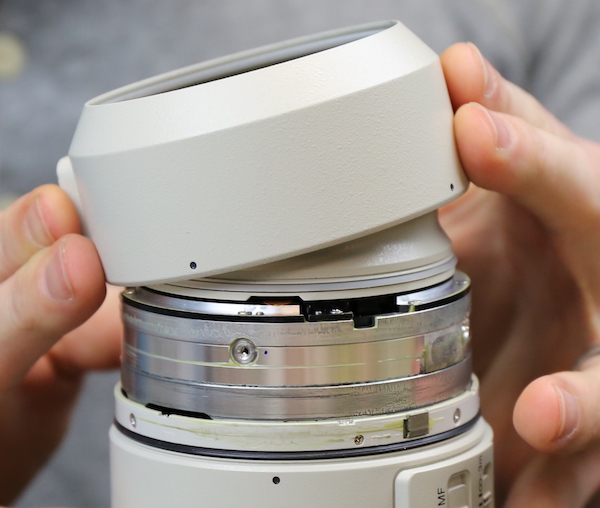
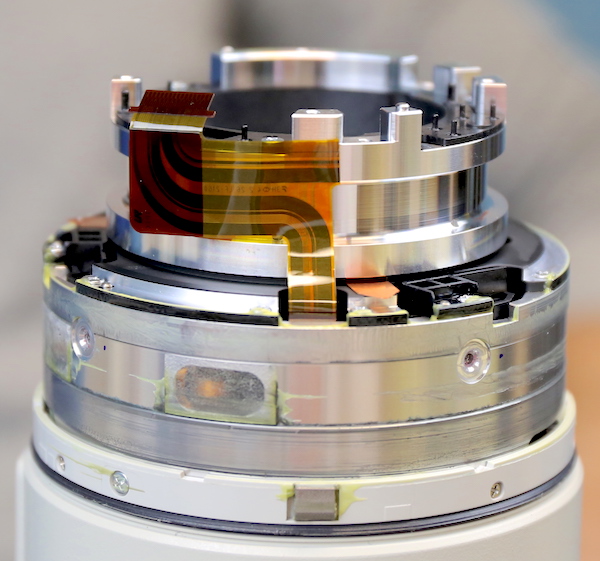
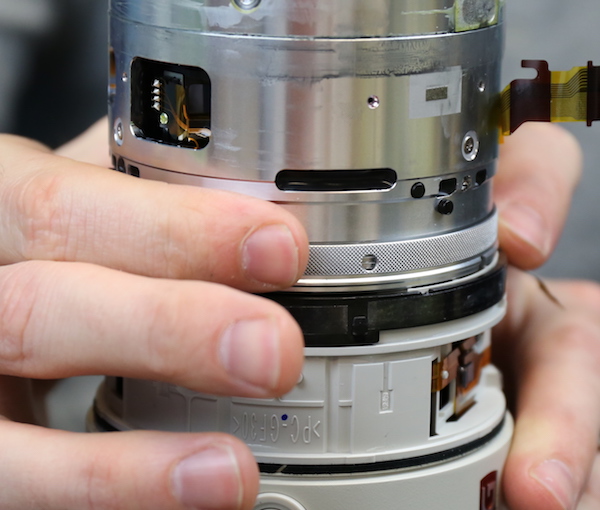
A bit to our surprise, we discovered our ring was a lock ring that held the two halves of the lens together.
Lensrentals.com, 2017
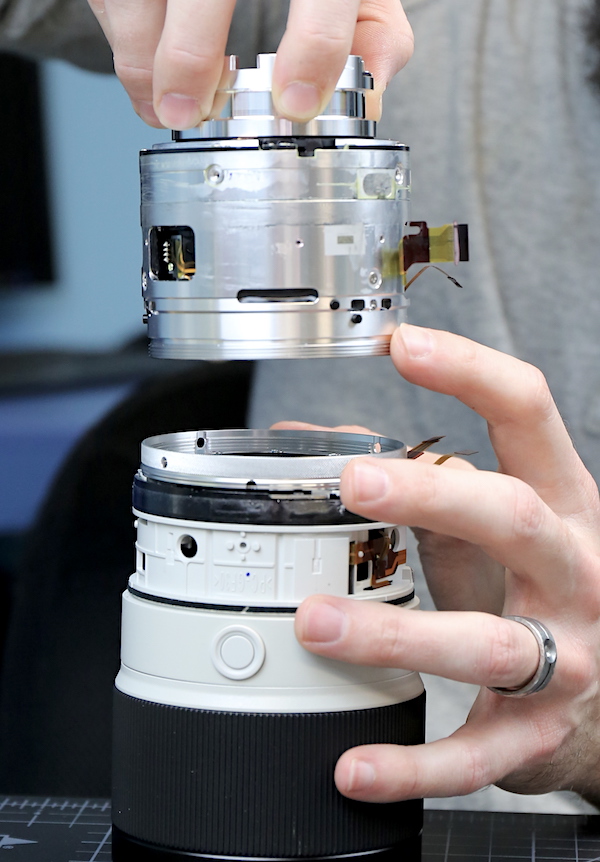
Here’s a view of where the lens divides; the bottom (mount) half is the one containing the aperture ring.
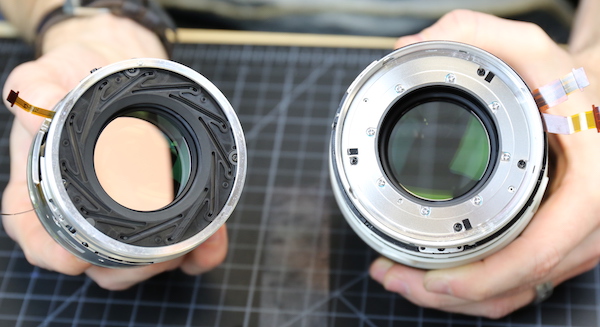
Lensrentals.com, 2017
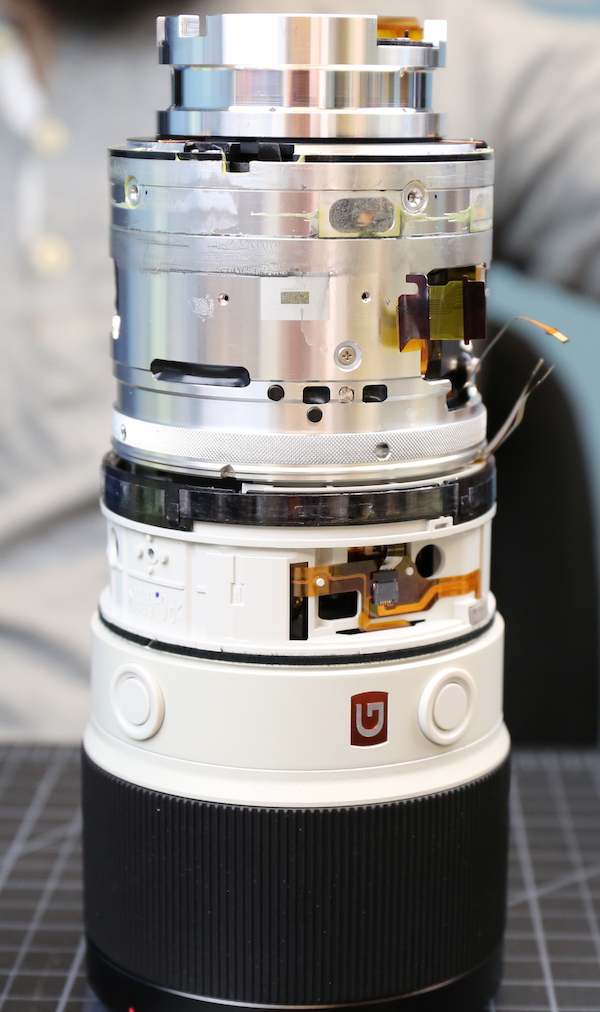
Here’s a side view.
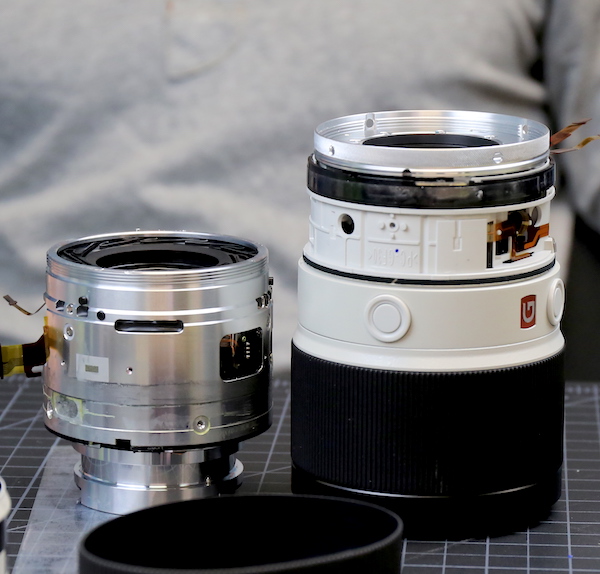
Lensrentals.com, 2017
We knew this lens had a problem focusing, but weren’t sure if it was with the front or back focusing assembly. We were kind of in the mood to look into the back part, mostly because that part looked more familiar to us. So that’s what we did. First, the inner light baffle was removed.
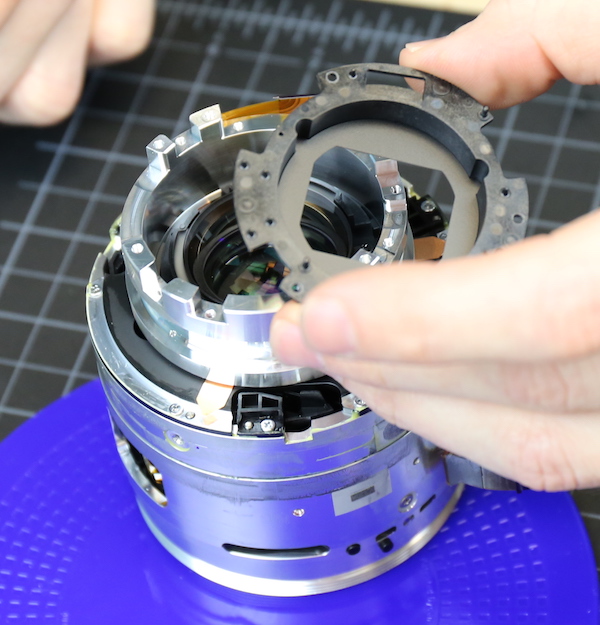
Lensrentals.com, 2017
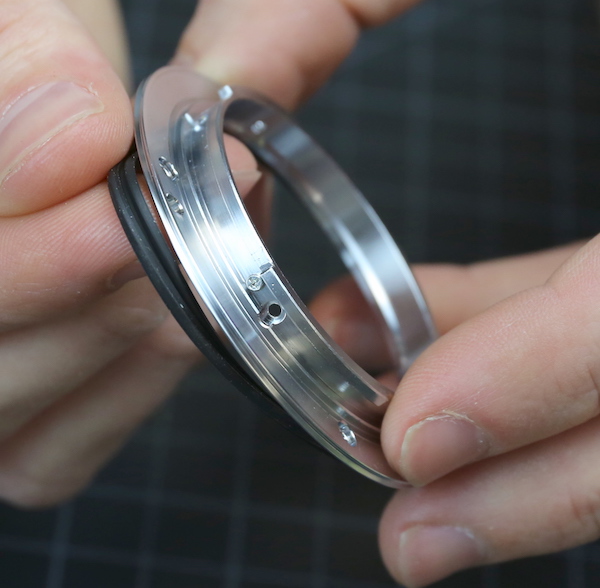
The next lens element was held in place by three screws and was obviously not a centering element, so it was removed next. You can see there are three copper shims which are under it; they obviously can be inserted from outside the barrel. Since these were all 0.15mm thickness, we assume they were for spacing only, not for tilt adjustment.
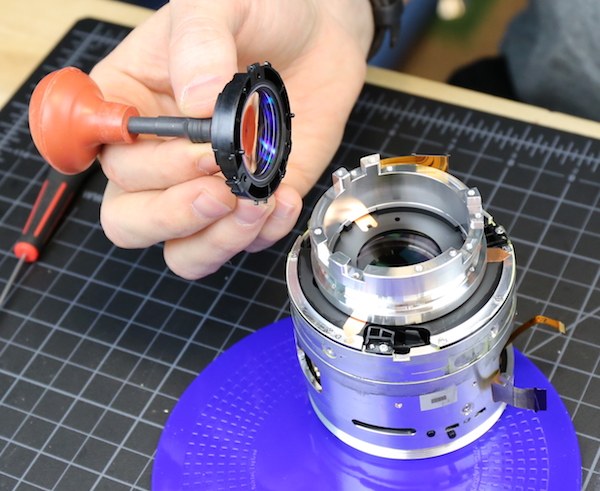
Lensrentals.com, 2017
Removing a set of 6 screws and two pins let us take the rear inner barrel off the assembly. We could have left the lens element above in place and done this, but, well, it’s a tear-down and all. You can see this is some seriously solid metal back here.
Lensrentals.com, 2017
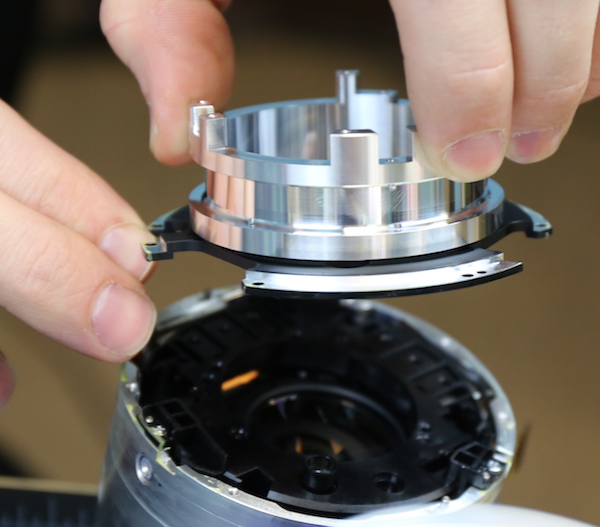
Now the big image stabilizing unit is exposed, and we can remove it. (Just to be clear, we could have done all of this rear disassembly without separating the lens.)

Lensrentals.com, 2017
Lensrentals.com, 2017
In a lot of lenses, the stabilizers are rather delicate and fragile things. This one is as fragile as a defensive tackle; it’s massive with thick metal plates and rods. I doubt this will be the first thing that breaks if you drop the lens.
Lensrentals.com, 2017
Interestingly, the IS unit is shimmed and the shims were not the same thickness, so the IS unit is being adjusted for at least tilt and perhaps spacing. That’s not unheard of, but not very common either.
Lensrentals.com, 2017
It probably needs to be a hefty unit because the stabilizing element itself is a large, aspheric doublet (blue line). Again, something kind of different from Sony.
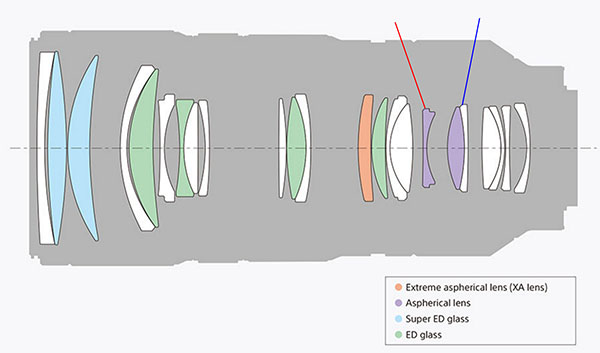
Image courtesy Sony USA, labels added.
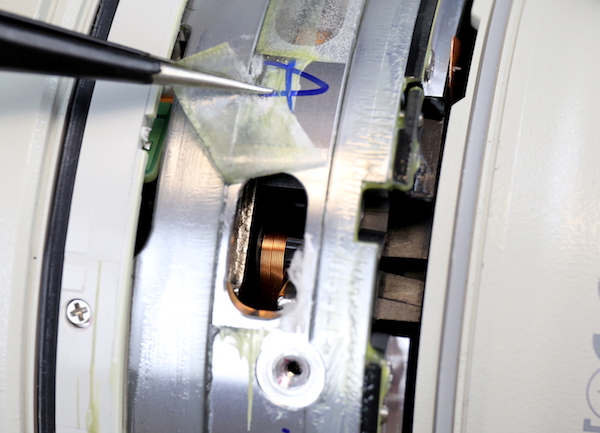
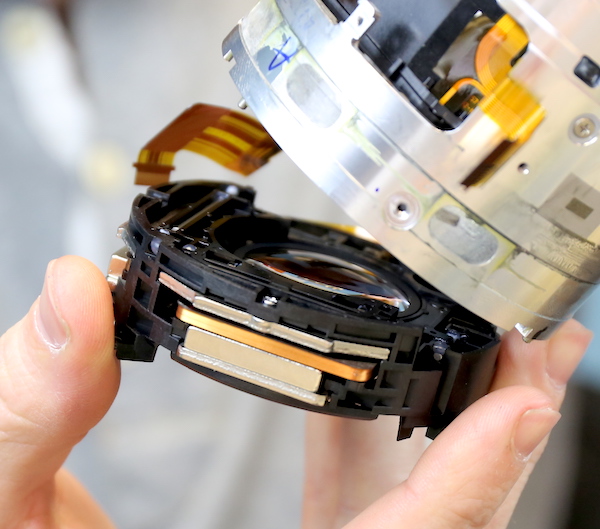
With the IS unit out of the way, we can look down on the top of the rear focusing group.
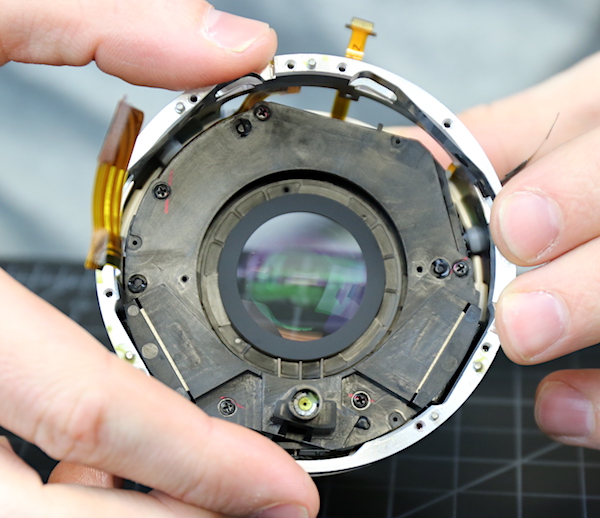
Lensrentals.com, 2017
The small, raised, yellow screw you probably noticed in the image above actually adjusts the vertical rod that the electric focusing motor slides up and down on. You can see in the closeup below that it’s eccentric; turning it would move the rod a bit at this end.
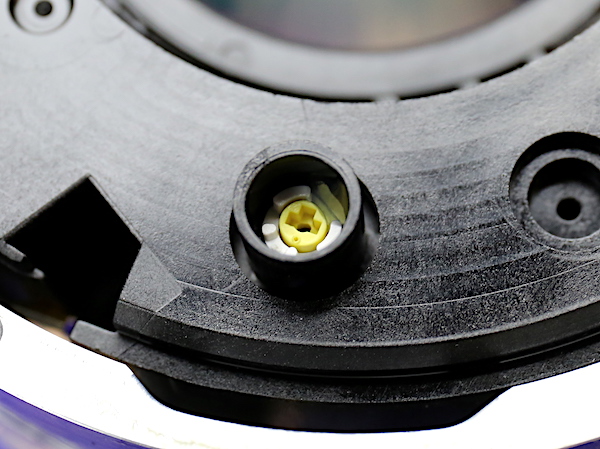
Lensrentals.com, 2017
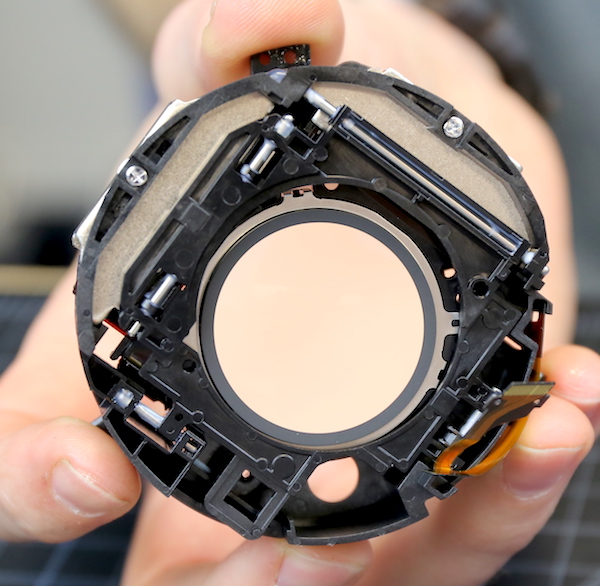
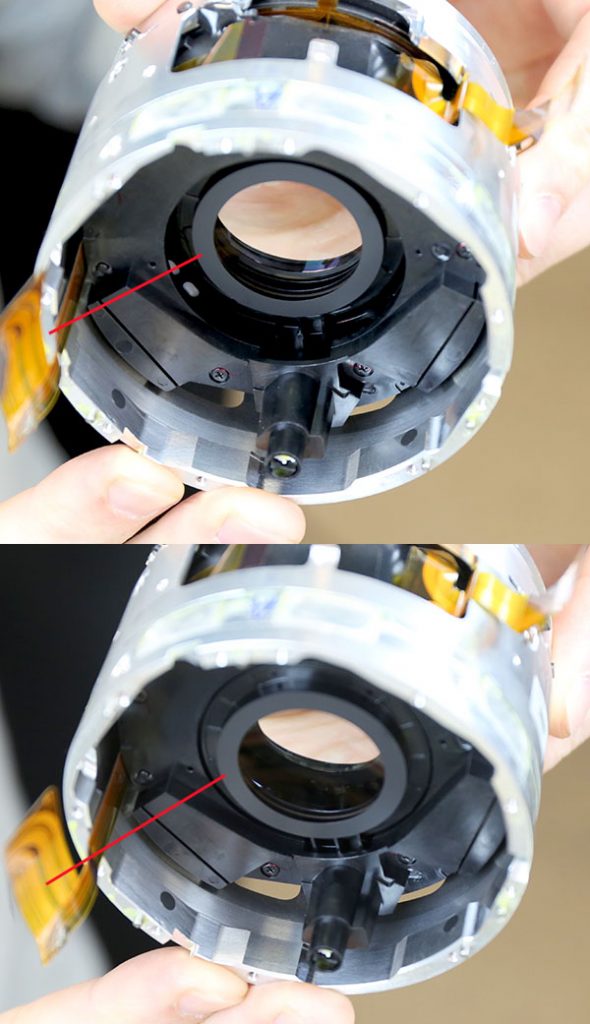
One possibility was the drop had knocked the rod out of position and the electronic motor wasn’t sliding properly. But the element (red lines) moved very smoothly through its full range, so that didn’t seem to be the problem. We had assumed this was basically a compensating group for close focus, but the amount of travel makes us rethink that. It may be a more active participant in focusing than we realized.
Lensrentals.com, 2017
So, now nearly 3 hours into this teardown (3 hours is usually the time it takes to complete a teardown and reassemble the lens) we did something we never had done before. No, not break into tears – we took a snack break. What we should probably have done was quit, put the damn thing back together, and sent it in to Sony for them to tell us it would cost slightly more to repair it than it would to buy a new lens.
That’s what we should have done. But Aaron and I, we’re stubborn; and overconfident.
So, if you want to see the front half of the lens disassembled; if you want to see if we actually figured out how to repair it; if you want to see if we just gave up and started drinking heavily; well you’ll have to wait for Part II of this disassembly next week. Because this is already a long article and, as Cowboy Mouth said, “We’re a little more than halfway there.”
Or, as Churchill said, “Now this is not the end. It is not even the beginning of the end. But it is, perhaps, the end of the beginning.”
So What Did We Learn So Far?
- The Sony 70-200mm f/2.8 GM has a lot of solid construction with heavy metal barrels and proper weather sealing.
- The rollers, cams, and screws seem appropriate for what they do. They aren’t over-engineered by any means, but certainly adequate.
- The lens is designed to take apart in the middle. That’s really different for a 70-200 f/2.8, but we’ve seen some super telephoto lenses that are similar. I doubt it’s going to break in half if you drop it. Or more to the point, if you drop it hard enough to break it in half, other stuff would be breaking too.
- There’s a lot of impressive engineering in here, but not what we (from a take-it-apart perspective) would call elegant. It looks similar to a Nikon design, which isn’t a bad thing, Nikon makes lots of great lenses. That are a pain to work on. Pain to work on often (but not always) translates into expensive to repair.
Roger Cicala and Aaron Closz
Lensrentals.com
February, 2017
Author: Roger Cicala
I’m Roger and I am the founder of Lensrentals.com. Hailed as one of the optic nerds here, I enjoy shooting collimated light through 30X microscope objectives in my spare time. When I do take real pictures I like using something different: a Medium format, or Pentax K1, or a Sony RX1R.
-
elektriker2007
-
Prefer Anonymous
-
Jay Dee
-
mtnman1984
-
Ian Goss
-
Cesjr86
-
Patrick Chase
-
Looney11
-
Barbu Mateescu
-
Sixpm
-
Roger Cicala
-
Arpe
-
Jim H
-
Vanitas Foto
-
Roger Cicala
-
Damir ?olak
-
Roger Cicala
-
Carleton Foxx
-
Martti O Suomivuori
-
Volker Bartheld
-
Sixpm
-
Athanasius Kirchner
-
Roger Cicala
-
Jay Philip Williams
-
Slingers
-
Slingers
-
Jeff Sellenrick
-
geekyrocketguy
-
Patrick Chase
-
Patrick Chase
