Beauty photography can seem a bit complicated on the surface, but it’s not nearly as difficult as people sometimes make it. With a hyper focus on skin and makeup, beauty photography provides a platform for a photographer to show their skills in lighting as well as in retouching. Afterall, lighting is most important when it’s focused on a macro level. With over 100 different beauty shoots in the last year, I’ve been able to use it as a way to highlight my skills in lighting and retouching, while creating images that help complement my portfolio.
A critical reason why I started shooting beauty, was the collaborative effort. Shooting beauty photography has gotten me in touch with more creative makeup artists, hair stylists, and agency models than any other type of photography, allowing me to develop contact lists and relationships for when I’m shooting the next commercial shoot that has little to nothing to do with beauty.
I’ll also preface this by saying I don’t consider myself an expert of this craft. It wasn’t until a year or so ago when I started experimenting with beauty work. And while I’ve shot over 100 different beauty photoshoots, and had the honor of being on set for some significant ad campaigns, I still think I have plenty to learn still but did want to take an opportunity to share what I have learned, to help those along who might just be starting out.
Where Camera is King
I’m not going to get into another battle about whether or not gear matters, but know that some critical pieces of gear are crucial when shooting beauty work. Perhaps the most important and useful tool when shooting beauty, from a camera standpoint, is resolution. In beauty photography, the high-resolution cameras like the Canon 5DS, Nikon D850, and Sony a7RIII are king. Particularly when paired with a macro lens like the Sony FE 90mm f/2.8 G Macro, Nikon 105mm f/2.8G Micro, or my personal favorite, Canon 100mm f/2.8L IS, the resolution gives you incredible cropping power, allowing you to turn a full face shot into a macro shot highlighting a single detail. This is incredibly important because while you may want a macro shot highlighting lips, the modeling agencies will only have a use for it if you have something full faced as well, and it’s important to keep them happy as well.
As always, these suggestions come with some caveats. While resolution and a macro lens are important, they’re not a complete requirement when shooting beauty work. For the first six months of my beauty work, I was shooting with a Canon 85mm f/1.2L II and Canon 5d Mark III. The resolution of the Canon 5DS, Nikon D850 and Sony a7rIII is great, and it’ll only make the process more pleasant, but not a complete requirement. (I call this the gear discussion hyperbole, where when you say you should use a specific piece of gear, it must automatically be followed by someone saying “I can do it with less”).
Lighting Your Beauty Shoot
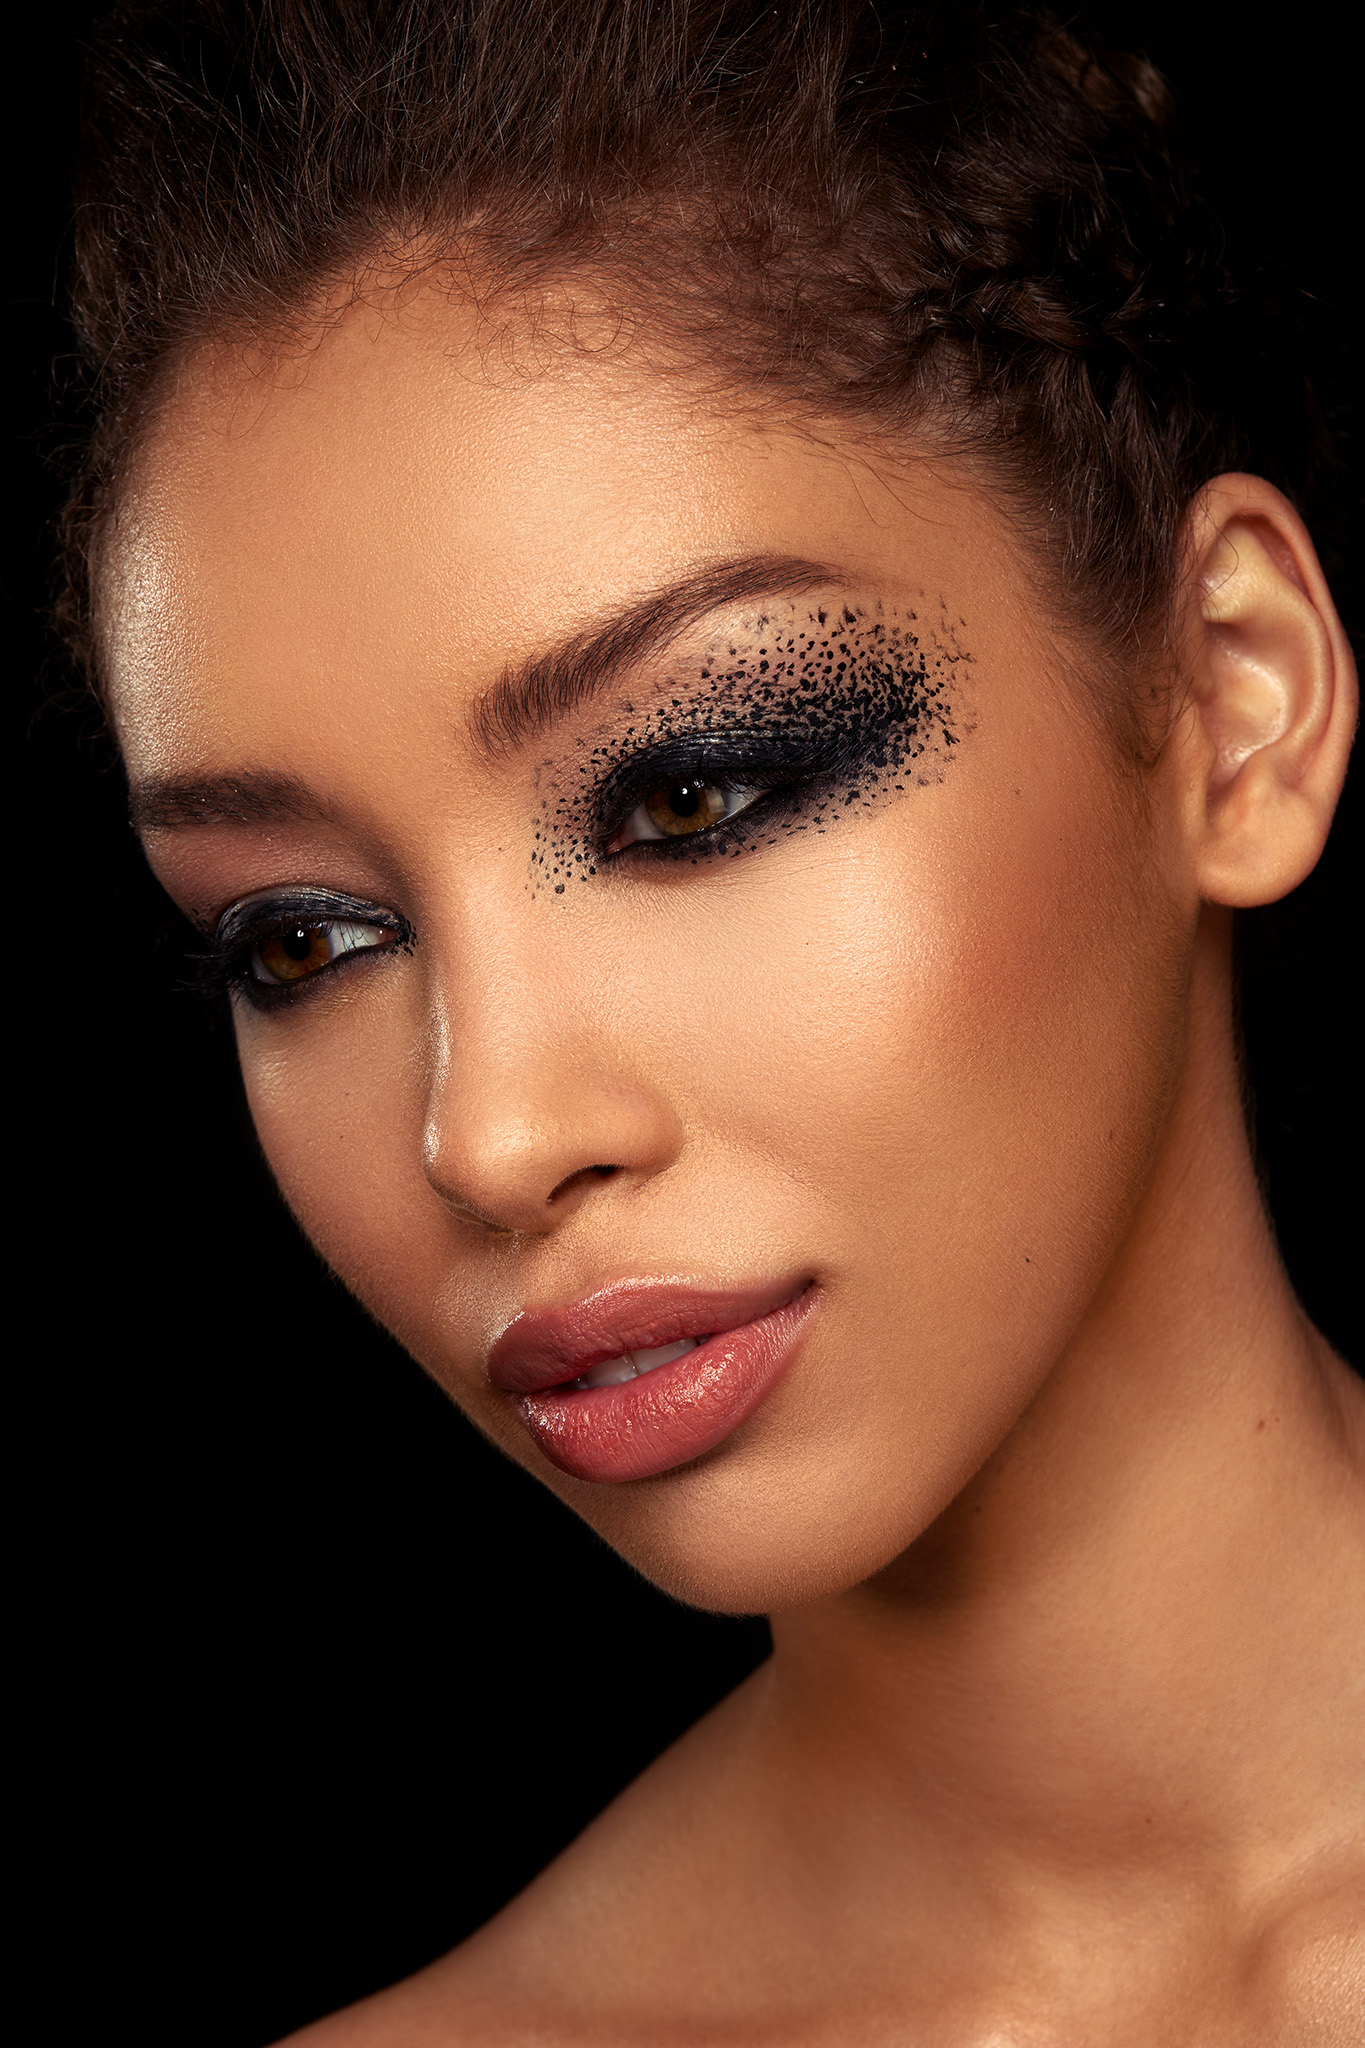
Lighting can be quite the challenge when shooting beauty work, but it’s quite easy if you stop and think about what your goals are. For me personally, I have three set goals when lighting a beauty shoot. With all portrait work, I want to make sure some light is in the eyes reflecting back into the camera, as otherwise you risk getting the ‘dead eye’ look. The second goal I have when lighting beauty work, is that I want some dimension in the lighting, creating gradients of lighting throughout the skin. These gradients of lighting will give your images a three-dimensional effect, and can easily be achieved by positioning your lighting at various angles and understanding your lighting ratios. The final rule for beauty lighting is to use lighting that is flattering to your subject; after all, this is beauty photography, right?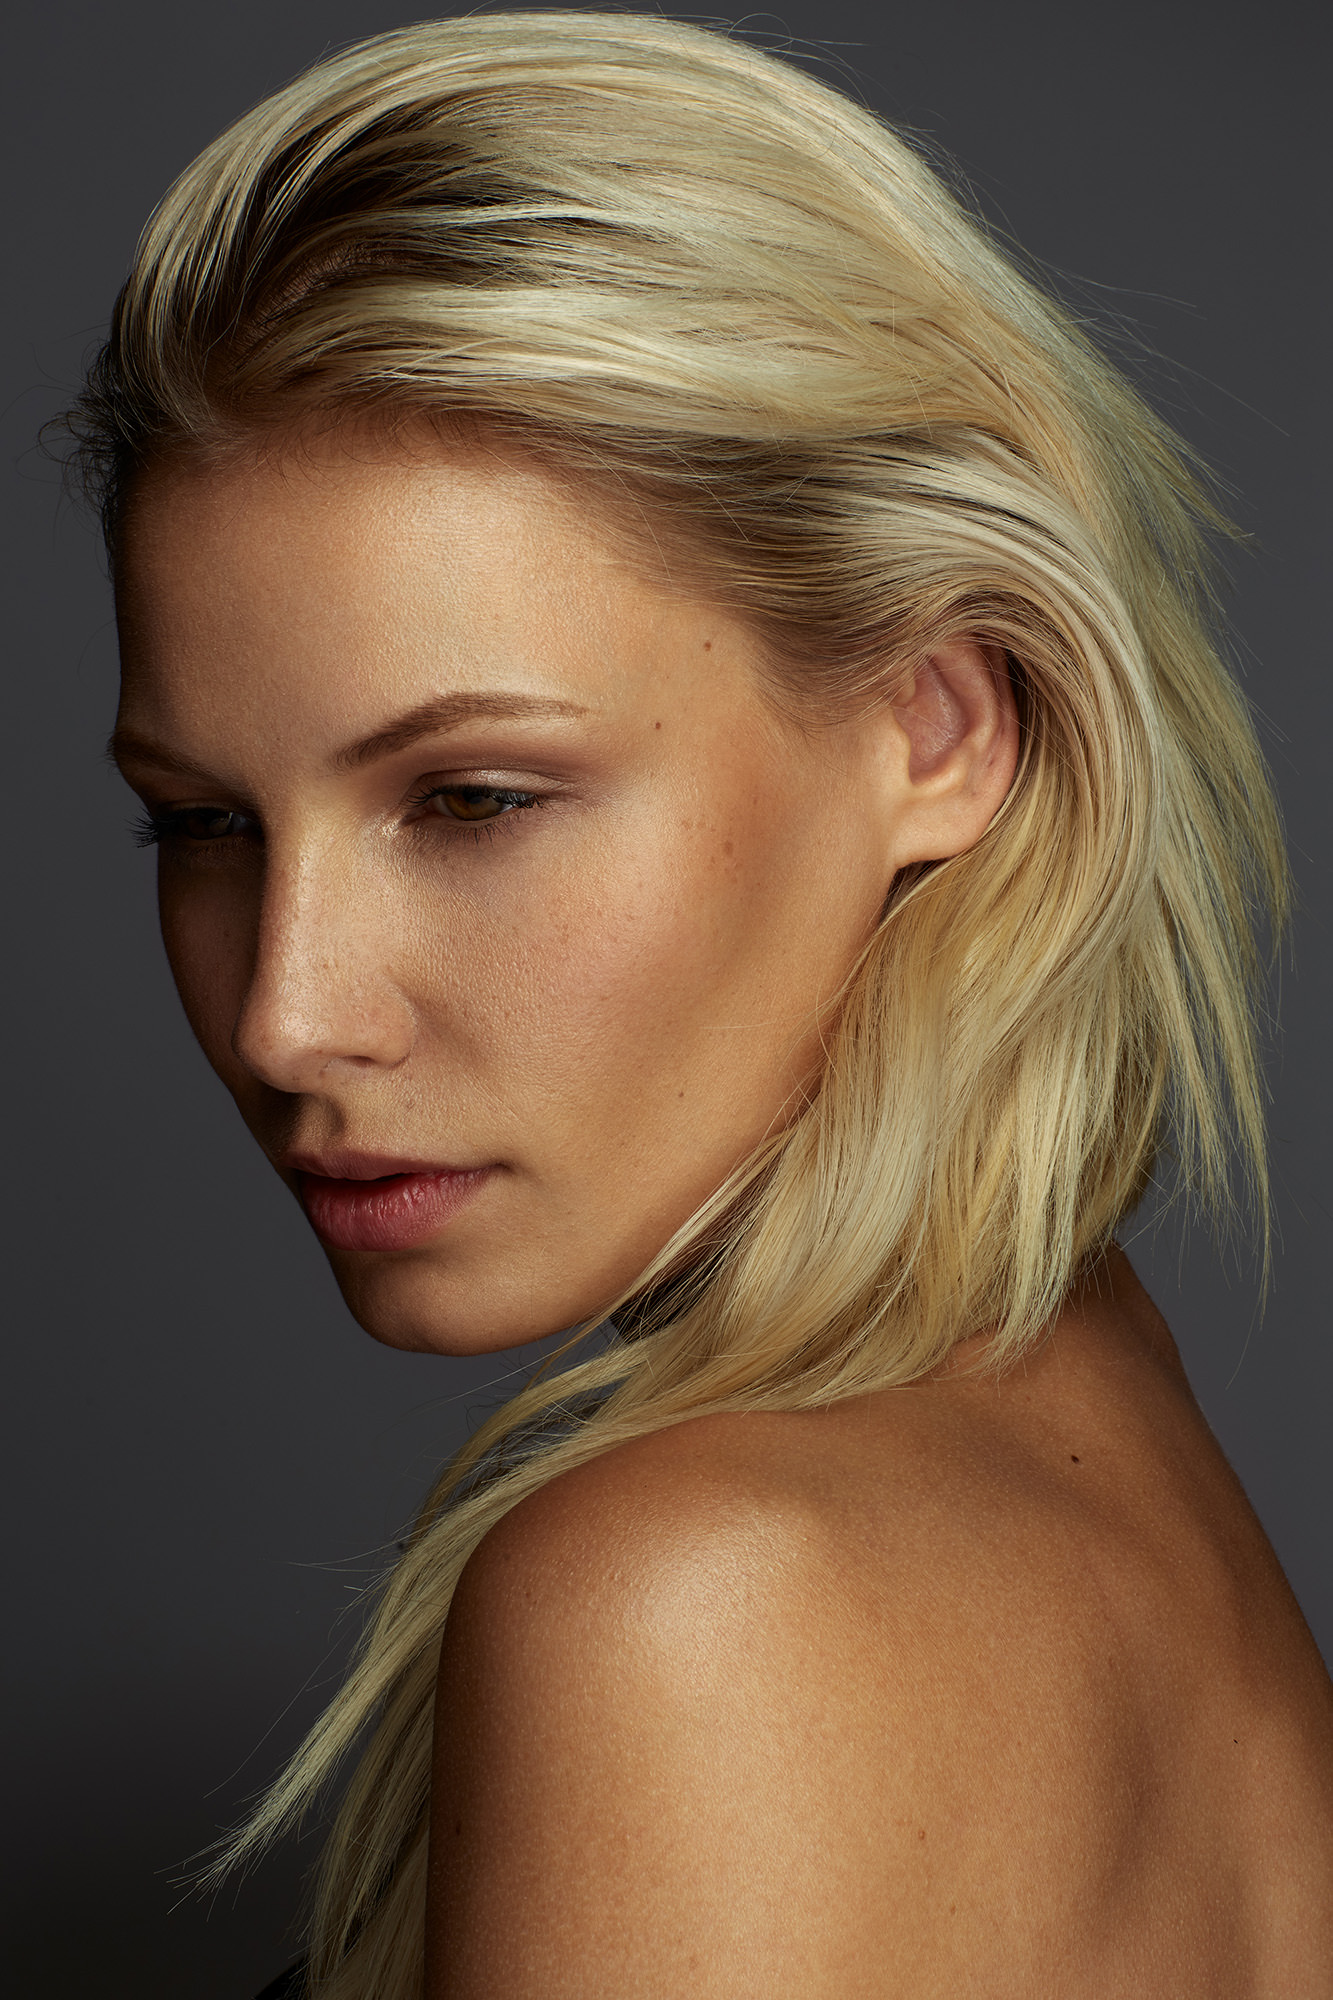
Adding Dimension to your Lighting
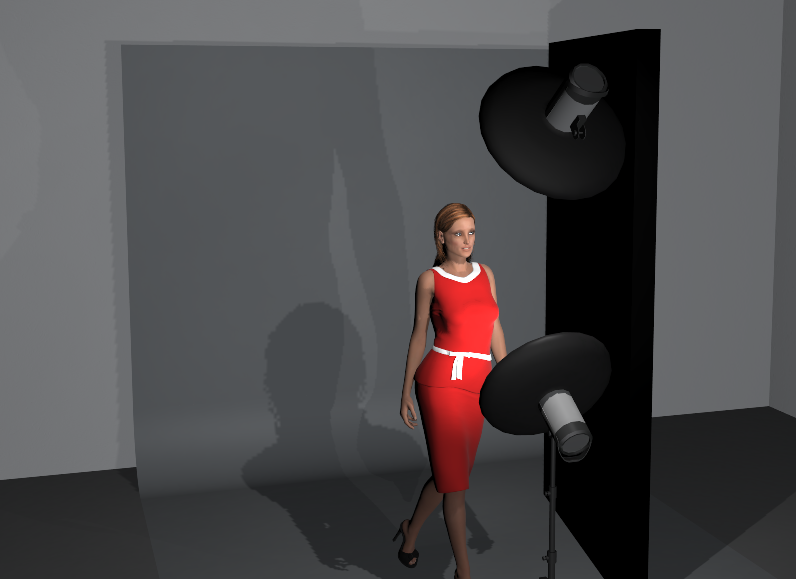
The first principle is easy, make sure you have a catchlight in the eyes, but how does one create dimension with their lighting? Well, I do it by using flags, in the same way I use lights, to create shadows instead of highlights. To use flags, all you need to know is an elementary understanding of lighting – dark colors absorbs light, light colors reflect light. This is the reason why Canon and Sony’s zoom lenses are painted white, which helps reflect light, and can be a big difference maker when shooting in the Sahara Desert for days at a time.
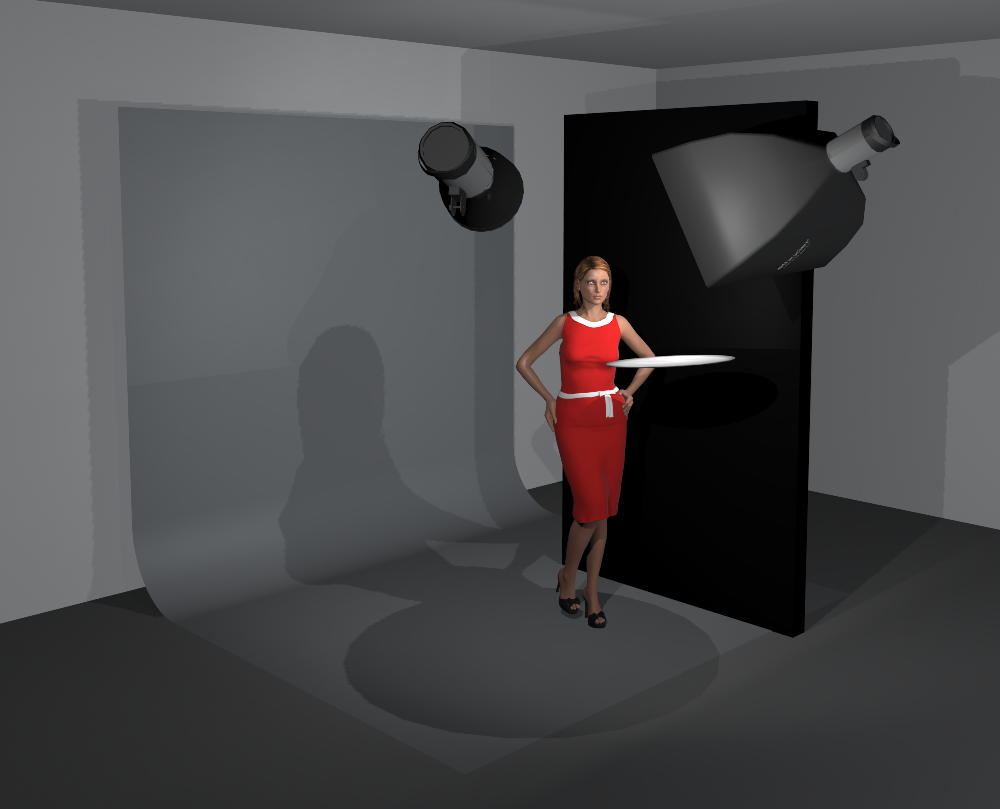
Using black flags can help control your highlights and shadows, giving you more dimension in your images. And this added dimension can be cheap. For example, most of my black flags are nothing more than a black posterboard purchased at a craft store for a couple of dollars.
But flags aren’t the only way to add dimension to your lighting. The same principles can be done by using grids, or by positioning your light at angles, and use feathering techniques to have better light control.
Finding Flattering Light
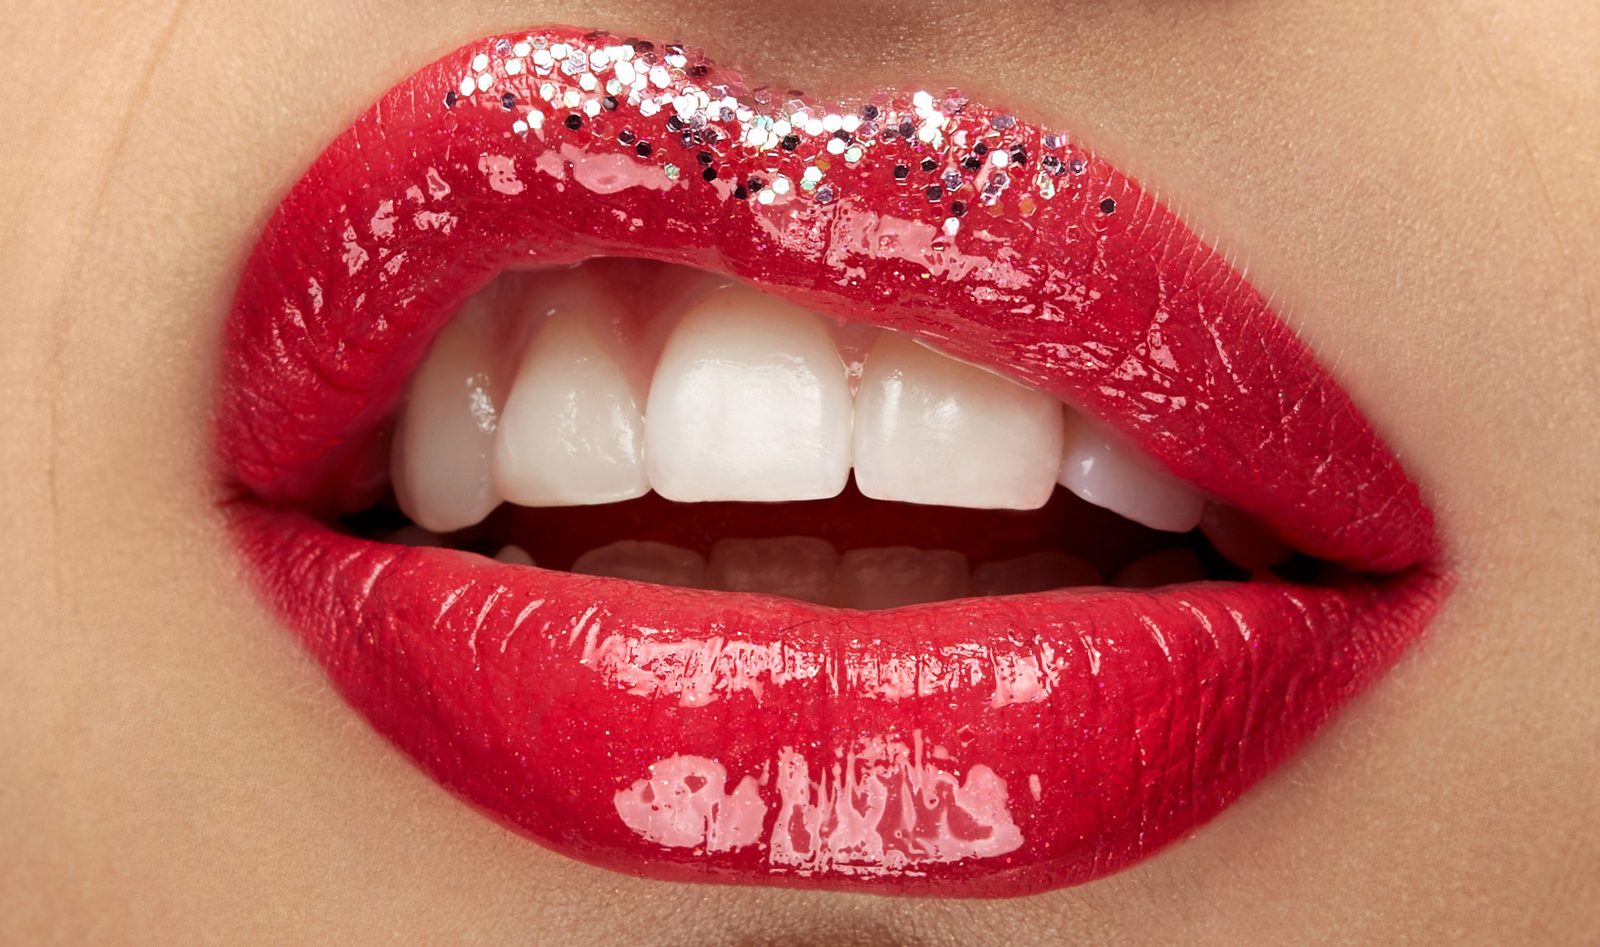
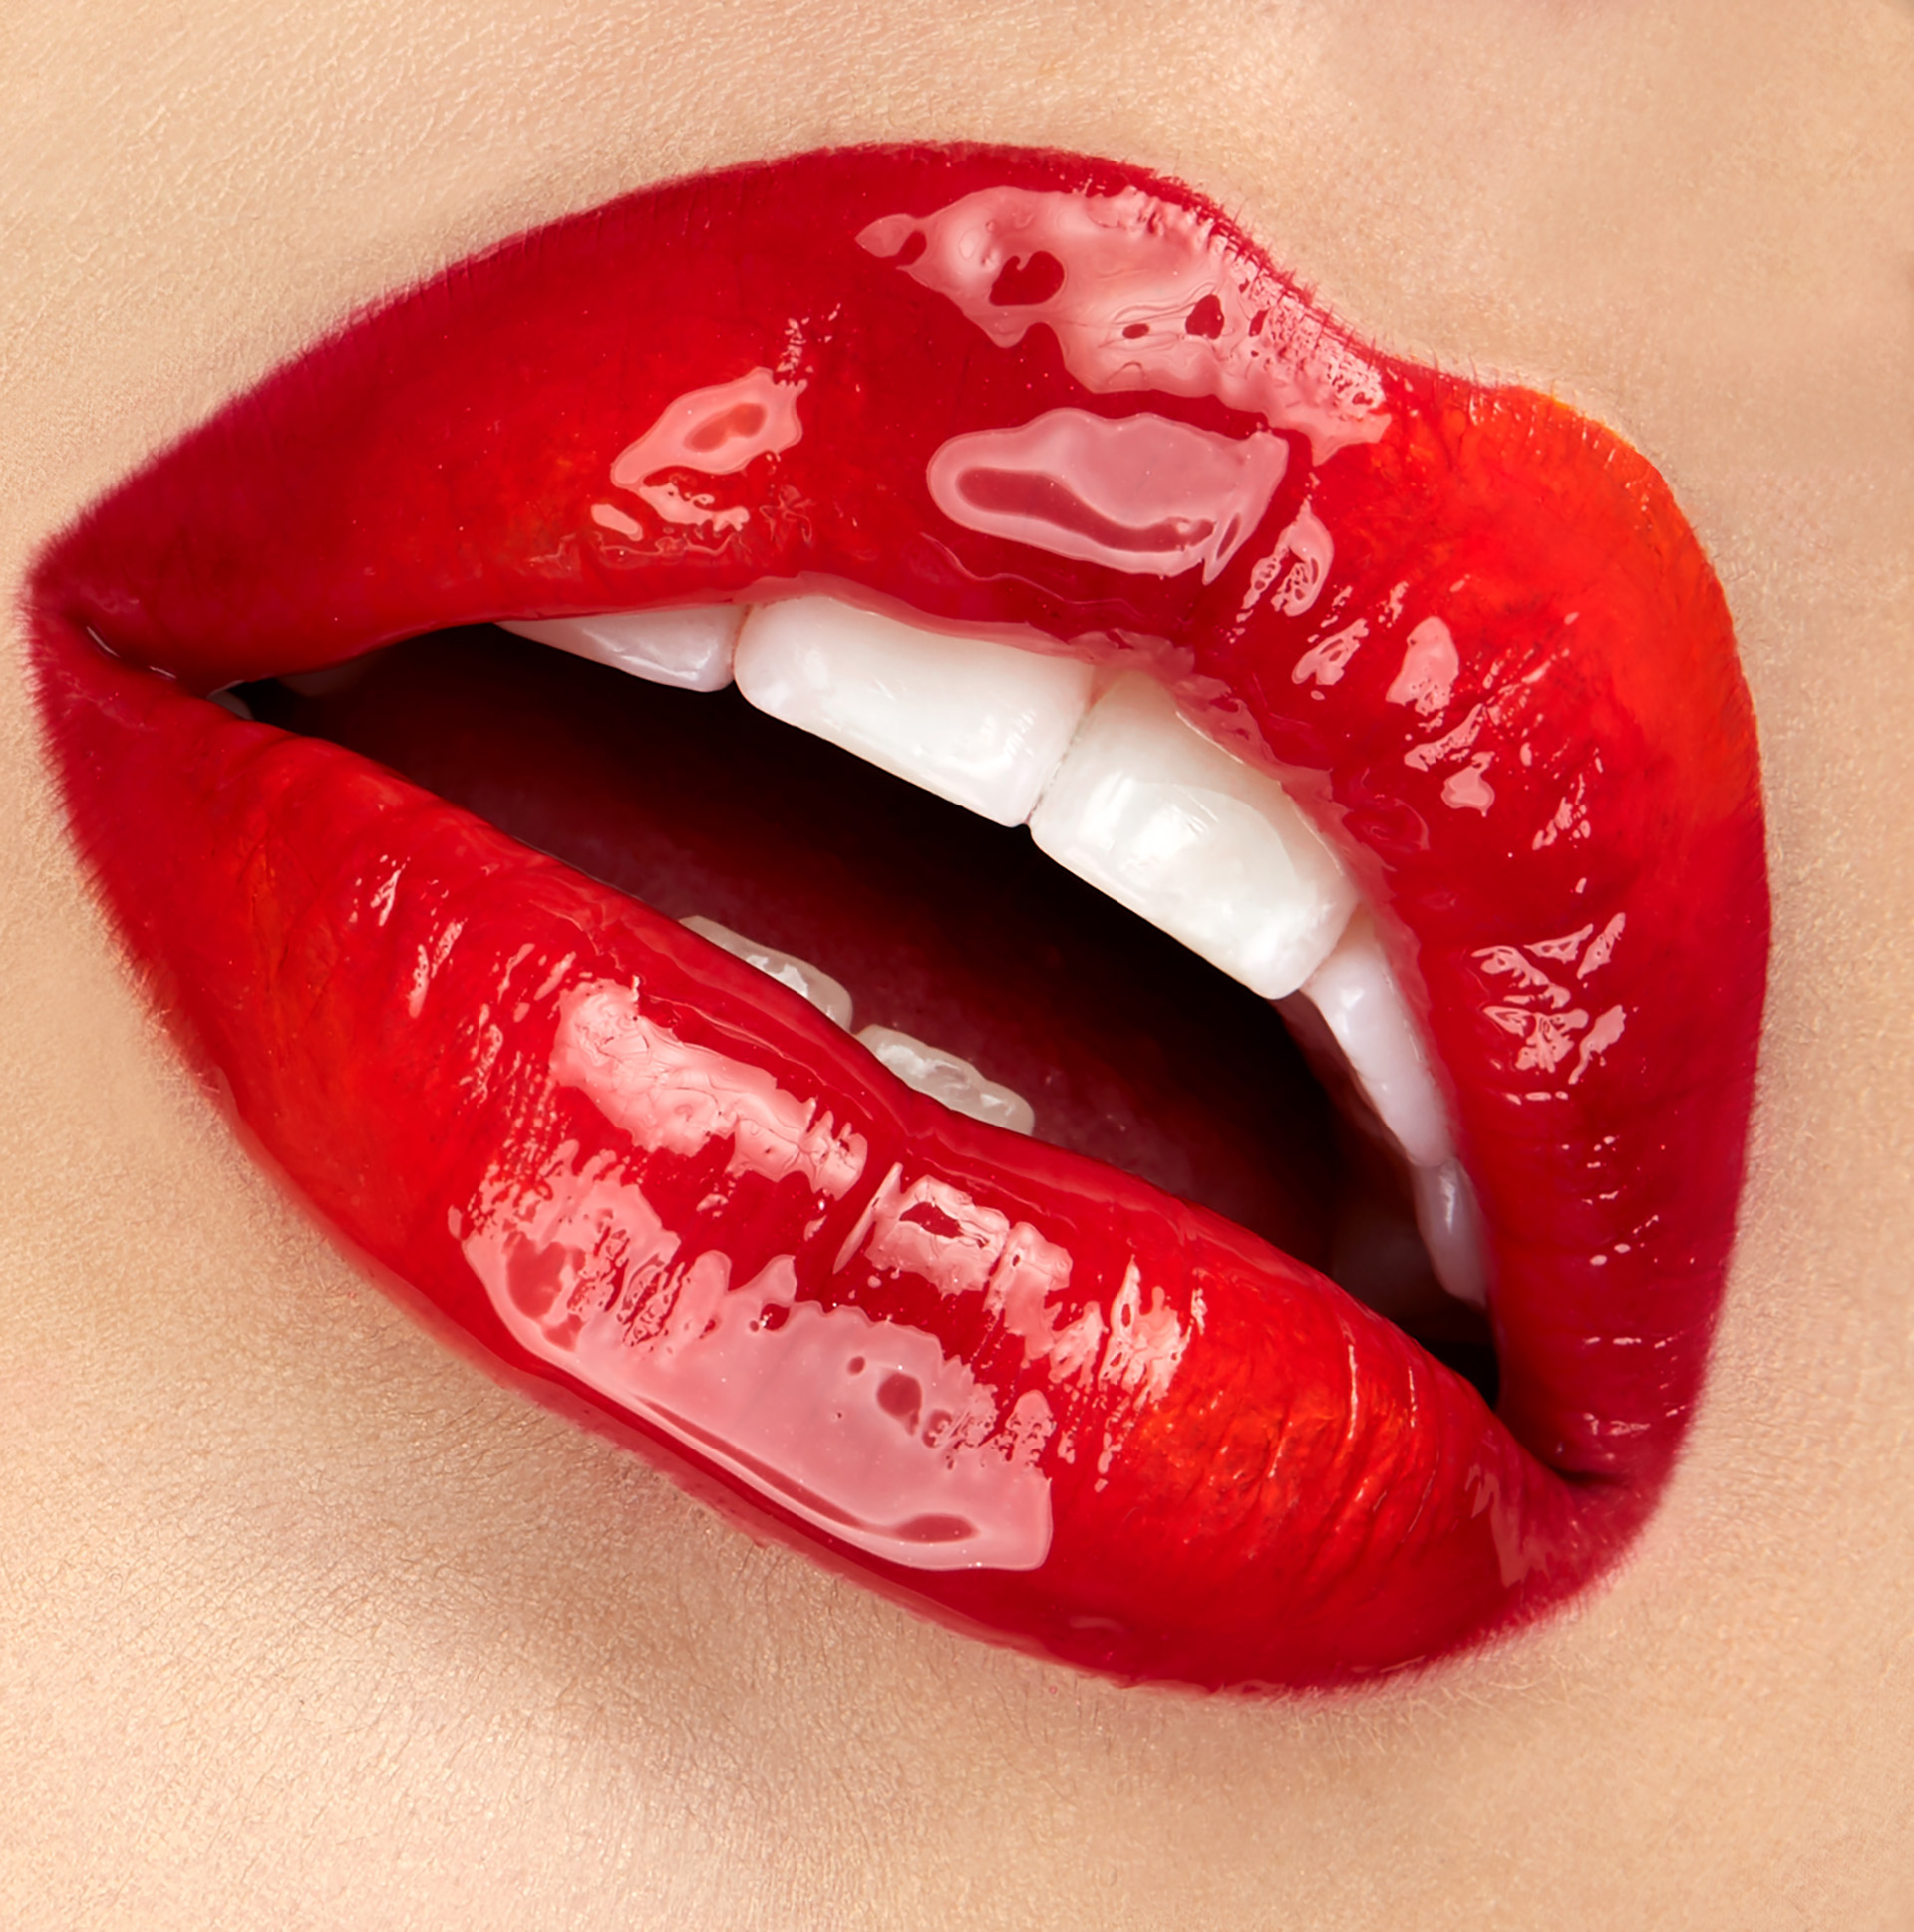
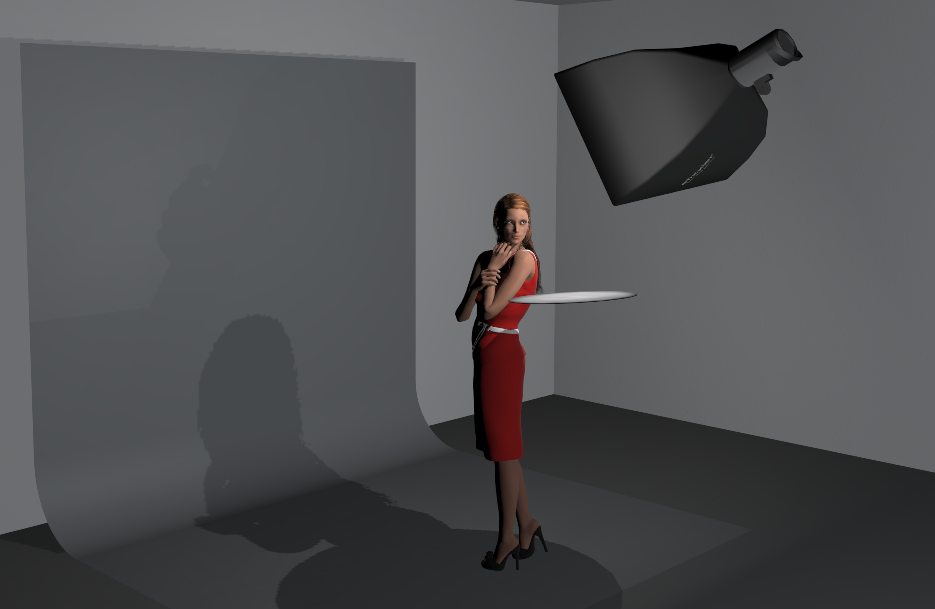
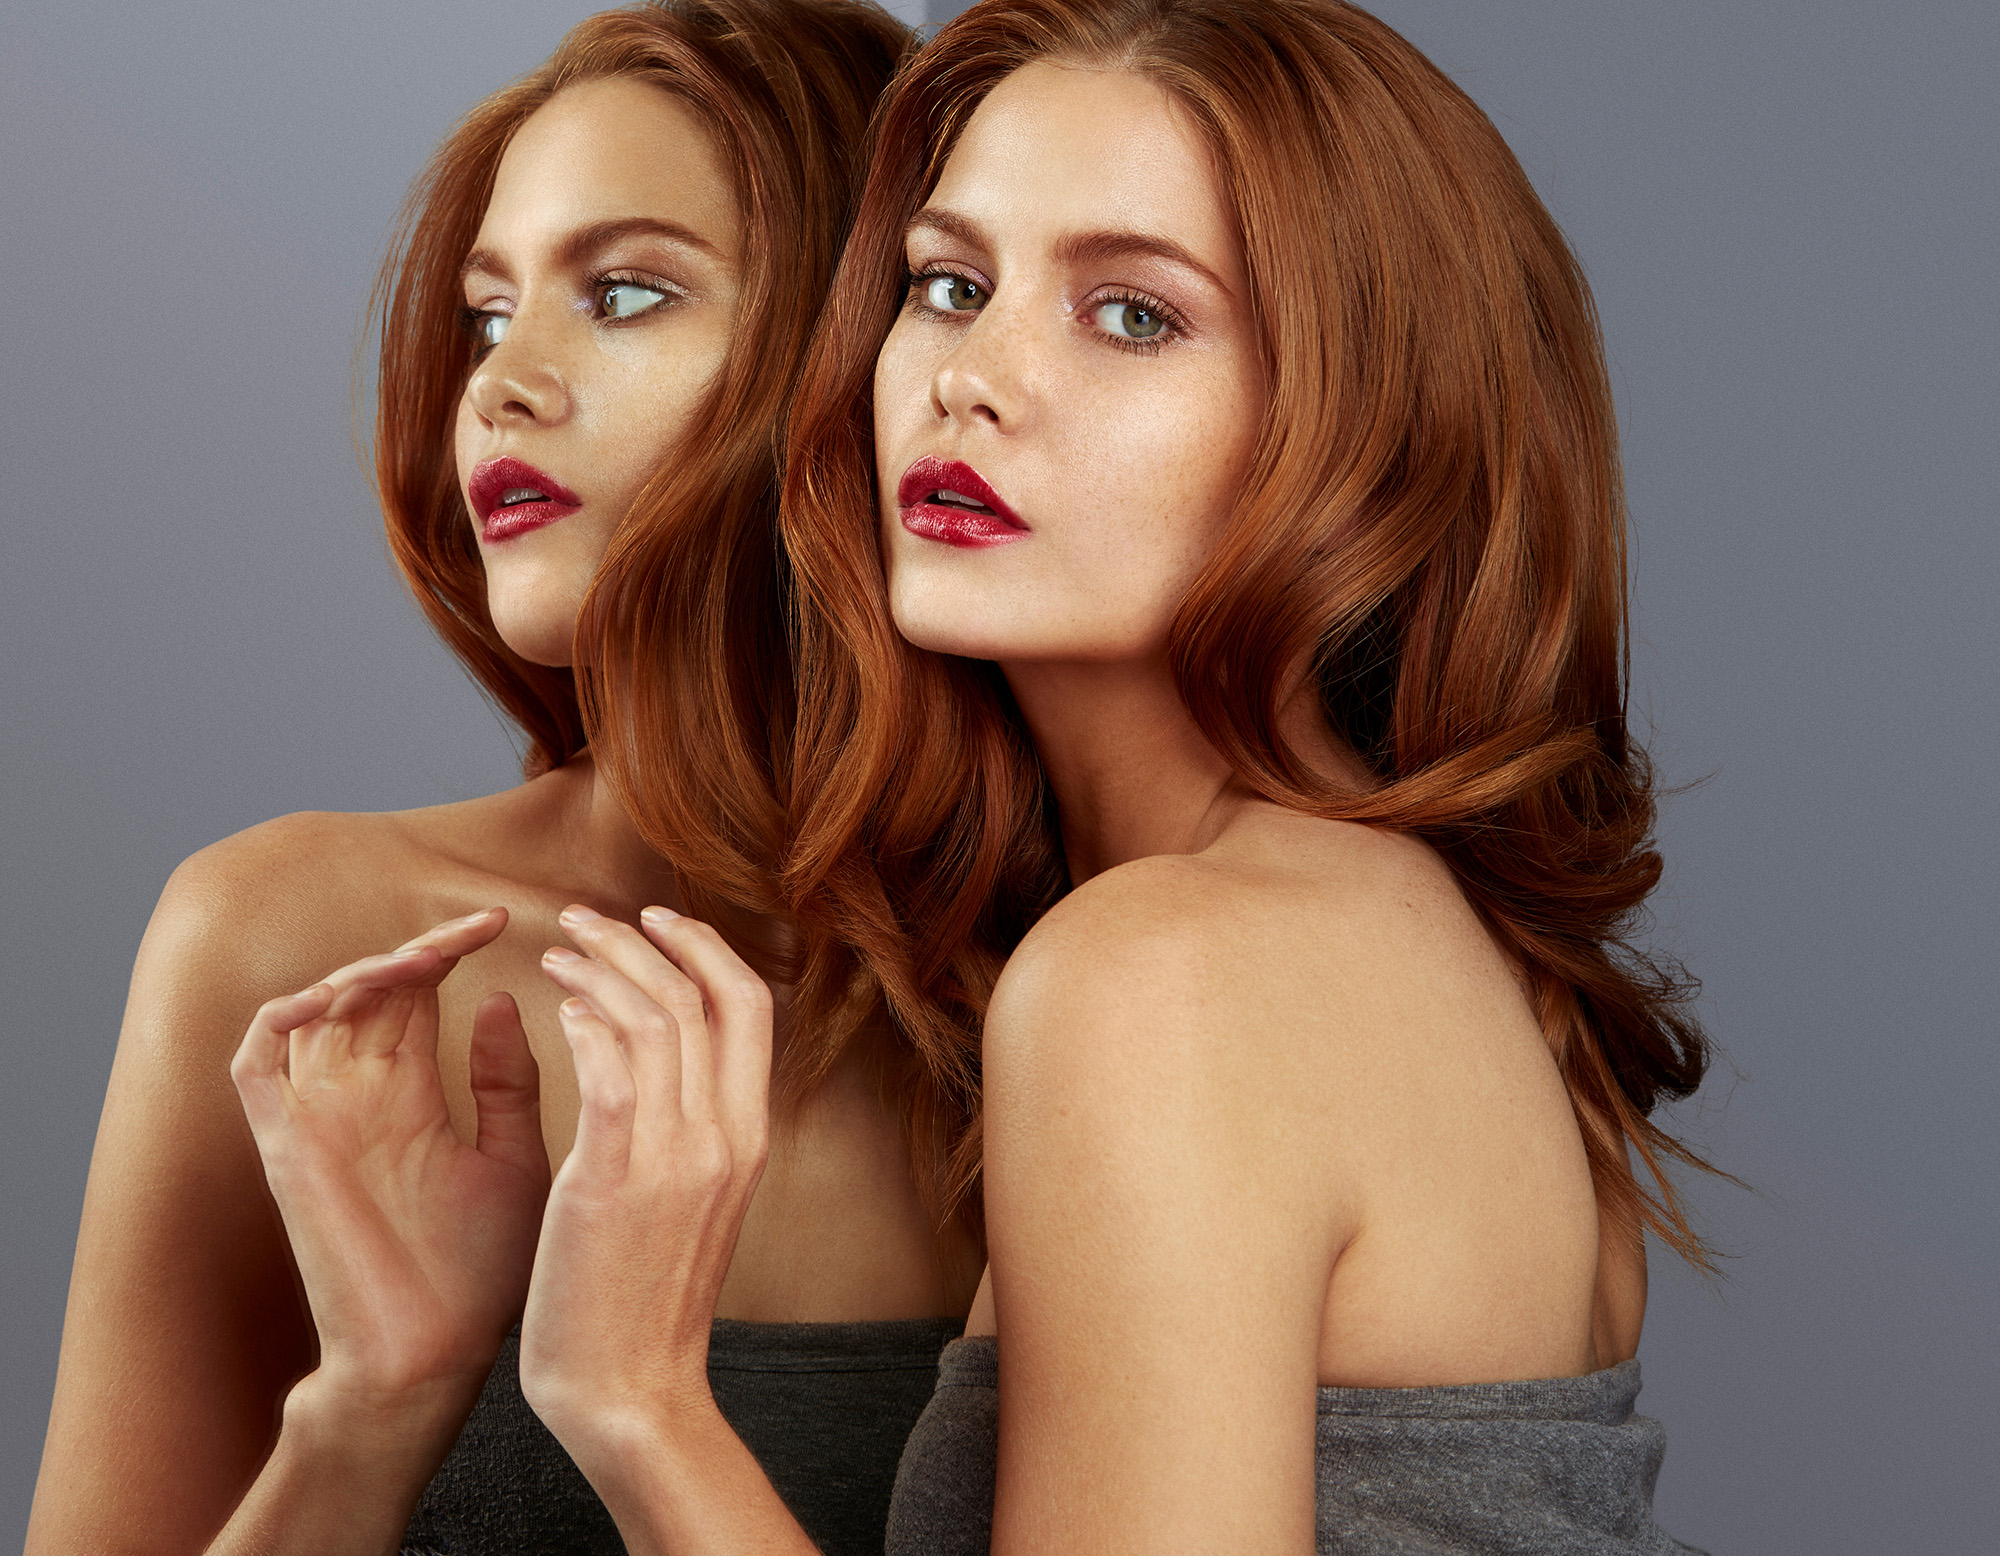
The third lighting principle I use for beauty photography is to find a flattering light for your subject. This can be done with a few observations before the shoot. For starters, I almost always broad light my beauty subjects, as it creates a softer, more elegant, light when compared to short lighting, which produces more drama. Secondly, have an understanding of the concept board, as well as the skin texture of your subject. For example, if we’re going for a glossy look, you’ll generally use smaller light modifers, as they will produce harder light and more contrast. If the subject has larger skin pores, a larger light source will help minimize the skin texture and give a softer, more elegant look. Having an understanding of your concepts, subject, and lighting principles will provide you with a better understanding when it comes to execution.
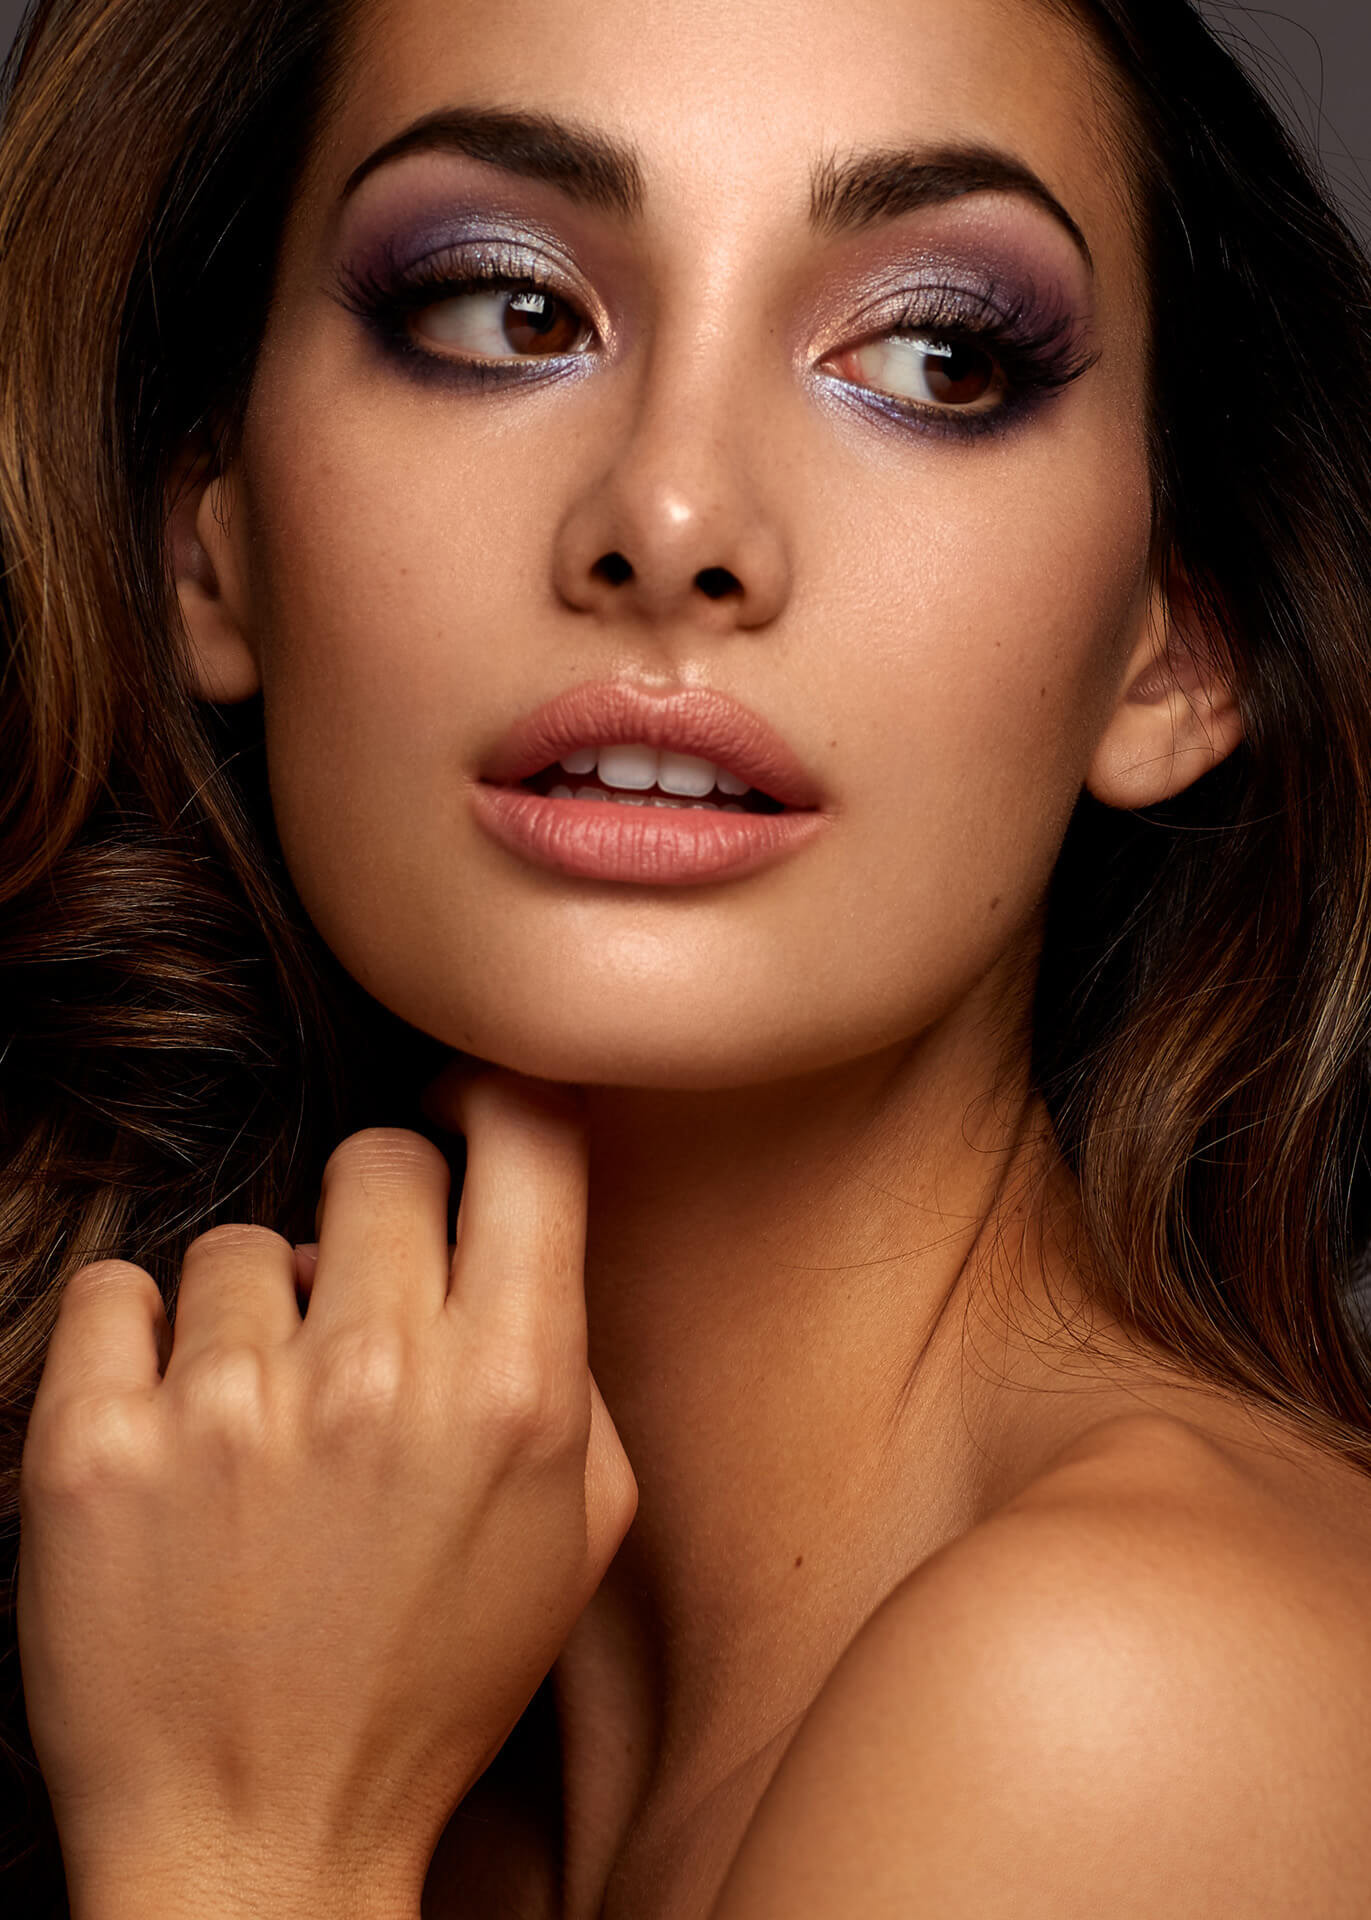
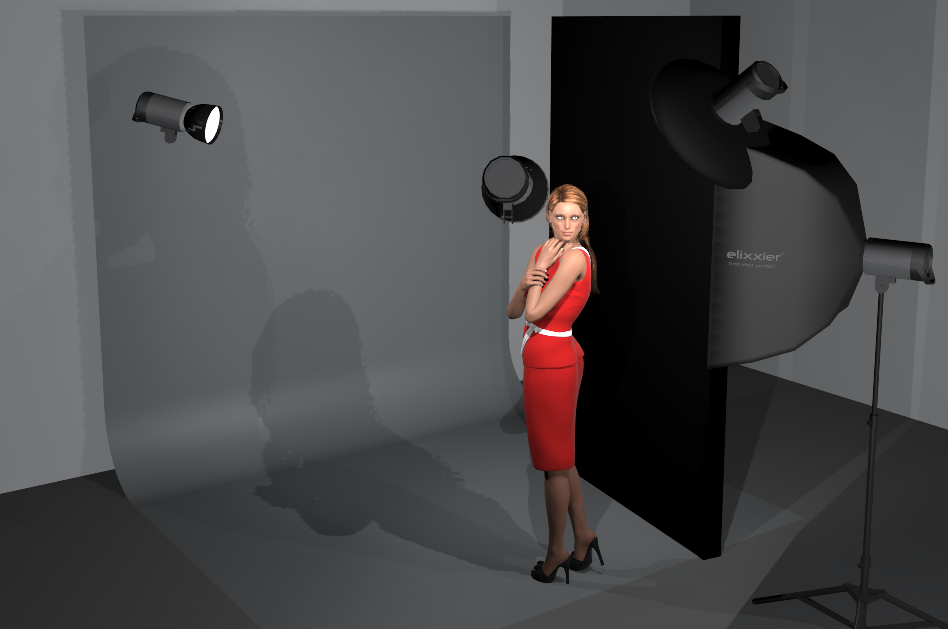
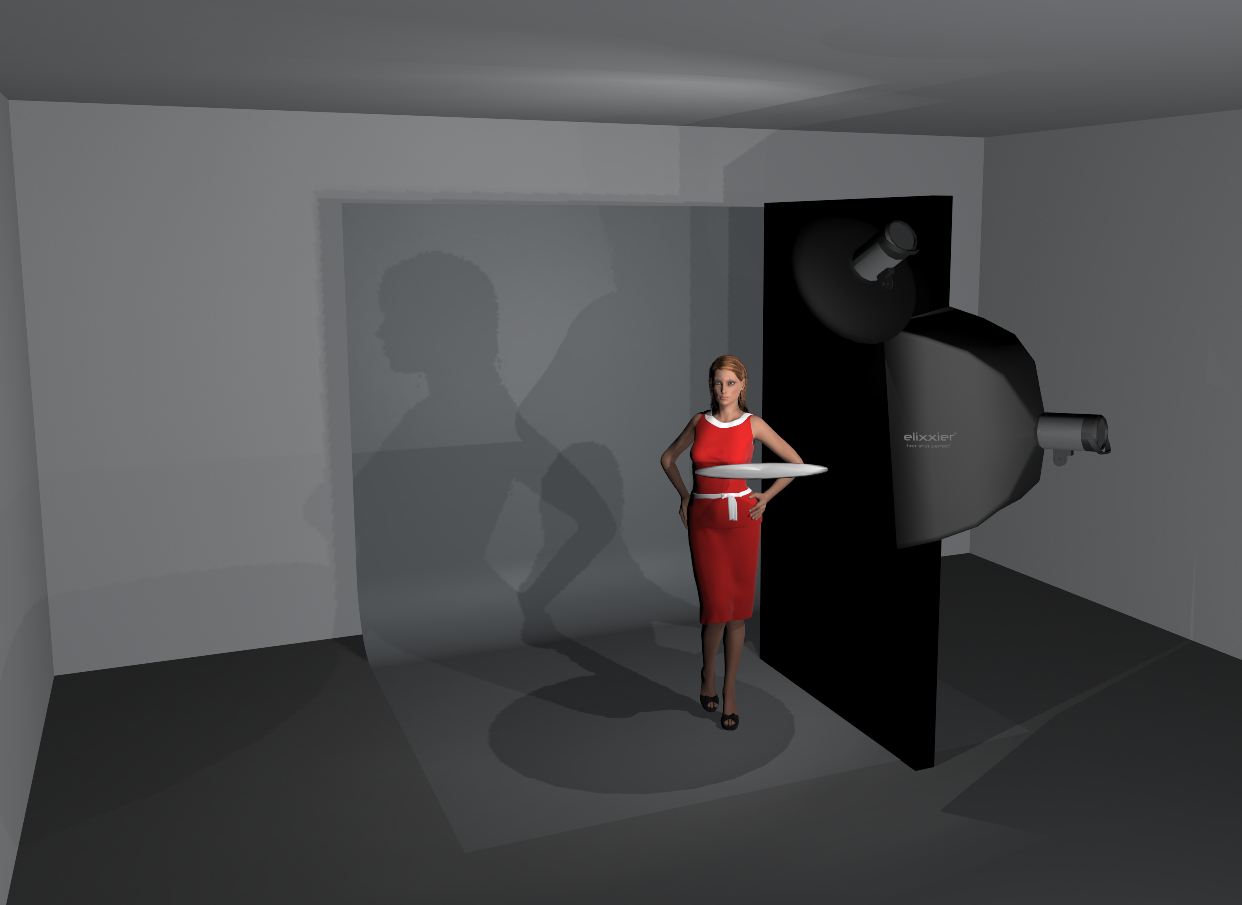
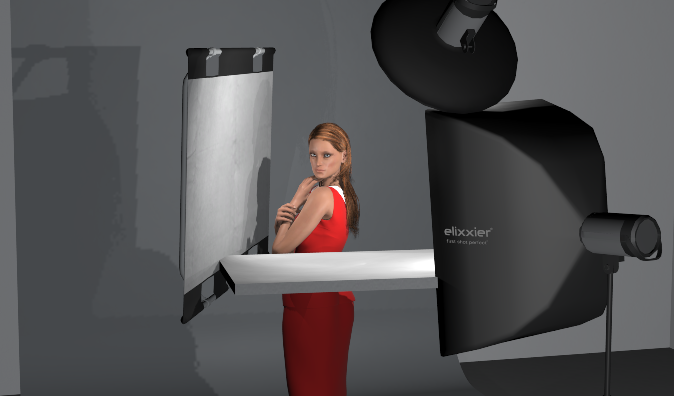
For this reason, clamshell/butterfly lighting is usually regarded as ‘Beauty Lighting’, as it’s a flattering light for a broad range of subjects. Clamshell/Butterfly lighting is done by having your main light overhead, aimed down at your model, and a second light source from below (usually a reflector) to help diminish shadows created by the nose and other features on the face. Looking through images, you’ll see this lighting technique is used for the majority of beauty photography, though some of the best work comes through experimenting.
Camera Settings
Without a doubt, when it comes to beauty photography, finding the correct camera settings is among the easier tasks. Because you’re (likely) shooting in a studio, you have the advantage of consistency in your lighting, and the advantages of that really show when choosing your camera settings. Because beauty photography is about the details, I generally recommend shooting with an aperture set between f8-f16, so that your details are in focus. And because you’re trying to create a clean image, ISO is usually set to it’s lowest setting, with your shutter speed set to its maximum sync speed (Usually 1/160th or 1/200th). However, as always, there are no rules when it comes to being creative, so find settings that best match your aesthetic, as these are only starting guidelines.
Workflow and Retouching
Now that you have a better understanding of the technicals, you’ll want to build a strong workflow and plan for retouching. When it comes to workflow, I highly recommend tethering, as it gives the hair stylist and makeup artist the ability to see the shots as they’re taken and make any adjustments as needed. A couple of weeks ago, I put together a short guide to get you started on tethering, which should help you get a better understanding of how it works and why you should consider it. As for retouching, I won’t go too far into that, as it’s an artform in its own right, but check out some guides put together by our friends over at Retouching Academy that help you get started on building the proper workflow for retouching.
Finding your Team
The final topic I want to touch on is perhaps one of the most important. Makeup artists are very much the star of beauty photography sessions, so it’s important to find one who can match your vision and help compliment the work. When casting for a makeup artist, I usually ask to see their beauty portfolio if they have them. The techniques applied to beauty makeup are quite a bit different than what you’d find with bridal or event photography, so it’s important to find someone to match the style. And same goes for models. While a model might be great when on location, they could really struggle when shooting in the studio, where subtle expressions are key. Additionally, pay attention to features you might ignore when shooting other styles of photography. With beauty, skin tones, skin texture, and features like the eyes and lips all become far more important when you’re focusing on them for a beauty campaign.
Hopefully, this guide has given you a starting point if you wanted to try your hand at beauty photography. As always, perhaps the most neglected technique with this kind of stuff is finding the proper inspiration when shooting beauty. For me, I am regularly sifting through the Instagram tag #beautyphotography, but I also personally love the work of Ben Hassett, Kendra Paige, Jenn Collins, and William Clark. You’re even welcome to follow me on Instagram if you need additional inspiration, and as always, if you have any other insight or techniques, feel free to share them in the comments below.

19 Comments
J.L. Williams ·
“…while creating images that help compliment my portfolio.”
IMAGE: Wow, nice portfolio!
ZACH: Thanks for the compliment. You know, you would look good with the other images in my portfolio. Care to join it?
IMAGE: Thanks, I would love to complement your portfolio.
Daniel Frederick ·
Wonderful article!
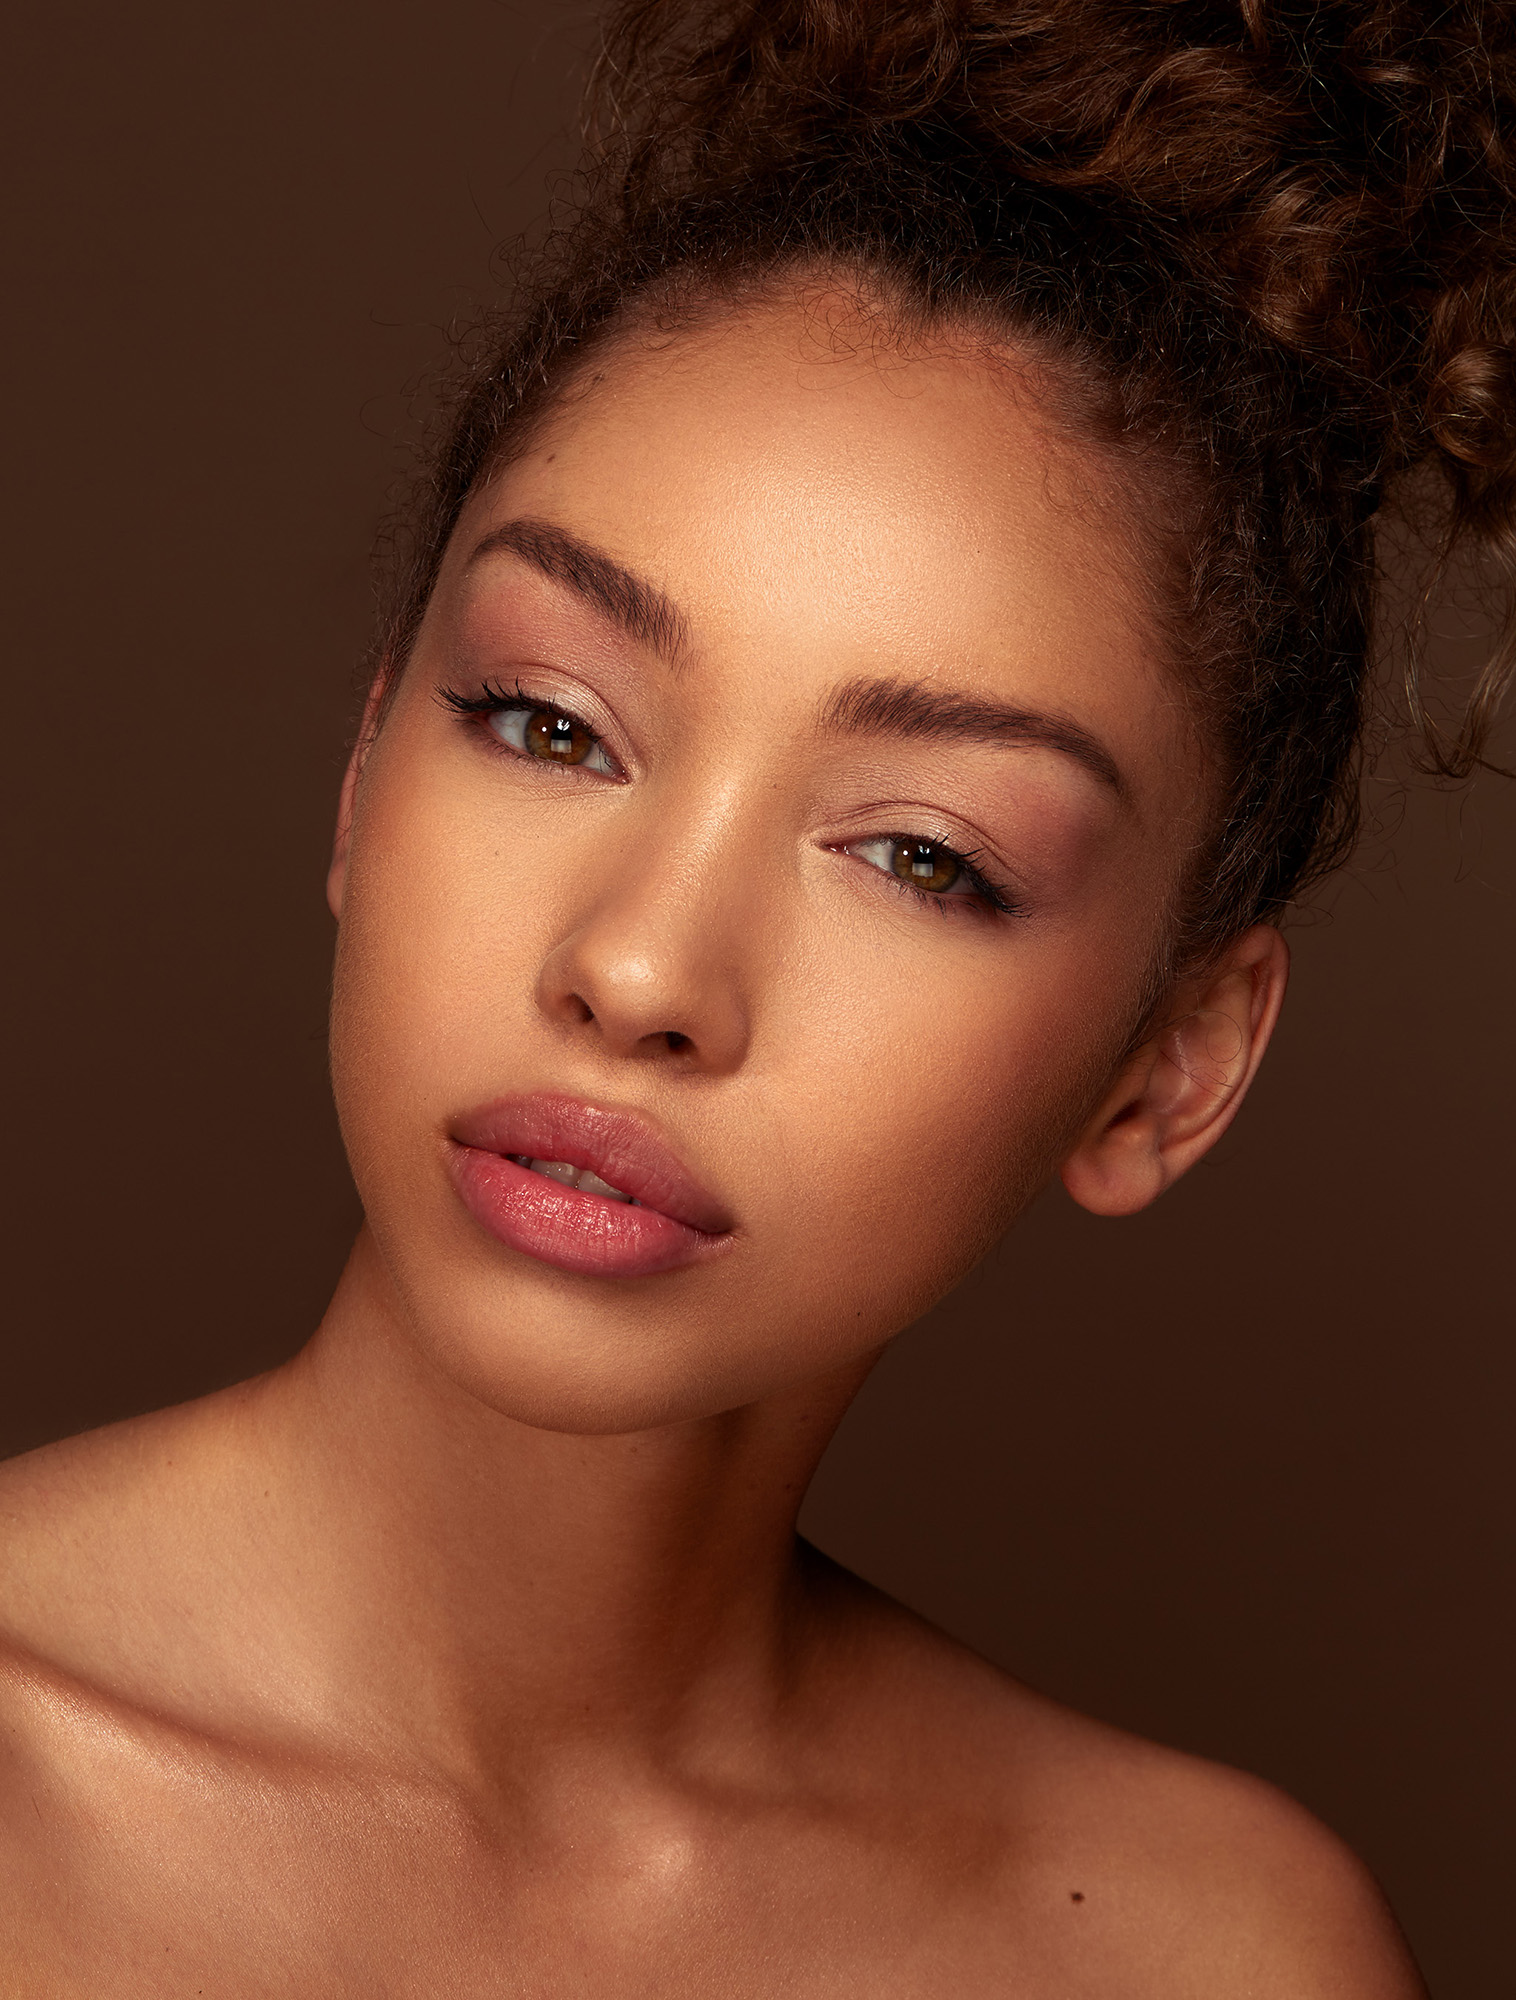
I love the 3D diagrams along with final images.
Zach Sutton Photography ·
Thanks Daniel.
I used the software set.a.light Studio. I’ve been using it for a lot of my educational stuff lately and it seems pretty intuitive and provide more context than a simple lighting diagram.
Alan Yuen ·
Wonderful article!
Zach Sutton Photography ·
Thanks Andy!
Carleton Foxx ·
This is great info, especially the part about building relationships. Awesome insight. I’m going to have to rent a macro lens the next time I shoot a face and see how closely I can replicate your setups with speedlights standing in for Profoto packs and heads.
Keep these articles coming please.
Zach Sutton Photography ·
Thanks Carleton!
Gordon Lewis ·
I won’t argue your point about the value of shooting with a high-resolution full frame camera, particularly if and when you’re shooting for a client. It’s not quite so necessary if you’re simply shooting to gain skill and experience though. In that case, I would prioritize a top-quality medium telephoto lens along with studio lights (i.e. lights that have a modeling light) and light modifiers. If you don’t know how to control your lighting, then even the best cameras in the world won’t save you, but if you know what you’re doing, you’ll be able to produce a high-quality image even with “lesser” equipment.
l_d_allan ·
>> recommend shooting with an aperture set between f8-f16
It seems like diffraction past f/8 would counteract DOF gains, especially f/16. Or not?
SpecialMan ·
You are correct. However, in my own experience, it’s a tradeoff worth making because you can rely on a principle in the psychology of perception to help you out.
You definitely lose absolute sharpness, but you gain depth of field so the picture looks sharper overall to the viewer. Why? Because the primitive monkey part of our brains expects and wants to be able to see all the details—the eyes, the lips, the hair, the eyelashes and the ears—when all of them are in focus it’s a more satisfying experience for the monkey and so the picture seems sharper to us.
On the other hand, if you shoot at f/4 like they tell you to do on the amateur websites, you are asking for trouble because often you get the eyelashes sharp but not the surface of the eye—which is the most important part of the picture. Worse yet, you may get the tip of the nose sharp and everything else out. The monkey who lives in your head hates that.
I’m only speaking as a photographer who has read a lot of books on seeing, I’m not an optics expert. The real experts here may give you an entirely different answer.
Munchma Quchi ·
Is there a good medicine to take for the monkey in your head?
What about if the monkey is on your back…
If the monkey is on your back do you beat him off ?
SpecialMan ·
You’re going ape. Take two bananas and lose my phone number.
Munchma Quchi ·
Magilla Gorilla needs to slap some monkey sense into you.
l_d_allan ·
I’m rethinking my earlier post, and coming around to being closer to what Zach and you (SpecialMan) recommend. Like most situations, “it depends” and there are usually trade-offs.
Some portraits would be preferred with small apertures like f/11 or even f/6 and greater DOF, with the trade-off of somewhat less absolute sharpness at the plane of focus.
I’m generally not a fan of the over-done shallow depth of field look for artsy-flatulence portraits.
And my apologies if anyone is bothered by my re-visiting a stale thread.
SpecialMan ·
And here I thought I was the king of raising zombie threads.
Arthur Meursault ·
Good article. An important must is a talented make up artist that can keep that sheen down as well as being tethered into a large enough monitor to catch and correct these issues in session.
RentOclicK ·
Nice Article, Thanks for sharing it.
auramae ·
I’m taking photos of JUST hair, not the face. What suggestions do you have for this specific use? Same?
auramae ·
I’m a haircolorist shooting my own work for social media marketing.