Geek Articles
The Fujifilm GFX 100 vs Salt Water Teardown

Lensrentals.com, 2020
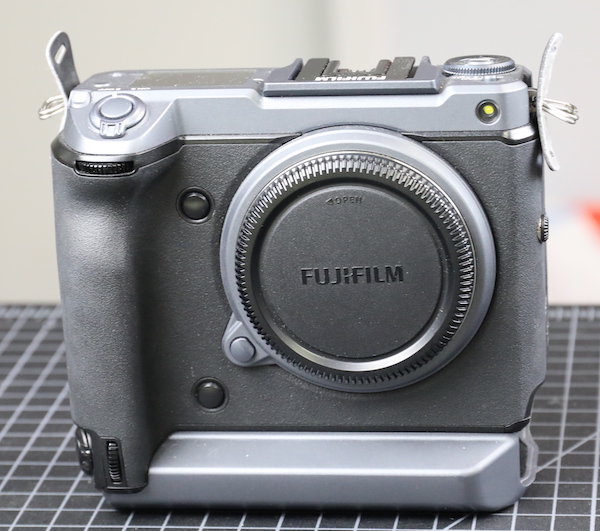
So today is “Every Dark Cloud Has a Silver Lining Day.” The dark cloud involves a Fujinon GFX100 medium format camera that went out on rental, got used in a dive housing, and ‘suddenly died for no reason.’ Except on further investigation, well, maybe it got a little wet, but just a bit, but it was working for a while after it got wet. Alas (our editor said my writing’s too casual, so I thought throwing an ‘alas’ in would class things up a bit), Fuji Service said ‘repair not possible’, insurance claims were paid, it got sent over to repair to see if there were any salvageable parts.
There were several silver linings. Aaron and I were still kind of sore from our disastrous Canon 600mm f/11 IS teardown, so we were eager to tear apart something we couldn’t break. Plus, medium format cameras are big, and big things come apart easily. Plus, since we’ve started becoming aware of fractures in IBIS units, we wanted to start comparing IBIS among the various cameras, and we figured medium format sensors, being large, would maybe have robust IBIS units. Plus, well, I get to add an MF format sensor to my ‘sensors: collect the whole set’ collection.
Lensrentals.com, 2020
The other silver lining is this should be a great example of what even a little saltwater does inside a camera. Seriously, everything we know about the incident indicates there was just a tiny bit of saltwater that got the camera wet. It wasn’t immersed or anything. The camera worked for a couple of hours after that before going belly up. In the image above, you can see the camera had no external signs of water exposure.
Routine Water Check
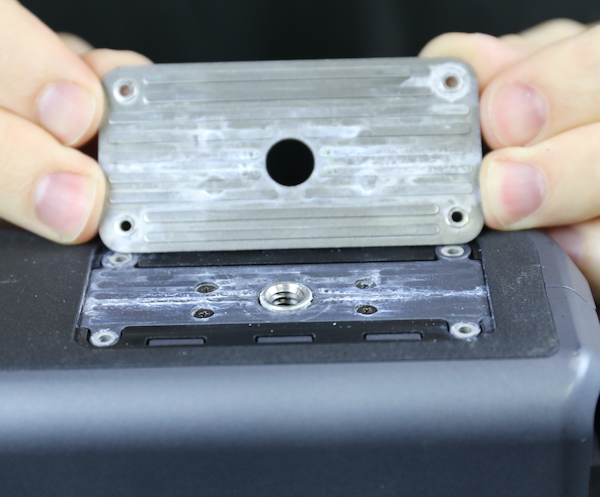
First, I’ll show you why it only takes about 10 seconds to say, “Yes, it was exposed to saltwater.” Removing 4-8 screws in most cameras lets you take off the tripod plate. If there has been water, you’ll almost always see corrosion under it; water tends to wick up along metal, often traveling a good ways from where it originally entered.
Lensrentals.com, 2020
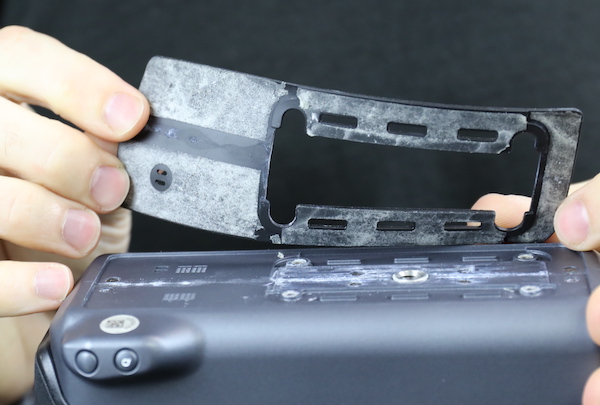
Peeling off the grip material shows salt deposits along the crack where the shell halves join. This is pretty mild exposure, which matches the story we were told very well. Heavy exposure would have caked a lot more salt and corroded the screw holes much more than this.
Lensrentals.com, 2020
This is all a repair person really needs to see to be 90% sure the camera is a write-off. Usually, you open the camera enough to see some internal corrosion. Often, you don’t even need to do that; just looking around the I/O ports is enough. Once you’ve seen that it’s considered not repairable for very good reason – replace the corroded stuff you see, and something that looks OK fails in another month or so.
Back To Tearing Stuff Down
The first step is always to peel off all the grips so we can see where the screws are.
Lensrentals.com, 2020
Something we hadn’t seen before is a clear plastic window on the grip.

Lensrentals.com, 2020
The Wifi chip and antenna are underneath that. Obviously, the plastic passes signal better than the body material.

Lensrentals.com, 2020
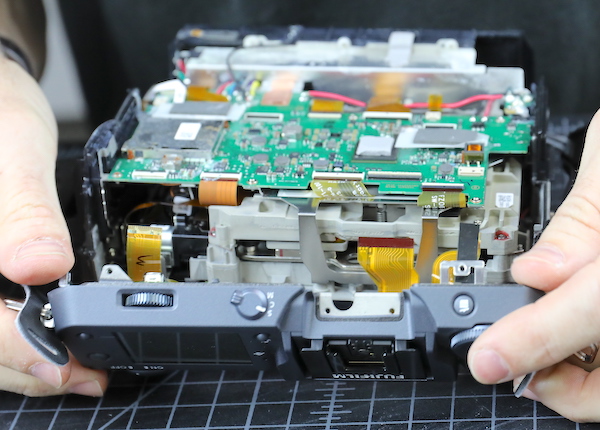
Once all the grips are off, the numerous screws holding things together are visible, except for the screws that aren’t visible. There’s always some of those.
Lensrentals.com, 2020
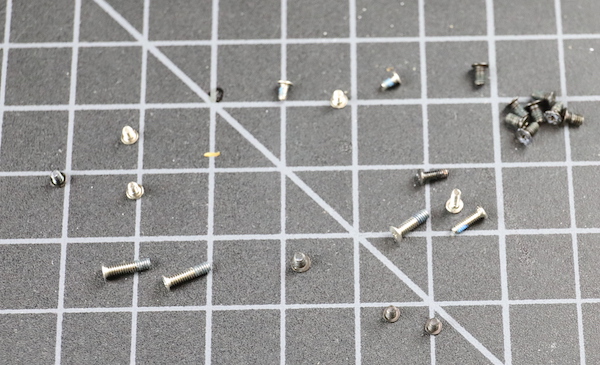
Rather than show you a bunch of pictures of a screwdriver removing screws, I’ll show the removed screws all at once. These are the obviously-visible body screws.
Lensrentals.com, 2020
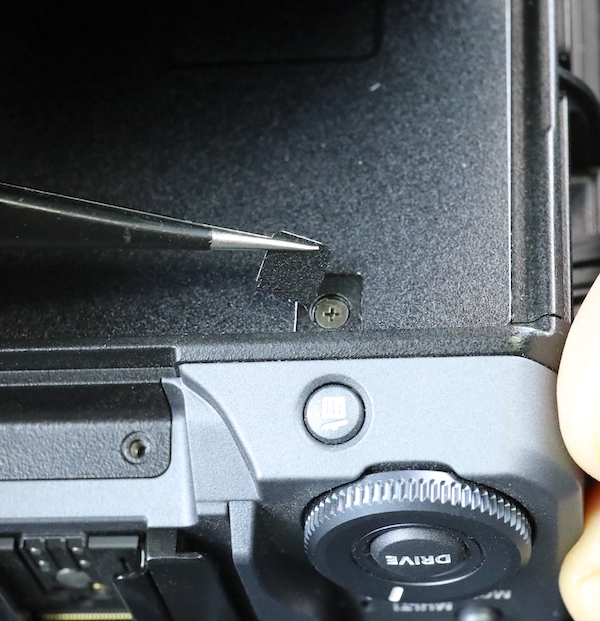
Then you try to separate the parts that look like they should come apart now that the screws are out, see where they are stuck, and look for the hidden screws in that area. I’m not sure why they hide the screws other than to keep people like us out of there.
Lensrentals.com, 2020
After that, we can take the back assembly off.
Lensrentals.com, 2020
Looking at the back assembly, it’s obvious we aren’t going to salvage much because we could see apparent corrosion in several places.
Lensrentals.com, 2020
It’s clearly worse along the bottom.
Lensrentals.com, 2020
But even at the top, circuit traces and connectors are damaged.
Lensrentals.com, 2020
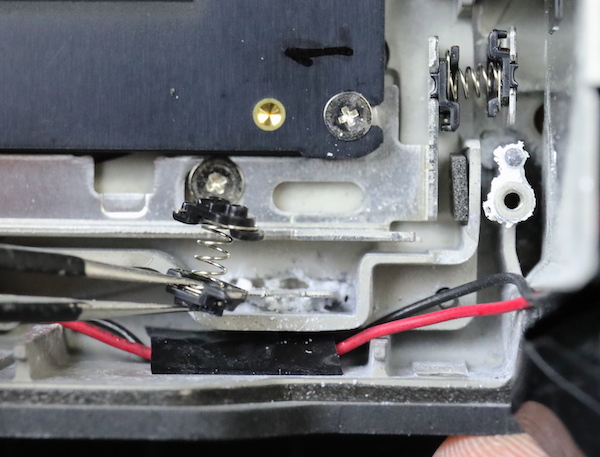
There was much more corrosion inside the bottom plate than outside it. Probably both because the renter wiped the outside down, but also since water wicks along nooks and crannies because of surface tension / capillary action. That’s the general rule of water damage, “it’s always worse on the inside.” Still, since this is a non-electric part, it can be cleaned and re-used if it’s not pitted.

Lensrentals.com, 2020
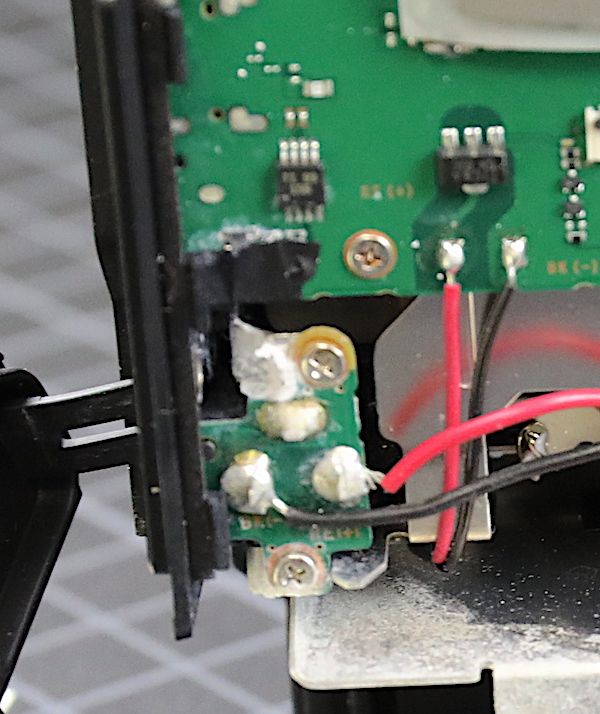
Despite my missing focus in this picture, you can see just above that area; there’s bad corrosion on the external power input wires. So nothing to salvage from the I/O ports or mainboard, but we didn’t expect to have any luck there.
Lensrentals.com, 2020
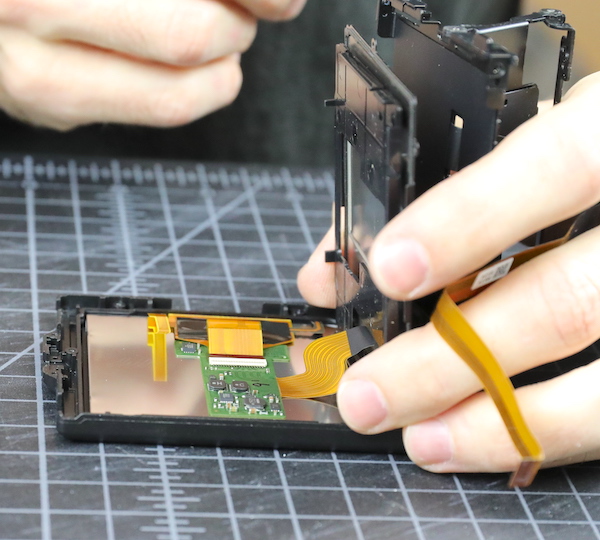
We disassembled the back assembly next because we had a little hope the LCD screen might be salvageable.
Lensrentals.com, 2020
The inner surface PCBs and connectors were all pretty fried, though.
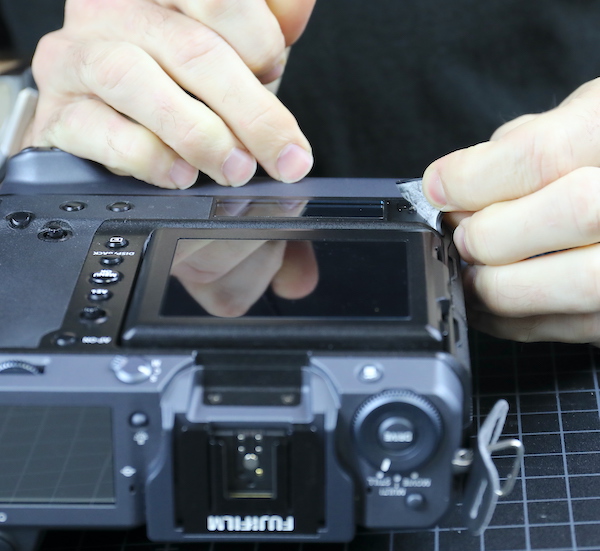
Lensrentals.com, 2020
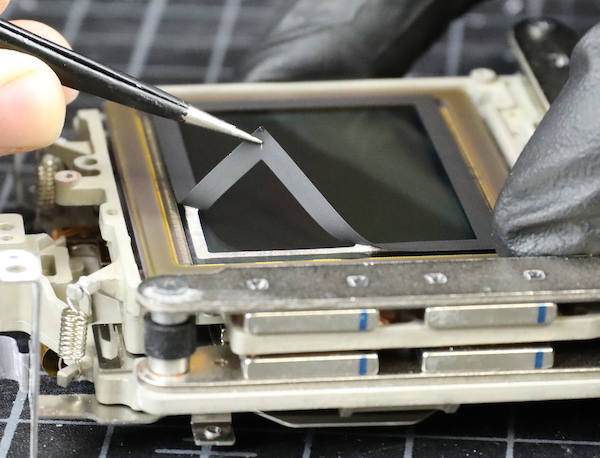
Cleaning out the back was necessary so we could detach the LCD flex. The information display is thoroughly covered by an adhesive light shade, which Aaron’s removing in this pic. That protected the LCD very well, but the flex has some corrosion.

Lensrentals.com, 2020
The main LCD assembly looked pristine on the outside and had adhesive covers on the entrance ports.
Lensrentals.com, 2020
The hinges were impressive; they aren’t just some friction springs and screws; each hinge had several different parts and was rather complicated.
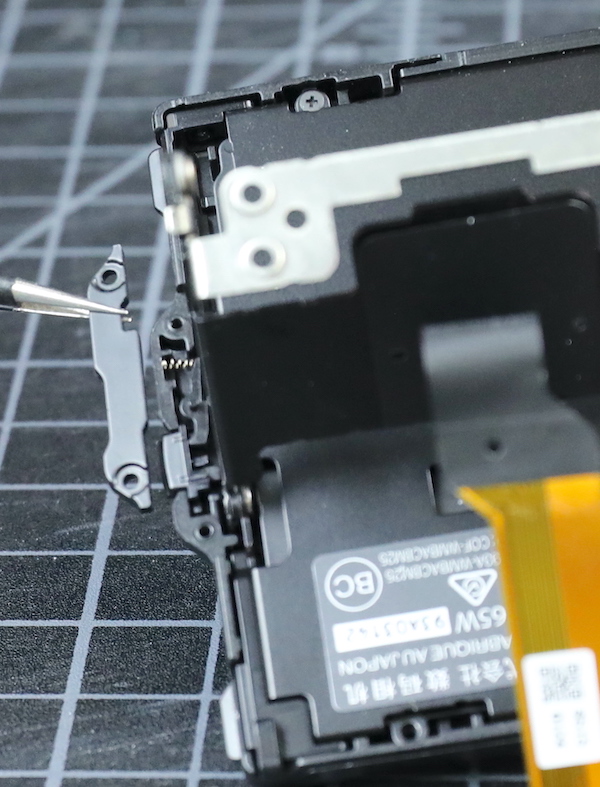
Lensrentals.com, 2020
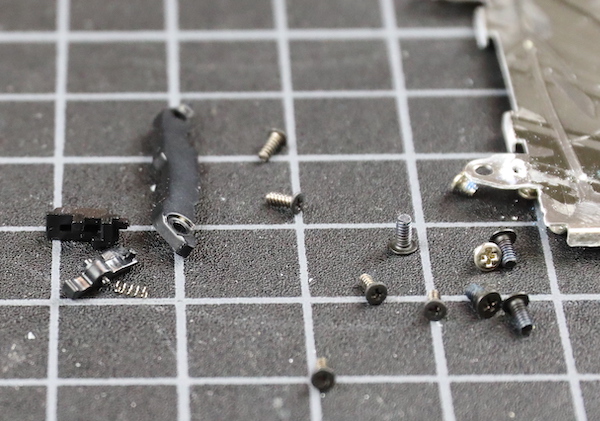
There were a ton of screws holding the LCD case together. This is most, but not all, of them, along with one hinge assembly.
Lensrentals.com, 2020
When we finally got everything apart, the inside of the LCD case was dry and pristine. We’ll at least see if that LCD is working, it seems to have escaped the saltiness.
Lensrentals.com, 2020
Back to the Camera
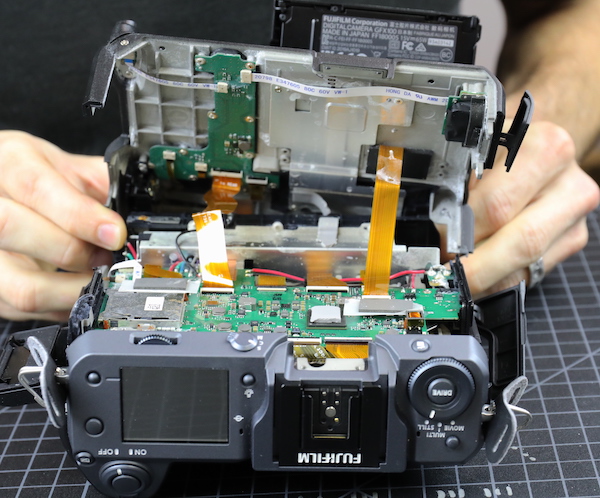
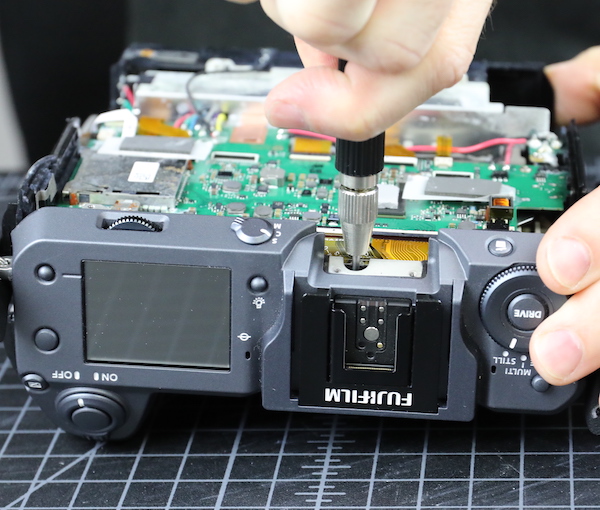
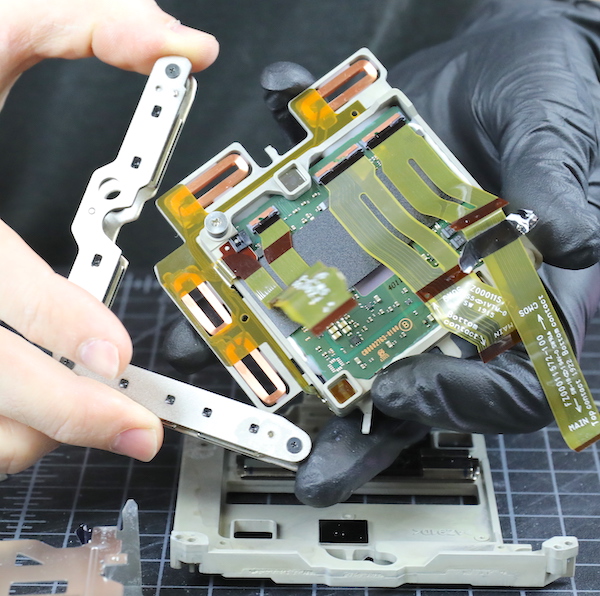
Removing the top assembly was next on our agenda. As is traditional for most mirrorless cameras, there’s a hidden screw inside the viewfinder box.
Lensrentals.com, 2020
After disconnecting a bunch of flexes, the top assembly came right off.
Lensrentals.com, 2020
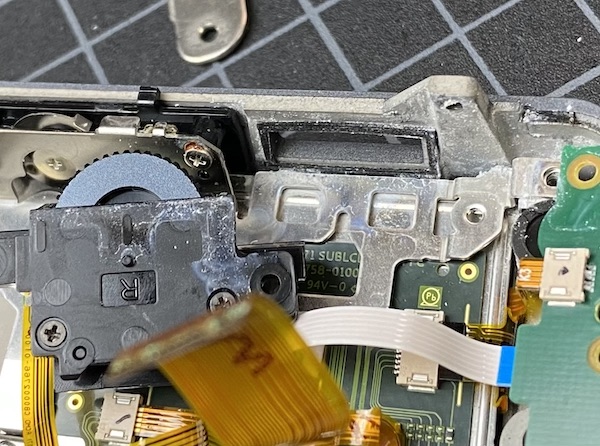
It looks a lot like every camera’s top assembly, tons of electrical communication from the switches and displays. It also looks pretty clean. It seems likely the camera sat in a saltwater puddle, rather than getting exposed from all directions; the bottom area is way more corroded than the top.
Lensrentals.com, 2020
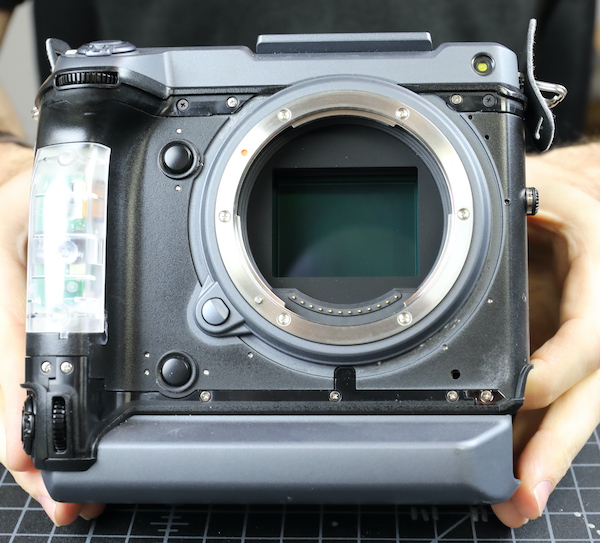
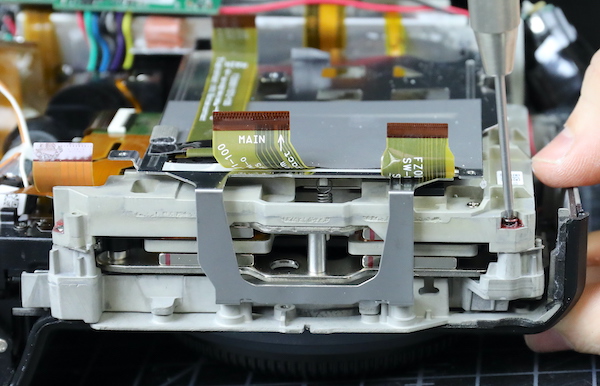
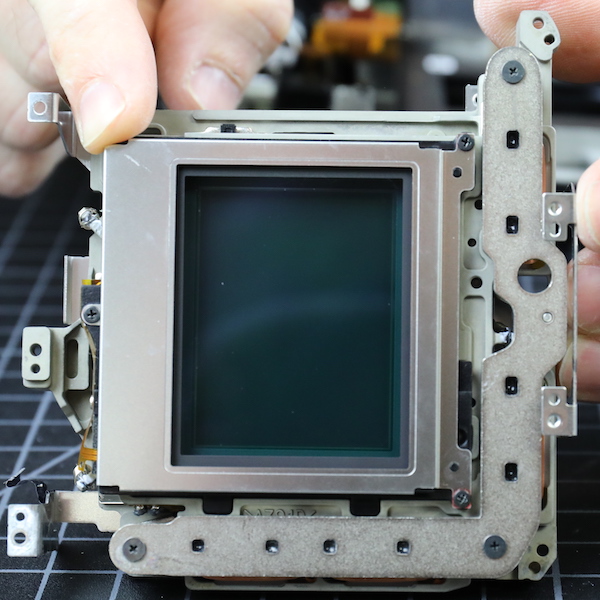
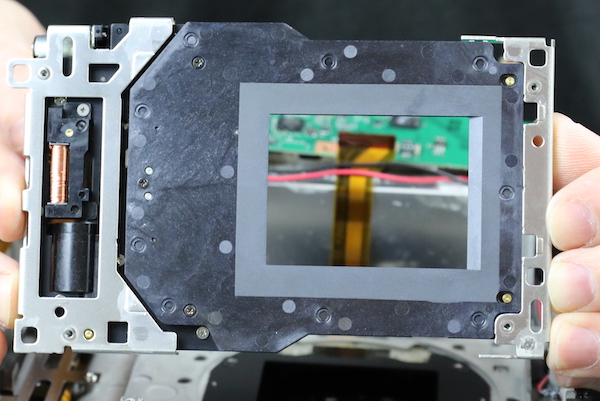
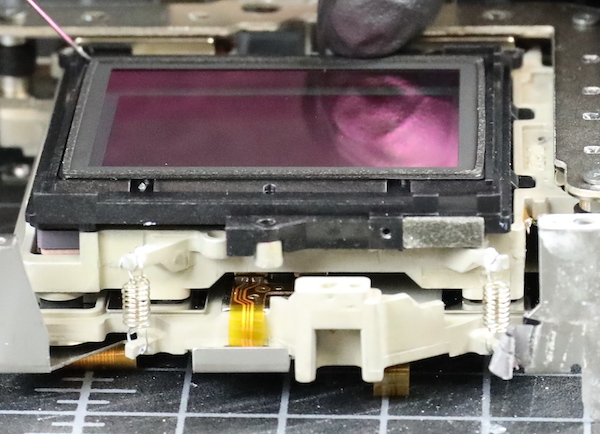
Looking back into the camera, we get a glimpse of that big sensor assembly / IBIS unit. The metal bars with red lines on them are some of the IBIS magnets.
Lensrentals.com, 2020
The seals between the various plastic shell pieces aren’t what I call robust weather sealing. I’m aware that several people have called it a great weather resistance camera. I am not joining those several people in claiming that. The top assembly looks quite resistant to water falling on it from above, that’s about it.
Lensrentals.com, 2020
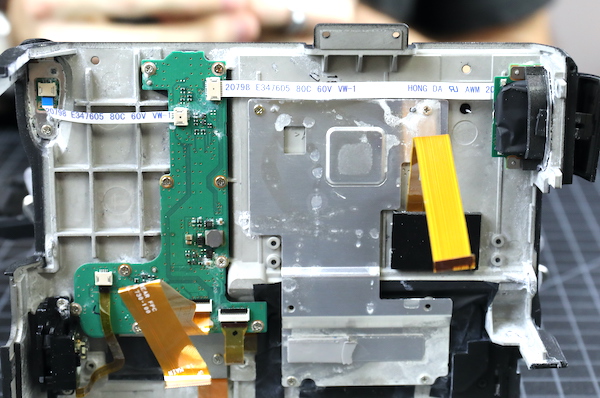
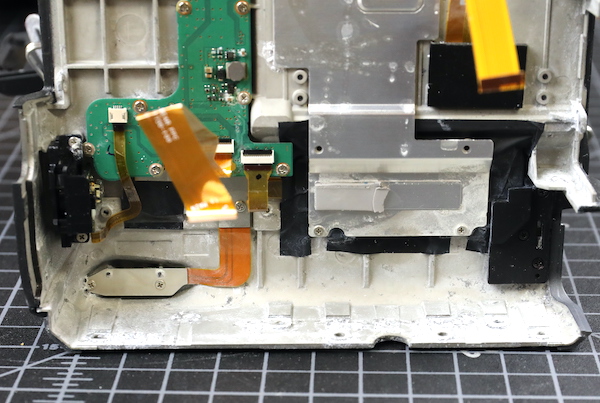
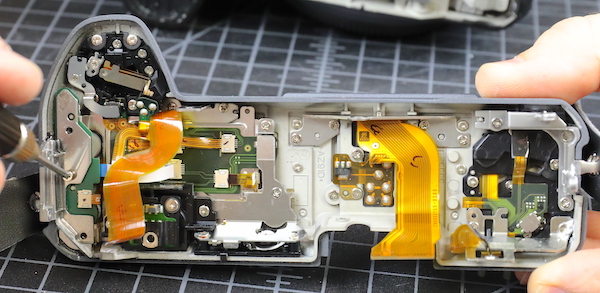
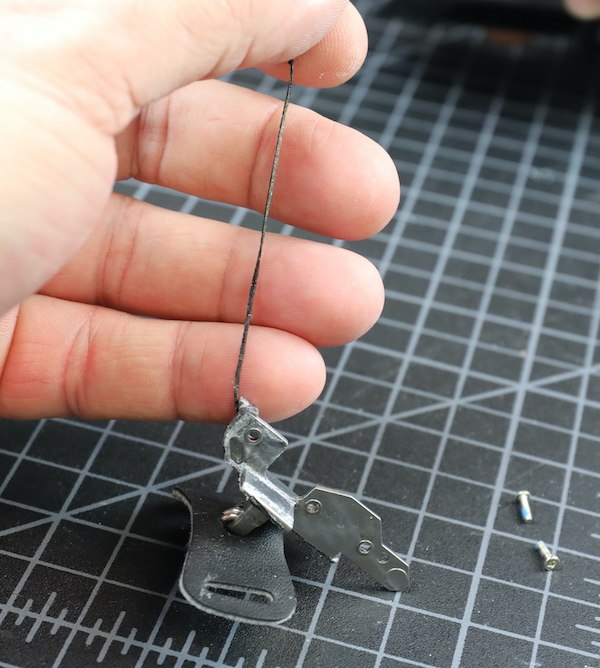
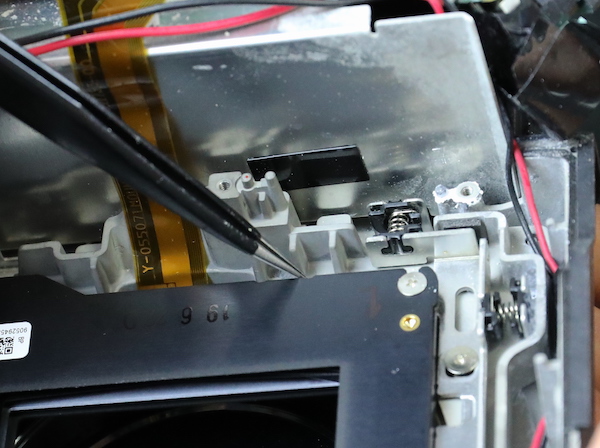
I won’t bore you with the top assembly disassembly. Some parts of it looked fine, but there were a couple of areas of corrosion even up here. We were able to salvage the hot shoe and a couple of other pieces. However, we found leakage around every command dial.
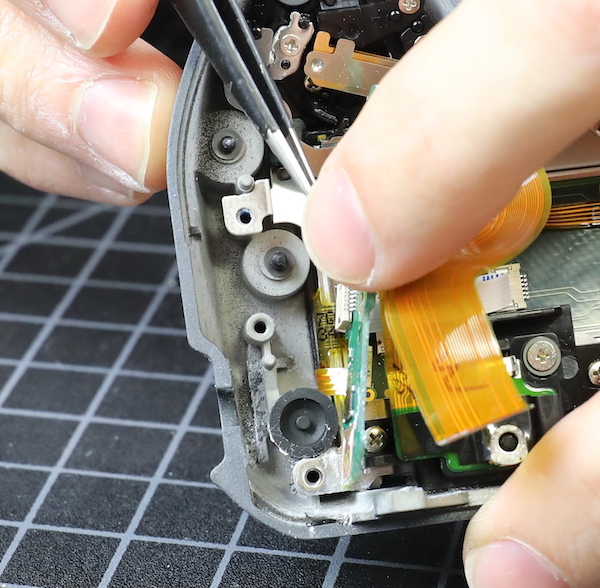
Lensrentals.com, 2020
Lensrentals.com, 2020
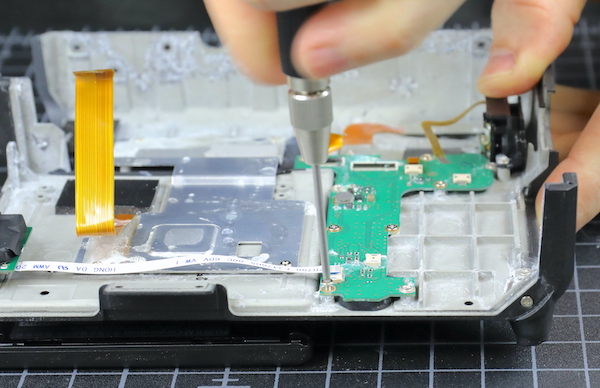
The main PCB comes off next, just a matter of taking out a couple of screws and unhooking flexes.
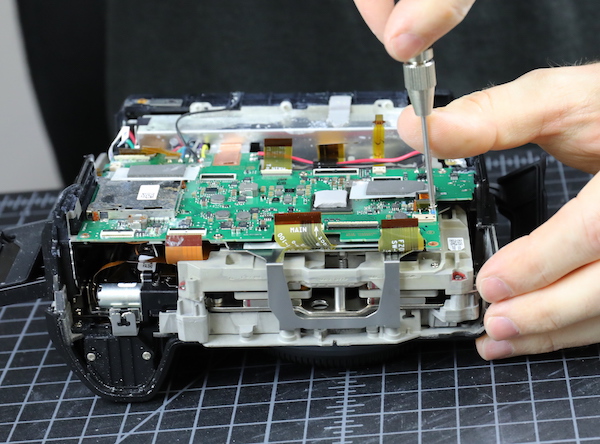
Lensrentals.com, 2020
The mainboard is toast, with corrosion showing in several places on the upper side.
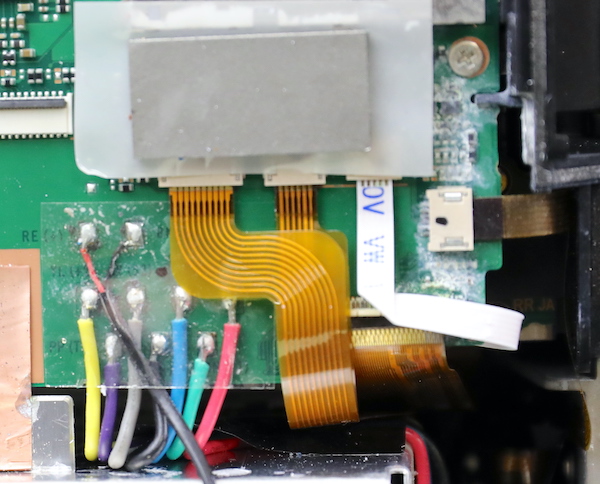
Lensrentals.com, 2020
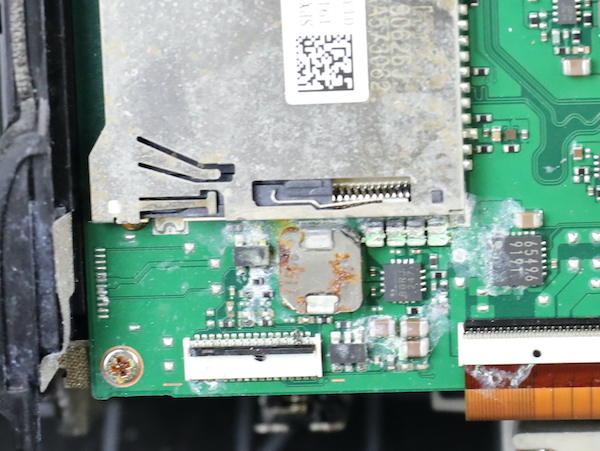
Lensrentals.com, 2020
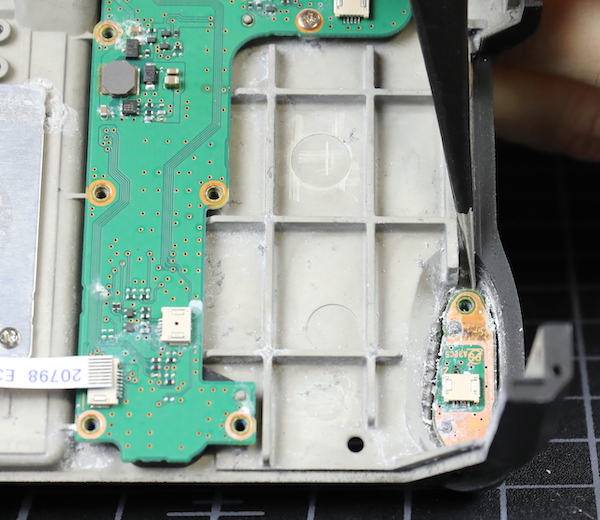
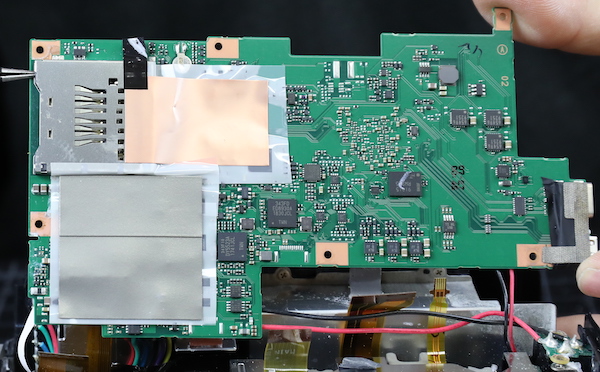
The underneath side still looks pristine. It’s worth noting that both card slots and the I/O ports are all soldered to the board, so breaking one of these probably means a mainboard replacement.
Lensrentals.com, 2020
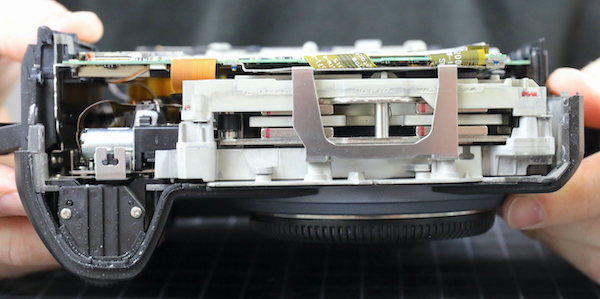
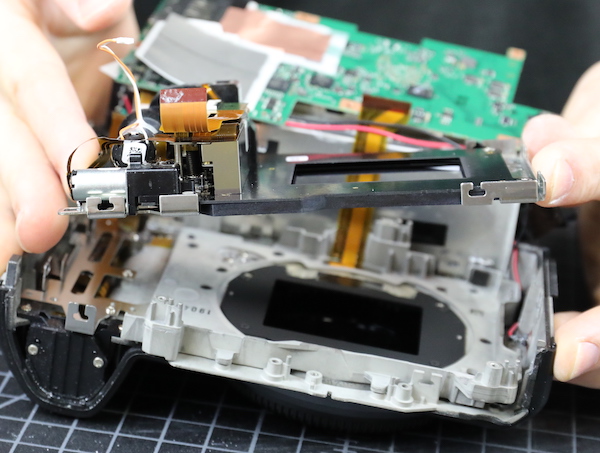
Looking back into the camera, we get a nice look at the back of the sensor/IBIS assembly and to the left the shutter motor and electronics. You can’t really tell in the picture, but the entire shutter assembly is suspended on springs, not attached directly to the chassis.
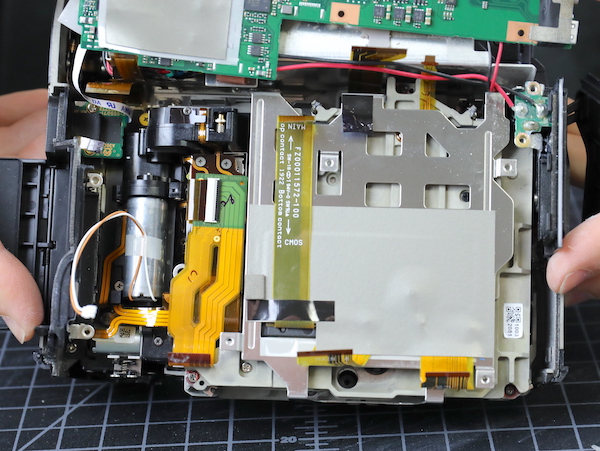
Lensrentals.com, 2020
All of the plastic side panels come off now.
Lensrentals.com, 2020
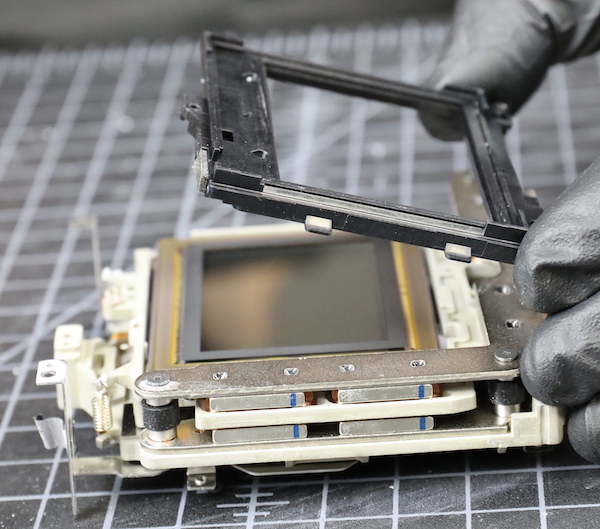
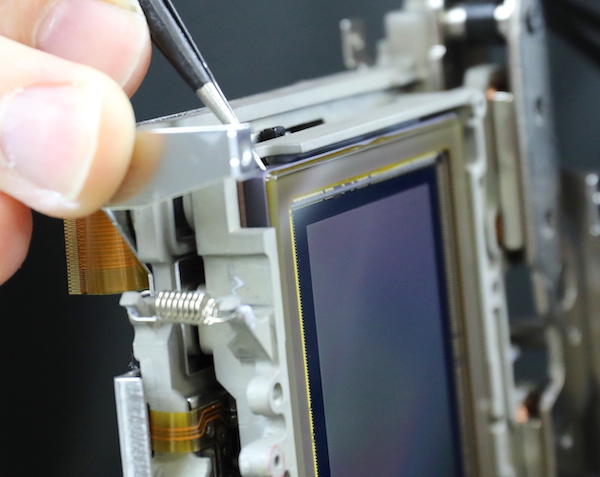
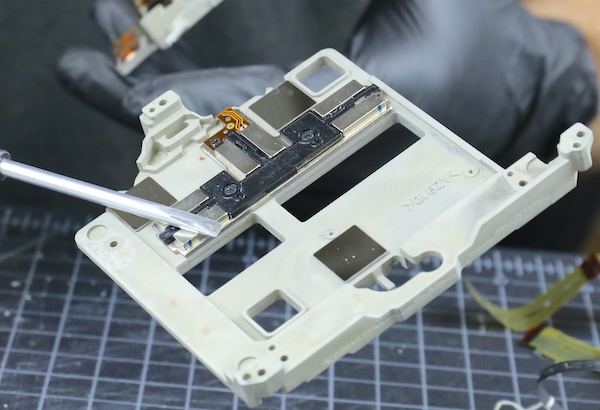
Now we have room to start evaluating the sensor/IBIS assembly. The sensor frame is two pieces. The front is mounted to the camera chassis. The sensor is mounted to the back, which is attached to the front. In between, the two pieces are shims at three places that level the sensor, so it is parallel to the lens mount. You can see the shims between the sensor assembly and mount, right under the screw Aaron is removing.
Lensrentals.com, 2020
OK, so you couldn’t really see them. Here’s a closeup.
Lensrentals.com, 2020
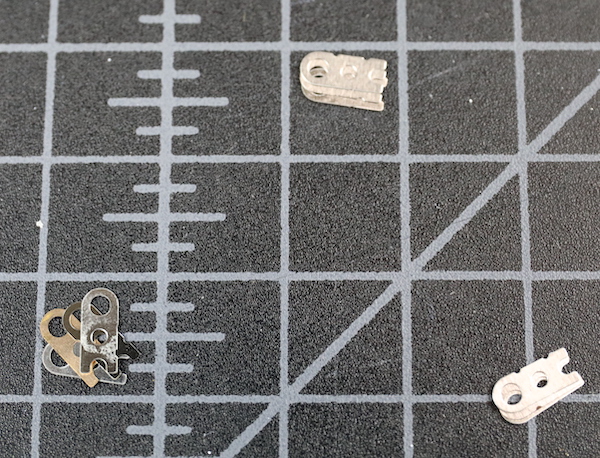
You can start quite the fracas claiming shims are better than tension spring – screw adjustments. (Isn’t fracas a great word? It’s not the kind of word you find in an article written too casually.) Tension spring adjustments can be more accurate, but shims stay the same thickness for years, while spring adjustments might not (or might, we don’t know). But for guys who disassemble cameras, shims are easier. You just make sure you keep the same shims in the same location when you reassemble. We also measure them and take notes, of course. Here they were 0.45, 0.45, and 0.47 thicknesses at the three locations.
Lensrentals.com, 2020
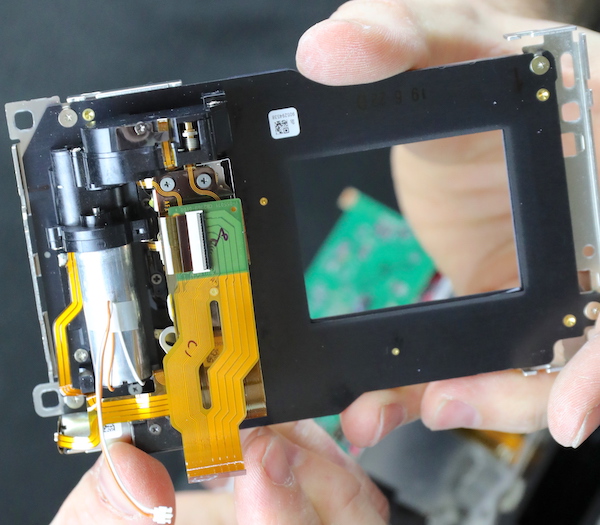
Now we can lift the sensor / IBIS assembly off and have a good look at it.
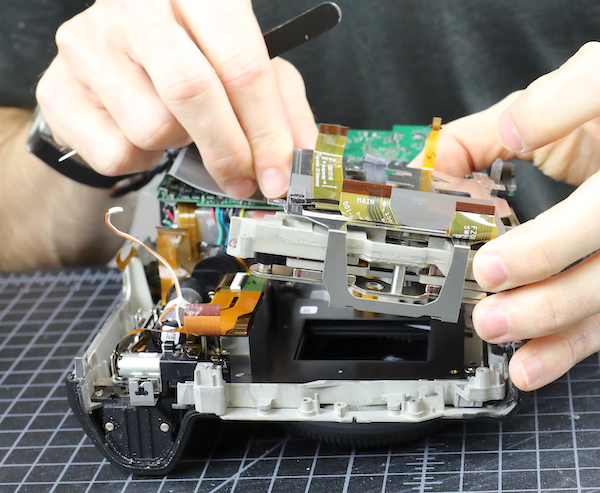
Lensrentals.com, 2020
Lensrentals.com, 2020
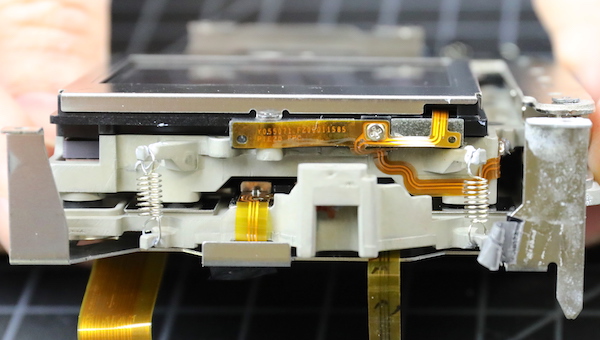
Here’s another look at the magnets we saw above, and this time a good look at the big posts and bumpers that connect the two halves of the IBIS unit.
Lensrentals.com, 2020
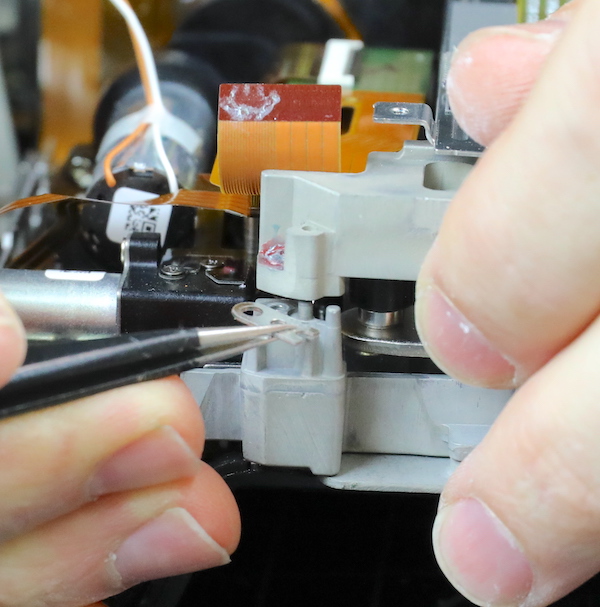
Before we take the sensor apart, let’s take a look at the shutter assembly, which I found very cool. A medium format camera has a big-ass shutter and shutter slap happens. Fuji has advertised a shock-absorbing shutter, but I hadn’t realized they mounted the entire shutter assembly on springs, it’s not mechanically attached to the body at all.
Lensrentals.com, 2020
Taking the shutter springs out, we see a bit more corrosion down in this bottom corner.
Lensrentals.com, 2020
Remove the springs and disconnect flexes, and the shutter assembly comes right out.
Lensrentals.com, 2020
Lensrentals.com, 2020
Lensrentals.com, 2020
Taking Apart the Sensor / IBIS Assembly
This is what I came for! First, we wanted to get the sensor glass off so we could measure thickness, not that many people are adapting lenses to the GFX, but some are. Plus, we’re just curious. First, let me show you the other side view of the assembly, which has some of the springs that compress the two halves of the IBIS unit (one side attaches to the body, the other mounts the sensor).
Lensrentals.com, 2020
The little metal shield over the sensor stack gets removed next.

Lensrentals.com, 2020
Before you ask, Aaron’s wearing a glove for the next part, not to protect the camera, but to protect Aaron. We’ve been known to break some glass plates taking apart the sensor stack. Anyway, the first layer peels off from the adhesive below pretty easily. This layer has an electrical connection; I think it’s just to generate a negative charge, but most of what I know about electronics comes from readers leaving comments telling me what stuff really is.
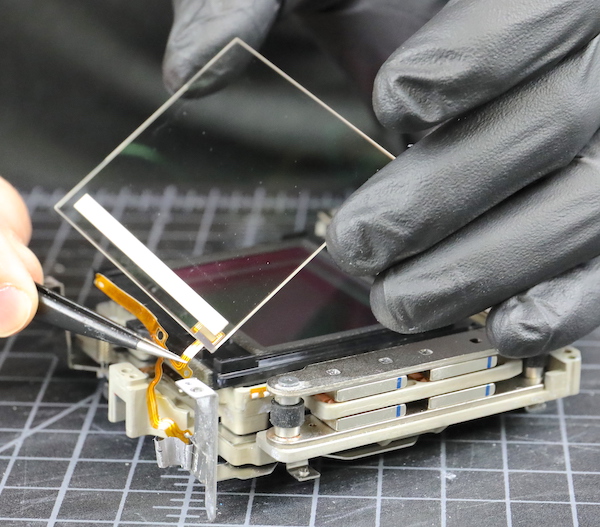
Lensrentals.com, 2020
The adhesive rubber below gave a bit of air gap between that top plate and the second plate. You can see the tip of the syringe in the top left, applying some alcohol to loosen the adhesive.
Lensrentals.com, 2020
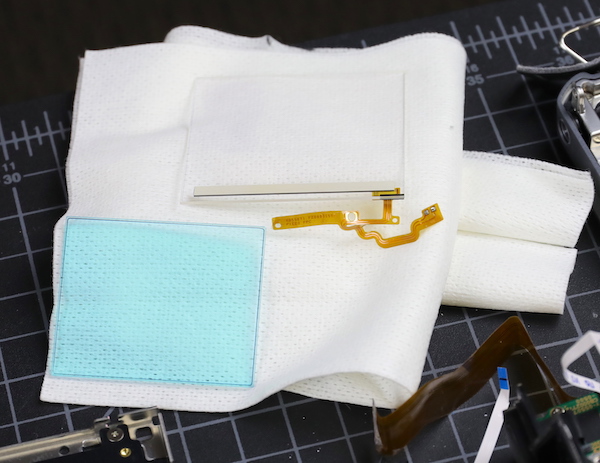
Once the adhesive softened, the adhesive rubber and the second plate came off pretty easily. The second plate, you can probably tell, is actually two glass plates cemented together.

Lensrentals.com, 2020
We have two plates out now, the uppermost electrically charged plate, and the glass sandwich, which I assume is IR filter. The GFX-100 doesn’t have a low-pass filter, but sometimes that actually means two low pass filters set opposite each other, cancelling out. I don’t know which is the case here.
Lensrentals.com, 2020
Next, we can take out the plastic frame that held up those two pieces of glass.
Lensrentals.com, 2020
Then the light baffle under that.
Lensrentals.com, 2020
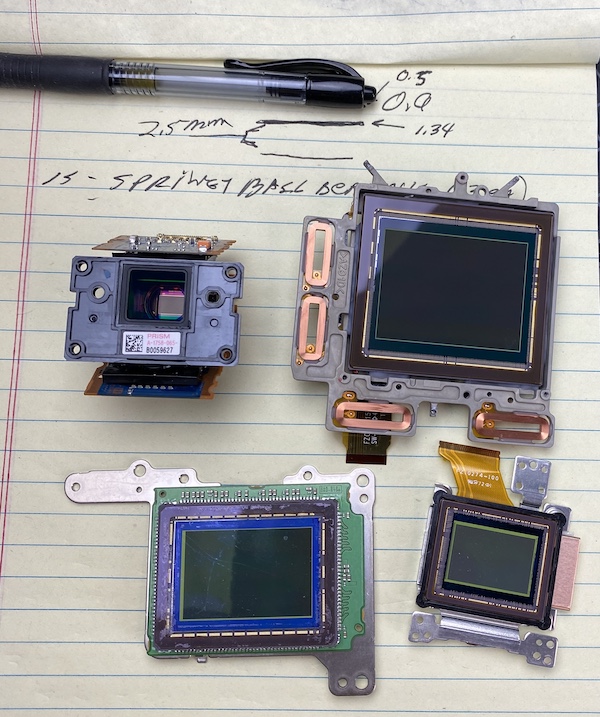
Which exposes the last piece of glass in the stack. These are usually tightly glued to the sensor, we often break them trying to get them off, and we could measure it in place, so we left it. The sensor stack had three pieces of glass measured at 0.9mm for the top, 1.34mm total for the second sandwich, and 1mm glued to the sensor. That’s 3.24mm of total glass thickness for those of you interested, not counting the two air gaps between the glass plates.
Lensrentals.com, 2020
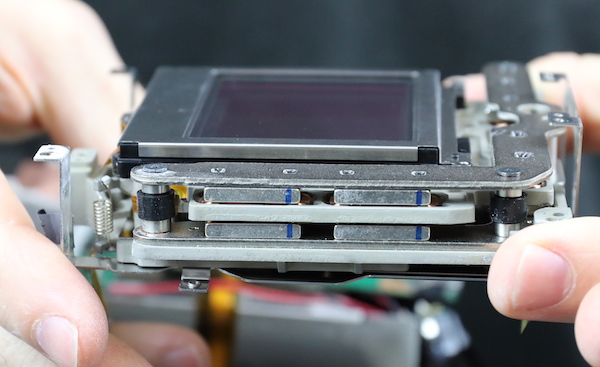
Now let’s take a look at the stabilizer. The IBIS unit is a stack. There’s a large plate containing the sensor with electromagnets around the edges. Below and above it is L-shaped metal brackets containing permanent magnets. The brackets are kept in place by large posts with rubber bumpers and bearings. The sensor is held to the bottom post with spring tension, which I assume allows for some up-and-down movement during stabilization, since this a 5-axis stabilizer.

Lensrentals.com, 2020
I like the robust construction; I like that the sensor is attached on a complete plate, not just by some tabs, etc. etc. But this is a big sensor in a big body. Fuji had plenty of room to do it right. To their credit, they did.
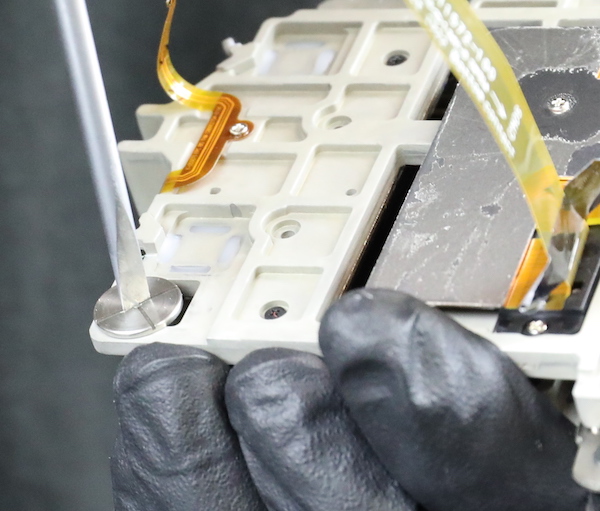
As long as I’m going all fanboy over the heavy-duty engineering, the base of the posts is so large I got to tell Aaron, “I think we’re gonna need a bigger screwdriver” because we did. Not often you get to use a screwdriver from your car’s tool kit on a camera disassembly.
Lensrentals.com, 2020
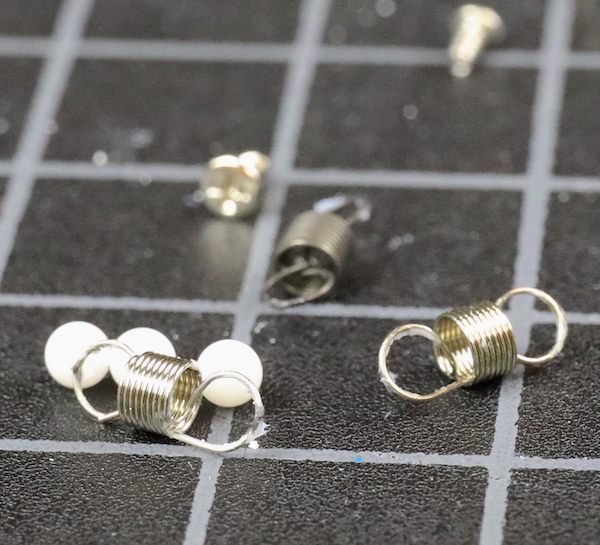
Anyway, with those posts unscrewed and springs removed, we can separate the two halves of the IBIS sandwich. If you look on the left side of the image, you see three flat mirror-looking thingies. Matching them on the other half are two boxes (the third is hidden under the flex) with smooth mirror-like bottoms.
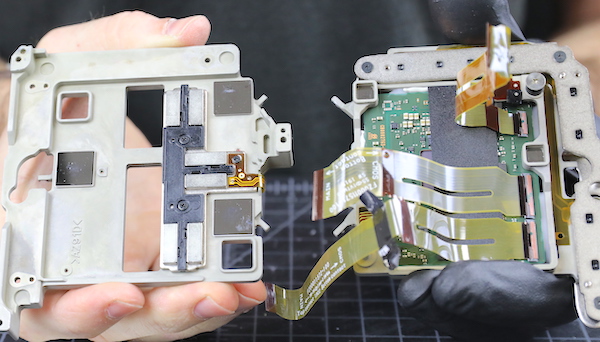
What you missed were the three large, white ball bearings that were in each of the three boxes. Why did you miss them? Because they fell out on the floor when we separated the plates and we had to go find them. But here they are, along with some of the springs that gave tension to the two halves. So kind of a cool roller bearing system; the springs tension the two halves together, the boxes and bearings let them move easily.
Lensrentals.com, 2020
Here’s another overview of the sensor plate, metal L bracket, and the base. You can see the electromagnets on the two sides of the sensor plate.
Lensrentals.com, 2020
In this image, how the electromagnets sit between the permanent magnets on the L bracket.

Lensrentals.com, 2020
Those permanent magnets, BTW, are damned strong. We had fun picking up various parts by touching a screwdriver to the magnets, any one of which was plenty strong to pick up the entire IBIS assembly. It took a bit of force to get out screwdriver away from them, though.
Lensrentals.com, 2020
I should probably take a moment to explain in more detail how IBIS works. You see, you put the magnets and electromagnets together, program stuff and connect it to some sensors, add a little electricity, and then magic happens, and your picture is better. I’ve tried to visualize just how fast all these parts move, but my brain won’t wrap around it, so I keep coming back to ‘and then there is magic.’ Kind of like ‘so if you put a colored coating on a lens, more light goes through.’ There’s magic everywhere if your physics knowledge game is weak enough.
What my skillset involves is basically ‘look at the mechanical stuff and see does it look like it will break if it moves in all directions faster than you can imagine for years.’ In this case, despite that huge sensor, I’m comfortable it won’t break. This is as well made as you could hope.
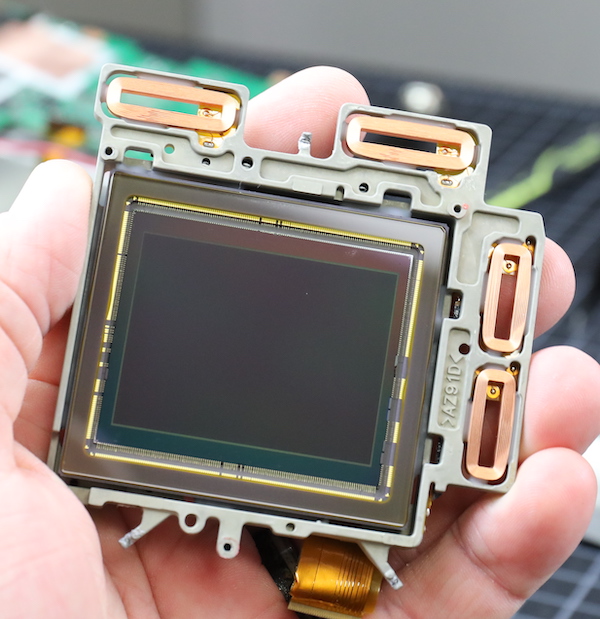
Anyway, the real point of all this was that I got to walk away with the very impressive, extremely pretty medium format sensor I wanted to add to my collection. Nice silver lining, isn’t it?
Lensrentals.com, 2020
So What Did We Learn Today?
Well, we learned that salt and water are bad for cameras. Really bad. Even if it’s just a little bit.
And we learned if you invest $10k in a GFX100, you should probably keep it dry. I’ve seen a lot of claims that the GFX100 does well in the rain, and it may, because it has a big overriding top and rainwater is freshwater. But did you notice all those weather resisting barriers and gaskets in the teardown? Yeah, me neither. I did notice some wide-open areas around the command dials you could shine a light through, and pour water in if water happened to be around.
But hey, it’s your camera, do as you like. Be aware, though, that your camera, just like this one, will get the ‘warranty void because of water damage’ response when you send it for repair.
Other than that, though, everything in here was as well supported and robust as you could ever hope. The IBIS unit looks like it could stabilize a small child, and certainly is strong enough to support this big sensor. I got a nice sensor to put on my desk, and our repair department got some grips and structural parts, and probably an LCD to hopefully fix some future copies that get damaged.
Roger Cicala and Aaron Closz
Lensrentals.com
August, 2020
Author: Roger Cicala
I’m Roger and I am the founder of Lensrentals.com. Hailed as one of the optic nerds here, I enjoy shooting collimated light through 30X microscope objectives in my spare time. When I do take real pictures I like using something different: a Medium format, or Pentax K1, or a Sony RX1R.
-
Astro Landscapes
-
geekyrocketguy
-
Otara
-
RNG
-
Nobody Knows
-
Mike Earussi
-
RNG
-
Tuolumne
-
Roger Cicala
-
obican
-
Nobody Knows
-
RNG
-
Roger Cicala
-
RNG
-
RNG
-
Nikooles
-
Roger Cicala
-
John Dillworth
-
Roger Cicala
-
Roger Cicala
-
Henry Winokur
-
Roger Cicala
-
Henry Winokur
-
Dave Jones
-
Andreas Werle
-
Andre Yew
-
El Aura
-
Roger Cicala
-
Athanasius Kirchner
-
Henry Winokur
