
A few months ago, I wrote about AI art, and what it means for the industry of photography. Admittedly, in the last 6 months or so, my take on the topic feels a bit dated, and I’m far more concerned than ever with the technology advancing so rapidly and what it means for the industry as a whole. However, there are a few different companies that are looking at AI as an opportunity to help photographers speed through their workflow, without disrupting their industry, so let’s look at some of the available options that can help photographers, without disrupting the creative process.
Before we get into the weeds about what brands are focusing on improving workflow and retouching, I think it’s also important to note that while not directly the topic of focus, AI has already done leaps and bounds when it comes to administrative work as a photographer. From using ChatGPT to help generate complex Excel sheets, to Google implementing procedural AI generation of emails to help speed along the exhausting process of pre-production, there are a lot of incredible tools that are being introduced daily that help the process of being a small business owner in 2023. That said, the focus on this topic today is how AI tools are being developed not for AI Art generation, but rather, to develop tools to help with the retouching process. And two companies are breaking the barriers when it comes to AI and retouching – Adobe and Retouch4me.
Adobe Tools
With AI blending into the art community, it’s no surprise that Adobe is involved with its own AI generation tools built into its software suite. And while Firefly – their AI art generation software aiming to be competitive with Midjourney and Stable Diffusion has been out for a few months, we’re going to focus our attention on other tools implemented within Photoshop and Lightroom. More specifically, their new Generative AI and their Separate Subject/Background tools.
Separate Subject/Background Tools
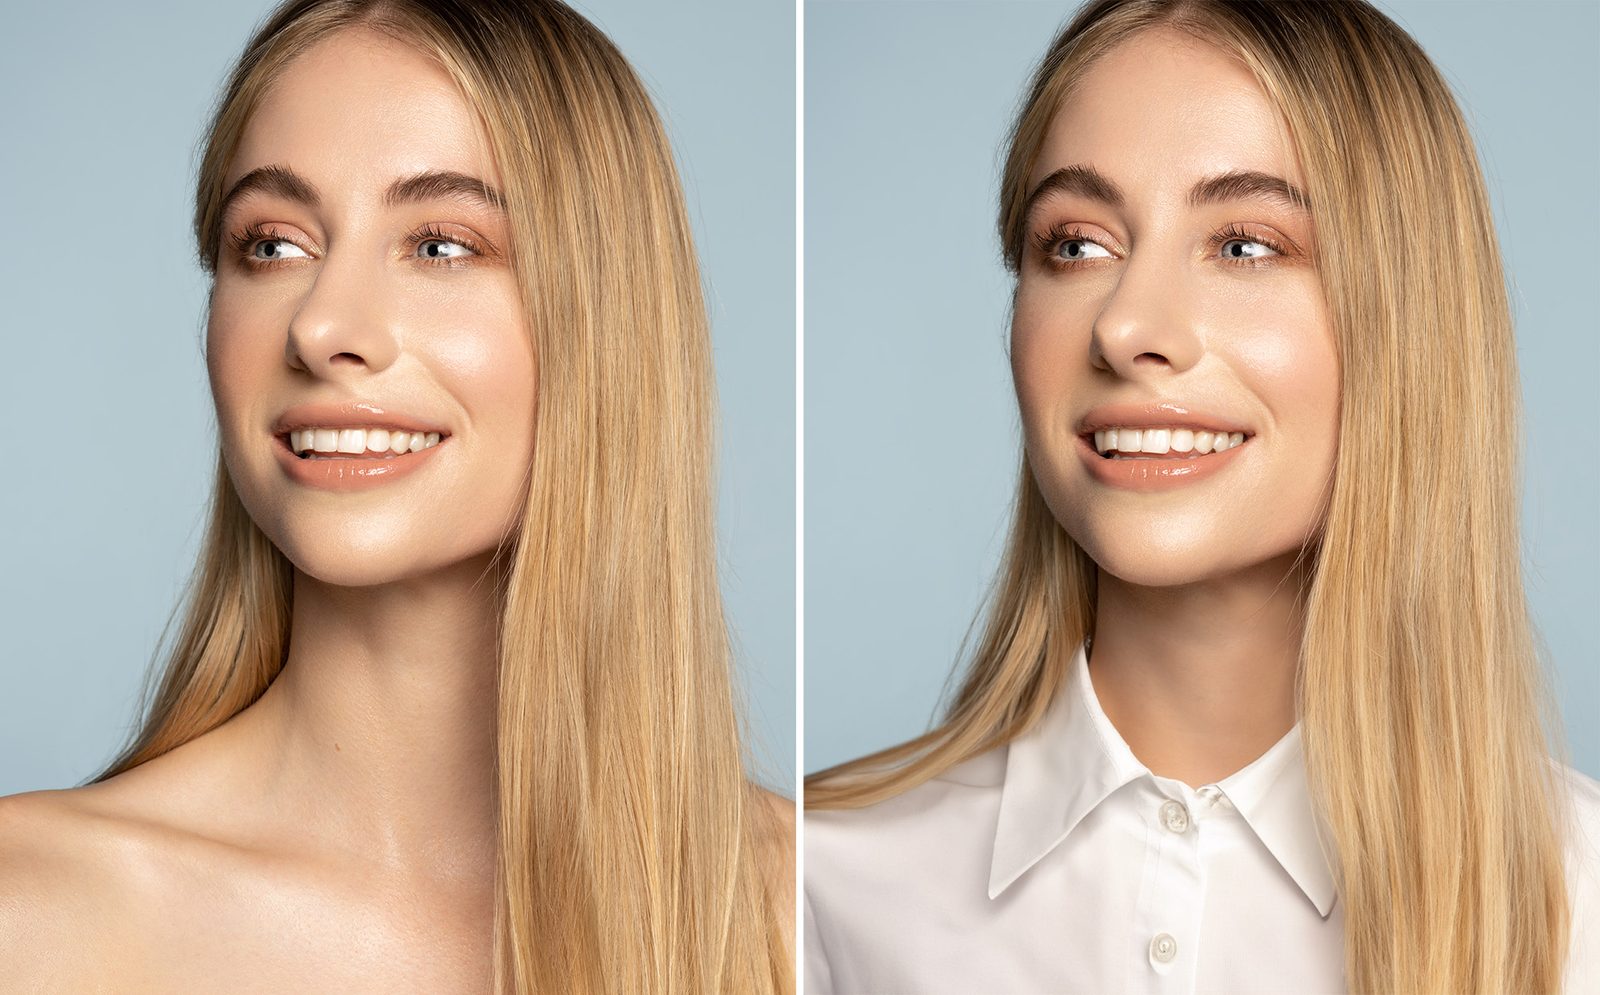
Perhaps a godsend (at least on paper) for those who do compositing, the Separate Subject/Background tools are available in both Lightroom and the latest Photoshop and are designed to give you a one-click solution to pulling your subject from your background. Whether in the studio or outdoors (though the studio works a lot better), the Remove Subject/Background tool does an incredible job masking out the subject from the background and putting them into layer masks to move and swap as needed.
In the past, this was done by tediously tracing the subject using the pen tool, and feathering the edges until you achieve a convincing look. The process often took hours to achieve a believable effect, and so, the new tool has a lot of compositing photographers a bit worried about the accessibility of the skill thanks to AI.

As for how it works, it’s pretty incredible. Below, I have examples of both in-studio work from my portfolio where I tested the tool, as well as outdoor work. I found that results aren’t always guaranteed, but it did near-perfect masking of the subject 90% of the time. Results are dependent on how much your subject is separated from the background – both in the depth of field and in colors. However, when I threw images both in the studio and on location, it was able to spit out convincing results in just a few seconds – a project that would typically take much much longer.
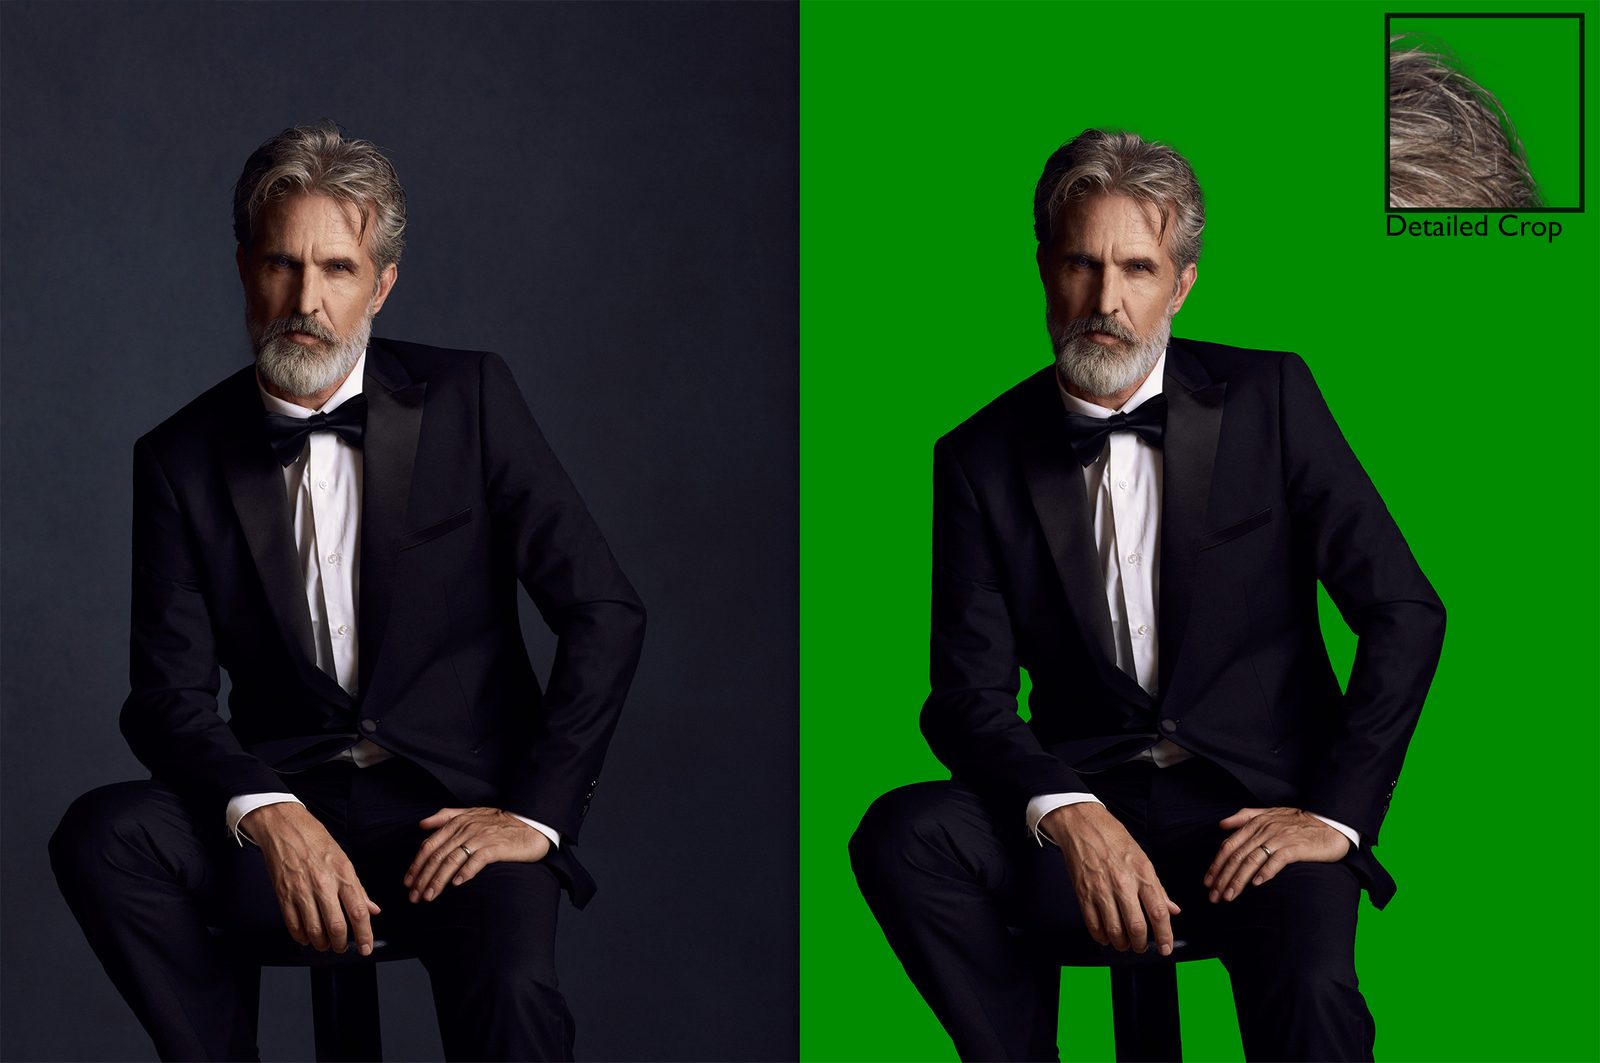
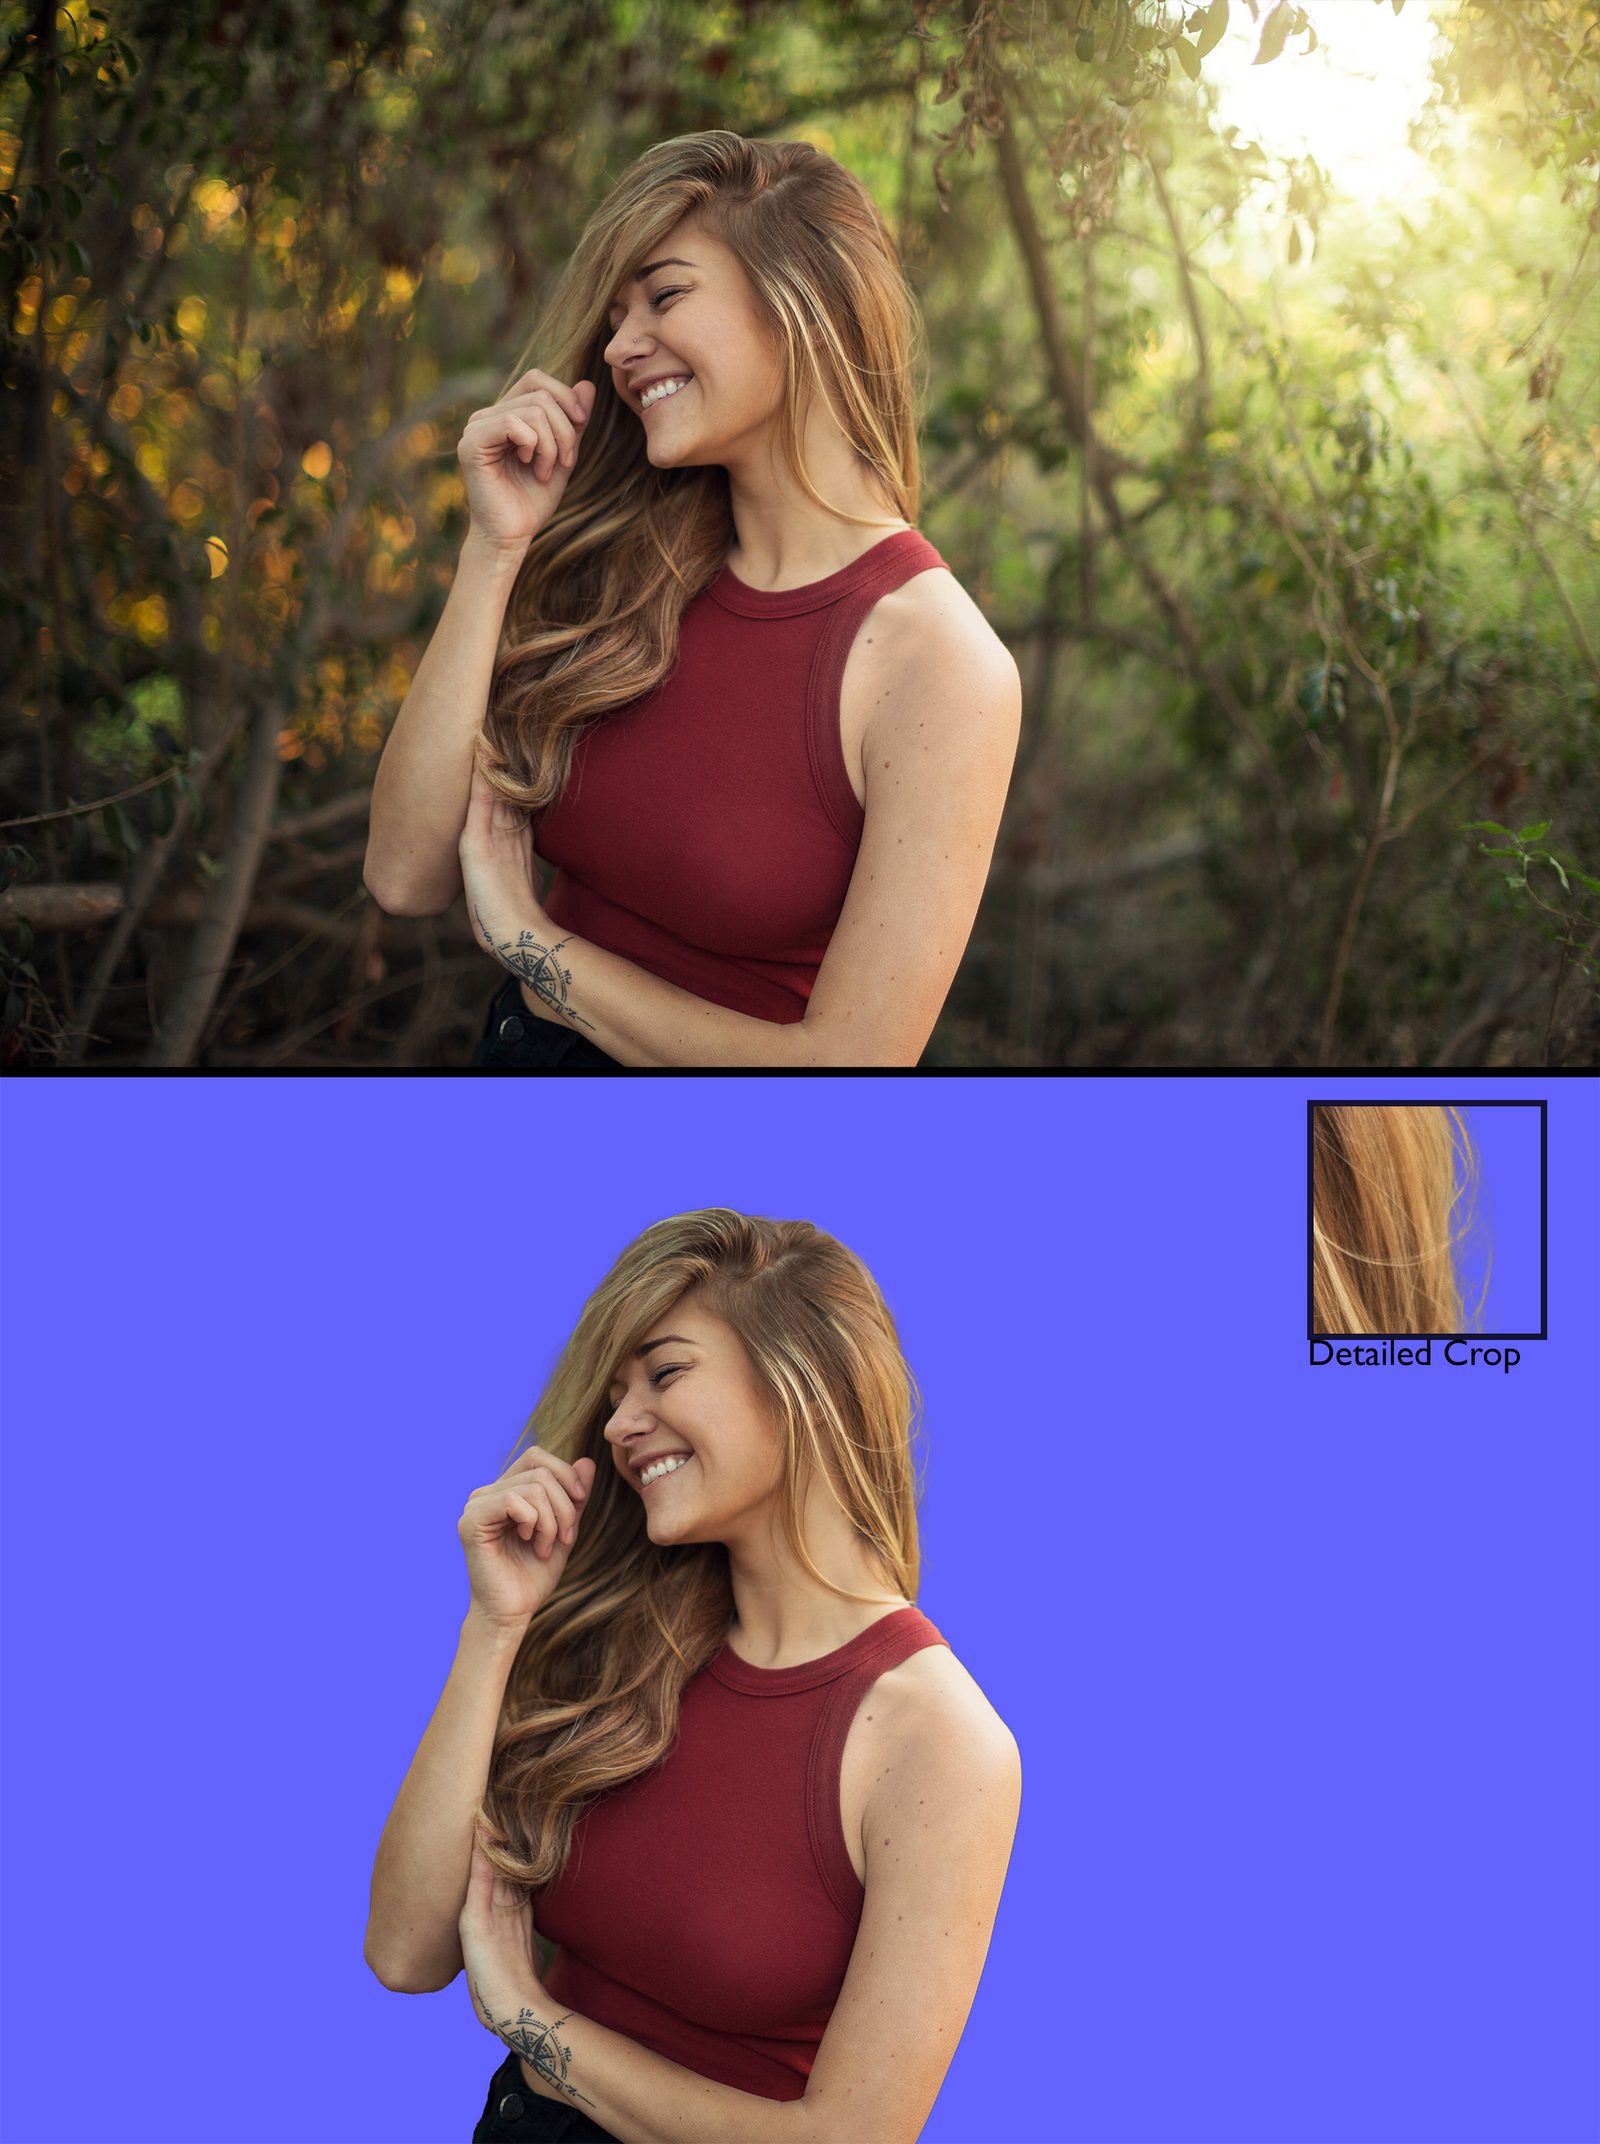
The Adobe Separate Background/Subject tools are now available on the latest release of Lightroom and Photoshop.
Adobe Generative AI
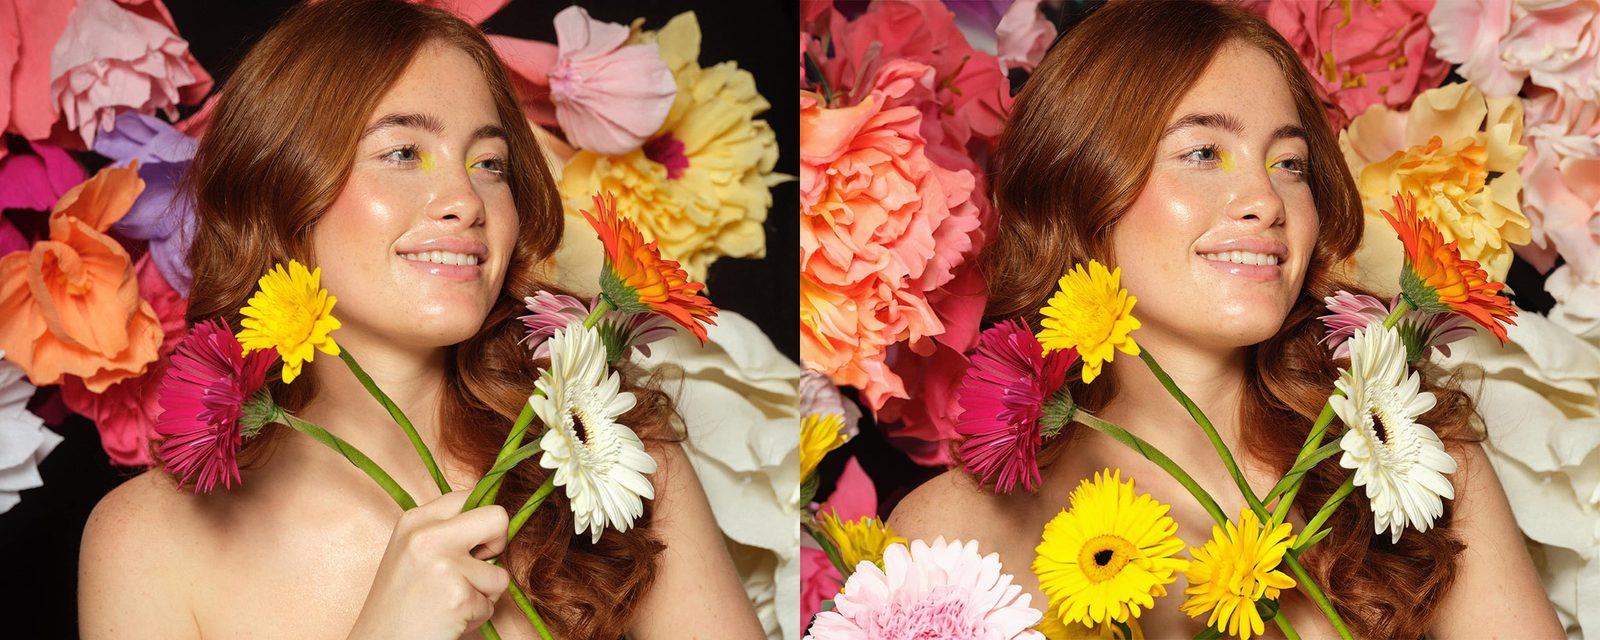
However helpful the Separate Background and Subject tools may be, they’re not the ones taking all of the attention these last few days – that would be Adobe’s Generative AI tool. Currently in beta (though you’re able to download the beta for free with a Creative Cloud membership), the Generative AI tool allows you to select specific portions of your image, and by using a prompt box, have Photoshop procedurally generate whatever you type. That’s right, finally, you can take a picture of your empty driveway. highlight the driveway, and have Photoshop generate the sports car to sit in the empty spot. Jokes aside, this tool can do as little or as much as you’d like based on the prompts you give it, and the results are really impressive despite being in beta.
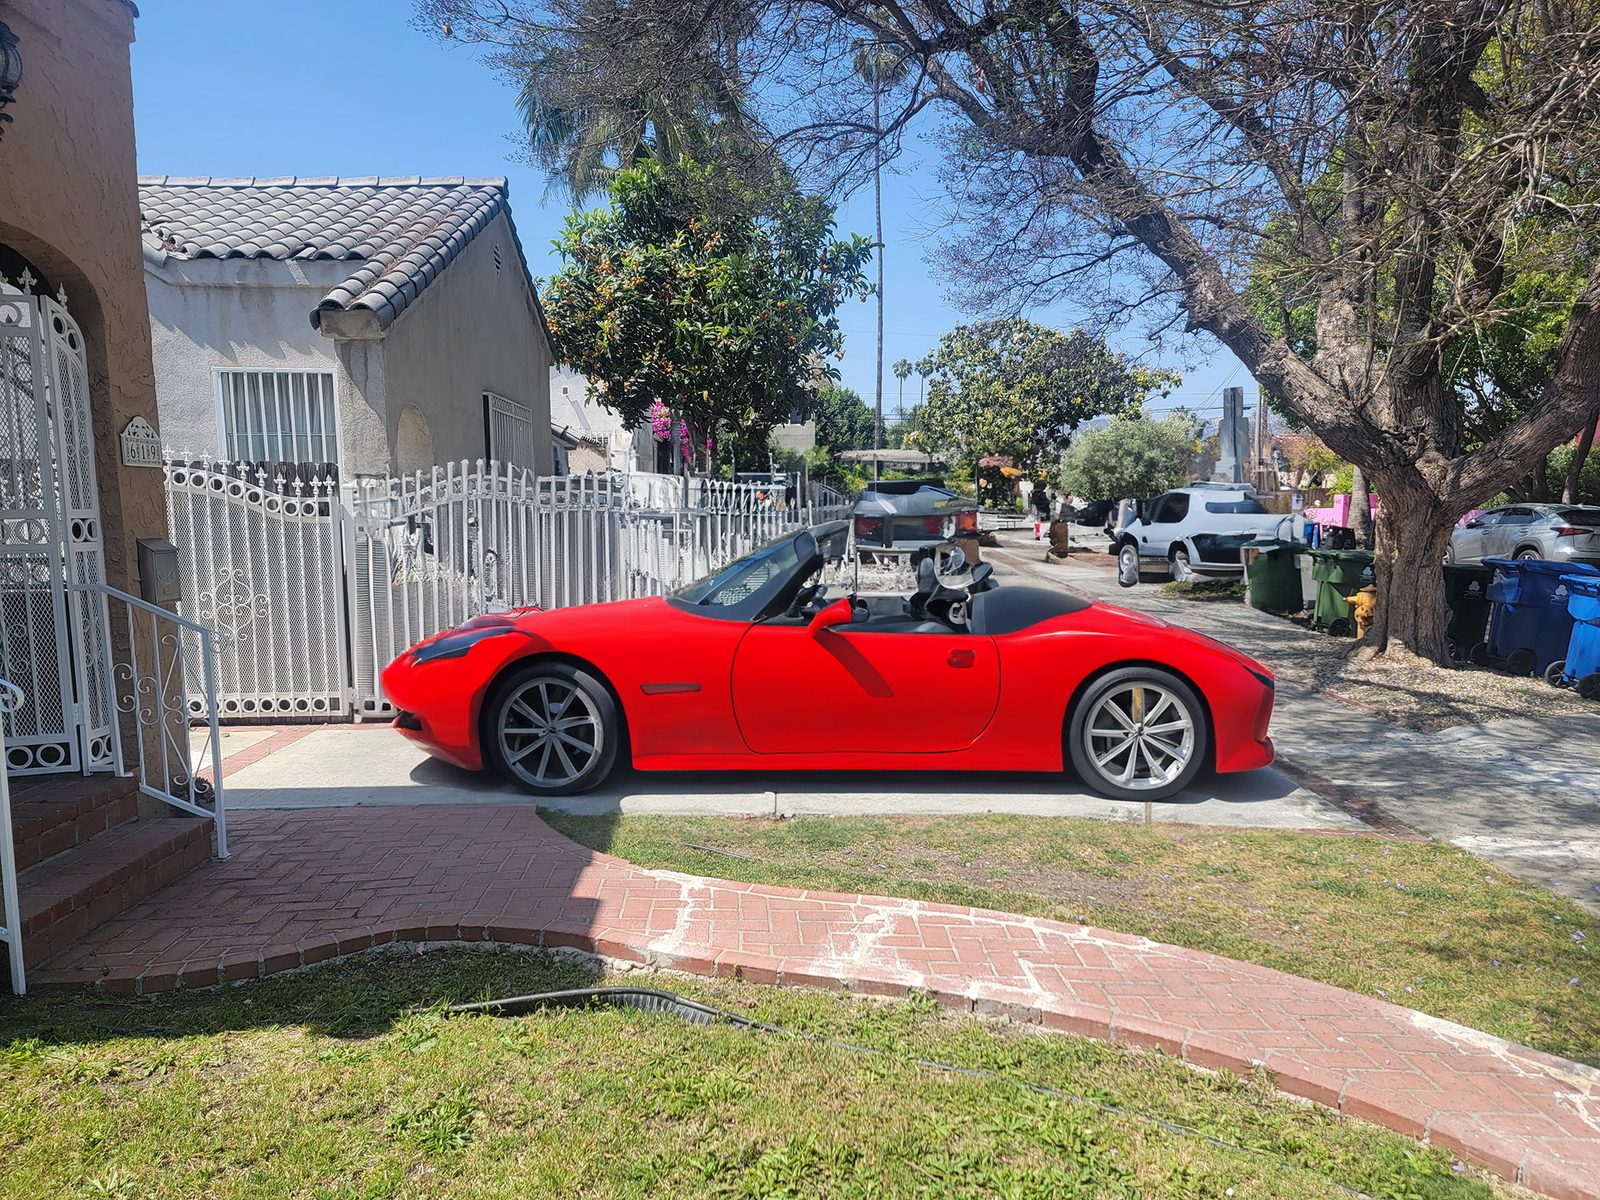
Now perhaps putting a sports car in the driveway isn’t the most practical use of Generative AI, as the current example has a lot of displaced things in the background, and the car’s shape and color are a bit off-putting. However, there are a lot of things Generative AI does an amazing job with. Most notably, if you’re trying to extend a background in an image, Generative AI can save you hours of time with a single click. It also does an exceptional job of adding smaller assets to the image. Some examples of that work is below.
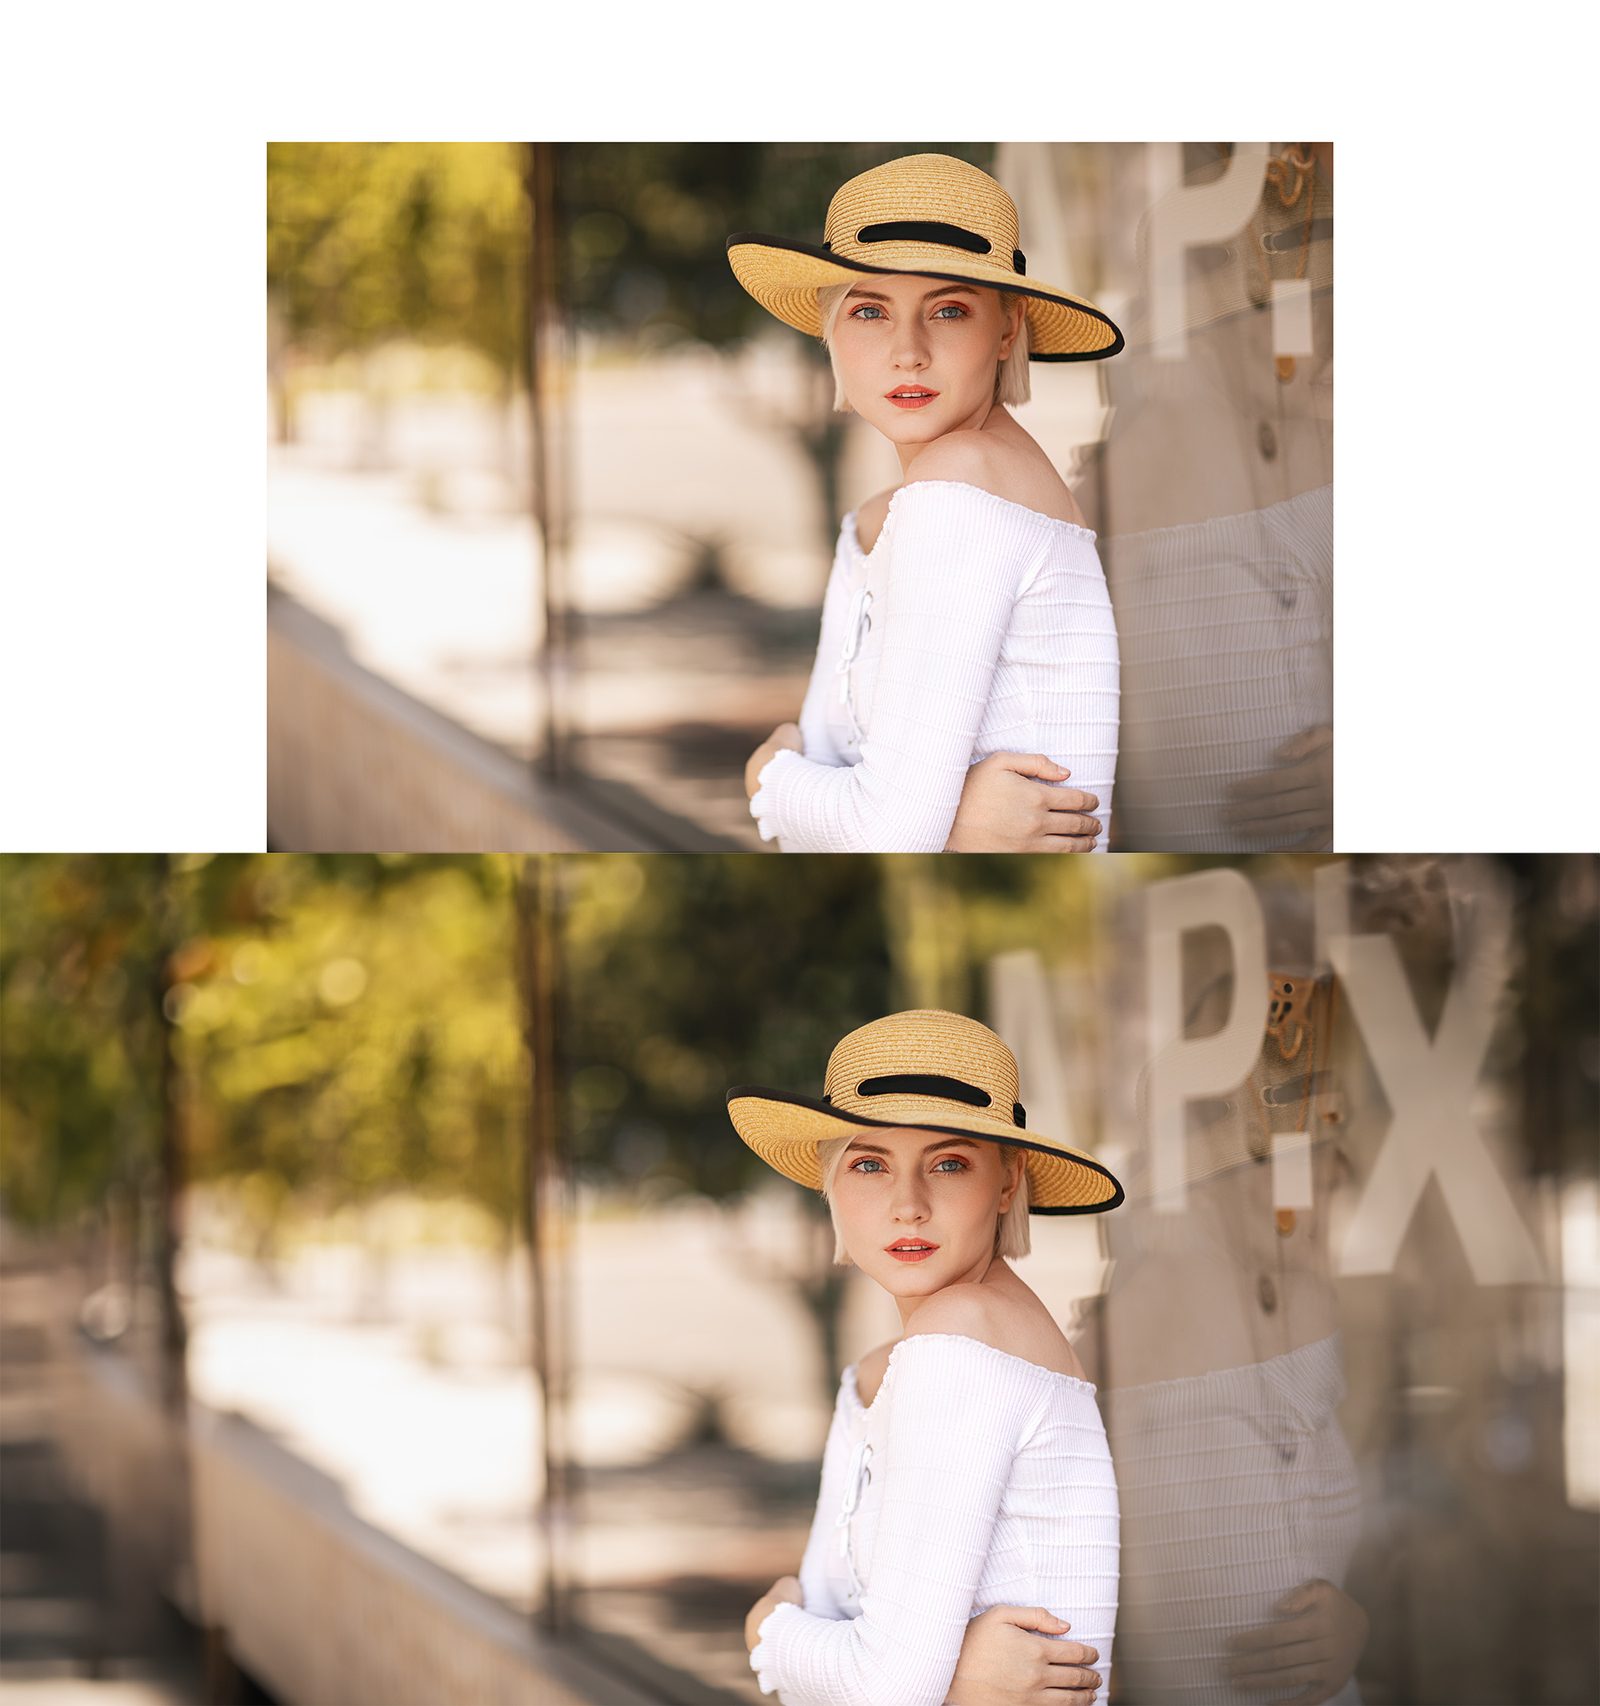
The results are so impressive, I’d go as far as to say that Generative AI is the best tool to come out of Photoshop since the Content-Aware Fill tool back in 2016. Leaving the greatest shortfall to your imagination, Generative AI using text prompts is a skillset in itself, but at the very least prompts like “Extend the background” work well, and allows you to fill a tight crop with something a bit wider.
[
View this post on Instagram
](https://www.instagram.com/reel/CtH9yLxgpuv/?utm_source=ig_embed&utm_campaign=loading)
And these are largely the two recent pieces of AI tools from Adobe (along with their AI Art generation tool entitled Firefly), with many more promised to come soon. Of those promises that is most noteworthy is their Shadow Regenerator found in their upcoming Neural Plugins. Not much is known yet about this upcoming tool, but the title alone makes us all very curious. Now let’s look at another company making plugins and standalone that are using AI to help with the retouching process – Retouch4me.
Retouch4Me Tools
Along with AI, a recent suite of tools has been released to photographers and retouchers which is supposed to change the way we retouch images as we know it. Often, old skin retouching plugins for Photoshop will find the color range of skin on an image, and apply a since overlay to that color range – often using a Gaussian blur effect on the skin and killing the detail. Retouch4me however, uses procedural AI to detect individual flaws within the image, and retouch them as a professional retoucher would – with far more selective editing.
You see, high-end skin retouching doesn’t have any shortcuts, it ends up just training your eyes and taking an obsessive amount of time retouching an image pore by pore. Usually using only localized dodge and burn and the healing brush, a good skin retoucher will easily spend over an hour cleaning blemishes on a model’s face. The job takes a long time, but when done right, makes the skin look perfect while still maintaining detail.
Retouch4me takes on the same process, but instead of using your eyes, it uses procedural learning to retouch the image much like a professional retoucher would. As for the results, I love these tools.
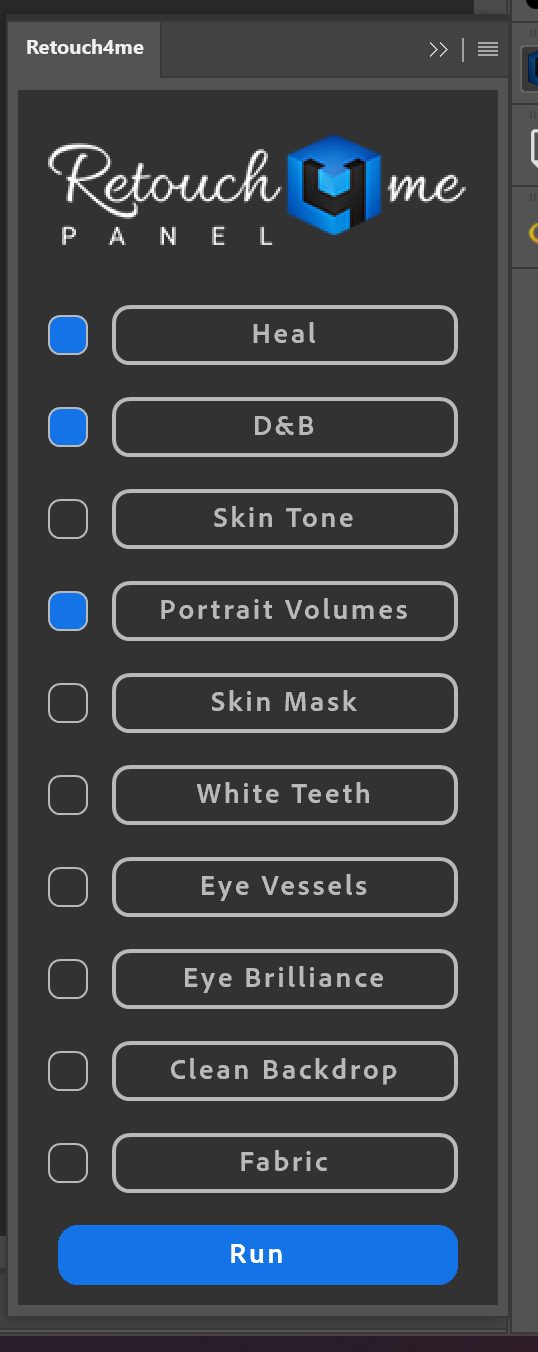
Retouch4me has several products in their product line for specific tasks that photographers are met with every day. Their lineup of products includes – Heal, Dodge&Burn, Eye Vessels, Eye Brilliance, Portrait Volumes, Clean Backdrop, Skin Tone, White Teeth, Skin Mask, and Mattifier. Of these tools, I was only able to test a few of them – Mattifier, Portrait Volumes, Dodge & Burn, Heal, and Clean Backdrop. So let’s take a look at them one by one.
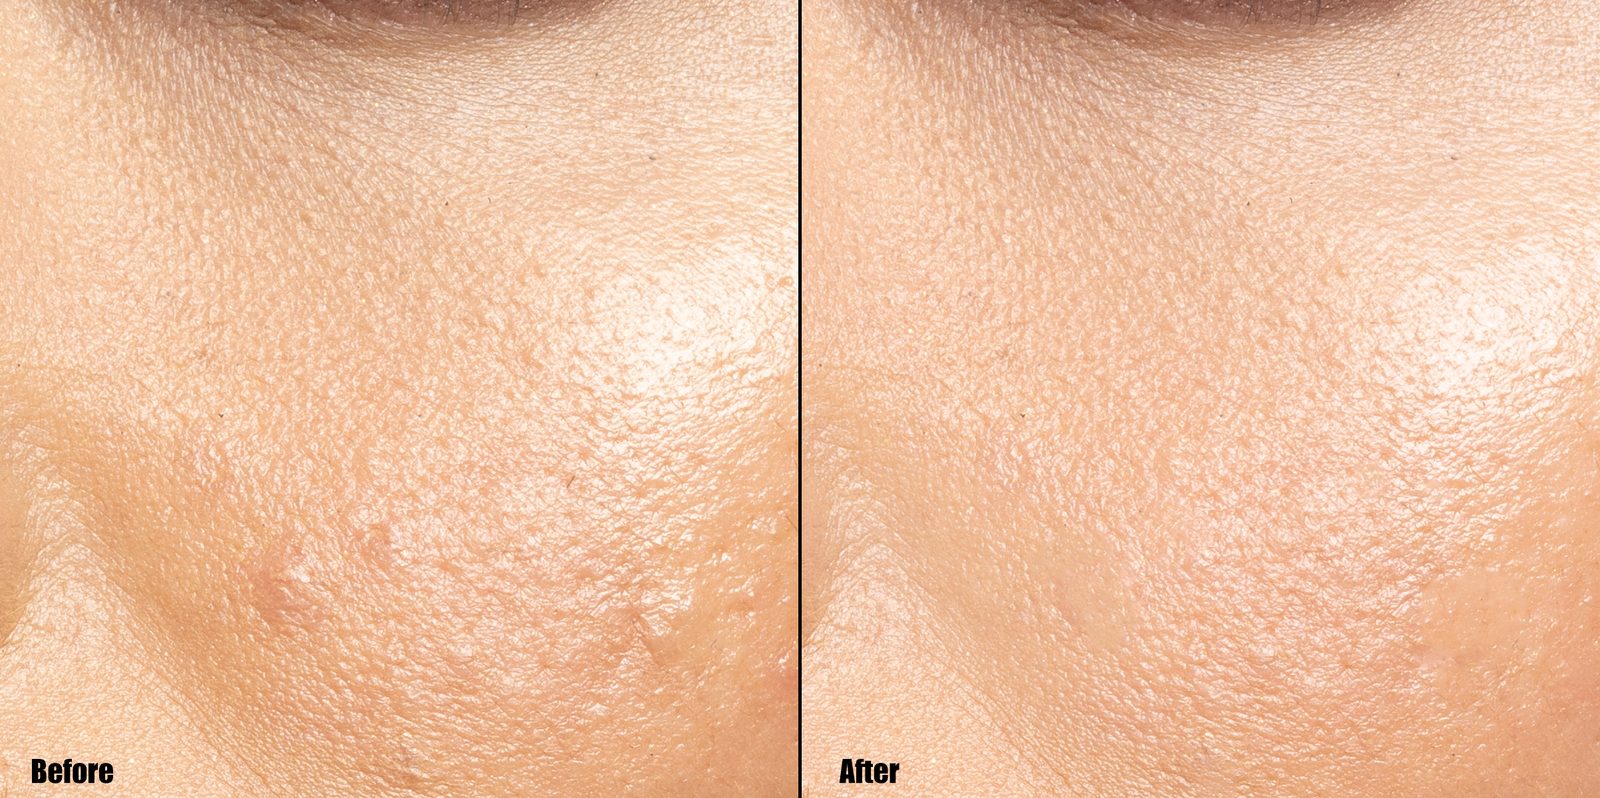
Mattifier
The first to test is the Mattifier tool, which is designed to help remove some of the glossy highlights you sometimes get on subjects. Of all the tools, this is probably my least used; not because it doesn’t do a great job, but more because I don’t typically have problematic highlights to remove in post-production. I’m, by and large, a studio photographer…so I’m in a hypercontrolled lighting environment, where highlights can be tamed pretty easily. Despite the lack of use for this tool, I did find that it does a good job finding the hot spots in skin, and an equally good job removing the highlights while maintaining a natural result. That said, it does typically work best when done, and then bring down the opacity a hair. I tested this on an image I recently took that has intention highlights to give a ‘wet skin’ look. However, despite the intent of the glossier skin, the plugin did a great job of minimizing the highlights, without making it look artificial.
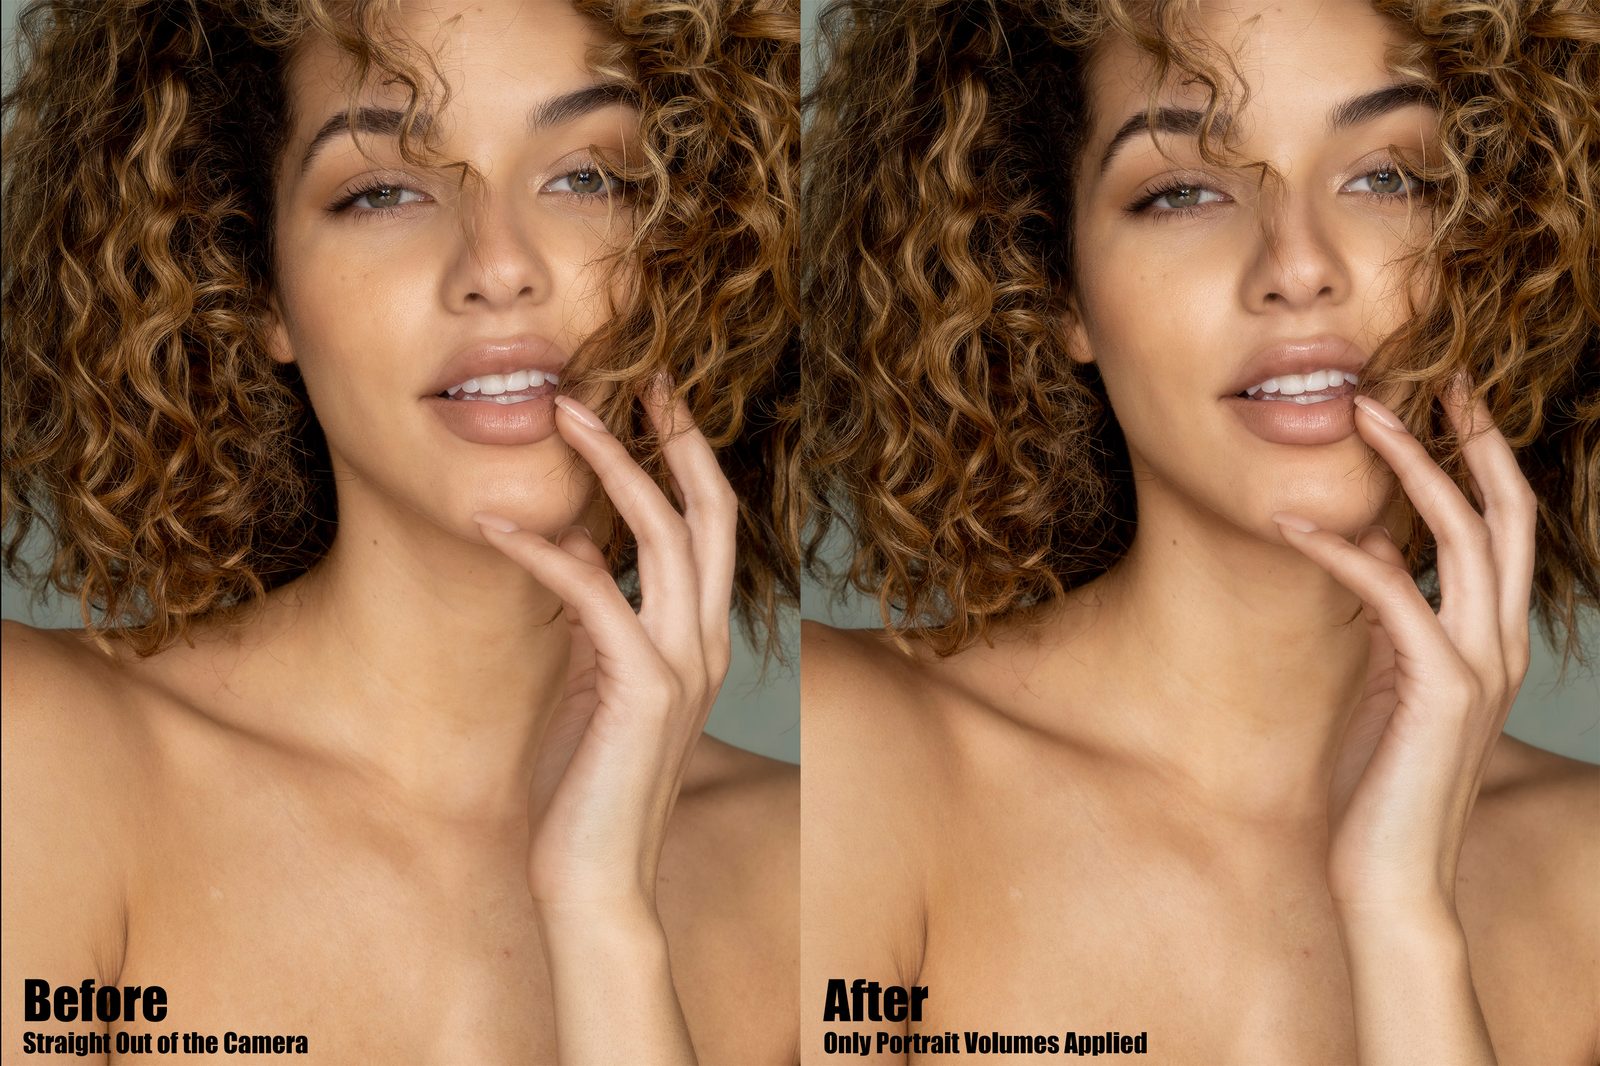
Portrait Volumes
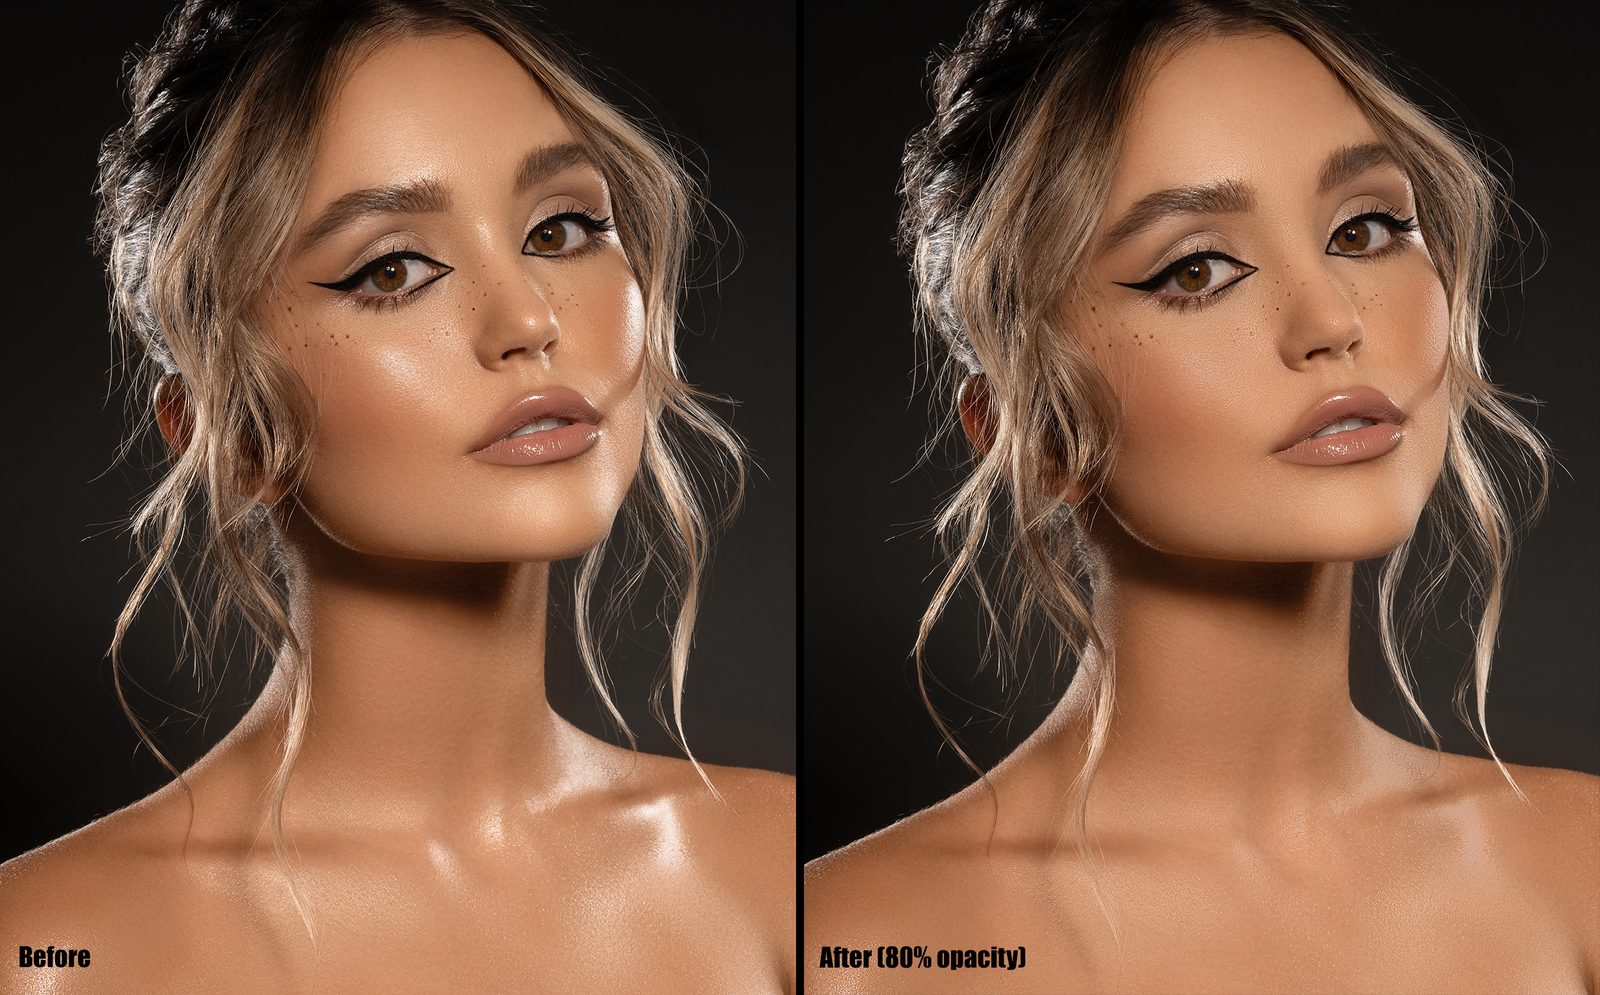
Of the 5 plugins from Retouch4me, this one might be my favorite. Dodge and Burn comes in a variety of flavors, but two of them are the most common – localized dodge and burn, and global dodge and burn. Localized is going in with and adjusting the highlights and shadows on a smaller level. This technique is usually used in skin retouching where you are able to make micro-adjustments to small places in the skin (as small as individual pores), and brighten or darken them to make the skin look cleaner, and more uniform. Global Dodge and Burn, or in this plugin’s case, Portrait Volumes, is designed to add contours and contrast on a more globalized level. Doing this will help give your images a more ‘3d’ effect, and is used to bring attention and focus to individual parts of the image.
And I must say, Retouch4me’s Portrait Volumes does a pretty astounding job achieving the ‘globalized D&B’ look with a single click. Now trust me, I’ve spent countless hours honing this skill set by literally drawing a 50% grey circle in Photoshop, and turning it into a 3d sphere by using only dodge and burn layers and brushes. While this software doesn’t turn circles into spheres, it does a great job of contouring faces and objects to help them stand out better. Some examples of the Portrait Volumes tool are reflected below.
Dodge & Burn
The second type of dodge and burn, commonly referred to as localized dodge and burn, is reflected in the next toolset – Dodge & Burn. Dodge and Burn is the process of adding highlights and shadows to your images, and actually goes back to the film days when photographers would use chemicals to expose portions of the image differently to add contrast. Now, it’s highlighted in a few different tool sets built into image editors, and for high-end retouchers, is one of the most important tools when retouching images.
Retouch4me’s Dodge and Burn tool automatically goes through, finds macro differences in the contrast of skin texture and objects, and evens them out automatically. This can help clean up blemishes in the skin, and help make colors look more uniform. The results are very subtle with this tool, but it does an excellent job of retouching problematic areas without looking overdone.
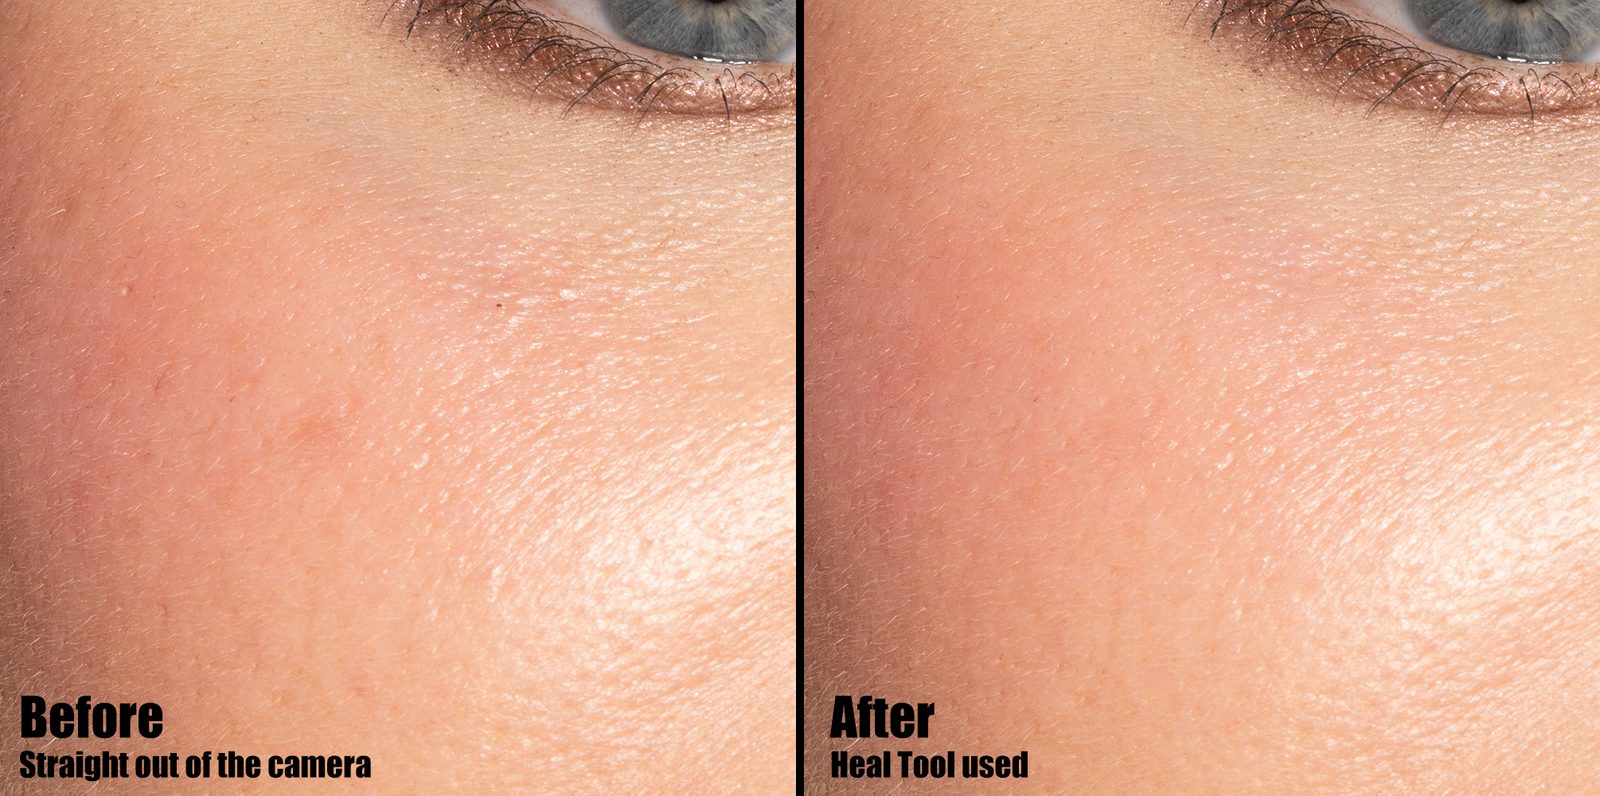
Heal
And then there is the Heal tool, which is a technique implemented by retouchers to remove problematic areas, such as blemishes, bruises, scratches, and wrinkles by essentially cloning out the area with cleaner skin in close proximity. Healing is usually done on a very small scale, as larger patches will look discolored or inaccurate – especially when dealing with skin.
Healing is the backbone of skin retouching and doesn’t get nearly enough credit for what it’s capable of. As for the Retouch4me version of healing, it does a really nice job, albeit, subtle. I have a zoomed-in example of what it did when I tried it below.
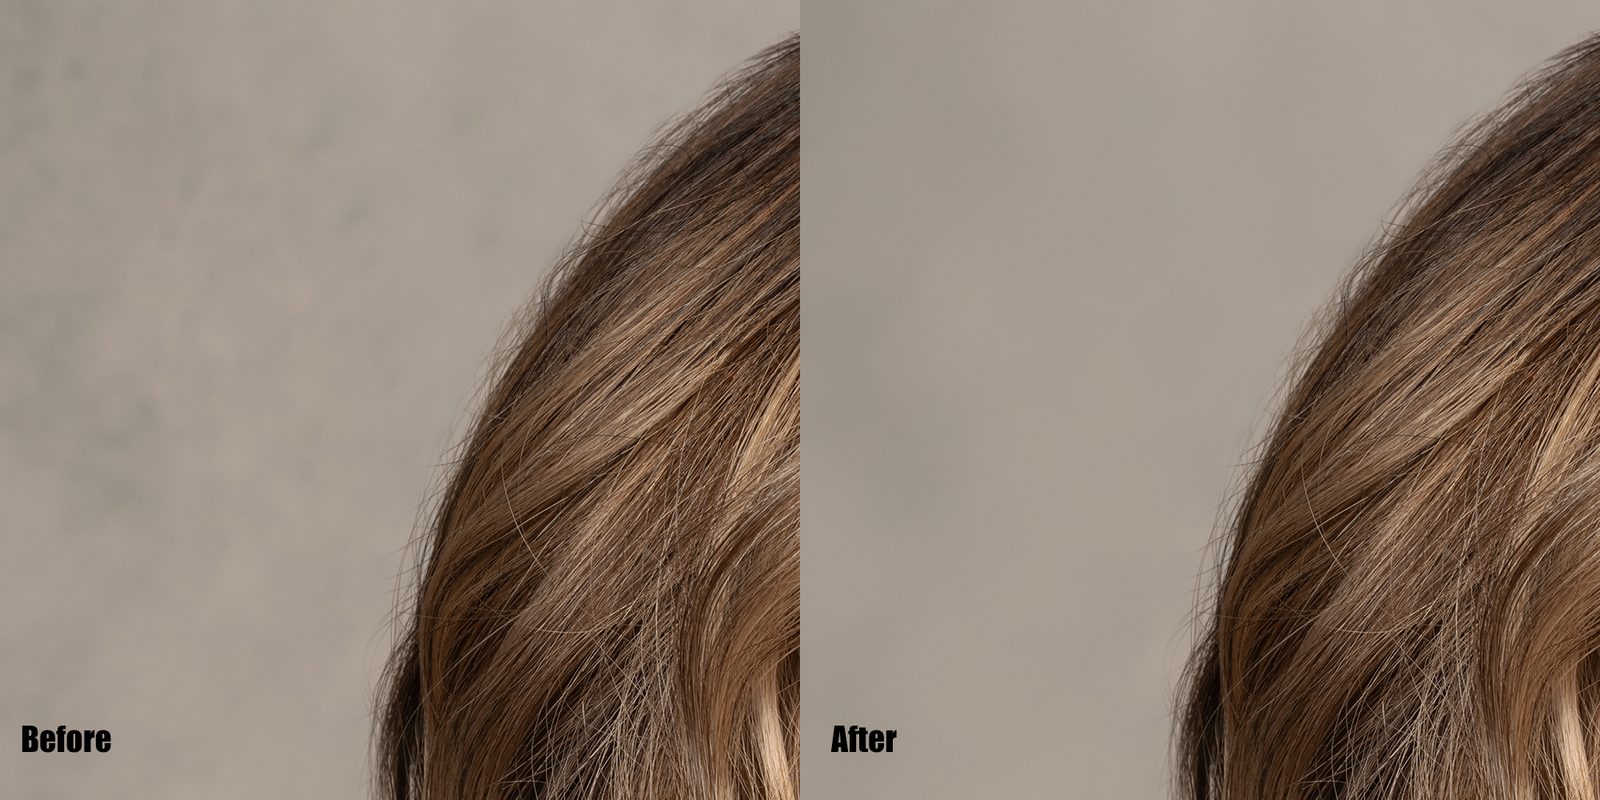
Clean Backdrop
And finally, the last of these tools I tested was probably the most practical for the broadest range of photographers – Clean Backdrop. Designed to go through a studio backdrop and remove any creases, dirt, and other distractions, Clean Backdrop works surprisingly well. And for someone who admittedly doesn’t always take the best care of my seamless backdrops, this tool can save a lot of time – especially when shooting product and macro photography, where the faults are only more glaring.
Those are just the five different Retouch4me tools that I tried. They have several more options, from teeth whitening to skin masking, and if they work as well as the ones I’ve tested, I’d continue to be deeply impressed. I fully intend on continuing to use these tools in my retouching workflow, and am excited about the hours of work I’ll be saving.
Conclusion
So those are just a few of the most popular AI tools being used in retouching today. A few months ago, I gave my take on what AI Art generation like Stable Diffusion and Midjourney would do to the industry. In short, I shared the sentiment that the cream will always rise to the top, and that if you kept your work unique and personal, you shouldn’t worry. Since then, I’ve seen several significant updates to the platforms, and have even had clients tell me directly how AI has completed jobs that they usually reserved for paying photographers and graphic designers. Not to mention, AI Art can already be seen used on billboards today.
So I’m hesitant to give my take on these latest innovations in the field. While I’m excited to see retouching tools, especially those from Retouch4me help make the basic and monotonous tasks so much faster and easier, I’m a bit more worried about what Generative AI will do for the industry. If AI tools can meet, or even surpass the skills of the experts in the field, it’ll only be harder to make a name in the fields of photography, and in this case, retouching. I learned years ago, that efficiency is the king of all markets…so when AI can generate something in seconds that would normally take a human dozens of hours, which way is the commercial market going to turn? Well, I hope I’m wrong, but the outlooks aren’t promising.
But I’d love to know your thoughts. Is there any AI that you’re using to help with the workflow process? Are you concerned or excited about what AI will continue to bring to the photography world? Chime in in the comments below.

3 Comments
Athanasius Kirchner ·
Excellent article, your overview of the features is concise and useful. My only niggle is that the price of the Retouch4Me tools is missing, and it’s not inconsiderable (over $120 for most of them), which puts them out of reach of amateurs with limited resources, or even pros in poorer nations. It’d be good to temper expectations first, as good as the results are.
Alec Kinnear ·
No kidding about the prices for Retouch4Me. Looks like Oleg is breaking up the tools into as many tiny pieces as possible and charging $124 for each of over a dozen tools.
Someone else will do the same thing better for less money. Patience.
JP ·
I was genuinely surprised at how useful the new generative AI tools are in the Photoshop Beta for a recent portrait session. It was able to do, in minutes, retouch work that would have taken me hours across a series of images.
To be fair, it still has a long way to go: What I consider to be “simple” retouch work it did not do to my satisfaction (or I need to learn to “instruct” it better).
All this is a boon for the current generation of photographer, like me -who has struggled to get certain results. But the converse of this advancement: I wonder how “lazy” this will make us? “Fix it in post” is the antithesis of how I came to first approach video and, now, photography. Now, we’re doing nearly *everything* in post.
My admiration for photographers like Dan Winters and others who shoot for publications (e.g. National Geographic) that prohibit retouching has only increased.