Lighting within photography holds a reality – It’s easy to understand, but really takes years to master. As such, you end up seeing a progression with photographers who start using studio strobes that looks very similar to the Dunning Kruger effect chart – where they figure out basic principles, think they’re a lighting expert, and then watch as their confidence slowly withers away as they start diving into more advanced techniques.
And as such, today we’re going to touch on some more advanced lighting principles that really apply to studio photography as you advance your understanding and skillsets in the field. By no means would I say I’m a lighting expert – solely because I think to be an expert at anything, you must devote your entire life and career to the craft, and I’m still learning all the time. However, I have written several articles on the topic, taught many classes and workshops, and gotten the attention of some of the bigger brands with my experimenting.
Lighting Foundations
This piece is going to be focusing on a single topic of lighting – quality. However, I think it’s important to have a basic understanding of what I consider the three principles of light – Intensity, Direction, and Quality.

Intensity & Direction
The first two principles are the two easiest to understand. Intensity is simple, after all, it’s just the brightness of the light (in relativity to your subject). This can be determined a number of ways, from the power output of the light, down to an understanding of the Inverse Square Law. Direction is largely just as easy. Is the light coming from above? From the side? How does the direction of light affect the highlights and shadows? Understanding basic principles like intensity and direction can get your lighting work 80% of the way there; but the quality is where the special sauce is applied.
What Quality Is Not
When discussing these three principles of lighting, it’s easy to have a missed understanding of what quality means. It does not mean whether you’re using a $5000 strobe over a $300 strobe…in fact, it has nothing to do with the gear you’re using, as the sun itself has different quality aspects throughout a single day.
What Quality of Light Is
Quality of Light, under the intended term here, means a variety of adjectives to describe your light. Is the light soft, or is the light hard? Is the light color balanced with daylight or some other color? Is the shape circular, or is it a rectangle? Additionally, how do the distance and intensity affect the quality of light? Is the falloff of light extreme, or subtle? How is the exposure balanced throughout the frame?
Having a clear answer to these questions will significantly better your understanding and placement of light to achieve the desired effect. I’ve given lighting principles and examples on this blog before, but let’s touch on some more advanced techniques that I implement all the time. Specifically, let’s look at feathering and zooming.
What is Feathering Light?
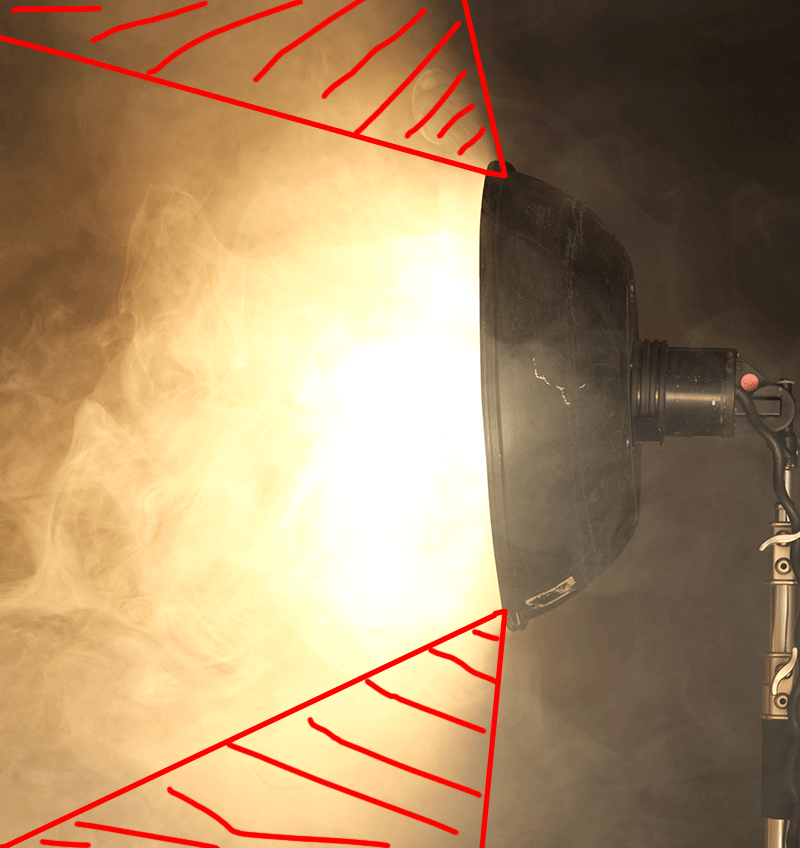
To understand how feathering light works, you must first have a basic understanding of how your strobe design affects your light falloff, a topic I’ve discussed on this blog before here. Feathering light refers to the technique of using a soft edge or gradual transition between the illuminated and shadowed areas of a light falloff. This technique can be used to create a softer, more natural-looking image by reducing harsh shadows and highlights. The reason why feathered light is considered “softer” is that it mimics the way that light behaves in nature, where the edges of shadows are usually not well-defined and there is often a gradual transition between light and dark areas. This can help to create a more pleasing and natural-looking image.


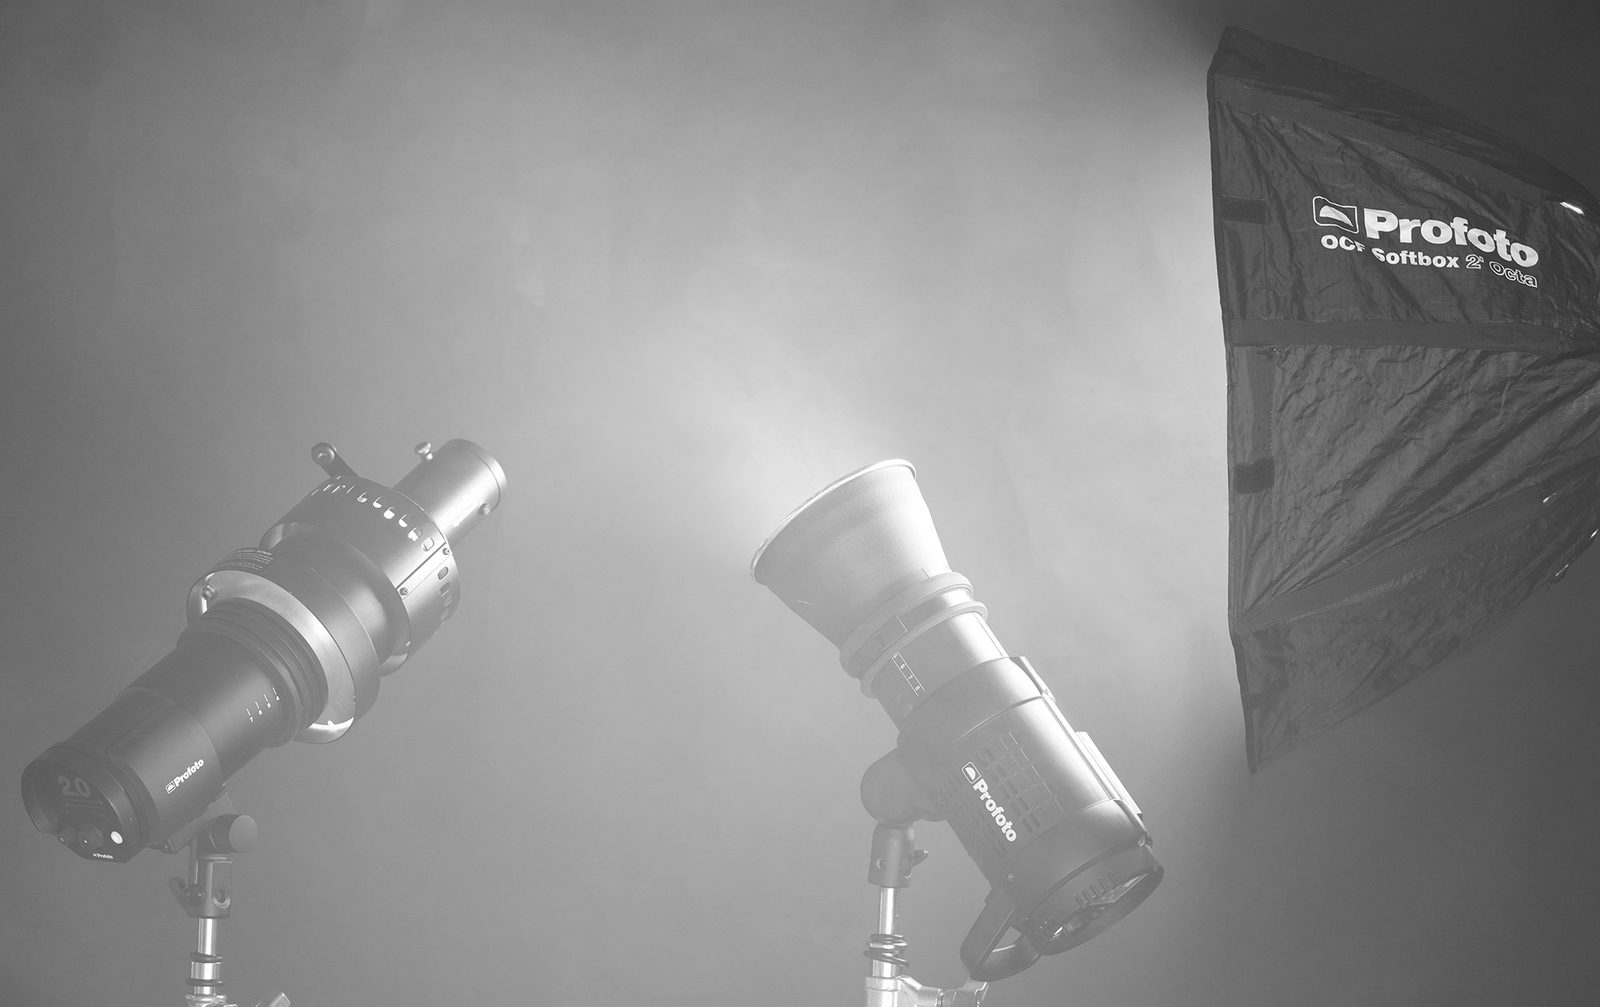
Using techniques like feather also gives you supreme control over your lights and how it falls off. Ultimately, photography isn’t just about controlling your light, but controlling your shadows as well. Feathering your light is simple, it involves angling your light in a way that the edge of the light is the part predominately lighting your subject. To visualize this, I used a fog machine in my studio, and with the help of the modeling light, was able to get a good visualization of how light falls off of a standard beauty dish.

Zooming Light

This technique is a great technique to better control your light, but limitingly, only available for a single strobe brand – Profoto. If you have read my piece on why I love parabolic reflectors, you probably have an understanding of how zooming lights works. But in short, your strobe bulb position matters, and zooming modifiers allow you to adjust the light beam qualities pretty dramatically. Zooming a light means repositioning where the flash bulb sits in your modifier and given Profoto’s rubber ring mounting system, you’re able to reposition the light’s beam angle based on where the light is mounted. On most modifiers, Profoto has a simple explanation of how it works – just match the numbered line on the side of the strobe with the mounting ring. This adjustment will change the beam angle of the light, and increase or decrease the angle and thus, the feathered zone on the light. In short, the higher the number setting, the more narrow the light beam will be, as the light has more places to bounce around and redirect at different angles. Below is a photo of these adjustments, as well as once again, an example of what zooming a light looks like in a smokey studio.

By having a better understanding of your light’s falloff properties and its beam angle, you’ll be able to get better control of your lights and use them in new creative ways. Hopefully, this breakdown brought a bit of clarity to the topic. Is there anything else lighting-related that you’d like to see covered? Feel free to write some recommendations in the comments below, and check out some of these recommended reads for more lighting breakdowns.

1 Comment
Athanasius Kirchner ·
Very nice intro to the topic, although I’d have loved to see a few more examples, like maybe hard vs. feathered light, or the impact of a zoomed strobe in two positions. I have little experience with artificial lighting, and so could use a more graphic explanation. Thanks for writing the article.