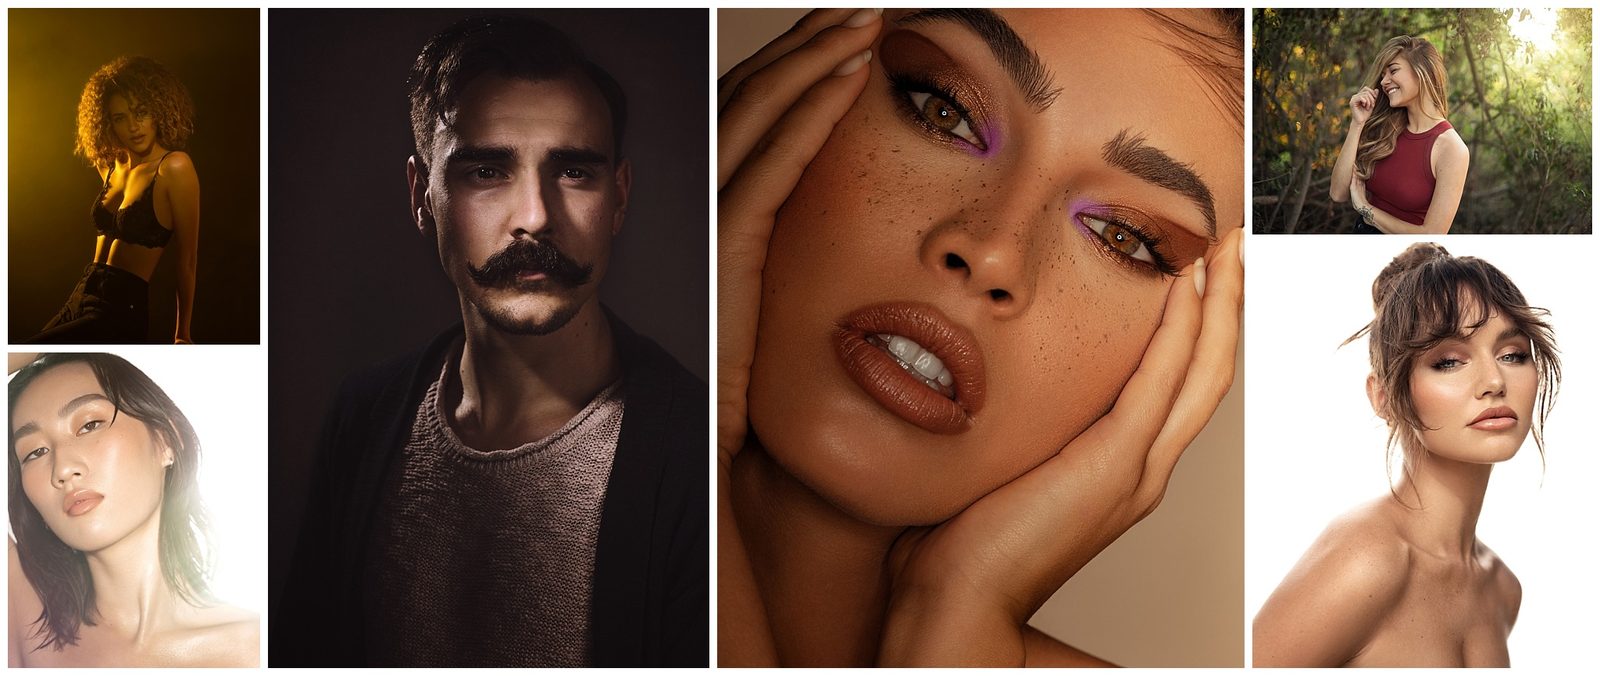
Over the course of my career, I’ve noticed that a lot of my work comes in waves, where I will be incredibly busy for several months on end, and then be really slow for a month or two. Historically, August is always been a slow month, so as a result, I typically take my time in August to organize my backups, and develop a stronger workflow for the upcoming busy season. This year was no exception, and while digging through my archives, I found a lot of photos that I’ve shot over the recent years that I really appreciated for their lighting technicalities. And since the month has been slow, I thought it would be a great time to share some of those images with you on this blog, with never-before-seen breakdowns of how I was able to shape the light.
So below, I have six different photo shoots of recent years, and I will walk you through the process and intent of each photo, how I light and the modifiers I used to capture my intended vision. If you have any interesting lighting techniques of your own, feel free to share them in the comments below, and if nothing else, let me know what you think. So without further ado, here are six different lighting breakdowns from somewhat recent photo shoots.
Chanel
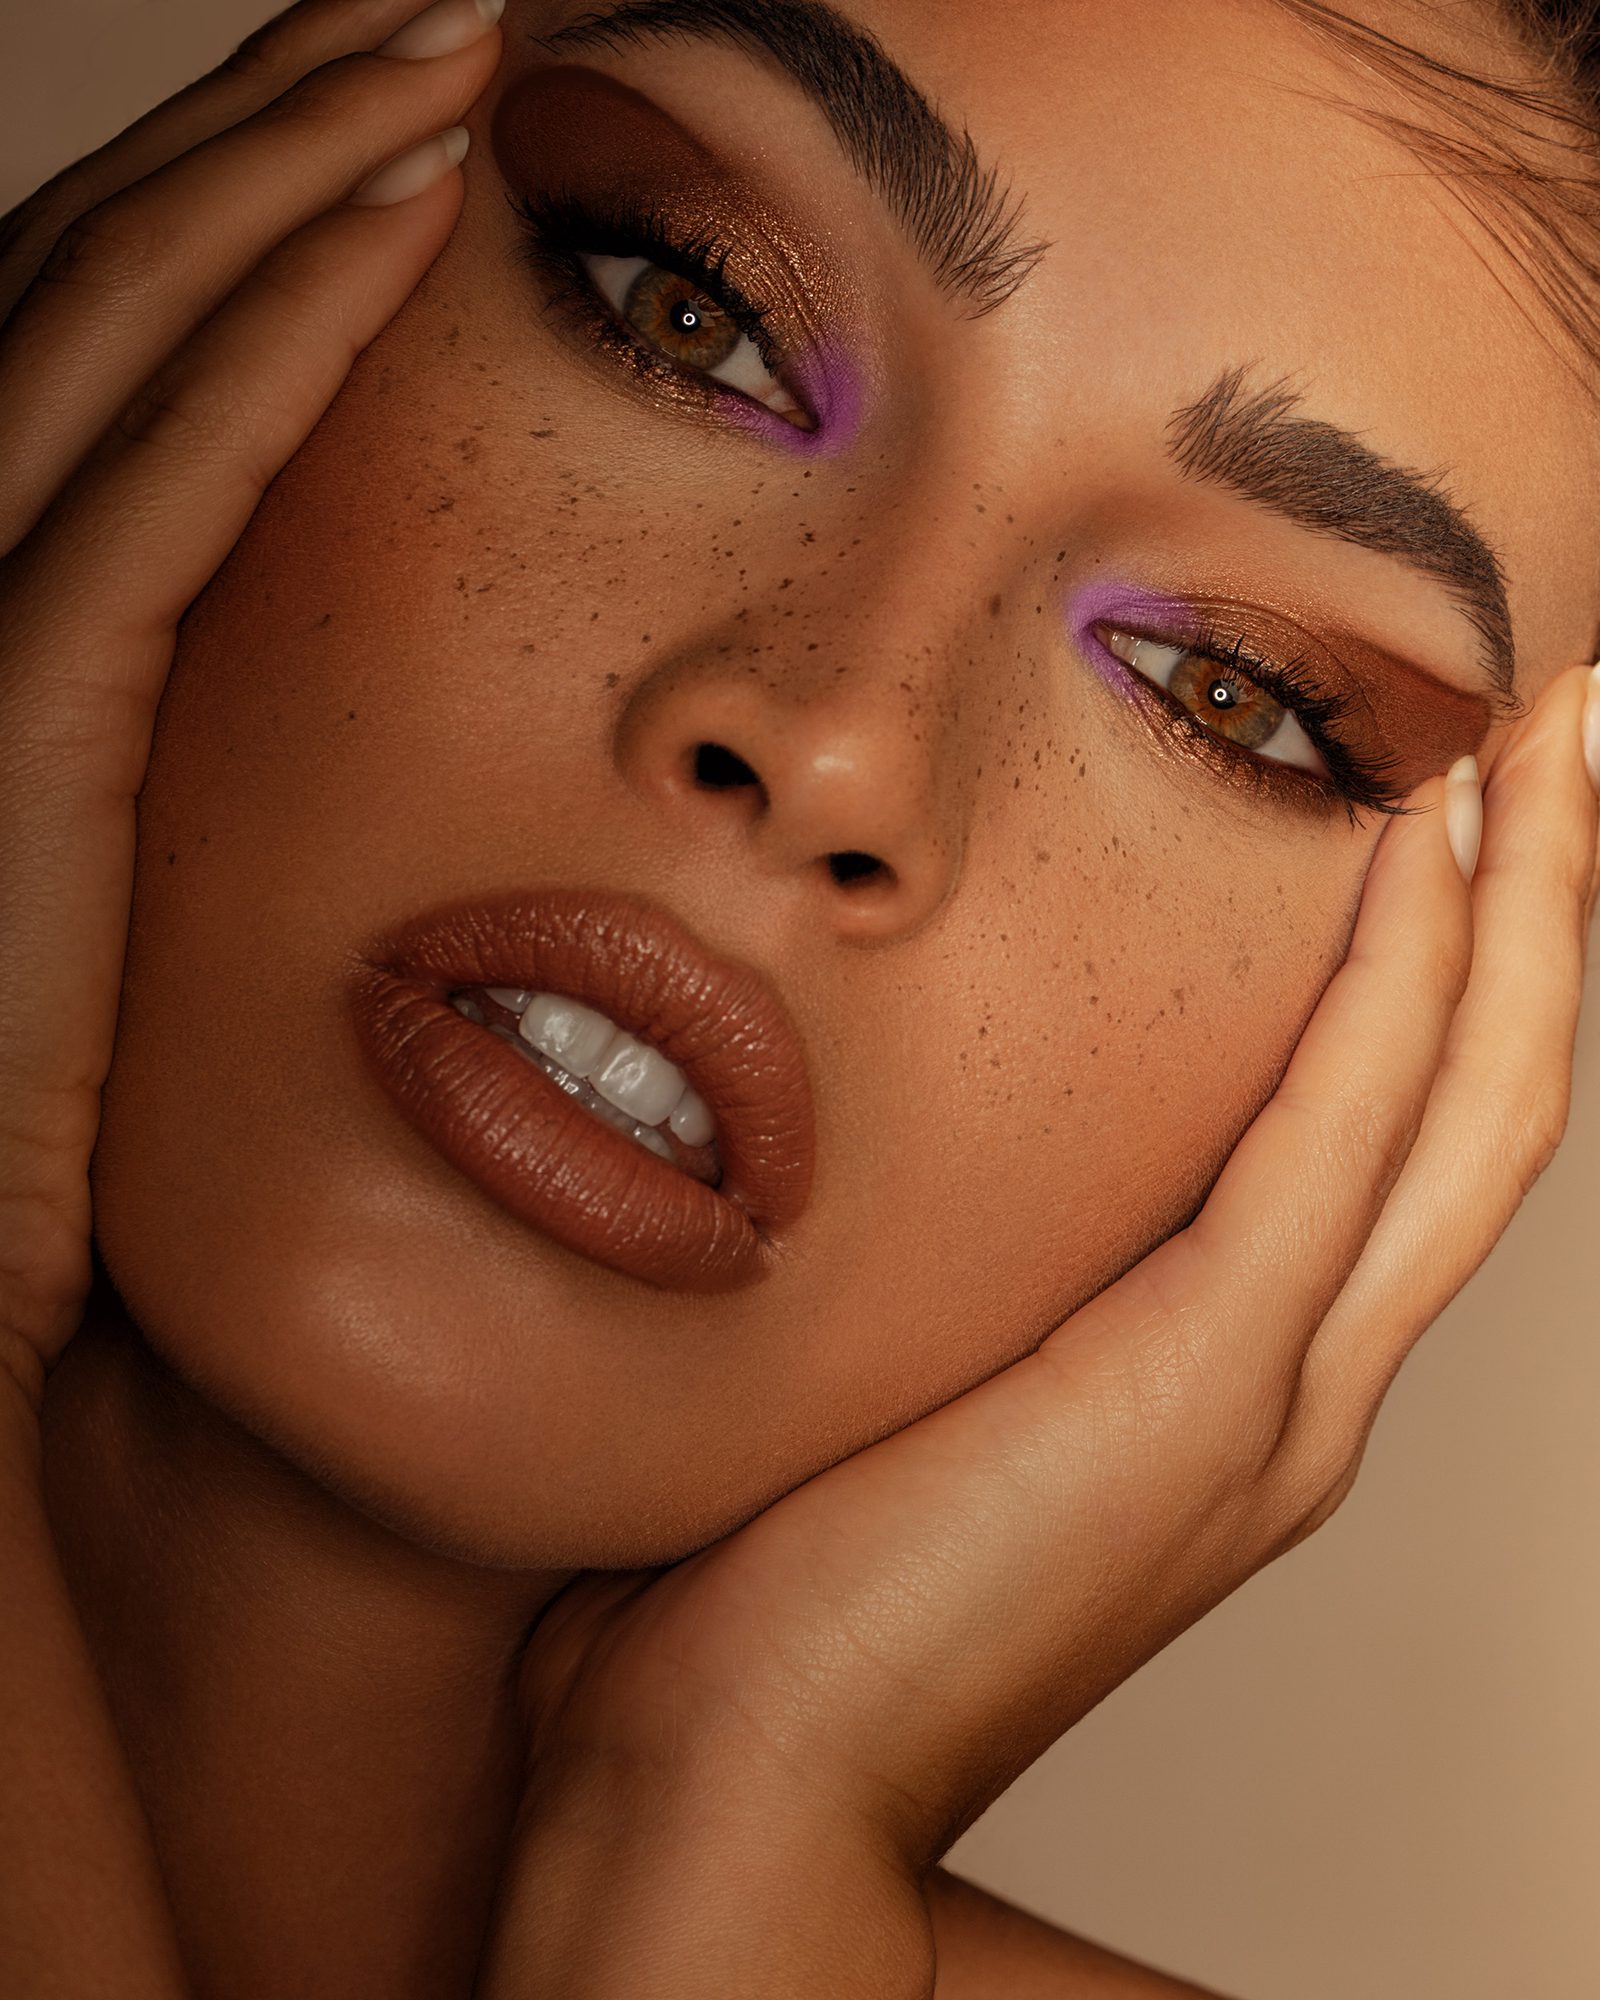
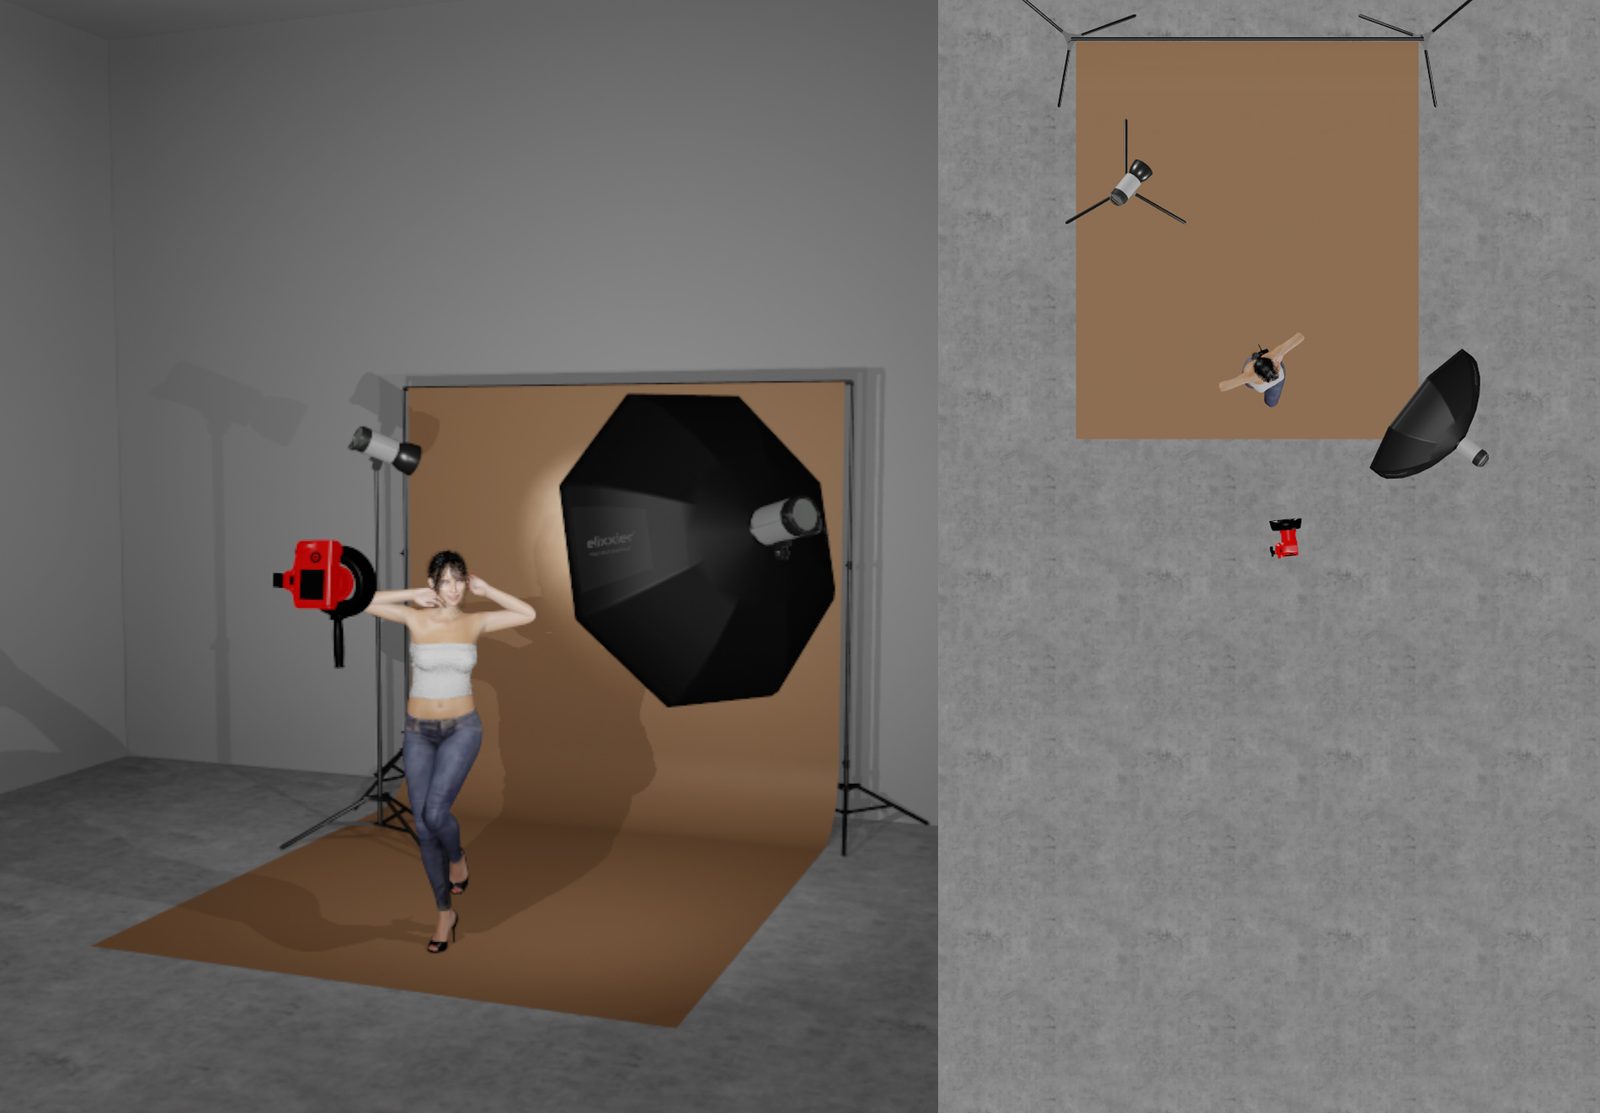
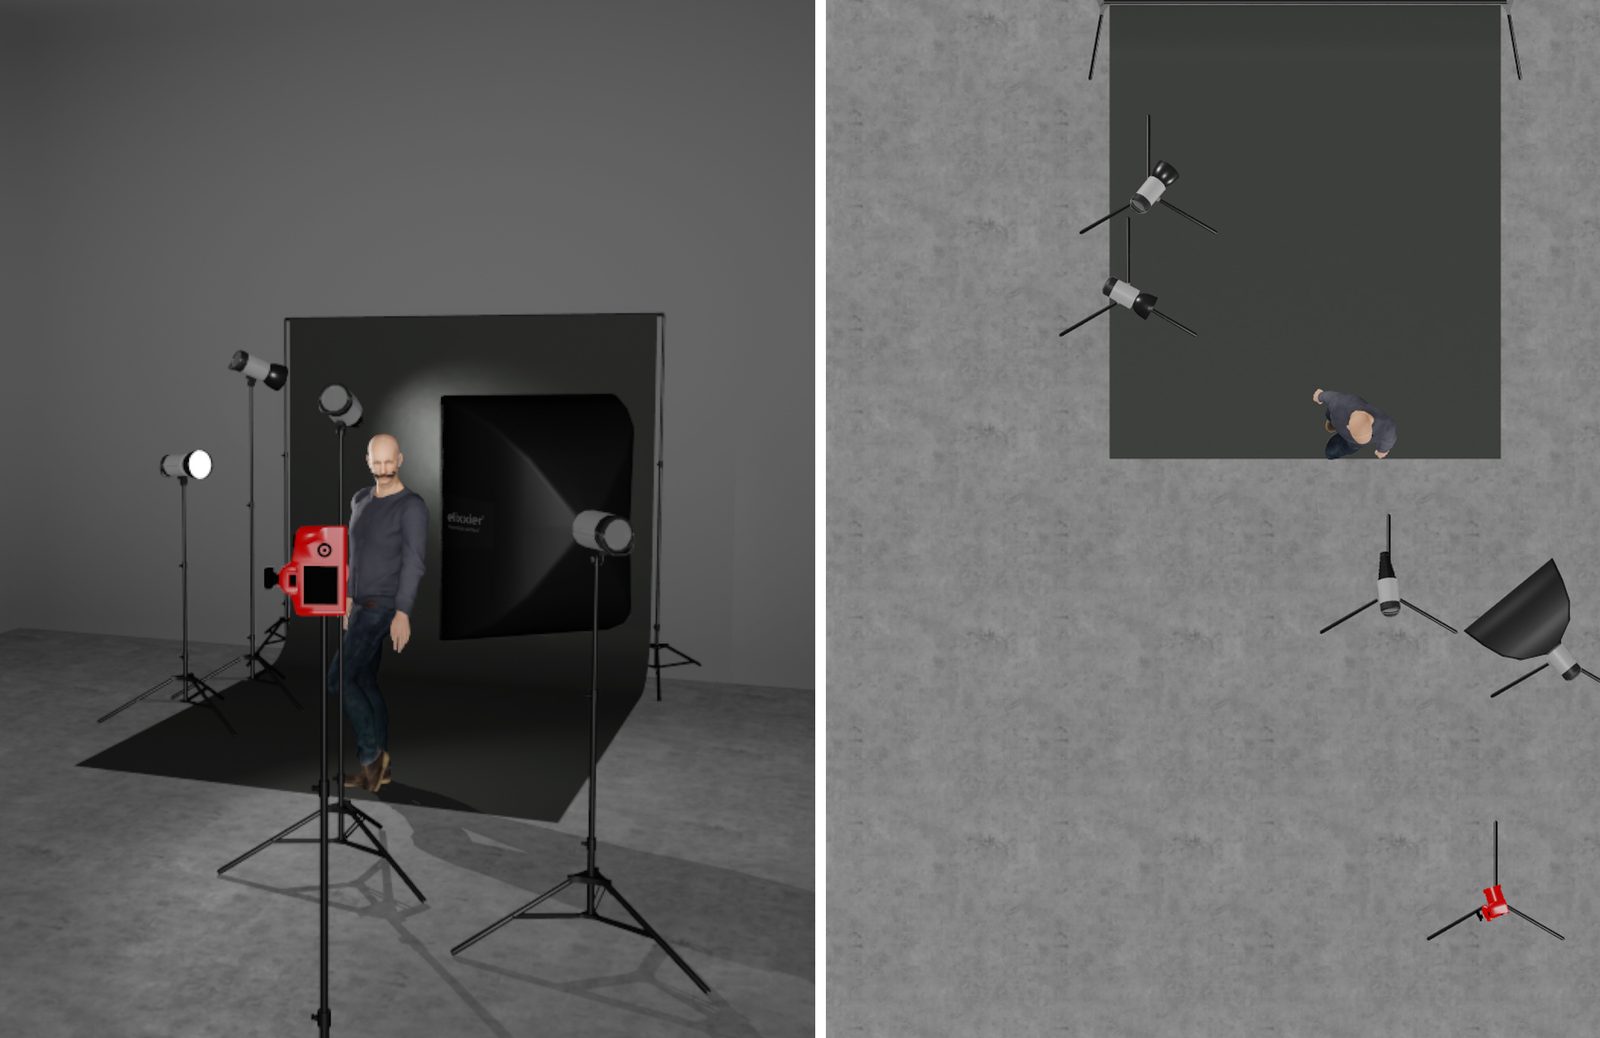
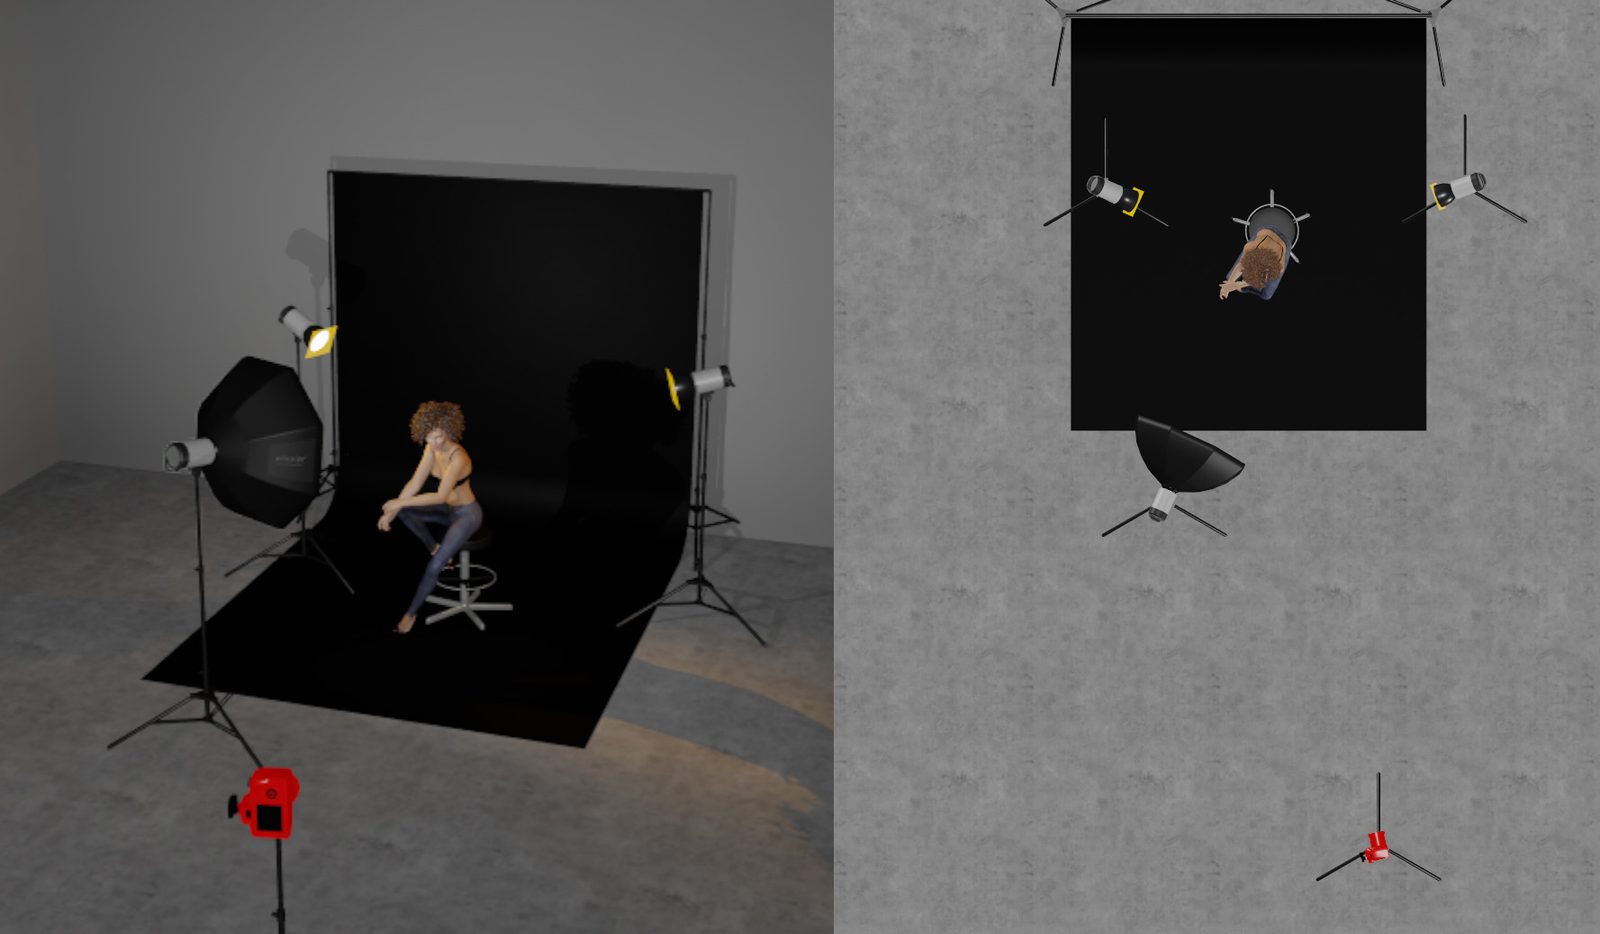
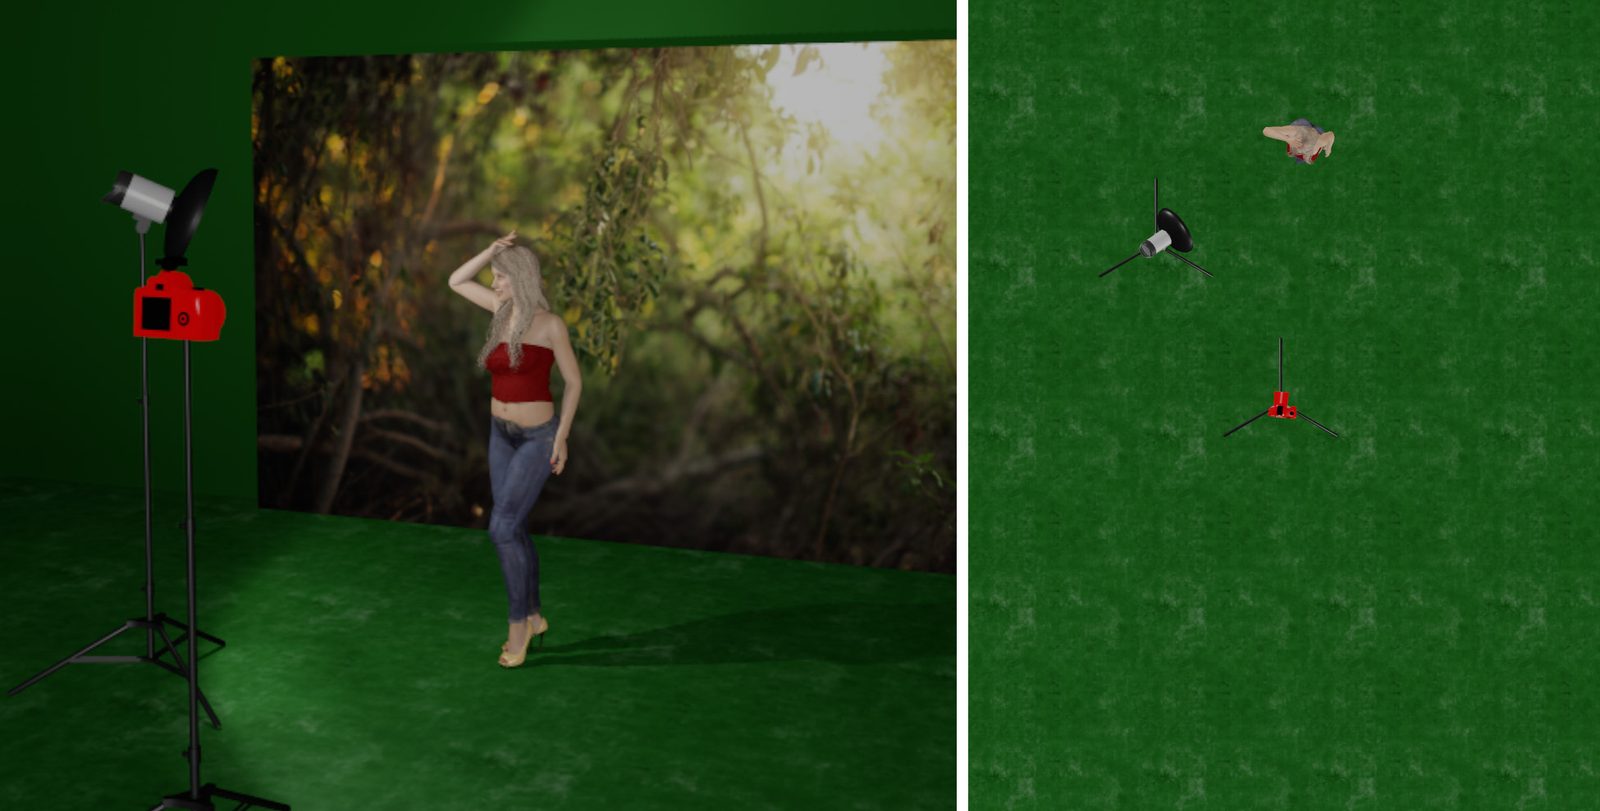
The first lighting breakdown I wanted to go over, is a series of photos I took a couple of years ago, that got a lot of positive feedback on the quick light falloff, while still having a nice soft gradient of light. For this shoot with Chanel, I used two different lights. My main light was a Profoto B10X in a 5ft Octobox camera right. I then also used a Profoto ProRing ring light mounted to my camera to bring back some of the shadows on the left side of her face, however, I next did a technique to get a greater falloff of light. For my studio lighting, I often use old Profoto Pro7a packs and Proheads. While they’re nearly 20 years old at this point, they are incredibly industrial in design and set to shoot off over a million flashes before needing service, so they work great for everything I need them to do.
However, being nearly 20 years old, they don’t have all the technology found in more modern strobes – one of note is the ability for High-Speed Sync. I won’t discuss how High-Speed Sync (HSS) works, as I’ve done that in previous blog posts, but when trying to use it on lights that don’t support it, you end up getting weird banding of light, where the lighting on one side of the frame is brighter than the other (Usually the right side is brighter). This is generally regarded as a fault within lighting, but for these photos, I used it to my advantage to help maximize the gradient of light. The result was I was able to create a unique lighting technique that complimented the final images well, by using the faults of older equipment.
Greg
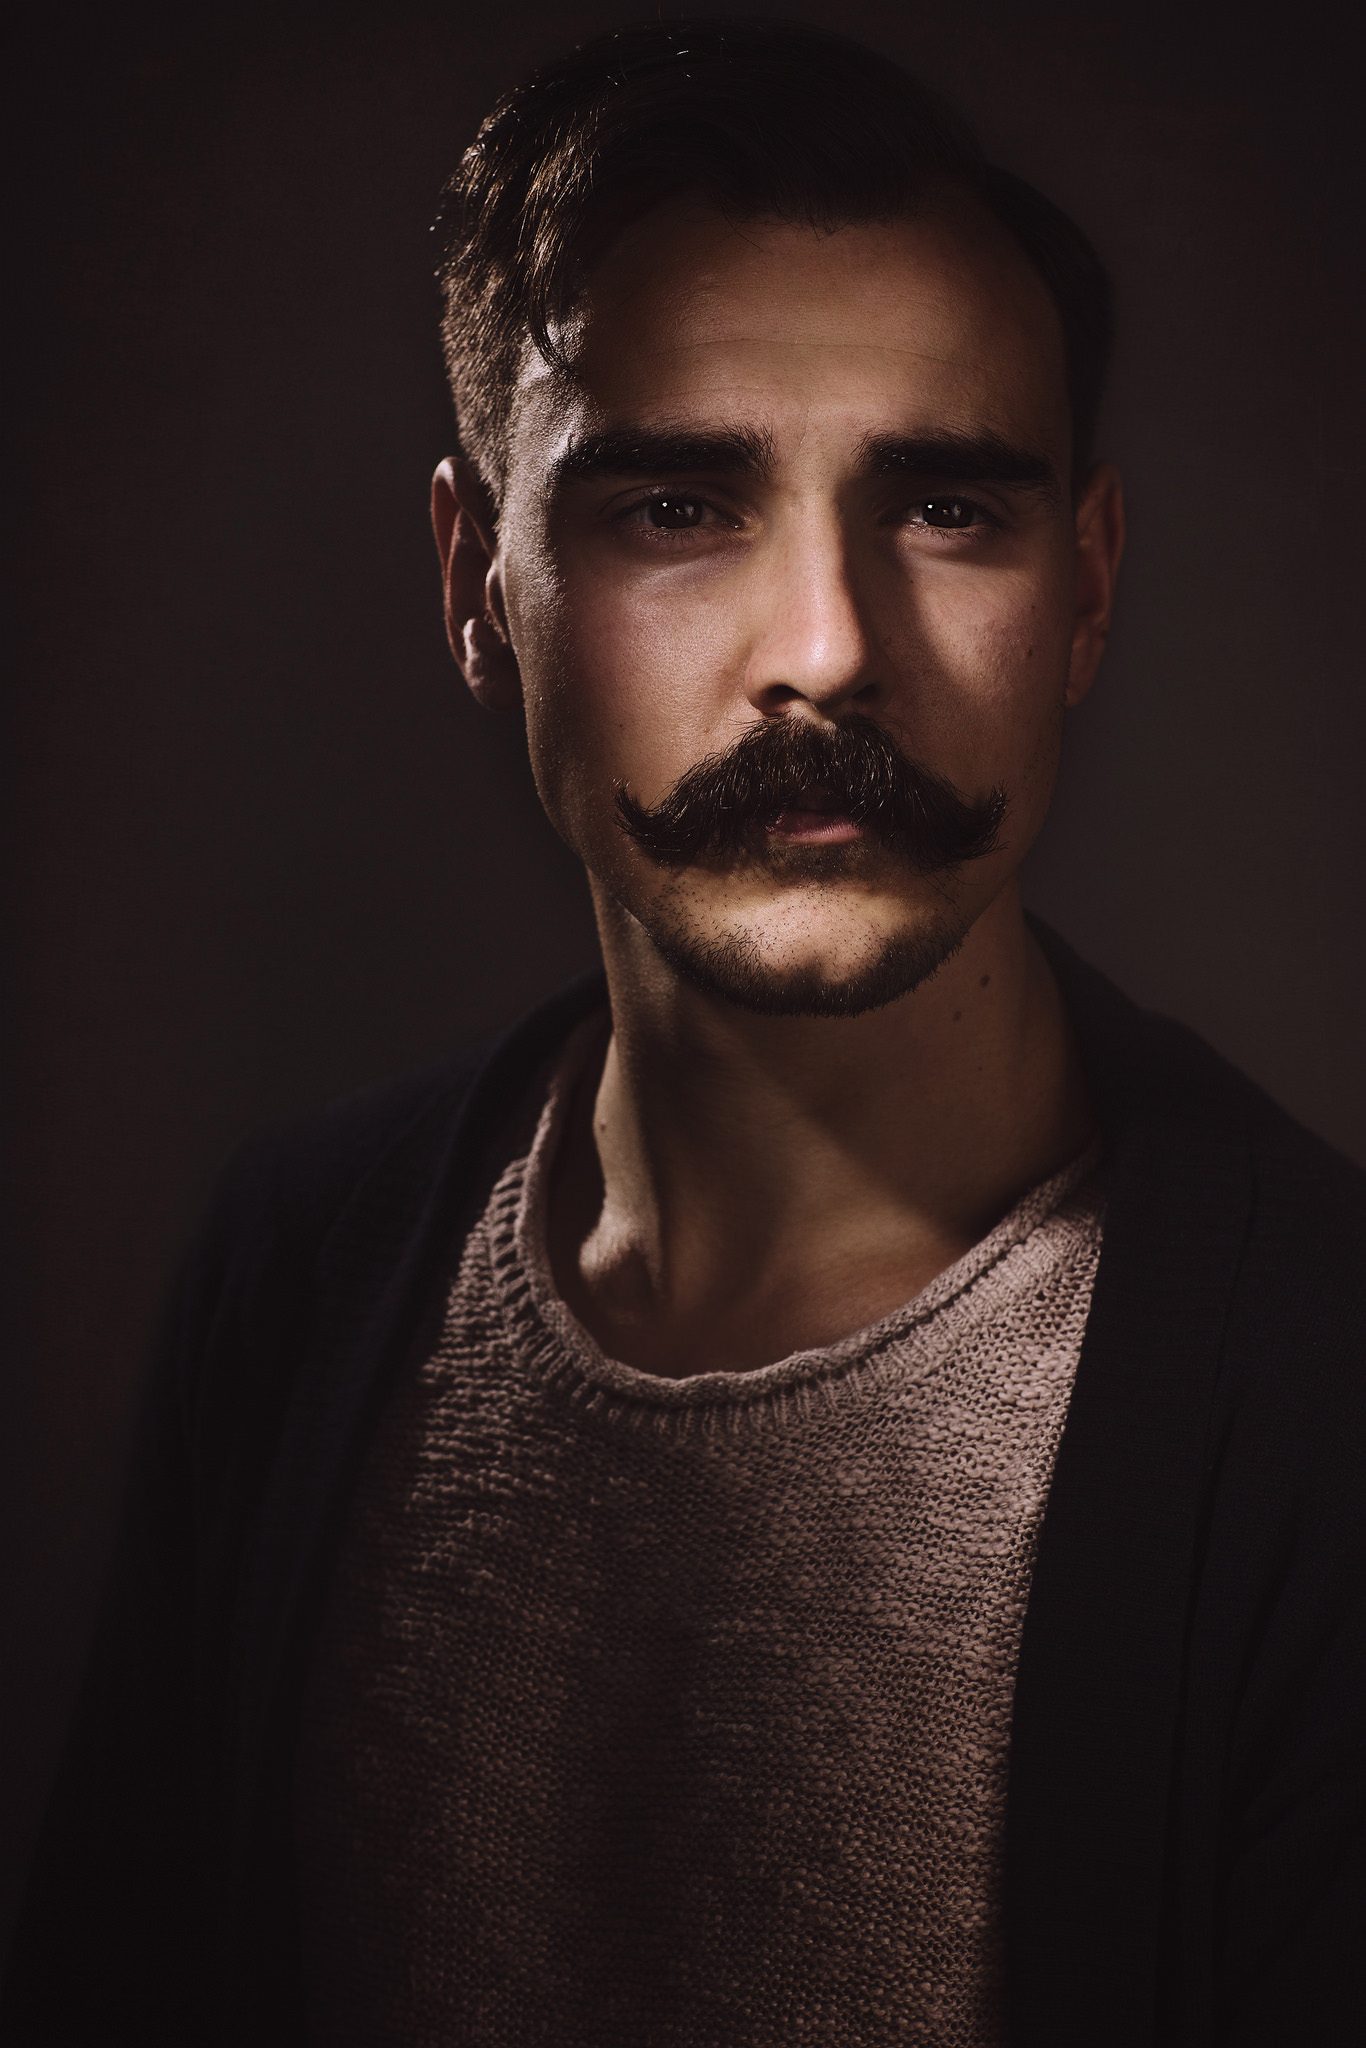
Definitely the oldest photo of the ones listed here, this photo of my friend Greg was done solely because I wanted to experiment with precision in my lighting. I called Greg up and he came over to my personal studio, and we spent a few hours playing with light over a couple of beers. My intent in these images was to create something that was very much inspired by the photographer Dan Winters, one of my favorite photographers in the portrait field.
To capture this image, my main light was extremely close to Greg, just out of frame, and was a Profoto B1 with the OCF snoot attached. This was able to create a spotlight effect on his face, and because of how close it was to him, the light only lit the front half of his face, with a quick fall off on his cheeks. Additionally, I had a rim light to bring some additional dimension to the image, and finally, used a 2 ft by 3 ft softbox with a grid to bring back some of the shadows that would otherwise fall to black. Below, is the final image, as well as the lighting diagram from the photo shoot.
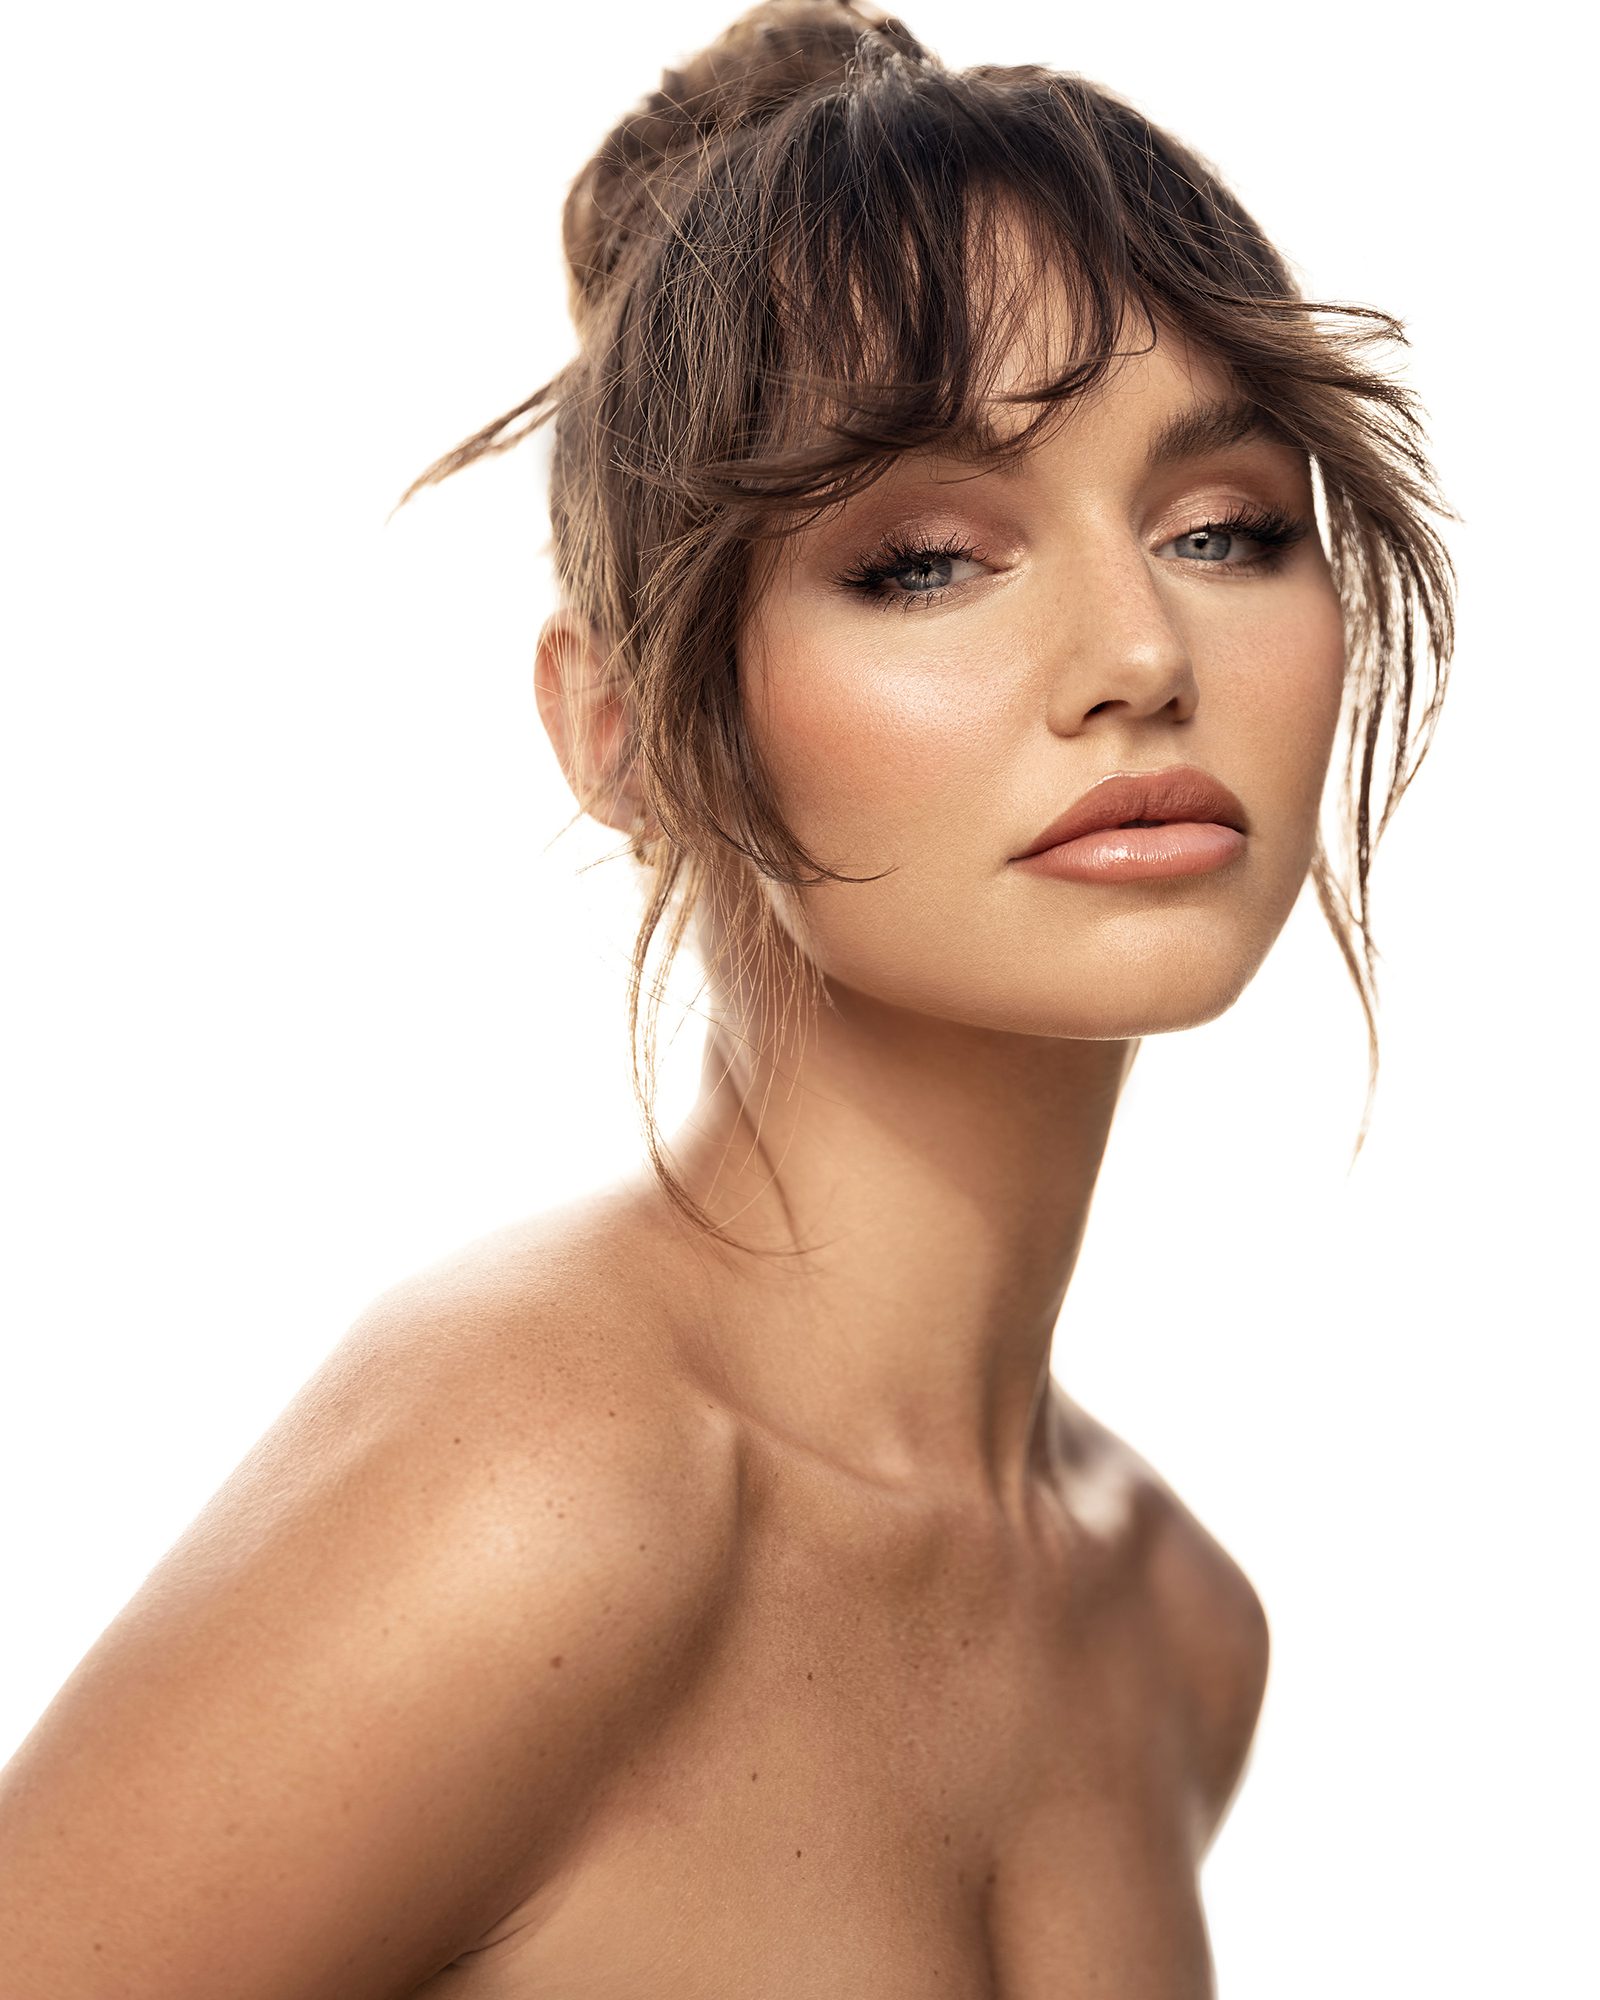
Joyce
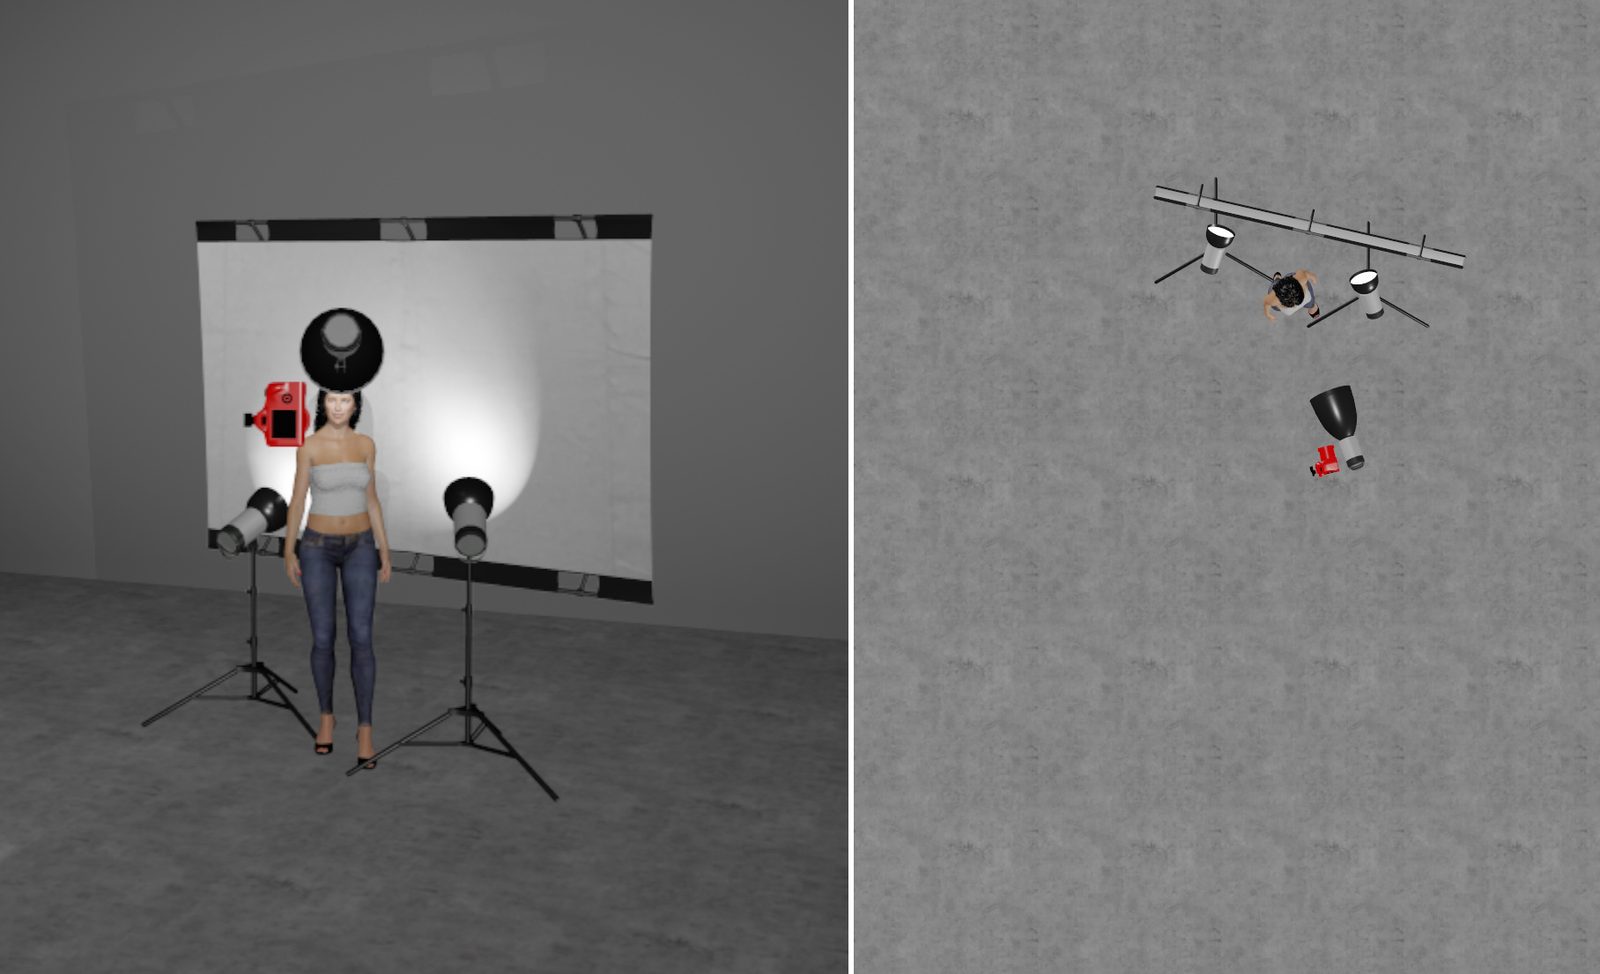
For the next image, the goal was to utilize highly specular light in a studio setting to highlight the dewiness of the skin and create a high-key image with some flaring back into the camera. If you’ve tried to create high-key images in a studio setting, you might realize how challenging this can be. When white backdrops become overexposed, they have a tendency to take away a lot of the contrast found within the image, so it’s important to blow out your highlights… But just barely so it doesn’t flare back into the camera and destroy the contrast.
Because I wanted the flaring to be an element within the image, I chose to use a silver background instead of white and ended up just using a large silver reflector as the backdrop for this image. Additionally, I wanted to have parallel light which would help with the flaring. I won’t go into all the details about parallel light, as you can get a breakdown of that in my article regarding parabolic reflectors, but for this image, I chose to use a fresnel lens to help project the light in a more parallel fashion.
From there, it was just a matter of adjusting the settings until my exposure was dialed in… A full lighting diagram can be seen below.
Alexis
For this set, I recently bought a cheap fog machine from Amazon, and I wanted to give it a try to add some atmosphere and dimension to my images. So I reached out to my friend and model Alexis. We had worked together a number of times at this point, and because of that decorum, she was more than happy to come over so that we could experiment with a warmer, hazy look. For this image, I chose to use a couple of different CTO gels I had lying around to add an extra bit of warmth to the images. I had two Profoto B10X lights with CTO gels on them as rim lights, with the left one being a stop brighter than the right. I then added a Profoto 3ft Octobox into the mix to add light on her face and body. From there, it was just hitting the button for the fog machine, which blew directly into a fan to help dissipate the billows of smoke and shoot until we got the photo.
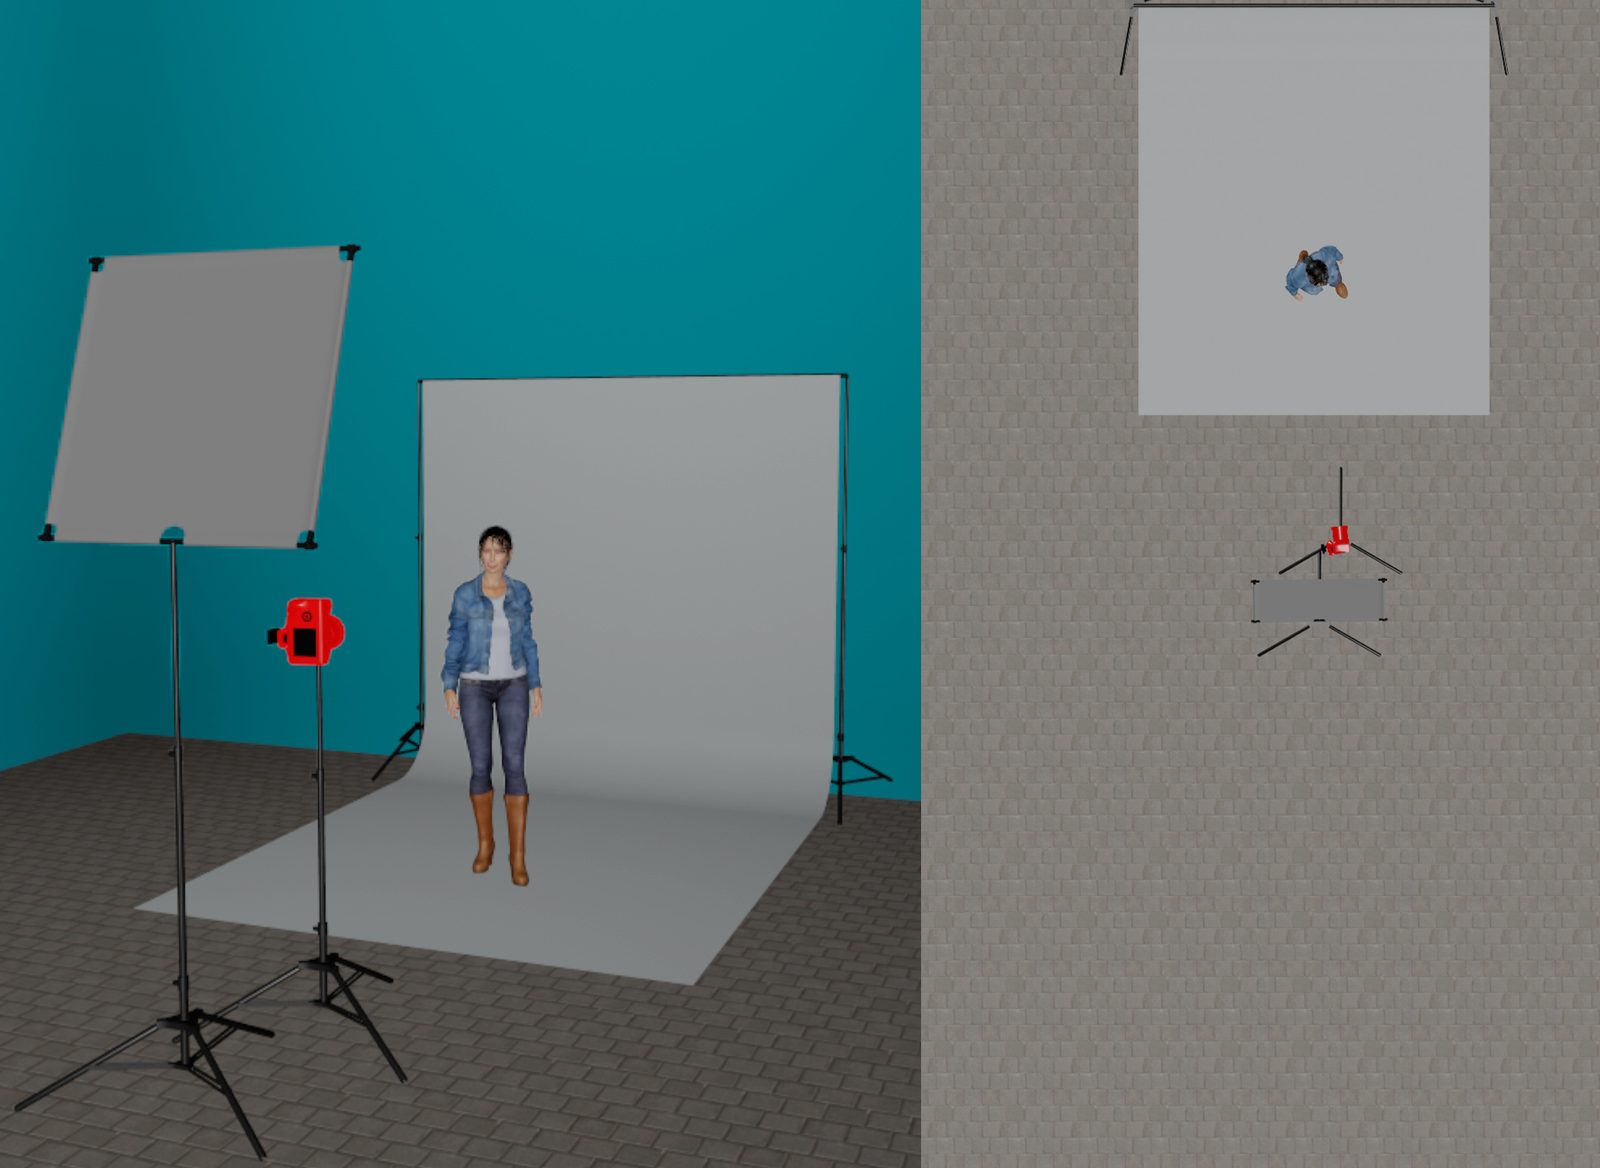
Kateri
Up until this point, all of the lighting diagrams shared were shot in my studio. This makes sense, lighting in a studio environment gives you complete control of your highlights and shadows. But not everyone has access to a studio, so I wanted to share a couple of lighting sets that were done on location.
For the two outdoor sessions, I wanted to start with a photo that was shot to look like it was done in the studio while getting the unique harsh qualities of natural light. To get this shot, I used a 4’x4′ scrim to help soften the sunlight and made sure to shoot this session in the late afternoon, when the sunlight is at a flattering angle. I then brought out a short 4ft roll of white seamless to use as my backdrop. At that point, it was just a matter of dialing in my settings. The result was a flattering light that would have been incredibly difficult to mimic in a studio setting, all done with a scrim, a couple of c-stands, and a little setup time in my backyard.
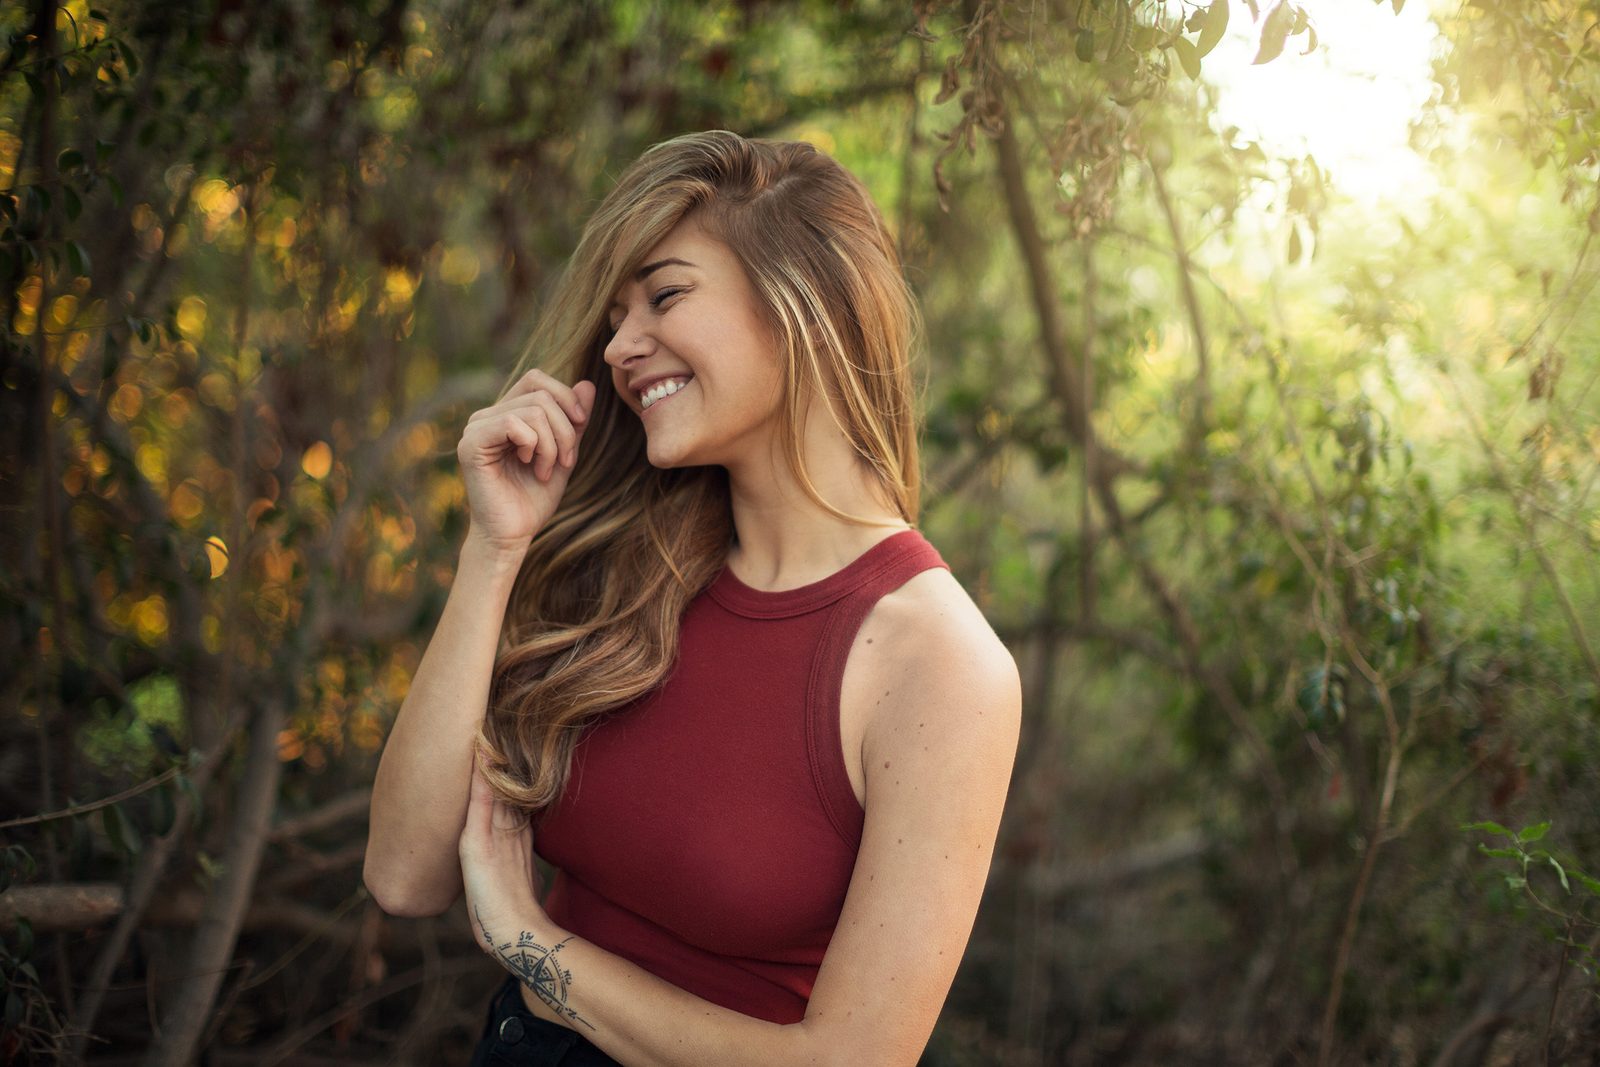
Megan
For the second outdoor photograph, I wanted to share a photo I took of a friend of mine who was in town for an extended weekend and wanted to meet up for a quick morning hike at Runyon Canyon here in Los Angeles. I told her I wanted to take a few images before our hike and to take advantage of the warm sunrise light. We got to Runyon right at sunrise, and I quickly set up everything to make sure I got the photos I wanted. Because we were in a heavily wooded area during sunrise, I knew the sunlight would work better with an additional light complimenting it, so I put a beauty dish and Profoto B1X on a stand that I could use as my main light, while the beautiful sunlight complimented her as a rim light. Our hike photo shoot took all of 15 minutes, but I was ultimately happy with the images we were able to capture.
So what did you think, any particular look that was your favorite? Do you have interesting photos from your portfolio to share? Feel free to comment below. All the lighting diagrams were made by a really neat lighting program called set.a.light 3D.

2 Comments
John MacLean Photography ·
Very nice examples. Love your lighting work Zach!
Mr Rohit ·
Impressive lighting breakdowns! Unique gradient in Chanel’s shoot, precision in Greg’s, high-key brilliance in Joyce’s, creative warmth with a fog machine in Alexis’s, fantastic outdoor studio look in Kateri’s, and stunning sunrise beauty with Megan. Well done!