As a person who works remotely the majority of the time, I often need to leave home for my own sanity. Only interacting with a cat all day is NOT GOOD for the human brain, so I try to write my blog articles and send my emails from a coffee shop or library at least a couple of times a week if I can. With that in mind, I thought it’d be helpful to compare a couple of the more popular video editing apps for mobile devices. Few people need sun and human interaction more than video editors and mobile devices are finally powerful enough to act as primary video editing workstations. So, why not put these apps to the test and determine which is best for which purpose? We’ll begin with the mobile version of a desktop application that we use nearly every day at Lensrentals.
Davinci Resolve
Lensrentals uses Davinci Resolve for the majority of our in-house video work, primarily because it strikes a good balance between features and speed. I’ve grown to prefer handling everything in the same place rather than roundtripping between more specialized Adobe apps for particular jobs. While Adobe Premiere Pro has gotten more and more capable as a standalone solution, now including robust tools for color correction and audio editing, I still find myself occasionally having to move to a different application for more demanding tasks.
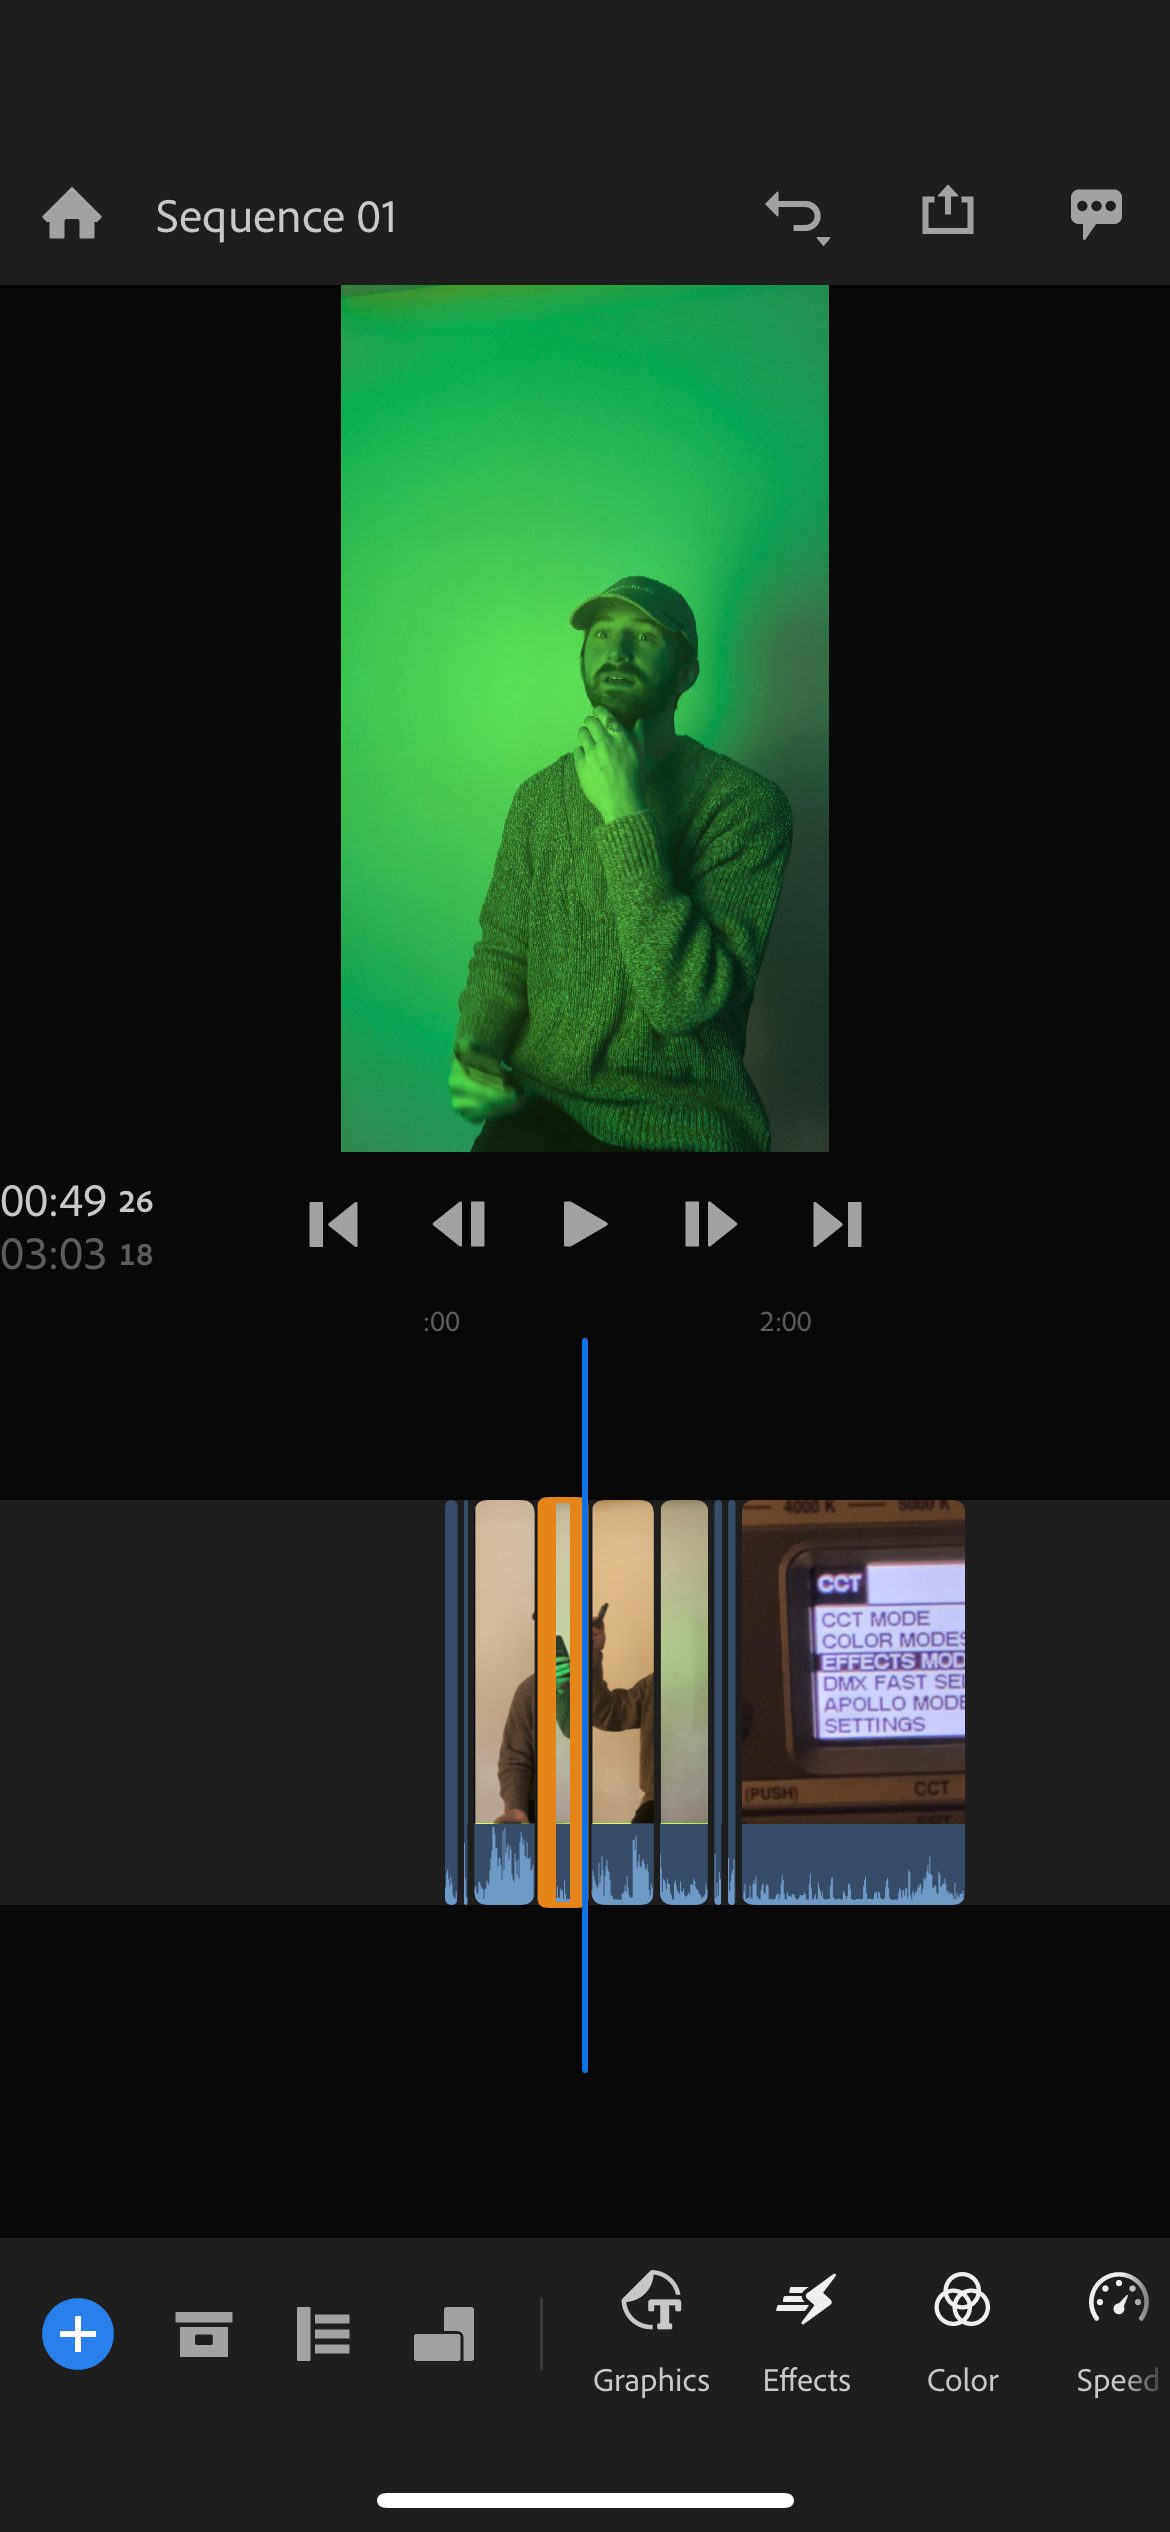
Resolve, on the other hand, is a little more self-contained. As Blackmagic have added functionality in the form of Fairlight (audio editing/mixing) and Fusion (compositing and effects), they’ve been integrated as panels directly into Davinci Resolve rather than released as separate pieces of software. Avoiding the cumbersome process of sending projects to, say, After Effects for graphics work saves precious time. And with a weekly publishing schedule on YouTube, we need all the time we can get. But all that is about the desktop version of Resolve. How does the mobile version compare? I’m happy to say that it feels surprisingly similar.
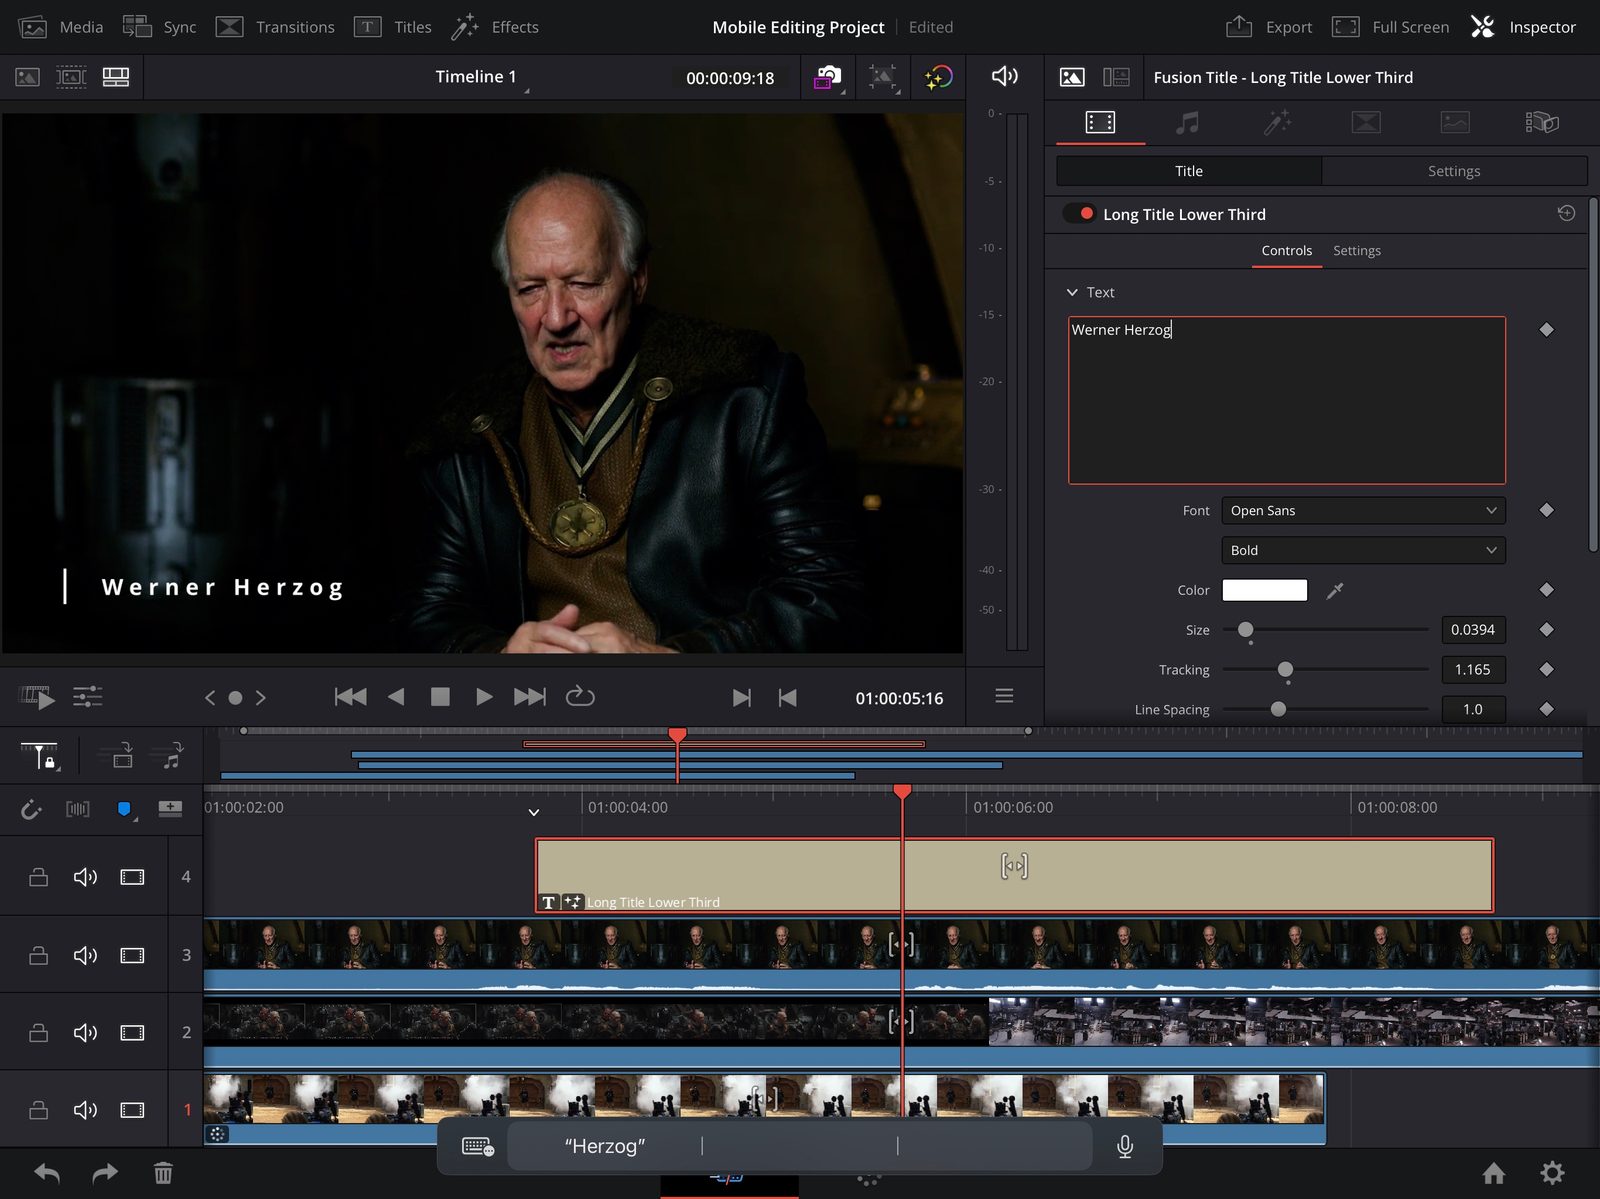
Blackmagic has clearly prioritized making the mobile version of Resolve feel as close as possible to the desktop version. While the mobile version doesn’t include everything, notably lacking the Fairlight and Fusion panels I was just praising, what is there performs exactly how you’d expect if you’re coming from a desktop. That approach is a welcome change from the days of underpowered mobile-specific apps, and I think Blackmagic’s ability to replicate the desktop experience is largely due to the iPad’s exponential increase in processing speed over the past few years.
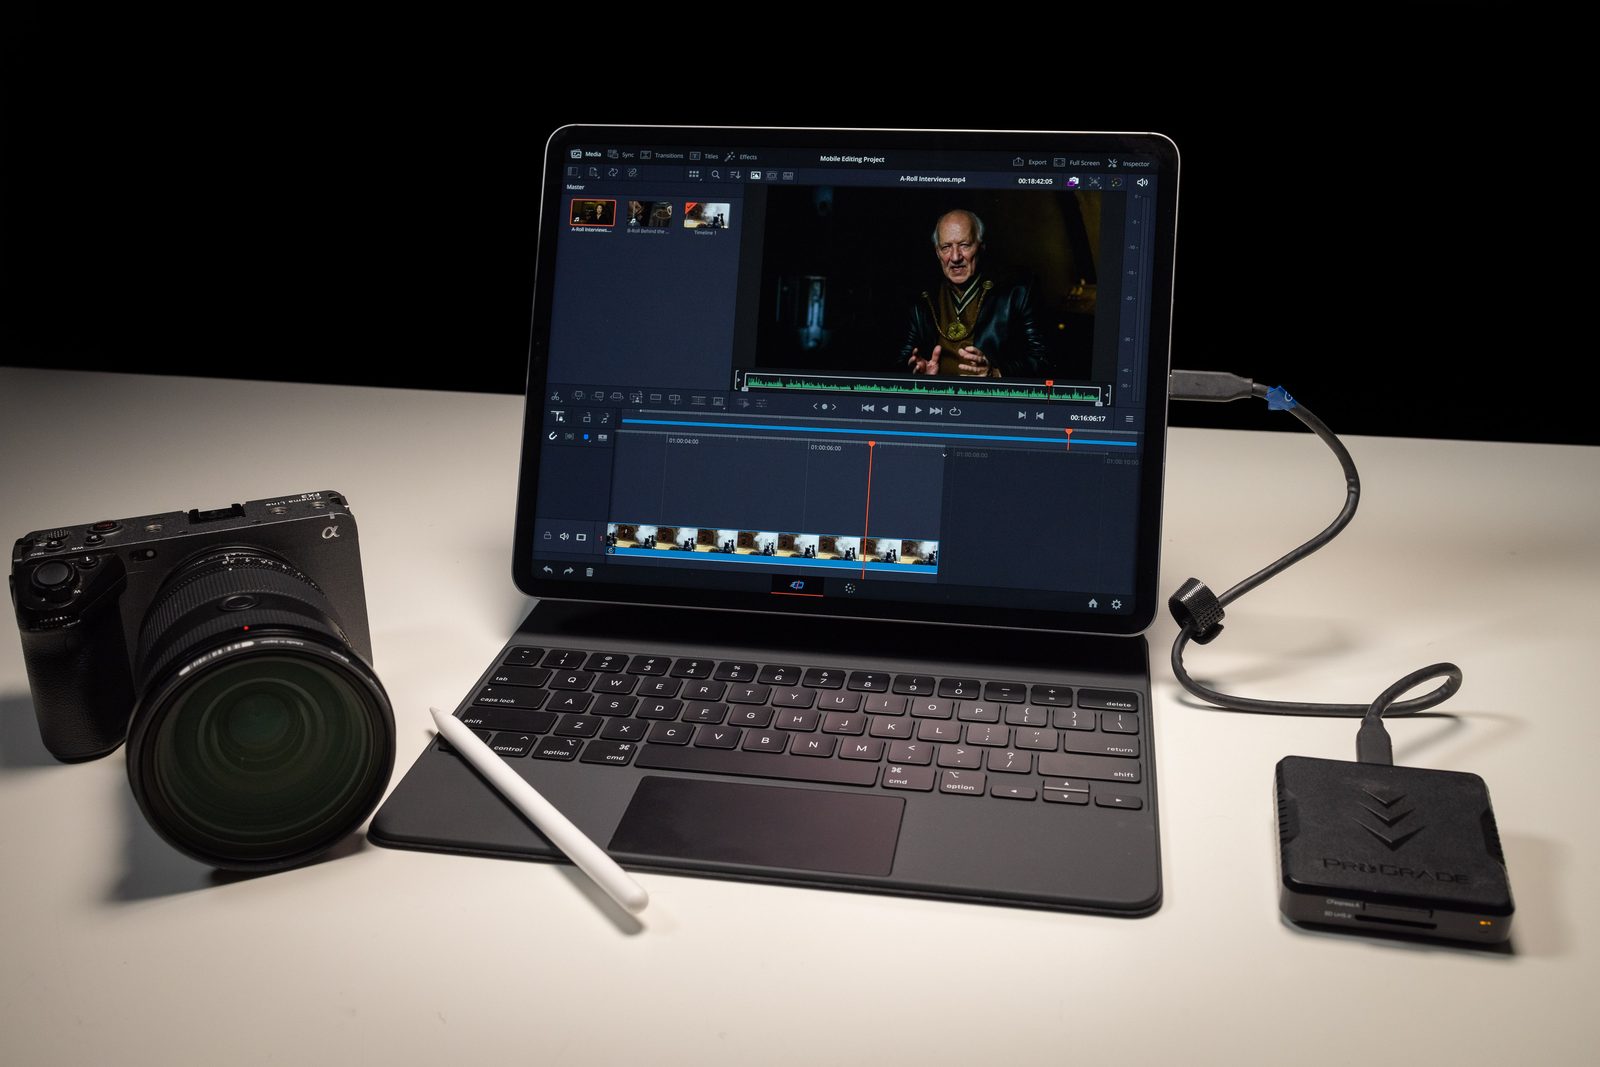
My rental for this particular test was a 12.9-inch M2 iPad and a Magic Keyboard. That combination, a powerful processor and a full keyboard with trackpad, enabled a user experience on the iPad that’s nearly identical to the experience on my work laptop, a 16-inch MacBook Pro with an M1 Pro processor. Shortcuts are the same, including the all-important J-K-L playback controls, and I didn’t notice a substantial difference in playback speed, even when stacking effects and multiple 4K clips. I’m sure I could get the iPad to the point where it would start to struggle, but it should be able to handle just about any rough cut, especially given Resolve’s new streamlined proxy tools.
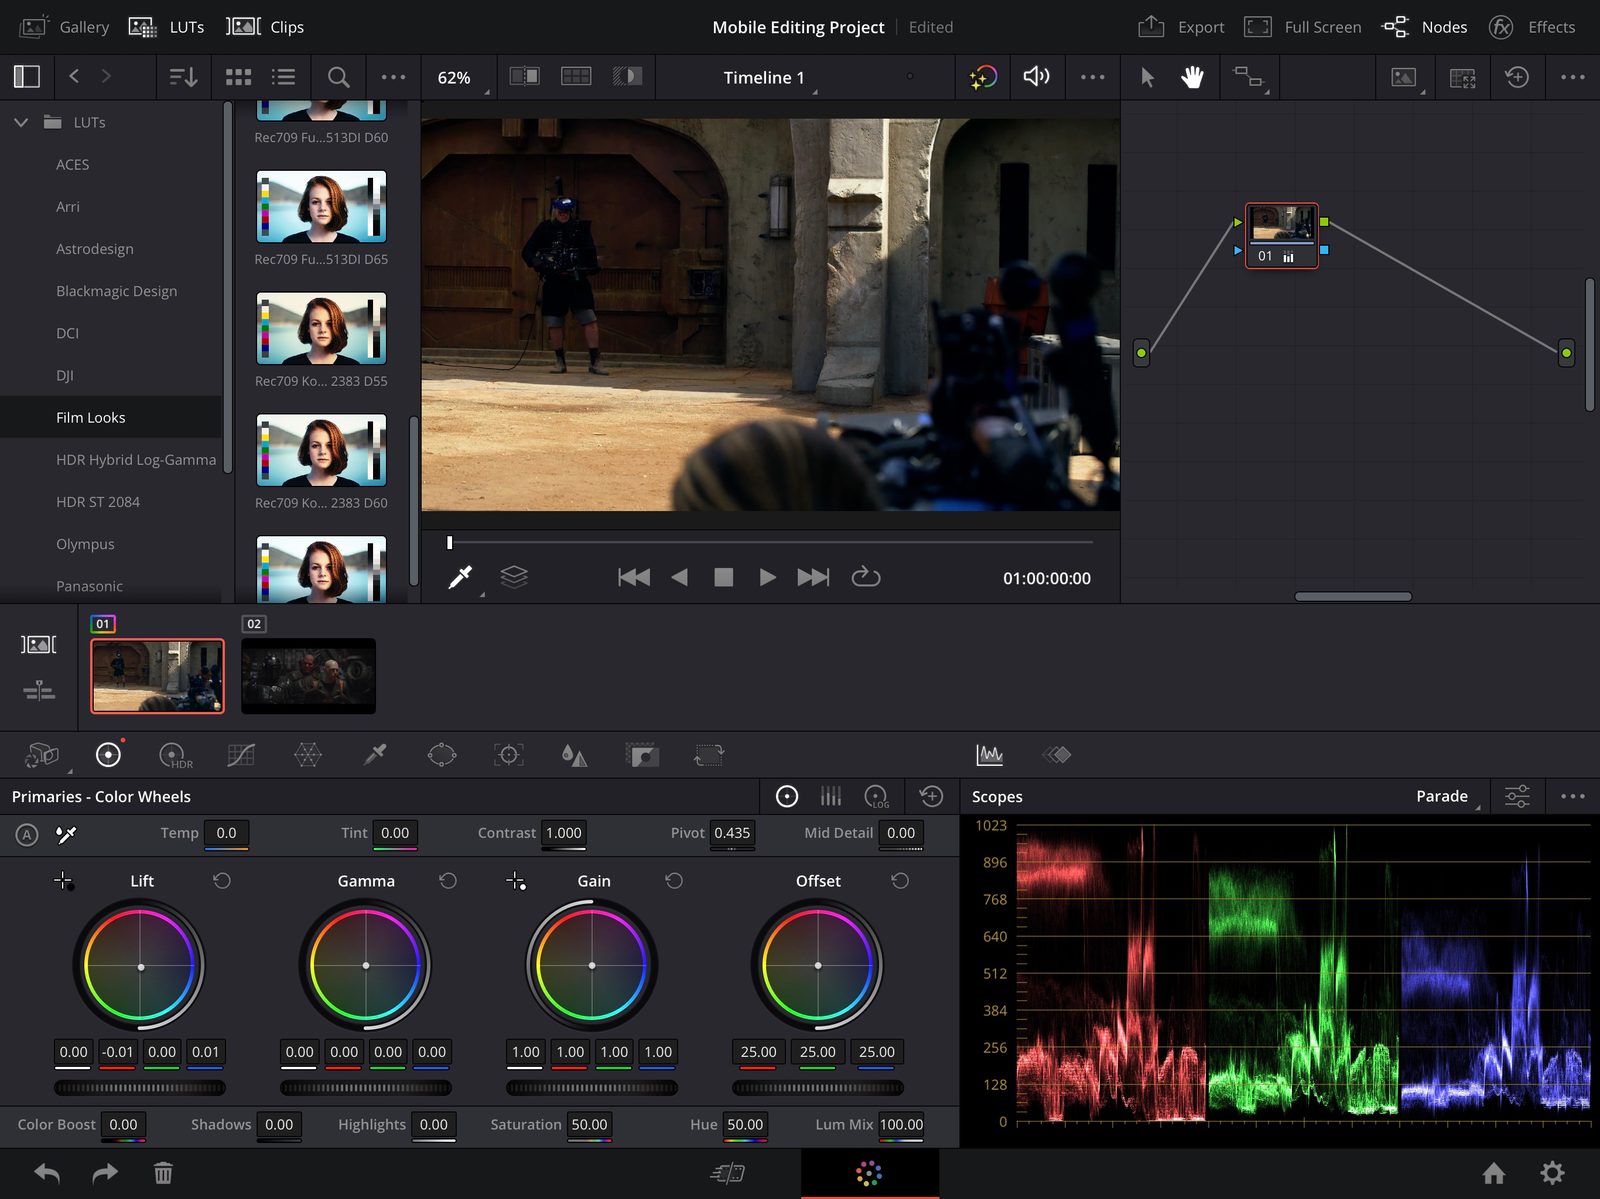
My test rental also included an Apple Pencil, which was a joy to use in Resolve’s color correction panel. Look, I’m not a professional colorist. Not by a long shot. And I’m sure a professional colorist wouldn’t be caught dead doing their incredibly precise and demanding work using an Apple Pencil on an iPad. I get that. But, on the other hand, it’s so cool! Navigating nodes and adjusting color wheels using that pencil made me feel like I was living in the future. While it might not be the best tool for dialing in color on a feature film, I could absolutely see myself working up a test LUT on mobile just for the fun of it.
Your levels of fun may vary, of course, depending on your particular workflow. No matter how powerful the iPad is, there’s the inevitable problem of getting access to the footage. Users can go about this in one of two ways.
- Store the footage locally, either directly on the iPad or on drives connected to the iPad. There are iPads available with up to 1TB of internal storage, so this isn’t totally impossible to accomplish. However, managing data, especially in the kinds of complicated file structures generated by professional film production, isn’t exactly a strong suit of the iPad’s operating system. In short, it’s possible, but I wouldn’t want to be the one to do it. I suspect most users, especially on the professional end, will go with option 2, which is…
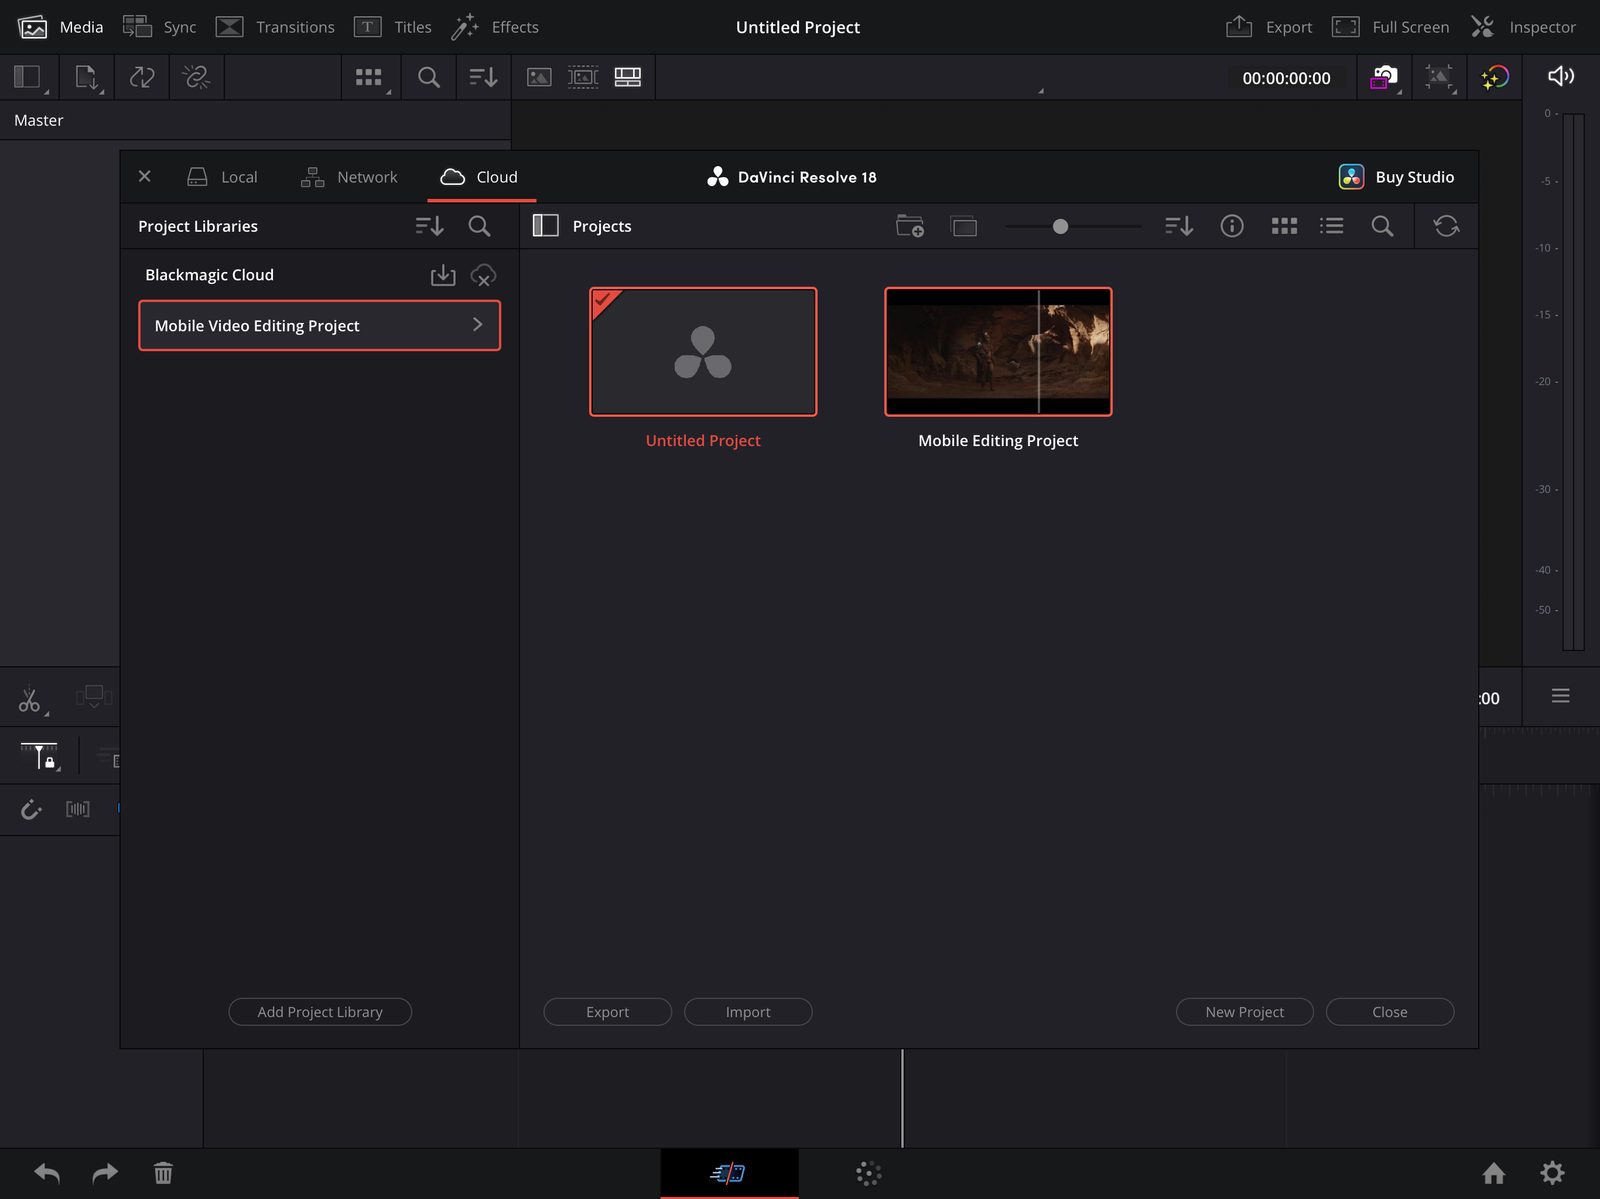
- Network-attached storage, or a cloud server, whatever you want to call hard drives connected to the internet. Footage in this workflow is accessed remotely via a network connection, likely WiFi in the case of the iPad. This is a lot more convenient than having to manually move footage over, especially if you’re dealing with multiple projects, but its usefulness depends on the speed of your network. If you’re trying to stream RAW files from hotel WiFi, you’re going to have a bad time.
I tried both during my time testing Resolve mobile, and I was a lot happier with option number two. While the details of this workflow are more than I have time to get into here, suffice it to say that cloud collaboration is a core feature of Resolve and is as easy to set up on mobile as I could reasonably hope. Any network solution like this is going to come with some initial headaches, but, once everything was set up, I was able to seamlessly edit the same project on my iPad and laptop, with changes synced automatically.
Imagining that ability at a larger scale, accessing multiple projects simultaneously, using proxy media stored in the cloud, it’s easy to see where Davinci Resolve mobile might fit in a professional workflow. While the iPad is certainly capable of handling a project on its own, I don’t see it acting as a primary workstation in this capacity. Rather, I could see it being helpful for, say, viewing dailies, reviewing cuts in progress, that kind of thing. If I was, for example, a post-production supervisor at a company with multiple projects in the pipeline at once, I would love the ability to review progress and make notes in bed or at a coffee shop (provided my local coffee shop in this hypothetical scenario has incredibly fast Wifi).
Looking to the future, it’s exciting that Blackmagic seems to be investing a ton of resources into mobile and cloud workflows for Davinci Resolve. While the mobile workspace only includes the “cut” and “color” panels from Resolve for now, I’d be surprised if that functionality isn’t expanded in the future. I could especially see Fairlight (audio editing/mixing) being relatively easy to incorporate. While I haven’t been able to test any personally, Blackmagic also makes multiple hardware solutions to support cloud workflows. There’s also a private beta currently in progress for “Blackmagic Cloud Presentations,” which looks to be a kind of Frame.io competitor, allowing multiple users to review, note, and approve cuts. Seen together, these solutions and features show that Blackmagic is willing to spend the time and money to continue supporting cloud collaboration. At a time when a mobile version of Adobe Premiere Pro doesn’t exist, I imagine that willingness to innovate will go a long way with professional users.
Last thing, did I mention Davinci Resolve is free? Yep, just like Resolve on the desktop, Resolve for iPad comes in either a free standard version or a paid “Studio” version. The free versions of both the mobile and desktop applications are remarkably fully-featured and totally usable without paying at all. For this article, I was using the “Studio” version of Resolve on my laptop combined with the free version of Resolve on the iPad. For those who do need the features of the paid version of either the desktop or mobile app, there’s a one-time fee of $295 or $95, respectively. You read that correctly. Blackmagic seems to be the last company on earth selling software without a monthly subscription fee. Here’s hoping that lasts.
Use Case
While Davinci Resolve mobile might be a bit much for users who are just looking for a simple way to edit video on an iPad, it’s a near-perfect solution for users who are already using Davinci Resolve on a desktop. The user interface and feature set are nearly identical in supported panels, and switching between the two versions is relatively easy once you go through the trouble of setting up a cloud workflow.
However, users who are starting and finishing projects on an iPad rather than using the iPad as a supplementary tool to a desktop workflow might be better served by a simpler user interface. And users working exclusively on phones will need things pared down even further. Those users would be better served by an app that’s designed to be used natively and exclusively on mobile devices.
Adobe Premiere Rush
The second piece of software I chose to try out during my mobile editing test was Adobe Premiere Rush, which is aiming for a somewhat different market than DaVinci Resolve. While Adobe’s offering for mobile video editors might not be as powerful as Resolve, or Premiere Pro for that matter, power isn’t really the goal here. Rather, Premiere Rush aims to simplify the editing process, making it easy for just about anyone to edit basic video on just about any device. Where DaVinci Resolve is meant for professional editors who might want to supplement their workflow with a fully-featured mobile replication of the desktop experience, Premiere Rush is for mobile-native users who just need a quick and simple way to edit video on the go.
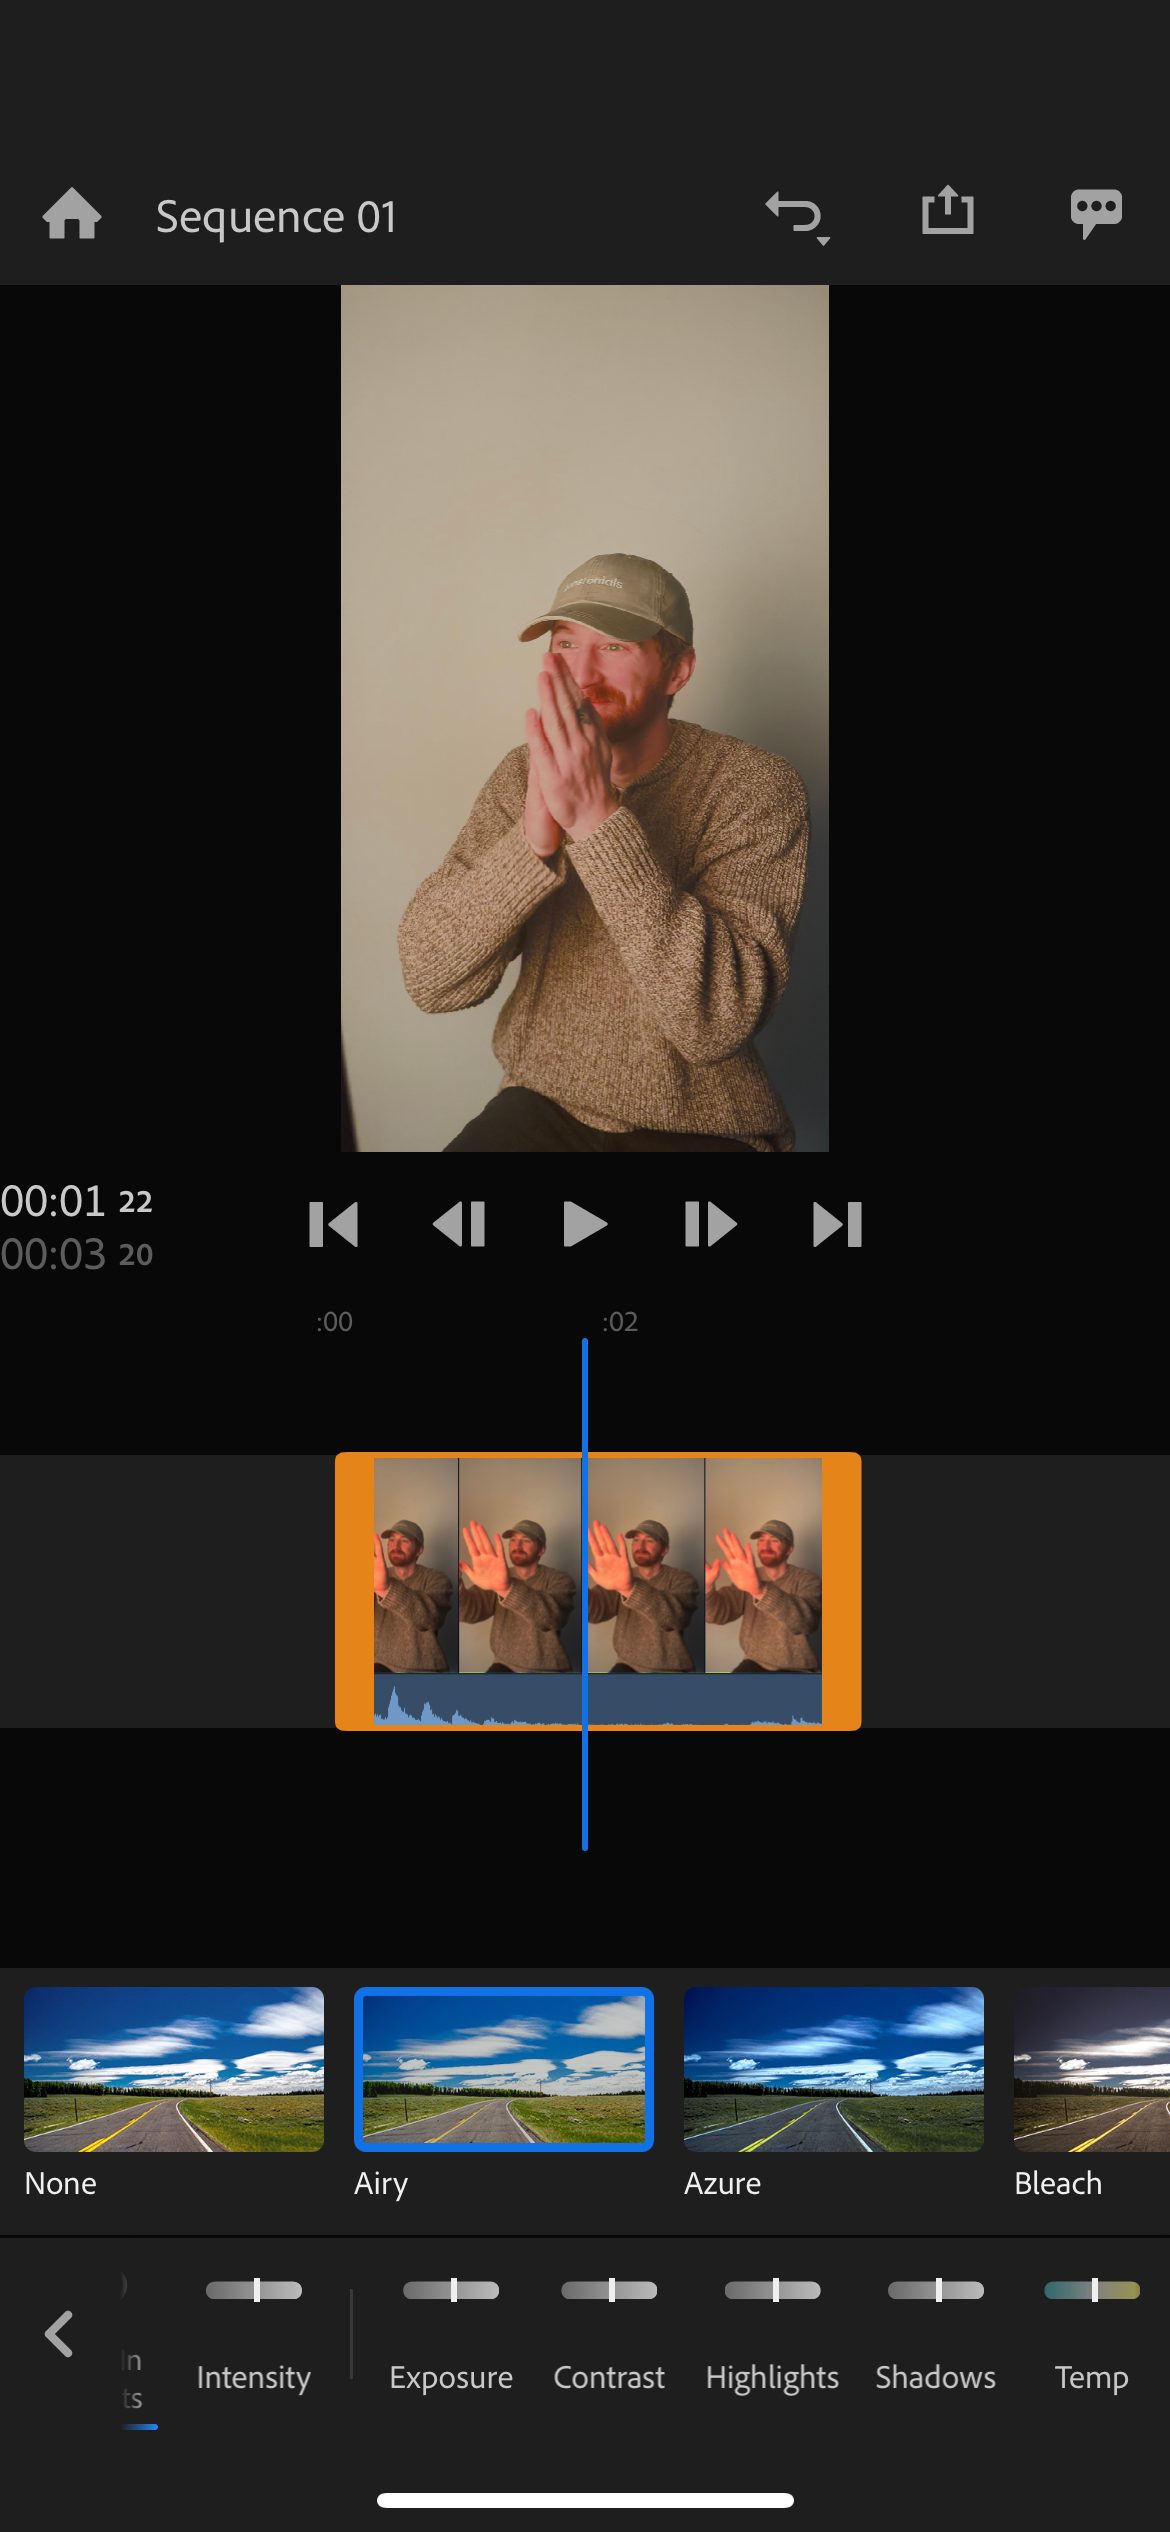
One of the key benefits of Adobe Premiere Rush over more feature-rich solutions like DaVinci Resolve is its user-friendly interface. A simple layout and intuitive controls make it easy for anyone to start editing videos right away, even if they have little to no experience. Rush also includes a ton of built-in templates and presets, as well as access to Adobe Stock. While I wouldn’t want to edit anything longer than a couple of minutes using Rush, anything that could be at home on social media should be relatively easy to accomplish.
For users who may want to combine a mobile and a desktop experience, Rush is luckily compatible with multiple devices and projects are easy to sync using Creative Cloud. This could be particularly useful for content creators whose needs vary on a project-by-project basis. During my tests, I found it easy to start a basic rough cut on my phone before moving to a laptop for more complicated work, especially anything involving audio.
Basic video editing tools such as trimming, cutting, and splitting footage are all present in Rush, as well as more advanced features like adding titles, transitions, and special effects. However, coming from more traditional NLEs like Premiere Pro, the basic act of editing on mobile might take some getting used to. The Premiere Rush interface, rather than being split between a “viewer” and “source” window like a traditional NLE, is based around a single window. Clips are brought onto the timeline one by one, then trimmed as needed once they’re there. The difference is a little difficult to explain, but, as a user, Rush is clearly designed to be used with a small number of short clips that mainly just need to be put in order. Again, not great for someone who is used to a professional editing system, but perfect for someone who just needs a simple way to cut short videos quickly.
Premiere Rush also has a number of built-in color correction tools, which I found to be simple but extremely useful. There are simple sliders for things like intensity, contrast, exposure, and saturation, plus a number of presets with variable intensity. All-in-all, the interface felt a lot like Adobe Lightroom, offering quick ways to make simple adjustments, sacrificing some degree of technical control in favor of simplicity. In the same way that I think a beginner would be a lot more comfortable with the Lightroom interface before moving on to Photoshop, the Premiere Rush interface is far more welcoming than DaVinci Resolve.
One of the drawbacks of Rush, however, is its limited range of export options. While it does support a range of popular video formats, such as MP4, it does not support some of the more niche formats that other video editing software does. While this might not be a problem for folks using exclusively social media platforms, I could see being frustrated by not being able to choose a more specific export format. I’d love to see even a few more file formats supported.
Overall, though, Premiere Rush is a fantastic option for folks who don’t need to bother with the complicated interface of something like DaVinci Resolve. As a sort of ultimate test, I asked my wife to edit a short video using Rush and let me know what she thought. Having had no prior training or experience with video editing at all, she was able to get something made up in just a few minutes, including titles and color correction. I don’t think there’s a better way to illustrate the strength of Rush vs. Resolve than that.
Conclusion
In short, there isn’t one end-all-be-all winner between DaVinci Resolve and Premiere Rush, just two different tools made for two different kinds of people. If you’re a professional editor who’s used to working with DaVinci Resolve on a desktop and wants to replicate that experience on an iPad, I’d recommend DaVinci Resolve Mobile. If you’re a beginning editor who wants a quick and easy way to edit mobile videos for social media, I’d recommend Adobe Premiere Rush. And finally, if you’re somewhere in between, there have never been more options for mobile video editing. iMovie, Kinemaster, LumaFusion, and InShot are just a few of the many popular editing applications that weren’t included in this test, and the list is growing all the time. No matter your experience level, there’s sure to be an application out there somewhere that fits your needs.