Equipment
How Lighting Affects Your Background

Over the years, I have discussed various lighting setups extensively on this blog. We’ve discussed the fundamentals at length, but I’ve also presented numerous experimental lighting diagrams and breakdowns. However, one thing has always been consistent across all those articles: the focus of the lighting principles is always on the lights used to capture your subject, and never on ambient or background lights.
This makes sense, lighting a person or object in a flattering way is a technique and tool that everyone wants to become better at. However, the same lighting principles can be applied to your back light, which can further enhance and draw the eye to your subject. By implementing the three principles of light that I’ve discussed before—Intensity, Direction, and Quality—you can add elements to your images that help create a more cohesive image. I’ll pretense that while these principles are being demonstrated in a studio environment, they also apply very much when it comes to shooting outdoors or in more environmental locations. The studio helps maintain a controlled environment. Let’s explore each of these principles individually and discuss how they can enhance your backdrop.
Intensity of Light
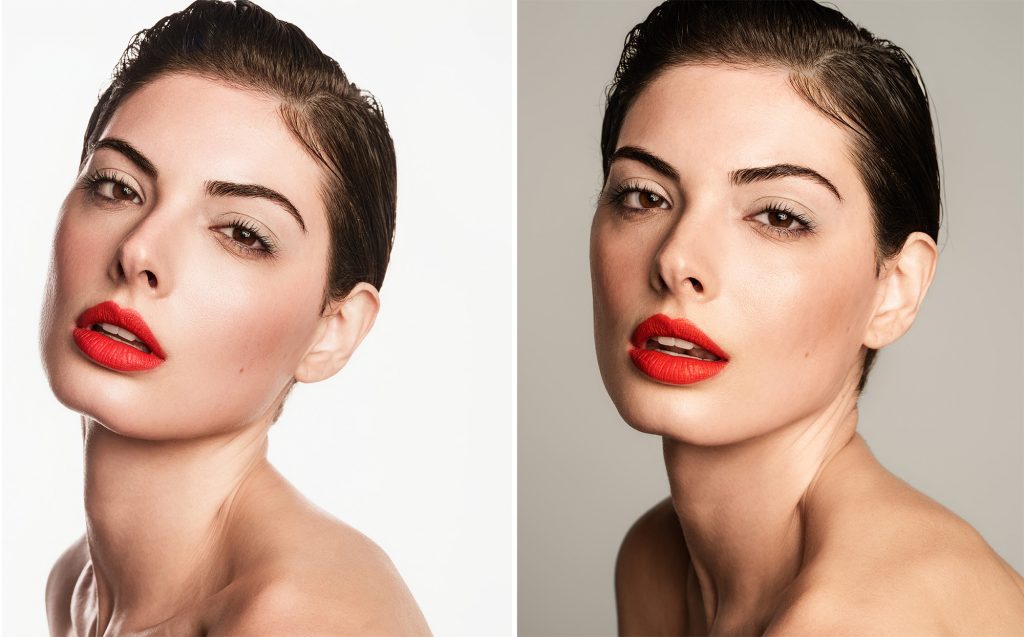
To start off the big three, let’s take a look at intensity, as it’s usually the easiest to understand. To put it simply, the intensity of light is how bright the light is in comparison to the scene. If you’ve spent some time in a photography studio, surely you’ve learned about the Inverse Square Law – at least by proxy – and understand that a white backdrop can also appear grey, or in some instances, black, depending on the lighting setup. However, those same fundamentals apply to all colors of backgrounds, and to prove this, I set up an apple box as my subject, pulled a number of seamless rolls, and began shooting to demonstrate it.
This was achieved by isolating the lighting on the subject (apple box) and independently lighting the background. From there, it was a matter of shooting an image, adjusting the power of the background lights only, shooting again, and repeating the process until I had a large range of color choices for my backdrop.


As you can see in the examples above, with each change in light intensity, the color shift changes significantly, not just on a brightness scale, but also in saturation. As another example, here are two nearly identical images in terms of posing and lighting; however, the only change is that I adjusted the intensity of the background light, which gives the images a different overall feel.
Direction
When shooting in a studio, the direction of the light has admittedly little differentiation from image to image, as you’re generally shooting light onto a flat plane. So, your directional availability is limited to 180 degrees. However, with an understanding of light falloff, you can use this technique to add gradients to your backdrop, bringing extra interest to the images. The most effective way to do this is to use a single light on the background, with it focused on one side of the image, rather than centered. The effect will add a gradient to the background, allowing you to highlight different saturations and textures within the backdrop.
Quality
Finally, let’s talk about the quality of light. Quality of light isn’t whether or not you’re using a brand-name strobe, but rather, all of the alterations done to the light. This could be whether the light is soft or hard, whether it’s gridded or in a snoot, or even the color properties of the light. Of the three principles, this one has the most ambiguity, so it can also have the most significant impact on the affected background.
Generally, when shooting in a studio, the goal is to create an even backdrop color that brings the attention to your subject, but by pushing against that “rule”, you’re able to get a level of enhancement to your images that adds an extra element of interest to an image. My preferred method is to use gels. Gels can implement a level of color theory to your images, breaking the image from the sometimes monotonous solid background, and adding extra elements to your work.

By adding gels, I can enhance the image without affecting the subject. The use of gels can also expand the amount of colored backdrops you have considerably, as rolls of seamless paper are far more expensive than a pack of gels.
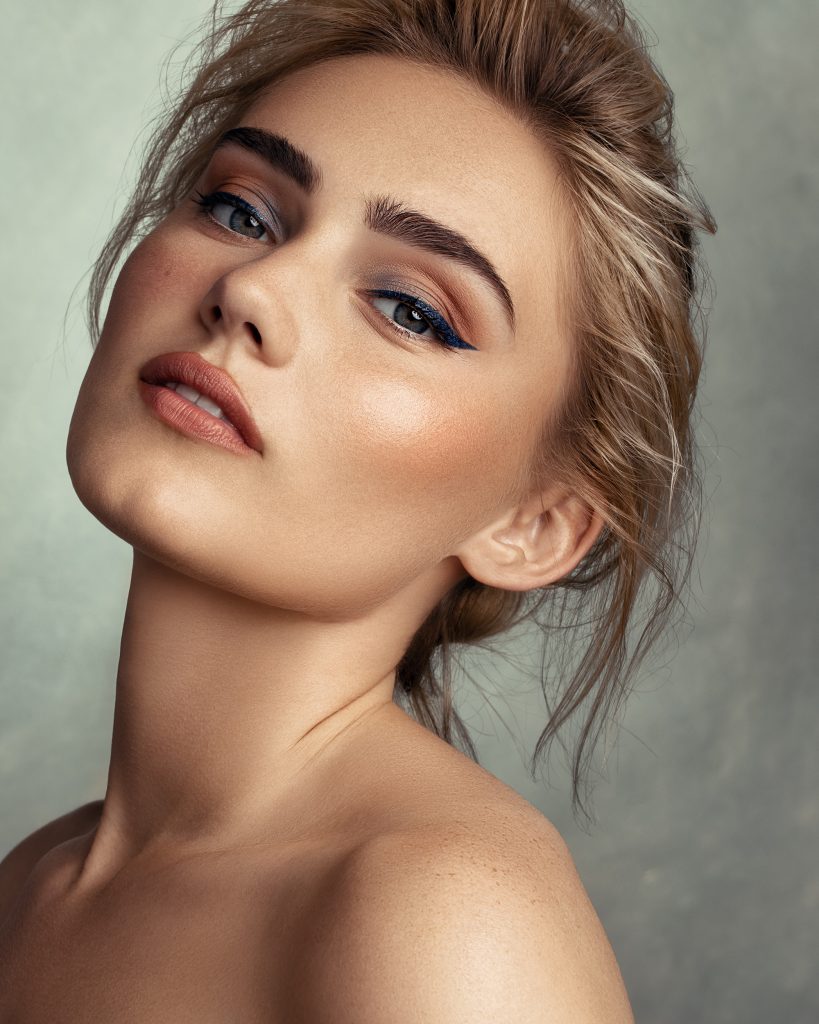
If your work has an interesting element that is worth highlighting, another technique is to implement a snoot or light blocking, allowing you to create beams of light that lead the viewer’s eye into the focus element of an image. An example of this is shown below, where I aimed to draw attention to the eye makeup. I used a snoot along with some flags to create a beam of light that angles the attention back onto the eye makeup.
These are just a few techniques to think about when creating images. Hopefully, this was educational for you, and if you have examples of implementing these techniques, feel free to post them in the comments below.
Author: Zach Sutton
I’m Zach and I’m the editor and a frequent writer here at Lensrentals.com. I’m also a commercial beauty photographer in Los Angeles, CA, and offer educational workshops on photography and lighting all over North America.-
Bruce_LD
