How To's
Getting Started in Deep Space and Astrophotography
It is sometimes said that astrophotography is one of the most challenging types of photography out there. There are numerous technical problems to overcome, substantial initial investments, and a considerable chance of getting burnt out if you get too frustrated. Luckily enough people have attempted astrophotography to form a general idea about what the best way to get started is. I have personally found a passion for astrophotography, and I thought I’d share some tips on what you may need to know to get started in such a unique and exciting genre of photography.
Dealing with the Rotation of the Earth
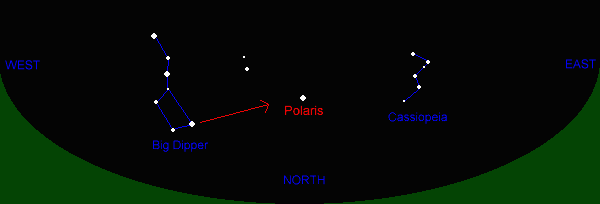
The first problem that every astrophotographer will need to learn to deal with is the rotation of the earth. The light from the stars is very faint and will require long exposures to see. Exposures could easily range from 1 minute – 5 minutes long, and in time-lengths like that, it’s impossible to get sharp images without first measuring and counteracting the rotation of the Earth. The best way to deal with the rotation is by using a star tracker. Star trackers use a motor to spin your camera at the same rate as the Earth to cancel out the movement of the stars. There is no limitation to how advanced and expensive a star tracker can be, but for just starting there are many affordable options like the Skywatcher Star Adventurer or iOptron SkyTracker. While each system has its own calibration and method, the goal is to make sure the rotation axis of the mount is aligned with the star Polaris (north celestial pole).
https://starizona.com/tutorial/polar-alignment/
There is an important caveat to purchasing affordable star trackers; they will not be able to handle large amounts of weight well (like a Sigma 150-600mm f/5-6.3 DG OS HSM Sports). To hold alignment, you will also need a sturdy tripod, perhaps even with added weight. Tracking the stars accurately is the bedrock of most good space images.
Often the “Rule of 500” or “Rule of 600” is brought up to suggest that you can take short exposures of the night sky without any trailing, and still produce images.
It suggests that your optimal exposure time follows the equation:
Shutter Speed (seconds)=500/(Focal Length * Crop Factor)
Yes, it is true if you expose for a short amount of time like the rule suggests there will be no trailing, however, you will get almost no light hitting your sensor. To produce good images we need as much light as possible. The rule of 500 is only a bandaid on the real problem.
Selecting a Lens
Assuming you have a stable tripod and star tracker to put your mount on, the next most important thing to decide is what lens you will use to capture images with. This is going to take a little introspection on your part because there is no correct focal length for astrophotography. You will have to decide what kind of images you want to make, and what kind of lenses will give you the focal length to produce those images. However, you will need to keep in mind some more caveats.
Sadr Nebula | Photo by Bray Falls
The first big issue is the limit of what your sky tracker can handle. You can’t expect an introductory level tracker like the Star Adventurer to handle a 500mm telephoto lens for long exposures; it just was not designed for that. Realistically the upper limit of what will be usable for a basic tracker is around 300mm. Of course, if you are willing to pay more money, there are other trackers out there that can handle a large telephoto lens, like the Orion Sirius, or SkyWatcher HEQ-5. This will come with added complexity and is probably beyond the range of just starting – but something to consider if you find passion in astrophotography.
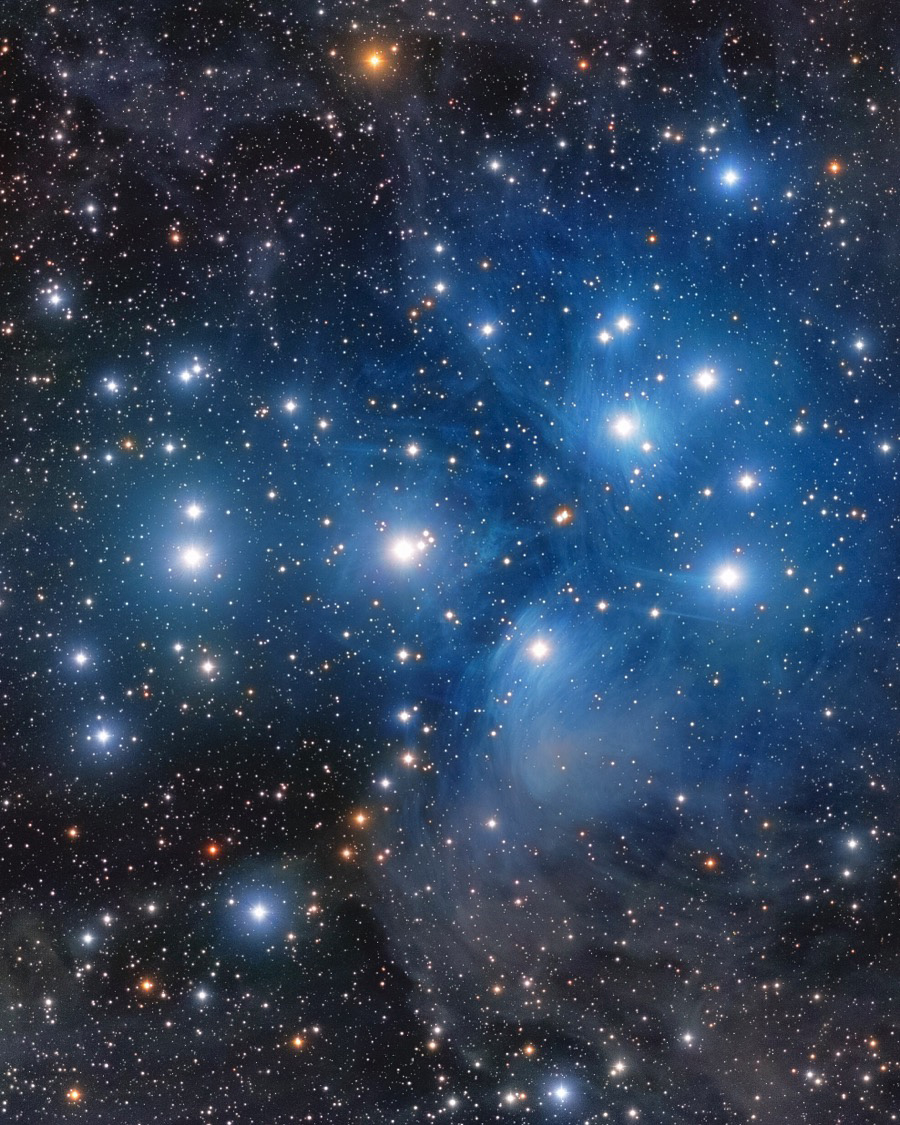
Pleiades Nebula | Photo by Bray Falls
The next big issue in lens selection is the amount of aberration in your lens. If you have ever tried imaging the stars before, you will probably have seen that they are very good at showing chromatic aberration (color fringing). The problem doesn’t just stop at color fringing though; you could see issues with astigmatism, spherical aberration, and many others. All of these things will lead to the stars in your images taking on weird shapes, instead of being the small points of light we expect.
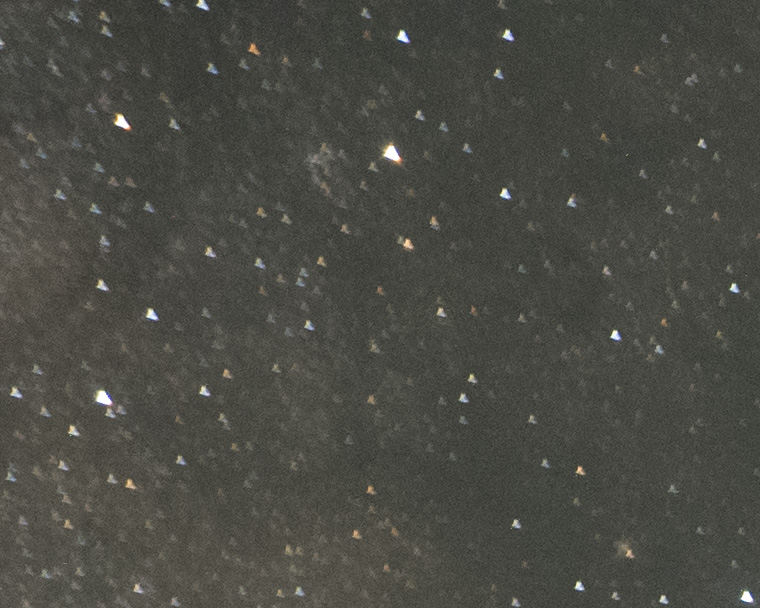
An example of misshapen stars due to lens issues.
There are some helpful tricks to avoiding lenses that will produce these artifacts. The first is to avoid zoom lenses as much as you can and only to use prime lenses. Prime lenses are designed to have excellent optical quality at a specific focal length, while zoom lenses tend to produce less image quality in favor of flexibility in focal length. The general rule of thumb is that prime lenses will produce sharper images over zoom lenses. The other helpful trick is to look for lenses from specific companies/lineups that are proven to be good. For example, the Sigma ART lineup with lenses like the 35mm f/1.4, 50mm f/1.4, and 135mm f/1.8 have been shown to produce great astro images. If you don’t want to pay so much for lenses the Rokinon lens lineup has also been well proven and beloved within the community. The Rokinon lenses will not offer you autofocus, but that doesn’t matter since autofocus struggles in low light. Some particular standouts from the Rokinon lineup are the 14mm f/2.8, the 24mm f/1.4, and especially the 135mm f/2.2. The Rokinon 135mm is perhaps the best value lens you can purchase to do astrophotography when starting.
Choosing a Camera
Believe it or not, the camera you choose is probably the least important part of the equation when you start shooting astrophotography, so long as the camera has a manual exposure mode. Of course, if you pay to get a top of the line DSLR, your raw images are going to be cleaner, have higher resolution, and better color reproduction than a more budget-friendly camera. The difference with astrophotography is that the picture taken with more exposure time is almost always better. If you aren’t familiar with the process of stacking images, consider familiarizing yourself with the process, since it is the key to processing astro-images. There is a common saying in astrophotography that “integration time is king.” The image that took five hours of exposure time to make will almost always be better than one which took five minutes, regardless of the camera.
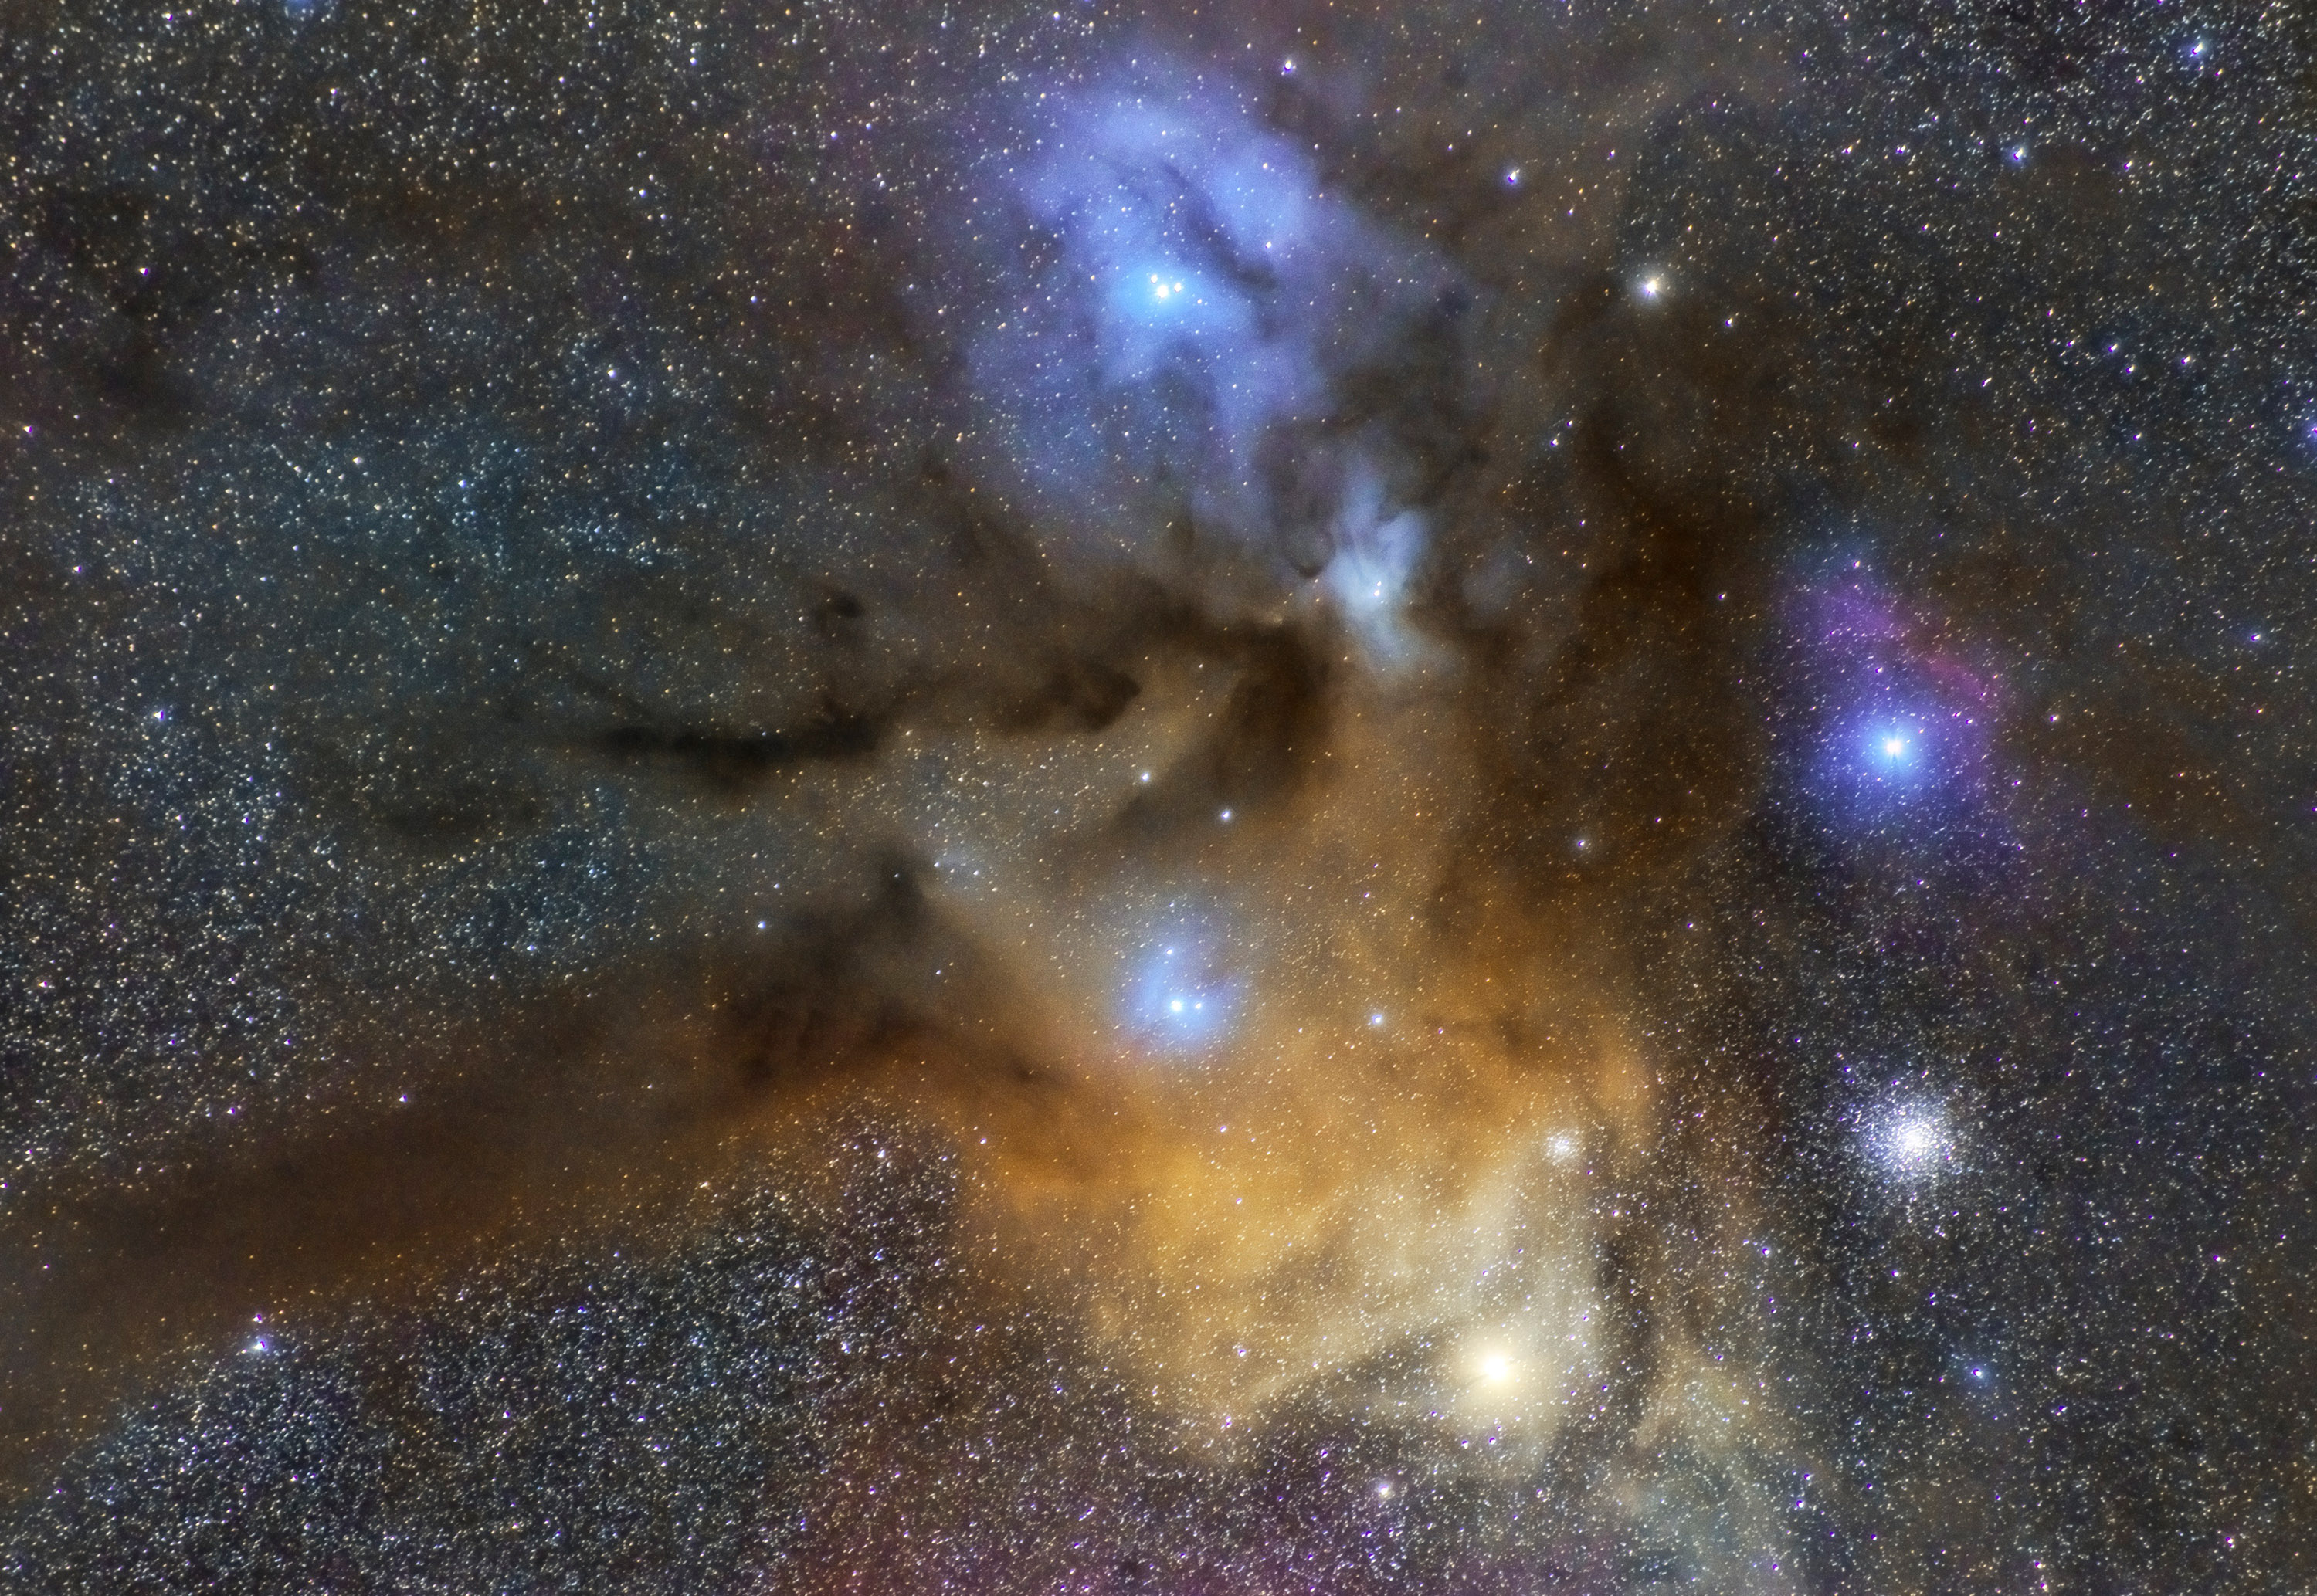
Auriga Constellation | Photo by Bray Falls
Since the actual quality of the camera you pick is not terribly important, how do you decide which one to choose? My answer would be whichever camera is most accessible to use for long periods of time with the least effort.
In many cases, people who are starting astrophotography will sit with their intervalometer for every-single-exposure that they take. This gets old fast, and the act of wrangling an intervalometer around can shake your camera which will ruin your images. The way to get around this is to control your camera with a computer with only a simple USB cable. There are some very easy to use programs like BackyardEOS and BackyardNikon that will allow you to take images unattended, or even while sleeping. Not all cameras have great software support for astrophotography, so check ahead of time to see if your camera is capable. Canon and Nikon are the most supported manufacturers, so I would recommend sticking to them. There are some proven astro-cameras from each company like the Canon 6D, the Nikon D610, Nikon D5600, and plenty others.

Pleiades taken with a Nikon D810 and 180mm prime lens
Where to Go & Where to Look
Assuming now that you have a camera, a lens, a way to track the stars, and a way to control your camera for long exposures, where do you go to capture your pictures, and how will you know what to look for?
The best place to go to take your pictures is as far away from city lights as possible (within reason). The best way to figure this out is with a light pollution map.
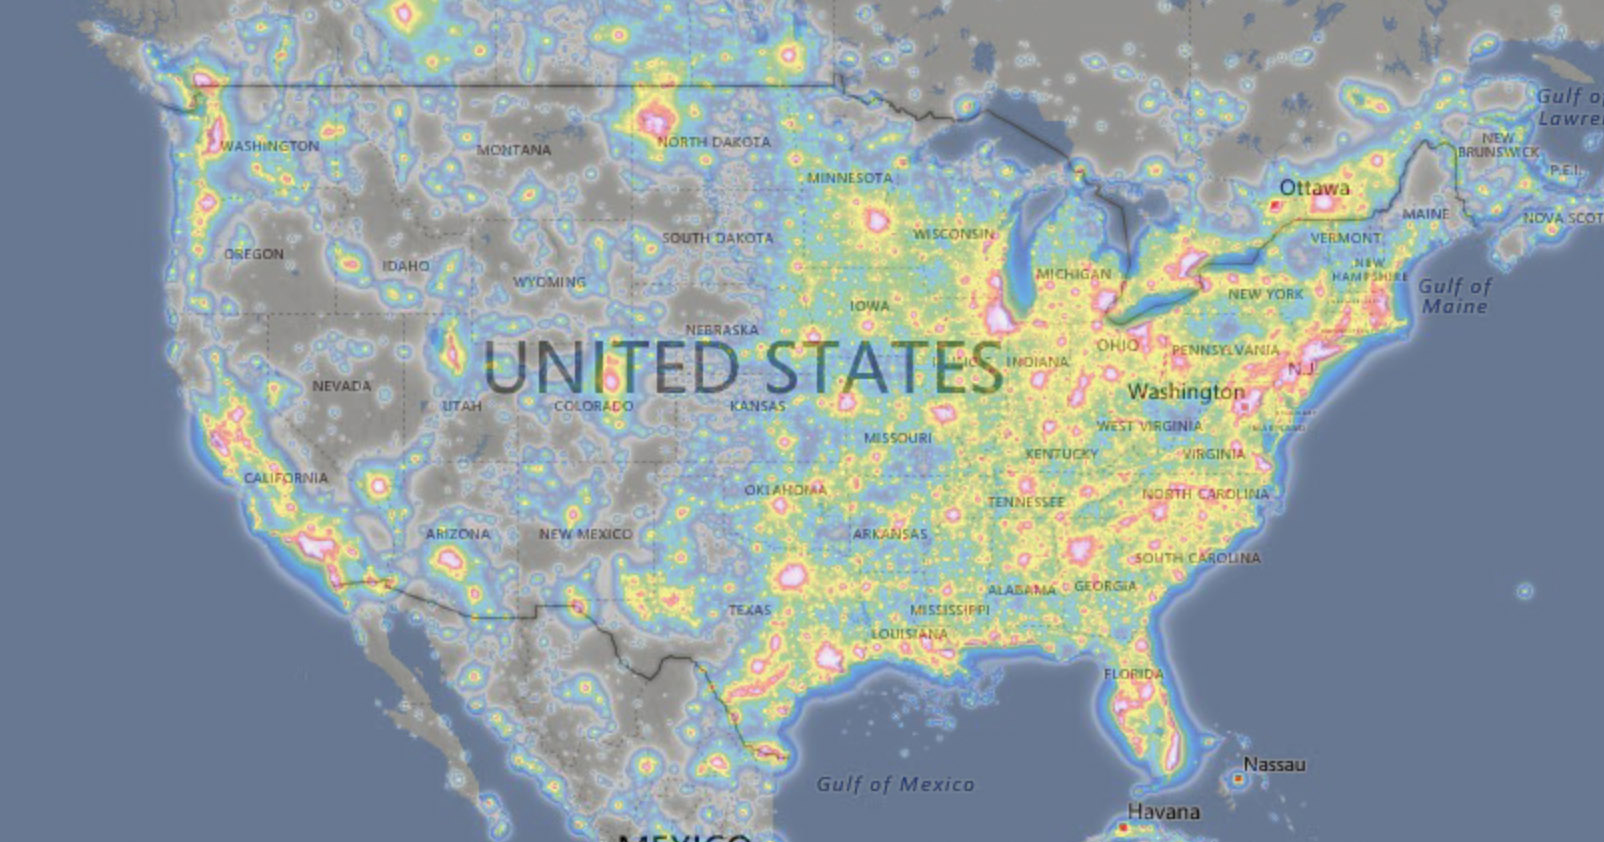
Example of a Light Pollution Map
The boost in image quality you get from shooting in dark skies is incredible and cannot be overstated, and you’ll never regret driving that extra 20 minutes further to get away from the city lights.
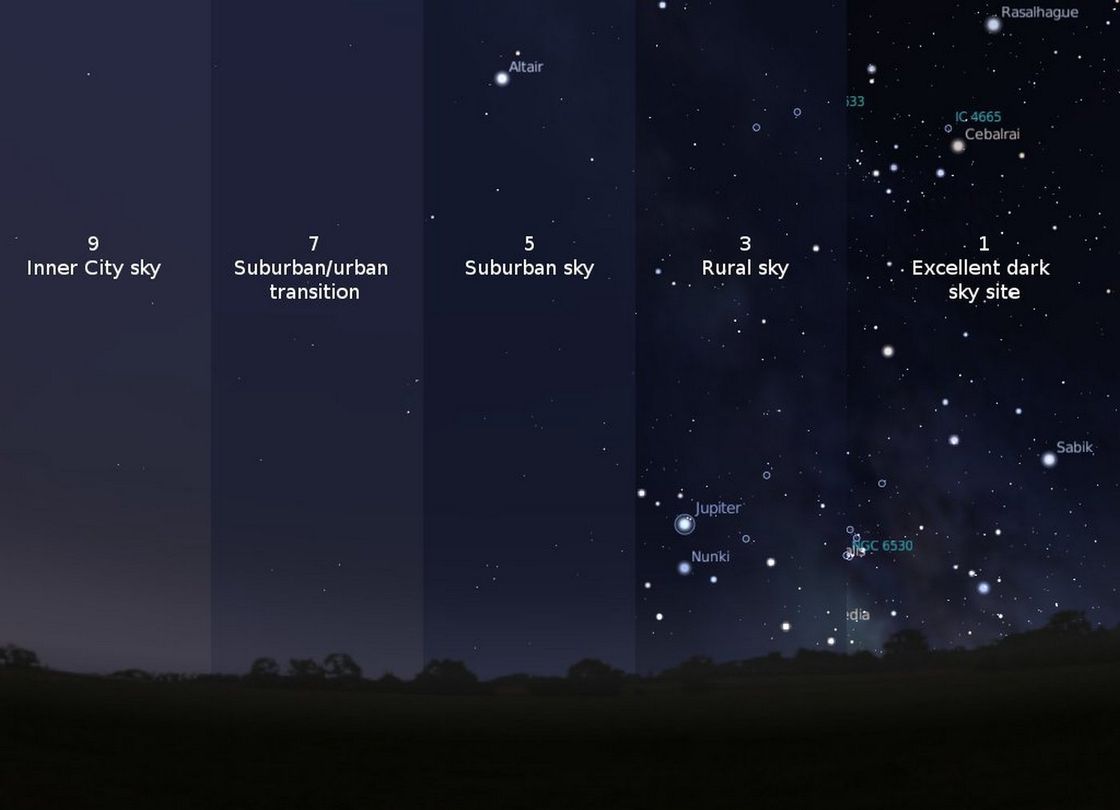
Example of Light Pollution and how it affects your images.
The best way to find out where to look in the sky is just by downloading a sky chart app to your phone (SkyGuide, Stellarium, etc.) or by downloading on to your computer. Use these charts to get familiar with the night sky, and learn where your imaging targets are. Some good ones to start on are M42, M31, M8, and M45.
It is essential to keep your expectations low for your first few attempts. Astrophotography is going to take you lots of practice to get down right, even when you are just starting. You might get disheartened or frustrated, but if you keep pushing through, then it will only serve to make your first image much more satisfying.
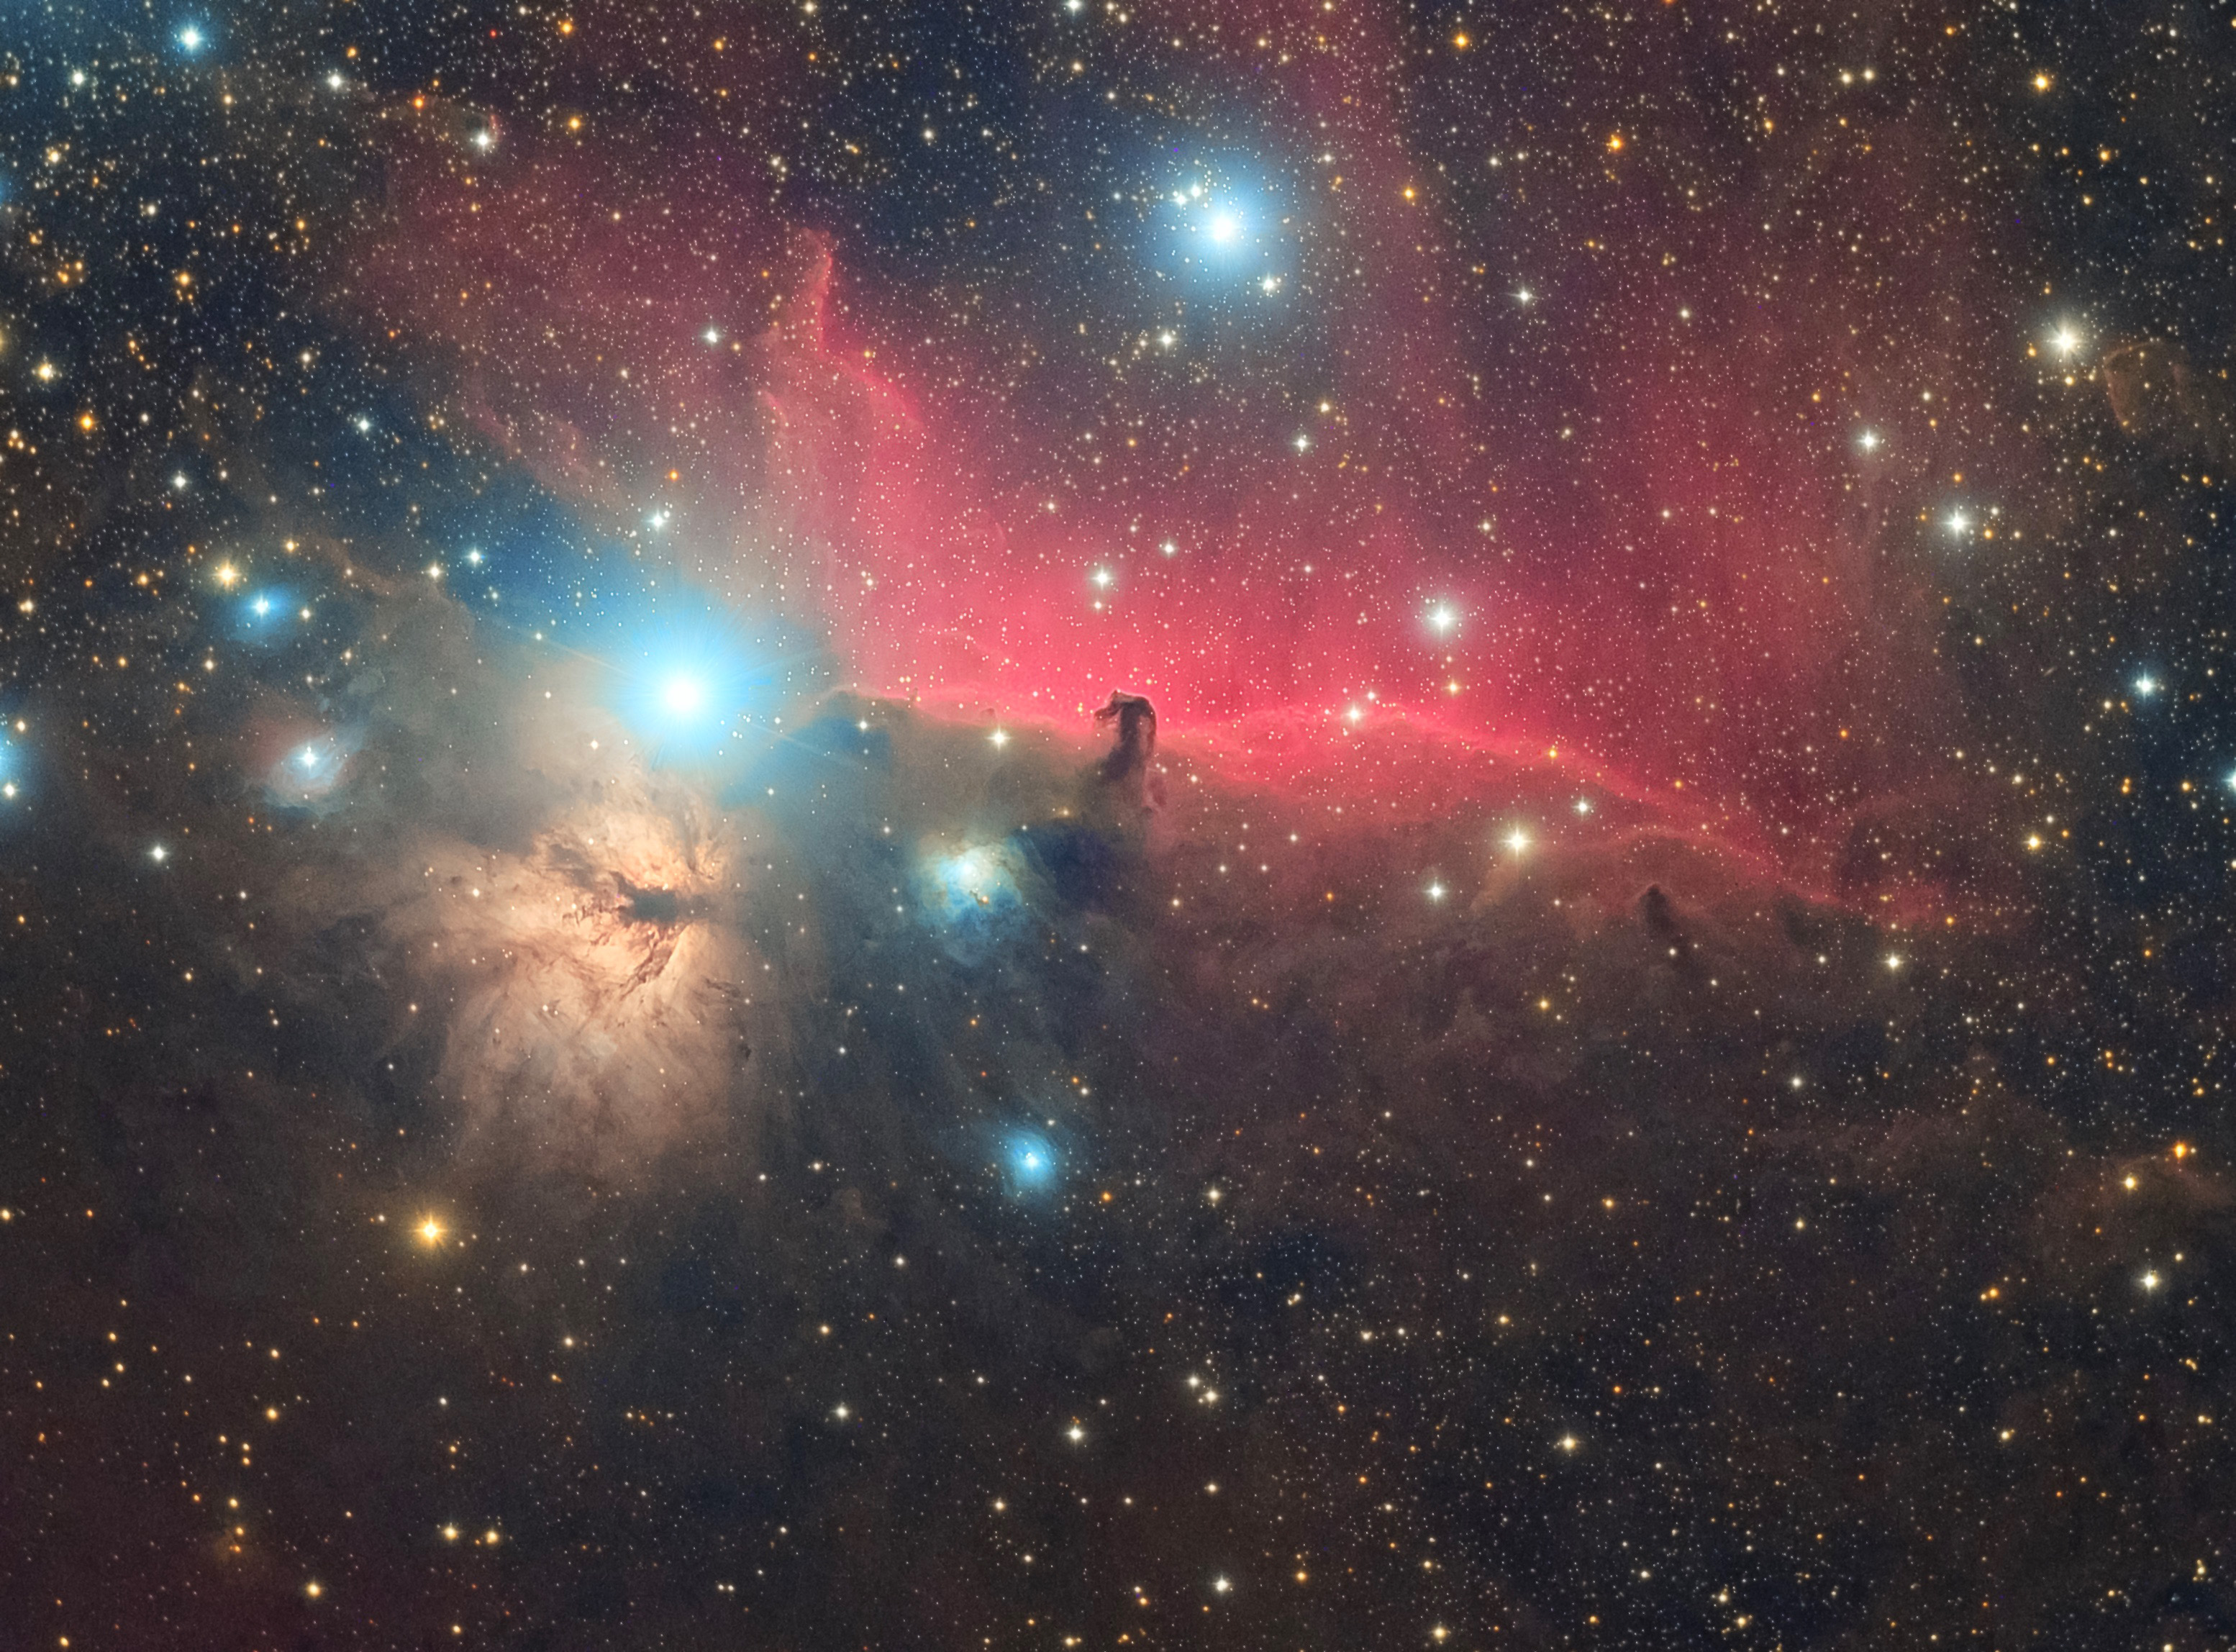
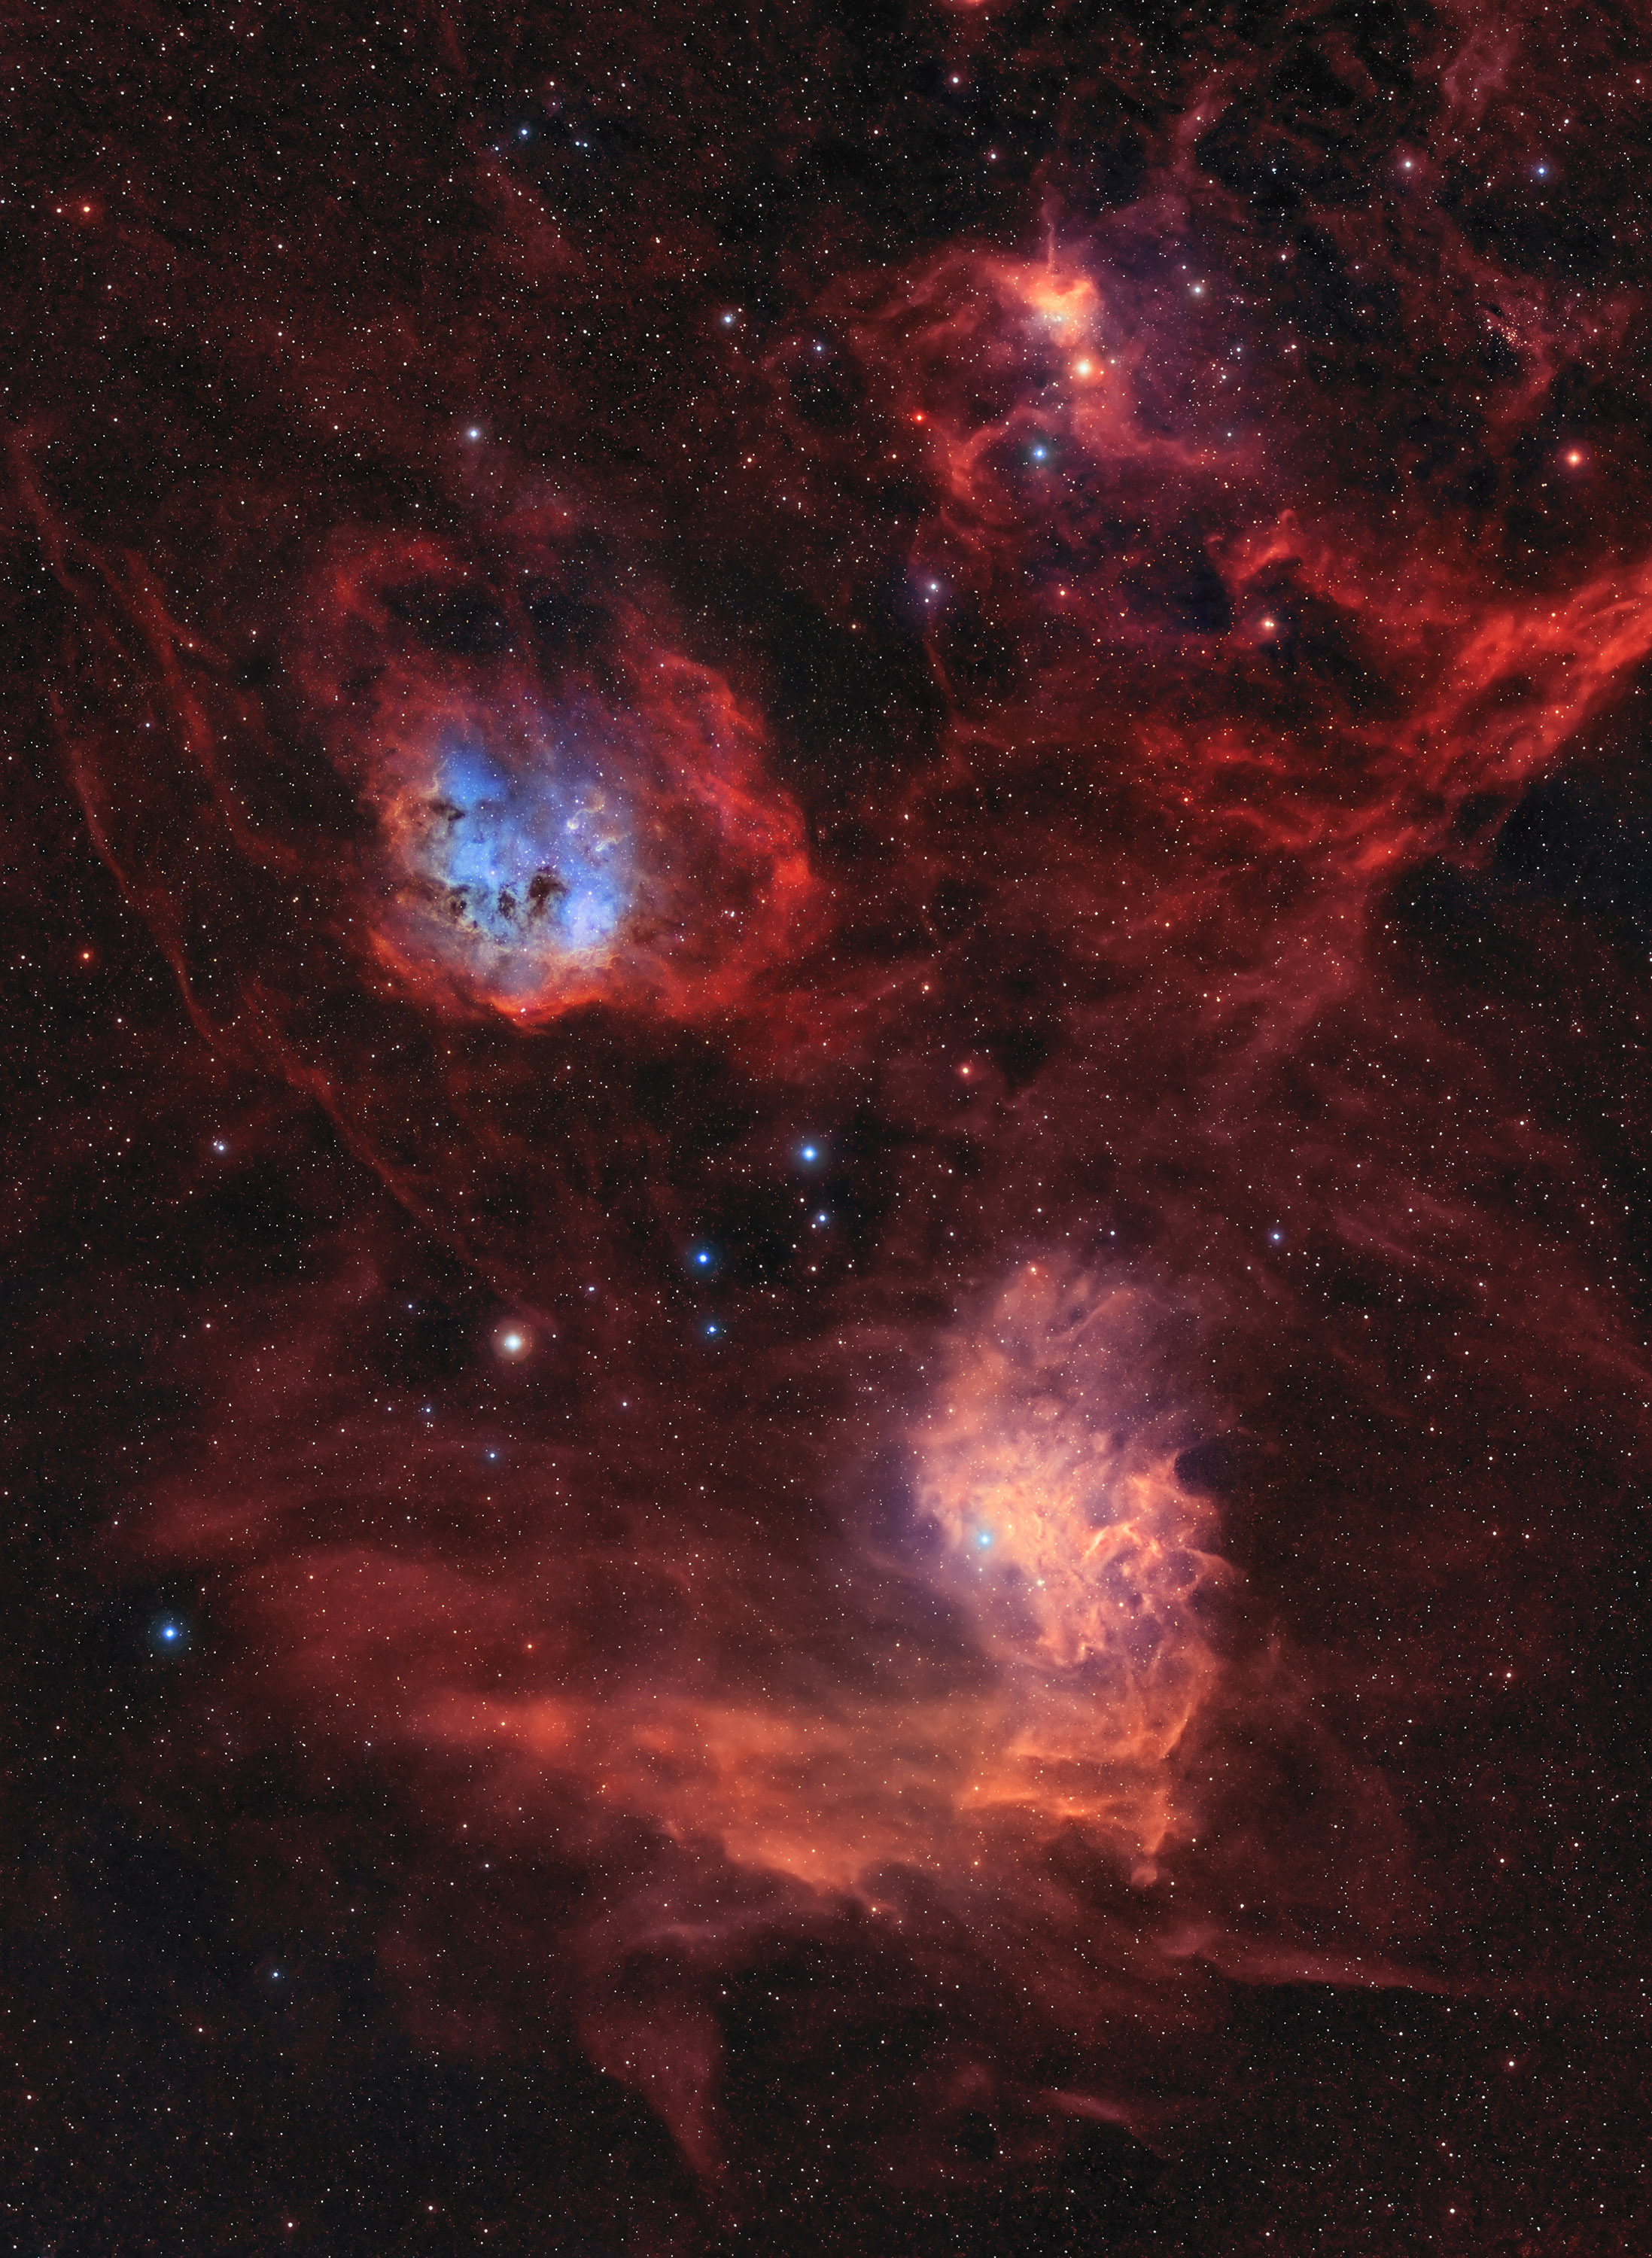
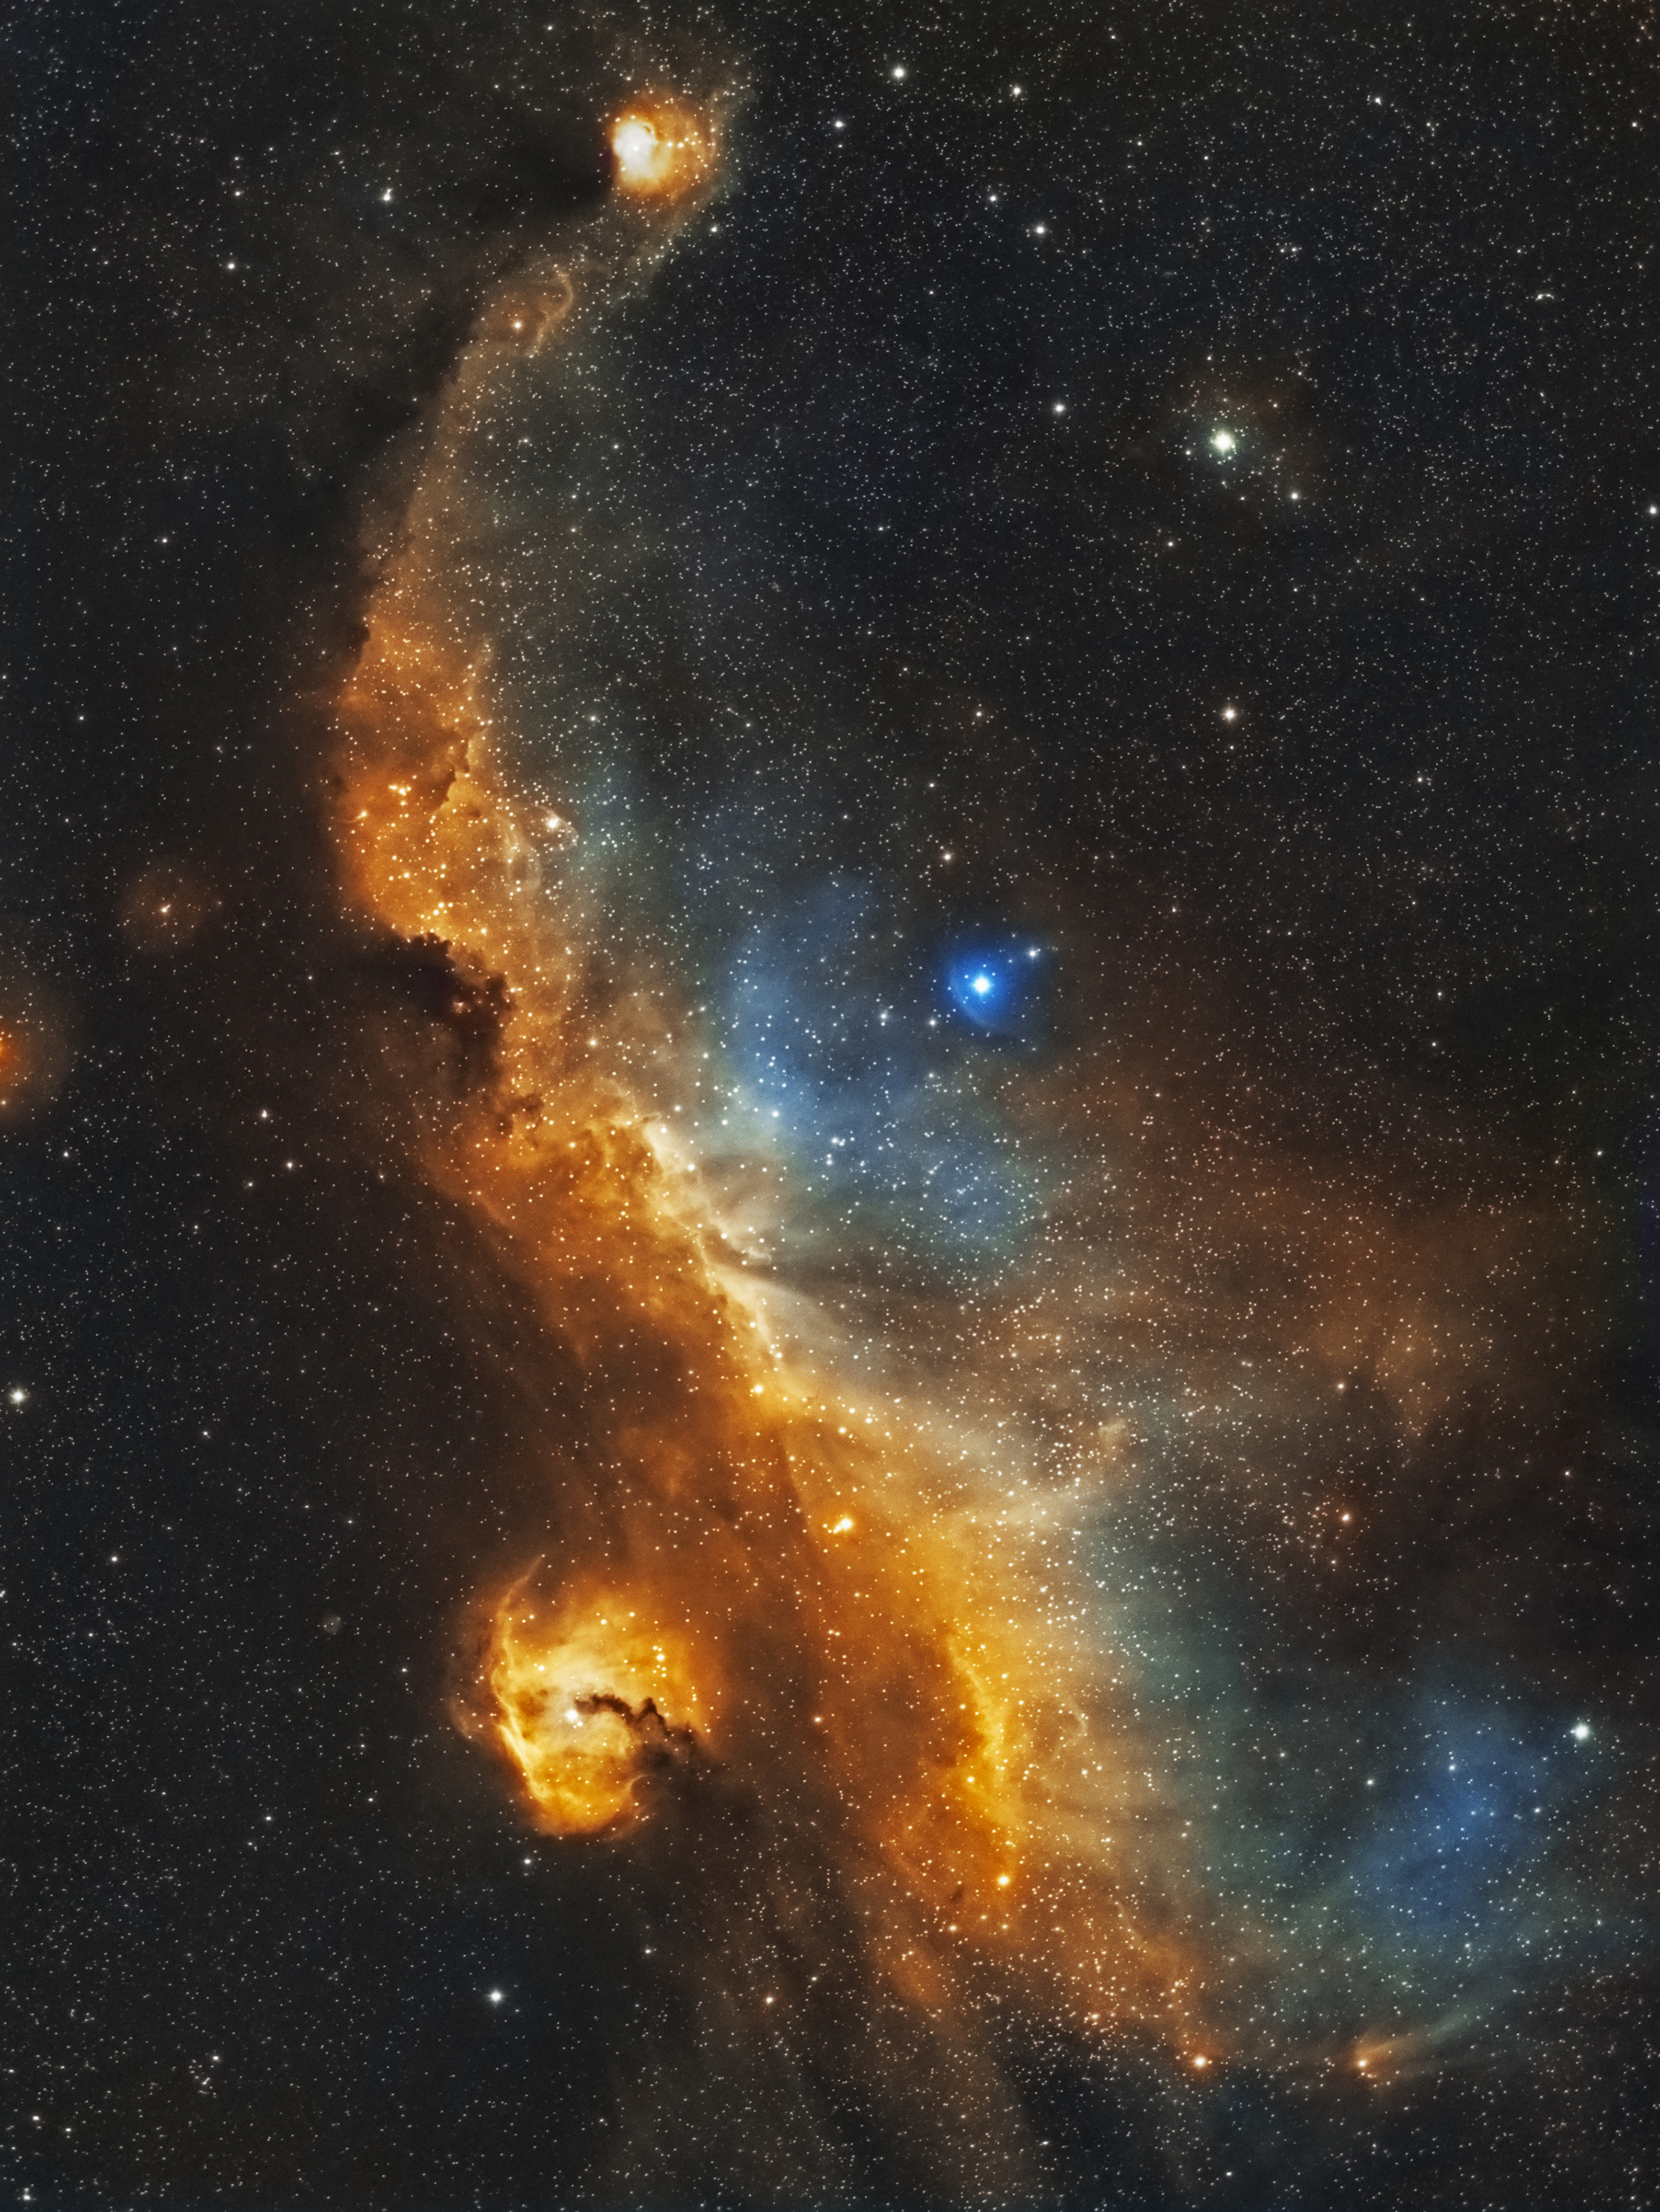
Horsehead Nebula | Photo by Bray Falls
One final piece of information about your images that you should always keep in mind is a thing called the signal to noise ratio (SNR). SNR is nothing but a method of scaling the quality of an image. Basically:
SNR =Target Signal/ Noise Signal
Your target signal is, of course, the light from space which you want to make an image from, and the noise signal is any source of light or noise which you don’t want in your image. For example noise signal could be light pollution, camera noise, or light from the moon. What you need to be able to do as an astrophotographer is to find ways to maximize this to improve your image quality. You could increase your target signal with a faster lens, a longer exposure, or stacking more frames. You could decrease your noise signal by driving to a place with no light pollution on a new moon, or by choosing a camera body with less noise.
Once you have all your gear, this is perhaps the most important thing to keep in mind when taking pictures. Astrophotography in its most basic form is nothing but separating the light from space from all of the things which pollute it. As a process, it is very similar to panning for gold. You could fill a gold pan with dirt, pan for maybe five minutes, and find absolutely nothing. However, if you pan through hundreds of pounds of dirt, you have a good chance at separating the nugget from all the things you don’t care about. Similarly, if you go out and only take one thirty-second exposure, it is reasonable to expect that you will end up with mostly dirt in your pan.
Once you have all your gear up and running, you should try to image one thing for as long as you can until you get bored. Once you start, your threshold for getting bored imaging one thing will be extremely low. This is the pitfall for people who are beginning astrophotography. Over time your tolerance for sticking with one object will increase, and your images will improve significantly. And if you’re lucky, you might pull your images up on your computer, and see that you’ve struck gold.
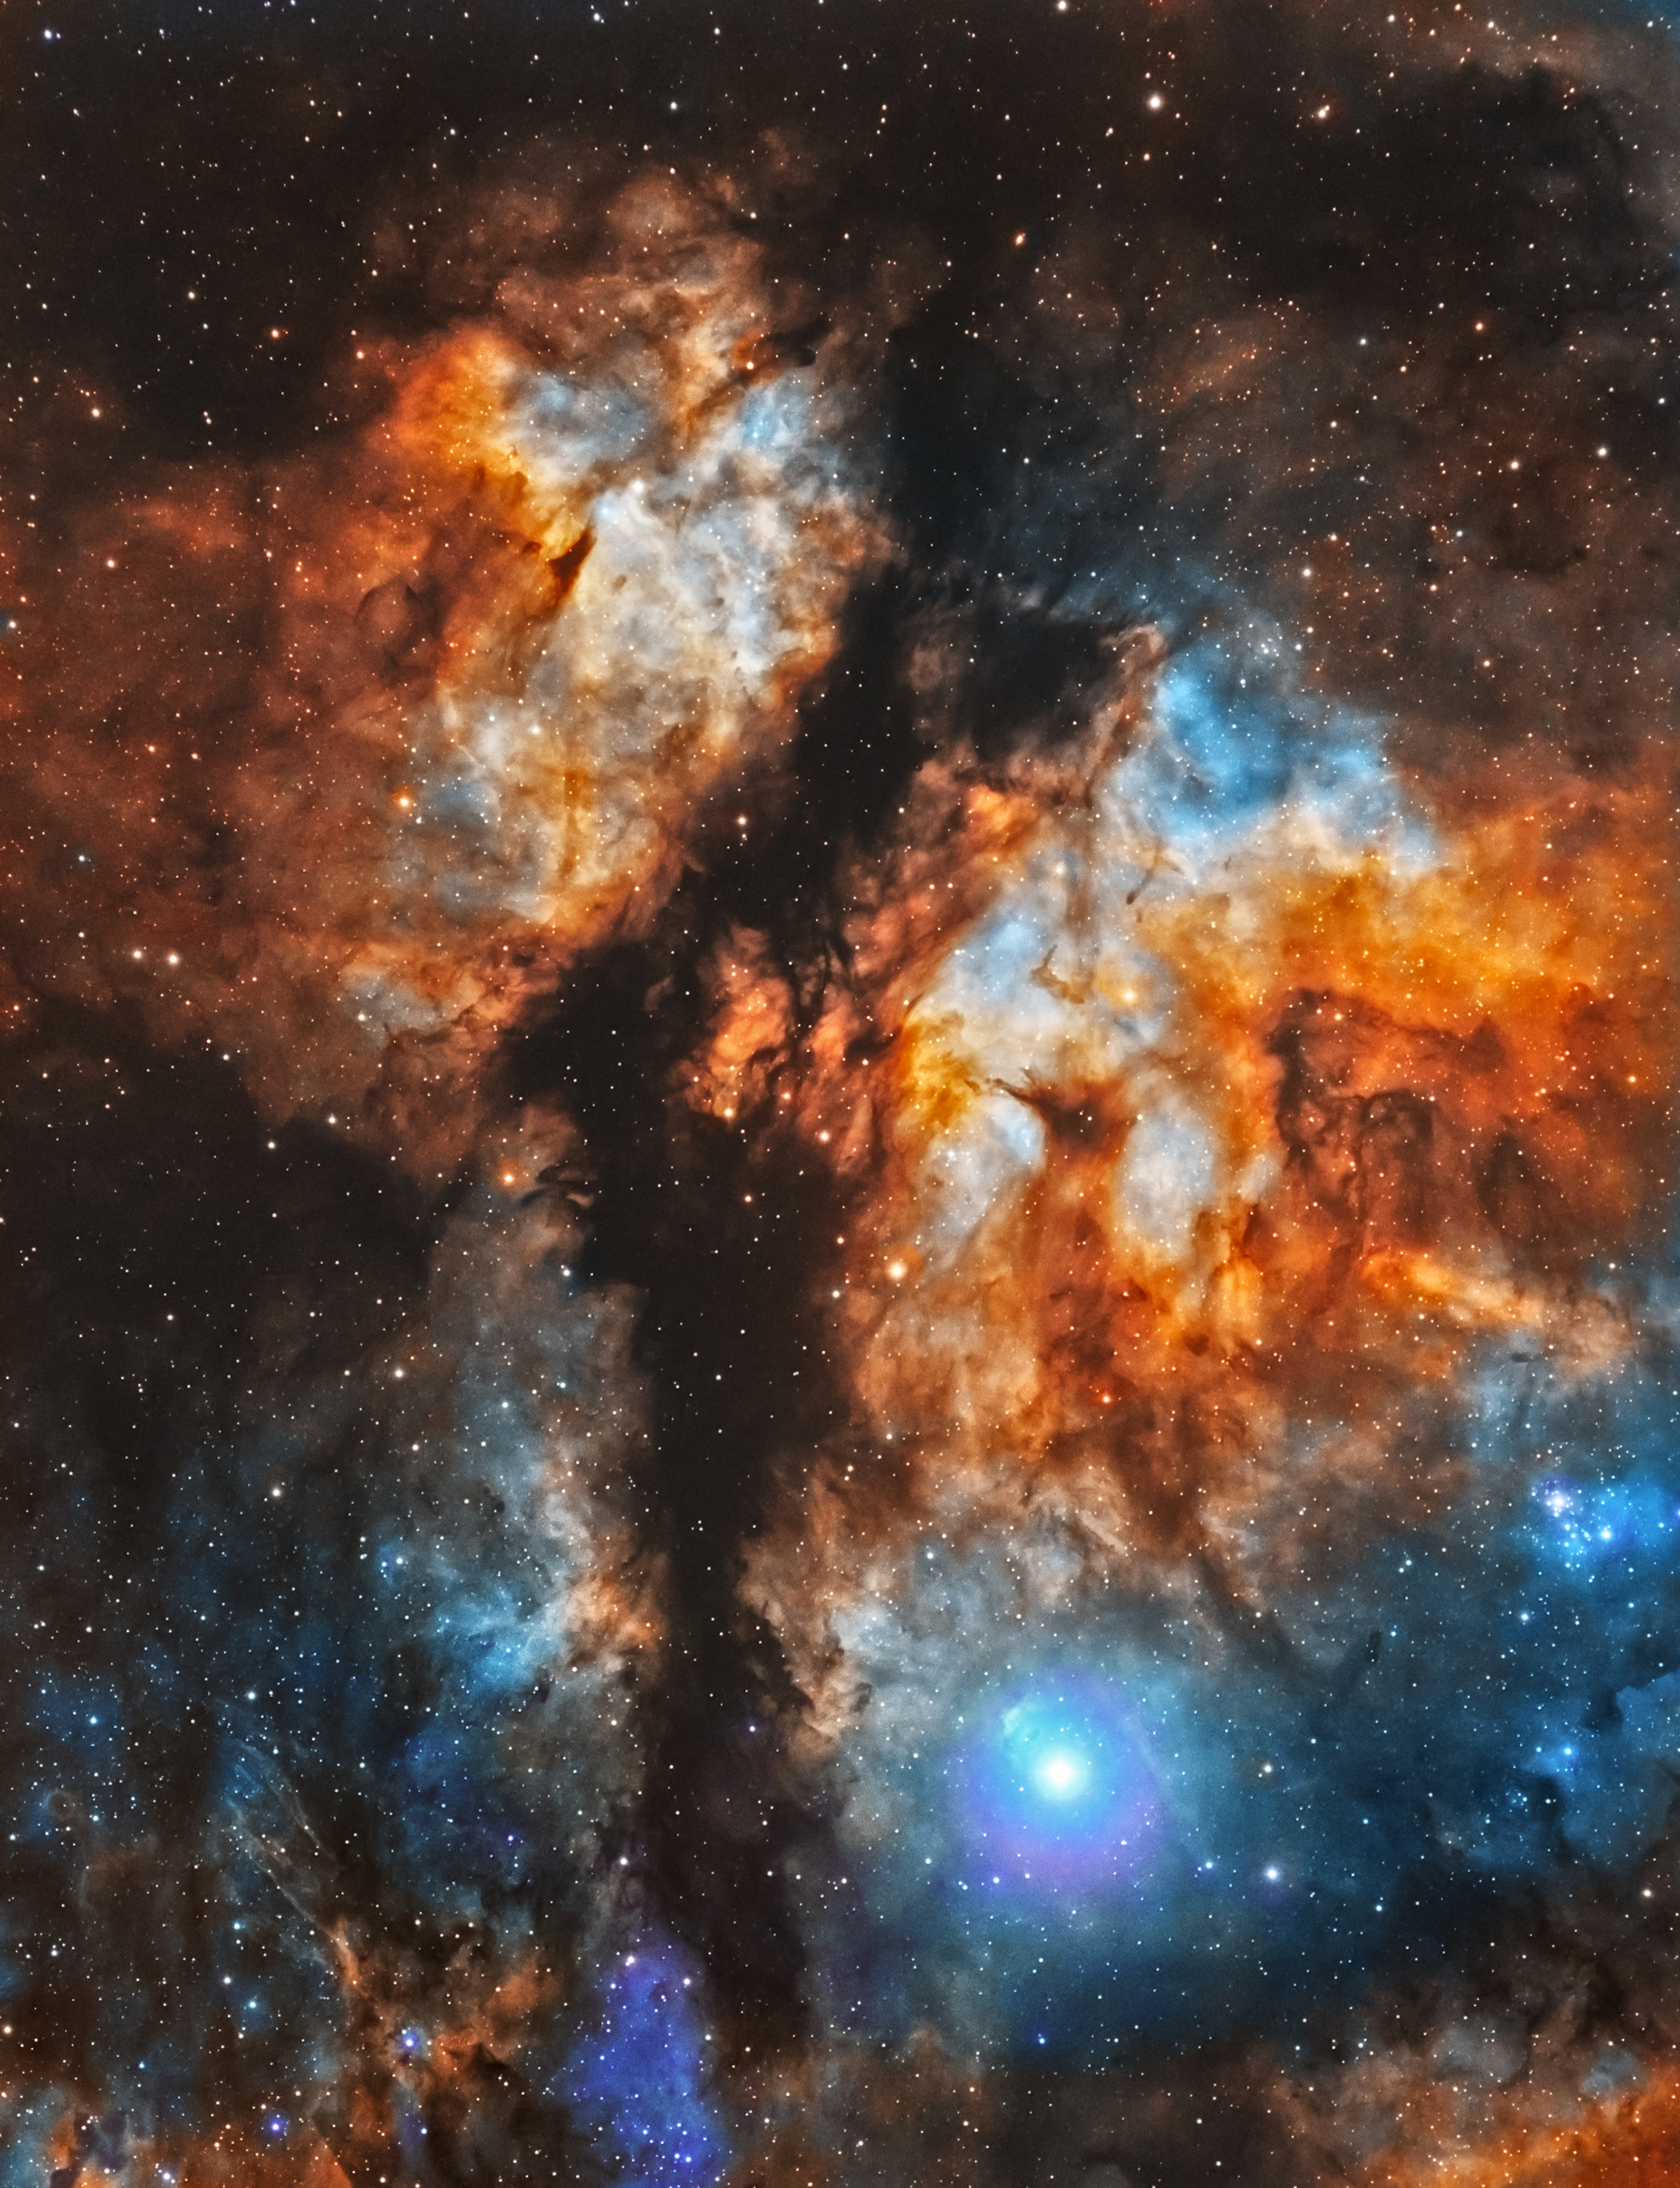
Seagull Nebula | Photo by Bray Falls
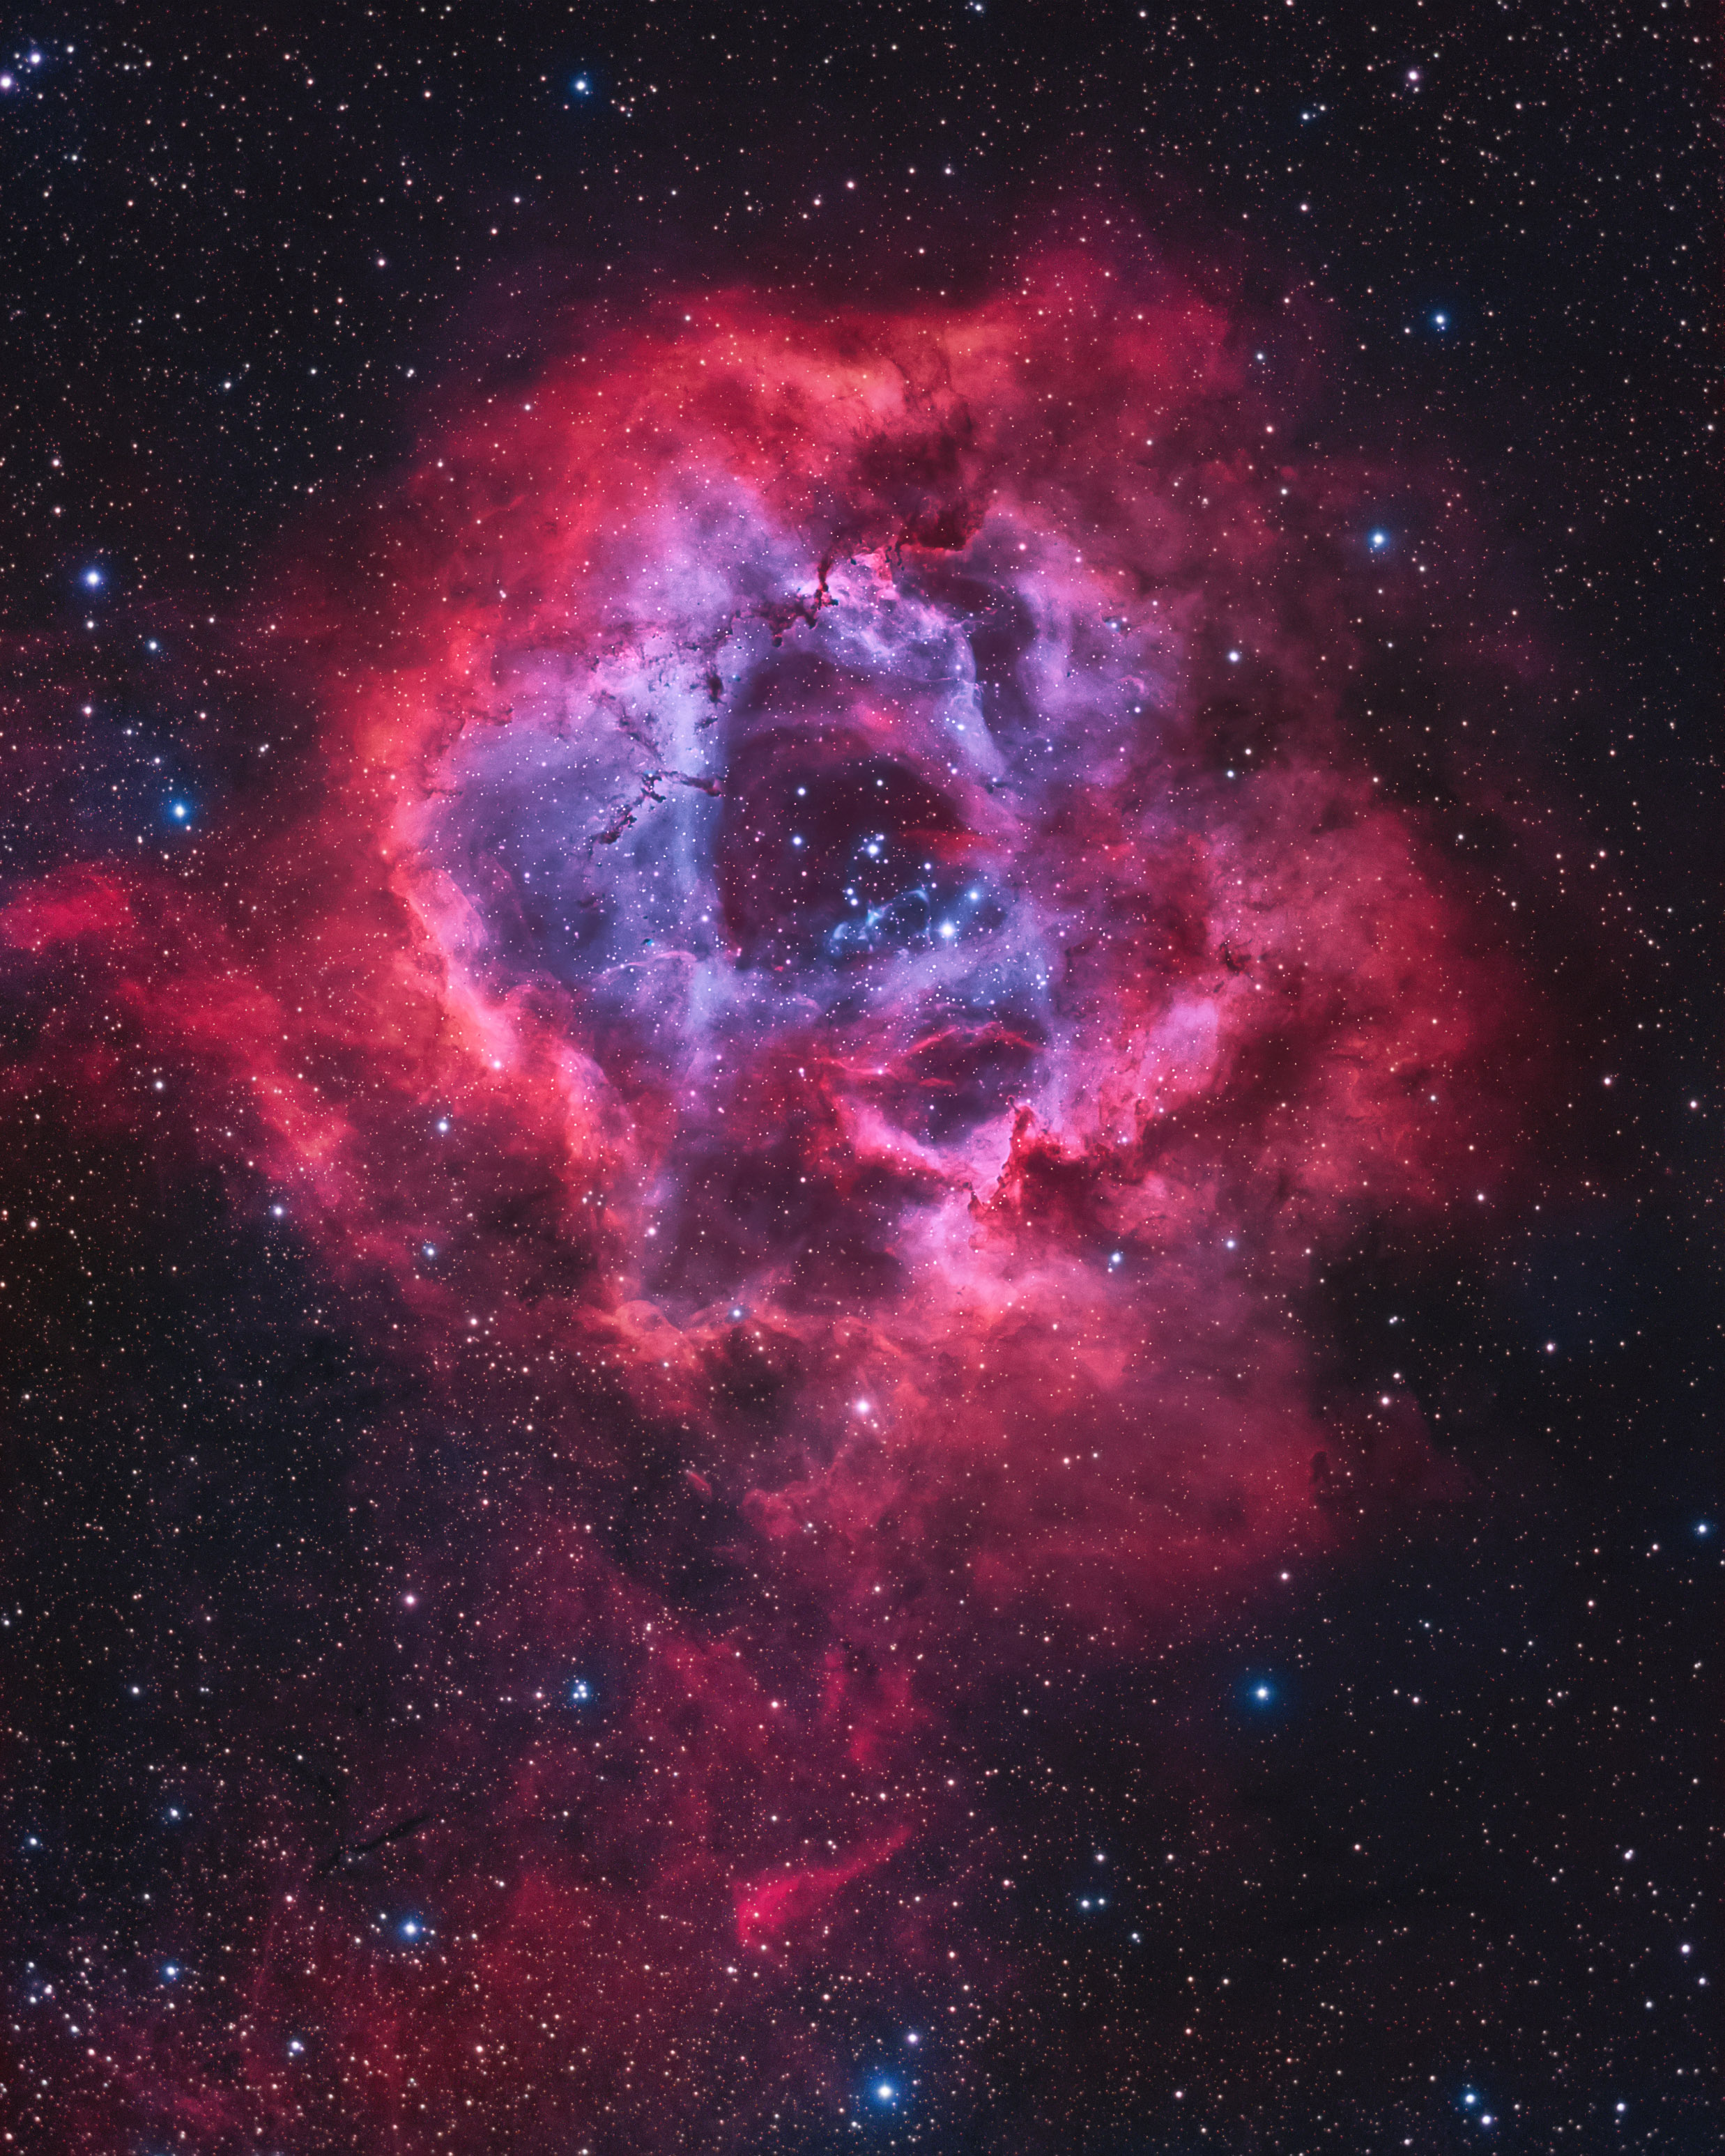
Rosette Nebula | Photo by Bray Falls
If you have any questions feel free to comment below or contact me through my Instagram @astrofalls. For more information and tips on astrophotography, be sure to check some other resources like https://www.cloudynights.com and the astrophotography subreddit.
Author: Bray Falls
My name is Bray Falls, and I’m an astrophotographer from Phoenix, Arizona. I focus mainly on deep sky astrophotography. I am currently studying aerospace engineering at Arizona State University. You can find all of my work at @astrofalls.
-
Joseph Senese
-
Mike Dunkel
-
Brenda
-
xWidget
-
fpink3
-
Ed Hassell
-
Colin
-
Carleton Foxx
-
KeithB
-
Not THAT Ross Cameron
-
Zach Sutton Photography
-
DrJon
