Here at Lensrentals.com, the articles we write are designed to help you as a photographer. Whether it’s Roger meticulously testing lenses to give you MTF charts, variance numbers and more, or me discussing the possibilities of off camera lighting and control – we’re here to help explain the products that can help take your work to the next level. With us anxiously waiting for the new products to be released, like the Sony a7RIII, and the Canon 85mm f/1.4L IS, we’re left without much new shiny gear to boast about and review. So I wanted to take a moment and discuss the functionalities of tethering while shooting, and encourage you to give it a try for your next shoot. While it is a slight deviation from our gear-centric pieces, there is a lot of confusion as to your tethering options, and why it might be necessary for your next shoot.
What Is Tethering and Why is it Important?
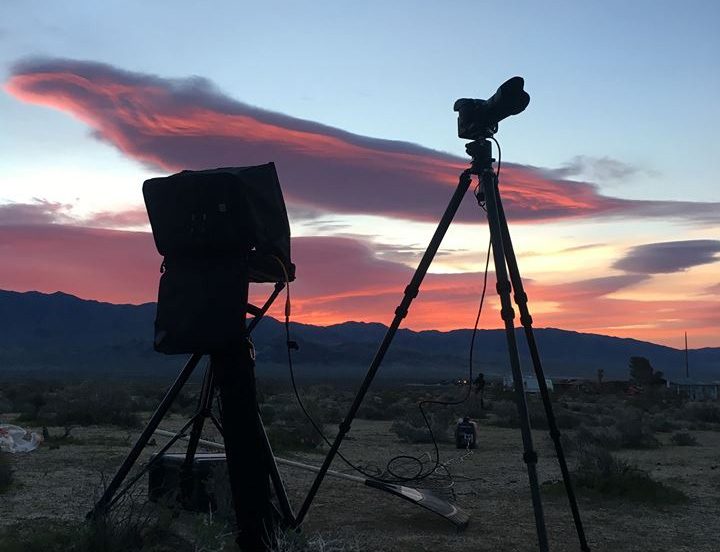
Tethering is the act of shooting with your camera attached to a computer (or in some cases, an iPad) so that the photos are displayed on the computer as they’re being shot. This can be done using a traditional USB cable (or commonly called, tether cable), and many options have flooded the market in the last couple years that are allowing for wireless tethering.
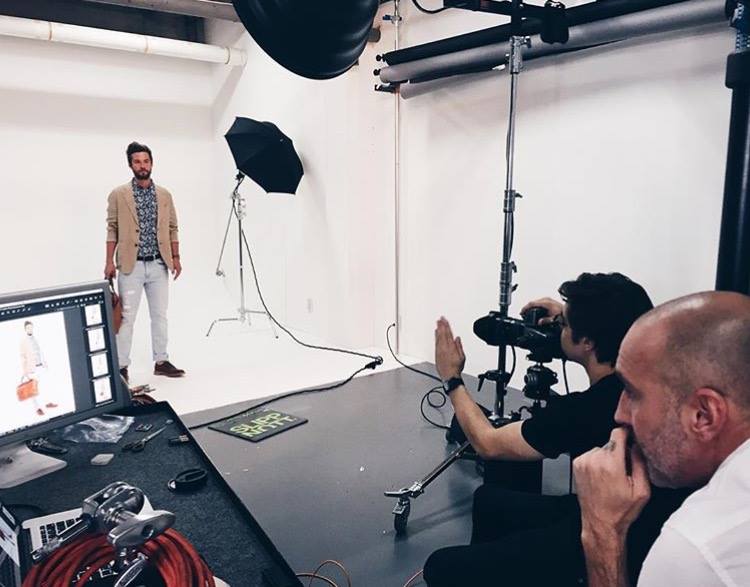
As for advantages to tethering, there are a few. First, if you’re working with a client, it allows you to stop shooting throughout the session, and view the photos without needing to upload them to your computer first. But this isn’t just advantageous for clients either. Tethering is most notably known on commercial shoots, where you have a team of stylists and art directors that will want to see the photos in real time. In a fast-moving environment, they want to be able to select their favorites as they’re shot, and with the help of a digital tech, selected and exported in real time.

But tethering’s benefits don’t just stop at ease of use for your clients. With a traditional camera, you’re left with putting your photos on a memory card, usually a Compact Flash or SD card, without the option of backing up (though some professional level cameras do offer dual card slots for backups). When using tethering as an option, you’re able to have the photos copied and archived in real time, and with the use of services like Dropbox, you’re ready to make off-site backups on the fly.
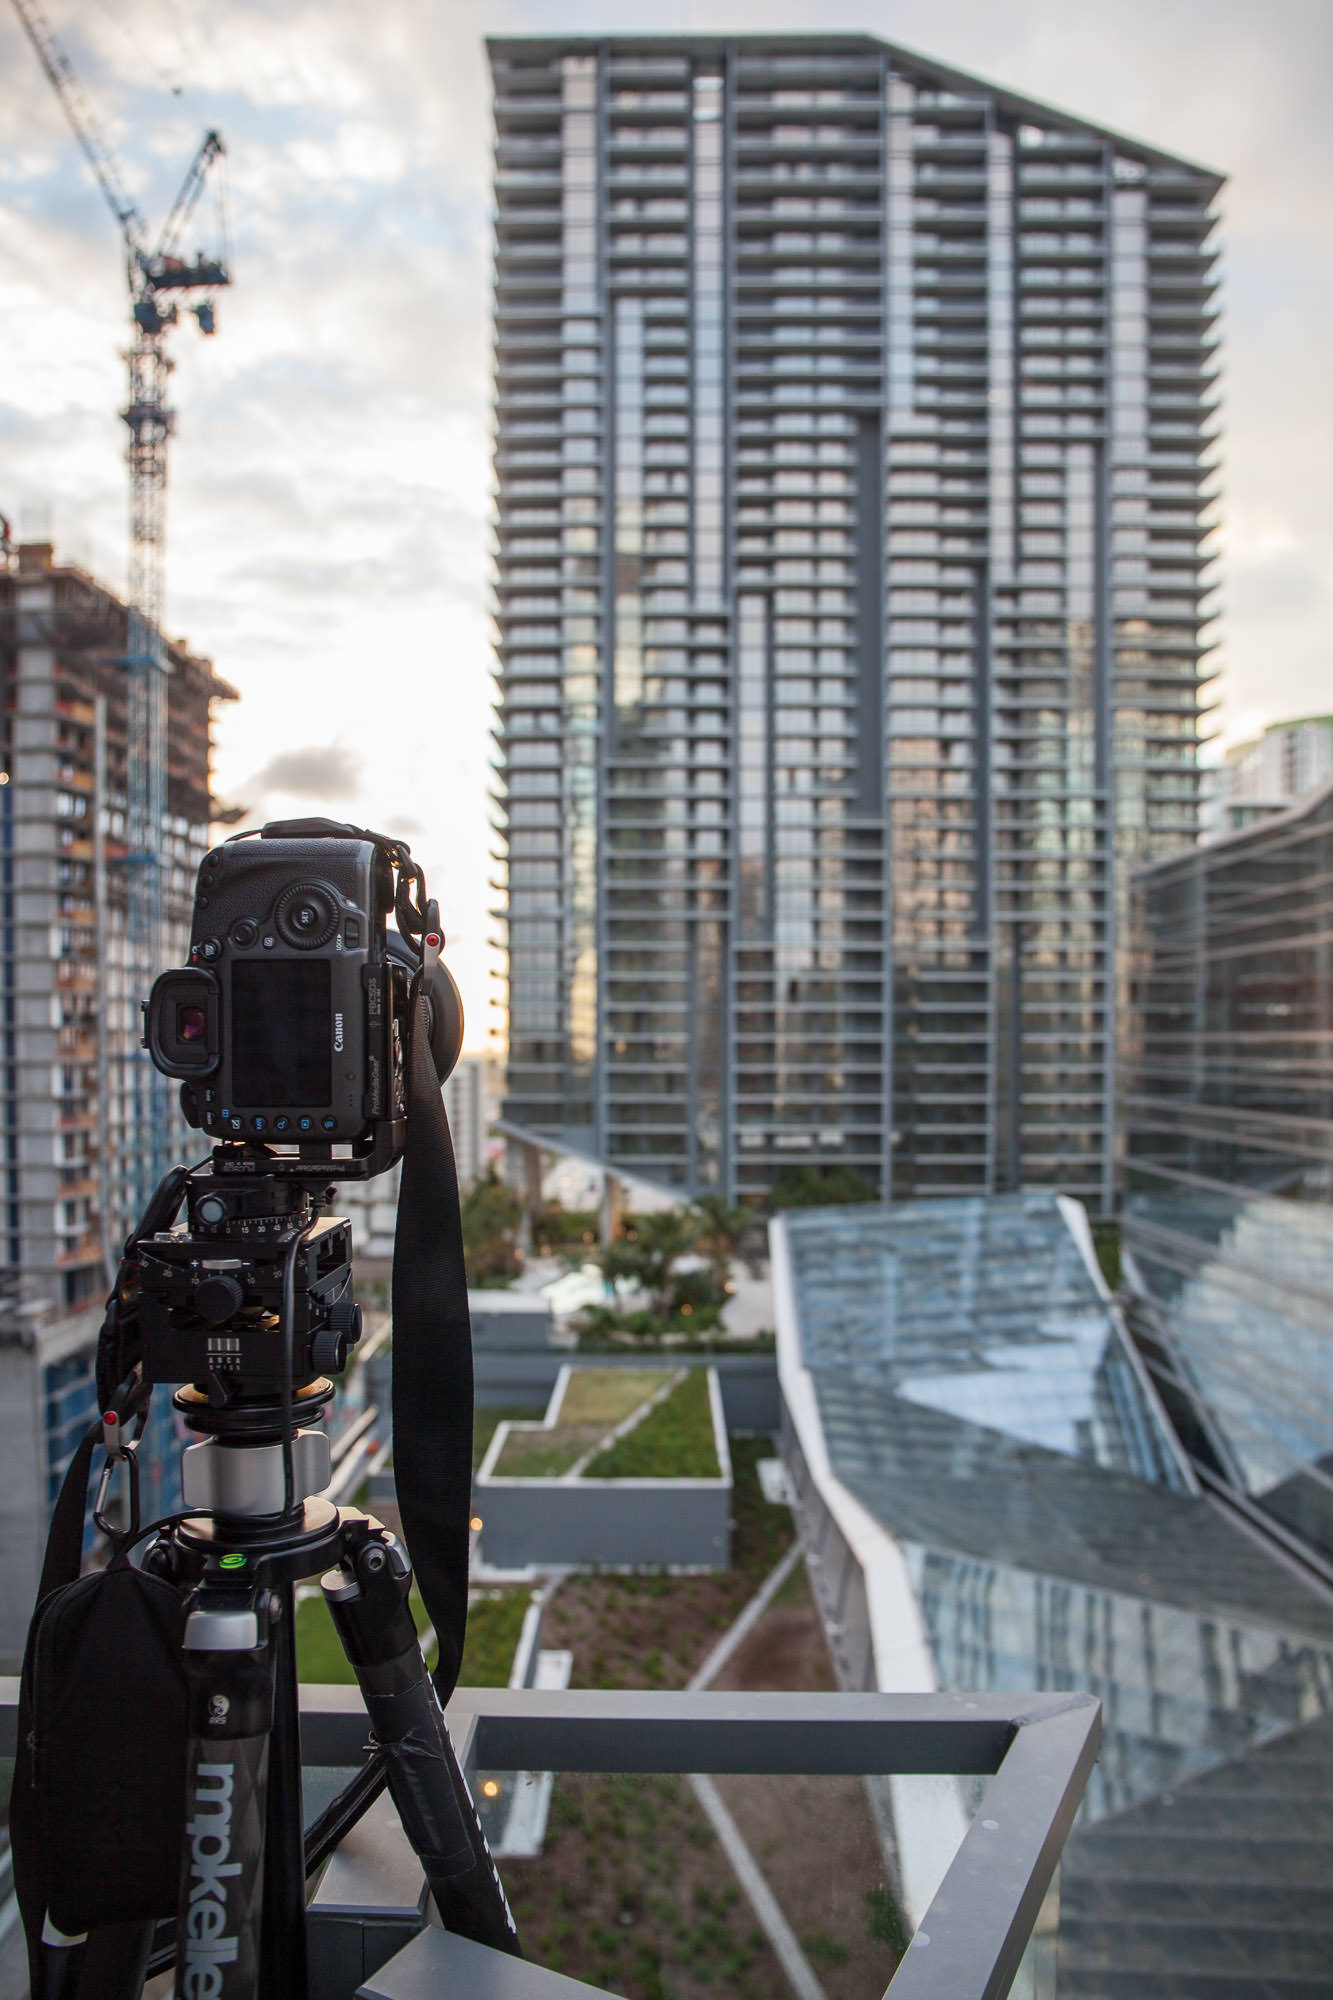
The final significant benefit to tethering is the ability to control the camera without needing to be near it. A great example of this comes when you look at the work of the architectural photography of Mike Kelley, or the action sports work of Chris Garrison. By mounting their camera in otherwise impossible places, they’re able to take photos through their laptops (or iPads) and make setting adjustments using the computer, instead of having to climb up a ladder to adjust settings.
How to Tether
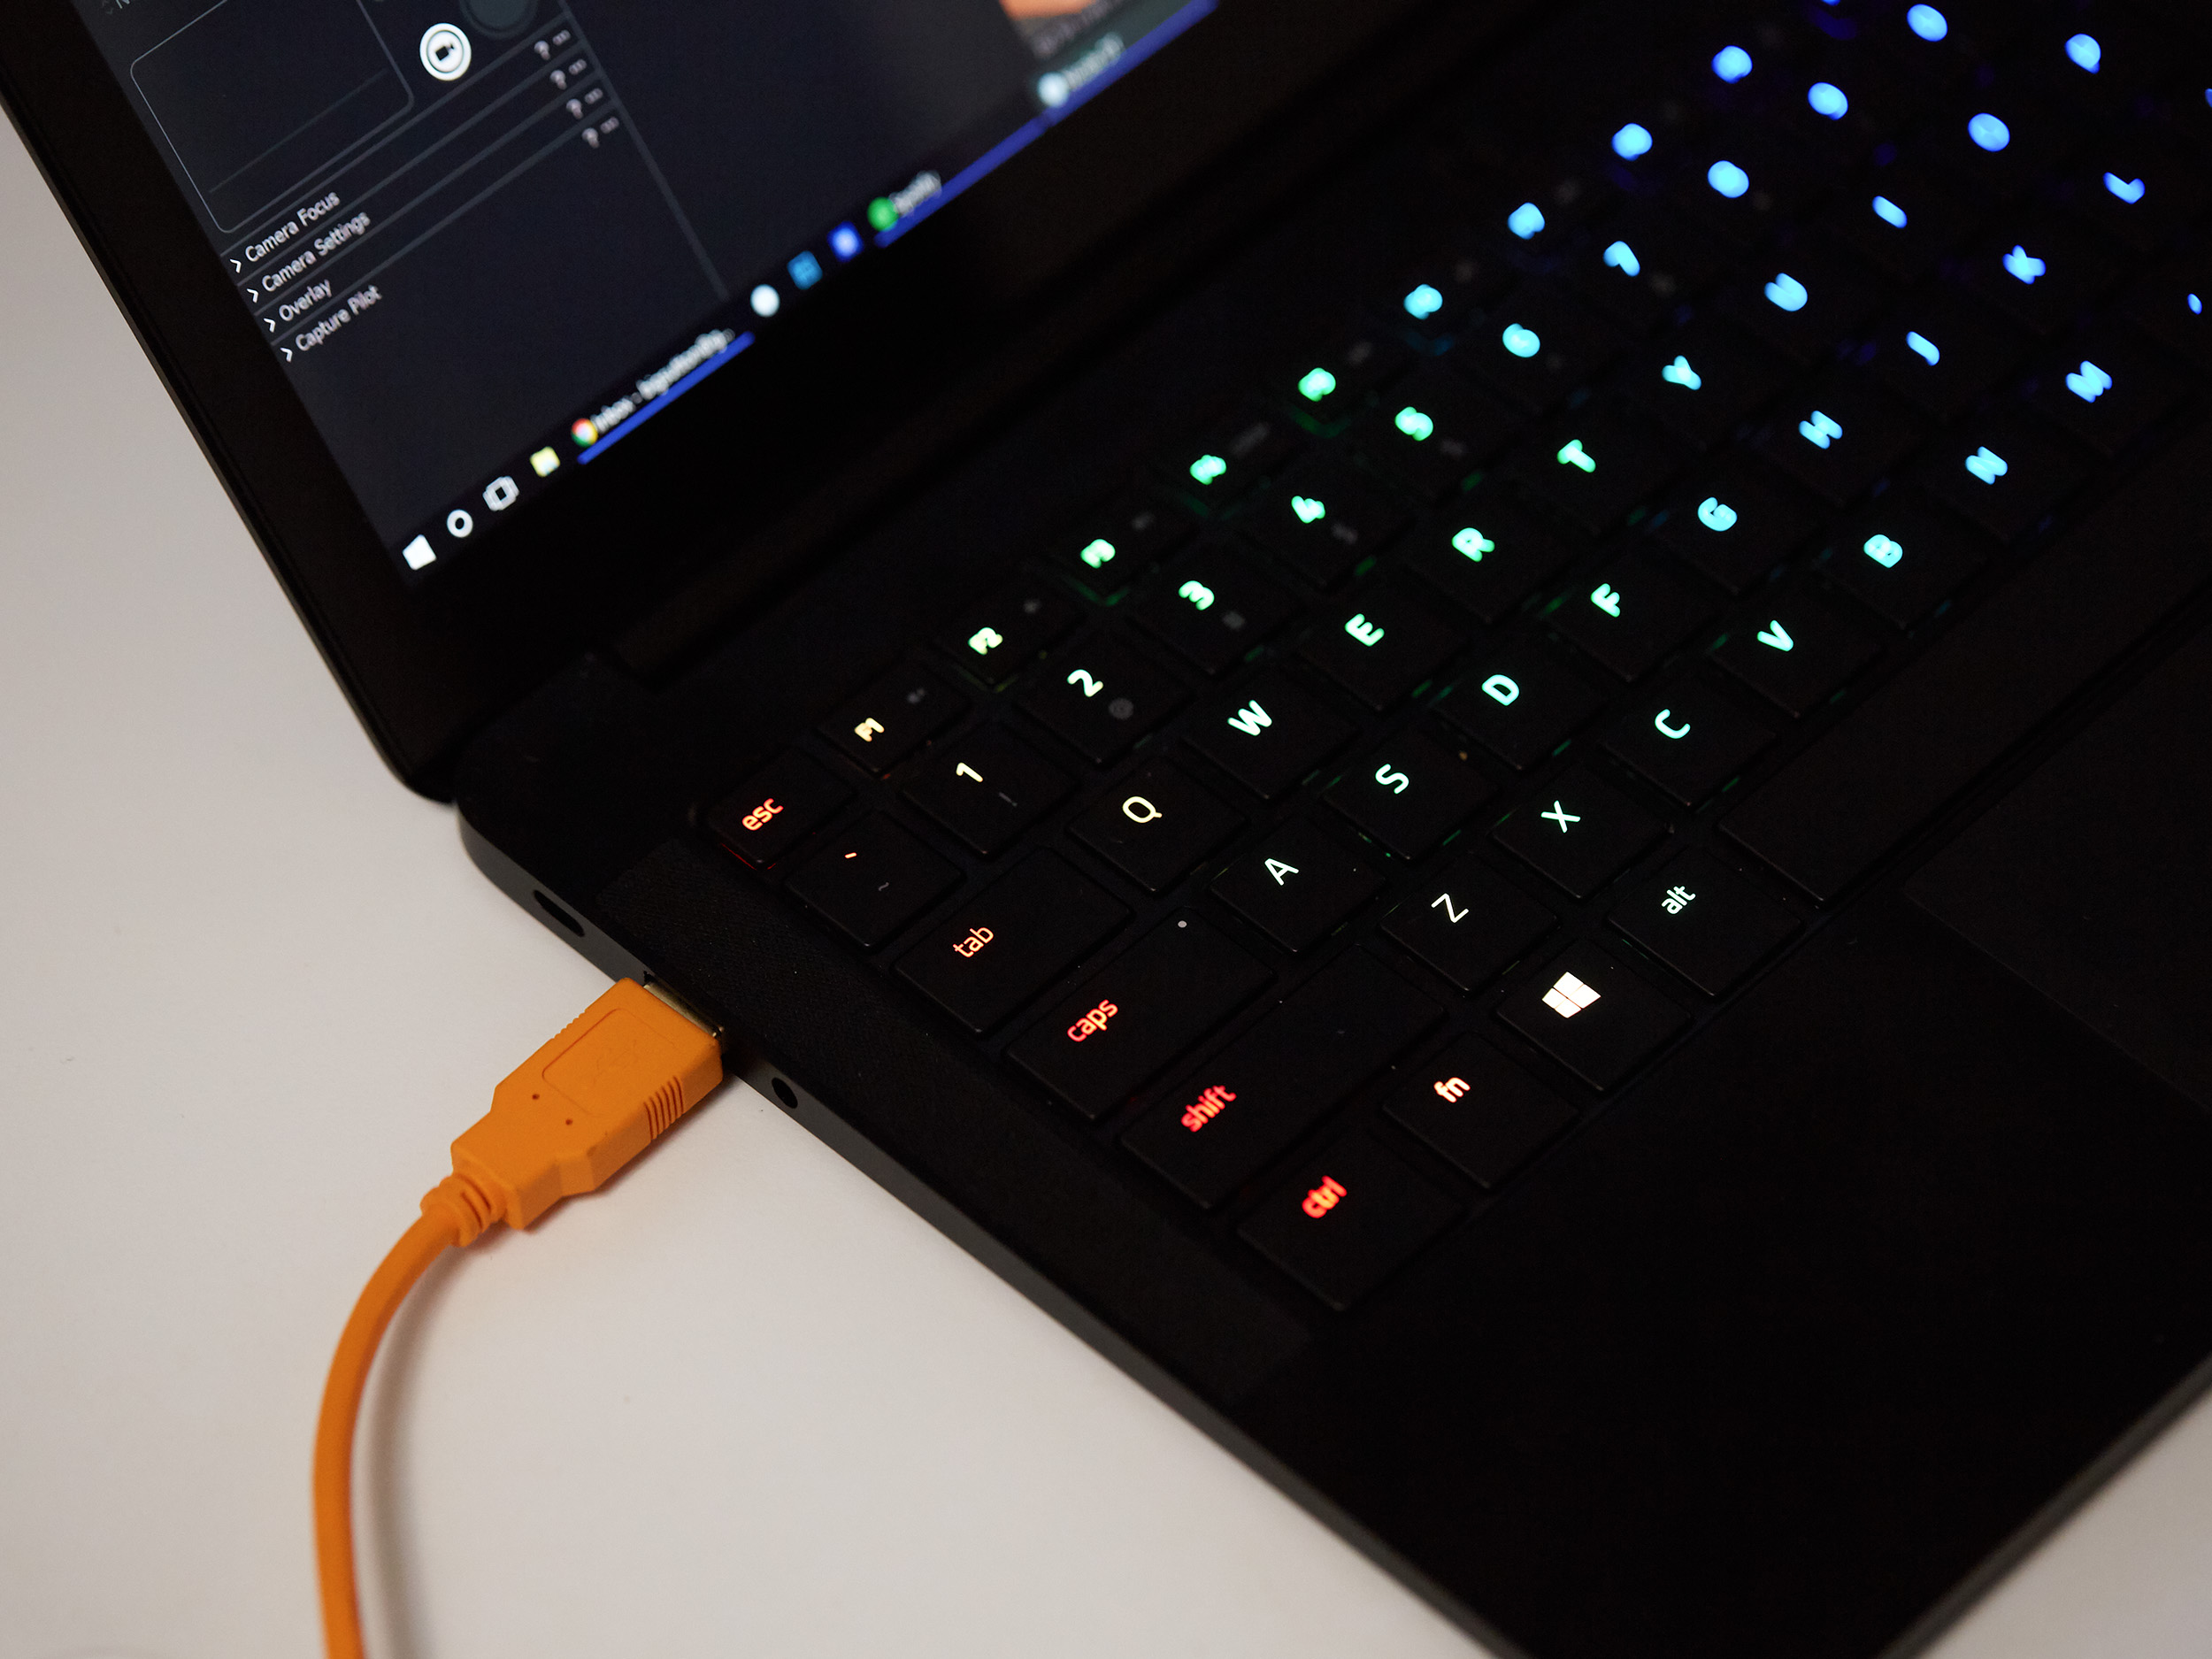
Tethering is an easy process, as many Raw converters have tethering options built into them. With the use of your USB port on your camera, it’s as easy as starting your preferred Raw converter, and plugging your camera in and turning it on.
However, not all software is created equally, and not all cameras are supported universally. While it would be easy to recommend my preferred tethering solution, it’s encouraged that you go through and find the software that works best for you. Fortunately, our friends over at TetherTools have developed a website that goes through and shows you all of the options available to you, based on your camera and computer platform.
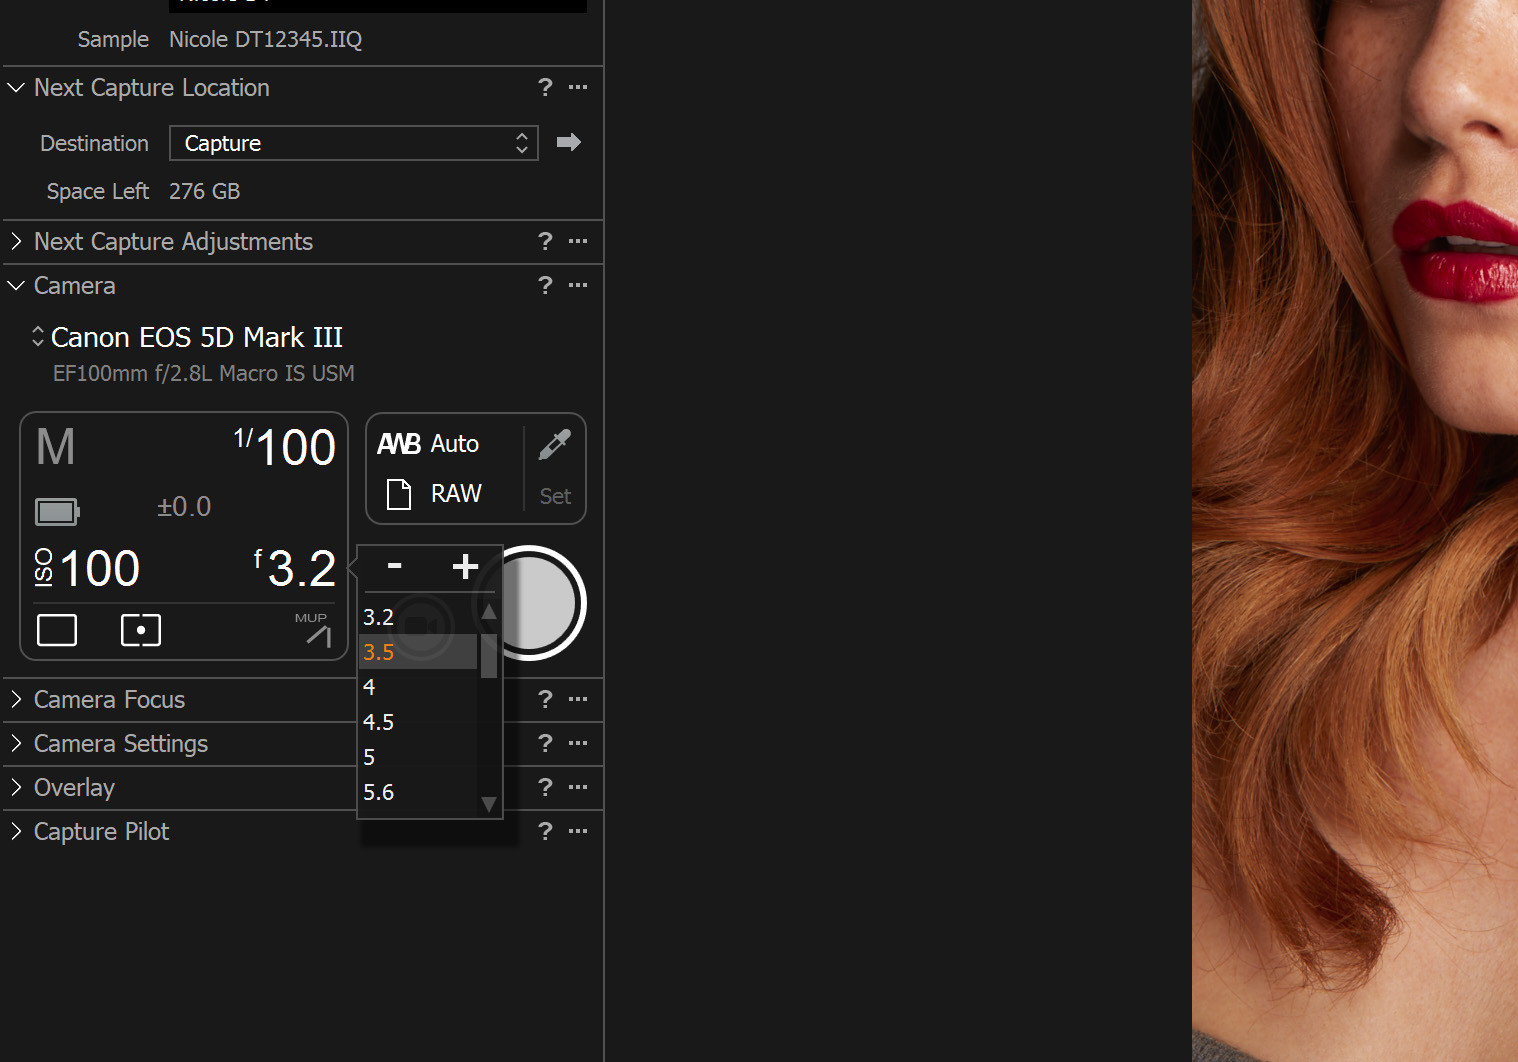
After entering the software of your choice, you’re presenting with a dialog that shows your camera’s settings and that the camera is correctly connected to the computer. From that point forward, all photos will be fed to the computer, and not to your memory card (unless your camera has a particular setting that I’ve never seen before).
Tethering Options
There a number of tethering options available, with more flexibility added with each and every new release. The two most common ways of tethering come in two self-explanatory flavors – wired & wireless. So lets quickly discuss those options and how they work.
Tether Cable
By far the most common and easiest tethering option is to just use a USB cable plugged in from your camera to your computer. By hardwiring into the system, you do not need to worry about signal fallout or images taking an exceedingly long time to load and transfer. However, there are of course some shortfalls when tethering through the use of a USB cable. For one, you need to be reasonably close to your computer system, making this a challenge when shooting on location and moving around. The other big problem is that not all cameras share the same plug. While we all wait patiently for USB Type-C to become the universal standard, it’s important to find a cable that matches your USB connection. Whether it’s Micro USB or Micro USB Type B, it’s important to know what type of cable you need before getting started. Again, our friends over at Tether Tools have a tool for finding the right cable for your camera.
Built-In Wireless
While the Tether Cable has been the tool to use since the transition into digital photography, new cameras are slowly releasing Wifi within their systems, with mirrorless brands like FujiFilm and Sony leading the cause. However, this is not actually tethering in the same sense as using a tether cable from your computer to your camera. With the Sony a7RII for example, you’re only able to transmit one photo at a time (in full res JPEG), and the process usually takes 20-30 seconds per image. For reference, in the past, I’ve done wireless tethering tests with the Canon 1DX Mark II, and got numbers of 50 Full RAW images transferred in an average of 27 seconds. While the Canon 5D Mark IV and similar cameras offer a wireless tethering option, you’re still limited to JPEG only, and the delay is significant. Hopefully, with advancements in technology, well see a viable option built into cameras, but there are a couple solutions that help bring wireless to tethering.
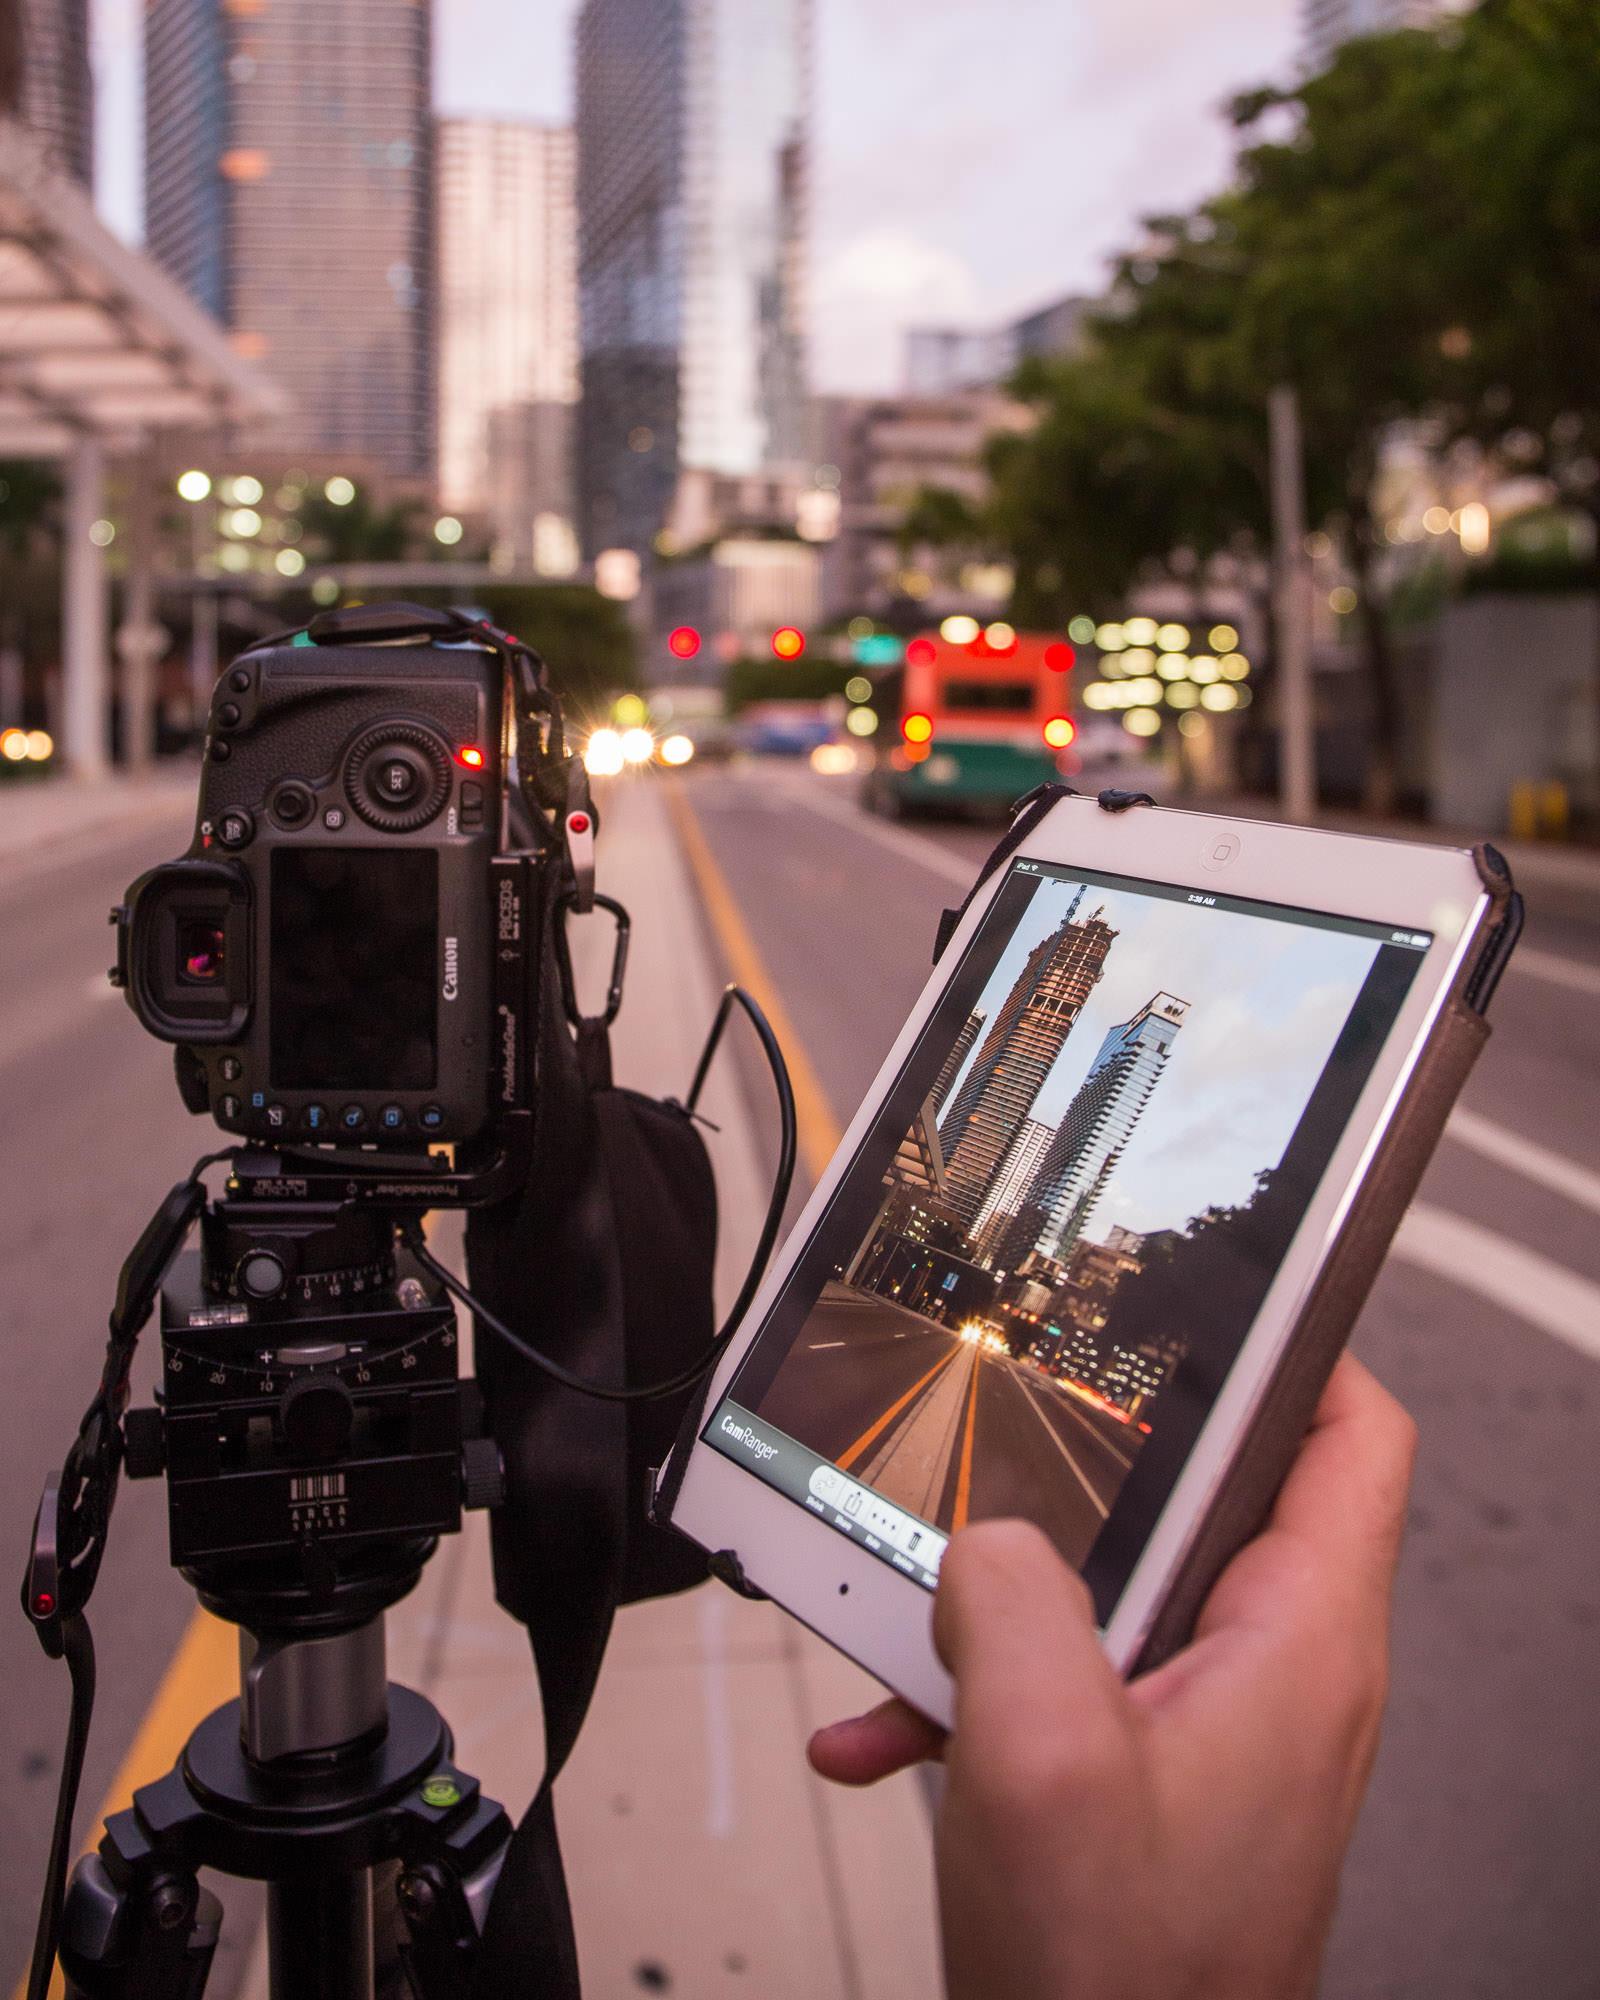
**Cam Ranger
**The first option is a pretty well known and respected system by the name of CamRanger. Using an innovative app available on your iPad, CamRanger is able to transfer JPEGs and adjust camera settings with ease. While this is a great solution if you’re away from the camera and need to see Live View, Previews, and adjust settings, it still doesn’t give you the flexibility of wired tethering, giving you access to the RAW images as they are taken.
**Case Air
**The other option, of course, works a lot like the CamRanger, and is called the Case Air. again, using a mobile app, you’re able to shoot wirelessly and have the JPEG images transferred over to your iPad or phone quickly, while maintaining full control over your settings. Much like the CamRanger, this system looks to be designed more for when you don’t have easy access to your camera, and need to compose and shoot remotely.
While we may not rent tether cables (simply because of how affordable they are), we still do encourage you to give tethering a try for your next shoot. Not only does it help you build a more secure and better workflow while working with a team, it’s generally a tool that all clients can appreciate. The ability to see the images on a 15″ inch screen instead of a 3″ screen on the back of the camera is night and day, and a better way to present your images and vision.

10 Comments
J L Williams ·
Another wireless/JPEG option that I’ve used for years is a wireless SD card (EyeFi, FlashAir, etc.) plus the fabulous iOS app ShutterSnitch. It doesn’t have camera-control features, but does push JPEGs to your iPad as you shoot (which most in-camera WiFi implementations don’t.) It also has an easy-to-use star rating feature that I use to let headshot clients and directors mark their favorite frame on the fly; a little third-party plugin called Snitch Sync lets me transfer these ratings to Lightroom later.
Since the wireless SD card doesn’t tie up the camera’s own WiFi, it’s also possible to use that to control the camera remotely via a manufacturer app. I like to hand the iPad to someone on set and then use my iPhone to set and trigger the camera.
All this may seem a bit of a lashup, but it does work well and can provide a wireless solution for photographers whose camera brands aren’t supported by CamRanger or Case Air.
Oleg ·
Camranger is nothing but a discontinued and God forsaken TPLink 3040 with OpenWRT + mobile apps which is a rip off considering its price.
For under $80 you can get the same modem + either DSLRDashboard (Canon/Nikon/Sony: iOS, Android, PC, MacOS, Linux) or DSLRController (Canon only, Android, but very stable).
appliance5000 ·
There’s nothing unique about Tether Tools cables – good quality perhaps, and orange, but I’m a fast cheap and out of control guy. 2 decent cables should do the trick and you’d still save 30 bucks. With the sony I use a short angled usb at the camera and then a longer extension to the computer. The angle allows the use of an L bracket in both positions, a break away point in case of clumsiness blah blah.
Sony just released their new suite that allows simple live view on the computer. It’s a great help. I work full manual so I can’t comment on its other features.
It would be nice of lightroom could easily interface with Sony – you can set up a feed folder etc., but it’s geared for Nikon and Canon. I don’t really use lightroom, but clients are used to it, and some of it’s pano/stacking previews could be useful.
Ben Rubinstein ·
We use the tether tools cables in our repro studio. They are a better tool than regular USB cables, especially the 15′ cables with right angle plug that we use. Far more reliable tethering and they last longer. That said ‘longer’ for us is 6 months on a static copy stand, that’s how long they last. The problems with wired USB tethering are that the cables don’t lock leading to constant disconnections when moving around with the camera and we’ve had a D800e whose USB connector became loose from the board and it was a pretty expensive fix, it’s the main camera board. The Canon 1 series cameras with a network cable port seems an admirable solution and the firewire cables we used to tether our Leaf MFDB with was also far more ‘usable’ as a moving tethering solution, it’s a strong connection. I realise that wireless RAW tethering is the next jump on the horizon (can’t come soon enough) but I honestly believe that USB tethering is doing a disservice to the concept of tethering. It’s too weak a connection, too weak a connector, non locking and lacking stability.
appliance5000 ·
I use a coiled right angle cable to the camera and a nite ize twist as a strain relief and relief from the weight of the cable on the camera USB port- though the coil gives some play. This still allows the L bracket to be used in both positions. I then use a usb cable to run to the computer. I have a couple of each in case of failure.
Everyone has their method, and the tether tools cable is fine – just highly priced overkill for my needs.
Zach Sutton Photography ·
I’d recommend looking into the TetherBlock, I think Tether Tools sells them now as well. It’s essentially a Arca Swiss tripod plate, but it’s routed so that a tether cable can run through it. It relieves the stress on the port, and I’ve had cables generally last long as a result.
Ben Rubinstein ·
Thanks! I hadn’t heard of them.j
Ionut ·
If you have L-brackets on the cameras, a better cheaper option is an arca swiss compatible cable anchor clamp, search for Desmond CAB-1, $12 bucks and a lot better.
Karen ·
I am so glad I found this article. It’s exactly what I want but I haven’t figured out what all I needed to get to do it. Thanks.
Jessica Tammie ·
Need help recovering lost and deleted files, also need help gaining access to the Targets device to confirm an Affair.A Trusted Mobile Phone Hacker hackadviserpro @ gmail com.
Find & Contact.