When lighting a subject, it makes the most sense to have the light in front of the subject. However, when shooting with the light in front of your subject, it’s easy to make your image appear flat and uninteresting. By using a backlight, you’re able to further separate your subject from the background and add additional details in the image that might make for a more compelling photo overall. So let’s dive into backlighting lighting, and talk about what that means in portrait photography.
What is Backlighting?
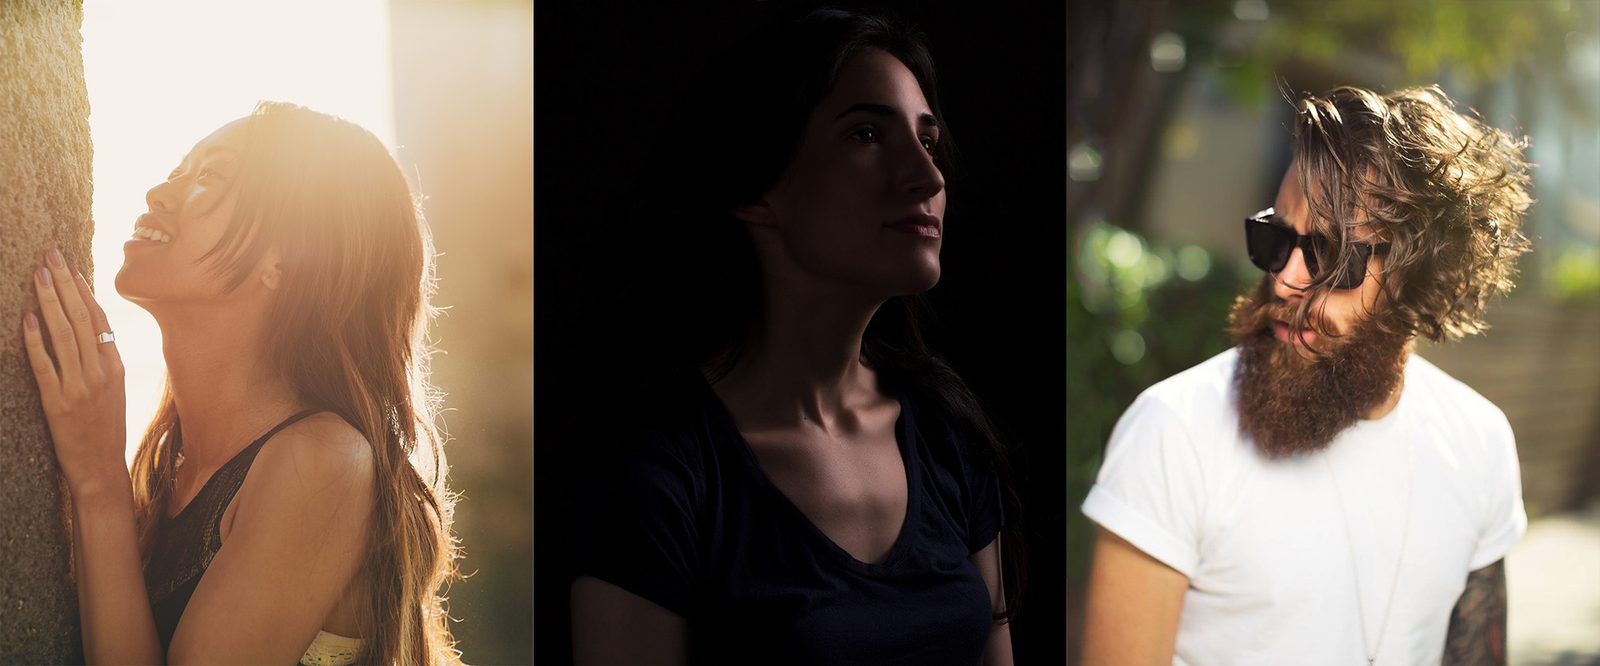
The explanation of backlighting is pretty simple – it’s when your most powerful light source is behind your subject, instead of in front of them. This could be done with a rim light (where the light creates a high key “rim” around your subject), or as dramatic as a full flare (where it creates a silhouette effect on your subject). Backlighting can easily be done both in the studio or on location but is achieved with balance. So I’ve broken down this article into two sections, on location, and in studio.
On Location Backlighting
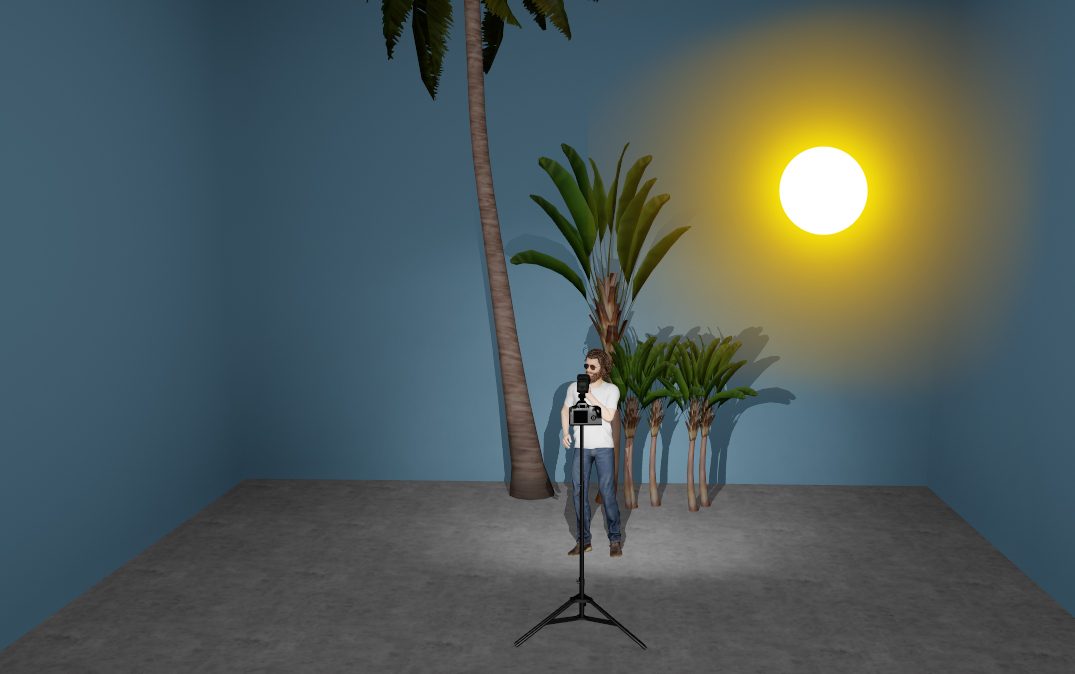
When shooting on location, whether it be through the use of natural light, or with off-camera lighting, achieving backlighting should be pretty easy – you just need to keep your key light (almost always the sun) behind your subject. Through the use of a bounce card (or anything white in color) or additional light source, you should be able to get a pretty good balance of light to help separate your subject from the background. But let’s look at the two main options of backlighting while on location and break down how to best achieve this technique.
Rim Lighting
The first and most common technique when it comes to backlighting, is through the use of rim lighting your subject. This can be done by angling the sun behind your subject, usually at an angle of at least 45 degrees from the camera and your subject – usually having the sun sitting in the far left or right of the frame. By keeping the sun off-axis with your subject, you will reduce the “silhouette” effect, and help reduce some flaring that can occur in the camera.
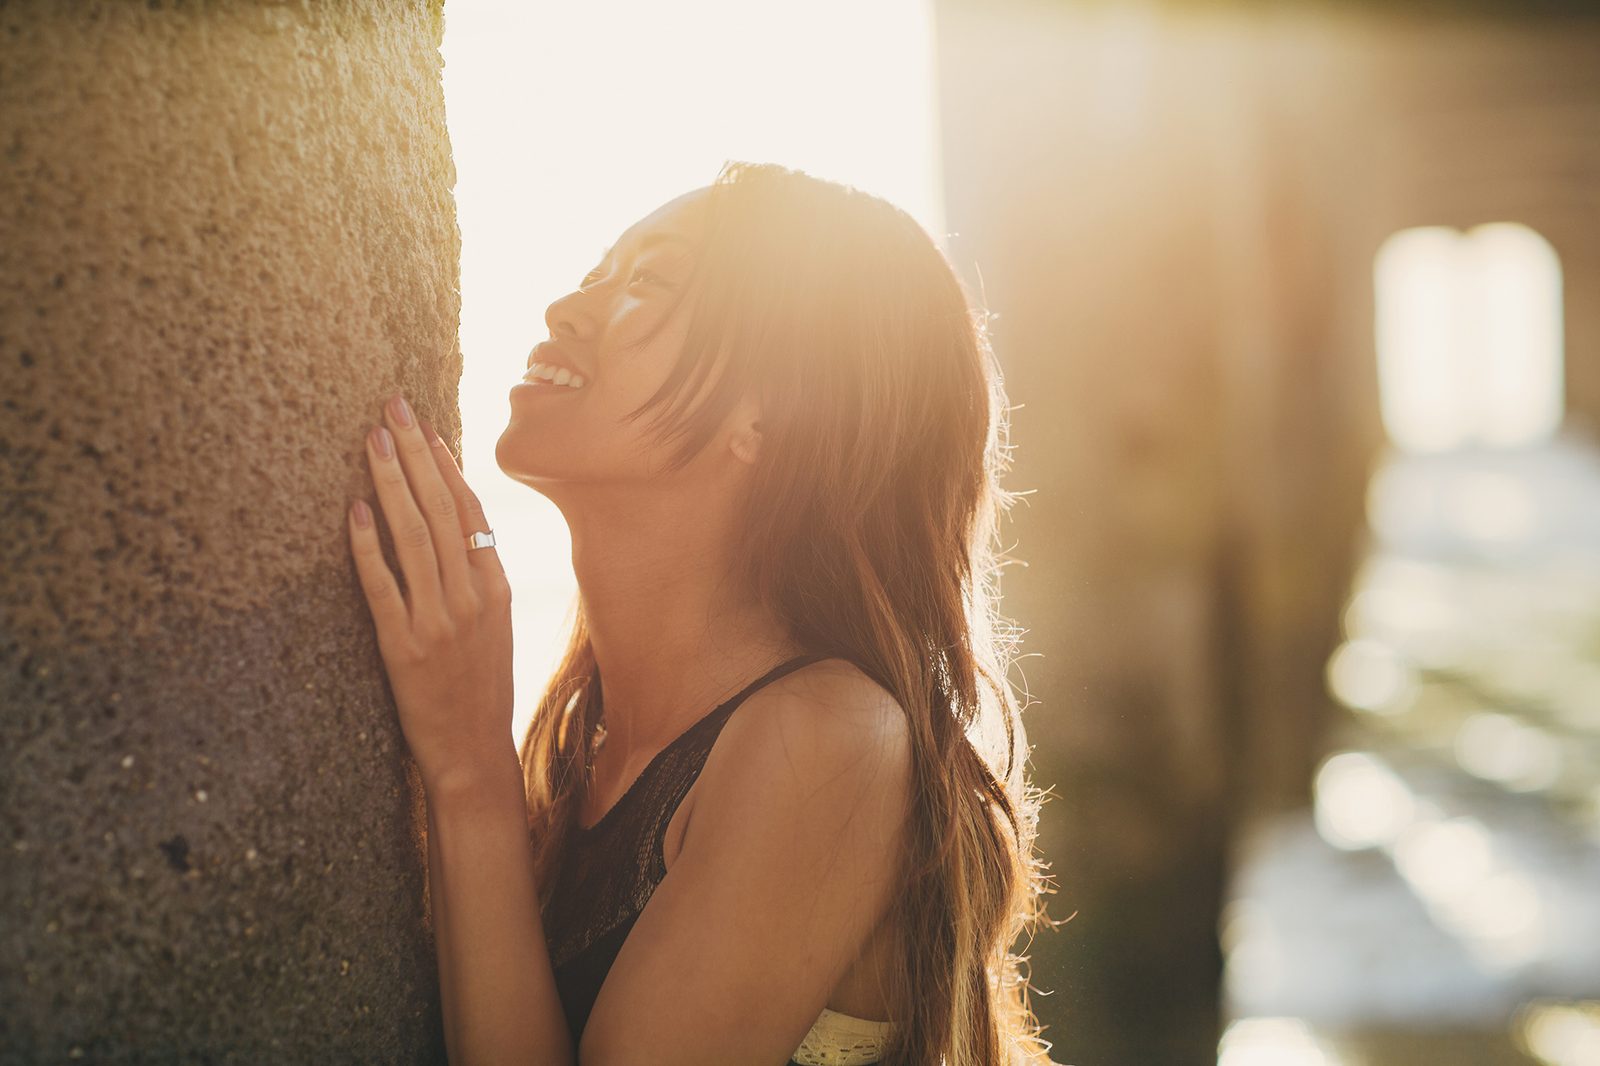
Full Flair
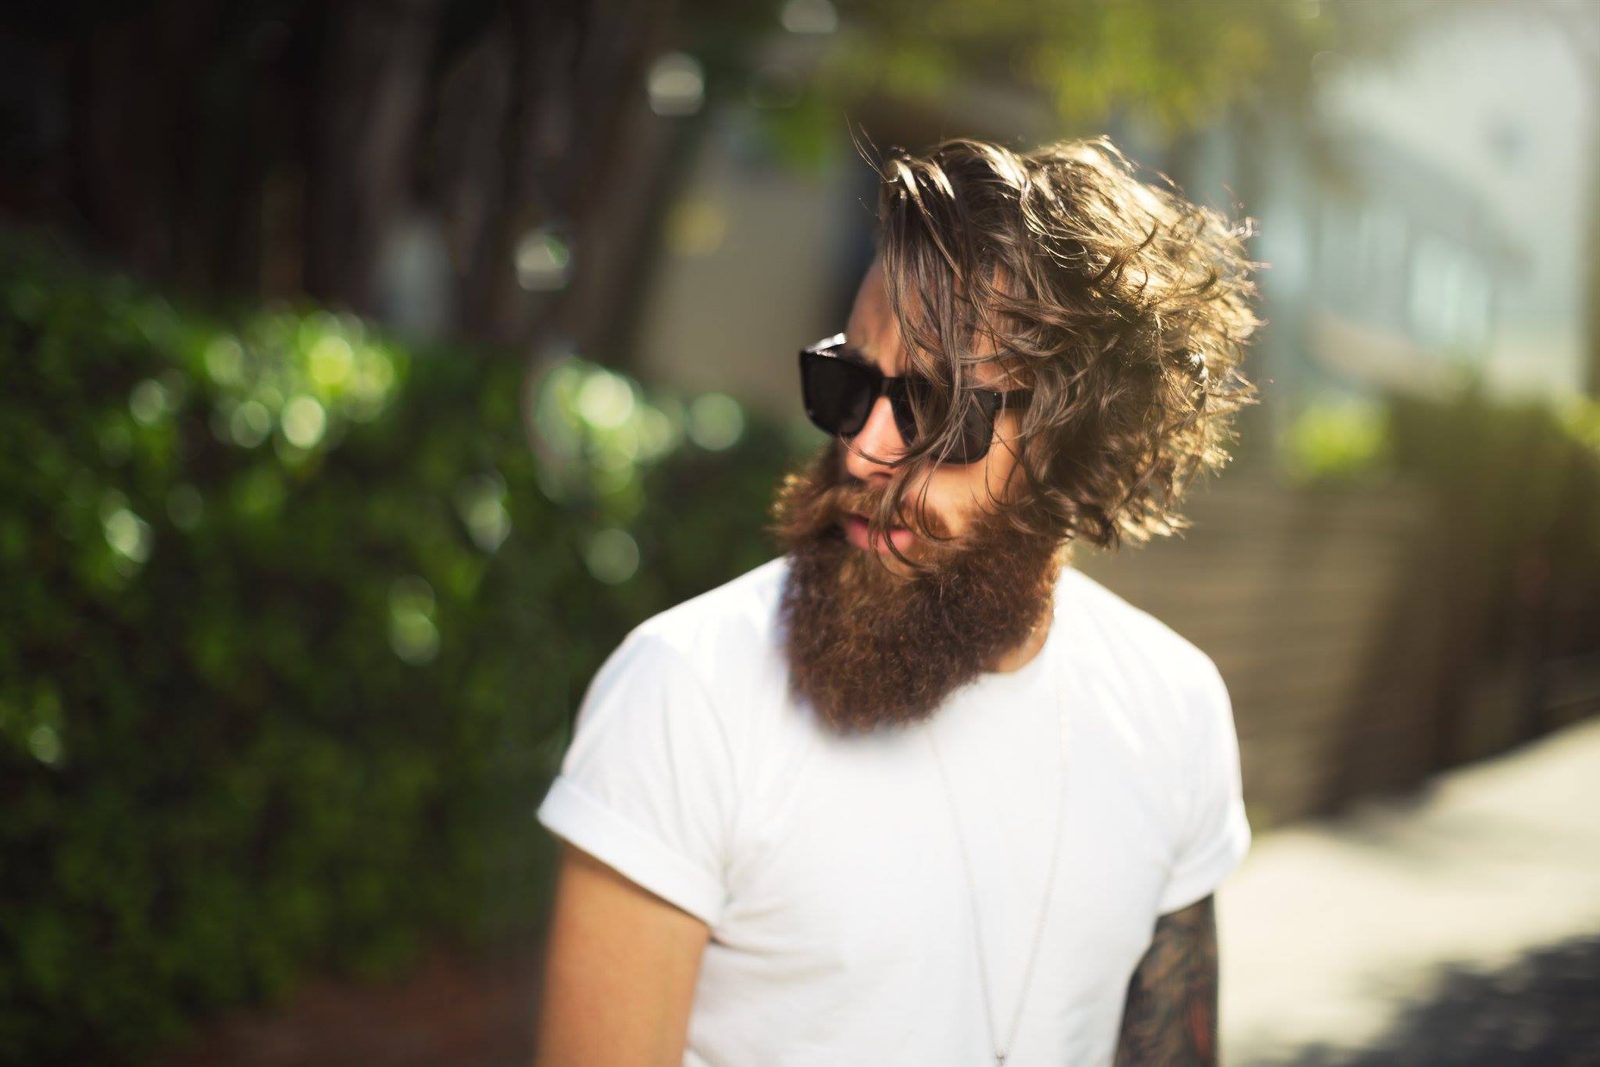
If you’re attempting to do a full flair, the process is as simple as shorting the angle of light, so that it is behind your subject, instead of over their shoulder or in the far edges of the frame. Thankfully, with the dynamic range of modern cameras, you can usually get a pretty heavy flair in the camera, and bump the exposure in post-production so that your subject is exposed correctly, while still getting the flaring effect.
Each camera lens will flare differently, and the aperture setting on your camera can affect how dramatic the flaring is. Generally, the higher your f-stop, the less of a hazy effect you’ll get in the camera – but again the process involves several variables that will be unique to the lens, and angle. My best advice is to experiment with your gear and make subtle movements to your position to see how that changes the flare.
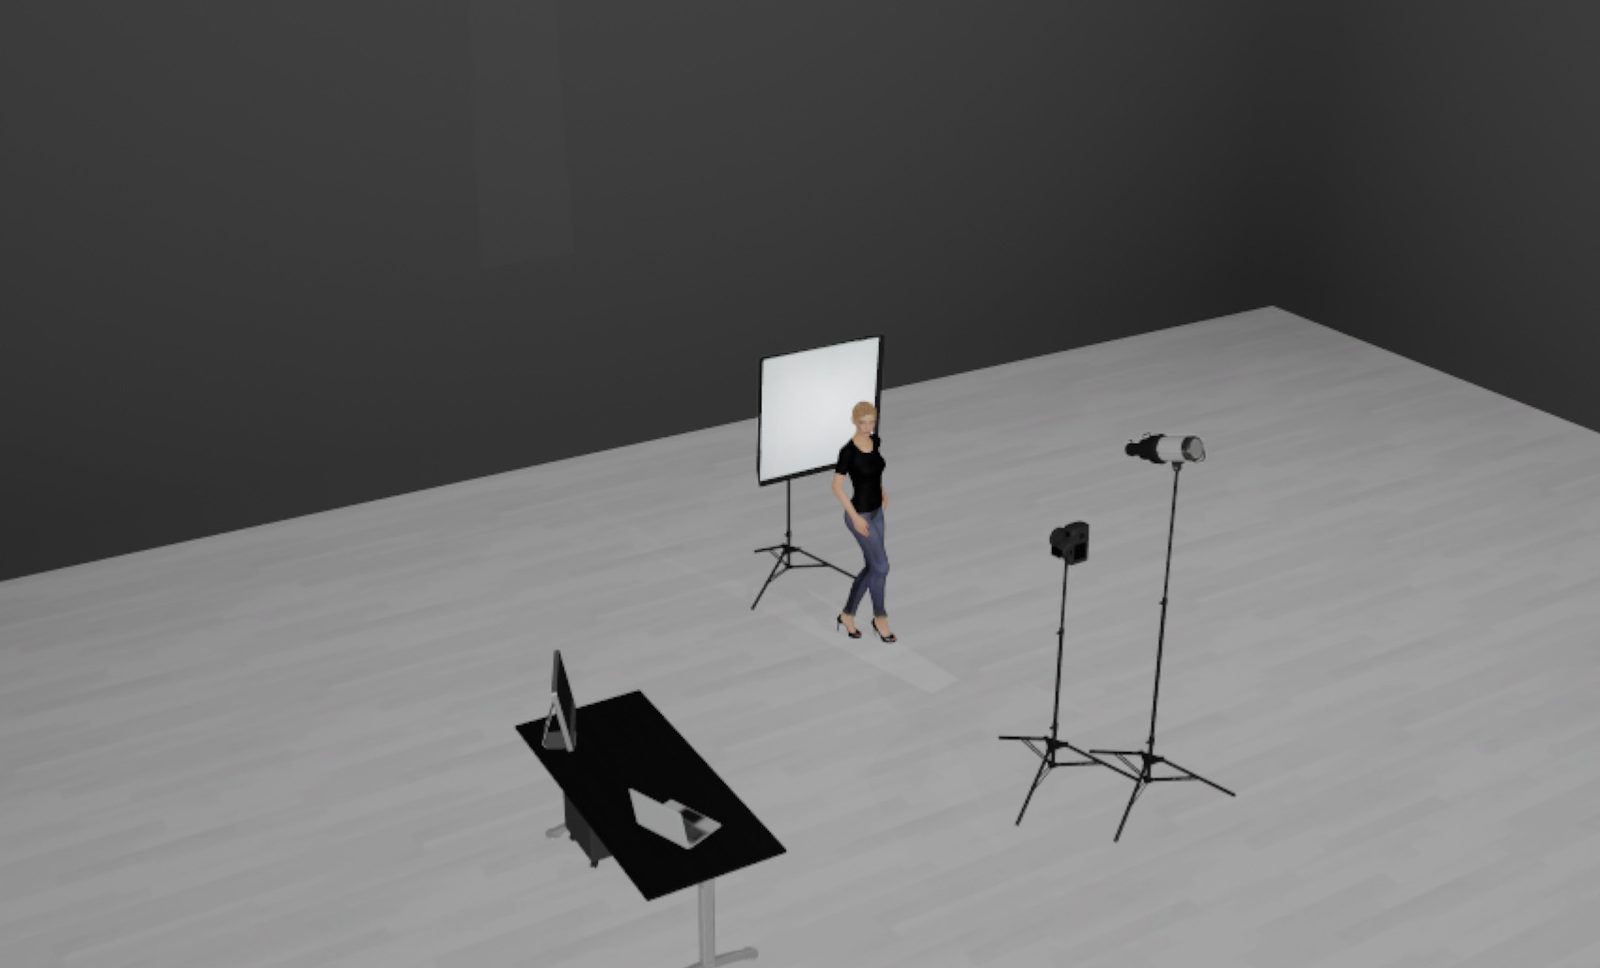
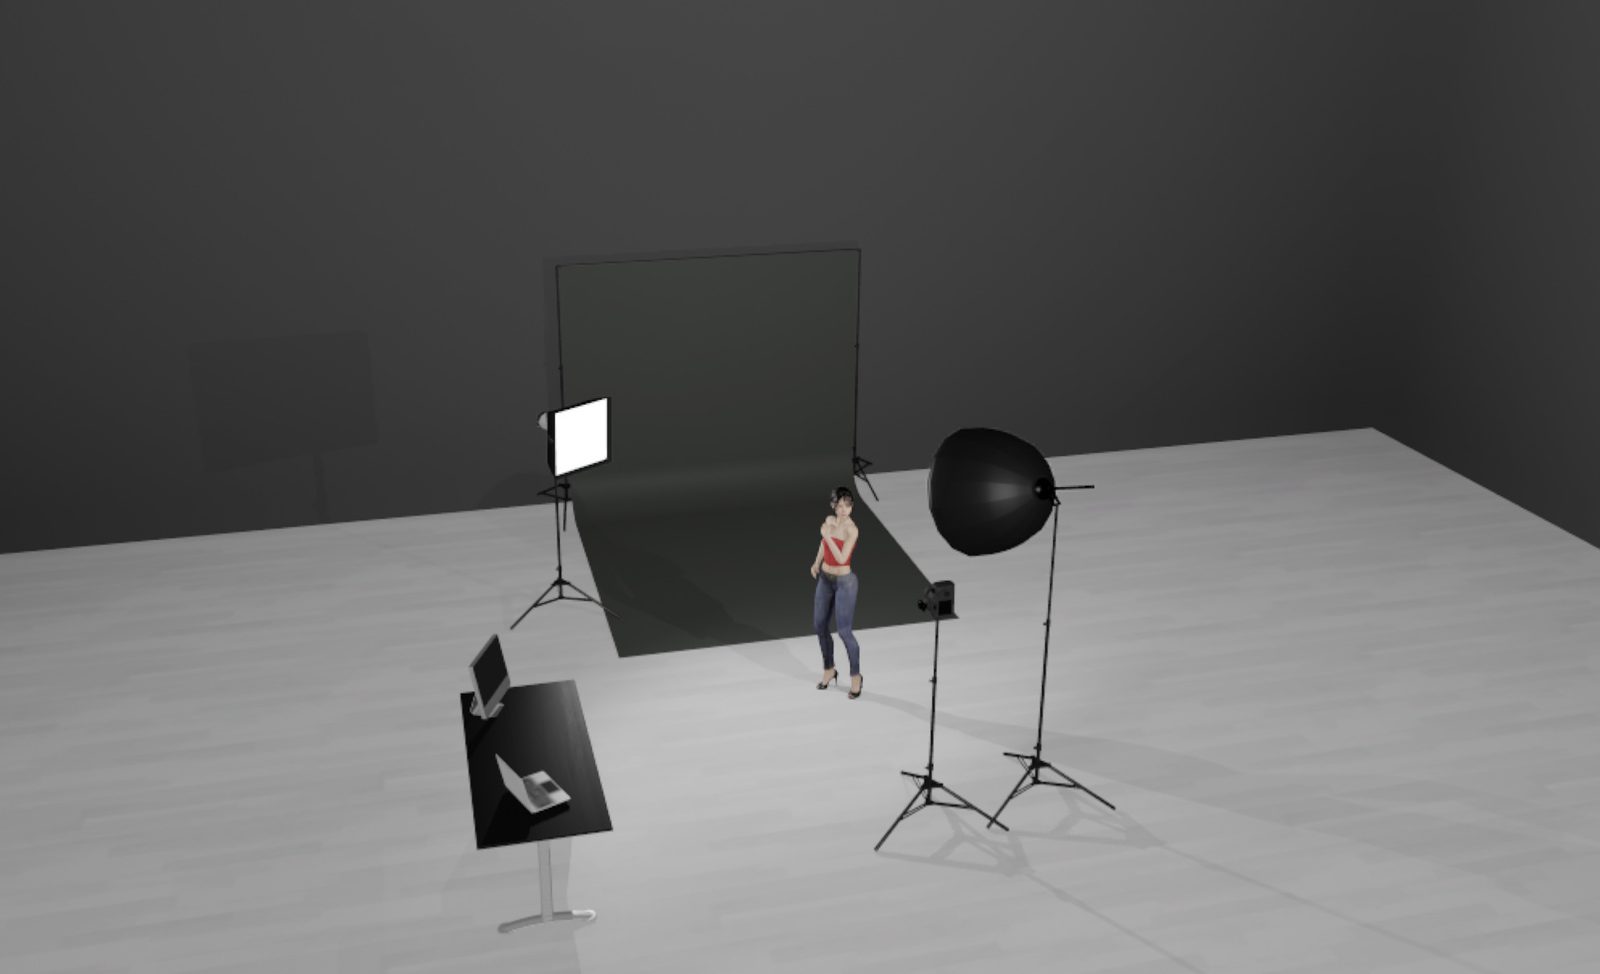
In Studio
When shooting in the studio, fundamentally nothing changes when it comes to backlighting, you just need two or more light sources to make it happen, with your key light being behind the subject. That said, while in the studio, the full flair look wouldn’t make a lot of sense, as you’re in a controlled environment, so instead, backlighting is generally done with rim lighting techniques. So instead, I will approach it in two different ways, one side being dramatic rim lighting, and the other being a bit more subtle to add more dimension. So let’s dive into those techniques with a few examples.
Dramatic Lighting
The first technique is a more dramatic approach., which is done in a couple of different variants – high key and low key. The first technique, high key, is usually done with an incredibly strong backlight so that there is a rim light around your entire subject. I’ve discussed this technique before, and have tagged it angelic lighting, but the idea is simple – use a softbox (or large bounce like a V-flat) as your backdrop, so that the overpowered light is used both as a strong rim light, as well as a white backdrop. The effect makes it as though your subject is stepping out of a hallway of light, and can provide a very ethereal effect.
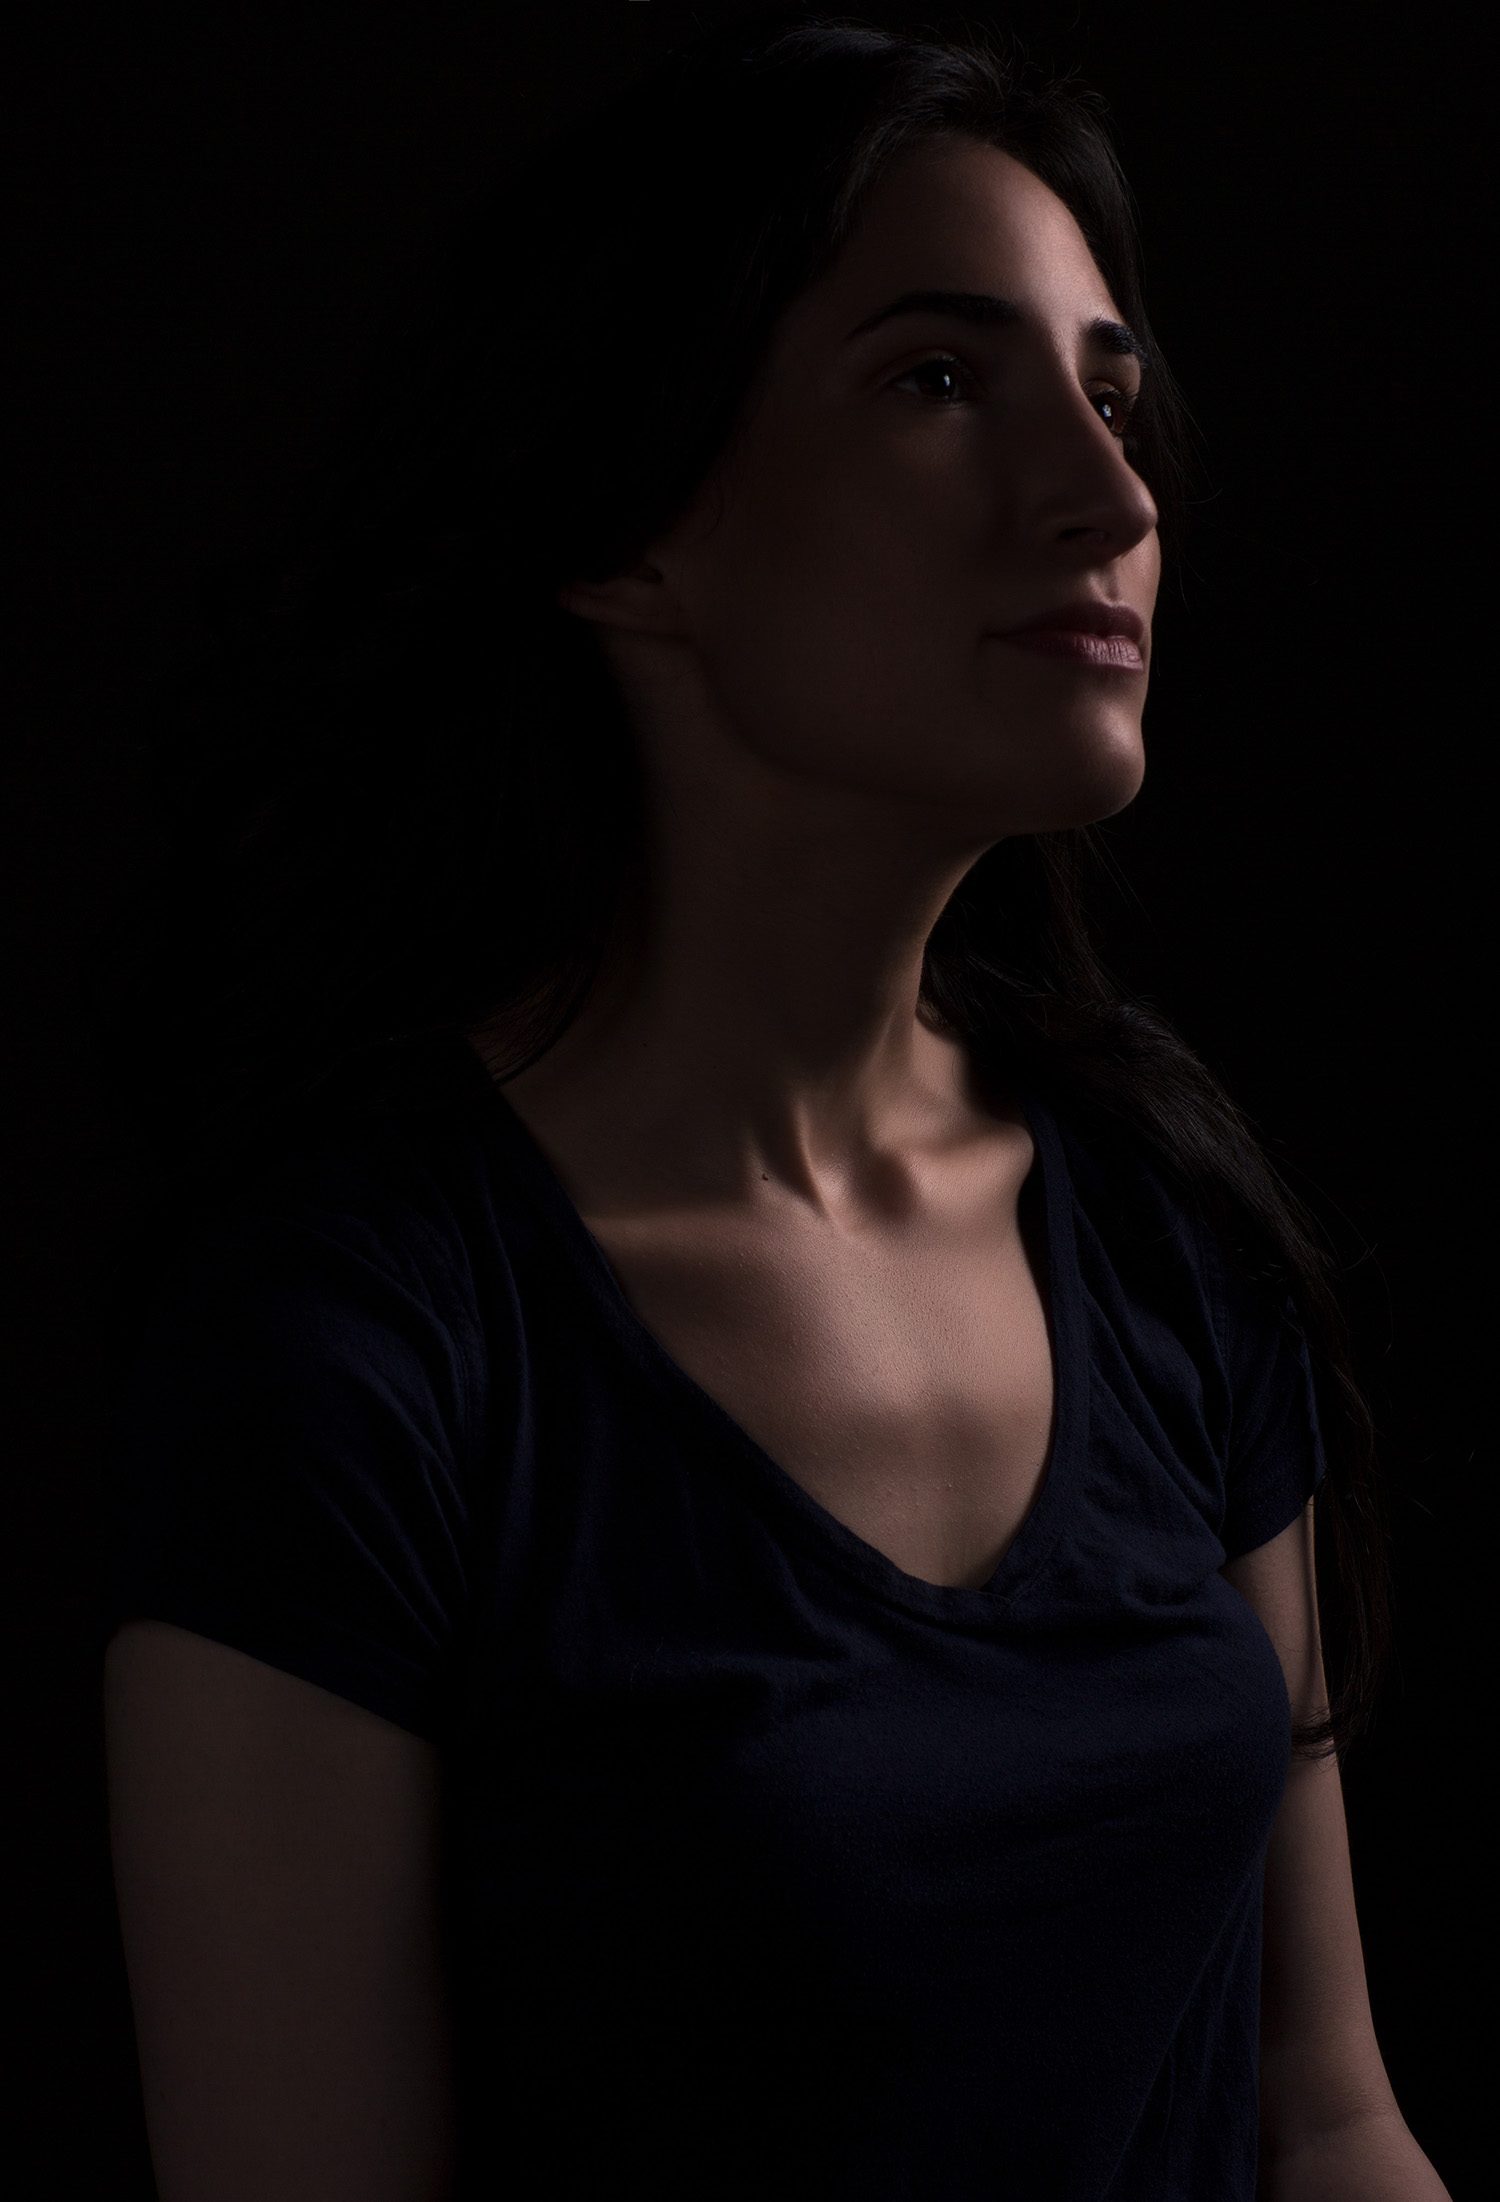
The other style of using this lighting is through low-key lighting techniques. The secret sauce to this type of lighting is to have a strong difference in power between your rim light (key light), and your fill light. To do this style of lighting, I generally try to start in two steps, focusing on my fill light first. I will light my subject normally, and get my light setting balanced with my fill light (again, not my key light yet), once I have balanced correctly, I will then reduce it by two to three stops, and then focus on my key light (rim light), so that the man focus is of the short lighting of my subject. As I’ve discussed previously, this is dependent on your subject having pretty clear skin, as short lighting will always highlight imperfections, but the result can make for a compelling photo.
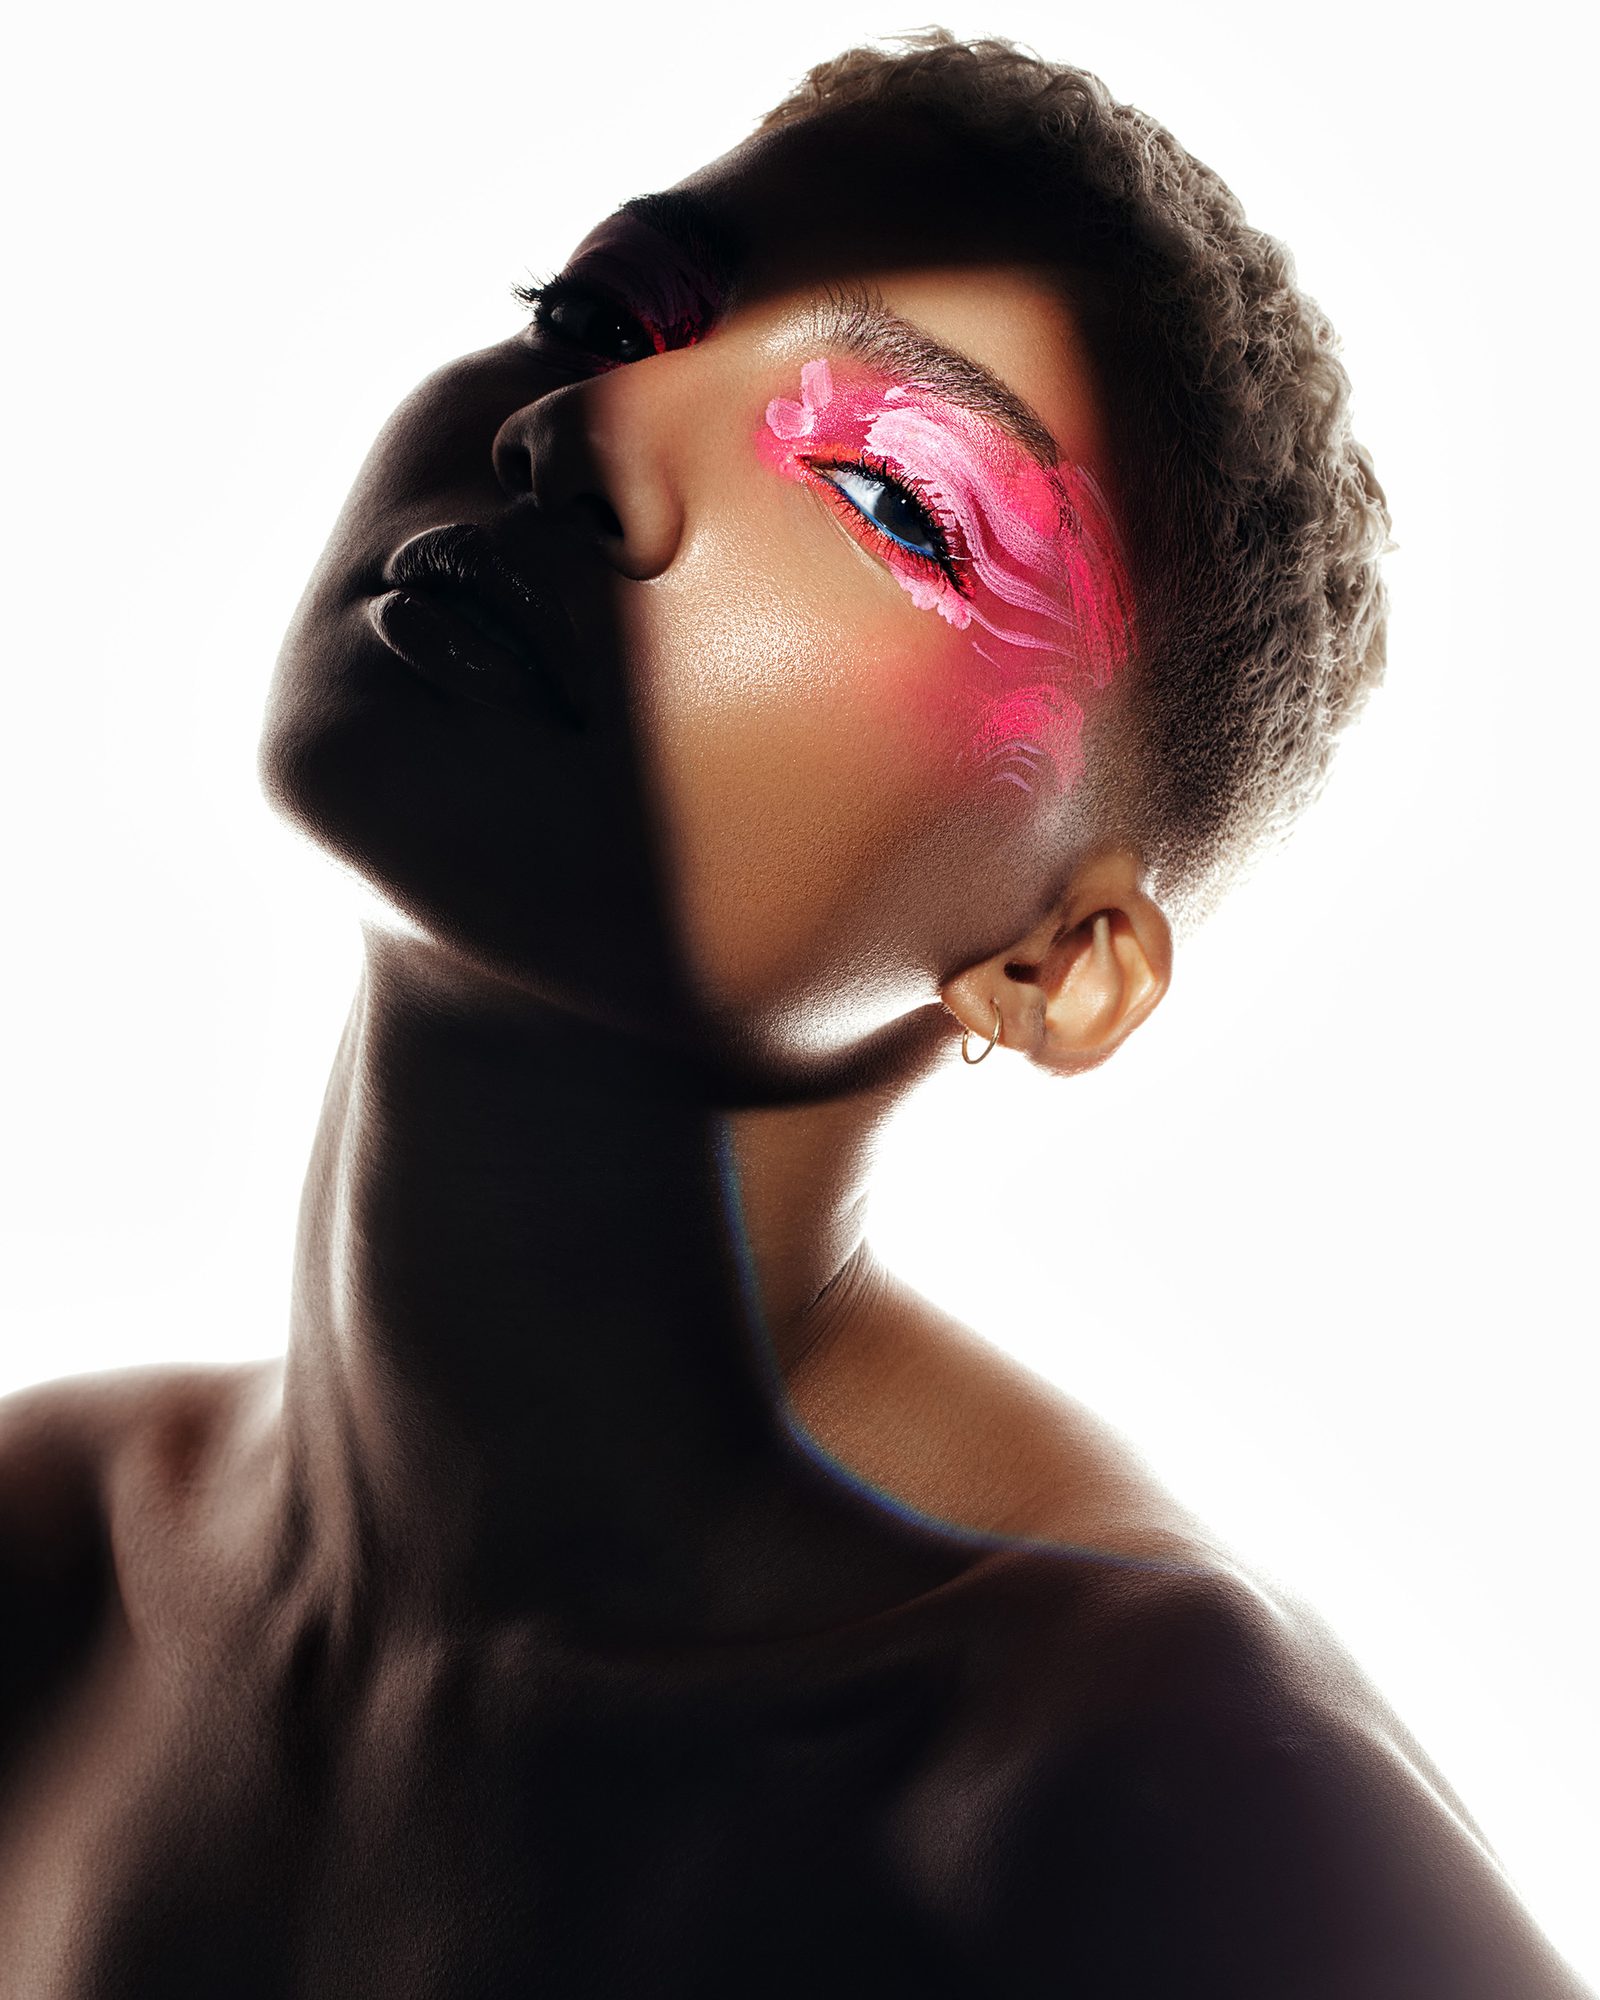
Rim Lighting & Hair Lights
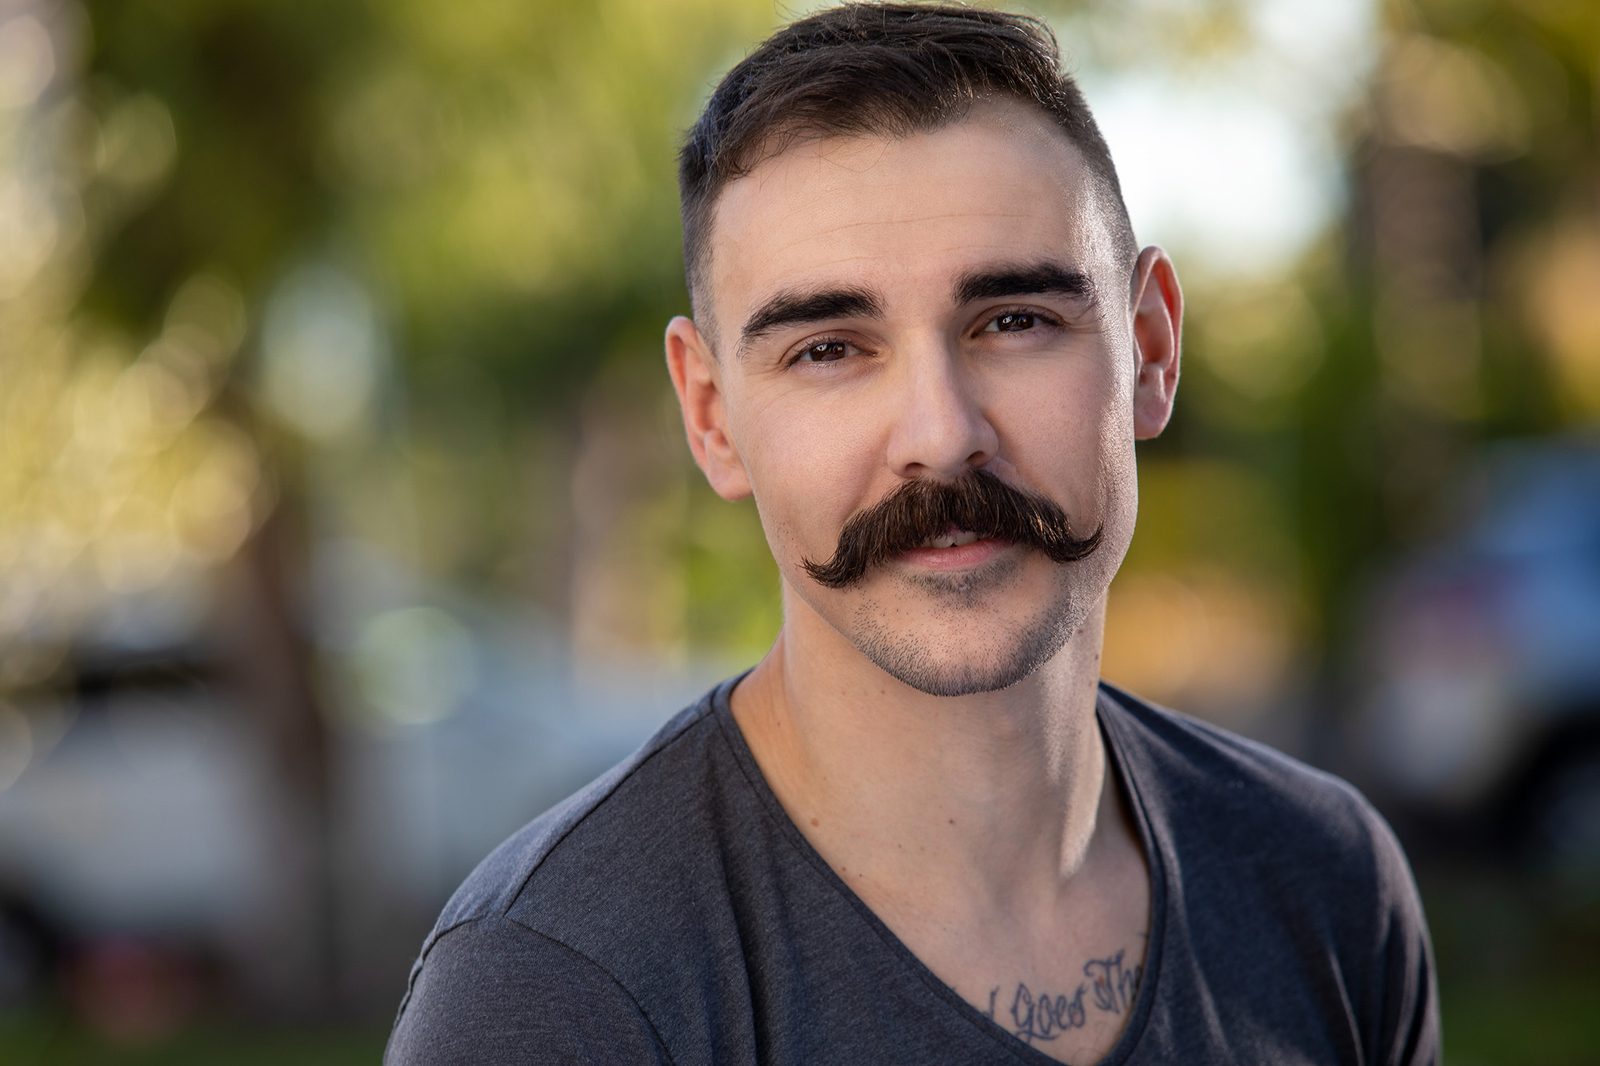
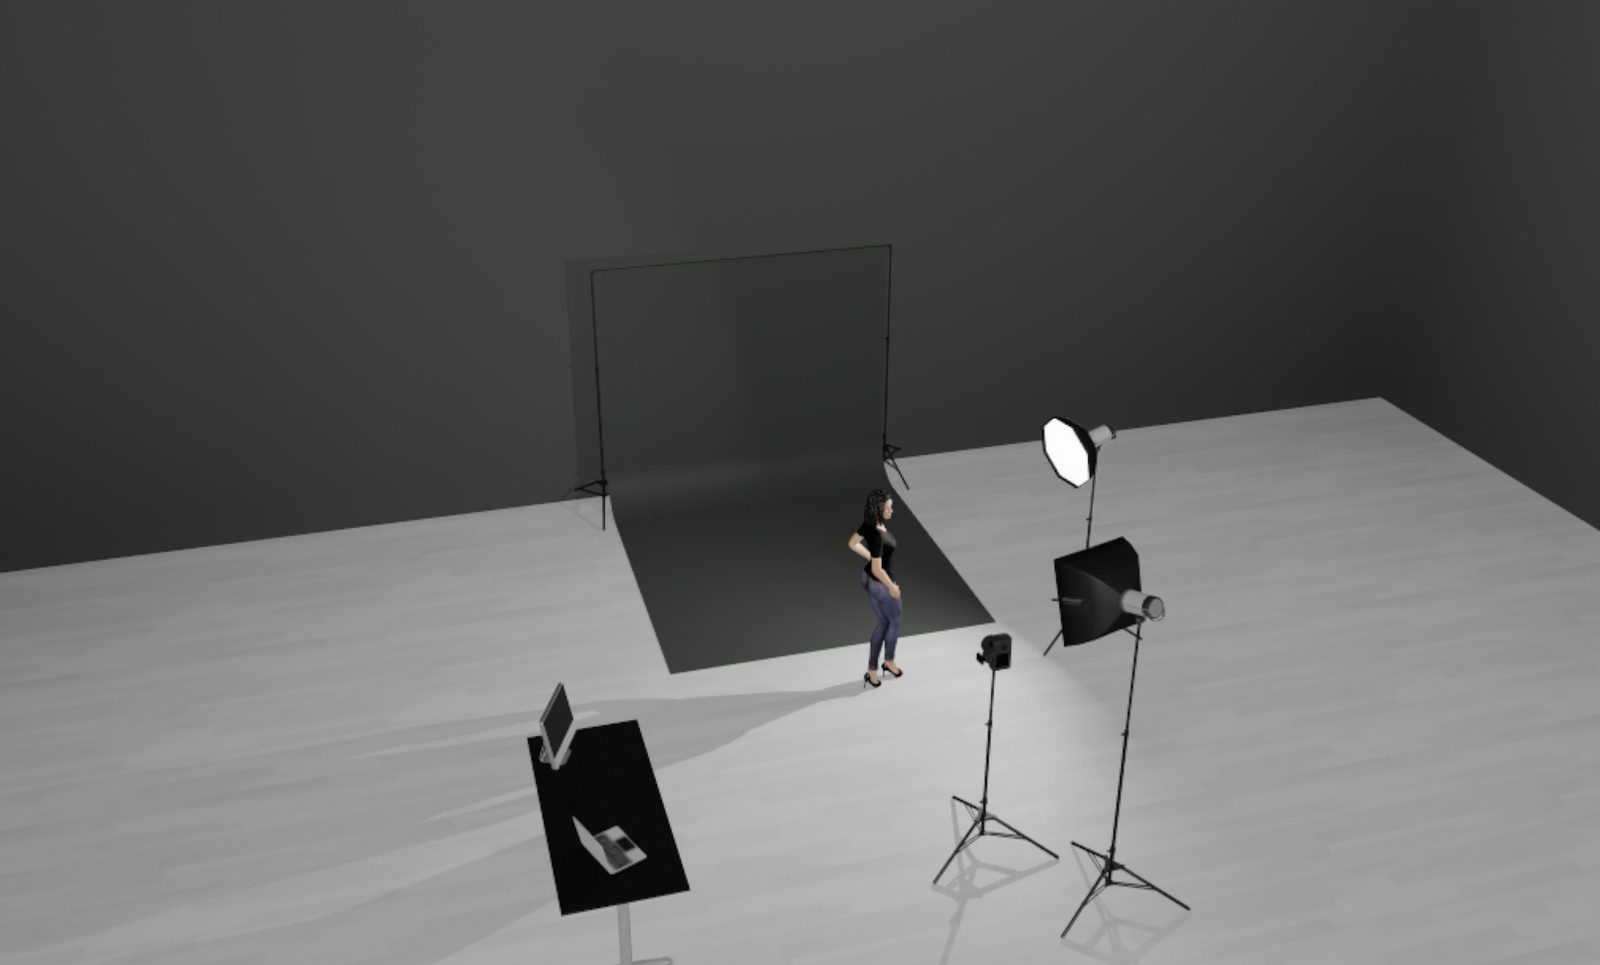
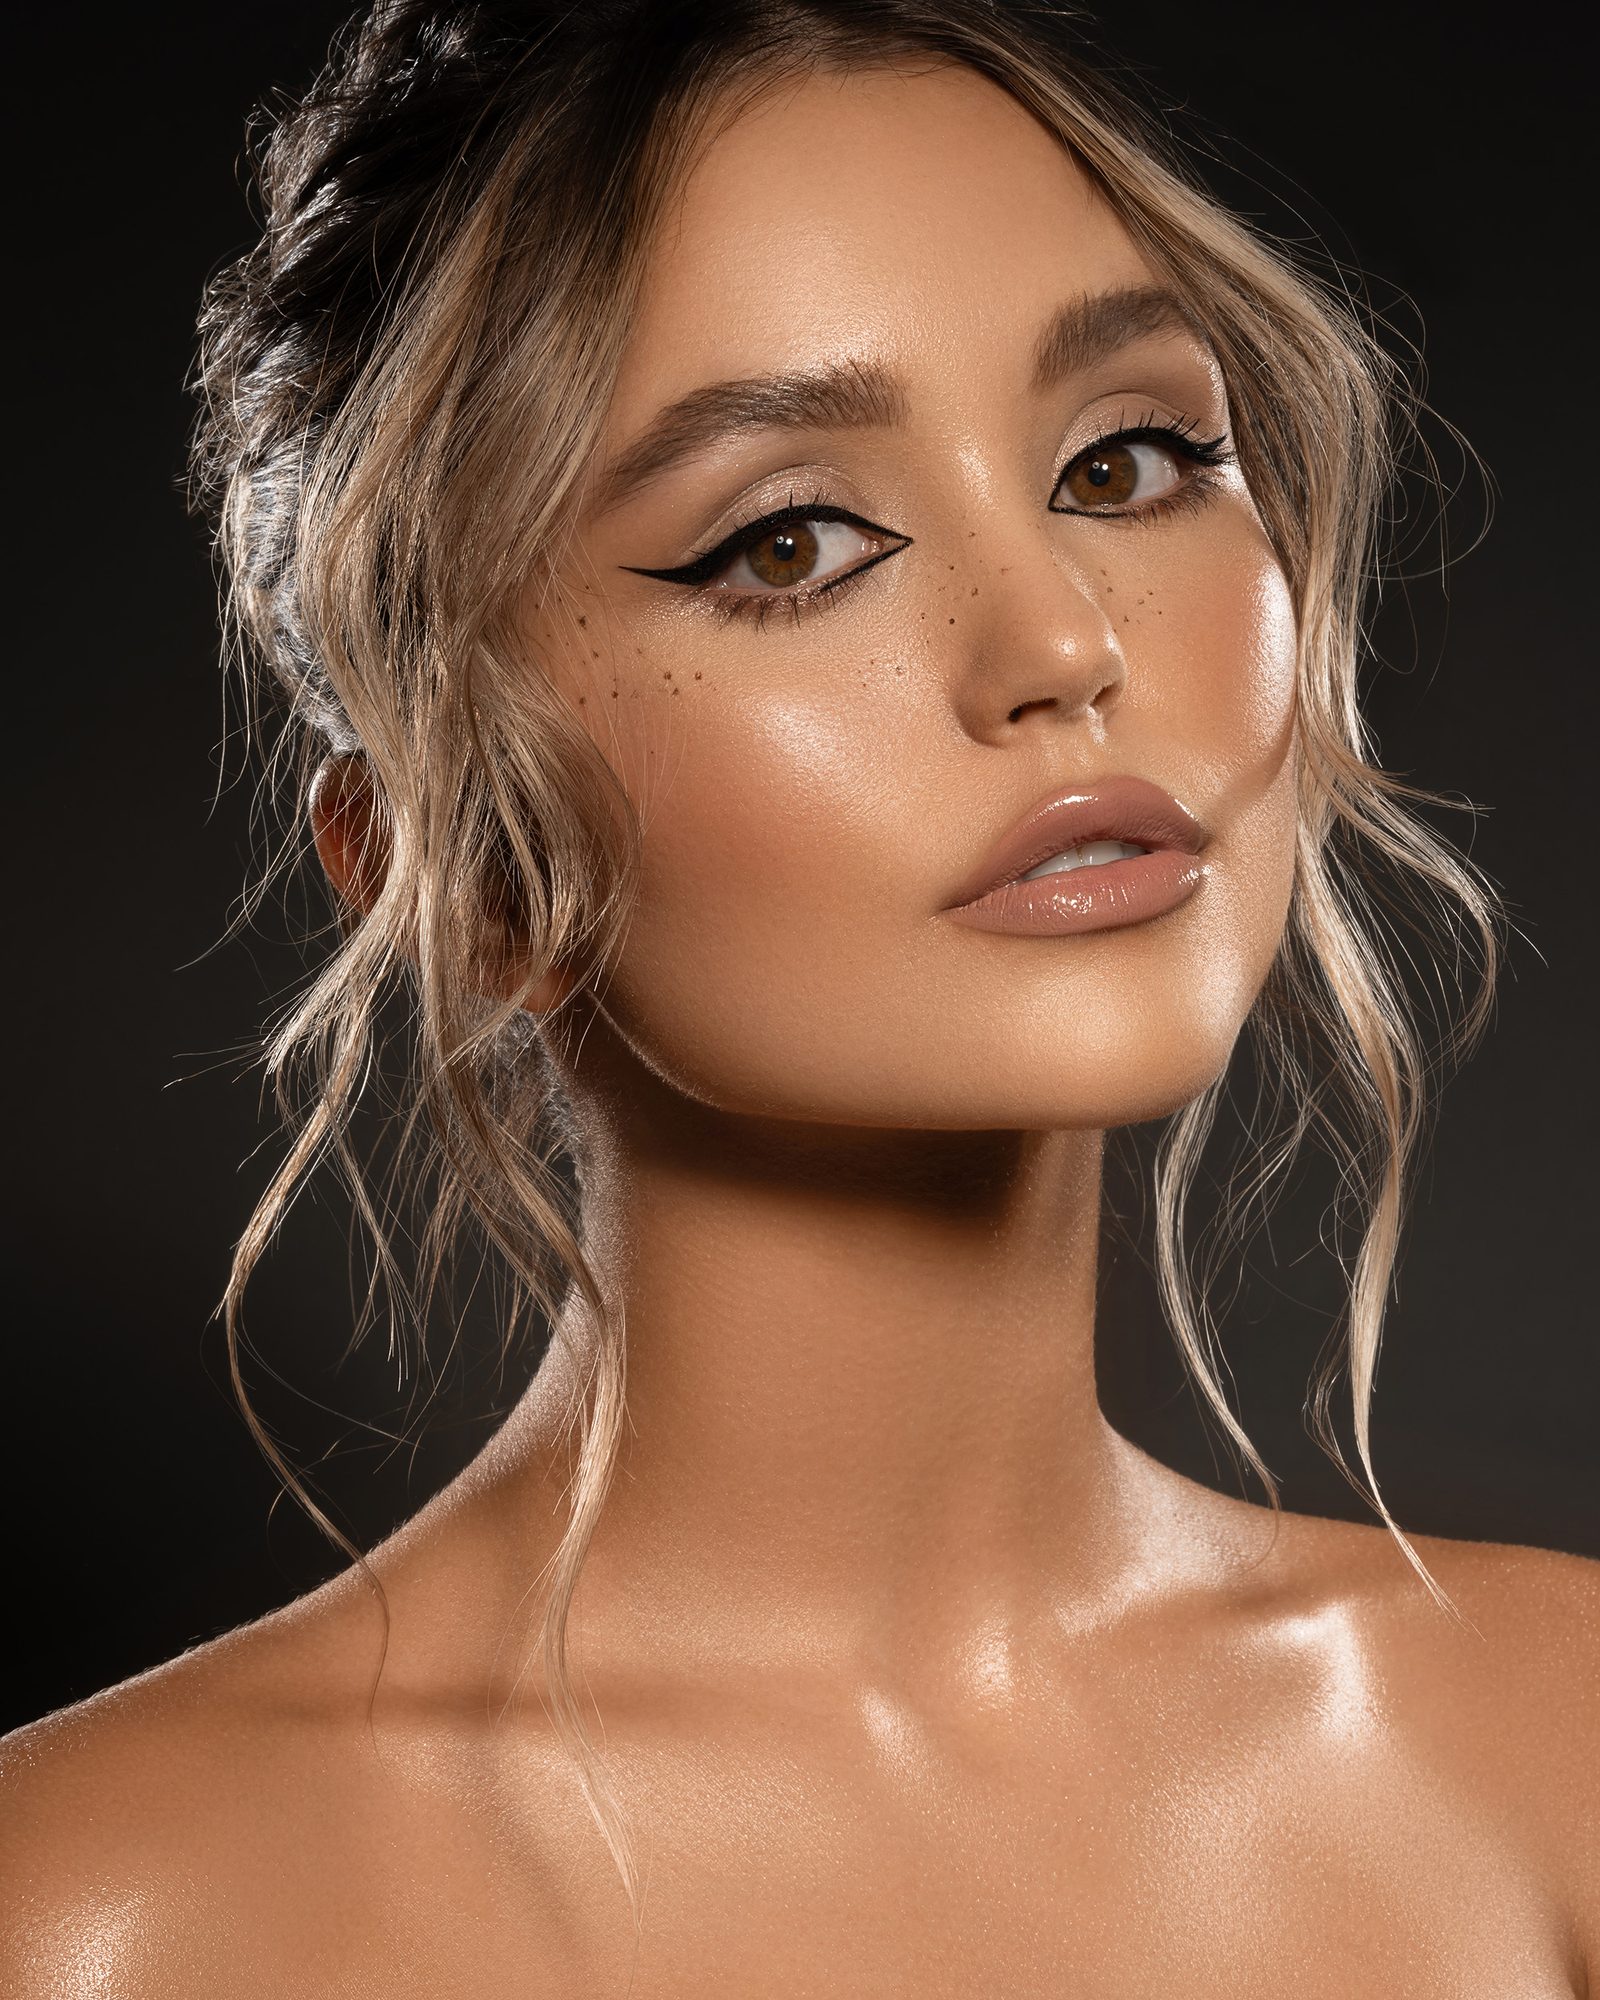
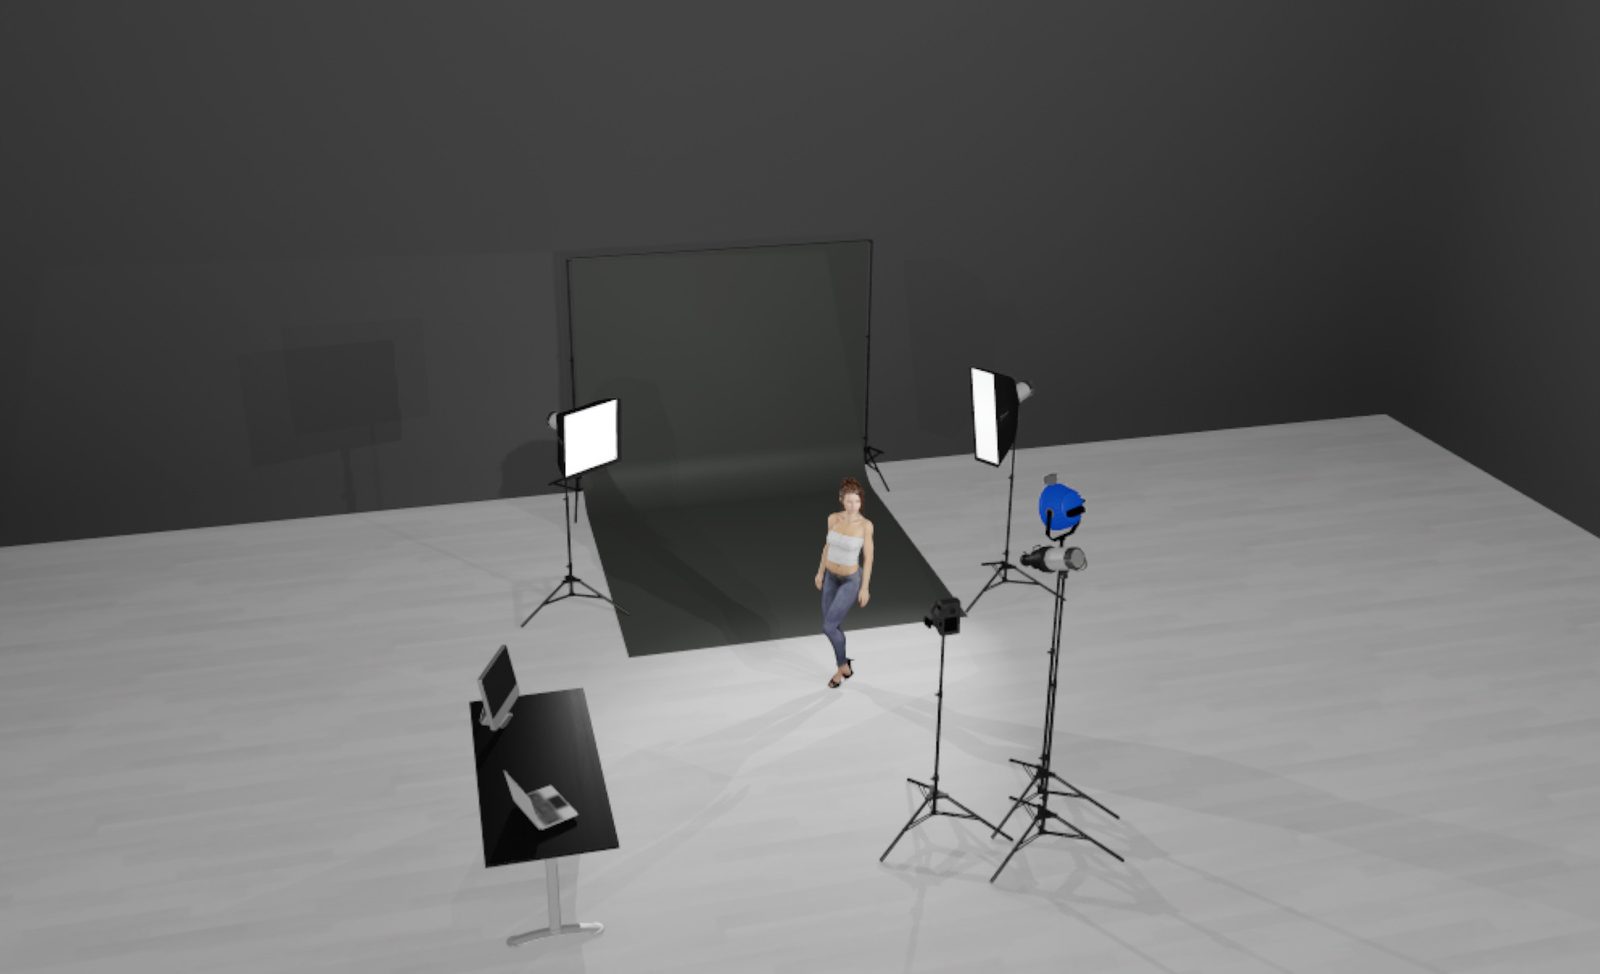
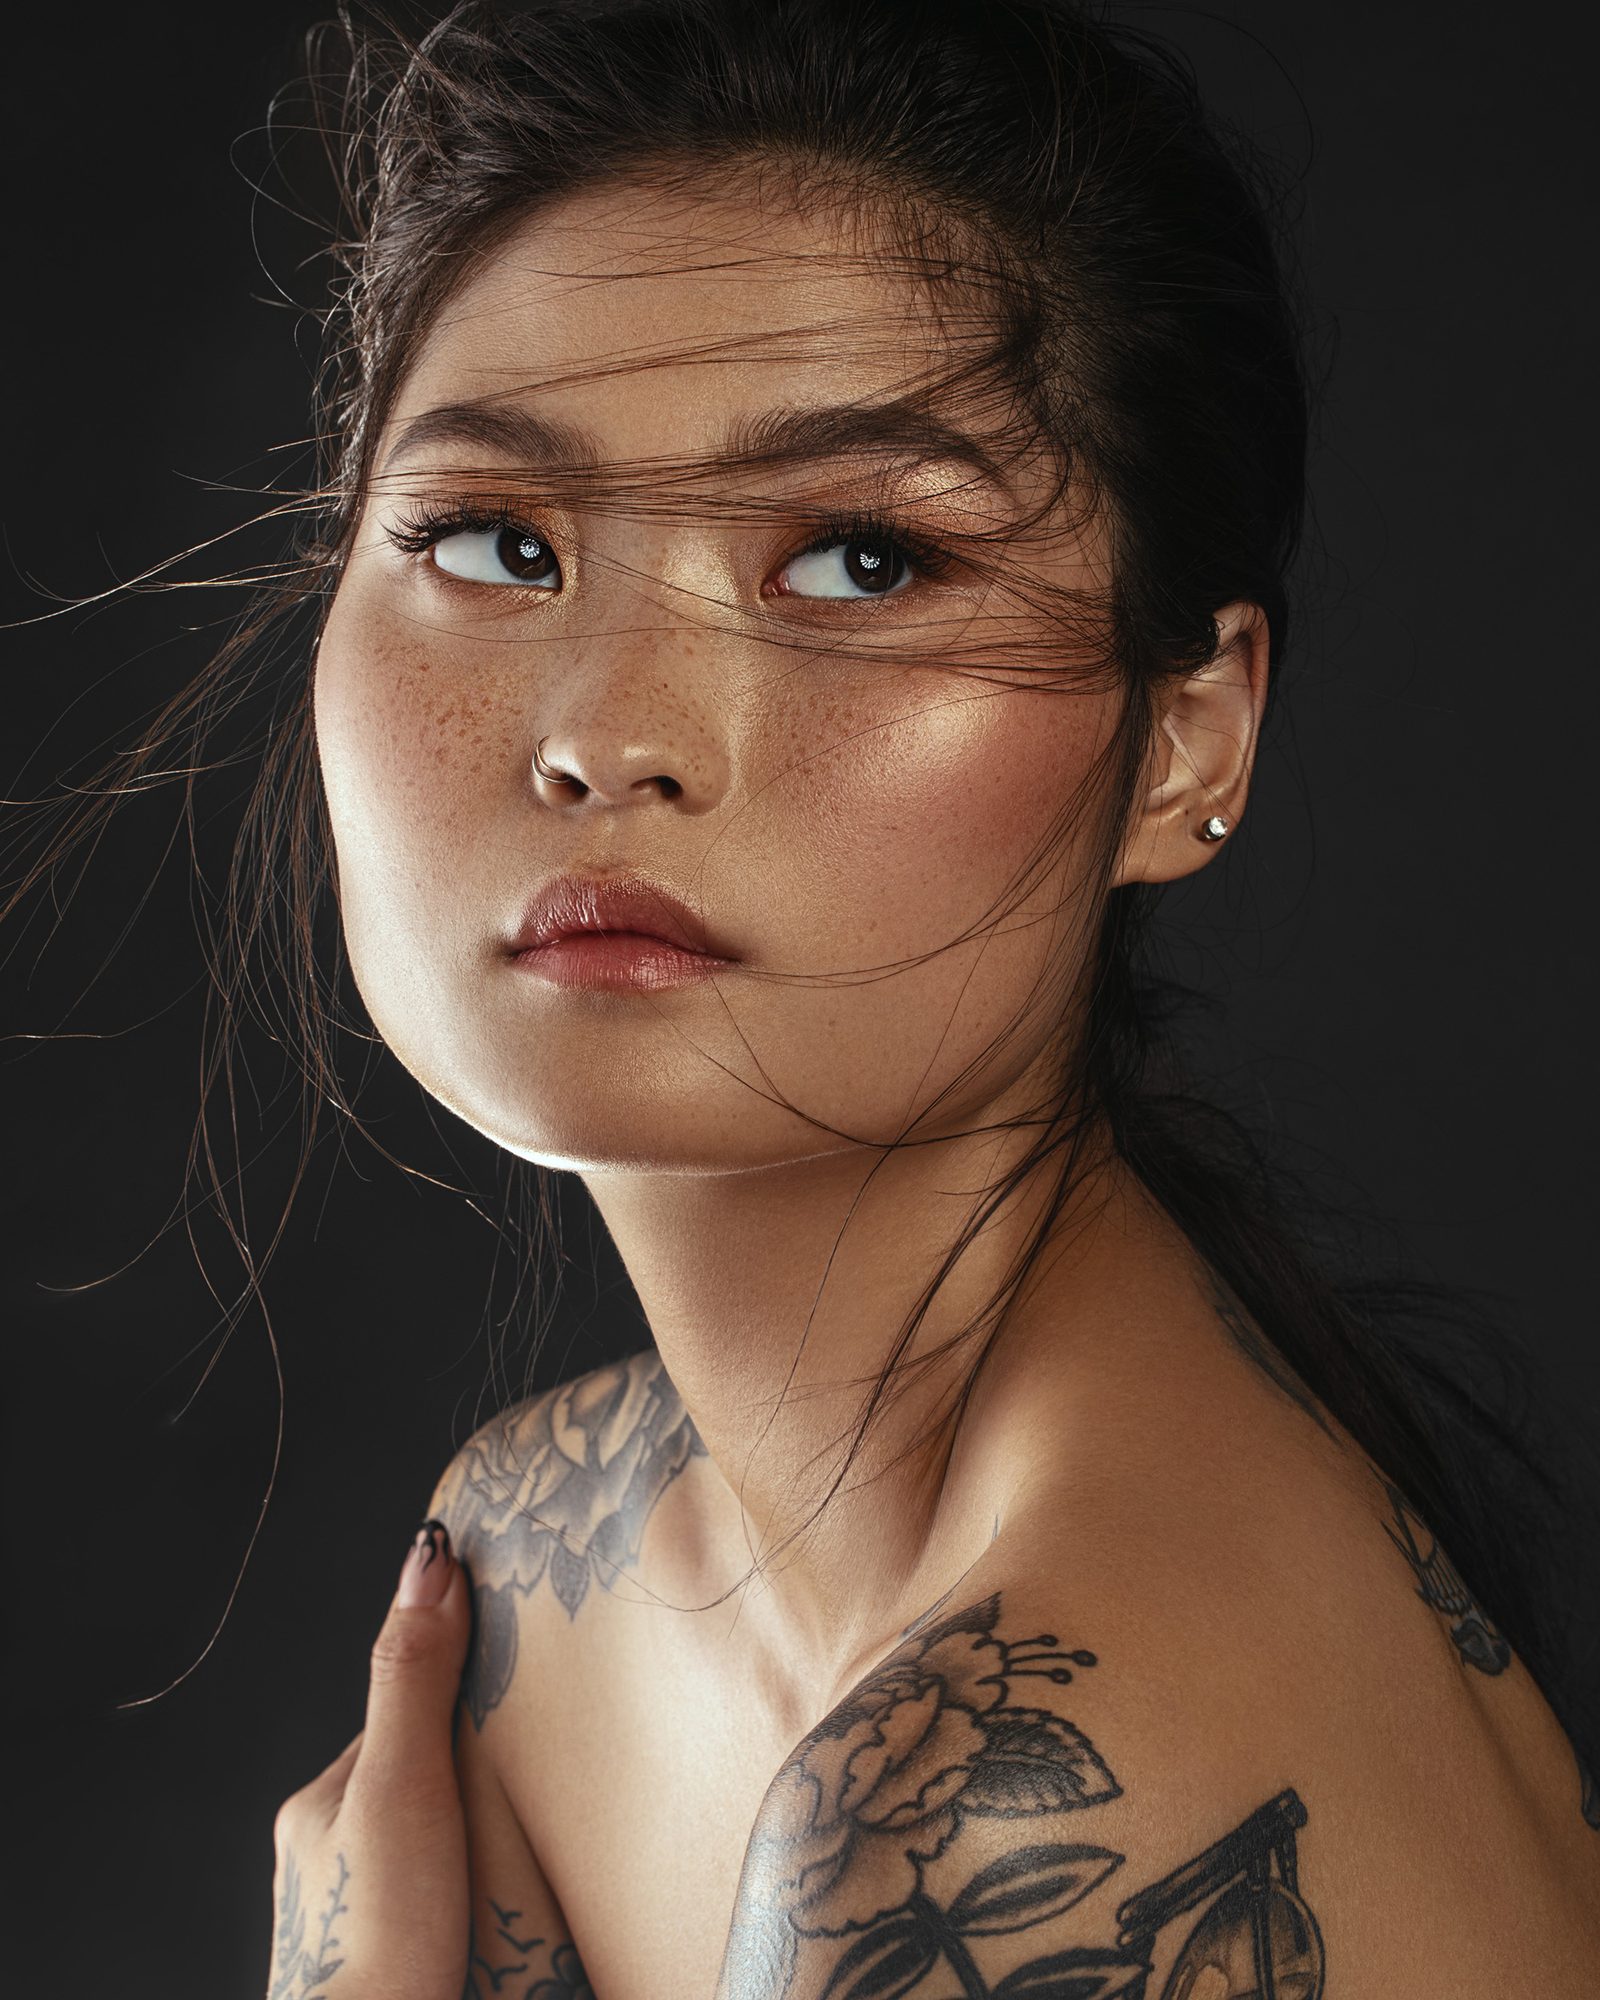
The second technique of using backlighting in the studio is by far the more common of lighting techniques and involves adding a rim light to your subject to highlight their cheekbones and bring them off of the background through lighting separation. Much like the low-key technique mentioned above, I generally add my rim light last, after all my other lights are set, as then I can adjust it independently from an already correctly exposed image. Below are a few breakdowns of lighting where a rim light or hair light is used to help add dimension to the images in the studio.
So did you learn something from this article? Feel free to chime in using the comments below and share some of your examples of using backlighting to add more interesting elements to your photography, thanks for reading!
