A fair amount of unease comes with interacting with one of the most fragile parts of a digital camera. Automatic sensor cleaners help but haven’t replaced the need for sensor cleaning entirely. However, cleaning camera sensors is not as delicate of an operation as it seems. You still might prefer to have your sensor professionally cleaned, but it’s not as scary an operation as you might think.
We clean hundreds of sensors every day to make sure every camera arrives in like-new condition. (Well, actually, a fair number of new in box cameras need a sensor cleaning, but that’s another topic.) Our principle is to do the least amount necessary to get the sensor clean. That should be your principle too, at least until you get really comfortable with the cleaning process.
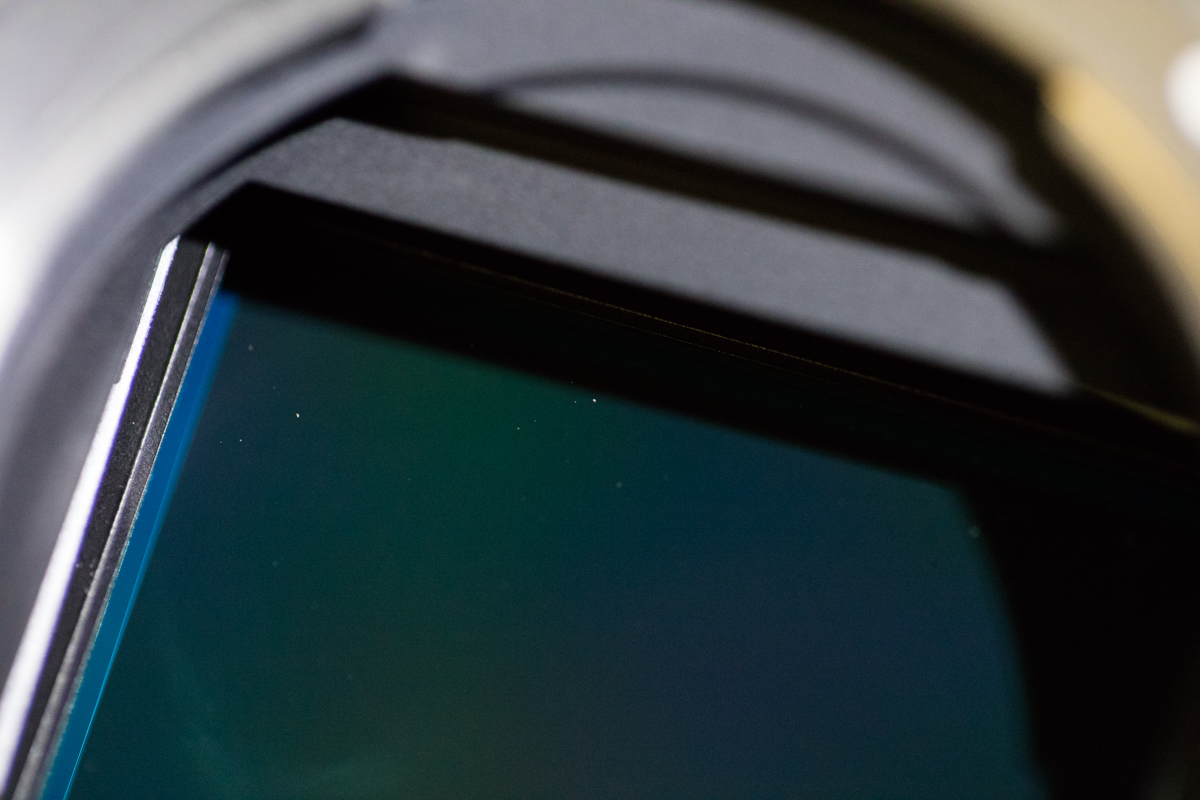
Most people decide their sensor needs cleaning when they start to see typical sensor dust artifacts in their images. If you always shoot wide open, you can have a pretty filthy sensor and never notice it. If you shoot at f/11 and f/16 a lot, you’ll see even a small amount of dust. You can take a typical ‘f/16 sky’ image if you want to see how much dust is on yours.
Just identifying there is dust on the sensor is a start, but seeing the dust is important, too. The make and model of each camera varies greatly in how you access the sensor, but the process for cleaning each is relatively the same. Hopefully this will relieve some of the angst that comes with cleaning sensors, and give you some insight on some useful techniques.
Can you damage the sensor? Sure you can, although it’s not very likely. Our best estimate is we scratch a sensor about once every 750 cleanings. It happens, but it’s rare. If the risk terrifies you, then you probably don’t want to try it. But you might read along anyway and decide if maybe you’d be comfortable with the first steps, which actually will handle things most of the time.
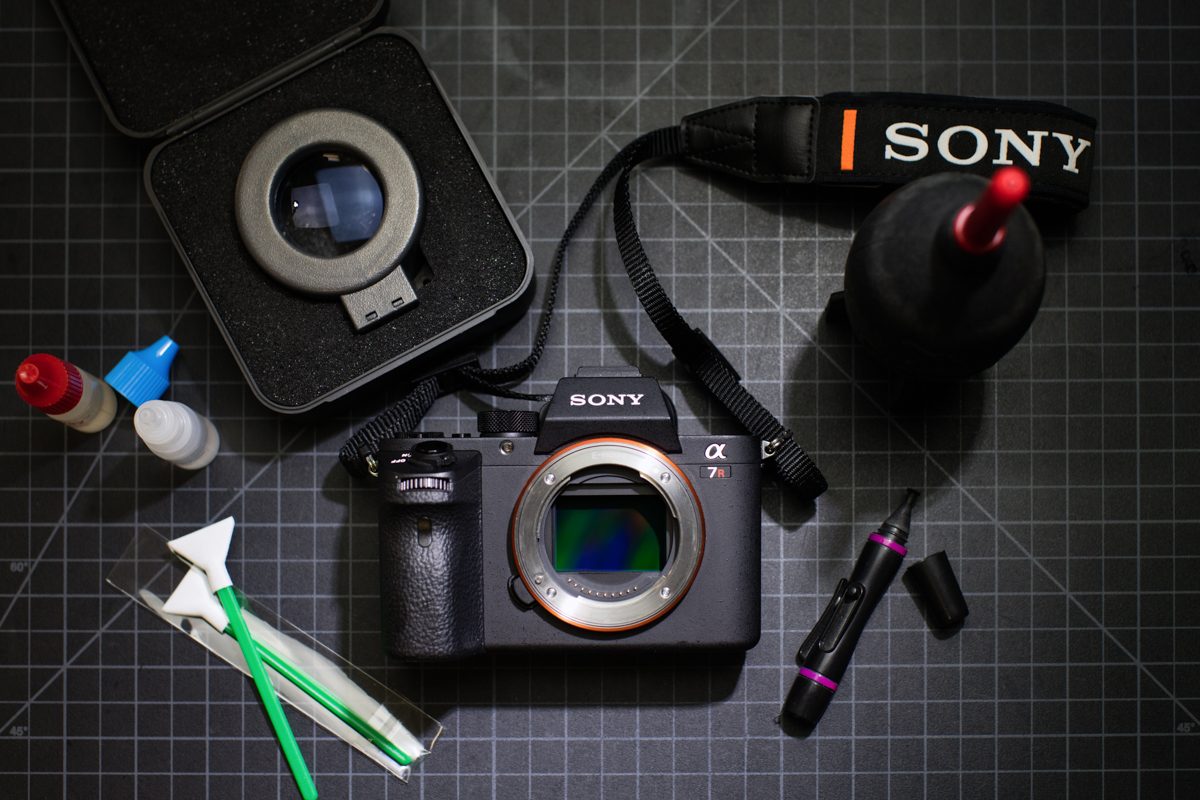
First and Foremost, a Sensor Loupe
We would never consider cleaning (other than blowing off the sensor) without properly examining the sensor with a sensor loop. Do other people do it? Sure, all the time and they probably get away with it just fine. But we don’t and won’t.

A Sensor Loupe should be used to identify what is actually on the sensor. Most of the time, it is nothing more than an inevitable constant in digital photography; dust. There are also liquid spots that closely resemble dust without a closer look. These occur under several conditions including humidity, factory defaults, and human error. Fingerprints and smudges can also occur, more often with mirrorless cameras, but it can happen to ones with mirrors as well…. Somehow.
Step Two, Cleaning the Sensor can be Easy
With dust, a rocket blower is the best option. It will dislodge anything that is not stuck by static electricity or humidity, and in theory blowing even a piece of gritty sand off of the sensor should never leave a scratch. It’s best to blow any dust out of the mirror box of a DSLR before raising the mirror and opening the shutter to expose the sensor. For the first few blasts, hold the camera up with the mount facing down, so the flying dust doesn’t immediately fall back into the sensor chamber. In the majority of cases, blowing dust out will be all that’s required, although it may require a couple of cycles of blow-examine-blow some more.
For dust particles that are stuck with either static or humidity may come off with a gentle brushing with a sensor brush. There are numerous types of these, all supposed to be the best, and all about equal as best we can tell.

There is one very rare risk with blowing and brushing. Once in a great while, we have seen a bit of dust get blown underneath the cover glass, between the glass and the sensor. If it gets there, there is, as far as we know, no way to get it back short of sensor disassembly.
Once we leave the blowing and brushing phase, there is the risk of scratching the sensor. It’s rare, but it happens. (And yes, sensor guru, I know you’ve cleaned your sensor 100 times and never scratched it. Odds are you shouldn’t. But if 100 people clean their sensor 100 times, odds are someone will.) This is one of the reasons we think it’s so important to look at what you’re cleaning. Shiny little crusty looking dust particle? Be afraid and be very careful.
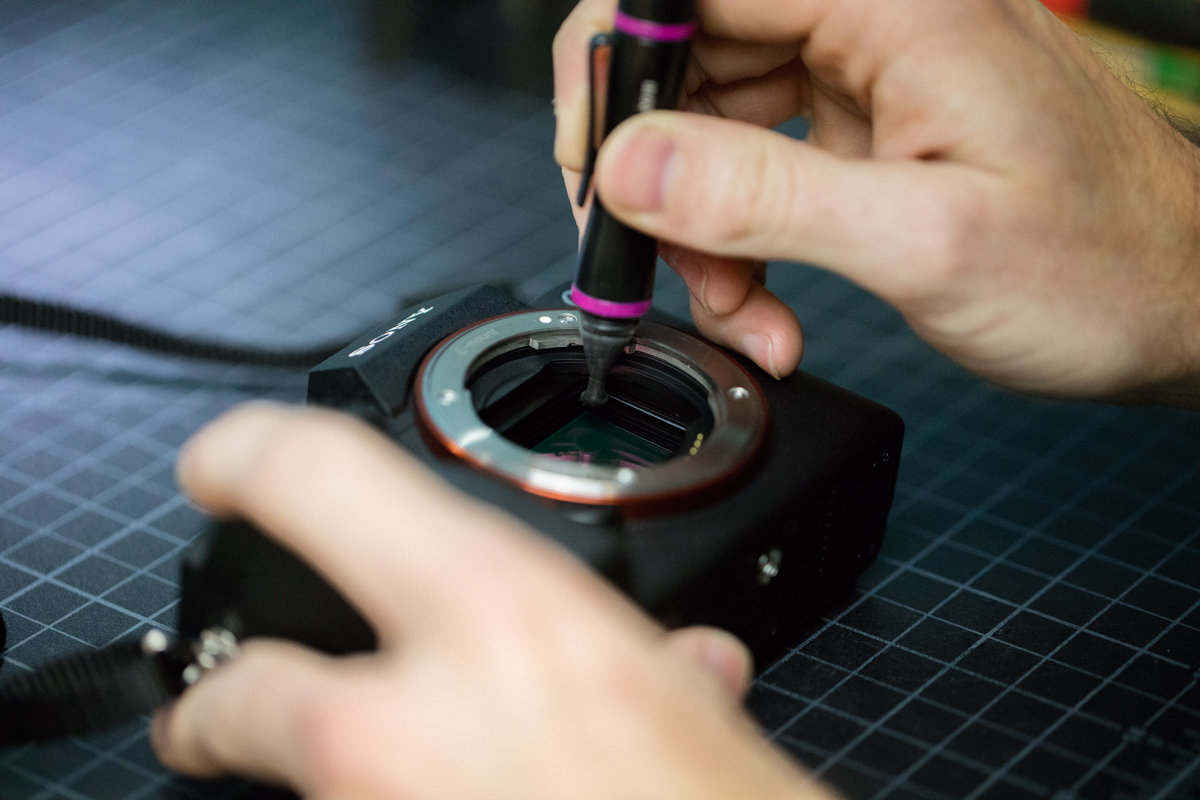
- When blowing and brushing doesn’t work our next step is a sensor pen (it’s not everybody’s next step, but everybody isn’t writing this so we’ll show you our way). The sensor pen should be used from the side; not on top of, the flake of dust in a single wax-on motion in order to dislodge it. Then the rocket blower may finish the job. We should note that the sensor pen itself is going to leave tiny carbon dust fibers, so after you finish, it’s back to blowing even if the dust particle you noted seems gone.
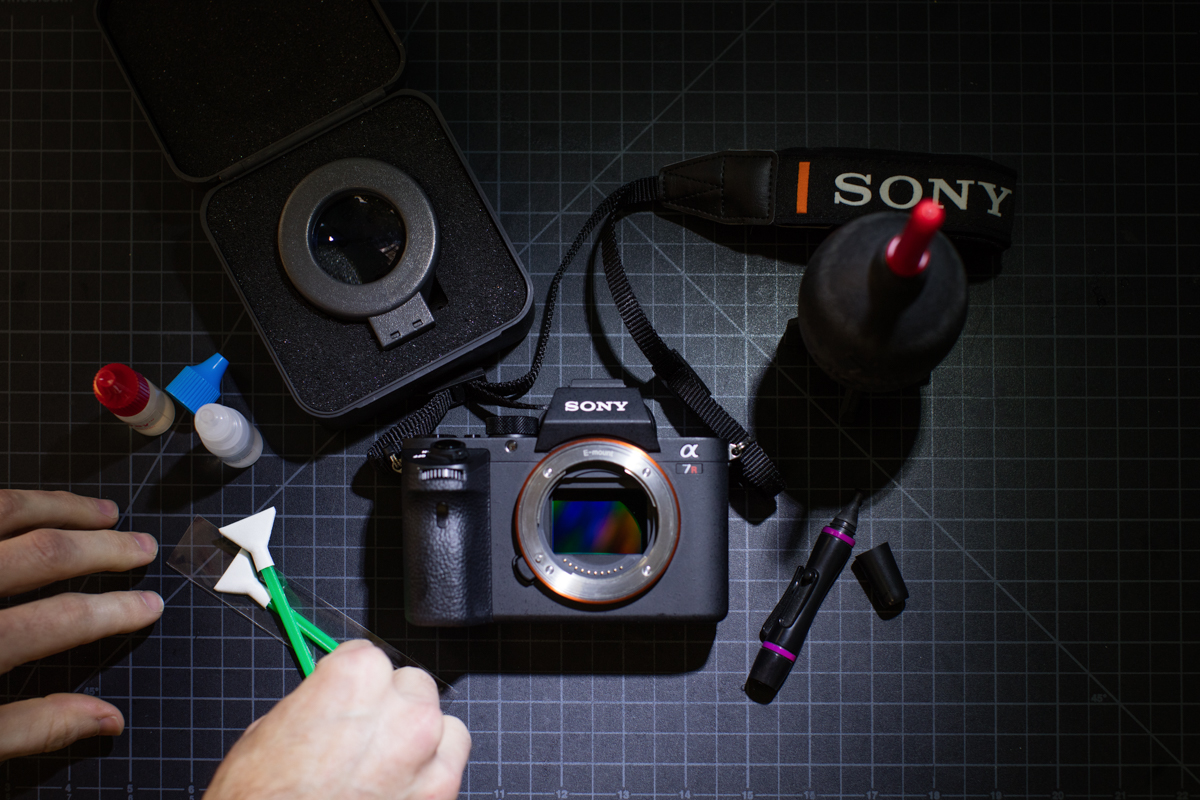
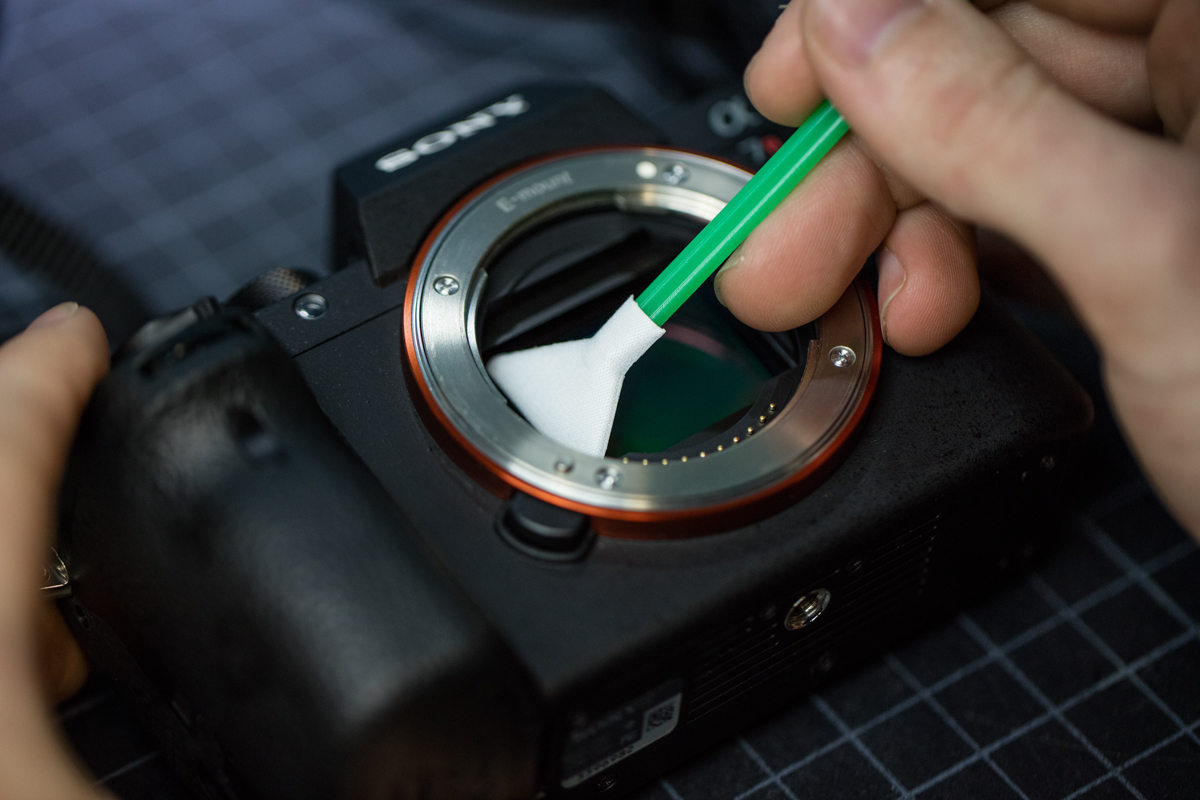
If tiny liquid spots or dried liquid residue is present, the best option is a wet cleaning. Wet cleaning a sensor is a simple enough process with a sensor brush and cleaning solution. There are several sizes of sensor wipes for the various sensor sizes. With the proper sensor cleaner selected, apply the recommended amount of solution, then using a light amount of pressure start at one side of the sensor, and glide from one side to the other. Check the progress with sensor loupe after each run as it may take a few depending on what liquid is actually on the sensor. This process is applicable for extra greasy fingerprints as well, but a light fingerprint can be tackled with a sensor pen.
It should go without saying, but re-using either swabs or sensor pens is one of those ‘why in the world would you’ kind of things. Sensor replacements are $400 to $1300 depending on the camera. Saving a couple of bucks reusing cleaning equipment is just not a good idea.
One of the most important points about cleaning your sensor is knowing when to stop. If you shoot f/16 landscapes frequently, you need a spotless sensor. If you rarely stop down past f/8, why not check your sky images at f/8? More cleaning is more opportunity to scratch the sensor. Stop and take a stopped down photo every so often to see if more cleaning is needed.

Every camera is different of course and each one is made differently. Canon cameras have a rather easy sensor to clean though they have a few problem cameras to be aware of. The Canon 5DSR, for example, has a protective filter over the sensor that can collect dust under it when a rocket blower is used. This problem has also been seen occasionally on Canon 1DX Mark II, Canon 5DS, and Canon 5D Mark IV.
The most consistent problem with Nikon cameras is an issue with Nikon D750 and Nikon D810. These cameras have a tendency to spit some oil spots onto the sensor. It’s easily wet-cleaned, but it required cleaning several times before it stopped altogether.
Mirrorless cameras have the sensor closer to the lens mount and seem to get dusty a bit more frequently. On the other hand, the fact that the sensor is so accessible makes cleaning it much easier.
Cameras with in-body image stabilization have a mode that allows demobilization which makes cleaning easier. It is of utmost importance to make sure this is activated before cleaning the sensor. Not doing so can damage the stabilization mechanism which will require the camera to be sent back to the manufacturer.
In the end, cleaning sensors shouldn’t require such a nervous approach when trying to eliminate that annoying spec that has been showing in images. With clean utensils and a clear understanding of what the problem is, it truly is a breeze to keep the sensor immaculate. It may seem a daunting task at first, but it will become obvious that most sensors themselves are rather resilient. Repetition will be key in perfecting which technique to use when it is appropriate. Renting equipment from LensRentals.com comes with the added perk that all of the equipment is cleaned before being shipped out, so you should never have to clean our equipment.
26 Comments
Damodara Kovie [dkovie] ·
No mention of the eyelead gel stick? ?
Also, using a rocket blower on any sensor is just poor form for the reasons mentioned in the article (mainly dust under the cover glass).
Brian Smith ·
Using a rocket blower on a sensor is a bad idea? I thought it was recommended by many as a first step. I have a Sony A7r II. Should I not use a rocket blower? How then do you blow out dust?
Eric Bowles ·
A rocket blower is fine, but how you use it is relevant. You want to use the blower at an angle with the camera lens mount opening pointing down. It’s also a good idea to blow out the mirror box as dust collects on all surfaces – not just on the sensor. The dust under the cover glass is extremely rare, and typically comes from using compressed air improperly.
Matt O'Brien ·
It may be worth mentioning ….. for DSLR’s, you need to check your manual on how to swing the mirror out of the way and precautions to be taken to avoid the mirror swinging while you are cleaning. You also need to make sure you have a fully charged battery.
philmar ·
Agree – that really should have been mentioned for noobs who may do some damage without that knowledge.
Matt O'Brien ·
Any comment on what cleaning fluid is most suitable for Sony A7 sensors.
Thomas Geist ·
“Cameras with in-body image stabilization have a mode that allows demobilization which makes cleaning easier.”
All of them? I know the Sony Alphas do, but for my Olympus E-M1 / E-M1 Mark II I never found a way to do that. Am I missing something?
Bruce Rubenstein ·
Lay the camera on it’s back, with the lens mount up. Remove the lens, or body cap, and gently tap the side of the body: the sensor will jiggle. Turn the camera on and observe that the sensor moves when the camera is powered up. Now, tap the body again and it won’t jiggle. The sensor wouldn’t even move when I gently tried to move it with a toothpick.
My E-M1, E-M10 & E-M5 all exhibited the same behavior.
mikerofoto ·
ever tried photographylife Sensor Gel Stick?
Any idea on it instead of using wipe?
Joey Miller ·
We’ve used those as well Dust-Aid sensor stamps, which work in much the same way. They work, but they can leave other residue behind as well.
Doug ·
It’s said that non PhotographyLife gel sticks cannot compare with any other gel stick, especially from Amazon. I used one on my Sony with embedded with plastic from the blower bulb’s tip. I thought my sensor was toast. I thought it was miraculous. Absolutely no residue left behind and they can be used infinitely.
rolling_pfff ·
ever tried photographylife Sensor Gel Stick?
Any idea on it instead of using wipe?
squirl033 ·
Why on earth would there ever be a freakin’ FINGERPRINT on the sensor?? Sheesh!
I use a blower first, and if that doesn’t do it, a couple of passes with a swab and some Eclipse cleaning solution usually does the trick…it’s not hard, you just have to be gentle…
Mk.82 ·
I believe that if you poke the dust particle enough with middle finger, it will gently understand to get off from your lawn….
Enfek ·
Blowers seem to be not equally useful. I actually had a blower that spat a sticky particle onto the sensor requiring wet cleaning as a result.
Terry ·
I keep my blower in a sealed zip lock bag to keep dust out of the blower
rich_tech ·
No mention of cleaning the mirror box, other than turning the camera face down when you blow. Dust can only get on the sensor if it first enters the mirror box. We clean the mirror box first. If there are spots on the focus screen we remove and blow those off. Then last but not least we wet clean the sensor. Fire the camera six times, (dust is sometimes trapped between shutter blades) then examine on a computer screen. Repeat as necessary. All in all a good article.
Fujica ·
Cleaning the mirrorbox with a mirrorless camera?
There is no mirror in a MILC camera.
Gerard Hughes ·
“When blowing and brushing doesn’t work our next step is a sensor pen…” Then, way down the article… “re-using either swabs or sensor pens is one of those ‘why in the world would you’ kind of things”
You use the carbon scrubby bit of a brand new LensPen for each sensor cleaning?
I ask because A) it makes sense to not re-use the LensPen scrubby pad, but B) LensPens aren’t marketed for sensor cleaning or single use. So I just want to make sure I understand your non-standard use of a LensPen.
Joey Miller ·
LensPen makes sensor specific pens that we use.
Joey Miller ·
Dis what happens when you press too hard on the glass. https://uploads.disquscdn.com/images/050544188c5c80199ef22ba26f07f298a59ddda5d315ef7284b4d8b1396c87fc.jpg
Echo ·
That hurts to look at.
jamesm007 ·
Well… I took my first dSLR back to the store because I used a rocket blower to clean the mirror chamber. What happened was I blew dust on the bottom and top of the focus screen, I did not know what happened at first. It took research through Google ten years ago to figure out my mistake. I could do nothing to clean the focus screen.
This should be noted. As I did, people my freak when cleaning then looking through the OVF to see a small spot, big spot and or many big/small spots.
Some people ignore the spots, some are anal over them. Like me, can now remove and clean my focus screen and sometimes I need to do so. I use a special brush. I won’t say how many focus screens I ruined by trying to clean them. Before I had the right equipment to do so.
I highly recommend using a brush to clean the mirror chamber.
I know most people may not know how easy it is to cross contaminate something with photography cleaning tools. Blowing is a safe way to keep pictures spot free. But may open up another can of worms.
Jaanish Fotografie ·
Wow, nice tips for cleaning my camera sensor. I wouldn’t dare to do that without the instructions.
mikko ·
Hey there,
I recently read this article and remembered my good old a7 with scratched sensor, and to again look up possible repair options. Back then when I scratched the sensor of my a7, there were no options, but to my surprise, now I found two: Kolarivision and Lifepixel.
Both offer the same service and price, which is changing the IR filter instead of the whole sensor array, which would come at a higher cost than a new a7 today. I was wondering if you guys have any experience with either of these companies and if you recommend any of them.
I figured since you are keen to take cameras apart and have a vast experience with repair services, you would have a notion of this kind of repair, and if it’s worth it, or if the camera will suffer with any sort of calibration issues, or functionality being irreversibly altered, etc.
Any orientation in this matter would be highly appreciated.
Cheers!
Steven Caruana ·
A tiny speck at f16+ in the side, would you bother cleaning it?
My actual question I suppose is, can this 1 speck cause long term damage as I’d rather just let it be.