
Now that weather has finally started to clear, many people are looking to get their cameras and gear out there to take some photos, and sports photography is a great choice if you’re looking to improve your skills. Whether you’re a seasoned professional or an enthusiastic amateur, sports photography offers endless opportunities to explore new techniques, challenge your skills, and create breathtaking images that convey the intensity and drama of the game. However, sports photography can be a challenging genre, requiring specific gear, knowledge of the sport, and the ability to anticipate and capture fleeting moments in the fast-paced action. In this guide, we’ll share some essential tips and techniques for sports photography, covering everything from gear and camera settings to composition and editing, so you can elevate your skills and capture stunning shots of your favorite sports events.
Finding the Right Focal Length
Perhaps the biggest hurdle when shooting sports photography is choosing the right focal length to best capture the images. With outdoor sports photography, there can be a pretty broad range of lenses used. You’d use a different lens for photographing a few friends playing an exhibition tennis match than you would if you got nosebleed seats for a Yankees game. To help with that, Lensrentals.com founder Roger put together a handy guide years ago that we’ll use as a reference. As Roger explains – “Deciding what focal length you’ll need is fairly straightforward with just a bit of calculating. We’ll assume you can photograph from near the sidelines (if not, then just add whatever distance your seat is from the sideline to the formula). We’ll want to be able to get a shot where the subject fills about least 2/3 of our frame vertically, so let’s assume we want to take a picture that includes 9 feet of the vertical area when we’ve focused on our subject (again assuming a 6-foot tall athlete – if the kids are 4 feet tall than multiply our focal length by 150%). Football, Soccer, and Lacrosse fields are all 55 to 60 yards in width. A baseball diamond is 30 yards across the infield and another 30 yards or more to the outfield. The summary is we’d like a lens that will give us about a 9-foot field of view at 60 yards. Here’s a table that shows how far away (in yards) a 9-foot vertical field of view is for lenses of different focal lengths”
| Focal Length | Distance (Full frame) | Distance (Crop frame) |
|---|---|---|
| 50mm | 10 yards | 6 yards |
| 100mm | 19 yards | 12 yards |
| 200mm | 38 yards | 23.5 yards |
| 300mm | 56.5 yards | 38 yards |
| 400mm | 75.3 yards | 50 yards |
This table should break down what lens you’ll want to use depending on how far away from the action you might be. So let us talk about the other obvious talking point with lenses – prime lenses verse zoom lenses.
Prime Lenses or Zoom Lenses
This topic is covered far less when talking about outdoor sports photography, because it comes down to the skill level of the shooter. Professional sports photographers will often prefer prime lenses in their kit but have years of experience using them to get the shots they want. People who are a little greener to sports photography might prefer the flexibility of zoom lenses, as you’re covered across a larger focal length faster. Generally speaking, prime focal length lenses will provide you with sharper images overall, and their wider apertures mean you can usually get a shallower depth of field. But when an athlete is running by you at 20mph, your priority becomes getting the subject in focus, which is way more difficult when shooting at f/2.8 instead of f/12. The biggest advantage of a zoom lens is in the name, the ability to zoom across multiple focal lengths. The versatility of something like the Canon 100-400mm f/4.5-5.6L IS II is unmatched when shooting outdoor sports, especially if you’re just starting with sports photography. Being able to zoom in on your subject and get different crops while the play is happening can only be done with a zoom lens, and that is why zoom lenses are generally recommended for those who are getting started in sports photography, and the prime lenses are usually reserved for the seasoned pros.
Camera and Lens Autofocus Speeds Are Important
Perhaps the biggest advancements in cameras over the last 10 years haven’t come in resolution or sensor size, but rather, in autofocus. If you take a Canon R3, and compare it to a preferred sports camera from a decade ago, like the Canon 1D X or a Nikon D4s, you’ll see the autofocus capabilities and speed are night and day. Where getting the subject in focus was the challenge a decade ago, technologies like Eye Control AF and massive advancements in their tracking modes built into the cameras have made focus tracking way easier than ever before. So instead, we’ll look at some of the autofocus technologies built into the lenses themselves.
As the old saying goes, ‘you’re only as strong as your weakest link’ really holds in this scenario, and makes the lens selection process of the utmost importance. If you’ve used several lenses in the past, you know that not all autofocus motors are created equal. Lenses like the Canon EF 85mm f/1.2L II are accurate, but travel at a snail’s pace – and more modern lenses seem to zip into focus instantaneously. Because of the vastness of lens options, I can’t really go through the lens lineup one by one, and tell you which lens has a great autofocus engine, and which ones do not, but there are a few hidden monikers in their names that should give you a clue as to their AF motor speeds.
- Lenses with Ultrasonic Motors focus faster than lenses with standard electric motors. So the designation USM (Canon), SWM (Nikon and Olympus), SSW (Sony), and HSM (Sigma) usually indicate fast autofocus.
- Lenses with Focus Limiter switches allow you to limit the lens to autofocusing longer focal lengths only, which can cut the autofocus time in half.
- The longer the zoom range, the longer autofocus will take to lock on. This is one reason Pros shoot with primes instead of zooms much of the time. It’s also why 18-200mm zooms generally aren’t great sports lenses.
Camera’s Shooting Speeds
Next on the list of important features, is how fast a camera is able to burst frames. Studio cameras may be perfectly acceptable for shooting at 2-3fps, but sports photographers are going to need something considerably faster to capture the action. Generally speaking in sports photography, you want to overshoot as often as possible and be able to look at your results later. Finding a camera that can shoot at least 10 frames per second is pretty important when shooting sports photography, but you also want a memory card that can keep up with those speeds. So when selecting a camera for an upcoming game, be sure to grab the fastest memory card available to really be able to reach those buffer speeds. Secondly, it might also be wise to shoot jpg instead of raw for this scenario, as shooting jpg will generally increase your fps speed, as well as the number of photos you can capture before the camera needs to stop.
Finding the Right Camera Settings
Aperture & ISO
Choosing your Aperture and ISO is next on the list and completely depends on what you might be shooting. If you’re using a modern camera, I personally think shooting at ISO 400-1600 is a wise choice, as it’ll let you max out your shutter as much as possible, and the files will still be really clean for general use. As for aperture, you’ll need to reach that conclusion on your own. Fast pace sports might be better suited for a higher aperture, like f/10-f/16, as it’ll give you enough of a focal plane to ensure your subjects are focused. However, if you want the soft, shallow background, shooting at f/2.8-f/5.6 might be the better option for you, though you’re going to get quite a few more misfires and out-of-focus subjects. My advice is to know how much depth of field you’re working with, by using a depth of field calculator.
Shutter Speed
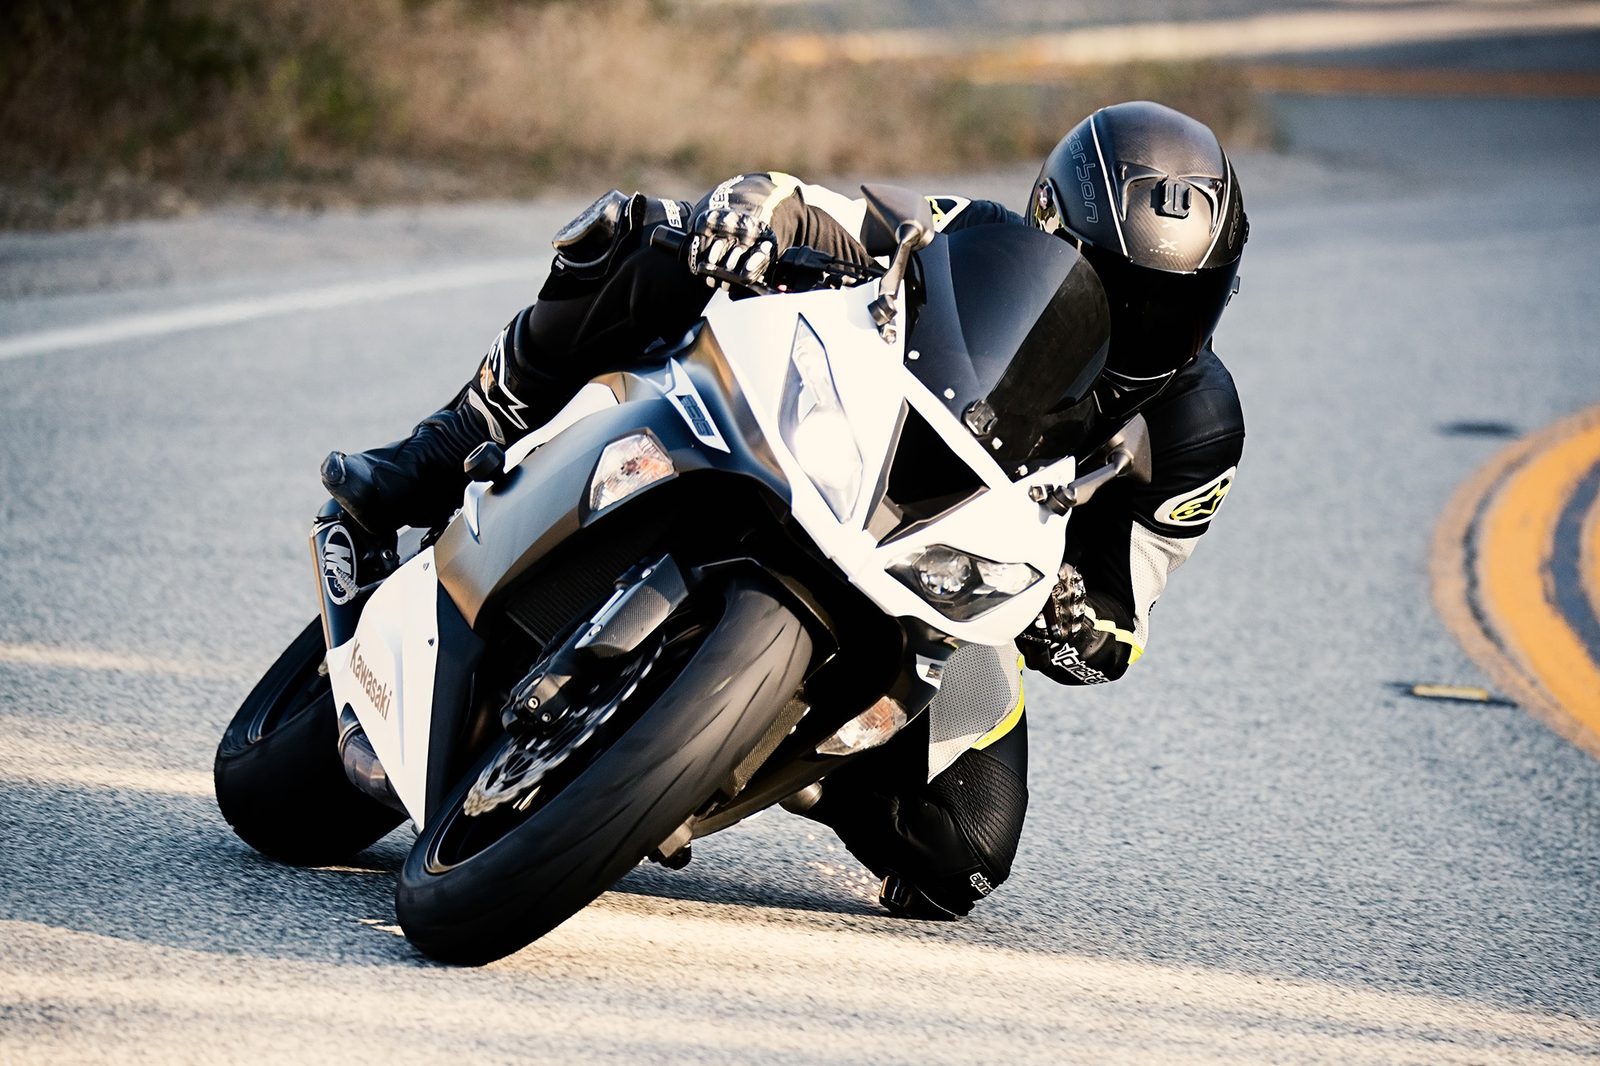
Finding the right shutter speed is incredibly important, as it’ll determine whether your subject is in focus. A common guideline for making sure images are free of camera shake is to make sure your shutter speed is at least that of your focal length. For example, if you’re shooting with an 85mm, you’ll want to make sure your shutter speed is at least 1/85 or in this case, 1/125). However, that doesn’t refer to if your subject is moving quickly. My advice for shutter speed is to keep it at least 1/250th of a second, and increase it if it’s a faster sport. Where 1/250th of a second might be plenty fast for a baseball game, it might result in a lot of motion blur if you’re shooting a MotoGP race. With the benefit of modern cameras, you’re always able to guess and check. So when in doubt, take some photos at your preferred shutter speed, and check if the edges of that subject are in focus as well. If you’re starting to see some unwanted smearing of the edges, simply increase your shutter speed and try again.
Other Tips for Sports Photography
Make Sure you Set your Focus Point and Metering
There are too many high-contrast subjects in outdoor sports to let the camera decide where to focus. Center point autofocus lets you pick the focus point, not the camera. Similarly, bright sunlight can cause a huge shift in metering between lighter objects and shadows. Spot metering helps make sure the exposure is accurate for the subject, not the 10 yards of brightly lit grass behind the subject.
Be Mindful of the Sun’s Position
Keeping the sun either behind you, or within 90degrees of being behind you will often give you the best results. If the sun is behind your subject, you’re going to get way more contrast and silhouttes of your subjects.
Overcast is Usually Best
If you’re lucky, you’ll get a slightly overcast day, which is generally the best time for photographing sports photography. The clouds will often lower the general contrast on the field and give you far less problems when it comes to metering.
Know Where to Be
Knowing your position is very important when taking photos of sports. No one wants to see the player’s backs during the highlight play of the game, so make sure you position yourself to get the best shot for specific plays. It may mean that you don’t capture all the action, but it can also help you get that frame-worthy shot.
Know the Regulations
If you’re at a professional sports arena, make yourself familiar with the regulations for the stadiums. Many places won’t allow professional cameras without a press pass.
Capture the Moments Between the Plays
Sometimes, the best photos come at the times in between the plays, when athletes are analyzing their next moves, or celebrating. Just because the game might not be in play, doesn’t mean there isn’t anything to photograph.
Be Mindful of Other Photographers
It’s also important to be mindful of other photographers who are there to capture the game and not obstruct their ability to do their job. Additionally, be mindful of others who may have been paid to be there. Was a photographer hired to photograph the game and sell prints to parents? Well, don’t undercut their business. Often if that is the case, the photographer has a contract or agreement with the league to be the sole provider of professional images. If that’s the case, be mindful of that, put your camera down, and just enjoy the game.
Our Recommendations
We’ll also offer some of our recommendations when it comes to cameras and lenses for sports photography – broken down into three categories, expert, intermediate, and entry-level. Here are just a few recommendations for what I’d use for sports photography.
Expert Camera & Lens Recommendations
| Camera Recommendations | Lens Recommendations |
| Canon EOS R3 | Canon 200-400mm f/4L IS with 1.4x Extender |
| Sony a9 | Nikon 600mm f/4E FL ED AF-S VR |
| Nikon Z9 | Sony FE 400mm f/2.8 GM OSS |
Intermediate Camera & Lens Recommendations
| Camera Recommendations | Lens Recommendations |
| Canon 1DX Mark II | Canon 100-400mm f/4.5-5.6L IS II |
| Sony Alpha a7 III | Sigma 150-600mm f/5-6.3 DG OS HSM Sports |
| Nikon D5 | Tamron 150-600mm f/5-6.3 SP Di VC USD G2 for Canon |
Entry Level Camera & Lens Recommendations
| Camera Recommendations | Lens Recommendations |
| Canon 7D Mark II | Canon RF 600mm f/11 IS STM |
| Nikon Coolpix P950 | Sony FE 200-600mm f/5.6-6.3 G OSS |
| Panasonic Lumix DC-FZ1000 II | Nikon 80-400mm f/4.5-5.6G ED AF-S VR |

1 Comment
Franz Graphstill ·
Not your best work. And not the “Comprehensive Guide” claimed in the title.
You talk of ultrasonic motors as though they are the fastest, completely ignoring linear motors.
The discussion of shutter speed is facile at best.
In your expert selections you line up a Sony body with a Nikon lens and a Nikon body with a Sony lens.
And putting the Sony 200-600mm lens in “entry level”? That’s an unusual choice.
Did you run this article past Roger?